As mentioned before, the first step in consuming an Application Insights service is to provision it on Azure.
Application Insights can be provisioned manually using the Azure Portal, Azure REST APIs, PowerShell, and ARM templates. Here we will use the Azure Portal:
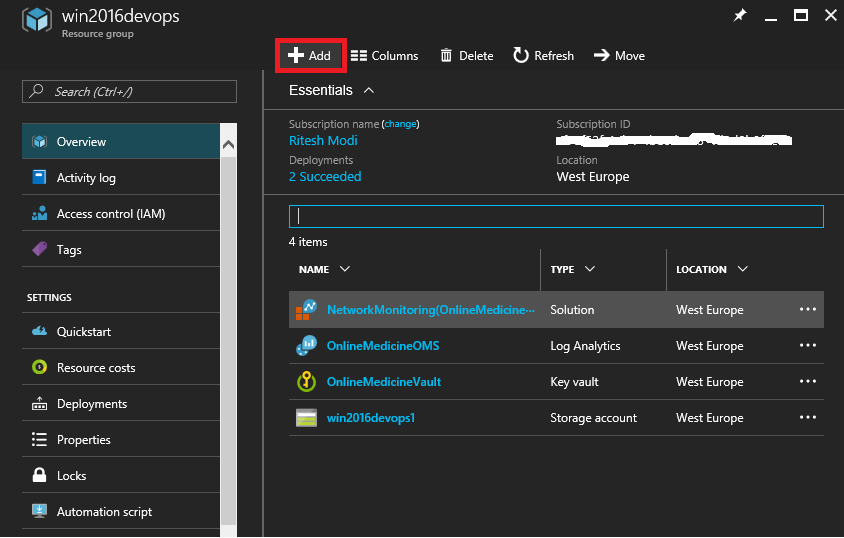
- Log in to the Azure Portal using your credentials and navigate to an existing resource group, or create a new resource group. Click on the Add button:

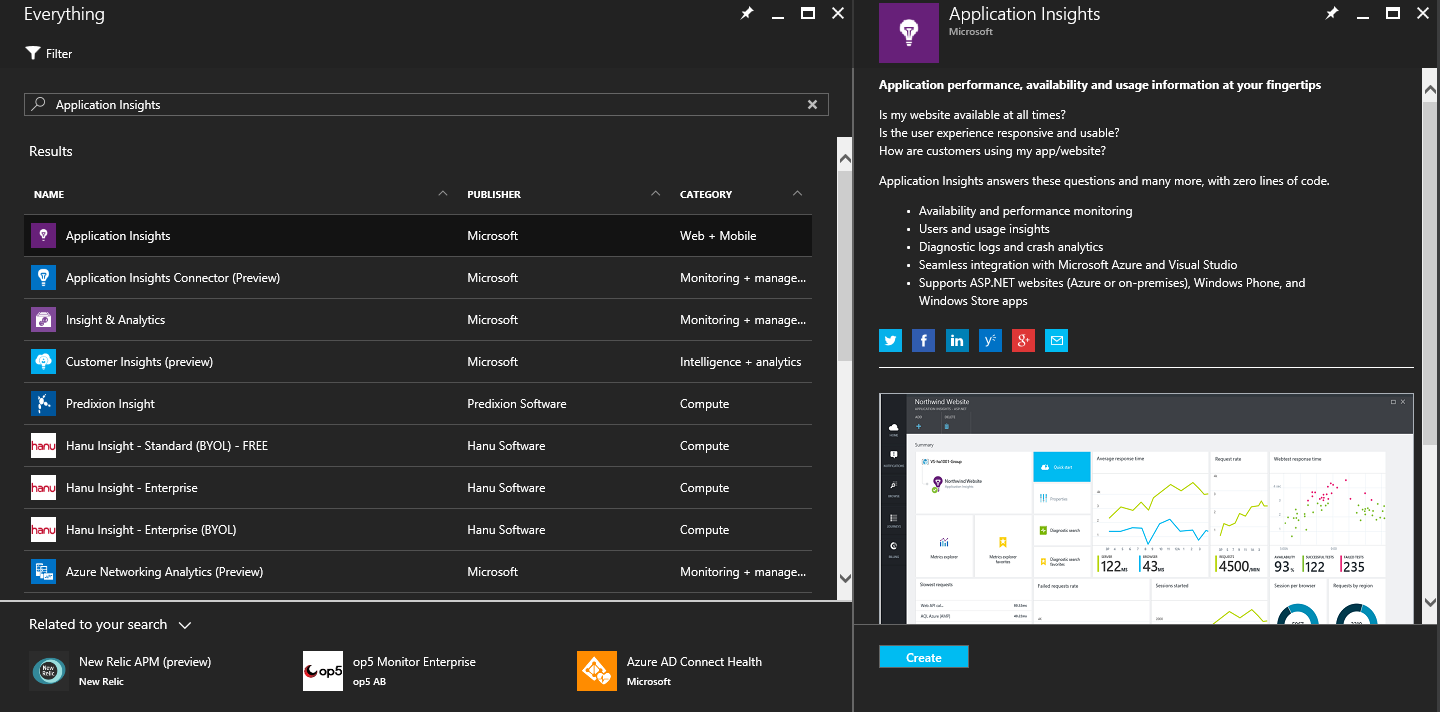
- Type Application Insights in the search box in the next blade. The first link should refer to Application Insights. Click on it to create a new Application Insights service instance. Click on the Create button to get started:

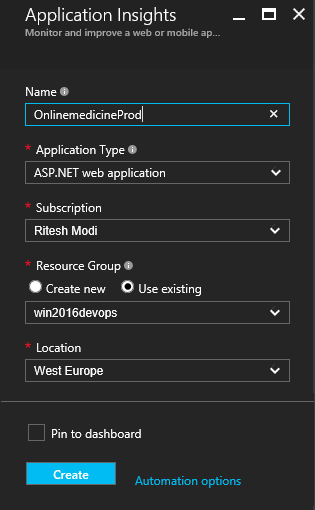
- The next blade will ask for the Application Insights service instance name, the type of application, the subscription name, the resource group name, and the location of the service. Provide the appropriate details and click on the Create button. This will provision the service:

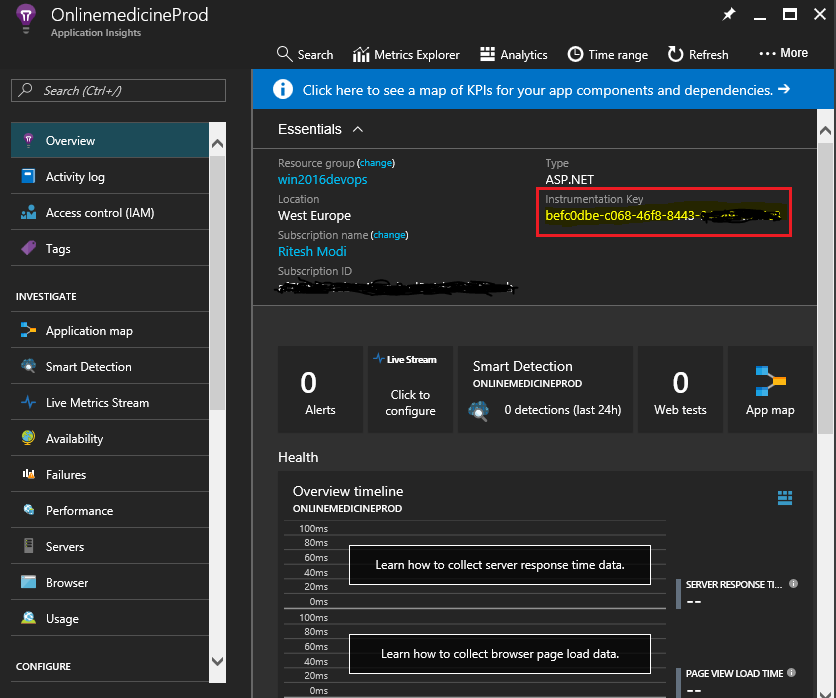
- Now navigate to the service that shows the essential properties, such as its Instrumentation Key highlighted in the following screenshot. The key will be different in every instance, and generally copied and used in Visual Studio. Please note that some of the information has been blacked out for security reasons:
