While looking through the generated entity screens, we might realize that there are some minor issues that affect the user experience. For example, on the product screens we have a relationship to a product category but when choosing the product category from the drop-down menu during creation, or when showing the category in the list, we show the category by its ID, which is not user-friendly. It would be nice if we could show the product category name instead. This is the default JHipster behavior but it can be customized while defining the relationships. Let's see how we can make our generated screens more user-friendly by editing the JDL model. This will overwrite existing files, but since we are using git we can easily cherry-pick the changes we made, we will see how this is done in a moment.
In our JDL, we defined relationships between entities using the following code:
relationship OneToOne {
    Customer{user} to User
}

relationship ManyToOne {
  OrderItem{product} to Product
}

relationship OneToMany {
   Customer{order} to ProductOrder{customer},
   ProductOrder{orderItem} to OrderItem{order},
   ProductOrder{invoice} to Invoice{order},
   Invoice{shipment} to Shipment{invoice},
   ProductCategory{product} to Product{productCategory}
}
By specifying the field to use for displaying the relationship in JDL using the (<field name>) syntax as follows, we can change how the client-side code displays relationships:
relationship OneToOne {
    Customer{user(login)} to User
}

relationship ManyToOne {
  OrderItem{product(name)} to Product
}

relationship OneToMany {
   Customer{order} to ProductOrder{customer(email)},
   ProductOrder{orderItem} to OrderItem{order(code)},
   ProductOrder{invoice} to Invoice{order(code)},
   Invoice{shipment} to Shipment{invoice(code)},
   ProductCategory{product} to Product{productCategory(name)}
}
Let's run this using the import-jdl command. The command only generates entities that underwent changes from the last run. But before we run let's also switch to a new branch, because it's a good practice to do major changes on a separate branch and merge them back so you have more control:
> git checkout -b entity-update-display-name
> jhipster import-jdl online-store.jh
Accept the changes to the files and wait for the build to finish. Now, let's look at the entity pages to verify that the display names are used properly and create some entities to try it out. Now we realize that the Invoice entity has empty drop-down menus, and that is because the Invoice entity does not have a field called code. Since we use {{invoice.order?.code}} in the template the symbol ? makes Angular skip undefined values preventing errors in rendering.
This is easy to fix. Sometimes we might want to make a small change to an entity after we have created it using JDL and the import-jdl command. The best way would be to make the change in JDL and regenerate it using the import JDL command as we saw in the previous code. Now there is also another option, the entity sub generator, which can yield the same result. For the sake of familiarizing yourself with this option, let's use that to add the field to our Invoice entity:
- Run the following command:
> jhipster entity Invoice
- From the options select Yes, add more fields and relationships:
Using JHipster version installed globally
Executing jhipster:entity Invoice
Options:

Found the .jhipster/Invoice.json configuration file, entity can be automatically generated!

The entity Invoice is being updated.

? Do you want to update the entity? This will replace the existing files for this entity, all your custom code will be overwritten
  Yes, re generate the entity
❯ Yes, add more fields and relationships
  Yes, remove fields and relationships
  No, exit
- Select Yes for the next question and provide the field name, type, and validation in the questions that follow:
Generating field #7

? Do you want to add a field to your entity? Yes
? What is the name of your field? code
? What is the type of your field? String
? Do you want to add validation rules to your field? Yes
? Which validation rules do you want to add? Required

================= Invoice =================
Fields
date (Instant) required
details (String)
status (InvoiceStatus) required
paymentMethod (PaymentMethod) required
paymentDate (Instant) required
paymentAmount (BigDecimal) required
code (String) required

Relationships
shipment (Shipment) one-to-many
order (ProductOrder) many-to-one


Generating field #8

? Do you want to add a field to your entity? (Y/n)
- Select n for the prompts that follow to add more fields and relationships. Accept the proposed file changes and that's it, we are done.
- Now just make sure to update the JDL so that the entity Invoice has code String required as a field.
Now that we have displayed entity relationships properly, we also need to make sure certain entities have relationship values mandatory. For example, for customers it should be mandatory to have a user, ProductOrder should have a customer, order item should have an order, Invoice should have an order, and finally, the shipment should have an invoice. Since JHipster supports making relationships required, we can make these changes using JDL. Update the relationships to the following snippet in online-store.jh:
relationship OneToOne {
    Customer{user(login) required} to User
}

relationship ManyToOne {
    OrderItem{product(name) required} to Product
}

relationship OneToMany {
   Customer{order} to ProductOrder{customer(email) required},
   ProductOrder{orderItem} to OrderItem{order(code) required},
   ProductOrder{invoice} to Invoice{order(code) required},
   Invoice{shipment} to Shipment{invoice(code) required},
   ProductCategory{product} to Product{productCategory(name)}
}
Now, run jhipster import-jdl online-store.jh and accept the proposed updates. Make sure to check what has changed using the git diff command or your Git UI tool.
Let's commit this step so that it can be rolled back if required:
> git add --all
> git commit -am "entity relationships display names and required update"
Now we have a problem, regenerating the entities overwrote all the files and that means we lost all the changes we made for the product listing page, but since we use git it's easy to get it back. So far, our project has only a few commits, so it will be easy to cherry-pick the commit we made for the product listing UI change and apply it back on top of the current codebase. However, in real-world scenarios, there could be a lot of changes before you can regenerate the JDL, and so it will require some effort to verify and merge the required changes back. Always rely on pull requests so that you can see what has changed and others can review and find any issues.
Let's cherry-pick the changes that we need.
Since the commit we need is the last one on the master we can simply use git cherry-pick master. We could also switch to the master and use the git log command to list the commits, then copy the commit hash of the required commit and use that with git cherry-pick <commit-sha>.
Now, this results in merge conflicts, as the product.component.html file was updated in the commit we picked on our current branch tip. We need the incoming change from the commit but also need to update the product category display name from ID to code, so let's accept the incoming change and make a manual update from {{product.productCategory?.id}} to {{product.productCategory?.name}}.
Resolve the conflict by staging the file and commit. Now we can merge the branch into the master:
> git add src/main/webapp/app/entities/product/product.component.html
> git commit -am "cherrypick: update product listing page UI"
> git checkout master
> git merge --no-ff entity-update-display-name
Now our page view should be good:
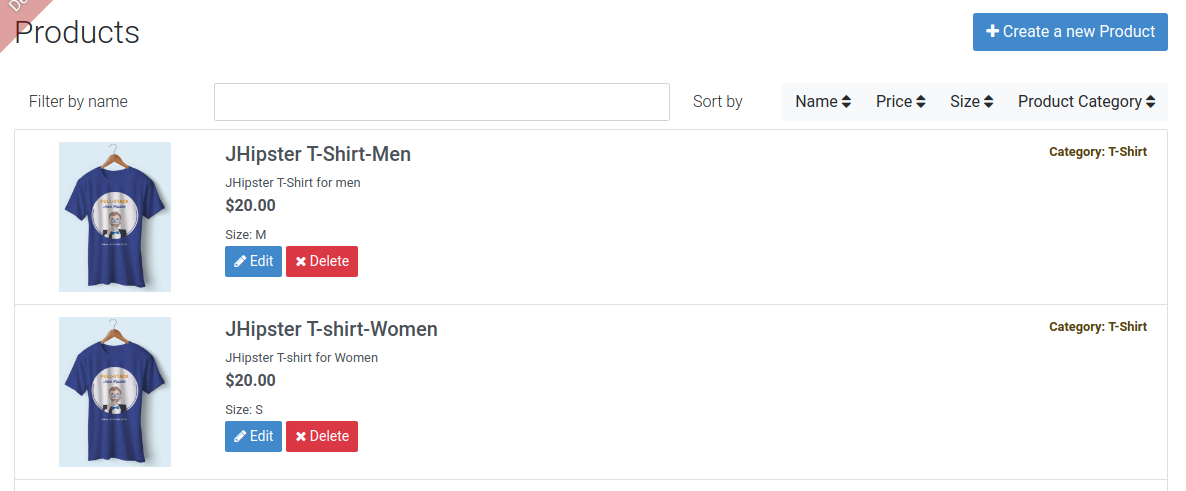
Of course, we could also make it more user-friendly by making the product listing our home page. But for now, let's skip that.
Since we were working on the client-side code we didn't pay attention to the server-side code that was changed during this. We need to compile the Java code to reload our server. Let's run ./gradlew compileJava.
Unfortunately, we receive an error during the reload regarding a failure to update the database changelogs by Liquibase due to a checksum error:
liquibase.AsyncSpringLiquibase : Liquibase could not start correctly, your database is NOT ready: Validation Failed:
     5 change sets check sum
          config/liquibase/changelog/20180114123500_added_entity_Customer.xml::20180114123500-1::jhipster was: 7:3e0637bae010a31ecb3416d07e41b621 but is now: 7:01f8e1965f0f48d255f613e7fb977628
          config/liquibase/changelog/20180114123501_added_entity_ProductOrder.xml::20180114123501-1::jhipster was: 7:0ff4ce77d65d6ab36f27b229b28e0cda but is now: 7:e5093e300c347aacf09284b817dc31f1
          config/liquibase/changelog/20180114123502_added_entity_OrderItem.xml::20180114123502-1::jhipster was: 7:2b3d9492d127add80003e2f7723903bf but is now: 7:4beb407d4411d250da2cc2f1d84dc025
          config/liquibase/changelog/20180114123503_added_entity_Invoice.xml::20180114123503-1::jhipster was: 7:5afaca031815e037cad23f0a0f5515d6 but is now: 7:fadec7bfabcd82dfc1ed22c0ba6c6406
          config/liquibase/changelog/20180114123504_added_entity_Shipment.xml::20180114123504-1::jhipster was: 7:74d9167f5da06d3dc072954b1487e11d but is now: 7:0b1b20dd4e3a38f7410b6b3c81e224fd
This is due to the changes made to the original changelog by JHipster. In an ideal world, new schema changes should be done in new changelogs so that Liquibase can apply them, but JHipster doesn't generate this by default yet. For local development using an H2 DB we can run ./gradlew clean to clear the DB and start the application again, but in real use cases you might be using an actual DB, and you would want to retain the data, so we would have to handle this manually here using the diff features provided by Liquibase.
JHipster provides an integration for Liquibase in both Gradle and Maven builds. You can make use of it to create new changelogs and to create diff changelogs. In cases like these, when we would like to resolve conflicts while retaining data, the Liquibase diff feature is our friend. With Gradle, you could run the ./gradlew liquibaseDiffChangeLog command to create a diff changelog of your changesets and the database. You can add this changeset to the src/main/resources/config/liquibase/master.xml file and it will get applied the next time you restart your server. By default, the command is configured to run against your development database, if you would like to do this against your production database just update the liquibaseCommand command definition in the gradle/liquibase.gradle file with the details of the production DB. Refer to http://www.jhipster.tech/development/#using-a-database for more.