If you do not want to convert the existing monolith and want to start fresh, then follow these steps.
In the Terminal, navigate to the e-commerce-app folder and create a new folder called app-gateway, change the directory to app-gateway, and run the jhipster command.
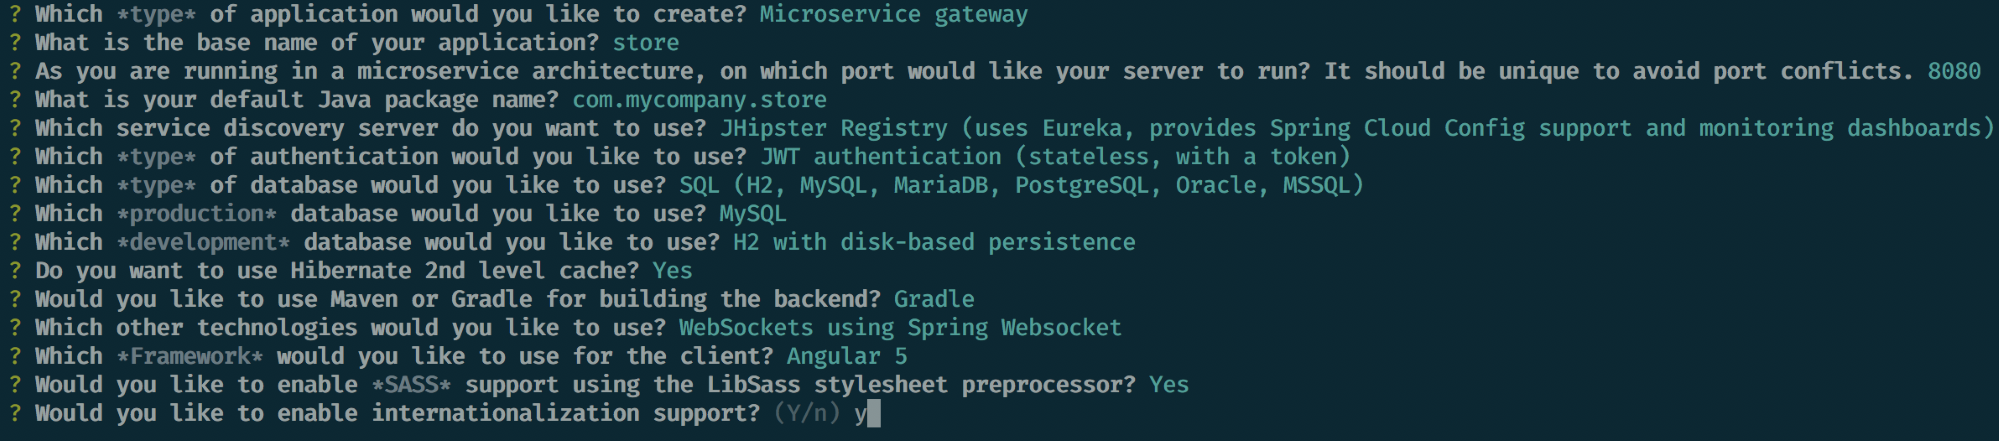
So, obviously, the first question is, Which *type* of application would we like to create? We will select the Microservice gateway (third option) and then click Enter:

Then, we will enter the base name of our application. We will use the name store:
Since we are working with microservices, there is a high risk of having port conflicts. In order to avoid them, JHipster will ask you to select a port for each microservice application (both gateway and application). By default, we will have 8080 as the port, but we can change the port as necessary. For now, we will use the default port since the gateway will run on 8080, similar to what our monolithic application had:

Then, we enter the package name for our application. We will use the default name that is available, which is com.mycompany.store:

For the next question, JHipster will ask you to configure the registry service. We will select the necessary registry service to configure, monitor, and scale our microservices and gateway application. We can either choose to use the JHipster registry or Consul. This is also optional; we don't need to choose any registry service here. We can then select No service discovery.

For the next question, JHipster will ask you to select the authentication type. JHipster provides three options for the authentication type, which are JWT, OAuth2, and UAA server-based. JWT is stateless, while the UAA runs on a different server (and application altogether). OAuth2, on the other hand, will provide authorization tokens, while the authorization is done on the third-party system.
We will look at JWT in more detail shortly. For now, we will select JWT authentication.

We will select the database type next. We have an option to select either SQL and NoSQL. In terms of NoSQL, we can choose MongoDB or Cassandra. We will select the SQL database:

Then, we will select the database that we will be using for production and development. JHipster provides an option to use a different database for your production and development environment. This really helps to kick-start application development faster and easier.
We will select a MySQL database for production:

Then, we will select H2 with disk-based persistence for development:

Following the databases, we will select yes for the second level hibernate cache:

Then, we will select Gradle for building the backend. We have an option to select Gradle for the backend development:

Then, we can select any other additional technologies that we need to use. JHipster provides an option to select Elasticsearch, using Hazelcast for clustered applications, WebSockets, and Swagger Codegen for API-based development and Kafka-based asynchronous messaging. We will select WebSockets here, similar to what we used in our monolithic store:

Since our gateway application needs a user interface, for the next question we can choose the framework that we need to use for the client. We will select Angular 5 for this:

Then, we will select whether we need to use a SASS-based preprocessor for the CSS. We will use SASS here, so we will select y:

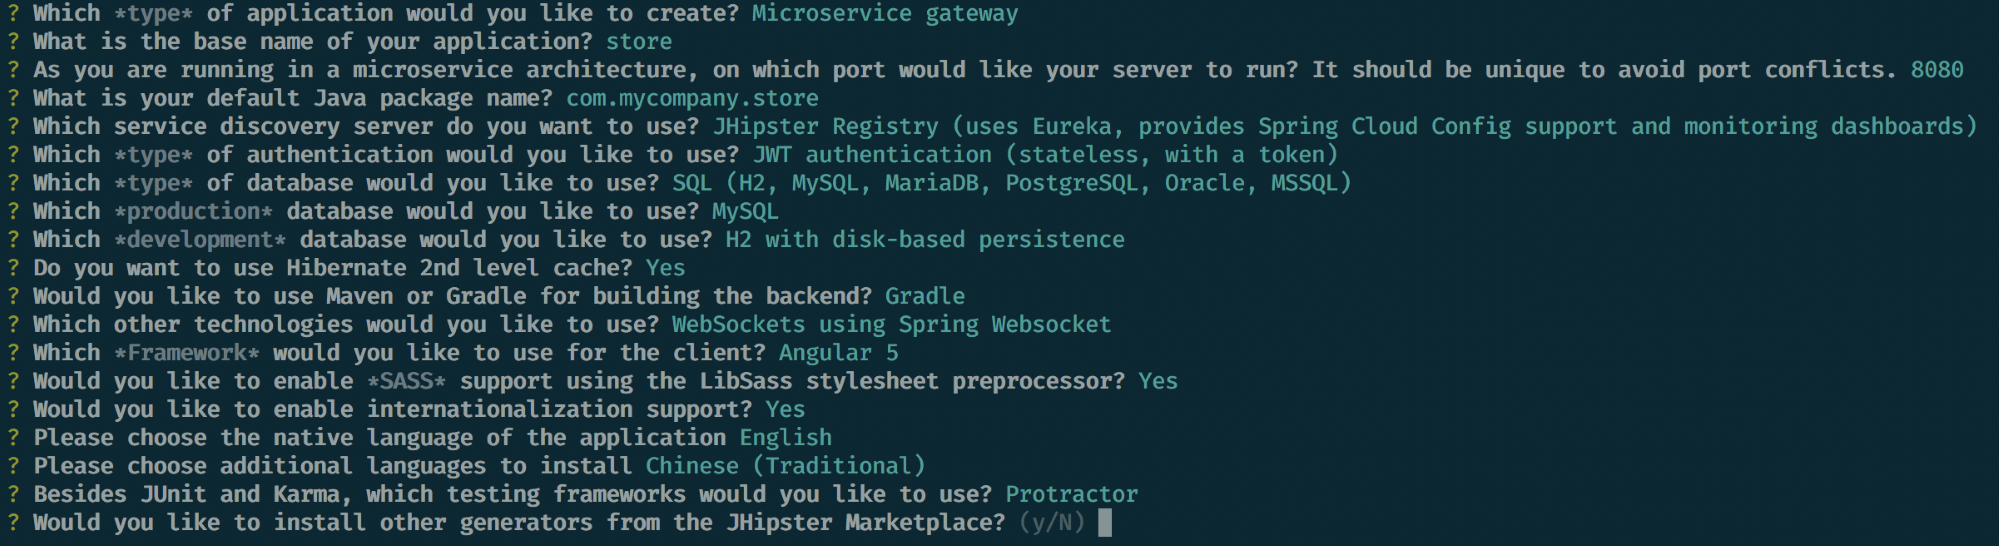
Then, we will select whether we need to enable internationalization support. We will select yes for this:
Then, we will choose English as our native language:

Then, choose any other additional languages:

Then, select any other testing frameworks, such as Gatling, Cucumber, and/or Protractor, since this is required. We will select Protractor as the testing tool:

Finally, JHipster asks us to install any other generators from the marketplace; we will select no here:
This will create all the necessary files and install the frontend dependencies using Yarn:
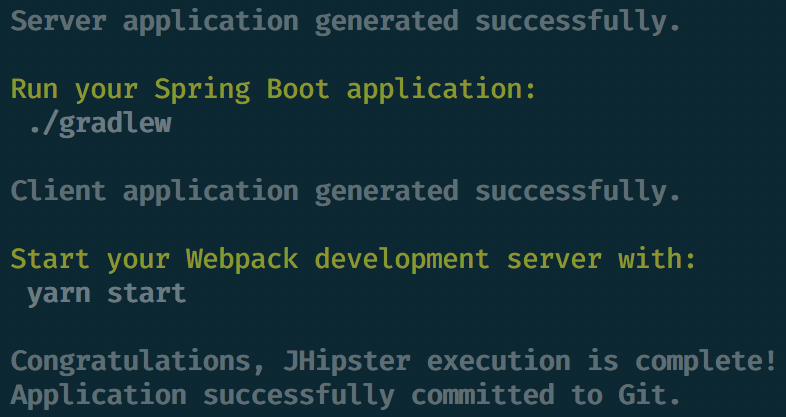
Now, our gateway application is generated. JHipster will automatically commit the generated files to Git; if you wish to do this step yourself, you can do so by passing the skip-git flag during execution, for example, jhipster --skip-git, and executing the steps manually as follows:
> git init
> git add --all
> git commit -am "converted into gateway application"