We need to choose a cloud provider. For this demo, let's choose Heroku.
Let's deploy our application to Heroku by completing the following steps:
- First, you need to create an account in Heroku (https://signup.heroku.com/). It is free and you get free credits as well.
- Install the Heroku CLI tool by following https://devcenter.heroku.com/articles/heroku-cli.
- Verify that the Heroku CLI is installed fine by running heroku --version.
- Login to Heroku by running heroku login. When prompted, enter your Heroku email and password.
- Now run the jhipster heroku command. You will start seeing questions.
- Choose a name you like when asked Name to deploy as: (store). By, default it will use the application name. Try to choose a unique name since the Heroku namespace is shared.
- Next, you will be asked to choose a region—On which region do you want to deploy? Choose between US and EU, and proceed.
- The generator will create the required files and accept changes suggested by the Gradle build files.
The console output will look like this:
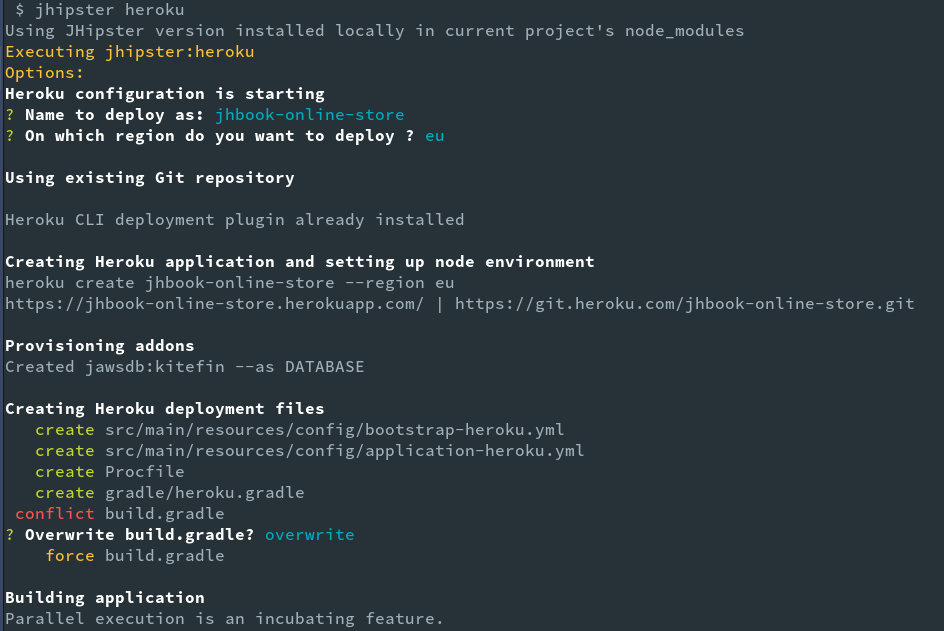
The generated .yml files add Heroku-specific configurations for the application. The Procfile contains the specific command that will be executed on Heroku for the application. The Gradle build is also modified to include dependencies required by Heroku.
After generating the files, it will build the application and will start uploading artifacts. This may take several minutes based on your network latency. Once this has been successfully completed, you should see the following screen:
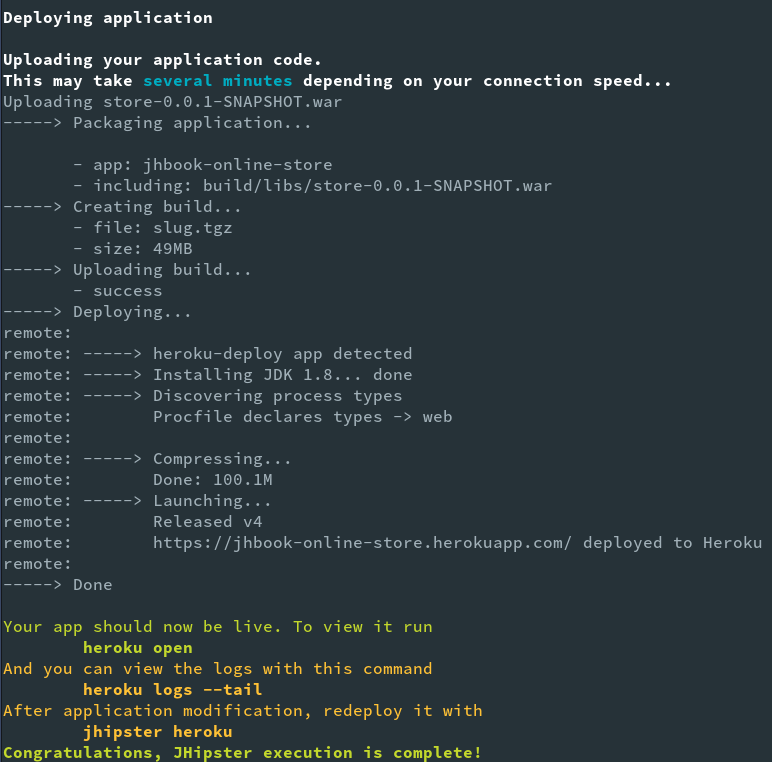
Now run the heroku open command to open the deployed application in a browser. That's it, you have successfully deployed your application to Heroku with a few commands.
When you update the application further, you can rebuild the package using ./gradlew -Pprod bootRepackage and then redeploy it using the heroku deploy:jar --jar build/libs/*war command.
Don't forget to commit the changes made to git by executing the following command:
> git add --all
> git commit -am "add heroku configuration"