1. Cover the top and bottom tiers with light blue buttercream and the middle tier with mid blue (see Covering Cakes). Decide how many dots you want, and draft the pattern on paper first before marking it out on the cake (see tip).
The lovely retro quality of this cake is created with a delightfully dotty background and clusters of cheerfully bright flowers that would not look out of place on a piece of vintage china. Using a paper pattern makes the dotted design easy to achieve. You could try this design in pastel shades for a softer, but still charmingly old-fashioned look.
1. Cover the top and bottom tiers with light blue buttercream and the middle tier with mid blue (see Covering Cakes). Decide how many dots you want, and draft the pattern on paper first before marking it out on the cake (see tip).
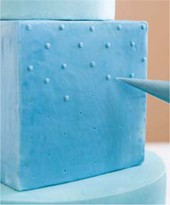
2. Use light blue buttercream in a piping bag with a small hole at the tip to pipe the dots.
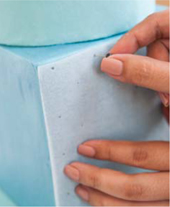
To mark a pattern, take a piece of paper the exact size of the side of the cake and draft your design before transferring it to your cake. Do this by pricking through the paper pattern with a round-headed pin to make guide marks in the buttercream on the cake. You can pre-prick the holes in the paper first, then just slide the pin through, making the job easier. If your cake is round, use a continuous strip of greaseproof (wax) paper to measure the circumference of the cake. Then draft your design on that paper before you mark your cake.
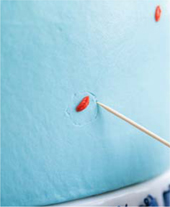
1. Look at your cake as one big canvas. Make marks with buttercream or a cocktail stick (toothpick), to show where you will position your flowers. Try to balance the spaces in between them.
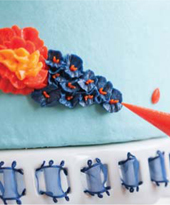
2. Pipe the marigold, then the buddleia (see Flowers).
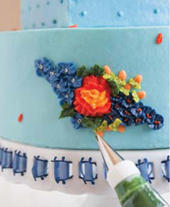
3. Pipe the small brunnera, then the hypericum berries and then the leaves.
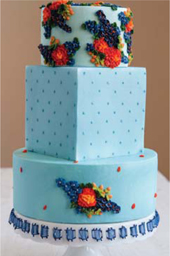
4. Repeat the same process and pipe the flowers in the same order all over the top tier and around the bottom tier.
