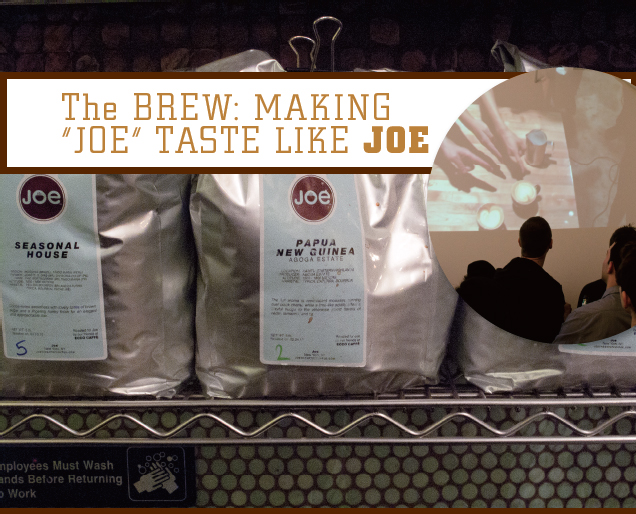
Because we are committed to using only the freshest, most full-bodied beans at joe, all of the coffees we offer change frequently based on seasonality and the work we do with our roaster. For instance, the components of our house coffee blend change based on which beans are available and fresh. However, the profile of the blend’s flavor is always reliable. Whatever their origin, the beans are all freshly roasted so that only the highest flavor profile is offered in the cup.
In addition to the beans we begin with, it is essential that every cup is made with the perfect brew in mind. Amanda Byron leads our educational forums for all joe employees so that new blends, techniques, and machinery become part of their coffee DNA. Every barista who joins us goes through a long training period, often beginning with a stint as a barback (technically barback is the term for a bartender’s assistant, but we use it to describe new employees whose first job is behind the coffee bar performing general cleanup and assisting the baristas however needed) and with many sessions at our espresso machine. But, no matter how much training we give or how revolutionary new techniques and machinery might be, our mantra is “everything comes back to taste.” To make certain that taste is the preeminent goal, both the brewed coffees and espresso are tasted by our baristas throughout the day, every day.
The professional environment created by the barista team helps us examine the various types of coffees and how we brew each one. There are rules to be followed for the appropriate grinding and weighing, water use, dosing, tamping, and extraction ratios, among other requirements. Our specifications are unique to joe, just as every coffee bar has its own methods of brewing its signature coffees. Here we share some of the factors that the joe barista learns and executes to create the coffees so loved by our customers.
WATER: In New York City, we are lucky to drink tap water that has been rated among the best in the United States; however, coffee bars in other areas of the country will often add water softener as well as additional filtering systems to their water supply. At joe the great New York tap water that flows to our brewing equipment passes through a sediment and a carbon filter, which not only assist in reducing any chlorine taste and odor that might be there, but also prevent scale buildup on the interior of the machine.
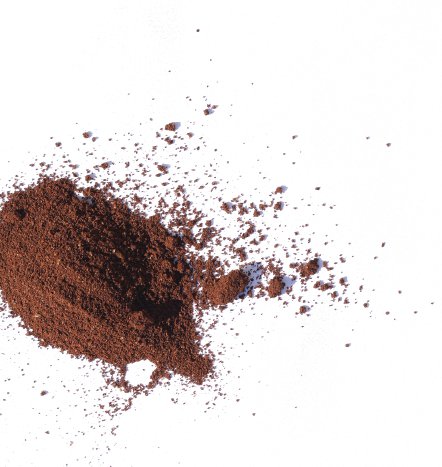
COFFEE: For our drip machines, those that brew our house, single origin, and decaffeinated coffees, we use freshly ground beans. The blend that we favor for the joe house blend is one that we like to call “accessible”—that is, a blend that creates an easy-to-drink, everyday delicious cup that is sweet and clean on the palate. We have had many different blends over the years, and they have all been delicious and easy to drink. At this writing, Gabby is loving our Costa Rica Finca La Clara. It has a great balance of sweetness and fruit along with a light roast profile that she finds rewarding. The joe blend changes seasonally and may also change within three weeks to two months of introduction, depending on inventory and seasonal preference.
For espresso, the beans are seven to ten days off roast. This is because espresso is brewed at such high pressure that fresh beans are just too volatile, allowing the natural gases in the coffee to be prominent once brewed. For espresso, the ideal blend should be well balanced and extremely low in acidity, giving a complex experience over the entire palate. We start with a base component (usually Brazilian beans) that creates the backdrop for the mid- or high component (origins selected by season and taste) that is added for accent and acidity. When buying coffee for home use, we recommend that you ask your local baristas what their system for blending might be and what optimal time window for usage they recommend for brewing their blend at home.
We look for similar characteristics (sweet, clean, balanced) in both our house blend and our espresso, while our ever-changing single origin coffees give joe fans the opportunity to experience a more adventuresome taste on a daily basis. For the latter, coffee can be less approachable and thus more daring.
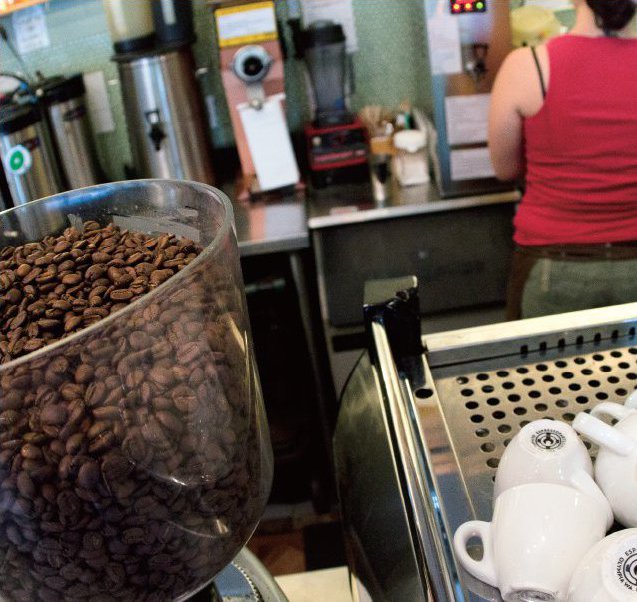
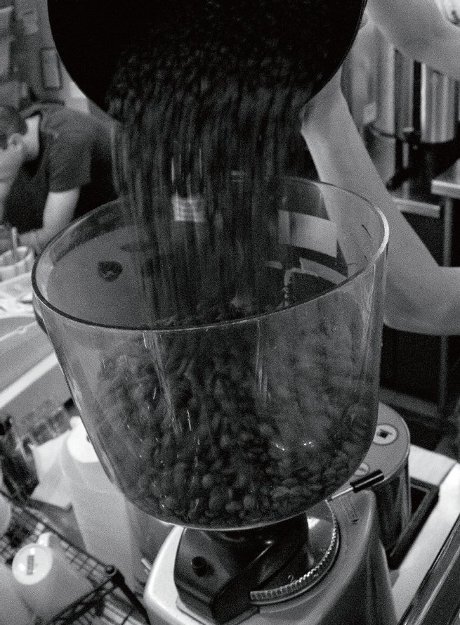
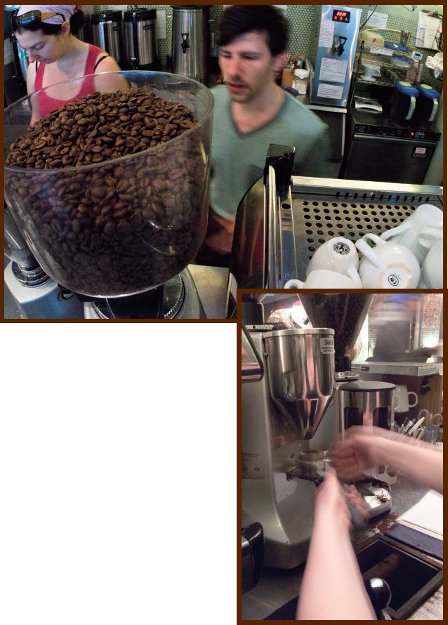
GRINDERS: For espresso preparation at joe, we use a Mazzer Robur E espresso grinder, a programmable electronic dosing grinder. It is a conical burr grinder that shears the beans, producing almost microscopic flake-like coffee granules that have the most surface area allowing for maximum extraction during brewing. In contrast to a burr grinder, a blade grinder chops the coffee into irregular granules, which results in uneven extraction. Also, since water is lazy, it will simply go around the more rock-shaped granules created by the blade grinder and, consequently, will not fully extract the flavor.
Our grinder is efficient because we can set it to dose a specific amount of coffee every time and still allow for adjustments to be made to give exact and reproducible amounts throughout the day and to address varying environmental concerns. Its speed is a tremendous aid to the busy barista who, with the simple push of a button, can move the preferred dose of perfectly ground coffee right into the espresso machine’s portafilter. This is important because all espresso coffee is made with beans that are ground per shot.
Because espresso is such a volatile ingredient—reacting to differences in air temperature, burr temperature, humidity, the amount of people in the room, the commingling of air-conditioning and outside air, and so forth—it is important that a barista understand the necessity of grind adjustment. A truly great barista will change the grind dozens of times a day, making small, precise adjustments to ensure that the brewed cup is perfect.

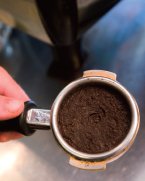
SCALE: After experimenting with a variety of scales, we now use just a high-quality digital home kitchen scale that precisely measures in grams. There are many brands on the market, and most are priced under fifty dollars. Depending upon the blend, day, age, and other variables found in freshly roasted beans, the amount of coffee needed to pull one double shot of espresso usually ranges from seventeen to twenty-one grams. In coffee parlance, the amount of coffee used is called a dose, and the precise amount is only discovered after trial and error and many, many tastings of each blend. Different beans have different densities, so sometimes a heavier dose may enhance the lower notes in the coffee as it is these low notes that are found in the denser beans. Even after the exact weight is determined, our baristas pull and taste shots at the beginning of each shift and on an hourly basis to ensure that the espresso is as desired.
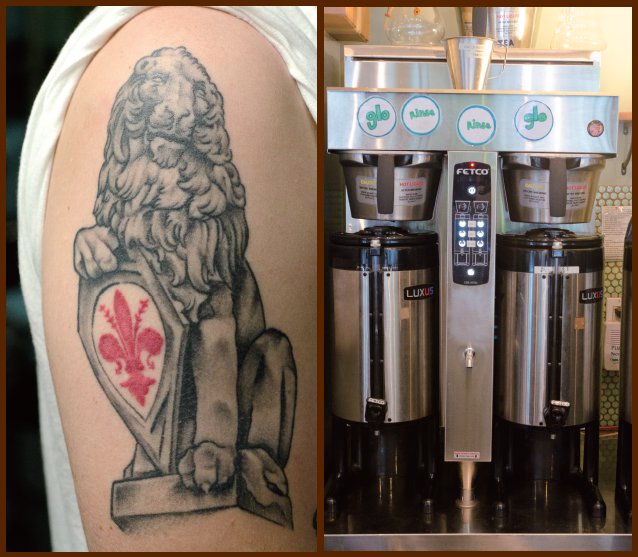
MACHINES: Our house, single origin, and decaffeinated coffees are brewed in large Fetco drip brand machines that give us the ability to program the specifics of our signature clean, sweet flavor. Their efficiency creates a coffee that is almost comparable to our manual pour-overs. (See page 119 for directions to create a manual pour-over at home just as we do at joe.) Coffee beans are ground just before brewing, just as we would do for any coffee. This automated system is preprogrammed with the water-to-coffee ratio, and it is not often necessary to change it. The coffee is brewed directly into thermal carafes and is, as far as we are concerned, the finest way to brew and serve large batches of coffee.
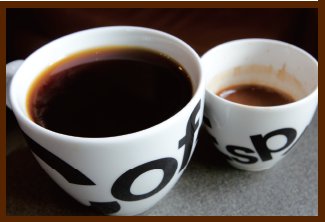
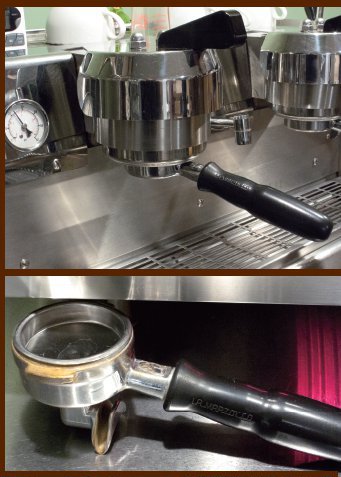
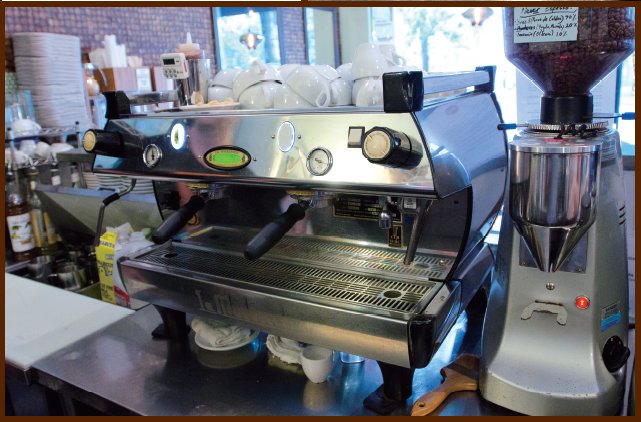
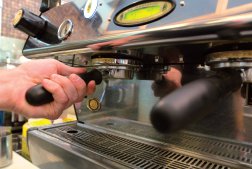
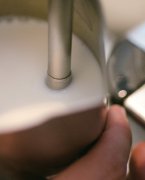
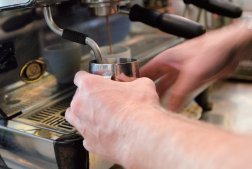
For espresso, we use La Marzocco GB5 espresso machines, which we, along with many others, consider the top of the line. It is a dual boiler machine, having one for brewing coffee and one for creating steam, and it allows the barista to pull a shot and steam milk simultaneously. The ground coffee is placed in a portafilter and is tamped down using a metal tamper. Water temperature is perhaps the most important element in creating the perfect espresso shot, and this machine gives the barista the ability to set the extraction temperature to his liking. At joe we pull our shots at about 200°F, give or take a degree or two depending upon the particular espresso blend. To make the perfect espresso, it is essential that correctly tamped ground beans and desired water temperature are met with exact timing. At joe we generally tamp down seventeen to twenty-one grams using a concentrated amount of water, resulting in an extraordinarily flavorful and rich brew that measures in at between 1.75 and 2 ounces.
EXTRACTION: The extraction time varies depending upon the blend, the volatility of the coffee, and many environmental factors. It will generally range from twenty-two to twenty-seven seconds, but at the end of the day, it simply comes down to how the coffee tastes. The barista uses his or her skill to set the appropriate extraction time to create the perfect cup. Overextracted espresso will tend to have more yellow hues and a sharp, bitter flavor, and while underextracted espresso might be pleasing on the palate, it will be shorter in volume and lack the complexity of a fully realized shot.
PULLING THE PERFECT SHOT
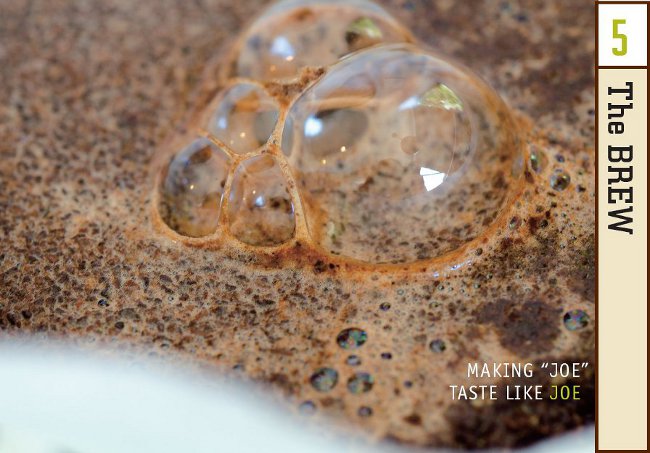
Day after day, Amanda Byron and her team put baristas-to-be through session after session of espresso and milk training in our training lab. There is a bit of chemistry to learn, as it is the intense pressure created by the machine that emulsifies the oils in the coffee and brings about the microscopic bubbles (gas droplets) that produce the crema, the creamy foam-like topping.
Learning how to pull the perfect shot takes hours of practice, as does learning to steam the milk required to make milk-based espresso drinks. The goal is to get the dosing, distributing, and tamping as consistent as possible so that there is complete control of the drink. The only thing that should change on a daily basis is the grind, which is dictated by environmental factors. The end result should be a tiny cup filled with very sweet but complex flavors, a potent scent, a balanced taste, and a pleasing mouth-feel that lingers for a few minutes.
First the shot glass or demitasse cup is warmed, and then the following steps take place:
1 Activate the grinder.

2 Remove the porta-filter from the grouphead and lightly knock out the used espresso cake (the puck).
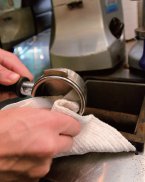
3 Wipe the portafilter with a clean, dry cloth.
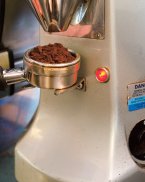
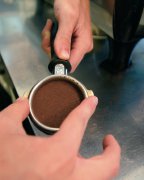
4 Dose the espresso into your portafilter.
Note: After dosing, you may choose to lightly tap the portafilter on the forks of the grinder to settle the grounds a bit. We do this step when we feel it is needed for a particular blend or a particular kind of extraction.
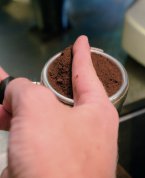
5 Begin your distribution by using your finger to push the grinds around until they rest evenly in the basket. There are many distribution techniques, but the most important element is that your distribution be consistent every time.
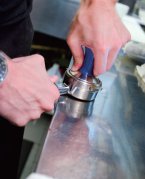
6 Holding the tamper evenly between your thumb and forefinger and with your forearm perpendicular to the counter, press down on the espresso with about twenty pounds of pressure.
7 It is important that the tamper be even so that the espresso cake is as level as possible.
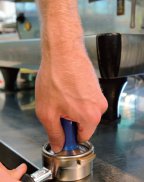
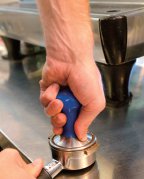
8 Twist the tamper to release it from the coffee, taking care not to press down further as you twist.
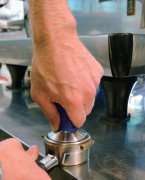
9 The actual weight is not the important factor; it is that you be consistent from shot to shot.
10 Clean off the edges of the portafilter.
11 Activate the grouphead for about three seconds to release any coffee that might have been stuck to the screen and to bring the grouphead back up to brew temperature.
12 Insert the portafilter into the grouphead.
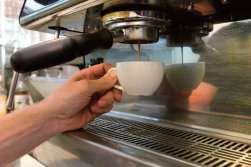
13 Pull the shot.
Turn off the pump when all of the essential flavors have been extracted from the shot.
Serve the shot.
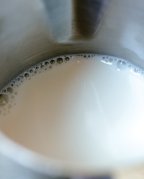
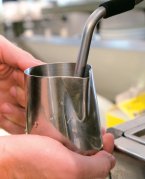
The fundamentals of steaming milk are also a necessary skill set for a barista. When milk is properly steamed, it should have a thick, velvetlike consistency with the appearance of wet paint. The tiny bubbles that form the foam are referred to as micro-bubbles; large bubbles are undesirable since they diminish the full-flavor experience of properly foamed foam, and they create an unappealing, loose foam from which you cannot create latte art. At joe, we steam milk to order just as we grind coffee to order. Any extra is tossed, and milk is never resteamed.
Here are the steps for steaming milk for a twelve-ounce latte:
1 Fill a twenty-ounce milk-steaming pitcher to about three-quarters of an inch below the bottom of the pour spout.
2 Submerge the tip of the steam wand about a half inch into the milk. (If the wand is too close to the top of the milk, the milk will splash out, and if it is too far down, no air will be introduced.)
3 Turn the steam wand on full-force.
Immediately take your right hand and place it under the pitcher so that the increase in heat can be felt. We gently pat the pitcher throughout the steaming process because if you leave your hand on the pitcher, it will come up to temperature as the milk does and you will get an inaccurate reading of when the milk is at its optimal temperature.
4 Stretch the milk until it reaches about 100°F—about seven seconds will elapse. (This is done mostly by ear and takes some experience—the milk will hiss slightly a few times when the steam wand touches the surface of the milk, indicating that air is being properly introduced. If the milk makes especially loud noises, as if it were screaming, more air needs to be introduced.)
5 At this point, submerge the wand completely and move it to the side of the pitcher to achieve the necessary whirlpooling effect that creates the desired micro-bubbles.
6 Turn off the steam when the bottom of the pitcher is hot to the touch (about 150°F), taking care not to bring the tip of the wand out of the milk until the steam is completely off.
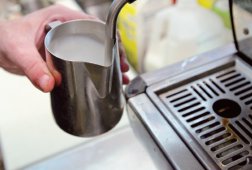
7 Swirl the milk until ready to pour into the espresso. The pitcher may also be banged on the counter to release any large bubbles.
8 Pour the milk into the drink and serve.

When steaming milk for cappuccino, the process is similar to steaming for a latte, except that the experience is stretched out. A joe cappuccino is much lighter in weight and foamier than a latte. The appearance of the milk remains a beautiful, velvety micro-bubble with the wet paint sheen, but it has a thicker texture on the palate. This is because the initial steaming phase is longer with an increased amount of air introduced into the milk.
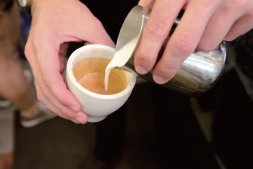
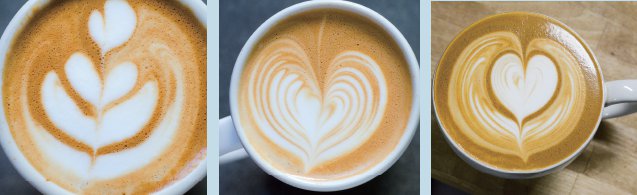
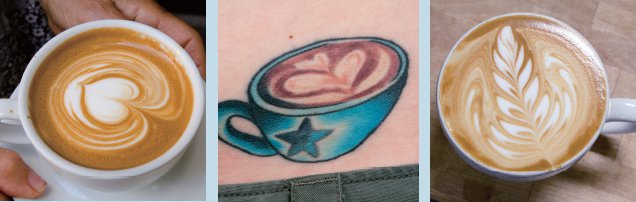
Many of our regular customers still get excited when they see the artwork in their espresso drinks. Called latte art, the design is only possible when the pulled shot and the steamed milk are executed in an exceptional manner. Although we can give you the basic steps, there is no practical way to teach the process. In order for the art to be accomplished, all motion must be as smooth and fluid as possible, and this only comes with lots and lots of practice. At joe every latte presented to a customer must have a design on it. And many of our baristas have become masters of the art, creating original designs that more than “wow” our fans.
Here are the basic steps:
1 Tip the cup that holds the espresso, angling it toward the milk pitcher.
2 Very slowly, begin pouring the milk into the cup, starting with the stream hitting the wall of the cup closest to the spout. The stream should be about the thickness of a pencil.
3 Carefully observe how the milk rather slides underneath the crema on the espresso—this is why the cup must be tipped. Poured into an untipped cup, the milk will break the crema and give the barista less “canvas” on which to execute the art.
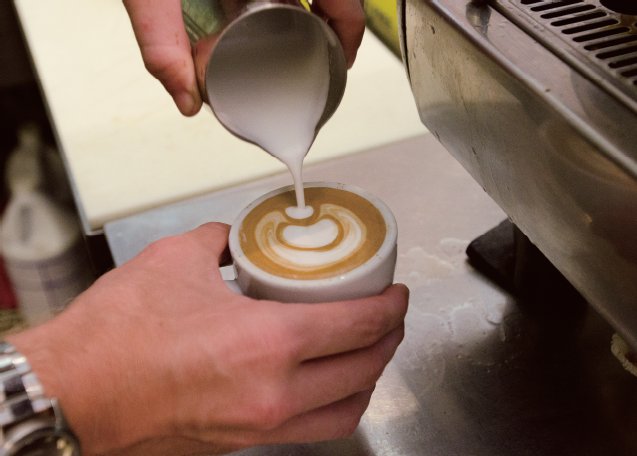
4 Continue to pour in a slow, steady stream, moving the pitcher toward the center of the cup or aiming for the opposite side of the cup.
5 At this point, a “halo” should form around where the pour stream comes in contact with the espresso.
6 When you see this halo, increase the speed of the pour by about double. The stream should now be about the size of a thin straw.
7 When the cup is half full and the “halo” has formed, the difficult steps begin as the movement of the milk must be carefully controlled to create the basic “rosetta” (a delicate fern leaf design that forms as the hot, foamy milk pushes up to the surface) that is the keystone of the art.
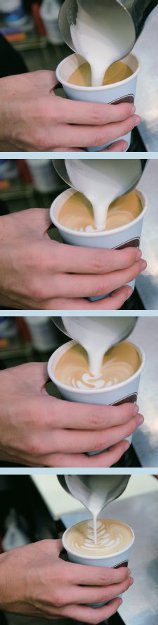
The difficult steps:
8 We tend to refer to the action as a wiggle, but it more resembles a pumping action—like engaging a bike brake. It is important to visualize that you are folding your steamed milk into the crema of the espresso rather than “drawing” a picture on top.
9 As you increase your wiggle, start to pull the pitcher back toward the original start point, maintaining a slow, steady stream as you move.
10 At this point, the rosetta leaves begin to open up at the bottom and taper off as the pitcher is retracted.
11 When the cup is almost full and the milk pitcher is almost empty, the pitcher should be back at the beginning point at the far edge of the cup.
12 Rather than pulling the stream up and out, push it back through the petals of the rosetta, creating the stem. This is called the “pull-through,” and it can go right over the far edge of the cup.
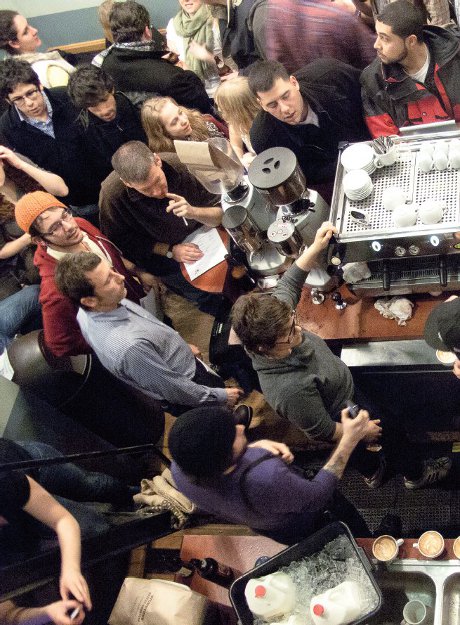
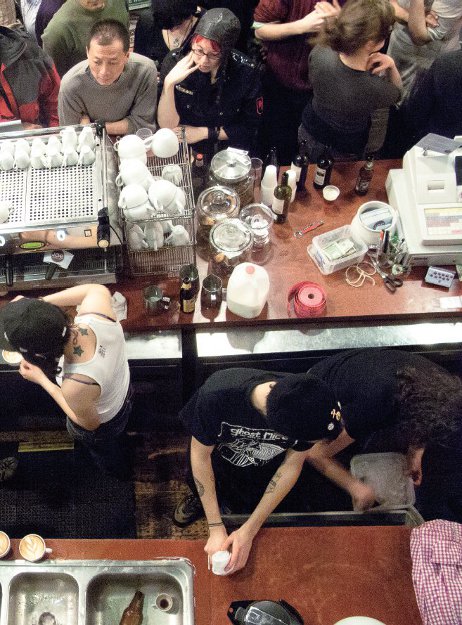
Being a great barista takes an enormous amount of time, skill, and talent. One way that many of our joe baristas stay in shape is through participation in international competitions and local events called “throwdowns” or “brew-downs.” A win in an international competition is exceedingly prestigious and can lead to a high-powered career in the specialty coffee business. On the other hand, the local events, although competitive, are also meant to be occasions when coffee fanatics can gather after hours, drink beer, and spur each other on to wildly adventuresome latte art. The rules are quite simple: a specific time (usually one minute) to pull a shot, steam milk, and create a stunning rosetta. For a trained barista this is all second nature, but it is not so easy to do after a day at the espresso machine, lots of caffeine, and a couple of beers! The judges are usually fellow baristas who rate each latte for its execution of design. Sometimes, but not always, the winner goes home with a cash prize or, at the least, a few pounds of coffee. Although throwdowns are real contests with the winners gaining a degree of specialty coffee notoriety, in actual fact they give baristas a chance to gather, relax, have some fun, and share the latest coffee gossip. This is the ultimate mingling of coffee and popular culture. And, at joe we are constantly celebrating the championships of our many superb baristas.