Now that we have patched the Metasploit library, let's perform a Nessus scan using Metasploit:
- After patching the gem, we can now create a vulnerability scanning task using the nessus_scan_new <UUID of Policy> <Scan name> <Description> <Targets> command, as shown here:

- Once the task is created, we can confirm it by executing the nessus_scan_list command. Scan ID will be used to launch the task, so let's make a note of it, as shown here:

- Let's confirm the same by accessing the Nessus web interface:

As we can see in the preceding screenshot, the scanning task is created but it has not yet launched.
- To launch the scanning task, we need to execute the nessus_scan_launch <scan ID> command:

We have successfully launched the scanning task.
- Let's confirm it on the Nessus web interface:

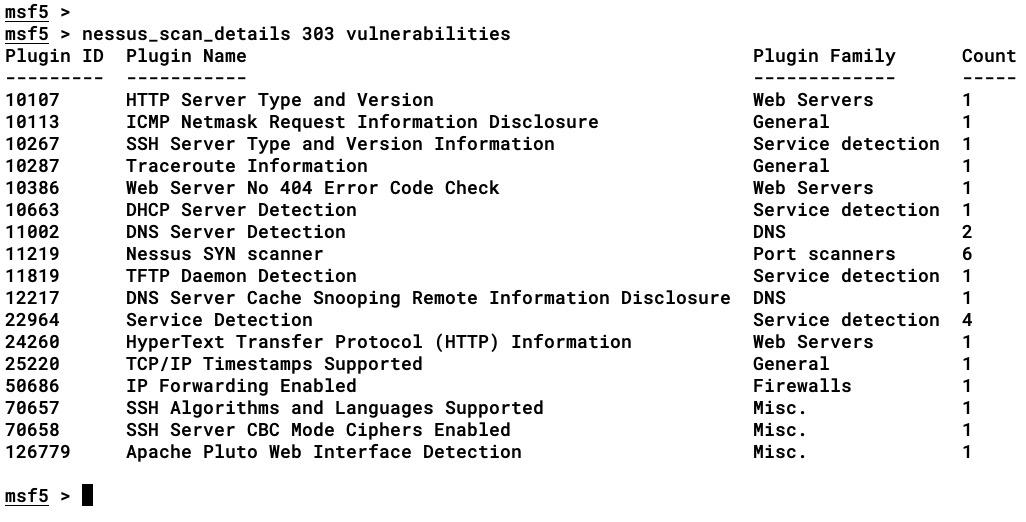
- We can see the same details from the preceding screenshot in msfconsole by executing the nessus_scan_details <scan ID> <category> command:

The available categories that can be used to view the scanning details are the following:
- Info: General scanning information, which includes scan status, the policy used for the scan, the scan name, the scan targets, and the scan start and end times
- Vulnerabilities: A list of vulnerabilities found by Nessus on the given targets, which include the plugin name used for scanning the target with its plugin ID, the plugin family (category), and the total number of instances found on the target
The following screenshot shows the output of the vulnerabilities command:
- History: This is the last time the same scanning task was launched. This includes the History ID, the Status of the scan, the Creation Date, and the Last Modification Date.
The following screenshot shows the output of the history command:

- Let's confirm the scanning details from the Nessus web interface:

- Let's now execute the nessus_report_hosts <scan ID> command to see an overall summary of the scan, as shown here:

- To get a list of the vulnerabilities identified, we can execute the nessus_report_vulns <scan ID> command, as shown here:

Using Nessus from Metasploit comes with a perk: being able to use the Metasploit DB for the scan. This can be very useful in cases where we have a list of targets stored in the Metasploit DB and we want to perform a vulnerability scan on those targets.