Chapter 1: Using SkyDrive in Windows 8.1
In This Chapter
![]() Introducing SkyDrive
Introducing SkyDrive
![]() Using the tiled Metro SkyDrive app
Using the tiled Metro SkyDrive app
![]() Working with SkyDrive on your old-fashioned desktop
Working with SkyDrive on your old-fashioned desktop
![]() Running SkyDrive on the Internet
Running SkyDrive on the Internet
![]() Working with Fetch
Working with Fetch
Microsoft has announced that it’s retiring the name SkyDrive. Microsoft lost a trademark lawsuit in the U.K. with British Sky Broadcasting — the TV people — and instead of taking the lawsuit back for another appeal, MS decided it was smarter to just stop using the term Sky. I’m astounded that a company can trademark the name Sky, but then again I’m still dealing with the idea that a company can trademark the name Windows.
As we went to press, Microsoft hadn’t spilled any beans about the new name for SkyDrive. So, in this book, we’ll stick with the old name. By the time you read this, Microsoft may have launched its new TrustYourDataWithUS service, so adjust your spectacles accordingly.
Start with the basics: The Windows 8.1, tiled Metro SkyDrive app doesn’t do justice to SkyDrive, Microsoft’s online storage service that enables you to keep files on the web and synchronize them among several devices.
 To get any real use out of SkyDrive — beyond very simple pecking file-picker style interactions — you have to flip over to the desktop and use the SkyDrive folder, or hop on to the web and run the full-fledged SkyDrive application.
In this chapter, I show you the limited things you can do with Microsoft’s tiled Metro SkyDrive app. But I also show you the rest of the story, by jumping over to the desktop side of things and then digging directly into SkyDrive with a web browser.
Microsoft will undoubtedly bring more capabilities to the tiled Metro SkyDrive app, probably dribbling out improvements over time. Slowly you’ll see the SkyDrive app add some of the features that are already accessible from the web.
You’re lucky. You don’t have to wait — because this chapter shows you where to look for the more robust SkyDrive features on the desktop. SkyDrive is up and running, and it doesn’t cost you a cent.
SkyDrive has many competitors — Dropbox, Google Drive (see Book X, Chapter 3), the Apple iCloud (which isn’t quite the same, although you can get to it through a web browser), the Amazon Cloud Drive, Facebook storage, SugarSync, Box, SpiderOak, and cloud storage and sharing from many smaller companies. (Cloud is another word for the web or the Internet.) These competitors all have advantages and disadvantages — and the feature list changes from week to week. I talk about the tradeoffs in Book X, Chapter 3.
In this chapter, I show you just about everything you need to know to make SkyDrive work for you and in Windows 8.1.
What Is SkyDrive?
SkyDrive is an Internet-based storage platform offered for free by Microsoft to anyone with a Microsoft account. Think of it as a hard drive in the cloud, which you can share, with a few extra benefits thrown in. One of the primary benefits: SkyDrive hooks into Windows 8.1 pretty easily.
 As of this writing, if you have a Microsoft account (see Book II, Chapter 4), you already have 7GB of free storage set aside. Microsoft, of course, wants you to buy more storage, but you’re under no obligation to do so. The free storage is there whether you use your Microsoft account to log on to Windows, even if you never use SkyDrive. In fact, if you have a Microsoft account, you’re all signed up for SkyDrive.
Here’s the SkyDrive shtick:
 SkyDrive does what all the other cloud storage services do — it gives you a place to put your files on the Internet. You need to log on to SkyDrive with your Microsoft account (or, equivalently, log on to Windows with your Microsoft account) to access your data.
If you log on to a different Windows 8.1 computer using the same Microsoft account, you have access to all your SkyDrive data through the tiled SkyDrive app.
The tiled SkyDrive app offers a very clumsy process for copying files from your computer into SkyDrive (see Figure 1-1). The tiled SkyDrive app also lets you move files in the other direction, from SkyDrive storage onto your local hard drive, but navigating around your hard drive by using the tiled interface is clunky at best.
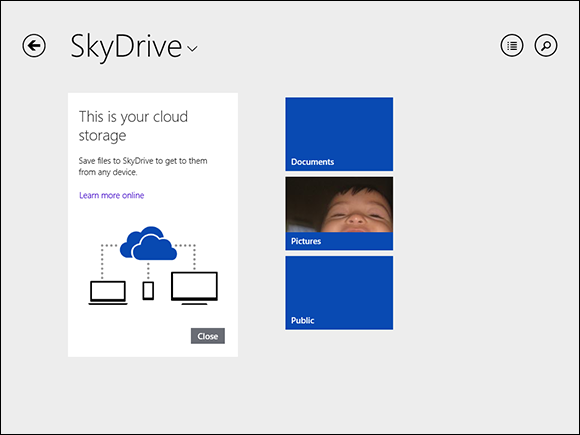
Figure 1-1: Microsoft’s tiled Metro SkyDrive app doesn’t do much, but it looks nice.
You can log on to SkyDrive at www.skydrive.com and see all your data (see Figure 1-2). Working through your favorite web browser, you can also copy or move files into SkyDrive, or delete or rename files inside SkyDrive.
You can share files or folders that are stored in SkyDrive by sending or posting a link to the file or folder to whomever you wish. So, for example, if you want Aunt Martha to be able to see the folder full of pictures of Little Billy, SkyDrive will create a link for you that you can e-mail to Aunt Martha. You can also specify that a file or folder is Public, so that anyone can see it. See the section “Running SkyDrive on the Web,” later in this chapter.
To work with the SkyDrive platform on the desktop or a mobile device, you can download and install a SkyDrive program — SkyDrive for Windows, SkyDrive for Mac, SkyDrive for iPhone, iPad, or Android.
In Windows 8.1, you don’t need to download or install a special program — it’s already baked into Windows.
If you have the program installed, SkyDrive syncs data among computers, phones, and/or tablets that are set up using the same Microsoft account. If you change a SkyDrive file on your iPad, for example, when you save it, the modified file is put in your SkyDrive storage area on the Internet. From there, the new file is “pushed” to all other computers with access to the file. Ditto for Android devices.
In most cases, SkyDrive doesn’t actually store the files on your computer. Instead, you see thumbnails, and the files get brought down only when they’re needed.
In addition to all of the above, you can go directly to the SkyDrive web site, www.skydrive.com, with any browser, to get the most options.
SkyDrive has a unique Fetch feature that allows you to access other computers that are logged in to SkyDrive with the same Windows account. Fetch can come in very handy if, for example, you forget that important spreadsheet while you’re on the road. As long as your home computer is logged on to SkyDrive with your Windows account, you can log on to SkyDrive from another computer, use the same Windows account, and retrieve the spreadsheet. See the “Fetching” section later in this chapter for details.
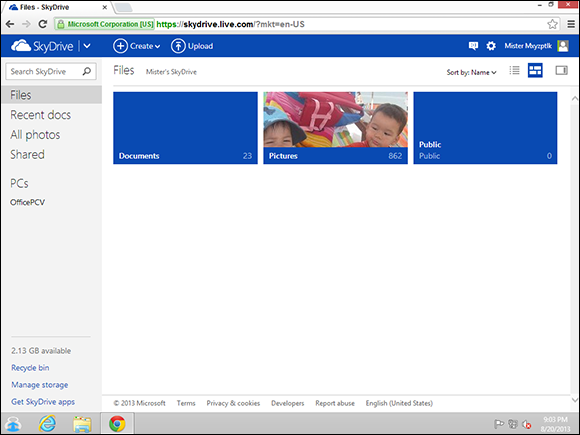
Figure 1-2: Using SkyDrive through a web browser opens many possibilities.
Using the Tiled Metro SkyDrive
Microsoft’s tiled Metro SkyDrive app leaves much to be desired, but it’s not a bad place to get your feet wet. Follow these steps to access SkyDrive via the tiled SkyDrive app:
1. On the Metro Start screen, tap or click the SkyDrive tile.
The tile is blue with billowy white clouds.
If you haven’t already logged on with a Microsoft account — either your Windows login ID is a Microsoft account, or you logged on to one of the other tiled apps with a Microsoft account — Windows asks you to sign in with a Microsoft account.
2. If you aren’t logged in automatically, log in using your Microsoft account.
In Book II, Chapter 4, I offer advice about the pros and cons of using a Microsoft account. A Microsoft account is the price of admission for SkyDrive. So no Microsoft account, no SkyDrive. Makes sense, actually.
If you’ve never used SkyDrive, the Metro SkyDrive app shows you the screen in Figure 1-3.
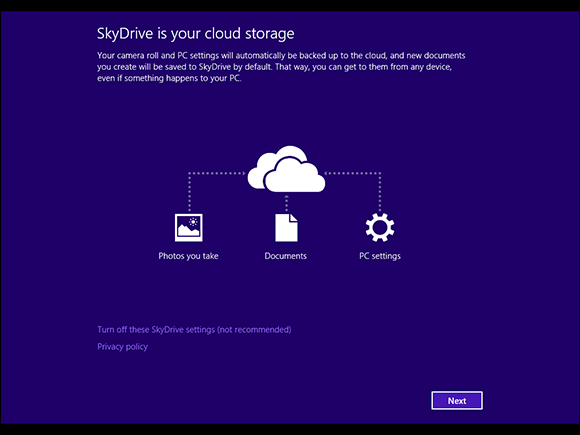
Figure 1-3: A fresh, new SkyDrive account gets this warning from the Metro tiled side of Windows.
Microsoft is telling you that, if you start using SkyDrive, your Documents Library (see Book VII, Chapter 3) will be modified so the default Documents folder in the Library isn’t your computers Documents folder. It’ll become your SkyDrive Documents folder. The part about “new documents you create” is completely bogus — Microsoft only has control over new documents that you create using Microsoft products; the admonishment really only applies to Office documents.
3. Click Next.
SkyDrive gurgles and burps and pulls down the SkyDrive app from the Windows Store. It takes a while because the installer is not only installing the guts behind the SkyDrive Metro tile, it’s also making changes to your old-fashioned desktop’s File Explorer, and adding some “glue” programs to both sides.
When the installer comes up for air, you’re presented with the wholly uninspiring picture you see in Figure 1-4.
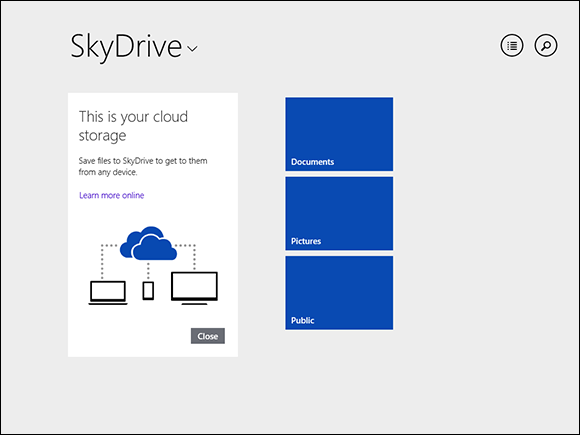
Figure 1-4: A new SkyDrive account, as seen from the Metro SkyDrive app.
The three folders — Documents, Pictures, and Public — in your online SkyDrive folder appear by default. Those are the three folders that Microsoft sets up for you in the cloud. From the screen shown in Figure 1-4, you can add a file to any of the folders, and after you’ve added files, you can delete files or download any of them to your computer. If you put a file in the Documents or Pictures folders, only you have access (unless you change permissions). However, anyone can see files you add to your Public folder.
4. On the left, under This is Your Cloud Storage, click Close.
Here’s how to work with files in SkyDrive when you access SkyDrive via the tiled Metro SkyDrive app:
Add a file: Swipe from the top or bottom or right-click in the middle of the screen. When the App bar appears, tap or click the Add Files icon. After the file picker appears, as shown in Figure 1-5, hunt around your hard drive until you find a file; then tap or click the file and in the lower-right corner, tap or click Copy to SkyDrive. The file is copied into your SkyDrive folder, as you can see in Figure 1-6.
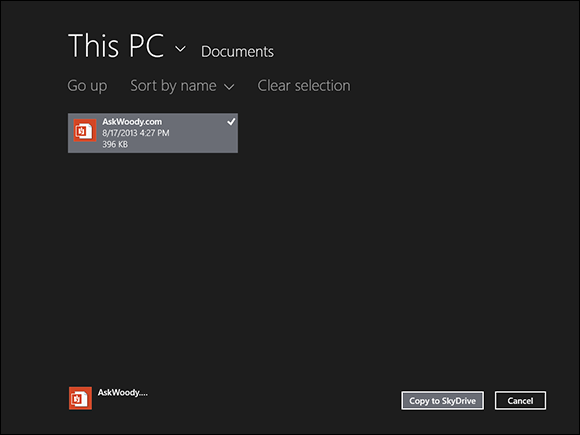
Figure 1-5: Choose a file to go into SkyDrive.
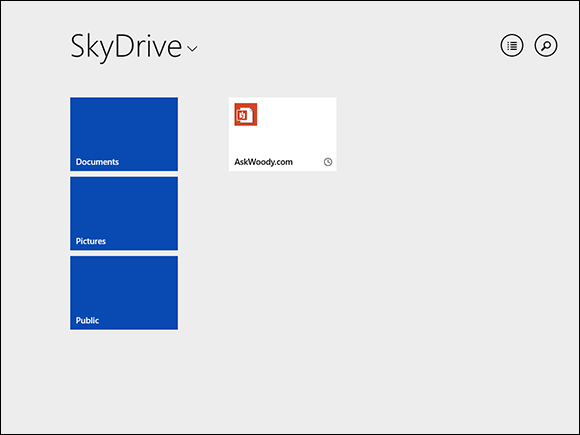
Figure 1-6: The file goes into SkyDrive.
Delete a file: Tap or click the file; swipe from the top or bottom, or right-click the file; and choose Delete. It takes a few seconds for your command to take place because SkyDrive has to reach out to the cloud and perform the Delete action.
Keep SkyDrive from downloading a file to your computer: Tap or click the file, swipe from the top or bottom, or right-click the file. Choose Make Online Only. This is helpful if you have large files inside SkyDrive, and it’s even more helpful if you don’t have a lot of hard drive space. SkyDrive will download the file if you need it — for example, to open it. But unless there’s a specific reason to copy the file onto your computer, it’ll just stay out there in the cloud.
The Metro SkyDrive app lets you use this finger-friendly interface for files on your computer, too. Just tap the big letters Sky Drive, up at the top, and choose This PC, as shown in Figure 1-7.
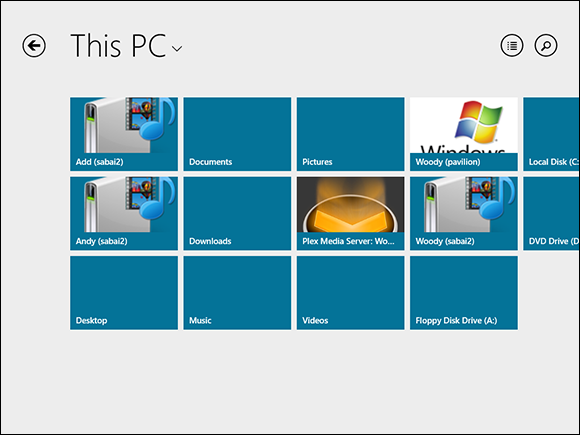
Figure 1-7: A finger-friendly File Explorer, on the Metro side.
The folders listed in the Metro SkyDrive app are very similar to the ones you see in the old-fashioned desktop’s File Explorer, although in some cases, drives hidden in File Explorer (at your request) crop up in Metro SkyDrive. Exhibit A: the Floppy Disk folder in Figure 1-7.
Using SkyDrive on Your Desktop
If you want to use SkyDrive (as opposed to just playing with it in the tiled Metro SkyDrive app), you need to flip over to your old-fashioned desktop.
The SkyDrive program is a rather unusual desktop program. You never need to start or stop it. The SkyDrive program just runs — fingers never leave the hands (if you’ll pardon my W.C. Fields impression). In fact, most people who use SkyDrive never use the online program. They cut straight to the SkyDrive folder in File Explorer and treat it as if it were any other folder.
Windows 8.1 ships with all the programs you need already installed. You’ll never know that there are programs sitting behind the scenes: All your interactions with SkyDrive on the desktop are through the SkyDrive folder in File Explorer, as in Figure 1-8.
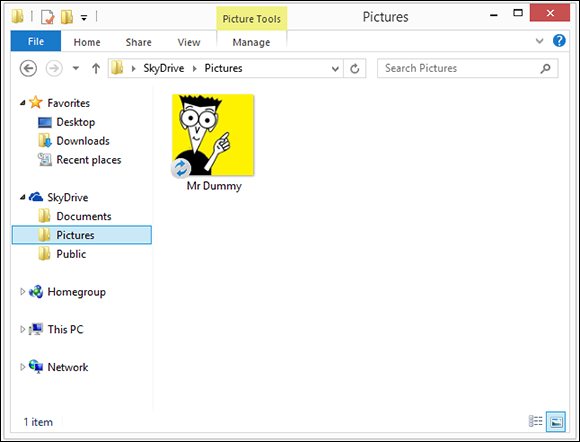
Figure 1-8: To a first approxima-tion, your SkyDrive files act as if they were in a special folder in File Explorer.
 In case you were wondering, in Figure 1-8, the circle with double rounded arrows in the lower-left corner of Mr Dummy’s picture indicate that the file is in the middle of being uploaded to SkyDrive. When the sync is complete, the arrows disappear.
To recap:
The SkyDrive folder sits inside File Explorer (see Figure 1-9) and acts in many respects as if it were a regular, everyday folder. It isn’t, of course, because the contents of the folder don’t sit on your hard drive. They’re up on Microsoft’s servers, somewhere in the cloud.
You can also access all the data that's stored on SkyDrive by logging in to www.skydrive.com with your Microsoft account.
And as if that weren’t confusing enough, there’s the tiled Metro SkyDrive app, which gives you just a few ways to access your SkyDrive data in the cloud.
With me still?
Anything you can do to files anywhere, you can do inside the SkyDrive folder — as long as you use File Explorer. For example:
You can edit files, rename them, copy or move vast numbers of them. The SkyDrive folder in File Explorer is by far the easiest way to put data into SkyDrive and take it out.
You can add subfolders inside the SkyDrive folder, rename them, delete them, move files around, and drag and drop files and folders in and out of the SkyDrive folder to your heart’s content.
You can change file properties (with a long tap or right-click).
You can print files from SkyDrive just as you would any other file in File Explorer.
 What makes the SkyDrive folder in File Explorer unique is that when you drag files into the SkyDrive folder, those files are copied into the cloud. If you have other computers connected to SkyDrive with the same Microsoft account, the SkyDrive folders on all those other computers are synchronized automatically — as long as the computers are connected to the Internet — and you needn’t do a thing.
It may take a minute or two to upload the files, and download them to other computers. But plus or minus a bit-slinging delay, the files appear everywhere, magically.
So if you have other computers (or tablets or phones) that you want to sync with your computer, now would be a good time to go to those other computers and install whichever version of the SkyDrive program is compatible with your devices. Remember that a SkyDrive program is available for Windows (Vista, Windows 7, and Windows 8 only), Windows Phone 7 or later, Mac OS X, and iOS (for iPad and iPhone). There’s also a SkyDrive app for Android phones and tablets.
Running SkyDrive on the Web
By far the most options and the best controls for SkyDrive are on the web. The option I use most? Sharing.
While it’s true that you can right-click a file or folder in the old-fashioned desktop version of SkyDrive — inside File Explorer — and choose Share With/SkyDrive, that just pops you into the web-based version of SkyDrive. Kinda cheating, but it works.
To share a file that’s sitting in your SkyDrive folder:
1. Go to www.skydrive.com with your favorite browser and then sign in with your Microsoft account.
Your SkyDrive data appears as big boxy tiles on a web page, as shown in Figure 1-2. To make the whole thing more accessible, at least with a mouse and keyboard, click or tap the icon immediately to the right of the Sort by Name line. That brings you into Details View, shown in Figure 1-9.
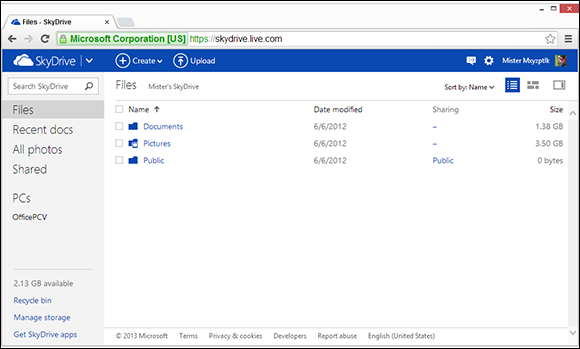
Figure 1-9: If you have a mouse, Details view is the easiest way to work with SkyDrive.
2. Find the file or folder you want to share, hover your mouse over it, and then select the box to the left of its name, or in the upper-right corner of the picture.
Selecting the box is important. Don’t click the file. If you click the file, you’ll probably open it — not the end of the world, but it’s easier to share without opening.
If the file or folder is already shared, the word “Shared” appears in the Sharing column (refer to Figure 1-10).
3. With the box in front of the file or folder selected (or the upper-right corner of the picture selected), tap or click the Sharing link at the top of the screen.
SkyDrive assumes that you not only want to share the file, but you also want to send an e-mail to the person(s) you’re sharing the file with. The e-mail has a link to the file or folder. The Send a Link screen appears, as shown in Figure 1-11.
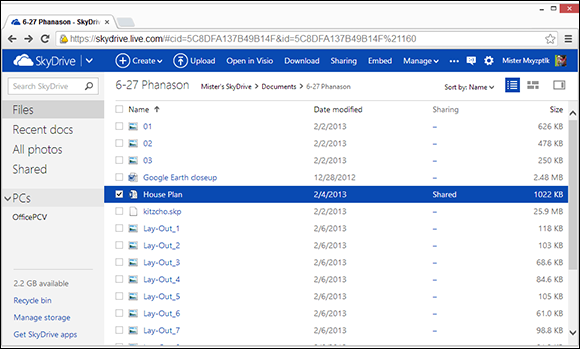
Figure 1-10: Files or folders with any kind of sharing enabled show “Shared” in the Sharing column.
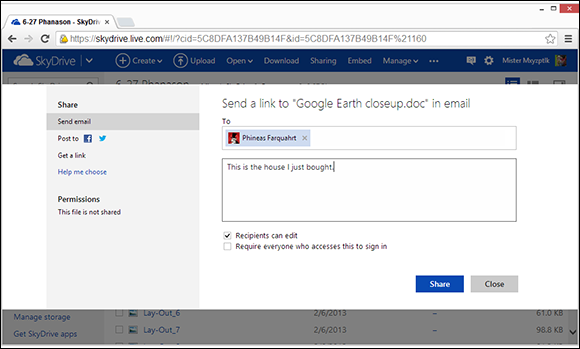
Figure 1-11: You can e-mail a link to someone, so she can see a file in your SkyDrive folder.
4a. If you want to send a message to someone and put the link to the shared file/folder in the message, fill out the Send a Link screen: Type e-mail address(es) in the To box, add whatever note you like, and then tap or click Share. Go to Step 5.
If you deselect both of the boxes at the bottom of the Send a Link screen, the person receiving the e-mail message and the link can only view, and not edit, the file.
If you select the box at the bottom, the recipient of the e-mail message has to log on with a Microsoft account that matches the e-mail address you sent. That’s a good way to reduce the possibility that the person who receives the e-mail will pass along the link.
4b. If you don’t want to send an e-mail, or you don’t want to share the file (folder) with specific e-mail addresses, tap or click the Get a Link option on the left.
SkyDrive shows you the rather ambiguous Get a Link screen, shown in Figure 1-12. Although the options seem straightforward, they aren’t.
5. Consult Table 4-1 and tap or click the correct button for your situation.
A link appears. Send that link to somebody, and when he clicks it, his web browser will open with the file you’ve selected, giving the person who clicked the link editing permissions indicated in Table 1-1.
6. Make sure you copy the link provided by SkyDrive.
You can use the link any way you wish.
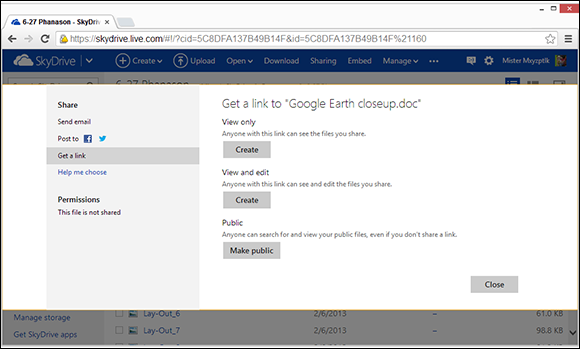
Figure 1-12: Create links with the appropriate restrictions.
Table 1-1 Get a Link Options
|
This Option |
Really Means This |
|
View Only |
SkyDrive gives you a link to your file or folder. Anybody who has that link can view, but not change, the file or folder. This setting doesn’t lock out other people: If someone can guess the link, she’s in like Flynn. Similarly if you give the link to someone, and she gives it to someone else, the third party can see the file or folder. |
|
View and Edit |
Like View Only, except anybody who gets into the file or folder can change or delete the file or anything in the folder. |
|
Public |
Makes the contents searchable, so Google or Bing may pick it up someday. Anyone can view, but not change, the file or folder. |
SkyDrive has many more capabilities. See the tutorial at http://windows.microsoft.com/en-US/skydrive/home for an overview.
Fetching
The SkyDrive Fetch feature lets you go into any computer that’s logged on with your Microsoft account and retrieve files on the computer.
Say you're going on a business trip. Before you leave, you log on to your Windows 8.1 computer using a Microsoft account. While you're driving through a corn field in Kansas, you suddenly realize that you left your favorite picture of a scarecrow back on the computer at home. You whip out your iPad, use its 3G connection to go to www.skydrive.com, log on with the same Microsoft account, and with a few clicks, you can reach into your home computer and retrieve the picture. In fact, you can fetch any file you want.
For security verification, you need to be able to access a secondary verification channel; for example, if you have a phone registered with your Microsoft account, you may get an SMS with a code that lets you get into the computer.
To pull out a file with Fetch:
1. Make sure the computer that contains your desired file meets the following criteria:
• The computer is turned on. Fetch will usually “wake up” a sleeping Windows 8 or Windows 8.1 computer, but if the computer’s turned off, there’s nothing you can do about it from a cornfield in Kansas.
• You must be logged on to that computer — the computer you’re going to probe — with a Microsoft account.
You also need to know the probed computer’s name, which is assigned when you set up Windows. I talk about assigning a computer name in Book I, Chapter 4.
That’s all you need to do before you set out on that road trip.
2. When you want to fetch a file from the waiting computer, fire up a browser — any browser — and go to www.skydrive.com. Log in with your Microsoft account.
The SkyDrive main page appears, as shown in Figure 1-13. Under the PCs heading on the left, note the names of other computers that are connected with the same Microsoft account.
3. In the lower-left corner, tap or click the name of the computer that you want to connect to.
In this case, I click Pavilion.
You may need to retrieve a security code via e-mail or SMS. Enter it, and SkyDrive comes back with a representation of all the folders and libraries on your computer, as shown in Figure 1-14.
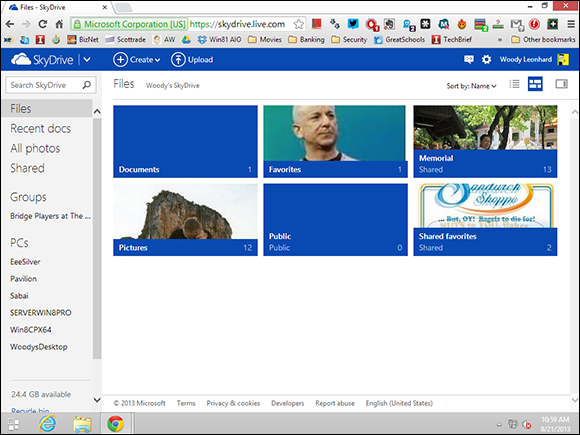
Figure 1-13: The SkyDrive main page.
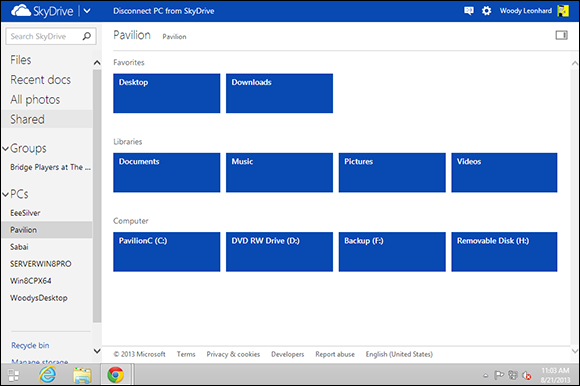
Figure 1-14: You can see all the files, folders, and libraries, even hidden files and system files, on the connected computer.
4. Navigate to the file you want to retrieve and then tap or click it.
Fetch selects it and shows it, as shown in Figure 1-15.
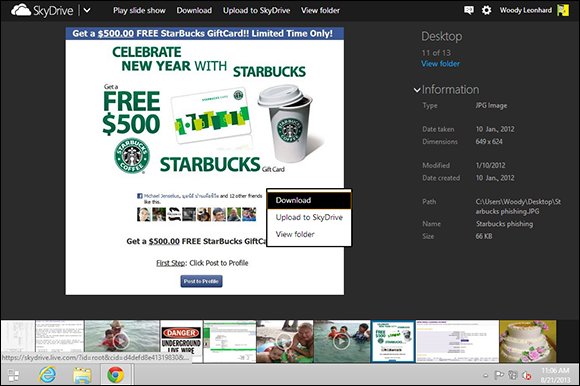
Figure 1-15: One file has been chosen.
5. Tap and hold or right-click the picture and choose Upload to SkyDrive.
Fetch asks where you want to put the file on SkyDrive.
6. Choose an appropriate folder on SkyDrive or create a new folder (click or tap the New Folder button); then tap or click Upload.
Fetch dutifully copies the file from the computer you’re connected to into your SkyDrive folder.
From that point, you can copy the file anywhere you like.
A couple of important disclaimers:
The computer you’re fetching from must have the SkyDrive program installed.
If the secondary validation you have on file with Microsoft is to send a message via SMS, you better have the phone (or something like it) handy.
Mac users (indeed any computer with a browser) can fetch files from PCs that have the SkyDrive program installed. But you can’t use Fetch to retrieve files from a Mac. You can only use Fetch to retrieve files from a Windows PC.
SkyDrive only retrieves files. It doesn’t let you control the other computer, as you can with Remote Desktop Services or (my favorite) LogMeIn. If you’re after a forgotten file, Fetch is great. If you’re trying to troubleshoot a cantankerous computer, you’re out of luck.