There are just a few simple techniques to learn in order to make all of the projects in this book. Most of the jewellery findings are simply glued onto your final LEGO® models, but here’s what else you need to know before you get started.
Before you crack open the glue, always make your entire model without gluing first so you know how the design goes together, there’s no going back once you’ve started gluing! As your LEGO® bricks will be glued, there are some designs where you can ‘cheat’ in the construction, so bricks do not need overlap or click together, you will need to be careful with these sections to ensure they’re well glued.
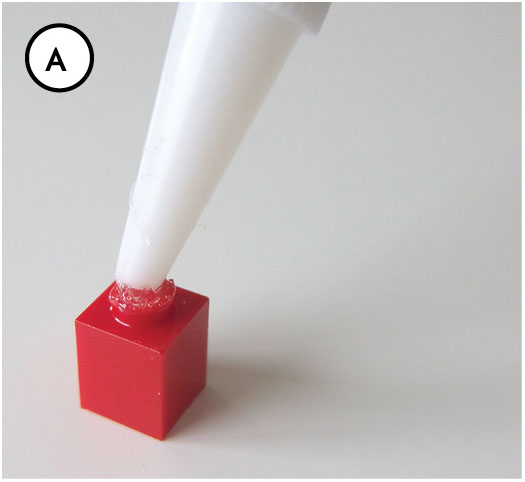
To glue your bricks, apply a small amount of strong adhesive to the studs of one piece (A) and press the adjoining brick into place firmly. Make sure the pieces are pushed tightly together, are level and that there are no gaps. When gluing flat sides of bricks together, use fine sandpaper (or an old nail file/emery board) to roughen the surfaces first – this will give a better bond. Avoid using too much glue, as your bricks will not fit tightly together and you risk glue spilling out onto the visible surfaces. If this does happen, wipe away any excess glue immediately.
Keep working to build up the final model by gluing one brick at a time. For larger pieces, it will help if you glue one section, allow to dry and add the rest of the bricks in stages. Allow the glue to dry completely before moving and always follow the drying time advised on the glue instructions.
Remember, always glue in a well-ventilated area.
To turn your LEGO® bricks into jewellery, you will need a way of securing them to your findings. To do this you will need to make holes in some bricks. There are two main methods, it’s up to you which you prefer.
You could use an electric drill with a small drill bit suitable for plastic, around 1.5–2mm (1⁄16in). Clamp the LEGO® brick into a vice and carefully drill through the plastic, making sure the drill is straight (B).

This method is very quick and creates nice, clean, even holes.
Or alternatively, you could take a needle or pin and carefully heat the tip in a flame (C).

Use a pair of pliers to hold the needle in the flame and when the needle is glowing orange, push through the brick to melt a hole (D).

Ensure the needle size will melt a hole big enough for your jump rings or eye pins. This method won’t create such clean and even holes as a drill and should only be used in a well-ventilated area.
1. Grip each side of the ring with a pair of pliers and twist away from you to open (G).

2. To close, twist back towards you so that the ends meet (H).
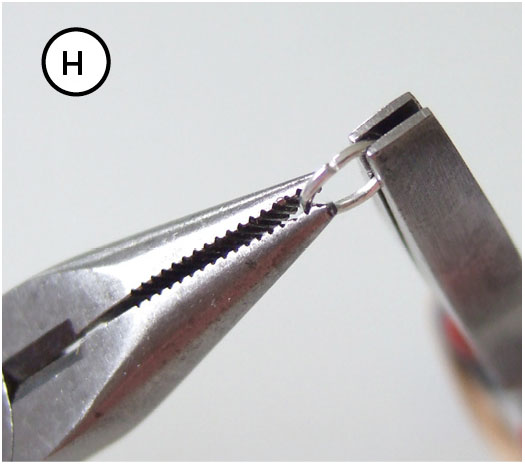
Try not to pull the rings apart sideways, as this will distort them.
1. Using the hot needle technique, make a small hole in the LEGO® brick as a guide. This hole should be smaller than the screw thread of the eye.
2. Grip the screw eye in a pair of pliers and using the guide hole, apply pressure as you turn the eye and screw into the brick (E).

Keep going until the eye itself rests just above the brick surface, and the thread is no longer visible (F).

Baseplates are large, flat LEGO® pieces usually used as a base for constructions. They are a lot more flexible that a normal flat LEGO® plate and therefore lend themselves to being reshaped to make jewellery. With a bit of care they can be cut with a pair of strong scissors or a craft knife. It helps to draw an outline to follow in pencil, and if you use a knife, be careful to always cut away from you. If the edges are rough or sharp after cutting you can sand lightly with fine sandpaper or an old nail file/emery board to smooth the shape.
Most fans of LEGO® toys would not even entertain the idea of gluing a single LEGO® piece – just look at the ultimate weapon in The LEGO® Movie – the Kragle, threatening to glue everything together forever and make all creations permanent! Gluing removes the purpose (and creativity) of LEGO® toys, which is that you can create, disassemble and recreate in an infinite range of designs. However, practically, if you’re making LEGO® jewellery and you want your pieces to last and stay together, it is advisable to glue them, or you risk ending up with a pile of bricks by the end of the day! If you want to leave them so you can take the designs apart and put them back together in a completely different way for the next day, that’s fine too, just be prepared to scoop the bits off the floor once in a while! Please note however, some designs in this book cannot be made without gluing, as they rely on being attached by two flat sides of bricks.
It’s also possible to have the best of both worlds – you can glue 90% of the design together and leave a few selected pieces loose, in order to change the bricks or colours for a different look. Either way, the beauty of LEGO® jewellery is that it’s your choice.