
FOOD DOES NOT HAVE TO BE ELABORATE. IN FACT SIMPLE preparations can be genuinely delicious. However, preparing things simply is deceptively difficult, since there is no way to hide any oversights. Care and attention are crucial.
When food is always fancy or elaborate, then fanciness becomes quite ordinary, and we forget the plain, full-natured, actual taste of things. Living in a world of created taste, we think that we can make everything suit our fancy. We reject foods that do not suit our cultivated taste, which gets increasingly particular the more we cater to it. Soon enough we have quite a low level of tolerance, of willingness to experience the unfamiliar. When we are open to ordinary goodness, not always comparing a particular taste with what we are used to, then we can experience and appreciate the actual taste of things. Though the taste is not like we thought it would be, the flavor comes home to our hearts.
When I was young, I couldn’t stand eating vegetables. The very sound of the word evoked something frightfully distasteful. “At least try it” was always the command, on occasion reluctantly obeyed. I mainly ate frozen peas and frozen green beans. Then in eighth grade a girl made a show-and-tell salad with sour cream and basil dressing, and I started eating lettuce. When I was in high school, my mother cooked cabbage with wine, and I started eating cabbage. Since then my vocabulary of edible vegetables has increased enormously. Only brussels sprouts give me pause, but I cook and eat them anyway—occasionally.
The recipes in this chapter have very few measurements. Essentially I am crediting everyone with an ability to sense things for themselves. The size of vegetables varies, appetites vary, tastes vary. Numbers can be fairly arbitrary. If you like onions, put more in; if you don’t like carrots, use less. “Spinach with Onion and Carrot” could be “Onion with Carrot and Spinach” or “Carrot with Spinach and Onion.”
Vegetables can be cooked much more precisely by taste and experience than they can by numbers. You know how full the salad bowl needs to be to serve everyone, which bowl (or combination of bowls) needs filling in order to make a vegetable dish. Cook more when it’s a dish you and your family just love and can’t get enough of. Cook less when it’s a dish that people aren’t so fond of, or perhaps one that you’re trying out for the first time.
You’re the cook. What I call cooked may be someone’s half raw. It’s a tentative designation. What I call overcooked may be someone’s favorite way of preparation. Don’t cook for me, cook for yourself, and for those who will be eating.
VEGETABLES
Whatever is done will not make a cucumber more of a cucumber or a radish more of a radish. What is done may make a vegetable more suitable to some particular taste—that’s the ordinary way, to see what taste we want. But why not “ask” the cucumber, why not “ask” the radish? What is the taste it would like to express? Welcome it into your mouth, into your experience: ask and listen.
Practicing Zen with Vegetables
Nowadays we are often advised to eat the best, to enjoy the freshest. And we shop for only the finest. I guess I’m in another school. My Zen teacher, Suzuki Roshi, would buy the worst-looking vegetables. “Who will use them if I don’t?” he would ask. The grocery clerk would try to dissuade him, “Wouldn’t you like something fresher?” When his wife joined him here in America from Japan, she wouldn’t let him go shopping anymore.
It’s an ancient Zen tradition, not wasting anything, including leftovers: we understand that the way you treat one thing is the way you treat everything, so study carefully how to use the moment, before discarding it: “Do not see with ordinary eyes. Do not think with ordinary mind.”
Especially when I began cooking at Tassajara in 1967, using what came to hand was pivotally important. Essentially we had no refrigeration. What we had was old-fashioned insulated walk-ins without any compressors, so we would open the walk-in doors at night to let in the cool air, and then close them in the morning. Menus came from what was in the garden and what was at hand—rather than the fantasy realm of “you can have what you want when you want to have it.” (Yes, and you can lose connection with Source and Sustenance and deplete natural resources relentlessly and unnaturally.)
My next-door neighbors still remember (as do other friends) when I first came to cook at their house, and they exclaimed, “We have nothing to eat.” After I made them a fine meal culled largely from their refrigerator, they said that I should have a TV show called, This Old Food, where I would go to people’s houses and cook what’s there.
So here is a guide to utilizing what can be utilized.
Take a look at what needs to be used. Glean from the garden and keep in mind what’s in the refrigerator. Start with the oldest vegetables before they are “gone.”
When are the vegetables still good? Vegetables are still good up to, but not including, the point at which they become rotten. If parts of the vegetables are still in good shape, the slimy or rotten portions can be removed. Greens are on their way when yellow. These are vegetables at their worst. Before they reach that point they can still go into a bean soup, or perhaps be cooked and blended and then put in soups, or served with a complementary (cover-up) sauce. Vegetables on the edge of oblivion have often been noted to add a marvelous, distinctive taste to casseroles, soups, and mixed vegetable dishes. Play it by nose. I just used some old beet greens (sorted through) with a bit of onion, some chopped olives, balsamic vinegar, and honey. So good. Turning what at first glance appears distasteful into something nourishing.
The next class of vegetables are those wilted or limp from loss of water. These too can still be used. They will need little doctoring other than the addition of some form of liquid—perhaps simply blanching will suffice, or a sauce, a dressing, or a light soup. In this way limp vegetables often make do for nearly any use. Cutting the tops off root vegetables will help keep them firm and fresh.
When vegetables are in their prime, consider doing as little as possible. Consider letting them be what the are—expressing themselves fully—rather than making them into something else. Hopefully, the simple recipes that follow will prove a guide for doing just this.
Of course, once in a while vegetables do become un-eatable. Careful planning and consideration can keep such loss to a minimum, but when it occurs, please give the vegetables back to Mother Earth, via a compost pile. Sometimes, even botched cooking must end up there, but when is a dish really botched? Here’s the recipe for some of the finest greens I ever ate.
Smoked Greens
I don’t necessarily recommend that you try to duplicate this recipe, but maybe you will sometime without even trying. (I did this just the other day, making some smoked lentil soup.)
Greens
Lemon butter
Oil
Salt
We cooked the greens in a wok, the concave Chinese frying pan, over a high flame. They were briefly forgotten about until—“Oh no! They’re burning!” Complete dismay in the kitchen—forty people waiting for supper—what to do to make do? The blackened greens stuck to the bottom of the pan, and out came the rest, to be served with lemon-flavored butter. Everyone wondered, “How did the greens get this wonderful smoked flavor, as though they’d been cooked with a flavorful ham bone?” C’est la vie.
Then all of those blackened leaves had to be cleaned out of the pan.
Carrots
Though common and ordinary, carrots are also versatile, inexpensive, and too often neglected. They can be prepared deliciously by themselves, and add sweetness and color when grated in salads, combined with other vegetables, or added to soups.

Carrots are used here to exemplify several possible vegetable cuts. Any one shape can be done in different sizes. I almost never peel carrots, but scrub them thoroughly and then cut off the stem and root tail—just barely. You needn’t toss away extra half inches of carrots every time you cut. Engage your mind in the activity.
ROUNDS, OVALS, AND JULIENNES
Once you have trimmed off the ends, the cutting can start at either end of the carrot. You can use the tip-of-the-knife-down stroke, slicing down and toward you, or one of the up-and-down chopping cuts (see illustrations in Stroking Down and Toward You and A Third Way to Slice). The latter is particularly effective at the carrot’s thick end. (If you are using a curved chef’s knife rather than the Japanese vegetable knife, you will often find the down-and-away cut useful (see illustrations in Stroking Down and Away from You).
For rounds, the cut is made straight across the carrot, and for ovals the cut is made diagonally across the carrot—keeping the knife in the same position as when cutting straight across, but changing the angle of the carrot (see illustrations).
To make juliennes, I like to cut the carrot into ovals, then cut the ovals crosswise into short julienne pieces. (See below for the more traditional way of cutting julienne pieces or “matchsticks.”)


HALF MOONS
Cut the carrot in half lengthwise. Slice crosswise.
SECTIONS, STRIPS AND MATCHSTICKS
For sections, cut the carrot crosswise at even intervals. Sections can then be cut lengthwise into strips. (The illustration shows how it is sometimes useful to hold the vegetable with your thumbnail while making the necessary cuts.) The strips may be cut lengthwise into short matchsticks. (the illustrations in Stroking Down and Away from You show the tip-on-the-table slice, away and down to cut strips into matchsticks.)


DICING
I like to cut the carrot first into lengthwise slabs, perhaps a quarter of an inch wide. When cutting the carrot lengthwise, you may find it useful to hold the carrot with your left (nonknife hand) thumbnail. Then you can cut lengthwise (about a quarter inch wide) into matchsticks. The matchstick pieces can be diced by cutting them crosswise.
CHINESE ROLLING CUT
Start by making a diagonal cut—cut straight down with the knife nearly parallel to the carrot. Then roll the carrot slightly away from the knife. Make the next diagonal cut at about a forty-five-degree angle to the first cut. After each diagonal cut the carrot is rotated by “walking” your fingertips. The cut surface which was perpendicular to the cutting board, now angles up toward the left. The new cut will intersect the plane of the preceding cut. These pieces can be made large or small, fatter, thinner, longer, shorter, depending on the angle of the carrot in relation with the knife. These pieces are attractive and sauté well, bouncing easily around the skillet, whereas rounds and ovals will often stick together, not allowing for a true sauté.


Carrot Salad
Find out how satisfying carrots can be, salt bringing up the flavors, lemon and honey accentuating their sunny brightness. Green of some sort—say parsley, green onion, or fresh tarragon—would be a welcome complement as well.
Carrots
Salt
Lemon juice
Honey (optional)
Green to garnish (optional)
Wash and grate the carrots, or cut them into ovals and then into thin strips. Sprinkle with salt and squeeze in hands. Add lemon juice and possibly honey. Mix well.
Garnish with green, if you have it and would like.
VARIATIONS

Breakfast Carrots
Just carrots cooked with oil and salt. Without fancy ideas in mind, they taste pretty fine. Good anytime.
Carrots
Oil
Salt
Water or stock with ginger (optional)
Nuts, seeds, or wheat germ (optional)
Wash and slice carrots in rounds or ovals, or use the rolling cut. Stir-fry for 3 to 4 minutes, until the sizzling quiets down. Add some water and grated ginger if using it, put on a close fitting lid and turn the heat down moderately low. Cook about 4 to 6 minutes with the lid on. Are they done? Salt to taste. When the breakfast carrots are ready, you might add toasted nuts or seeds, or maybe wheat germ.
Carrots Sautéed and . . .
Curried with pineapple, banana, or poppy seeds.
Glazed with butter and choice of sweetening.
Seasoned with allspice, caraway, cardamom, cinnamon, cloves, ginger, pepper, basil, mint, parsley, tarragon, or thyme (no, not all of them).
Onions

Onions! Magic beyond compare, especially when sautéed, onions transform the single note melody of other ingredients into full-bodied chords—the flavors broaden and deepen, and you find yourself saying, “Yes, let’s eat.” Onion goes with almost anything including watermelon: it picks up tired dishes, sweetens greens, beefs up sauces, zests salads. But consider who is being served. Raw onion in particular does not suit everyone’s taste. To cope with this I cut the onion pieces very finely—or make pickled onions (which are milder). (And—doctor I am not—onions are not what causes indigestion, though they are fragrant enough to be what you smell when you have it and burp.) The cooking time for onions can vary a lot: a longer cooking will bring out their sweetness and “meatiness”—imagine onion soup! Cooked onions lose their overwhelming sharpness, and become quite compatible with other vegetables. Starting a mixed vegetable sauté with onions brings out the depth of all the flavors excellently.
The fleshy concentric layers of the onion are covered with a skin which is papery and inedible. Like potatoes, onions may be baked in their skins, but usually the onion is peeled prior to cooking or eating. To remove the skins, first trim off both top and bottom ends of the onion. Place the onion on one of its flat surfaces and cut it in half. Peel the layer of papery skin off the onion. If one particular layer shares some fleshy part and some paper part, it’s usually best to remove it entirely, although some smaller paper skin patches may be pared off. Now the onion—halved and peeled—is ready to be sectioned, sliced, diced, minced, or grated.


Crying time. It’ll help to peel all the onions first, and then start cutting, as the cut pieces may then be placed in a covered container off to the side rather than under your nose. Tear remedies include a wooden match between the teeth (OK to chew), and chewing on a piece of raw onion or bread. Many people feel that onion skin is one vegetable trimming which is not especially good in stock.
SLICED ONIONS
Place the peeled half onion flat side down, slice (or chop) parallel with the axis (see illustrations in Stroking Down and Toward You, Stroking Down and Away from You, and A Third Way to Slice). When you have sliced about two-thirds of the onion half, tip over the remainder and continue slicing on the uncut surface. A final picture here shows how the remainder of the onion half can be held for the last few cuts, balanced against the first finger and held in place with the thumb. The knife can be guided by the thumb knuckle. This is quite a useful grip to know in cutting many different vegetables—sometimes it will be easier to turn the vegetable around before continuing to cut (cutting radishes into rounds for example), whereas with the onion you can simply tip it over and continue cutting.


DICED ONIONS
To dice the onion, begin with the halved onion, placing it flat side down, root end to the left (if right-handed). Leave the root end intact when cutting. Cut straight down and through, parallel with the axis and at appropriate intervals. Then make a couple of cuts with the knife parallel to the tabletop. Again, leave the left end intact. When cutting horizontally, use a gentle sawing motion so that the knife doesn’t suddenly cut through to your fingers. Now cut straight down across all the cuts you have made. Isn’t it helpful to have pictures? Tip over the intact part. Section it, turn ninety degrees, and dice.


MINCED ONION
To start with, dice the onion as finely as you can. This gives a head start on the mincing.
Sautéed Onions
Sautéed onions are simply classic. I think it was M. F. K. Fisher who remarked that if you’ve been home alone all day and haven’t done much in the realm of house cleaning or laundry washing, have some onions sautéing when your partner comes home, and all will be well. The fragrance in the air says, “Welcome home, honey, you are in for something delicious.”
Onions
Olive oil
Salt
Soy sauce (optional)
Balsamic vinegar (optional)
Slice, dice, or section the onions. Heat a sauté pan, add a thin layer of oil (and a sprinkling of salt), and sauté the onions from 3 to 5 minutes. Allow longer cooking time for bigger onion sections. The onions will first turn translucent, and then begin to brown. (A sprinkling of soy sauce or balsamic vinegar will accentuate the flavors and add to the earthy brownness.)
VARIATIONS
Baked Onions
These come out very sweet, mild, and succulent.
Onions
Balsamic vinegar
Salt
Pepper
Preheat oven to 375°. Bake the onions in their skins like potatoes for 50 to 60 minutes, depending on size. Having a bit of water in the bottom of the pan will make cleaning easier, as the onions release sugary juices which will caramelize in the pan. Onions may also be skinned, then quartered or chunked, and baked in a small amount of water and/or oil. After baking, marinate with some balsamic vinegar, salt, and pepper. As for baking with skins on or off, both have their virtues—partly having to do with presentation.
Green Onions
Known as green onion or scallion, this is the slender long one with a white root end and slightly spreading green top. In most grocery stores these onions will be chopped down to 12 or 15 inches, as the upper greens wilt. All of this onion is good—mild yet zippy. The green as well as the white can be cut finely for salads, or in longer sections for cooking. Particularly when sliced diagonally, the green pieces make an excellent bright green alternative to a parsley garnish. To prepare, first wash, then cut off the roots and break off all wilted green stalks.

SLICING GREEN ONIONS
To slice the onions, grip them with the left hand; thumb and last finger on the sides, then other fingers curled on top. Keeping the tip (or curve) of the knife on the table, the cut is made by pulling the knife down and toward you. (This is the most thorough way to cut green onions.) The table-hugging tip cuts through all of the onion at some point, so that there is no chain of onion slices hung together where they were incompletely cut. Cutting on a long diagonal will make attractive ellipses of green as you see in miso soup in Japanese restaurants. Green onions can be used to decorate and season vegetables, grains, potatoes, eggs, cheese, soups, salads, main dishes—anything. Yes, I’ve even had them finely cut with oranges and watermelon.


Leeks
Leeks, yet another form of onion, look like large scallions. Mild and sweet, they are frequently used in potato soups and quiches. Though some cooks use just the white part as it has a milder flavor, we use the whole plant, prepared and sliced like scallions in narrow slices. The thin slices will make for easier chewing. Before cutting the narrow slices crosswise, I tend to cut the leek lengthwise and then wash out the dirt between the layers. Another option is to wash the slices after you have cut them.
Leeks vary from baby, a fat-pen size (serves two per person), to extra large, an inch and a half in diameter (each one serves 3 to 4 people)—please consider this if you are getting confused about quantities.

Simply Leeks
As the leeks are not cut thinly crosswise here, this preparation is best with tender small leeks rather than the giant 12 to 15 inchers.
Leeks
Butter
Water
Salt
Pepper
Cut off the tips of any wilted leaves, leaving 4 to 6 inches of green. Trim the roots. Cut in half lengthwise and wash between the layers. Melt the butter. Place the leeks flat side down and cook for a couple of minutes. Then add some water (cover the bottom of the pan), salt, and pepper. Cover and simmer for 10 minutes. Check periodically to make sure there is still liquid in the pan. Using a white wine in place of water or adding a touch of lemon juice will enliven the flavors.
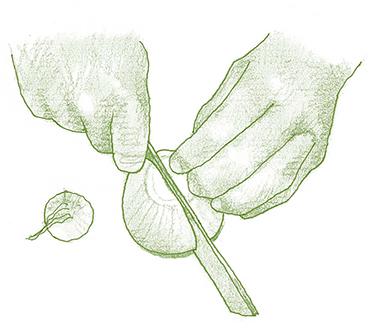
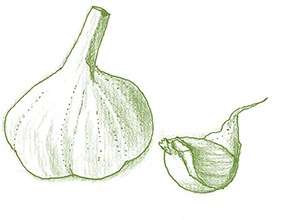
Garlic
The subtle, intoxicating, and invigorating flavors of garlic are at their peak when you prepare it freshly—rather than using garlic previously peeled, minced, powdered, or preserved.
MINCING GARLIC
Mincing garlic rates a special note, since it is done so often. I’ve developed a method of mincing the garlic where I rely on my Japanese vegetable-cutting knife. For me, it’s simple and effective, and saves dirtying other implements, such as a garlic press. To use the garlic, separate the cloves from the head. I like to get the peel loose by placing the flat of my knife on the garlic clove and tapping it with the fist of my other hand. Or if the cloves are larger, simply cut them in half lengthwise. Follow this up by removing the papery skins.


The key for mincing garlic is getting it started. On the TV show Yan Can Cook, I think I have seen Martin Yan demonstrate pressing the flat of the knife on the garlic clove and giving it a good wallop with his left hand to smash the clove. Then it can be minced.
I prefer to chop the clove of garlic into thin slices with the back of my knife first, and then mince. People love this method when I demonstrate it. The keys are to hold the knife with the cutting edge directly up (upside down); position the clove of garlic close to the near edge of the cutting board; hold the garlic clove firmly in your left hand; and then, with the back tip of the knife on the counter, lever the back of the knife down onto the clove of garlic, cutting and mashing a section off the edge. Repeat until the clove is “preminced,” then mince it more thoroughly. If this doesn’t work for you, get a garlic press, macerate the clove in a mortar and pestle, or chop it as you please.
Ginger Root
Ginger root is used in several recipes, as it is a pungent bright element much like garlic which can enliven a variety of dishes. I have fabulous bamboo ginger graters, but you can also grate it on a regular cheese grater. In my rustic cuisine, I leave the peel on.
Potatoes
Potatoes are marvelously soft, smooth, filling. Especially after a steady diet of brown rice back in the 1960s at Tassajara, potatoes were always a treat: mellow, earthy, soft. If you want to know how I messed up by serving impenetrable baked potatoes, see “Potato Fiascoes.”
We always eat potatoes with the skins—even mashed potatoes are good with flecks of skin. Scrub before cooking.
CUTTING POTATOES
Cutting into chunks: First cut in half lengthwise. Place these halves cut side down and cut them lengthwise once or twice. Then section the potato crosswise into chunks.
Cutting into rounds: Use the chopping cut, down-and-away continuing down-and-toward. (See the illustration in A Third Way to Slice.)

Cutting into sticks (french fries): First cut into rounds. Then cut the rounds crosswise into sticks.
Home-Fried Potatoes
Simple—and simply delicious.
Potatoes
Butter
Salt
Pepper
Wash the potatoes and cut them into narrow strips, or grate. Smaller pieces will cook more thoroughly and fry more quickly than larger ones. Use a generous amount of butter. Fry on gentle heat, until the potatoes are brown on the outside and soft on the inside (flip or turn over from time to time). Season. The pan can be covered so that the potatoes steam as well as fry. Open and turn over the potatoes regularly. Butter seems to work better than oil for keeping the potatoes from sticking to the pan.

Oven-Fried Potatoes
This is a good recipe to know about. These potatoes can come out well browned without the fuss of french-frying. Works for me—I don’t want big pans of hot oil in my kitchen.
Potatoes
Oil
Salt
Preheat oven to 425°. Cut the potatoes into rounds and the rounds into french-fry shapes. Toss with a bit of oil to coat and then put the sticks on baking sheets, more or less one layer thick. Bake for about 40 minutes. Turn with a spatula 2 or 3 times. Sprinkle with salt. Try one. Bake longer if necessary. These are best when served straight from the oven.
Potato halves can be baked in the same way. Cut in half lengthwise. Place cut side up on baking sheet. Brush with oil, sprinkle with salt, bake. You may also put sliced or grated cheese on top for the last 5 minutes although they are amazingly good when served plain.
Baked Potatoes
Baked potatoes uplift heaven—is that possible? A food of the gods, maybe it’s all the butter and other accompaniments. You’ll have to figure out which of these you’ll want to use, with the list below giving you something of a head start.
Potatoes (russets are the standard for this)
Butter or oil
Accompaniments (see below)
Preheat oven to 375° to 400°. Wash the potatoes, dry them, rub on butter or oil. Bake for an hour or until fork-piercing tender. The bigger the potato the longer the baking time.
Here are some possible accompaniments: Butter, salt, and pepper; grated cheese; sliced green onions; or how about cilantro and salsa? Nut butter or nut butter sauces, sour cream, yogurt, (vegetarian) bacon bits. I don’t know—look in your refrigerator: olives, capers, green goddess dressing, what’s in there?
Mashed Potatoes
The best mashed potatoes bring to mind the sublime—the earth-bound potato raised from the ground to heavenly silky smoothness. Oh let’s . . .
Potatoes
Water
Milk, buttermilk, or sour cream, or rice or soy milk
Butter
Salt
Pepper
Garlic (optional)
Cut the potatoes in halves or thirds and cook them in lightly salted water until tender. Drain off the water and save it for soup. Mash the potatoes, mixing in the milk, buttermilk or sour cream—possibly some butter or a nondairy alternative. Season with salt and pepper. Do you like garlic? It’s fantastic in mashed potatoes.
VARIATIONS
Potato Salads
I suggest dressing potato salads with mayonnaise or with an oil-and-vinegar dressing. Putting on the dressing while the potatoes are still hot helps them soak up all the flavors.
Potatoes
Choice of dressing: oil and vinegar or mayonnaise with mustard, curry, tarragon, and/or marjoram, vinegar and sugar
Choice of vegetables and other ingredients: grated carrot, sliced celery, hard-boiled egg, grated cheese, minced onion, sliced green onion, parsley, black olives, pimento, dill pickle, sliced radishes, fresh basil
Cut the potatoes into cubes and blanch until tender (6 to 8 minutes). Remove and drain. Mix in a liberal amount of dressing, seasoning the dressings to your taste. (You can also look in the section on salad dressings.) Chill the dressed potatoes. Prepare the other ingredients (not too many) and mix them in also. Some of the optional ingredients can be saved for garnishing, especially the grated cheese and the fresh herbs.
Yams and Sweet Potatoes
Even more than potatoes, yams and sweet potatoes are favorites of ours. Deep yellow-orange with sweet, rich flavor, they can be cooked in the same way as potatoes, although the seasoning may vary. In the recipes that follow, the names “yams” and “sweet potatoes” are used interchangeably. (Yams to me have the brick red exterior with the somewhat darker orange-yellow interior. Sweet potatoes have the more beige exterior and somewhat lighter interior.)
Home-Fried Yams (or Sweet Potatoes)
The orange earthiness of the yams is accented with the slightly bitter earthiness of the roasted seeds. Add a touch of orange juice or minced peel to brighten or lift the flavors.
Yams or sweet potatoes, sliced
Oil or butter
Salt or soy sauce
Sunflower or sesame seeds, roasted
Cut and fry these like the regular home fries above. Once the yam slices are soft, add soy sauce and sprinkle generously with roasted sunflower or sesame seeds.
VARIATION
For Onion Home Fries, fry the yams with sliced onions. May be served with yogurt.

Just Yams and More
Yams baked in water have a mellow succulence. Dark greens wilted in butter and/or a salad complement this nicely.
Yams
Water
Salt
Preheat oven to 375°. Scrub the yams, cut in halves or thirds crosswise. Then in quarters lengthwise. Arrange in a baking dish with a quarter inch of water on the bottom. Cover and bake until soft, about 40 minutes.
VARIATIONS
Mashed Yams
These mashed yams can be served on their own or layered in a casserole—see one suggestion below.
Yams
Butter
Orange rind, grated (optional)
Boil or bake the yams. Mash them with butter, salt, and pepper. Mix in the orange rind, and add cinnamon for seasoning. Serve.
VARIATIONS
Sprouts
Sprouts can be started at any time of the year from beans, grains, and assorted seeds, including alfalfa, fenugreek, radish, mustard, sesame and sunflower. The little shoots are literally bursting with energy, as well as vitamins and protein. Crisp with moisture, they are also tender without having to be cut up. Growing them at home, which isn’t difficult, produces the freshest vegetable available.
Most easily sprouted are mung beans (which produce the well-known “Chinese bean sprout”), alfalfa and fenugreek seeds, and lentils. Oats, wheat, and rye are fairly easy to grow, but their taste doesn’t appeal to everyone. Soybeans can be sprouted if the nonsprouting beans are carefully sorted out as the sprouting progresses.
Sprouting seeds need to be kept in a dark, moist, warm environment. First soak the seeds overnight. Drain off the water and reserve it for some other cooking use. Then put the seeds into a wide-mouthed jar. Leave the end open, or cover it with cheesecloth or some other material which lets air in and out. Place the bottle on its side and keep it in a dark, warm place—in a cupboard or simply covered with a towel. To keep the seeds moist, rinse them once a day: cover the seeds with tepid water, swish the water gently around, then pour it through the cheesecloth or into a strainer. If the seeds are actually in water (after the initial soaking) they will tend to rot rather than sprout, so drain off the rinsing liquid thoroughly. Seeds can also be sprouted in a tray, plate, bowl, or crock. Cover with a lid to keep moisture from evaporating. Pour the rinse water off through a strainer. Another method for sprouting is to put paper towels under and over the soaked seeds in the tray. Keep moist and out of the light. This method may take a little longer, but rinsing is not necessary.
Before eating, if the sprouts are put in the sunlight for several hours, they will turn green, which means that chlorophyll and vitamin C are present.
Seeds take from three to five days to sprout. Alfalfa sprouts are at the peak of their nutritional value when they are one inch long, but they can be eaten when they’re several inches long, and even after the first leaves appear—“alfalfa lettuce.”
Lentil sprouts peak at two inches, soy and mung bean sprouts at three inches.
Homegrown mung bean sprouts are darker than the commercial variety, which are chemically bleached.
For eating, grain sprouts are best when equal in length with the grain. Larger grain sprouts can be chopped or used in breads.
If the seeds don’t sprout, it may be that the particular batch of seeds is old, defective or sprayed.

Sprouts are tasty and refreshing when eaten raw. They can be added to any salad, centered in a clump or tossed in with everything else. They also add a moist, light quality to sandwiches. Only bean sprouts are really suited to cooking. The others, being very delicate, can stand only brief cooking—add them at the end—in the last two minutes for soup or as a garnish for soups or mixed vegetable dishes.
ALFALFA SPROUTS
Very popular in salads and sandwiches, these make an excellent side dish as well. Lemon juice sweetened with honey dresses them adequately.
Alfalfa-Banana Sprouts with Nuts
If you’re looking for a more substantial side dish or salad, try this.
Alfalfa sprouts
Banana
Lemon juice (optional)
Walnuts
Mash the banana to make a dressing for the alfalfa sprouts. Thin and season with lemon juice if necessary, then mix it with the sprouts and walnut pieces (which could be roasted).
VARIATIONS
Stir-Fried Bean Sprouts
A straight-forward dish with optional seasonings in the variations.
Bean sprouts
Celery
Mushrooms
Oil
Water or stock
Salt
Soy sauce
Slice the celery and the mushrooms. Stir-fry them in oil for about 2 minutes before adding the sprouts. Stir to mix, add some water or stock and a bit of soy sauce. Cover and steam a couple of minutes. Adjust seasoning and serve.
VARIATIONS
LENTIL SPROUTS
For a two month period during one winter several years ago the fourteen-mile dirt road into Tassajara was washed out (see “Finding Out That Food is Precious”). That provided quite an incentive to conserve food and to use things efficiently. Everything was at a premium. That’s when we first started sprouting seeds. Two cups of lentils became over a gallon of sprouts. We had them almost every day for lunch, by themselves or mixed with wild greens: curly dock, miner’s lettuce, chickweed, shepherd’s purse. Arugula or a baby lettuce mix would be excellent alternatives. Equal amounts of vinegar and honey dressed the salads, except on occasion when a few lemons or oranges would show up. Living with some limitation like that, everything was delicious. Maybe with other things available lentil sprouts aren’t quite that good, but I am still fond of them.
Lentil sprouts, somewhat heftier than mung bean sprouts, may require slightly longer cooking, but the same recipes can be followed. One combination to try is with onions and roasted sunflower seeds, seasoned with soy sauce and ginger.
Cabbage
Like any vegetable, cabbage is what you make it. Don’t boil it down to mush and don’t serve it with overly sweet mayonnaise. When raw, I find it best sliced quite thinly and given a little salt to start with. Cooked, it is good sautéed or lightly steamed. Raw cabbage has a natural peppery or slightly hot taste, which is vigorous and refreshing, that can be accented with the seasoning. Red cabbage is somewhat more pungent than green, and lends coloring to green salads or mixed vegetable dishes. Chinese cabbage (also known as hakusai, or nappa) has a very mild flavor and is quite juicy and tender—a marvelous ingredient for a fresh-tasting salad.

CUTTING CABBAGE
To prepare, remove the outer wilted or dirty leaves. Wash these and use them for stock, or if in good shape cut and prepare with the remainder of the cabbage. To slice the cabbage, first cut it in quarters lengthwise through the core. Holding the quarter at an angle with the cut surfaces facing up, cut out the core.
Remove a few inner layers of the cabbage, place them flat on the table, and then slice thinly crosswise. Place the remainder of the cabbage leaves on the counter—I often do it in two batches—inner side down (to help flatten it out), and slice thinly crosswise. If necessary to have the cabbage leaves lay flat, cut them in half crosswise first, and then place the inner side down and slice thinly. Cut into larger wedges or cubes for steaming or soups.


Thin-Slice Cabbage Salad
Can you cut the cabbage as thin as you can without cutting yourself or taking forever? This is what makes the dish. So simple, so delicious.
Cabbage
Salt
Honey or sugar
Vinegar or lemon juice
Cut the cabbage in thin slices. If you have some question about how to do this, see the above instructions for cutting. Sprinkle with a couple pinches of salt and squeeze in your hands, this way and that, until some moisture begins to come out of the cabbage. If this isn’t happening after a minute or so, add a little more salt and work it some more. Add sweet (honey, sugar) and sour (vinegar, lemon juice) to brighten the flavors. Taste before and after the addition to notice the difference.
VARIATIONS
Sautéed Cabbage
For my taste a very light cooking leaves the cabbage perky and live-tasting. See what you discover.
Cabbage
Oil
Salt
Water
Cut the cabbage fairly thinly. Stir-fry a couple of minutes until the cabbage wilts slightly. Add some water (or white wine) along with a little salt, put on a lid, and steam briefly.
VARIATIONS
Tomato-Sautéed Cabbage
Food is so delicious, especially when you haven’t filled up on chips and dip. Take this dish with cabbage brought more fully alive with the red summery fruit of tomato, the grassy green pungency of the onion or parsley. Cook it a short time and the tomato pieces will retain their shape and fresh-flavor. Cook it longer and you will have cabbage with tomato sauce—you may want to add some dried herbs (especially thyme and oregano)!
Cabbage
Tomato
Green onion or parsley
Oil
Salt
Slice the cabbage into about 1-inch squares. Section the tomatoes and slice the green onions. Stir-fry the cabbage for 3 or 4 minutes, add the onions and tomatoes (along with a little salt), cover, and cook just a couple of minutes, until the tomatoes are hot.
Red Cabbage and Apple
This is more or less a traditional Northern European dish, that here is prepared without the meat juices.
Red cabbage
Apples
Brown sugar
Vinegar
Salt
Pepper
Cut the cabbage into fairly large wedges. Slice the apples. Sauté the cabbage for several minutes before adding the apples. Then sprinkle on equal amounts of brown sugar and cider vinegar, making it sweet and sour to taste. Salt and pepper lightly. Cover, cook for 5 to 8 minutes, and serve.
VARIATION
Bake in a covered baking dish for 30 minutes or more at 375°. You may want to try adding a sprinkling of sherry to sooth its nerves. When baked the dish will be quite a bit limper than the unbaked version.
Celery
Celery is notably stringy, crunchy, crisp, but it can also be a tender and luscious green with no strings attached. Used primarily as an accompaniment, celery attractively greens and complements cauliflower, potatoes, squashes, soups, casseroles, and salads. But like carrots and onions, celery can also be a main ingredient. Celery leaves are very much edible and, when finely chopped like parsley, add seasoning. Especially in salads, celery is best when cut thinly, prettiest when cut in boomerang shape. The thinner the celery is cut, the less string there is and the more easily it is chewed.
CUTTING CELERY
To prepare the celery, break off individual stalks and wash them carefully, rubbing thumbs up and down the interior surfaces. Place celery stalk with leaf end to the right and cut off side branches. (Chop these separately.) Turn bottom end to right and trim off the end of stalks. When you cut the celery into thin slices, the strings of the celery stalks are cut into short pieces as well, which make the celery easy to chew. Here are two ways to do it.
To cut boomerang pieces: Hold the stalk (or stalks) on its edge and cut on a diagonal.
To cut comma pieces: Let the stalk (or stalks) lie flat and cut on a diagonal.


Orange-Celery Salad
What makes this salad exquisite for me is slicing the celery thinly into beautiful shapes. (See above.) Then the vibrant stalkiness of the celery lends a touch of ground to the fruit—while still being easily chewable: flash of color, flash of flavor.
Celery
Oranges
Apple
Salt
Honey (optional)
Lemon juice (optional)
Spearmint leaves (optional)
Wash the celery and trim off the leaves. Hold the stalks on their edges and cut into thin pieces diagonally. Add salt lightly. Cut the peel off of the orange and cut in rounds or half rounds. Wash and quarter the apple. Cut out the seeds, and cut in slices. Mix all together. Need anything else? (You may enjoy some honey and lemon juice for instance, or some spearmint leaves.) Sprinkle chopped celery leaves on top.
Quick-Fry Celery
A quick sauté will do wonders for most any vegetable. Celery is no exception—so go ahead and surprise yourself with how good this is. Splurge with some gratings of fresh black pepper.
Celery
Oil
Salt or soy sauce
Slice the celery and stir-fry in oil (and salt) until tender. Sprinkle on some soy sauce, if you’d like a different sense of salt.
“Fancy” Boiled Celery
What makes this “fancy” is the use of butter and cream. If you are not eating dairy, I would suggest the options of roasted cashews or cashew butter thinned with water.
Celery
Butter
Cream or milk
Salt
Pepper
Cut the celery in boomerangs. Boil in a covered pot with just enough water to cover the celery. When tender, pour off the water and save for stock. Then add a touch of butter and cream or milk, along with salt and pepper to taste.

Mushrooms
Mushrooms aren’t really vegetables, of course, they’re fungi, which grow from rot—turning it into something edible. Some mushrooms, shiitake for one, are considered to do the same in the body, reducing cancerous growths. I think most vegetarians must grow to love mushrooms, especially if they were once meat eaters, as mushrooms have something of a meaty quality: dried mushrooms in particular have something of the chewiness of meat.
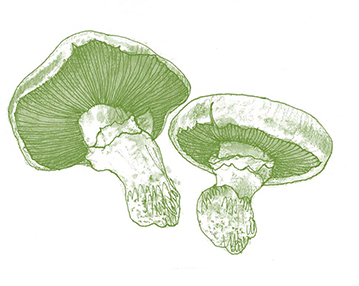
Nowadays there are many mushrooms readily available: most commonly the generic whites, the brown field mushrooms, fresh shiitakes, and portobellos. As with other ingredients, I tend to keep it simple—I have neither the cabinetry for storage nor the wherewithal to track everything—so I mostly stick to the brown field mushrooms and the fresh shiitakes.
The price per pound for mushrooms looks high, but there are a lot of mushrooms per pound and, like garlic, a little can go a long way. A few mushrooms can be a good addition to almost any vegetable dish. I think I’ve had mushrooms with every vegetable except beets. Plus, there are mushroom sauces, mushroom soups, mushroom stuffings, and mushrooms stuffed.
Mushroom lovers insist that mushrooms not be washed—especially the wild ones—but, if anything, simply wiped with a damp towel. Still, I prefer to give them a quick bath, lightly rubbing the tops with my thumbs. (I like to determine these things from my own experience, and hey, I’ve done taste tests and can’t say that I notice a distinctive taste difference between the washed and the wiped. Appearance-wise, the wiped-by-hand ones definitely look more attractive. Go figure—or observe for yourself.)
Mushrooms can be sliced using the chopping cut, down and slightly toward. If the stems have darkened with age, they can be trimmed off and discarded. (The stems of fresh shiitakes need to be cut off and discarded as they are not chewable.)
Mushrooms don’t require much cooking. They brown in just three to four minutes and steam to perfection in five minutes. When added to soups at the last minute they bob handsomely on the surface. Mixed into potato dishes, grain dishes, stuffings, or casseroles, the mushrooms can cook for a more lengthy time and their flavors will permeate the dish.
Mushroom sauce can be made by adding sautéed mushroom slices to a white or brown sauce. Mushroom soup can be made by thinning the mushroom sauce with hot milk to soup consistency.
Sautéed Mushrooms
Sautéed mushrooms can be served on their own or used to garnish other vegetable dishes. They can also be added to grain, bread cube, or potato stuffings. The hearty flavors and deep brown colors can make this a striking accompaniment, so give it a consideration when otherwise at a loss of what else will complete a meal.
Mushrooms
Oil or butter
Salt
Pepper
Parsley, minced or green onion, finely sliced (optional)
Slice or quarter the mushrooms. Cook them in butter or oil, 3 to 4 minutes. Season with salt and pepper. Sprinkle with minced parsley or green onion.
VARIATIONS
ABOUT DRIED MUSHROOMS
I have found dried mushrooms available at Italian groceries (porcinis) and at Asian food shops (shiitakes). Both are prepared in the same way by soaking for thirty minutes or more in warm or hot water.
Be sure to save the water in which the mushrooms were soaked. There will be some dirt at the bottom of the soaking bowl, so after removing the mushrooms, carefully pour off the liquid or strain it through a paper towel. This soaking liquid will be a flavorful addition to the dried mushroom dish itself, or to some other soup, sauce, grain, or casserole dish. After soaking, the mushrooms can be used whole or sliced. The Asian type can be cooked in ten minutes, while the European type takes twenty minutes or more. Simmer them in the soaking liquid or a sauce. They are a great addition to sauces and soups both for flavor and texture. They are also good in quiche or lasagna.
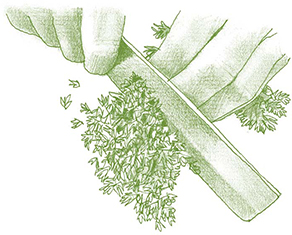
Parsley
Parsley can be used as an ingredient, a seasoning, or a garnish. It is excellent in soups, especially those which seem overly sweet, like onion, carrot, or yam, as it provides a lemony grassiness that fine tunes the flavors. Parsley sprigs are a famed and overused garnish. Green onion, water cress, green pepper, celery, cucumber, and alfalfa sprouts, artfully sliced and arranged, could all be considered alternatives. Flat-leafed (Italian) parsley has a great flavor and is easier to work with than the curly leaf. I recommend it.

MINCING
The parsley (or whatever vegetable is to be minced) is first cut as finely as possible right from the start. With parsley, several sprigs can be bunched together. Roll the sprigs up sideways to clump the leaves into a more cutable pile—then it’s helpful to cut off the loose ends and place the main pile on top of them—and then cut finely crosswise. Again the sides are held in with the thumb and little finger, the other fingers bunching together the top. The short down and away cut can be very effective here. If you can do this well, it will take care of the mincing. Otherwise proceed to the second part.
The finely cut pieces may be piled up to be minced. If a curving chef’s knife is used, the knife is rocked up and down through the pile. The top edge of the blade is tilted in the direction in which the knife is traveling. Each chop is farther and farther away, or closer and closer, to the person chopping. At intervals the dispersed pile is regrouped for further mincing. If a straight-edged Japanese vegetable knife is used, the tip can be held down with thumb and first finger on either side of the blade (or between first two fingers with the thumb on top—see also mincing and mincing garlic).

Winter Squash
Winter squashes are harvested in the fall and, if their tough outer skin is intact, they will keep for several weeks or more over the winter. They include banana squash, Hubbard squash, acorn squash, butternut squash, even pumpkin, which makes heartwarming soup and vegetable dishes as well as pie. Smooth, squashy, and among the most satisfying of wintertime foods, when cooked, these vegetables are like a piece of summer sunshine. They are usually steamed or baked, or a combination of both. If the skin is tough, the squash can be eaten by scooping out the pulp with a spoon. Thinner skins can be eaten. Another alternative is to cut off the skins before or after cooking.

Steamed Winter Squash
Steaming the winter squash brings out its mild mellow goodness. The butter or nut butter gives it richness.
Squash
Salt
Water
Butter (optional)
Nut Butter (optional)
Put about ½ inch of water in the bottom of a pan. Cut open the squash, remove the seeds and cut into serving-size chunks before putting it in the water. Sprinkle on some salt, heat to boiling, then turn down to simmer. Put on a lid and let cook until tender, about 30 to 40 minutes. Serve with melted butter, or mix some of the cooking liquid in with a nut butter, season, and use it as a sauce. A green garnish would provide color and freshness.
Roasted Winter Squash
Roasting the squash will give it a more robust nutty earthiness. Use the spices and it’s almost dessert.
Squash
Oil or butter
Salt or sesame salt
Cinnamon, nutmeg, or allspice (optional)
Preheat oven to 375°. Cut up the squash, remove the seeds, and arrange the pieces in a baking dish. Baste the pieces generously with oil or melted butter; add cinnamon, nutmeg, or allspice to the basting liquid, if you like. Bake for 40 to 60 minutes, depending on the size of the pieces. Baste every 10 or 15 minutes for added moistness and flavor. Season with salt or serve with sesame salt.
VARIATIONS
Beets
Beets are red, and once they are cut open or cooked, beets will tint everything that comes into contact with them—hands, knife, cutting board; egg whites and potatoes turn pink; even celery and carrots will redden with prolonged contact—a wondrous effect.
Beets have a sweet, earthy flavor, and cooking will bring out their sweetness. Raw beets are occasionally eaten grated in salad. They taste, quite simply, like dirt, which may not be so bad, but I prefer to cook them first and then grate them. Beet greens, including the red stems, are quite edible, tender, and mild tasting. They can be cooked with the beets or separately as a greens dish. A pound of beets without tops can provide four servings. (In fact this is my standard measure for determining quantities: four ounces of vegetable per person.)

COOKING BEETS
Boiling is the most common method of cooking beets, after which they may be prepared as a beet dish or combined with other ingredients. Scrub the beets as best you can with the root and about one inch of stem attached. Cover or half-cover the beets with salted water, then cover with a lid and simmer until fork-piercing tender—one-half hour or more for smaller beets, up to an hour or more for larger ones. Check from time to time that there is still water in the cooking pot. (Seriously—I have more than once found the beet pot without water.) With a pressure cooker, use just an inch of water and cook twelve to eighteen minutes, depending on size.
When the beets are drained and cool enough to handle, one of the most sensuous pleasures in cooking awaits: slipping off the skins. A gentle tug dislodges the stems, then, squeezing the beet proper, out pops the bright interior—smooth, slippery, warm, and plump in your hand.
Next, cut the beets in the desired shape: rounds, half rounds, wedges, quarters, or eighths. Notice I do not say cubes: I am not a fan of making beets look like they came out of a machine.
Then, reheat the cut beets with a bit of butter, salt, and pepper. Beyond this you might do the following:
Beets can also be steamed. Cut the stems off about an inch from the beets, then the beet juices will stay inside the beet, and you will have a little handle to start the skin removal later. If they are fresh and in good condition, you can save the the greens to cook later (one recipe here calls for them), but they can also be added to other vegetable dishes or soups, like spinach or chard.
Put the beets in a saucepot with one-half inch or so of water; it doesn’t need to cover the beets. Cover the pot and heat to boiling, then reduce the heat and continue cooking (steaming) until the beets are fork-tender. This will take about thirty minutes, depending on the size of the beets. If the biggest ones are cut in half, they will cook more quickly. Check the pot on occasion to make sure it still has water in it.
Remove the beets from the pot or pan and let them cool for several minutes until you can handle them easily. Remove the stems, and then slip off the skins by hand, as above.
Cut into the desired shape.
Baking the beets will give them a somewhat sweeter, roasted, or grilled flavor. Prepare the beets as for boiling, leaving on the root and an inch of stem. For larger beets, slice into halves or quarters through the stem and root. Toss with olive oil and sprinkle with salt and pepper. Bake at 375° for one half to one hour. Season to taste, sprinkle with balsamic vinegar if you like, and serve. Roast on kitchen parchment to keep the pan cleaner.
Another alternative would be to put the unpeeled beets (with the inch of stalk) in a baking pan with one-half inch of water, and cover with foil or a lid. Bake at 375° until fork-tender, about one hour. As with the steamed beets, wait for them to cool before peeling. Season to taste and sprinkle with balsamic vinegar.
Beets and Greens
I usually find the idea of washing and cutting up the greens for this dish to be somewhat daunting, but the dish speaks for itself: the beets gentled by the greens, the greens made more sturdy by the beets.
Beets
Beet greens
Salt
Pepper, black or red
Green onions or chives (optional)
Boil or steam the beets and cut them as described previously. Cut the greens and stems into 1-inch sections crosswise (and wash). When reheating the cooked beets, add the greens, and a little salt along with some pepper, cover and steam for a couple of minutes. Then stir the beets and greens together, adjust the seasoning, and continue cooking until done—another 2 or 3 minutes. Garnish with sliced green onions or chives.
VARIATIONS
Radishes
Radishes have a snappy, peppery flavor which is refreshing and palate cleansing. Aside from being served whole, as an appetizer with sweet butter and salt, radishes can be sliced and added to salads: lettuce, cabbage, potato, bean, vegetable, corn. Some people find it is easier to leave the stem and leaves attached when slicing so there is something to hold on to. But after a few slices you can turn the radish around and hold it with your thumbnail. If you want red-tipped radish juliennes, cut into rounds, then cut the rounds crosswise. Another possibility would be to cut the radish using the Chinese rolling cut.


The white radish, known as icicle radish or daikon radish, has a hot taste, so it may be quite a hit in salads, or again it can be cooked like carrots, to make the flavors milder.
Radish Salad
The fresh goodness of earth, water, sunlight, and sky brought to the table.
Radishes, sliced
Green pepper, slivered
Carrot, grated
Vinegar
Soy sauce
Honey or sugar
Sweeten the vinegar to taste with the honey or sugar and season with soy sauce. Mix with the vegetables.

Radish-Raisin Salad
The sweetness of the raisins with the pungent flavor of the radishes.
Radishes
Carrot
Lettuce leaves (or arugula)
Raisins
Oil
Vinegar
Soy sauce
Mint, fresh basil, or flat-leafed parsley (optional)
Slice the radishes in rounds. Cut the carrot into short matchstick pieces. Tear or cut the lettuce into small pieces. Mix up the dressing—about 2 parts oil and 1 part vinegar and then soy sauce to taste. Toss everything together. And splurge: garnish with cute little leaves of mint, fresh basil, or flat-leafed parsley.
Turnips & Rutabagas
Is it ruta-BAH-gas or ruta-BAY-gas? They’re good either way. Turnips and rutabagas are both root vegetables: the turnip round and white, often with a purplish area on its skin; the rutabaga more oval shaped and orange-brown. When eaten raw they have, as radishes have, something of a peppery, zesty taste. When cooked just to tenderness, their taste is clean, mild, with a slight bite. Cooking to mushiness will draw out the more odorous and penetrating flavors, which is OK, but like well-cooked cabbage, it is not a taste everyone acquires. Here are several ways to prepare them.
Turnip Pickle
This is a Japanese-style pickle, originally made with seaweed.
Turnips
Salt
Lemon peel and juice
Sugar or honey
Kombu seaweed (optional)
Much like the Thin-Slice Cabbage Salad, here’s another recipe that will test how well you’re cutting. Wash the turnip and trim off the root and the green at the top. Cut the turnip in rounds as thin as you possibly can. Half rounds won’t have the same wholeness, but they’ll do, as far as flavor. Put the slices in a bowl with some salt (about ¼ teaspoon for each medium sized turnip), and salt under pressure (see Salting Vegetables) for 30 minutes or more. (It can even be overnight.) Meanwhile, peel a lemon with a vegetable peeler and cut the strips of peel into ¼-inch squares or narrow crosswise strips. Soak the kombu for 20 minutes and cut it in ¼-inch squares also. If there is a lot of water with the turnips after salting, pour it off and save it for some soup stock. Taste the turnips and rinse off any excess salt. Mix the lemon juice with the sugar or honey to taste, and then toss everything together. The turnip is good by itself after just the salt and the pressing, too. The pickles will keep.
Turnip Stir-Fry
A natural for those littleish turnips which come with a lot of green.
Turnips
Turnip greens
Olive oil
Salt
Pepper
Ginger, freshly grated
Sugar (optional)
Wash the turnips, then cut in half and slice. Wash the greens, cut in 1-inch sections, and keep them separate from the turnips. Stir-fry the turnips for 3 or 4 minutes in the olive oil. Turn the heat down to medium low, put in the greens, along with the salt, pepper, ginger, and possibly a couple pinches of sugar, and cover. Let it cook for 4 or 5 minutes. Check it once in the meantime. Is it doing OK? Temperature all right? Turnips not quite tender?
VARIATIONS

Roasted Turnips or Rutabagas
Roasting the turnips or rutabagas does wonders for deepening their flavors, giving them a sense of nuttiness, that you could enhance with some roasted, chopped almonds.
Turnips and/or rutabagas
Olive oil or butter
Balsamic vinegar (optional)
Preheat oven to 375°. Wash the vegetables and cut them into ½-inch chunks. Toss with oil or melted butter. Place on baking sheet or pan and bake for about 40 minutes. May be garnished with grated cheese and/or chopped parsley when serving—or the roasted, chopped almonds as mentioned above. A sprinkling of balsamic vinegar brightens the flavors.
Greens
This is mainly about chard and spinach, probably the two commonest greens, but what is written here can be applied to most cooking greens. Beet greens (one of the most tender), turnip greens, collard and mustard greens, kale (probably the toughest green) and bok choy are all frequently available. Of these, only spinach is really appetizing when eaten raw, although the others may be thinly sliced and salted as a thin-slice salad.

Greens are slightly bitter or tart, but other flavors can be brought out depending on the way they are prepared. When using greens, the first decision is how much of the stems to use. With chard I like to cut out the stems using a V cut, and then cut them thinly crosswise about a quarter of an inch wide. With kale, collards, and mustard greens I tend to cut off the fat part of the stems and discard them—or use them to make stock. To cut the leaves I often start by cutting them in half lengthwise, then piling them up and cutting them crosswise into one-inch pieces.
Greens cook down by quite a lot, so to come out with the same cooked volume as with other vegetables, it is necessary to start with three to four times as much raw volume. We have found, however, that people eat about the same amount, by weight, of greens as they would of other vegetables.
When doing a combination vegetable dish with greens, the other vegetables can be stir-fried in the bottom of a larger pot. Then there is plenty of room to add the greens for steaming on top of the other vegetables. Folding over the stir-fried vegetables from the bottom will speed the process.
CHARD AND SPINACH
Spinach greens add a tender meatiness to salads, while chard is tougher and tends to pucker the mouth when eaten raw. Spinach leaves have (mostly) thin, easy-chewing stems, while chard leaves are centered on a broad, stringy white stalk. There is also a spectacularly beautiful chard with leaves centered on a red stalk with red ribs extending out into the green leafiness and also yellow chard. If prepared by themselves, these greens are probably best steamed or sautéed. Often slightly bitter, all greens can be sweetened when cooked in combination with onions, carrots, bananas, or such, and can be a main dish when cooked with eggs.
Nowadays baby spinach is often available in the produce section, and makes excellent spinach salad. Otherwise the stems of the largest spinach leaves can be removed, and the larger leaves cut into smaller pieces. Used in combination with other salad greens, or used alone, spinach may want a creamy dressing, perhaps some chopped hard-boiled egg, or maybe some grated cheese. Minced onion is good, too, if you and your guests think so. Little chunks of tomato make a bright addition; sliced pear or apple are complementary and refreshing. Roasted, sliced almonds add a welcome earthiness. I also enjoy spinach salads “wilted” with hot oil.
Steamed Whole Spinach
Spinach is particularly elegant and tasty cooked this way. The funny thing is that most people don’t know what it is. I have heard people commenting, “Oh my, how gorgeous—what is it?” One time someone said, “I think maybe it’s dandelion leaves.” For such a simple dish the reactions are often astounding. What makes the dish is some careful attention to details.
Spinach
Salt
Melted butter
Lemon wedges
Wash the spinach and, as you do so, make an effort to keep all of the stems going in the same direction. Arrange the spinach in a steamer, again in piles of leaves with stems in the same direction. Sprinkle in a little salt, picking up piles of leaves here and there. Steam the spinach just 2 to 4 minutes. Arrange the spinach attractively with lemon wedges (an extra star if you’ve taken the seeds out) on a heated serving platter. Spoon some melted butter over the spinach. Serve immediately.
VARIATION
Steam the spinach in a small amount of melted butter with a lid over the pot—the liquid released from the spinach as it cooks will keep it moist.
Sauté-Steaming Greens
Ease of cuisine, that’s one of the goals here. Start the greens cooking in the oil, then season and cover to complete the cooking. Black or red pepper, or green chilies, garlic or ginger, vinegars of various flavors (or lemon or lime juice), and soon you have numerous dishes at your command.
Greens
Olive oil
Salt
Pepper, black or red, or minced green chilies
Garlic or ginger (optional)
Lemon juice or vinegar
Once the greens are washed and cut, start the stems cooking in some olive oil (if you are using them). After 1 or 2 minutes begin adding greens, and continue adding as the greens cook down. Sprinkle new additions with some salt and black or red pepper (or other pungent ingredient). Cover and turn the heat down to finish cooking by steaming. Add a bit of lemon juice or vinegar to brighten the flavors.
Greens, Orange and Onion
Once again, steamed greens—only on a bed of carrot and onion, which add a marvelous earthy sweetness to the greens.
Greens
Onion
Carrot
Oil
Salt
Lemon juice (optional)
Wash the greens and cut them in 1- or 2-inch sections. Slice the onion and cut the carrot into small pieces. Sauté the onion for 1 minute, then add stalk pieces and the carrot, continuing to sauté for 3 to 5 minutes. Turn the heat down and add the greens, or as much as will fit comfortably. Sprinkle with salt. Cover and let steam for 1 minute, then open, fold in the greens, adding the rest if they didn’t fit at first. Steam another 2 or 3 minutes. Add lemon juice, if you have it.
Greens Get Egged On
The egg can appear or disappear, but in any case the greens become more meaty.
Greens
Olive oil
Salt
Pepper
Eggs
Soy sauce (optional)
Onion or green onion (optional)
Sauté-steam the greens until they’re nearly done. Stir in some beaten egg or eggs. With few eggs and lots of stirring, the eggs will blend in much like a seasoning. With more eggs and less stirring, the effect will be more omelet-like. A little bit of soy sauce can season the eggs. If you like onions, start by sautéing the yellow kind before adding the greens, or sprinkle on some chopped green onion to finish.
Lettuce: Head, Romaine, Boston, Oak Leaf, Red Leaf, Butter
Lettuces includes a wide variety of tender, leafy greens. Head lettuce and romaine are two with crispy-crunchy leaves, while the others tend to have softer, more velvety leaves. There are many exacting prescriptions for turning lettuce into salad. What follows are some basic principles.
Remembering that the idea is to eat some lettuce, why not just rinse off the earth and serve it? If you appreciate and enjoy lettuce like this, and the other people eating do also, read no further, nothing could be simpler. When one is in the garden this is sweet, savory, redolent eating. In the kitchen though maybe adding a little salt would bring out the flavors. What happens when salt is added is that water is drawn out of the lettuce. It goes limp, loses its crisp. With cabbage this is appropriate, but lettuce leaves, more delicate than cabbage, don’t have crisp to spare. The answer to this is get the lettuce coated with oil first (the oil also helps with “mouth-feel”). The salt won’t penetrate nearly as fast—and the oil helps the salt stick to the lettuce. Now the lettuce is rather gummed up with oil. What cuts oil is vinegar. A bit of zing, too, not bad. So that’s the basic dressing: oil, vinegar, and salt. Beyond this basic dressing, we can explore ways to further amplify, mollify, pacify. More about that in the salad section. For now let’s take care of the lettuce.
WASHING AND DRYING LETTUCE
Dirt is one of the most unappetizing things that could garnish lettuce. It adds a lot of hesitation and reluctance to chewing. Often only the outer leaves of a head of lettuce need washing—these leaves will frequently have some dirt tucked away in their folds or at the base of their stalks, but it is most practical to simply rinse off all the leaves. Focus some attention and energy on the activity of washing, and it can be a blessing.
It is sometimes recommended to wash each leaf individually under running water, since soaking the lettuce in water will leech out flavor and nutrients. I’ve never found that this running water method works very well, and it is impractical in any quantity—as well as a waste of water.
Here’s what I have found:
Prep the lettuce some before washing. Remove any wilted, yellowed, or slimy leaves and discard. Cut or tear the lettuce into bite-sized pieces. I did say “cut or tear.” Somehow people still think that cutting lettuce is damaging to the flavor—I haven’t noticed this—especially now that kitchen knives are made to not react with the food being cut. But I have noticed that people take a number of leaves at a time and rip the lettuce to shreds (often misshapen pieces) and call it “tearing”—not appetizing in my experience. Not good for the lettuce or its appearance.
Here’s my suggestion:
With romaine lettuce, cut it lengthwise down the rib, and for the largest leaves cut each half again in half lengthwise. Then cut all the leaves crosswise into one-inch pieces. Simple. Elegant. It works.
With other leaf lettuce, make a short lengthwise cut in the stems before tearing the leaves—and I do suggest tearing one leaf at a time. (As with so many kitchen practices, you can always study for yourself what works best for you.) The smaller leaves may be left whole.
Prepping the lettuce before washing makes it easier to clean—and also to dry.

To wash the lettuce immerse it in water. Swish it around and remove to a salad spinner or colander. Spin it dry in the salad spinner—or what I do for myself when I’m without a spinner, place in a clean dishtowel, hold the corners together and twirl outside. (For larger quantities you’ll need an old onion sack. At Tassajara we used an old dryer—on spin without heat. And nowadays you can also purchase a big-bucks “greens machine” for spinning greens or drying off french fries which have been soaking in water prior to frying.)
You can keep the dried lettuce in the refrigerator, covered with a damp towel. But of course the flavors are better when the lettuce is closer to room temperature. Go figure.
Here are some alternatives for dressing a salad.
Two-Step Salad Toss
A simple way to dress a salad on a day to day basis.
Olive or other salad oil
Vinegar or lemon juice
Salt
Pepper
Herbs of your choice (optional)
First toss the salad with oil. Start with a small amount, toss well, and see that each leaf has got some. When the salad is sufficiently oiled, sprinkle on your choice of vinegar or lemon juice, salt, freshly ground pepper, and perhaps dust with herbs, all just to your taste. Toss well. Done properly, there won’t be a puddle of dressing on the bottom of the salad bowl or plate, and the dressing will give a little kick without being overpowering.
VARIATIONS
Lemonade Lettuce
This makes a light, refreshing salad. Maybe a bit unusual at first, but the sweetened, fragrant lemon leads right into the lettuce-ness of lettuce.
Lettuce
Lemon juice
Honey
Salt (optional)
Sweeten the lemon juice to taste. Mix thoroughly. Dip a piece of lettuce in it to sample. This is a wonderful dressing for wild, edible greens such as miner’s lettuce, chick weed, shepherd’s purse and curly dock. It can also be made with vinegar and sugar. Add a touch of salt possibly. Toss first with olive oil if you wish.
Nut-Butter Dressing
The earthy oily nut quality can be a grounding element with leafy greens, especially the more sturdy ones, such as spinach, cabbage, and kale. With more delicate lettuces adding toasted nuts or seeds directly seems a useful alternative.
Nut butter
Water or oil
Vinegar
Honey, sugar, or maple syrup
Salt or soy sauce
Pepper, black or red
Thin out the nut butter with some warm water (or possibly some oil). Season to taste with vinegar, sweetening, salt or soy sauce. Spice it up with some pepper (black or red) or some fresh ginger. Thin more to desired consistency. Yum . . .
Artichokes

Artichokes are one of the most spectacular and aristocratic of vegetables, despite (or maybe because of) the fact that most of it is thrown away. A type of thistle, artichokes are grown in California in an area centering around Castroville, the “artichoke capital of the world.” Artichokes are served whole and the leaves pulled off at the table, dipped in melted butter or sauce, and the fleshy end bitten off. If the artichokes are small, the outer leaves can be removed and the inner portion cooked and served as an “artichoke heart” where the whole thing is eaten—these also come in jars prepickled for use in salads. Whole artichokes are usually boiled or steamed (occasionally baked), while the hearts can also be sautéed, deep-fried, or pickled for salads. Artichokes are not eaten raw, but may be served either hot or cold.
To wash artichokes, hold them by the stem and swish them briskly up and down in water. Some of the tougher outer leaves may be removed. Cut off the stem flush with the lower leaves. The artichokes can be cooked like this or the top one-quarter to one-third of the leaves may be cut off with knife or scissors. (This removes the thistles which are at the end of each leaf, so that eating the artichoke is easier.) The stem, when peeled, may be cooked and eaten along with the rest.
COOKING ARTICHOKES
Artichokes are usually steamed or boiled, though baking is also a possibility. Slip the washed and trimmed artichokes into the boiling salted water or arrange in a steamer. If cooking in the liquid, cover, bring the water to a boil and then turn down the heat. Simmer for forty minutes or until the outer leaves may be easily removed. If steaming, the artichokes will probably take from forty minutes to an hour to cook. Check periodically to make sure that there is still water in the lower part of the steamer. Or pressure-cook for 12 to 15 minutes.
Want to dress up the artichokes? One of the easiest things to do is to cut off the upper portion of the leaves so that the tops of the artichokes are basically level. Loosen and spread the leaves apart, then sprinkle herbs between the layers. Use sweet basil, tarragon, thyme, or possibly marjoram or oregano, along with a sprinkling of salt. The herb’s fragrance will penetrate quite well. Another alternative is to season the cooking liquid. For this add the juice of a lemon, some onion and/or garlic, some celery, bay leaves or any other seasoning that you’re fond of.
When eating artichokes hot, dip the petals in melted butter or perhaps a seasoned mayonnaise (see Lemon Mayonnaise and Mayonnaise with Soy Sauce and Balsamic Vinegar) on their way to your mouth, or take a look at the other suggestions in the Asparagus section.
Asparagus

Fresh asparagus is a wonderful treat, which used to be available for only a short time in the late spring, when the new shoots of the asparagus plant are harvested. The cut end of the shoots may be set in water to help maintain freshness. This stem end at its base is frequently white and tough to chew. The tough part of the stem can be removed by gripping it as close to the end as possible and snapping it off. The shoot will break right at the tender eating mark. The asparagus is now ready to be eaten raw or cooked whole, boiled or steamed, or to be cut up for sautéing. Cook asparagus only until tender. Anything short of this is tasty too, juicy with a slight crunch. Hot or cold, asparagus is often served with mayonnaise, but there are many other possibilities.
Basic Asparagus
These are some basic options for cooking asparagus with water. Other options for cooking would include grilling, roasting, and sautéing/steaming. Cooking with water will accentuate the invigorating green-leafy quality of the asparagus.
Asparagus
Water
Salt
Melted butter and lemon juice or seasoned mayonnaise
Prepare the asparagus by snapping off the tough ends. Place in salted boiling water and when the water returns to boiling, turn the heat down so that the asparagus simmers, or steam the asparagus on a metal rack over boiling water. Another method is to tie a bunch of asparagus together with string, and cook all of them together standing on their end in water. If the asparagus is to be served cold, some crispness is especially appetizing, so cook the asparagus anywhere from 2 to 8 minutes, depending on how much crispness you want. To cool, spread out the asparagus on a large dish towel. Boiled or steamed asparagus is good with melted butter, lemon juice, or a seasoned mayonnaise. One attractive serving arrangement is to put the mayonnaise at one end of a platter, then arrange the asparagus to be swimming toward it.
Lemon Mayonnaise
Taste buds will perk up when the asparagus, as well as the artichokes, are served with this seasoned mayonnaise.
Mayonnaise
Lemon or lime juice
Salt (optional)
Garlic (optional)
Season the mayonnaise to taste with lemon juice. Taste for salt. Add finely chopped or macerated garlic for a poor cook’s aioli. Lime juice is also fine.
Mayonnaise with Soy Sauce and Balsamic Vinegar
This mayonnaise recipe also goes well with artichokes.
Mayonnaise
Soy sauce
Balsamic vinegar
Season the mayonnaise to taste with soy sauce and balsamic vinegar.
Asparagus with Guacamole
Deep green and light green blending.
Asparagus
Guacamole
Cook the asparagus as in the basic recipe, and serve with a guacamole dip.
Basic Asparagus Over Easy
Asparagus can be cut on long diagonals or Chinese rolling cut for sautéing. After it’s cut, then it’s sautéed.
Asparagus
Yellow onion
Carrot
Oil
Salt
Nuts (optional)
Snap the tough ends off of the asparagus. Then cut in oval shaped pieces (diagonally) about ¼ inch wide, leaving the buds intact at the tender tip end. Slice or dice the onion and cut the carrot in ovals, rolling cut, half rounds, or what-have-you. Sauté the onion for about a minute. Add the carrot and fry this with the onion for a minute or two. Then add the asparagus and a little salt. Toss with the onion and carrot for a minute, then add a small amount of water (or white wine), put a lid on, turning the heat down to medium or medium low. Cook for 2 to 5 minutes until tender. (The smaller the pieces, the shorter the cooking time.) For variation, sprinkle with roasted, chopped nuts.
Broccoli
One of cabbage’s many cousins, broccoli makes green, succulent eating. The broccoli flowerets extend from a thick main stalk. Both the flowerets and the stalk are edible, but the outside of the main stalk is generally tough and stringy. To use the stalk, cut it loose from the broccoli and trim off the tougher outside layer. Cut as you wish—without the outside layer it’s a very tender delicacy.

Cut apart the flowerets into bigger or smaller pieces, as you prefer.


Broccoli will have a more subtle taste, a bright green color, and an especially pleasing texture if it’s not overcooked. It has a strong flavor of its own, so it can stand being well seasoned. If the broccoli flowerets have bloomed yellow, the broccoli is past its peak, and is best served with a hearty sauce or put into soup.
Blanched Broccoli
Many vegetables taste great with butter, lemon, salt, and pepper, and broccoli is certainly one of them. Again the key here is to err on the side of undercooking the broccoli rather that overcooking it. So get the broccoli out of the water while still firm, as it will continue to cook.
Broccoli
Water
Salt
Pepper
Butter (optional)
Cheese, grated (optional)
Lemon juice (optional)
Prepare the broccoli as above, then drop into boiling, salted water. Be sure to turn the heat down after the water returns to boiling. The broccoli will be done in as little as 5 to 6 minutes. Remove from the water when it’s still bright green and slightly crunchy. Drain and spread out on a clean dish towel to cool. Serve with butter, salt and pepper, lemon juice, grated cheese, or a sauce.
VARIATION
Steam the broccoli instead of boiling.
Greek Steamed Broccoli
As well as the simpler combination above, I like this combination of flavors, giving the broccoli something of a Greek feeling. It’s also a combination good with other vegetables including carrots, green beans, zucchini, and greens.
Onion, sliced
Garlic
Olive oil
Black olives
Broccoli, chunked
Water
Salt
Pepper
Melted butter with lemon juice (optional)
Parmesan cheese, grated (optional)
Sauté the onion and garlic in olive oil. Add the black olives and broccoli, cover and steam until done, about 5 to 6 minutes, adding a little water if necessary to keep from burning. Season with salt and pepper. May also be dressed with lemon butter and grated Parmesan.
Cauliflower
Cauliflower is another member of the cabbage family. Attached to the cauliflower core by short stalks is a sunburst array of white flowerets. This white head is encased in green leaves, which almost universally are severed from the cauliflower before it is sold, but can be used if you wish. Best cooked, these greens may be cooked with the cauliflower or separately. Wash the greens and cut once lengthwise first, then crosswise in segments, slicing more thinly closer to the core where the center rib is broader.
The tender white of the cauliflower is suitable cooked or raw, unless it’s old and getting black spots, in which case it’s better cooked.
The sliced flowerets are distinctive and attractive in salads and lightly cooked cauliflower is also an excellent salad ingredient.
When served hot, the cauliflower is most palatable when still slightly crunchy. Longer cooking will make the texture mushy and bring out an odorous, cabbagey taste.
Cauliflower Salad
A delightful switch from all those greens. If the cauliflower is to be cooked, start well ahead of time to give it a chance to cool.
Cauliflower
Water (optional)
Choice of vegetables and other ingredients: grated carrot, chopped parsley, watercress, green onion, celery, pitted olives, sliced tomato or pimento, chopped pickles
Salt
Pepper
Oil and vinegar, or sour cream
Herbs of your choice
Cut the raw cauliflower into small pieces. When using cooked cauliflower, blanch or sauté-steam for just 3 to 4 minutes, so that the cauliflower still has plenty of body and chew left in it. Remove to bowl or tray or spread out on a clean dish towel to cool. Meanwhile cut up the other ingredients you will be using. Prepare an oil-and-vinegar or sour cream dressing and mix it with the salad ingredients, adding herbs of your choice. Leave in the refrigerator (or at room temperature) until serving time. The grated carrot and celery could go in with the cauliflower for the last minute of cooking.
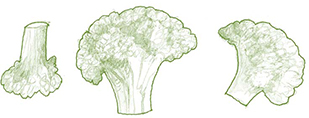
Cauliflower Stir-Fry and Steam
I like this better than straight steaming. Stir-frying it first brings out the nutty quality.
Cauliflower
Olive oil
Salt
Cut the cauliflower into medium to small pieces, making sure the pieces are roughly the same size so that they will cook uniformly. Stir-fry in oil and salt for perhaps 3 to 4 minutes and then, adding a squirt of water, cover and steam for another 4 to 5 minutes until just tender. Check the seasoning and serve. Simple, delicious.
VARIATION
Sprinkle with roasted, chopped walnuts and/or toss in some garlic or ginger toward the end of the sautéing, and then continue on to the steaming.
Orange and Green on White
Grated cheddar melts right into the cauliflower.
Cauliflower
Salt
Pepper
Cheddar cheese
Green onion or parsley
Blanch the cauliflower in boiling lightly salted water for a few minutes until it is as tender as you like. After draining, remove the cauliflower to a serving bowl, season, and sprinkle generously with grated cheese and chopped green onion or parsley.
Avocado
Avocados are so incredibly rich in oils that they are almost the consistency of butter. This quality sometimes puts people off—the avocado is left on the side of the plate. As avocados ripen, their skins turn from deep green to a dark chocolaty brown. Pick an avocado that gives slightly when gently pressed. (If the avocado is soft when pressed, it is over-ripe.) Often you will need to buy firm avocados and allow them to ripen at home.

Cut the avocado in half lengthwise around the pit. Twist to remove half of the avocado. Whack your knife into the pit and twist to remove it. Pull the pit off of the knife, or, leveraging the pit at the edge of the counter (or the compost bucket), pull the knife off the pit.
To serve whole, sliced, or in chunks, first remove the fleshy fruit from the skin; gently slip a rubber spatula (or a large metal spoon) between the flesh and the skin and carefully work it around to loosen the fruit. You now have half an avocado intact.
To cut the avocado half into handsome slices, place it flat side down on the counter, and make diagonal slices perhaps an eighth of an inch thick. After each cut, hold the cut piece in place with your left hand, while you lift the knife with your right. This will keep all the cut pieces in place.
When you have finished cutting the half avocado, pick it up, place it on a plate or platter and fan out the slices—elegant. A composed avocado platter appears below and there are several avocado platters later in the book.
Avocado chunks are good in salads, and as a late addition to cooked greens or omelets. If you like avocado you’ll find lots of uses.
Avocado, sliced or spread, is excellent on sourdough French bread (or bread of your choice), plain or with lemon juice and salt and pepper. It can be the spread for a cheese, lettuce, and tomato sandwich. I love bringing it along for my picnics at the beach: a make-your-own sandwich affair.


Avocado Composition Platter with Tomatoes
Avocado platters present a fine opportunity for the budding artist within: fanning out the avocado slices, fanning out the tomato slices—perhaps the tomato slices ringed by the avocado slices. Additional green is always an option.
Avocado
Tomato
Olives
2 parts olive oil
1 part vinegar
Salt
Pepper
Sugar (optional)
Green garnish
Slice the avocados as noted previously and fan out the slices on a platter. Slice the tomatoes and arrange them on the platter as well. Decorate with olives. Combine oil, vinegar (I like balsamic or rice wine vinegar for this), salt, and pepper (and a hint of sugar?), and spoon over the other ingredients. You’re good—so’s the platter.
Additional fresh green garnish could be parsley, basil, tarragon, cilantro, thinly-sliced green onion.
Avocado on the Half-Shell
Use half an unpeeled avocado per person.
Avocado, halved and pitted
Lemon or lime, cut in wedges
Salt or soy sauce
Mango or melon (optional)
Arrange the halved avocados on a platter with lemon wedges. Serve with salt or soy sauce handy. Eat with a spoon. Or cut up some mango or melon, mix with the lemon and a hint of sugar, and mound into and onto the avocado.
Guacamole
Mouthwatering and mouth-filling, guacamole brings tangy flavors along with the rich oily goodness of avocado—and it can be excellently utilized with salads, salad platters, and salad dressings, as well as a dip for chips or vegetables. I also enjoy it as a sandwich spread.
Avocado
Lemon juice or lime juice
Salt
Garlic
Green chili such as fresh serrano or jalapeño, minced
Onion, minced (optional)
Green pepper, minced (optional)
Tomato, chopped (optional)
Sour cream (optional)
Mash and season the avocado to taste with lemon or lime juice, and then the salt, garlic, and minced green chili. Add optional ingredients if available and desired.
Green Beans, String Beans and Wax Beans
Green beans have a distinctive flavor of green and when young and tender, they are simply classic. Younger beans are tender with a smooth green skin and are about the diameter of a pencil. They can be easily steamed or sautéed. Older beans have a more wrinkled skin, get as big as a finger, and will have many more strings attached. If time is not taken to cut them, they’re probably best boiled or stewed. So many of the green beans in the markets used to be monstrous and tough, and needed to be cooked for ages to be chewable, but this has been changing in more recent years.

The bean has a stem at one end and comes to a point at the other. On a young bean only the stem need be removed. You can always try a bean or two to see if the pointed (blossom) end is tender. I’ve worked at removing the tips both by hand and with a knife. Either way you can be studying how much of the bean to use. You can snap off just the tip or, if the end of the bean feels pretty well dried out, snap off a larger section. Snap the tip off to the side, and if it’s attached to some string, draw the end down the side of the bean, removing the string. If part of a bean is moldy, the other sections are nonetheless still good. Cutting green beans in half lengthwise or in long, thin strips adds to their tenderness and flavor. This cut is fairly difficult and time-consuming, so undertake it only when you have time and energy to spare.
Sautéed Green Beans
A sturdy, yet supple and elegant vegetable, green beans make a reliable companion dish to fill out a meal.
Green beans
Oil or butter
Salt
Water
Use either tender whole beans or cut-up larger beans. Follow the usual method for sautéing. Heat a skillet, add olive oil (and perhaps a sprinkling of salt), and stir-fry the green beans for 4 to 5 minutes, then cover and steam with a touch of water until the beans are bright green and just tender. If using butter for frying, it’s best to have some oil with it and not get the pan too hot. Check the seasoning and serve.
VARIATIONS
Boiled Green Beans
Boiling the green beans will take care of their toughness. Get them out soon enough and they’ll still be bright green.
Green beans
Water
Salt
Pepper (optional)
Butter (optional)
Herbs of your choice (optional)
Olive oil and vinegar (optional)
Prepare the green beans. Put them in the salted boiling water and cook for 6 to 8 minutes. Observe closely, unless you prefer your beans dull and mushy. Have a sample bite and take the beans out when they’re still slightly chewy. These beans can be seasoned with butter, salt, pepper, herbs, or go in the direction of olive oil and a splash of vinegar.
Cheese on Beans
Though cheese (and dairy) seems to have gotten a bit of a bad name, I still love it and enjoy sprinkling it on vegetables from time to time.
Cheddar cheese
Green beans, boiled
Salt
Pepper
Grate the cheese or cut it in matchstick pieces. Mix it with the drained green beans, season to taste and serve. This dish can sit in the oven awhile, especially if the green beans were drained while they still had a bit of crunch left in them.
Sweet Corn
Corn is really a grain, though it is often served as a vegetable. I once stayed with friends in Vermont who had the water boiling while they were picking the corn, so that it would be exquisitely fresh. They ran it into the house, shucking it along the way. Plop, plop, splash, splash! Love that fresh corn—cooked in only two minutes perhaps, so it’s still a little nutty, doused with butter, and sprinkled with salt and pepper. We were chomping away at the corn less than ten minutes after it had been separated from its stalk. And you have to confess, “Corn was never like this. I am in corn heaven.” Most of us don’t live next door to a cornfield, so we’d have a long run to get the corn home. May as well enjoy what we can get. Nearby.

Whether the corn is cooked or raw, the kernels can be removed—and eaten by themselves or added to other vegetable dishes. Lay the ear down flat and cut the corn kernels off the side. Rotate the cob and repeat.
Corn on the Cob
Brilliant yellow sunnyness floods the mouth.
Corn
Water
Salt
Butter
Pepper
Soy sauce (optional)
Shuck the corn by removing the leafy wrapping and the thready corn silks. The stem where there’s no kernels may be broken off or left on for a handle. The ear may also be broken in half, if you prefer. Drop in salted boiling water and cook 3 to 4 minutes. Pick out the corn with tongs or drain through a colander or strainer. Serve with butter, salt, and pepper. You could also use soy sauce.
VARIATIONS

Corn Salad
Cutting the corn kernels off of the cob makes them easier to chew, while still being flavorful. The yellow fabric of corn can be dotted with other vegetables.
Corn, cooked
Olive oil
Vinegar
Salt
Pepper, black or red
Choice of vegetables: red peppers, tomato, cold cooked beets
Fresh parsley, basil, or cilantro
Cut the kernels off the cob. Cut other vegetables into salad pieces. Combine 2 parts oil with 1 part vinegar and season to taste with salt and pepper. Garnish with the parsley, basil, or fresh cilantro.
Mixed Vegetables with Corn
The corn contributes sweetness to the other vegetables.
Corn, cooked
Choice of vegetables: onion, peppers, zucchini, tomato, green beans (perhaps something you were preparing anyway?)
Oil
Salt
Water
Tabasco sauce (optional)
Basil or oregano (optional)
Pesto (optional)
Cut the kernels off the cob. Slice the other vegetables for sautéing. Stir-fry the onion and green beans, if using them, for several minutes. Add the remaining ingredients and steam for perhaps 5 minutes. Season with Tabasco sauce or red pepper or a bit of dried basil or oregano—or break out your leftover pesto for seasoning.
Cucumber
Cucumber is the smallest, plainest, least sweet melon. In addition to generic cucumbers there are lemon cucumbers and English cucumbers, all with a fleshy interior covered with a waxy, usually tough exterior. If the skin is bitter, peel the cucumber before serving. Otherwise the peeling is optional, or you can peel it in lengthwise strips, leaving decorative ribs of green peel on the cucumber. Like all melons, cucumbers are mostly water and quite refreshing in hot weather. Frequently pickled, cucumbers can be sweet, sour, dill, or bread ’n’ butter. Fresh cucumber is at its refreshing best when served raw—in salads, side dishes and cold soups, but it is also an underrated cooked vegetable.
Cucumbers are usually cut into rounds, but cutting them in lengthwise strips can be decorative and chunks of cucumber provide something more to bite into and chew.
Since cucumbers have a great deal of water, their flavor will be somewhat more concentrated if the cucumbers are first salted (and drained of excess liquid, see Salting Vegetables). Sprinkle salt on the cucumbers, weight them, and let stand for 30 minutes or longer. Pour off the accumulated liquid and save it for soup. Taste the cucumbers and if they are too salty, rinse them off before adding the dressing.

You can use the salted cucumbers in the salads below—or simply prepare the salads without salting the cucumbers. See what you think.
Cucumber Salad
Cool and palate-cleansing contrast to other dishes.
Cucumber
Salt
Lime juice
Honey
Tabasco sauce
Cut the cucumber and season to taste with salt. Then dress with lime juice and honey and a sprinkling of Tabasco sauce.
VARIATIONS
Cucumber and Cantaloupe Salad
This salad could also be done with just the cucumbers. As usual, fresh green will give the dish a fertile feeling.
Cucumber
Cantaloupe
Parsley or watercress, chopped (optional)
Salt
Fresh mint, cut into strips
Sugar or honey
Lemon juice or lime juice
Slice or chunk the cucumber. Mix with pieces of cantaloupe, add generous amounts of parsley or watercress (if you like them), and season with salt and fresh mint. Add equal amounts of sugar (or honey) and lemon juice (or lime), for additional seasoning, especially if you do not have the fresh mint.
VARIATIONS
Cooked Cucumbers
Cooked cucumbers make for tender eating, especially when you remove the skins and scoop out the seeds.
Cucumbers
Sour cream or cream cheese
Salt
Pepper
Water or stock
Caraway, chervil, dill, basil, or tarragon
Peel the cucumbers, unless you find them tender enough to leave the peels on. Then cut them in half crosswise and quarters lengthwise, and scoop out the seeds with a spoon. Simmer in the salted water or stock until verging on tenderness, about 2 to 3 minutes. Drain them and dress with sour cream or with slightly thinned cream cheese. Season to taste. Caraway and chervil are herb possibilities along with dill, basil, and tarragon. Heat briefly in oven or double broiler if necessary. The cucumbers are also tasty in light soups.
Eggplant

Eggplant has a pulpy white interior covered with a shiny purple skin, which is edible. To prepare, pull or cut off the stem and cut the eggplant in rounds or half-rounds, section like a potato, and cut in chunks or strips.
Eggplant can take some tending. Since it can be bitter, it is sometimes salted and allowed to stand for an hour or more after being cut up so that some liquid is drawn out, giving the eggplant a milder taste (see Salting Vegetables). After salting, dry the pieces with a paper towel or a clean dish towel. The pieces of eggplant will brown better when sautéed if well dried first. I’ve found that slicing and roasting the eggplant leaves it tender and mild-flavored without the necessity of salting.
Eggplant is a cook’s delight. It is one vegetable that can stand lengthy cooking, and since it sponges up other flavors while keeping its own, it is terrific in stews and gratins. It can be Italian—loving oil, garlic, tomato, and Parmesan cheese. It can also be Asian, benefiting from soy sauce, ginger or curry. Sumptuous.
Roasted Eggplant
Roasting the eggplant slices leaves them tender and none too bitter for eating. Simple. Straightforward.
Eggplant, cut in rounds
Olive oil
Salt
Balsamic vinegar (optional)
Parsley, green onion, basil, or cilantro (optional)
Preheat oven to 425°. Slice the eggplant into ¼-inch rounds or ovals. Brush oil on both sides and roast (in a single layer), turning once or twice. (If you have baking parchment cover the bottom of the baking sheet with it to save on the cleaning later.) Cook until tender—well softened and flexible, melt-in-your-mouth. Sprinkle with salt and perhaps some balsamic vinegar. Give it a green garnish: parsley, green onion, basil, cilantro, if available.
A Simple Ratatouille
This is simple because you just cook it—without salting and draining the eggplant, without skinning and de-seeding the tomatoes. (The tomatoes cook just briefly to heat so the skins don’t start to come loose and the seeds don’t start to scatter—all right, then?)
Eggplant, chunked
Olive oil
Onion, sliced or diced
Garlic, minced
Green bell pepper, sliced or diced
Tomato, large pieces
Salt
Pepper
Dried oregano
Dried thyme
Parmesan or Asiago cheese, grated
Parsley, green onion, or basil (optional)
Stir-fry the eggplant—I leave the skin on—in the olive oil for 5 or 6 minutes and remove from the pan. Add a bit more oil and sauté the onion and bell pepper for 3 or 4 minutes. Then add the garlic, a touch of salt and black pepper, the dried herbs, and cook another minute or so. Add back the eggplant and add a splash of water (or perhaps sherry), and cook covered at a low temperature until all is tender. Add the tomatoes and cook until they’re hot. Some green to finish? Serve with grated Parmesan or Asiago.
Peas
I can remember the first time I had fresh peas on the back porch of my aunt’s in South Dakota. How wonderful! Opening the pods, running a thumb down the inside—out jumped the peas and the fresh green smells of sun and earth. (And I went on sitting there while the warm summer rain splashed down.) I can’t even remember how they tasted, only the joy of discovery, each pod a treasure house of peas, and how many would there be?

Peas, like beans, need water. They’re fairly dry and starchy to start with, but given a few minutes of cooking, they become moist, brilliant green; delicious by themselves, floating in soups, dotting stews, or in combination vegetable dishes.
SNOW PEAS
These peas are flat and the pod is edible. They are used extensively in Asian cooking for their shape, color, and flavor. Snap off the stem before using and pull it down the side to remove any string you can. Raw, they are suitable for salads, and they can be easily sautéed, steamed, or briefly boiled. Cook lightly! Add to soups just 3 to 4 minutes before serving.

Fresh, Green, and Succulent Peas
Some people knock boiling vegetables, but with care and mindfulness, the peas can be done to juicy tenderness and you will have some stock for the next pot of soup.
Peas
Water
Butter
Salt
Pepper
Shell the peas, bring the salted water to a boil, and drop the peas in. Leave the heat on high, put on a lid, and stay nearby. The peas will be done in just 3 to 5 minutes. If the water comes back to a boil before the peas are tender, turn the heat down and try a couple of peas. Have a colander or strainer set in a pot for draining, and when the peas are just on the verge of tenderness, drain them or use an Eastern-style strainer to scoop them out (see Boiling (or Blanching)). To serve, toss with melted butter, add salt and pepper to taste.
Frosted Peas with Green Onion
Funny, peas were the only vegetable I’d eat for a long time, but my (former) father-in-law never liked peas until he ate these.
Peas
Water
Sour cream
Green onion
Salt
Pepper
Thyme or basil (optional)
Shell the peas and cook them as in the preceding recipe. Slice the green onions thinly and mix with the sour cream. When the peas have been drained, mix them with the sour cream and green onions and season to taste with the salt and pepper. This dish may be kept warm in a double boiler for 5 or 10 minutes. A bit of thyme or basil goes well here. It’s not the same, but yogurt could be used in place of the sour cream.
Peas Roll in Carrots and Mushrooms
Love the colors so beautifully contrasting: the green peas, orange carrots, and brown mushrooms.
Peas
Carrots
Mushrooms
Oil
Salt
Water or stock
Shell the peas. Wash the carrots and cut in ovals, half rounds, or matchsticks. Rinse and slice the mushrooms. Sauté the carrots for a couple of minutes. Add the mushrooms and peas, sprinkle on salt, sauté another minute or so, and then add a few spoonfuls of water or stock, cover, turn the heat down to medium low. Check in 3 to 4 minutes. Are they tender? Is there enough water left? Stir and continue steaming a few minutes until the peas are just tender. Stop cooking before their color begins to dull.
Bell Peppers: Green, Red, and Yellow
The shell or pod of the pepper, which encloses the seeds, is the edible part. Red and yellow peppers have become quite popular as they are sweeter and more deeply flavorful than the green ones. Peppers are often added to salads both for their mild bite and their colorful effect. They are frequently cooked with tomatoes and other summer vegetables. Fire-roasted red peppers have become a staple of the new cuisine.
Prepare the pepper by first cutting in half lengthwise and removing the stem, seeds, and pith from each half. Then knock the open halves on the cutting board so that any stray seeds are dislodged. Remove the seeds from all the peppers you will be using and clean the cutting surface before beginning to slice or chop the peppers.
The pepper halves may be cut in a variety of ways, including lengthwise strips, diagonal strips, diagonal slivers, or wedges. If the halves are again halved, the slivers may be cut more easily. For diced green pepper, cut the strips or slivers crosswise into smaller pieces.

Green Pepper in Salads
Bell peppers are excellent in a number of salads: lettuce, tomato, cauliflower, carrot, cottage cheese, bean, and potato. In salads, peppers are best if they are cut into thin strips. This leaves them easy to chew, and no one gets too big a piece in one bite.
About Roasted Red Peppers
These are juicy with a sweet smoky flavor, which comes from the skins being blackened before their removal. Roast the red pepper(s) over a gas flame until they are completely blackened, turning with tongs as necessary. If you overdo it, the peppers will turn from black to gray, so don’t worry, here’s your chance to burn some food on purpose—get them good and black! The peppers can also be blackened over a charcoal grill (blacken all over, as above with the gas flame) or in the broiler. To blacken in the broiler, place on a baking sheet under the broiler and leave until the tops of the peppers are blackened, perhaps 5 to 8 minutes, depending on the broiler—sometimes in electric-oven broilers this can take 15 to 20 minutes. Turn over and broil the other side until blackened. (Leave whole and the juice will stay inside.)
Place the blackened peppers in a brown paper bag or a covered bowl or pot to steam in their own heat. When cool enough, cut in half, remove core, seeds, and blackened skin—a messy job, but the results are well worth it. I like to do this by first cutting out the core and removing all the seeds. Then I wipe off the counter and lay the pepper down with its black side up and scrape off the black with a knife. Sometimes it is easy enough to remove the blackened skin by hand. Do not rinse off the blackened skin with water, as this will wash away flavor as well. Keep plenty of damp sponges or towels handy for wiping the counter, the knife, and your hands.
You now have some red pepper “fillets,” which you can cut into strips or squares or blend. With these in your kitchen, you are wealthy and prosperous!
Stewed Red (or Yellow) Peppers
A simple, stunning dish.
Red or yellow peppers
Olive oil
Salt
Garlic
Dried thyme
Water or wine
Slice the peppers into strips about ¼-inch wide. Sauté them in olive oil for 2 to 3 minutes, add the garlic, a sprinkling of salt, some thyme, and cook briefly. Then add a touch of water or wine, cover, and stew slowly (12 to 15 minutes) to succulence. The peppers “melt” during this cooking, and you might too, when eating them.
Tomatoes and Green Peppers
Or if the peppers are red, how about some yellow tomatoes?
Green peppers
Tomatoes
Onions
Salt
Oil
Seasoning: dried (or fresh) thyme, oregano, basil
Cut the peppers into wide strips, wedges, or squares, section the tomatoes into eighths, and slice or section the onions. Sauté the onions for a minute or two, add the peppers, and stir-fry for several minutes longer until they are tender. Then add the tomatoes and seasoning, turning the heat down. Cover and cook for just a few minutes, until the tomatoes are thoroughly heated. Peppers will stay bright green when given only brief cooking. If you have fresh herbs available, you could use some as a garnish.
VARIATION
If you’re using olive oil, season with sweet basil, sage, or thyme. If using corn, peanut, or sesame oil, utilize some fresh ginger and soy sauce. Garlic can be used in either case.
Summer Squash: Zucchini, Crookneck, and Scalloped
Beauteous squashes: straight and deep green, yellow with thin neck spreading to plumpness, pale green, round and scalloped; they are full of delicate, earthy flavor unless cooked into mushiness—although some people like that too! Quickly stir-fried or steamed, these squashes can stand alone, be lightly seasoned with herbs, or be combined with eggplant, tomato, greens, onions, carrots, or cheese. Raw and thinly sliced, they can make a good addition to salads. Give them a light scrubbing, trim off the ends, and cut according to intended use. The rolling cut is especially good for cooking. To appreciate the mild flavor, season lightly.

Zucchini and crookneck squash can be cut in any of the ways shown for cutting carrots. Scalloped squash (officially cymling, sometimes “Summer”) can be cut in half and sliced like an onion, sectioned like a tomato, or chunked like a potato.
These squashes have a fine, soft crunch when eaten raw. The larger ones with tougher seeds are usually better cooked. Cut into strips, chunks, or ovals, sprinkle with salt, and toss by hand. For more tang and brightness, toss with lemon juice and lemon peel and sweeten to taste with sugar or honey. Or use a lemon dressing with two parts olive oil and one part lemon along with some black pepper. Arrange decoratively on a plate.
Summer squashes are quite good boiled or steamed if you can get them off the fire before they’re mush—just four or five minutes at most, depending on the size. Larger chunks may need slightly longer cooking. Toss with butter, salt, and pepper, or dress with a mild sauce.
Summer squashes can also be baked whole, cut in half, or cut into strips. Brush with oil. Sprinkling of salt. Twenty minutes at 375° is usually sufficient baking time. Sprinkle with a light vinegar, say rice wine or apple, salt and pepper lightly, and top with grated Parmesan cheese. Layer with tomatoes and cheese? Use on top of your pizza?
Stir-Fried Summer Squash
Squash doesn’t have to be all squashed. Lightly cooked, it retains some texture along with a mild earthy flavor.
Zucchini, crookneck, and/or scalloped squash
Oil
Salt
Lemon juice or pear vinegar (optional)
Wash the squash and cut with the rolling cut if possible. Otherwise cut in rounds or ovals. Then stir-fry for 4 to 5 minutes, put a lid on, and turn the heat down for a minute or two. There will usually be enough water from the squash so that none need be added. Check the seasoning and serve. A splash of lemon or some pear vinegar—just a hint, yes?
Tomatoes
Tomatoes are one of the most versatile, most commercially utilized vegetables, appearing in salads, soups, sauces, paste, and catsup. Their hearty red color and tangy flavor, enlivening and brightening, top off many a dish. Ripe, unwashed, right off an unsprayed vine: plump, warm with summer sun, fleshy, the tomato almost melts in the mouth, juices rushing out, flooding the palate with uncommon succulence. Anything else is of a lesser magnificence, though excellent for what it has to offer. Tomatoes can stand alone or blend with almost any vegetable.

Generally I like to cook fresh tomatoes as little as possible; I use canned tomato products for making sauces, and now there are very good organic canned tomatoes. Rinse off the tomatoes, trim out the little core, and then cut in segments or slice in rounds. Some people find that a sharp stainless steel knife works well for this, but if I’ve kept my Japanese vegetable knife sharp, it works fine.
When using canned tomato products, keep in mind that tomato paste is much stronger than tomato sauce or canned tomatoes. Tomato paste usually needs to be diluted with water, while canned tomatoes and tomato sauce are used undiluted. Tomato paste can be added to soups to deepen their color and to lend acidity, or tartness, to their flavor, but more commonly I prefer to use unseasoned canned tomatoes, either whole or chunked.
When using fresh tomatoes (for soups or sauces), you can easily peel them by first immersing them for ten to twenty seconds in boiling water. Then the skins come right off. (If they don’t come right off, then try the boiling water for a longer period.)
Tomato Salad
The simplest tomato salad: tomatoes cut up in a bowl, perhaps some salt at the last minute. For a comparatively more elaborate tomato salad, try this.
Tomatoes
Olive oil
Mild vinegar (rice vinegar for one)
Salt
Sugar (optional)
Fresh basil or tarragon
Slice or section the tomatoes. Arrange slices on a platter and sprinkle on olive oil, vinegar, salt, and herbs for garnish. Put sections in bowl and toss with remaining ingredients. Be cautious with the salt or add at the last minute as it will draw water out of the tomatoes and turn the dish into soup.
Baked Tomatoes
Roasting gives the tomatoes a quiet elegance for a juicy, flavorful side dish.
Tomatoes
Garlic
Olive oil
Parmesan or cheddar cheese, grated
Tarragon, parsley, or fresh basil (optional)
Preheat oven to 350°. Cut off tomato tops, sprinkle with minced garlic. Drizzle on some olive oil, about a teaspoon per tomato. Bake 20 minutes, removing from oven to baste once or twice. Sprinkle on Parmesan or grated cheddar for the last 5 minutes. These can also be sprinkled with tarragon, parsley, or fresh basil to garnish.
SUN-DRIED TOMATOES
Sun-dried tomatoes have a wonderfully intense, concentrated flavor that is sunny, sweet, and robust, and their chewy texture is reminiscent of other dried fruits: a real pick-me-up for the taste buds. Although common in parts of southern Europe, they are relatively new to the grocery shelves of this country.
Sun-dried tomatoes come two ways: packed in olive oil and simply dried. The ones packed in olive oil are either plain or seasoned, most commonly with garlic and basil. Although I am quite fond of the oil-packed tomatoes, I sometimes buy the plain dried ones because they are often cheaper.
The plain dried ones are too tough to chew, so if I need them immediately I plump them in boiling water for a minute or so, then drain, cool, and slice or chop. Recently though, I came across a suggestion by Narsai David that worked well when I tried it out.
Plumping Sun-Dried Tomatoes
3 ounces sun-dried tomatoes, dry packed
1 tablespoon vinegar
1 tablespoon wine or sherry
Olive oil
Fresh herbs or garlic
Combine tomatoes, vinegar, and wine in a jar with a tight-fitting lid. Set the jar aside for a day or two, inverting periodically. When the tomatoes become chewable, you can cover them with olive oil and herbs or garlic, to taste. Store them in the refrigerator.
SOME OTHER VEGETABLES
These are vegetables which I have handled very little or those which are fairly uncommon in this country. An increasingly wide variety of vegetables is now available in supermarkets. Even though you don’t know of a particular dish using these vegetables, it is still possible to bring some home and try them out: sautéed, steamed, boiled, or baked. Given them a taste. Curiosity helps with the adventure.
What follows are brief discussions of several vegetables, both common and uncommon, which have not yet been dealt with. Only those vegetables with which I have had personal experience are included.
Burdock Root
Gobo in Japanese. This is a long, slender, brown root vegetable with a rich earthy flavor. Gobo should be scrubbed, but needn’t be peeled. It is most often cut in slender strips, using the Chinese rolling cut. Being somewhat chewy, it needs about twice as much cooking as carrots do. Sometimes it is boiled for ten minutes before being added to mixed vegetable dishes. Here’s a recipe which is one of our favorites.
Kimpira
Burdoock root
Carrot
Sesame seeds, roasted
Corn oil
Sesame oil
Soy sauce
Salt (optional)
Wash the vegetables, then cut in long, thin pieces using the Chinese rolling cut. Cover the bottom of a sauté pan generously with oil and heat. Cook the burdock for 4 to 5 minutes, then add the carrot and continue cooking for another 4 to 5 minutes, until the vegetables begin to get tender. Add the soy sauce, cook briefly, and serve garnished with the sesame seeds. The vegetables will be crisp, with a soy sauce glaze. You may want to add a pinch or two of salt so that you use less soy sauce for a milder flavor.
Celery Root
Also known as celeriac, this root comes from a slightly different variety of celery than the one raised for its stalks. Because of its surface irregularities it is fairly difficult to wash, but you can cut the skin off with a knife. Slice it for sautéing or chunk it for steaming or boiling. Cook it like carrots or turnips. Cooked and cut into matchstick pieces, it can be used as a salad ingredient. You’ll find it baked in the Potato Gratin.
Jerusalem Artichokes
These can be cooked like potatoes: sautéed, boiled, baked, deep-fried. They can be mixed with other vegetables and can be eaten raw in salads. They can be substituted for water chestnuts in Asian cooking.
Jicama
This is a large root vegetable which is imported from Mexico. It can be finely cut for salads, providing a crunchy, juicy, refreshing element.
Parsnips
These are a white root vegetable which, when raw, smell a great deal like carrots. Not so good raw, they can be cooked like carrots or turnips. Here’s a recipe which uses both turnips and parsnips:
Parsnips, Turnips, Mushrooms
Autumn flavors with earthy autumn colors.
Parsnips
Turnips
Mushrooms
Olive oil
Salt
Lemon juice
Water
Parsley, minced
Cut parsnips with rolling cut or in ovals. Cut turnips in quarters lengthwise, then in slices crosswise. Slice the mushrooms. Sauté the turnips and parsnips for 3 to 4 minutes, then add a bit of water and lemon juice, and put a lid on so they can steam. Brown the mushrooms in a separate sauté pan, add to the other vegetables, and stir them up. Are the turnips and parsnips tender? Adjust seasoning. Garnish with minced parsley.
Brussels Sprouts
These aren’t sprouts in the same sense as bean sprouts or alfalfa sprouts, but are more like very small heads of cabbage. To prepare them for cooking, remove any outer leaves which are yellow or wilted. The bottom of the core can also be trimmed off. The Brussels sprouts can be boiled whole or cut in halves or quarters lengthwise to be sauté-steamed. In either case, I suggest that they not be overcooked. Here’s one recipe.
Brussels Sprouts with Cheese
For me lightly cooking the brussels sprouts brings out a slight nuttiness in the flavor, and the butter and orange soften the cabbagey edge. Cheese works for me, but you could always substitute with some toasted almonds or hazelnuts.
Brussels sprouts
Olive oil or butter
Orange juice
Salt
Pepper
Cheese, grated
Cut the brussels sprouts in halves or quarters lengthwise and sauté them in olive oil or butter for 3 to 4 minutes. Add enough orange juice to cover the bottom of the pan and a few tablespoons more. Stir the brussels sprouts, cover and simmer for another 2 or 3 minutes. Season with some salt and pepper. Are they tender yet? Sprinkle with grated cheese, perhaps Parmesan or Gouda, before serving.

Sea Vegetables
These are more widely used in the East than in the West, but they are increasingly available in large supermarkets among the imported foods. They are a fine source of trace minerals and a flavorful addition to any diet. The most common varieties are dulse, hijiki (or hiziki), wakame, kombu, and nori. All of these sea vegetables are excellent used in vegetable, bean, and grain dishes, as well as added to soups. Cooked hijiki is also quite good in salads.
NORI
Nori comes in thin sheets. The only preparation required is toasting. Wave the sheets of nori, one at a time, about 5 to 6 minutes above a medium hot burner until they start to wrinkle. The toasted sheets can then be crumbled for use as a garnish on grains or soups, or sprinkled on salads. They are also used to wrap sushi.
WAKAME AND DULSE
Rinse these once before soaking, then soak for fifteen to thirty minutes until they swell up. Strain and save the soaking liquid—it is full of ocean flavor and nutrition. Wakame has a tough string attached along its length. Even when raw, this string should be soft enough to chew after soaking. If not, pull it off by hand. Lay out strips of soaked wakame or dulse and section into one-inch pieces before using.
HIJIKI
Hijiki tends to be especially gritty, so when rinsing it, pick it off the top of the rinsing water carefully so that the grit stays at the bottom of the bowl. Soak the same as wakame or dulse and then repeat the rinsing process. Hijiki comes in small, slender pieces and need not be sectioned before using. You can add it to the Kimpira.
KOMBU
This comes in thick sheets and makes an excellent soup stock. No rinsing or soaking is necessary. A three-by-three-inch piece of kombu will flavor about a quart of stock. After cooking for stock, the same piece of kombu can be cut in strips for addition to the soup or used in Turnip Pickle.
Sea Vegetables with Earth Vegetables
Seaweed cooked by itself makes a potent dish. For a milder dish try this.
Seaweed, prepared as described above
Onion
Carrot
Seaweed soaking water
Soy sauce
Salt
Ginger, grated (optional)
Garlic (optional)
Wash the seaweed and start it cooking while dicing the onion and carrot. Finish preparing the seaweed for cooking. Sauté the onion for a minute, add the carrot and continue sautéing for 4 or 5 minutes. Add the seaweed and some of the soaking water, cover, and simmer for 8 to 10 minutes. Season with soy sauce, salt, some freshly grated ginger, if it’s available, and perhaps some garlic if you’d like it. Keep the seasoning mild if you want to enjoy the ocean flavor. Cook a few more minutes.
Chilies
A whole new world opened up for me when I discovered chilies. Here’s how to make your own ground chili, chili flakes, or chili paste.
I use three different dried chilies, which I get from one of the Mexican markets in my area. Curiously enough chilies seem to be known by different names in different places, so I am providing a description with the name. If this is something that interests you, you can refer to Diana Kennedy’s The Cuisines of Mexico.
People whose hands are sensitive find it best to wear thin rubber gloves when working with chilies. In any case, wash your hands thoroughly after handling the chilies, so you don’t end up with a hot eye or some other body part touched by chili-laden fingers.
CHILI NEGRO
This chili is about six inches long and dark red-brown or black, turning a chocolaty brown when ground. The shape is cylindrical, about an inch across, and the surface is wrinkled. The flavor is distinctly earthy as well as hot.
ANCHO CHILI
Also known as pasilla in San Francisco, it is ruby red with a wrinkled skin, is pear- or heart-shaped, is two or three inches wide near the stem end, and tapers to the far end. Ancho chilies generally range from three to five inches in length. The flavor has hints of prune and raisin. Ground, the chili is deep red.
NEW MEXICO (CALIFORNIA) CHILI
With its familiar brick-red color and supple, graceful length, this is the most recognizable dried chili. Generally about six inches long with a smooth-textured skin, this chili has sides that are roughly parallel, tapering toward the tip. The flavor is herbaceous, bell-peppery. When ground, the chili is brilliantly red. These are called California chilies when they have been grown in California.
Homemade Chili Powder
Take a chili and grind it into a powder, that’s the principle. Whereas commercial chili powders are most commonly made with garlic, oregano, and cumin in addition to chili, this is just chili. Then you can add the other ingredients in the amounts you wish to different parts of a dish, or to different dishes within the same meal. Also you may find you prefer a particular chili or combination of chilies. And you can add freshly minced garlic along with freshly ground cumin seed—more explosive flavors!
Dried chili (chili negros, ancho chilies, or New Mexico chilies)
Preheat oven to 350°. Roast the chilies on a baking sheet for just 3 minutes. The chilies will tend to puff up a bit and become aromatic and a bit drier. More than 3 minutes and the chilies will tend to start burning.
Cool briefly, then cut open and remove the stem and seeds. Grind the flesh in a coffee mill, one you are using to grind spices and not coffee. Sometimes prechopping the chilies with a knife will be necessary so the grinder can do its work. That’s it. I store the ground chili in small jars.
Note that ancho chilies are moister than the other two and will not grind as readily into a powder, but will end up in flakes. For most purposes this is sufficient, but if you want powder, you can roast the flakes in a dry skillet over moderate heat and then grind again.
An alternative method of preparing chili powder is to cut the stems off the chilies, chop them coarsely with a knife, and then grind them, seeds and all. After grinding, you can roast the powder in a dry skillet, stirring, for a toastier flavor.
Homemade Chili Paste
Making chili paste instead of ground chili powder is especially useful if you do not have a convenient way to grind the chili. It can be refrigerated or frozen for later use.
Dried New Mexico, negro, or ancho chilies
Water
Cut off the stems, cut open the chilies, and remove the seeds. Chop each chili into several pieces. Simmer in water over low heat for about 15 minutes. Puree—or scrape through sieve. Ready.
FRESH GREEN CHILIES
I use mostly jalapeños and serranos. Again, great care is urged with the handling of fresh green chilies. These are even more potent than the dried chilies, so especially if your hands are sensitive, it’s best to wear thin rubber gloves when working with them.
One way to chop up the chili is to cut off the stem and then slice the chili crosswise. This will make healthy-sized chunks of chili, which can be quite formidable. My friend Dan Welch once made me a pizza strewn with this coarsely cut green chili, and I nearly died, while gamely assuring him that it was indeed (gasp) delicious.
A second method is to cut off the stem, cut open the chili lengthwise, and remove the seeds and pithy parts from the interior. Using a spoon for the seed removal will save your hands. Then chop or mince to the desired consistency—I prefer rather finely chopped.
A third method, which I use, is to leave the stem on, and make several lengthwise just-off-center slices to remove the flesh from the inner core of seeds. Then chop or mince the resulting pieces.
FRUITS AND DRIED FRUITS
Fruits are the final results of a plant’s labor, accumulations of energy, food for seeds. Some people are fond of fruits and miss them dearly when they’re not available, while others seem content without them. They are a deceptively potent food: refreshing, invigorating, cleansing. Best fresh, cool, and raw in hot weather, and hot, thick, and sweet in cold weather. Fruits can start a day, pick up an afternoon, complete a dinner.
Citrus Fruits: Oranges, Lemons, Limes, Grapefruit, and Tangerines
These fruits are noted for their tangy juices and refreshing balance of sweet and sour. Used in place of vinegar in salad dressings, their juice is also invaluable for brightening the flavor of vegetable dishes. They also will preserve the color and freshness of newly sliced apples, peaches, bananas, avocados and other fruits and vegetables which otherwise might brown (oxidize) while sitting out. Soups which are overly sweet or bland can be perked up with lemon or lime juice, or with some grated orange or lemon peel, which is also useful in salad dressings, sauces, and pickles.
Both oranges and grapefruit can be peeled with the fingers or with a well-sharpened knife. See below.
MAKING LEMON, LIME, OR ORANGE ZEST
The fragrant outer layer of the rind is called zest, and whether it is minced or grated, it will provide a flavorful seasoning for soups, salad dressings, pasta dishes, desserts, and numerous other dishes. Using a grater for this seemed to leave most of the zest in the grater, so now I do it with a vegetable peeler and a sharp knife.
First of all, wash the fruit. If I am uncertain of the source of the fruit (whether it is organic or not), I use hot water to try to remove whatever may have been sprayed on its surface. If the fruit feels really waxy, I pop it in boiling water briefly.
Using a vegetable peeler, remove the colored outer layer of the peel in strips. Arrange a pile of strips on the counter and cut them crosswise into very narrow strips with quick, down-and-forward strokes of the knife. If you want the peel in even smaller pieces, mince the narrow strips.
ORANGE SLICES OR SUPREMES: PLAIN OR ELABORATED
This is the more or less classical method, which I use for peeling oranges or grapefruit for fresh fruit or salads.
To peel with a knife so that the outside of the orange (or grapefruit) has no white, cut off the top and bottom of the orange with a sharp knife, so that a circle of orange shows. Place the orange flat side down, and then cut off a section of peel, top to bottom, following the outline of the orange. Once you have cut off one section of peel, you can cut off the remaining sections of peel following the line where the orange meets the white. After you have cut off the peel all the way around, turn the orange over and trim off any parts of the peel you may have missed at the other end.
Slice the orange crosswise into rounds, or cut the orange in half vertically first and then crosswise into half-rounds.
The oranges may be served as is, or combined with slices of apple, banana, and/or raisins or date pieces. In the summer, sliced oranges are also wonderful with blueberries and strawberries or other summer fruits. I add a touch of sugar or a couple of spoonfuls of maple syrup.
With a sharp knife and a little more work you can make “supremes,” (something you might consider doing for that special someone on Valentine’s Day or Christmas.) Start by cutting the peel off the orange or grapefruit as in the directions above. Then hold the orange or grapefruit over a bowl to catch the juice, and cut toward the center along one side of a segment next to the membrane and then along the other side of the segment, so that the segment comes loose from the membrane on both sides. Turn the fruit in your hand and cut on each side of the next segment so that it drops loose. Continue until all the segments have been cut loose. (Squeeze the remains of membrane and orange with your hand for extra juice.)


These may be served as is or sweetened lightly. The orange and grapefruit may be combined, and other fruits may be added. Supremes are also an excellent way to prepare orange or grapefruit for salads.
Orange-Salad with Sprouts
The tender fresh greens of the sprouts meet orange juiciness—refreshing and invigorating.
Oranges (or grapefruit or tangerines)
Alfalfa sprouts
First peel the fruit, then slice or chunk it. Mix it with the alfalfa sprouts, adding a few raisins if it’s not sweet enough. This could also be done with Thin-Slice Cabbage Salad instead of sprouts.
Grapefruit-Avocado Salad
The lively tartness of grapefruit is softened with the oily richness of the avocado, while the buttery avocado is brightened with citrus.
Grapefruit (or oranges or tangerines)
Avocado
Vinaigrette
Fresh parsley, cilantro, or mint
Peel and section the grapefruit—or cut it in supremes. Cut the avocado lengthwise and remove the meat from the skins with a rubber spatula or large spoon. Cut diagonally into strips. Arrange avocado slices and fruit on a platter. Spoon on a vinaigrette of oil and vinegar or oil and citrus (with salt and pepper). Garnish with parsley, cilantro, or mint.
Orange Date Dessert
Simple goodness: orange slices with dried fruit and coconut.
Oranges
Dates
Coconut, shredded
Peel the oranges and slice in rounds. Pit the dates and slice them crosswise. Arrange the orange slices in dessert dishes and sprinkle with the dates and coconut.
VARIATIONS
Baked Grapefruit
I guess this sounds unusual to some people, but I grew up with it, as my father loved grapefruit prepared this way with brown sugar.
Grapefruit
Sugar or honey
Preheat oven to 350°. Cut the grapefruit in half and, if you want to, cut around each section to loosen it. Put a spoonful or so of sugar or honey in the middle of the grapefruit halves and bake them face up on cookie sheets for 10 minutes.
Berries, Peaches, Apricots, Nectarines, Plums, Grapes, and Cherries
Most summer fruits have skins which are eaten along with the fruit, though peaches, with their characteristic fuzz, are frequently peeled. To accomplish this, dip the peaches in boiling water for ten seconds, or longer if the peaches are somewhat under ripe. Let them cool slightly and then peel by hand, or use a knife to pull up the skin. Aside from grapes, berries, and cherries, these fruits can all be sectioned by cutting from pole to pole, down to the pit. If necessary, loosen the section from the pit by twisting the knife.
At their best when fully ripe, these fruits can be simply washed and eaten—it’s as though the heavens open. Berries dye the hands red or purple. Peach juice runs down the chin and forearm. Sweet stickiness abounds. On those occasions calling for a bit more civility, try this recipe.

Fresh Fruit Compote
A variety of colors and shapes makes this an engaging dish.
AS AVAILABLE:
Berries
Peaches
Apricots
Nectarines
Plums
Grapes
Cherries
Honey or sugar or maple syrup
Lemon or lime juice
Fresh mint leaves (optional)
Anise seed, freshly ground (optional)
Wash and slice the fruits. If preferred, peel the peaches first. The apricots could be left in halves, the berries or grapes whole. Mix the fruits together. Add equal amounts of sweetening and lemon juice. Garnish with the mint leaves. If you want a touch of spice, my favorite is anise seed, freshly minced or ground.
VARIATIONS
Peaches and Cream
Some foods are as good—even better than they sound: peaches! and cream! The challenge is to find juicy ripe peaches—perhaps a local farmers market.
Peaches
Whipping cream
Vanilla (or rum, brandy, or fruit syrup)
Cinnamon or nutmeg, freshly grated
Peel and slice the peaches. Beat the cream until it is softly fluffy rather than liquidy, but not so much that it gets thick or turns to butter. Flavor it with a little vanilla, rum, or brandy—or a fruit syrup. Arrange the slices in dessert dishes and spoon the whipped cream on top. It doesn’t take much—a little goes a long way. Sprinkle cinnamon or freshly grated nutmeg on top of the cream.
VARIATIONS
Pale Green Snow
This grape salad could also be a dessert.
Grapes, Thompson seedless or “flame”
Sour cream
Honey
Vanilla
Nutmeg or cinnamon
Lemon peel, grated (optional)
Walnuts, roasted and chopped (optional)
Remove the grapes from the stems and rinse them off. Sweeten the sour cream with honey and season lightly with vanilla. Add spice (delicately) and possibly lemon peel. Set aside some of the grapes for a garnish and combine the remainder with the sour cream mixture, along with some walnuts, if you have them. Chill until time to serve, then garnish with the extra grapes.
VARIATIONS

Cooked Summer Fruit
Warm and sweet for breakfast! This is a useful way to prepare fruit which is no longer fresh looking.
Any of the fruits in this section
Water
Sugar or honey
Cornstarch
Wash, trim, and slice the fruit. Place in a pan, add water to cover, and cook over low heat. Sweeten to taste with sugar, honey, or possibly dried fruit. If the fruit seems too soupy, thicken with cornstarch dissolved in cold water. (One tablespoon cornstarch in one tablespoon cold water thickens one cup liquid. Start with a minimal amount, then add more if you want it thicker.) Or leave the juice unthickened if you prefer.
Melons: Cataloupe, Honeydew, Casaba, Crenshaw, Watermelon
Sweet juiciness in frosty pulp. The high water content of melons makes them the most refreshing of hot-weather fruits, but for the same reason they are not suitable for cooking into sauces or pies. Chill them in the refrigerator, in the creek, or in the shade. Cut out a thick crescent and bite in. Don’t you wish your mouth was bigger?

Melon Salad
So refreshing on those really hot summer days, as a salad, a dessert, or a palate-cleansing course.
Melons
Banana, sliced
Grapes
Mint, freshly chopped
Coconut (optional)
Cut open the melons and remove the seeds. Even with watermelon, this isn’t too difficult—the seeds run in lines. Cut the skin away from the pulp and then cut the pulp into chunks. (Or use a melon-baller to scoop out rounds of melon.) Fold in the banana and grapes. Season with mint and top with coconut, if things are going that way.
VARIATIONS
Cantaloupe Dreams
Many people like to sprinkle salt on their melon. Here are some other dreams.
Cantaloupe
Lemon juice (or lime)
Raw cashew butter
Cut the cantaloupe in halves or quarters and remove the seeds. Drizzle on the lemon juice and mound on a spoon or two of the cashew butter.
VARIATION
Use a mixture of yogurt and cottage cheese instead of cashew butter. Mound it up as desired in the cantaloupe. Add raisins, dates, or fig slices or use fresh fruit pieces as a garnish.
Apples, Pears, and Bananas
These fruits are grouped together since they are, aside from citrus fruits, probably the most readily available fresh fruits during the fall and winter.


Pears and apples have crisper flesh than the summer fruits. The skins can be left on, but wash them well. To prepare them, cut in quarters lengthwise and cut out the stems and seeds. Slice the quarters lengthwise or diagonally, and the pieces will have some of the graceful roundness of the original fruit.
Pears or Apples, Sliced
The citrus brings a vibrancy to the pears and/or apples; the banana slices a sweetness.
Pears or apples, sliced
Orange or lemon juice
Bananas, sliced
Toss the pears or apples with orange or lemon juice. Mix in the banana.
Apple or Pear Salad with Citrus
Sliced fruit along with fruit peeled and sectioned can be surprisingly reassuring—colorful and easy to chew, the flavors blossom in your mouth.
Apples or pears
Grapefruit (oranges or tangerines)
Mint
Slice the apple and section the grapefruit. Mix them together with some mint. Try Pippin apple with white grapefruit, or Red Delicious with pink grapefruit. Oranges or tangerines could also be used. Add a touch of sweetening if you’d like.
Hot Fruit
Cooking the apples or pears with dried fruit will give the dish a hearty feeling.
Apples or pears
Water
Dates, figs, or raisins, or sugar or honey
Lemon juice or lemon peel (optional)
The fruit can be left in quarters for cooking. Put the cut-up fruit in a couple of inches of water. Add the sweetening: sugar, honey, dates, figs, or raisins. Put on a lid and simmer-steam for 10 to 12 minutes, until the fruit is soft, stirring a couple of times while it’s cooking. If it’s gotten too sweet, add some lemon juice or chopped lemon peel.
VARIATIONS
Prune-Apple Combo
The prunes give the apples an intense depth of sunny-earthy flavor—and the apples soften the full-bodied flavor of the prunes.
Prunes
Raisins (optional)
Apples, quartered and cored
Water
Ground cinnamon or cinnamon stick
Cook the prunes (and raisins) along with the apples in water to cover for about 30 minutes. Cook longer if you want the prunes or apples softer. Season with cinnamon or cook with a cinnamon stick or three.
Breakfast Banana Split
One of our head cooks, Issan Dorsey, would frequently say, “Let them have banana splits for breakfast.” Here’s what he meant.
Banana
Yogurt or buttermilk
Cottage cheese (optional)
Stewed dried apricots (optional)
Mix sliced bananas with yogurt or buttermilk. Stretch the yogurt with cottage cheese if necessary, or if you like it. Other fruits, most notably stewed dried apricots, can be added. Buttermilk is another option in place of the yogurt.
Fried Bananas
I don’t ordinarily think to make this, but when I have bananas cooked this way, I am delighted.
Bananas
Butter or oil
Powdered sugar
Cut the bananas in half crosswise, and then in half lengthwise. Fry in butter or in a generous amount of oil of your choosing. Sprinkle with powdered sugar.
Banana Orange Dessert
In a day of quick foods and quick fixes, again, this dish is an opportunity to find out how satisfying actual food can taste: bananas! oranges! walnuts! coconut!
Bananas
Orange juice or orange supremes
Walnuts, roasted, chopped
Coconut
Slice the bananas and mix them with the orange juice so that they won’t darken. Arrange in dessert dishes with chopped walnuts and coconut.
Pineapple, Persimmon, Papaya, and Mango
These refreshing and colorful fruits may be added to any of the raw fruit dishes—or served by themselves. When they are fresh and flavorful, they are decidedly fresh and flavorful.
PINEAPPLE
It will take some cutting to remove the cross-hatching of pineapple peel. And then the core is usually too tough for eating, so the easiest way is probably to cut the pineapple in half crosswise. Then cut each half into quarters vertically, and cut the core off the side of each quarter. Slice the remainder into chunks.
PERSIMMON
There are two main varieties of persimmon. One is the fuyu, which is short and squat. Even when firm, it can be ripe enough to slice for a flash of orange and flavor in salads. (The skin is edible.) The other kind of persimmon is larger and more elongated, and is best eaten when entirely soft. (Otherwise it will be chalky.) Stand the persimmon on its stem, and make perpendicular cuts in the surface of the persimmon. Eat with a spoon or remove the flesh and combine with vanilla yogurt. Sweet.
PAPAYA
Papaya is so delicious for breakfast on the islands. Cut in half lengthwise and scoop out the seeds. Squeeze on some lime juice. Indulge. Spoon directly into mouth. Savor the goodness.
MANGO
Mango is a fruit I adore, although for some people it can cause skin rashes. I like to cut off the skin all the way around, and then cut off slices of mango fillets, which are a decorative and refreshing addition to avocado platters, Chinese noodle salad, and other salads.
DRIED FRUITS
A source of concentrated, chewy sweetness, dried fruits make excellent snacks (often mixed with nuts or seeds) and good desserts, and combine well with fresh ingredients.
For a few years we were sun-drying our own fruit at Tassajara, since we’re lucky enough to have the hot, dry summer weather necessary for this process. The main problem we’ve had has been raccoons: once an entire rack of drying bananas disappeared.
You’ll find many sources of information on home-drying fruits if you look. Some of my friends love their fruit-drying appliances. Remember, though, that home-dried fruit is seldom as plump and moist as the sulphur-treated kind prepared commercially, though it’s certainly more deeply flavored.
Raisins, Dates, and Figs
These are lumped together as the least expensive, most often used dried fruits. There are several kinds of dates, which vary somewhat in size, sweetness, and texture—from almost creamy to fairly chewy. There are basically two kinds of figs available in this country: black mission and various types of “white” figs, most notably Calymirna. Black mission and dried domestic Calymirna figs are usually fairly soft, while imported dried white figs, which often come strung on a twig, are comparatively tough. When sliced figs are called for, use the softer variety. Here in California, fresh figs are available in the summer season, a sensual delight.
AS A DESSERT
When I have nothing else available, and the occasion calls for a dessert, I put out dried fruits with some lightly roasted almonds, walnuts, or cashews. Cutting the dried fruit makes it more open to being eaten.
AS A SNACK
Serve raisins, dates, or figs with roasted peanuts, pumpkin, or sunflower seeds; walnuts, almonds, or cashews. Skip the chips!
IN SALADS
Dried fruits in modest amounts can complement many kinds of salads: carrot, lettuce, alfalfa sprout, cabbage, cottage cheese, or fruit. If you’re using dates or figs, it’s useful to slice them first.
IN FROSTINGS OR FILLINGS
Dates or figs are especially suited to this use. Cover them with water and cook until soft. Then mash them into a paste. It’s good just like that, or it could be spiced with vanilla extract, cinnamon, orange peel, lemon juice, cloves, or other seasonings.
Prunes, Dried Apricots, Pears, Apples, Pineapple, Bananas, and Coconut
I had my first dried banana two years ago. Talk about a potent, concentrated food! One thing to remember when eating dried fruit is that it’s easy to overdo it. Often people who wouldn’t consider eating ten plums sit down and eat ten prunes, or they eat two, three, or four stewed dried pears when they wouldn’t eat more than one fresh pear. Since dried fruit can have a pretty strong effect, some caution may be necessary.
Stewed Dried Fruit
Prunes are the most frequently stewed dried fruit, but apricots, pears, and apples can also be used. (Carrying dried fruit—to be stewed at camp—is a backpacker’s delight.)
Dried fruit
Water (enough to cover and then some)
Put the dried fruit in a pot and cover with an inch or two of water. Heat to boiling, then simmer until done. Apricots are the quickest, taking about 10 minutes, while pears, prunes, and apples take 20 to 30.
VARIATIONS
Apricot Condiment
Good with rice dishes and curries.
Dried apricots
Banana
Parsley, minced
Mint, minced
Salt
Lemon juice
Cayenne (optional)
Green chili, minced (optional)
Stew the apricots. Mash (at least some of) the banana, mix in the apricots, and add generous amounts of minced parsley and mint, seasoning with a touch of salt and lemon juice. If you want some heat, add a touch of cayenne or some minced green chilis.
BEANS
Beans. What suffering the word evokes. Beans. When things did not work out: Oh beans! When you went camping. Beans! Still . . . I love them.

Beans are not meat, they’re beans: garbanzo (chickpeas), kidney, navy, soldier, white, black, red, and pinto. There are also soy beans—which more commonly appear as soy milk, tofu, or veggie burgers; split pea soup—thick, green, creamy, and soothing (try it with caraway seeds or with bacon pieces); refried beans—greasy, soft, fragrant, and filling; uncooked lentils—a rainbow of tans and greens—cook into a deep mellow brown with the taste of earthen sunshine.
The overlooked jewels of the vegetable world, beans sell at dirt-cheap prices and are one of the best protein buys around. Beans and greens, beans with grains or nuts, beans with eggs or cheese—all are good protein combinations.
Beans take some getting used to, some familiarity. It’s easy to say, “Beans don’t agree with me,” without having given yourself a chance to agree with them.
Cooking Beans: A Basic Outline
Preparing the beans: One cup of dry beans makes four average servings, either in a bean dish or in a soup. Spread out the measured beans—a white plate is especially useful for this—so that you can poke through them and pick out any extraneous materials, particularly small pebbles. Garbanzos, azuki, red, and black beans seem to be especially pebble-prone. Besides being a jarring surprise, pebbles are a genuine hazard to the teeth. Unless the beans are unusually dirty, they’ll need just one rinsing to remove storage dust. Cover the beans in a pot or pan with water, stir them around by hand and pour the water off. Now the beans are ready for soaking or cooking.
Soaking the beans: Beans absorb water rather reluctantly. Soaking them in water before cooking reduces the cooking time by thirty minutes if simmering and by five minutes if pressure cooking. Also, it seems good to give the beans several hours to get used to the water before the heat is turned on. Cover the beans with water by a couple of inches when soaking starts. The beans can be soaked overnight or during the day, six to eight hours or longer. In very hot weather, keep the soaking beans in a cool place or they will tend to sour.
Cooking the beans: As a rule, no salt is added until the beans are soft, since salt tends to draw the moisture out of foods.
Remember, beans take time, or pressure, to cook.
If the beans are presoaked, pressure-cook as follows:
If the beans are not presoaked, add five minutes cooking time at 15-pound pressure.
For cooking without pressure, if the beans are presoaked, bring to a boil, then simmer as follows:
If the beans are not presoaked, add thirty minutes to these cooking times.
“Others” includes black-eyed peas, cranberry beans, navy (white) beans, red kidney, red, pinto, lima, great northern, pink, black, azuki, and mung beans.
Basic Bean Recipe
Time is the main ingredient here besides the beans—and you can reduce that with a pressure cooker.
Beans
Water
Garlic (optional)
Dried herbs (optional)
Salt
Lemon juice or vinegar (optional)
Prepare the beans for soaking or cooking. Add three times as much water as beans for a bean dish, and five times as much water if making soup. Soak, then cook until tender (times above). For extra flavor cook with some fresh garlic or dried herbs. (Depending on the bean I have especially enjoyed sage, thyme, or oregano—see what you like.) Do not add any salt until after the beans are completely tender. If the beans are simmered rather than pressure-cooked, it may be necessary to add more hot water as the cooking progresses. When the beans are tender, salt to taste. If you are not using a pressure cooker to cook the beans, you may wish to cook up a double batch and save some for later use. A modest amount of tartness—lemon juice or vinegar—will lift the flavor.
ACCOMPANYING BEANS WITH VEGETABLES
Vegetables go well in the bean pot. Beans and bean water relish the company of onions, celery, and carrots. Here’s how the vegetables can be added:
Pressure-cook some diced vegetables with the beans. The vegetables and beans will have about the same taste (having flavored each other) and soft texture.
Sauté the vegetables first and then add them to the cooked or nearly cooked beans. The vegetables will retain some of their original taste and texture. A variation of this is to add leftover cooked vegetables to the beans.
Simmer the vegetables with the cooking, or cooked, beans for thirty to forty minutes. The vegetables will enhance the flavor of the beans and still retain some of their individuality.
Traditionally, beans are often cooked with bones or seasoned with pieces of meat. But beans have also been known to get mixed up with tomatoes, sweetened with sugar or molasses, and spiced with chili. Here are some combinations and seasonings.
Sweetened Soy Beans
This is the Japanese version of an American standby.
Soy beans, cooked
Sugar, honey, or molasses
Soy sauce
Salt
Lemon juice or vinegar (optional)
If baking, preheat oven to 350°. Flavor the cooked beans first with the sugar, then with the soy sauce. Add a little salt if necessary. This recipe, as it was originally shown to me by one of my Japanese Zen teachers, used way more sugar and soy sauce than I would ever put in it. For a small side dish these candied beans are a treat, but if the beans are to be eaten in larger amounts, try seasoning them more lightly. Serve immediately, or let the sweetened beans cook for an additional ½ hour on top of the stove or in the oven. Add a light touch of lemon juice or vinegar if you wish, to help the flavors blossom.
Nut-Buttered Beans
The nut butter makes this a flavorful, hearty, delicious dish. Again, other beans besides soy can be used.
Soybeans, cooked
Peanut butter
Salt (or soy sauce)
If baking, preheat oven 350°. If you started with a cup of dry beans, use about ½ cup of peanut butter. Add a little of the cooking liquid at a time, mixing well so that the peanut butter becomes a smooth sauce. Add to the cooked soybeans. Simmer on the stove or bake in the oven.
VARIATIONS
Chili Beans
Kidneys are the standard bean for this recipe, but soy, garbanzo, pinto, black–eyed peas, and others can be used.
Beans, cooked
Onion
Green pepper
Olive oil
Chili powder
Garlic (optional)
Ginger root, grated (optional)
Tomatoes, chunked or canned unseasoned tomato
Cooking liquid (or stock)
Salt
Pepper
If baking, preheat oven to 350°. Dice the onions and green peppers, then sauté them for a few minutes. Add the chili powder, and garlic and ginger if you are using it, and cook another minute or two. Add the tomato wedges and/or canned tomato, along with some of the cooking liquid. Add the cooked beans and season to taste with salt and red pepper to taste; add more chili, garlic or ginger for additional oomph if you like them. The dish can then simmer or bake for another ½ hour or more.
VARIATION
For a milder dish, season the tomato sauce with salt, pepper, and basil, tarragon, or thyme. Note that chili powder is primarily garlic, cumin, oregano, and ground chili. Use your own preparation of these four, as in the following recipe.
Blanco Beans
This is a Tassajara version of refried beans. Pintos are normally used for this recipe, but soy, kidney, garbanzo, and others are good too. Create your own chili powder with red chili, minced garlic, ground cumin seed, and dried oregano. Familiarize yourself with the ingredients as you go.
Beans, cooked
Onions
Oil, for sautéing
Salt
Garlic, minced
Cumin seed, freshly ground, if possible
Dried oregano
Red chili, powder or flakes
Sour cream
Cheddar or Monterey Jack cheese, grated
Slice and sauté the onions, using a generous amount if you like them. When the onions are well cooked, headed toward golden, add seasonings and continue cooking another minute. Mash about half of the beans with the cooking liquid to make a creamy sauce, then add the remainder whole, and mix all the beans in with the onions. Adjust the season adding more salt, garlic, ground cumin seed, oregano, and chili to taste. Five minutes before serving, stir in the sour cream and most of the grated cheese. Let it heat gently. Garnish with the remainder of the cheese.
VARIATION
Preheat oven to 350° and bake for 20 minutes after the addition of the sour cream and cheese.
NUTS AND SEEDS
Peanuts, almonds, walnuts, cashews, brazil nuts, hazelnuts, and sesame, sunflower, pumpkin, and poppy seeds are for many people (perhaps especially vegetarians) a vital and welcome addition to many dishes. High in proteins, usable fats, vitamins and minerals, eaten raw or roasted, they enrich and decorate cooked vegetables, salads, staples, and main dishes. Raw nuts, for instance peanuts or sunflower seeds, have a tasty and interesting beanlike quality when added to cooked vegetable or grain dishes, and they are excellent in soups.
Any nuts or seeds—though usually peanuts, cashews, or sesame seeds—can be made into a nut butter by being ground under pressure. The pressure extracts some oil from the nut meal, giving it a buttery texture. If the nuts or seeds are ground without pressure, oil or water can be added to give them a spreadable consistency. For hungry vegetarians, nut butters provide an enjoyable substantial food. They can be served as a spread or diluted for sauces, drinks, and soup bases.
Growing up we chopped nuts in a wooden bowl with a rounded chopper—that’s a thing of the past. Now I chop them with my chef’s knife or Japanese vegetable knife.

Roasted Nuts or Seeds
Some people consider that roasting nuts or seeds reduces the nutritional value, and if this is the case, I am willing to sacrifice a bit for the fragrant aromas and toasty flavors.
Nuts or seeds
Salt (optional)
The roasting can be done in a frying pan or in the oven; preheat the oven to 350°, if that will be your cooking method. No oil is necessary in either case, but can be used. For stovetop roasting, put the nuts in the frying pan over a medium flame. Salt if you wish. Stir fairly frequently for even roasting. If the nuts begin to brown or burn before they are dry, turn down the heat. Unwatched nuts roasting in a skillet are probably the most common burnt item in the kitchen. Turn the heat down low on the nuts, if you want to neglect them, or hey, set a timer!
For oven roasting, put the nuts on a baking sheet or in a baking pan and roast for 8 minutes. Check and stir after 7 minutes. The nuts or seeds will not reach their full crunchiness until they cool.
Nut Butters
In some ways homemade nut butters are a stop-gap for when a commercial product is not available, but on the other hand you may find them so fresh and flavorful, you want to take a few minutes to manufacture them.
Peanuts, cashews, or sesame seeds
Oil or water
Salt
Raw or roasted nuts or seeds can be used. Grind the nuts once in a hand mill or in a Cuisinart, or grind ½ cup at a time in a coffee mill (which you are reserving for nuts, seeds, and spices). Add oil or water until the nut butter is the consistency you want, and salt to taste.
Nut Milk (Sauce or Soup Base)
This is one way to make nuts go further, and it makes a potent and refreshing beverage. Serve hot or cold. This milk will not be of the white variety found in markets, but will be thick with ground nut flesh and oils.
Nuts or seeds for grinding, or nut butters
Water
Honey, molasses, or sugar
Salt
Vanilla or almond extract (optional)
Lightly roast and then grind the nuts or seeds. Add water gradually to the ground nuts or the nut butter until the mixture is a drinkable consistency. This can be thick, like a milk shake, or thinner, like milk. (You could also try using a blender or Cuisinart after adding the water.) Sweeten to taste with honey, molasses, or sugar. Does it need a pinch of salt?
If using almonds, a few drops of almond extract could be added. Otherwise a few drops of vanilla extract can be used to sweeten and flavor.
Note: One-quarter cup of nuts will make nut milk out of 1 cup of water.
VARIATIONS
Peanut Butter Balls
These are easy to make and can be easily varied.
FOR THE COOKIES:
Peanut butter
Honey
Wheat bran, oat bran, or wheat germ
Dry milk (optional)
Vanilla extract
FOR THE COATING:
Sesame seeds, toasted coconut, or roasted nuts, chopped
Mix the ingredients together, except for the coating—so you’ll need enough bran or germ to make the mixture stiff and dry enough to shape into balls, which then may be rolled in the toasted sesame seeds, coconut, or chopped nuts.
VARIATIONS

Sesame Seeds
Sesame seeds made “Open Sesame” magic words. They come unhulled or hulled, brown or white, as well as a variety which is black. They are expensive if purchased in little boxes or bottles from the spice shelves, but inexpensive when purchased in bulk. Being small and solid, they will pass through the digestive system intact unless they are ground or well chewed.
Roasted sesame seeds complement carrots, cooked greens, grains, and salads, and when sprinkled on top, they make a decorative and flavorful garnish. Roast the seeds as you do nuts.
Sesame Salt (Goma Shio)
At Tassajara, goma shio is our standard table seasoning, used particularly on cereals, grains, and beans. Many people also like sesame salt with eggs and salads. Use seven or eight parts sesame seeds to one part salt.
Sesame seeds
Salt
Roast the sesame seeds in a skillet or in the oven; preheat the oven to 350°, if that will be your cooking method. Once they have begun to brown, add the salt and continue roasting. The seeds are ready when they can be easily crunched. Test them by taking a few out of the pan and letting them cool enough to chew on. Grind the roasted seeds and salt in a suribachi, a grain mill, or in a blender or Cuisinart. Or, again, pulse smaller quantities in a coffee mill reserved for spices and seeds. The seeds should be mostly ground, but some can be left whole. The whole seeds give added flavor when bitten into. Store in a closed container when not in use. Refrigeration will keep the sesame salt fresher.
VARIATION
Roasted sunflower seeds, whole or ground, can be partially substituted for sesame seeds.
TAHINI AND HALVAH
Two fairly well-known sesame products, aside from sesame oils, are tahini and halvah, which are both made from white sesame seeds. Tahini is a very creamy sesame butter and halvah is a sesame candy.
Tahini Shortbread
These cookie bars are incredibly rich and smooth.
MAKES ONE PAN, 8 BY 8 INCH
¼ cup butter
1 cup tahini
¼ to ½ cup sugar
½ teaspoon salt
Flour until firm (about 2 to 2½ cups)
Preheat oven to 350°. Cream the butter with the tahini. Add the sugar, salt, and then flour until the mixture is firm, working with your hands at the end. Press the mixture into a pie tin or square pan, making it about ¼ inch thick. It’s all right if it doesn’t come all the way to the edges. Mark into pieces and cut about halfway through. An almond or walnut can be pressed on top of each piece. Bake for about 30 minutes, or until the center is firm when gently pressed. Don’t wait for it to brown—the shortbread would be overly hard, dry and crumbly.
VARIATION
Use cashew butter or peanut butter.
GRAINS
Grains—brown rice, white rice, wheat, corn, rye, oats, millet, bulgur (cracked wheat), and buckwheat—are seeds, packed with just what seeds need to become plants: a germ from which the shoot will sprout and food for its growth, enveloped in protective husk and bran.
A staple food having a taste which is plain, earthy, and underappreciated, grains have the capacity to satisfy deep human hunger. However, people’s taste for grains varies widely.
People say that creamy smooth oatmeal is “heavenly” or “library paste.” About thick oatmeal they say, “You could chew it!” or “You had to chew it!” Cornmeal mush is either their favorite or they can’t stand it. Brown rice is a way of life or a poor substitute for bread. Put raisins in the cracked wheat, and you may hear, “How delicious” or “Please, no dessert with breakfast.”
Whole grains take a generous amount of cooking and chewing to be eaten. Unchewed whole grains are not digested. Because of the lengthy cooking and chewing involved in eating uncracked grains, people have discovered alternatives: wheat ground into flour and made into bread and pasta; corn made into polenta; wheat made into couscous. In fact, rice, millet, and buckwheat are the only grains suitable for cooking whole, and of these, buckwheat isn’t really a grain (grass seed); it is related to dock and rhubarb, which helps explain why it isn’t as tough as the others.
Cooking Whole Grains
Amounts: One cup of whole grain, when cooked, will generally serve four people, although quantities will depend on what else is being served.

Washing the grain: Rinse the grain once in cold water. Stir the water and grain around with your hands to gently loosen the dust and small bits of dirt. Pour out the rinse water through a strainer. If the water appears dirty, rinse again.
Preparing the pot: Rub oil around the inside of the cooking pot, both the bottom and sides. When you do this for grain and cereal dishes, the grain is less likely to stick and the pot will be much easier to clean.
Basic ways to cook grains: Although the ratio of water to grain and the length of cooking time varies, there are two basic ways for cooking whole or cracked grains. In the first, the grain is combined with cold water, while in the second, the grain is combined with boiling water.
THE COLD-WATER METHOD
Put the cleaned grain in an oiled pot along with salt and water. Cover, bring to a boil (the steam will be escaping from around the sides of the lid), then reduce to a simmer for the duration of the cooking time. Try not to look in, as precious steam will escape. Listen to the sounds and sniff the air to determine how the cooking is proceeding. When all the water is absorbed, there will no longer be a bubbling sound, but more of a popping or crackling, the sound of the grain toasting—you should be able to smell it—on the bottom of the pan. It is proper for the grain to brown slightly, but it’s done before you smell it burning. Open the pot and stir up the grain so that the drier kernels on top are mixed with the wetter ones on the bottom. Cover and let stand a few minutes before serving.
THE BOILING-WATER METHOD
This method starts with hot water and often with hot grain. Start the water heating and in the meantime sauté the grain, either with or without oil. Oil (or butter) will add flavor. Continue the sautéing to whatever shade of brown you prefer. (The toasting process develops the flavor but destroys vitamins.) Either add the grain to boiling water in a cereal pot, or do the sautéing in the pot, removing it briefly from the flame and then pouring in the boiling water. Use hot pads for this and watch out for the steam. For whole grains, cover the pot immediately after the water is added. Since the grain cooks some when sautéed, slightly less water is necessary to complete the cooking when this method is used.
Rice
Brown rice can be long grain or short grain, and I prefer the short-grain variety. Like wheat, potatoes, or other staples, rice is such a basic, wholesome food that simply cooking it well will bring out its natural goodness and provide a plain-flavored dish to refresh the palate.
Japanese white rice is washed several times to remove talc, which is used as a preservative, while brown rice is washed more as a precautionary “you-don’t-know-where-it’s-been.”
A pot with a tight-fitting lid is essential for this cooking method. If the lid is dented or the wrong size, excessive steam will escape while the rice is cooking, which means that the rice will need more liquid and/or more time to cook. If the lid does not fit well, cover the pot with foil, and put on a lid to hold the foil in place.
One cup of rice will serve three to four people (or even more people, if the rice is a modest side dish). For brown rice use twice as much water as rice, and a quarter teaspoon salt for every cup of rice. Butter or oil for a touch of flavor and heartiness.
Properly Cooked Brown Rice
All right, all you brown rice fans out there, here is a method that always produces perfectly cooked rice. It works for both short grain and long grain brown rice. You need a pot with a tight-fitting lid and plenty of time to contemplate.
MAKES 2 CUPS OF COOKED RICE
1 cup brown rice
2 cups water
½ teaspoon salt
1 tablespoon butter or oil
Rinse and drain the rice, then soak it in the water for 1 hour (optional). Put both rice and water into a heavy saucepan. Add the salt and butter and bring to a boil. Immediately reduce the heat to its lowest setting and cover the pot with a tight-fitting lid. Cook the rice for 45 minutes undisturbed.
Watch TV, prepare other dishes for dinner, or do your yoga asanas, but don’t look in the pot. The rice needs seclusion to turn out properly. To tell when it’s done just listen to the pot: no more bubbling, but a subtle, yet distinct crackling or popping sound. The rice on the bottom is becoming toasted. Leave the pot tightly covered. Just before serving, gently fluff the grains with a fork. If properly cooked and properly eaten (100 chews per mouthful), the brown rice will properly become you.
Pressure-Cooked Brown Rice
This makes the rice so tasty and easy to chew that people usually eat more of it than when it is just plain boiled.
Brown rice
Water (1½ cups for every 1 cup of rice)
Salt
Wash rice. Place all ingredients in pressure cooker. Cover and heat to boiling. Cook over low heat for 30 minutes. Then bring to 15-pound pressure and cook for 20 minutes more. Remove from the heat and allow to depressurize completely on its own. If necessary, the pressure cooker can be cooled by running cold water over the top. Remove cover and stir thoroughly. Replace cover without jiggler and allow to sit 5 to 15 minutes before serving.
Boiled White Rice
For people who have grown to love it—and I am one of them—the clean flavors are somehow like blue sky: heavenly.
White rice
Water (1¼ to 1½ cups for every 1 cup of rice)
Salt (optional; ¼ teaspoon for every 1 cup of rice)
White rice sometimes comes coated with talc. The talc is not appetizing to bugs and rodents and it’s not too good for people either, so that rice needs to be thoroughly rinsed off. It takes 5 to 7 rinsings to remove the talc. The rinse water should be nearly clear after the final rinsing.
The Japanese cook their rice without salt, but some could be added. Cook the same as for Properly Cooked Brown Rice, except that it will take only about 20 minutes of simmerng. Be sure to bring the water to a vigorous boil before turning down to a simmer. All with the lid on. When cooking is finished, open, stir, and fluff. Then let sit with the lid on for a few minutes. Of course a Japanese rice cooker will do this cooking of white rice quite reliably!
Parsley Rice
Even in hot weather this rice looks cool and delicious.
White rice, cooked
Parsley, minced
Butter
Salt
Pepper
Mix a generous amount of parsley with the cooked white rice so that it is well greened. Serve seasoned with butter, salt, and pepper.
VARIATION
Use bulgur, brown rice, buttered noodles, or spaghetti in place of the rice.
Whole Barley
Prepare this like brown rice, by either boiling or pressure cooking. Whole barley has a rather pleasant chewiness. By itself it is a heavy dish, but its flavor and texture make it an excellent addition to bean dishes, stuffings, and soups. Cook as a whole grain using two parts water to one part barley along with a touch of salt.
Whole Barley with White Rice
The whole barley adds a sturdy texture and earthiness to the heavenly white rice.
Barley
White rice
Water
Use about three parts of white rice to one part barley. Cook the barley as described under “Cooking Whole Grains” (using two parts water to one part barley). Clean the white rice, combine the cooked barley with the uncooked rice and water, and proceed with the Boiled White Rice recipe.
VARIATIONS
Millet and Buckwheat Groats
Both of these can be prepared by either of the two basic methods described previously, although most people prefer them sautéed first. Use one cup of grain to one and one-half cups water, with a quarter teaspoon of salt per cup of grain. Again, one cup uncooked grain to start with serves four to six, depending on the rest of the menu. Using the cold-water method, allow 20 minutes cooking time. If sautéed first, simmer for 10 to 15 minutes after adding the boiling water.
Bulgur (Cracked Wheat)
Bulgur is wheat which has been cracked, steamed, and roasted, so it is, in a sense, precooked. It is included here with the uncracked grains, since it is most frequently prepared as a dinner dish rather than a breakfast cereal. Use one part bulgur to one and one-third or one and one-half parts water. Sauté the bulgur first, then boil. Cook like white rice.
Grains with Vegetables
More elaborate dishes will be considered in part two. For now, let’s look at simple grain-vegetable combinations. Onions are utilized most frequently because they add a richness and depth of flavor. Celery, green peppers, and carrots are often used in combination with onion.

Onions and Grain
You’re winging it here—how much water to add; how long to cook depending on which grain you’re using. You could always try the “knuckle method” if you want: the water level is one knuckle (about an inch) above the grain for most every grain, except for brown rice, barley, and wheat berries where the water needs to be two knuckles (about two inches) above the grain. And wondrously enough, no matter what sized pot or how much grain, this method (pretty much) works!
Onion, diced
Oil
Grain
Water, boiling
Salt
Sauté the onion for several minutes in the pot in which you’ll be cooking the grain. Remove the onion, add a little more oil, and roast the grain for 5 minutes. Stir in the onions, salt, and add the boiling water. Cover and simmer until well done.
VARIATIONS
Refried Grains
The grain is completely cooked, then added to sautéed vegetables and fried—an excellent way to use leftover cooked grains, or vegetables for that matter.
Grain, cooked
Onion, diced
Celery, carrot, or green pepper, diced
Garlic, minced (optional)
Ginger, grated (optional)
Eggs
Soy sauce
Green onions, sliced fine (optional)
Nuts (optional)
Cheese, grated (optional)
Not all of these vegetables need be used, perhaps just onion and one vegetable—unless you have readily available leftovers, in which case you’re set. Stir-fry the vegetables for 4 to 5 minutes (if raw), adding garlic and ginger, if you’re using it, toward the end. Break up the grain and mix it with the vegetables. Continue frying over low heat while stirring and scraping the bottom of the pan. (If necessary to keep from sticking, add some liquid.) When the grain is heated through, season with salt, pepper, and soy sauce. Make a space in the center, drop in an egg or two, and quickly stir in with the grain to scramble and disperse. Garnish with green onions, nuts, or grated cheese.
VARIATIONS
Grain Soup
Whole grains can be made into soup with the addition of extra water. You’ll need six to twelve parts water to one part grain to make this flavorful broth.
Grain (rice, barley, buckwheat, or bulgur)
Water
Salt
Oil the pot around the sides and bottom. Roast the grain in a little oil if desired. Add salt and water (larger quantities for thinner soup), bring to boiling, then simmer for 40 to 60 minutes or longer. White rice cooked this way makes a thick, creamy soup base. (For more about grain soups, see the chapter on soups.)
Greek Lemon Soup
I’m not spelling out quantities here, but one way to finish off a grain soup is with eggs and lemon: so simple, such stunning flavors. My one stipulation: be generous with the lemon juice, say a couple tablespoons per egg, and one egg per person.
Grain
Water
Salt
Lemon juice
Eggs
Prepare the grain and add to the water and salt as described for the Grain Soup. When the grain is thoroughly cooked, beat the eggs in a separate bowl. Whisk the lemon juice and some of the hot soup into the eggs a little at a time until the eggs are well heated. Then the heated egg mixture can be whisked into the soup. Check the seasoning. Serve immediately—further cooking will tend to cause the eggs to scramble rather than remaining liquid.

Cereals
Grains go through a mill to have their hulls removed. This hulling removes the outermost layer of bran, which is also known as the chaff. Polishing a grain removes further layers of bran. Hulled grain is milled into cereal or flour. Cereals are coarser, with distinct pieces of meal, while flours are completely ground into a powder. Once grains are broken up or ground in this way, water enters more readily, cooking time is reduced, and chewing is made less arduous. Some grains, especially oats, are rolled, which means they are flattened between rollers. Oatmeal is usually rolled and then further broken up and processed. Grains milled for cereal are often known as creams: cream of wheat, cream of rice, and so on. Flour can also be used to make a very creamy cereal.
COOKING CEREALS
Cereals can be cooked by either of the two processes already described for cooking grains. For cooking cereal, a thick-bottomed pot is preferable, since the mush tends to burn on the bottom otherwise. Cereal cooked in a thin-bottomed pot needs more stirring and a very low flame. In either case, oil the sides and bottom of the pot before adding the cereal and water (cleaning will be easier).
Basic Hot Cereal
A hot breakfast cereal will digest and nourish better than cold processed cereal foods (if I may say so)—and there are so many great choices.
SERVES 4 TO 6 PEOPLE
3½ cups water
¼ teaspoon salt
1 to 2 tablespoons oil or butter
1 cup cereal: rice cream, barley cream, cracked meal, bulgur wheat, buckwheat cream, polenta, or 1½ cups oatmeal or rolled oats)
Start the water heating in a separate pot, while the cereal is being sautéed in the cereal pot. Stir the roasting cereal for even browning, until a pleasing grain aroma greets your nose. Take the pot off the fire, let it sit a minute or two, and then pour into the boiling or nearly boiling water. Use hot pads! Stir briskly, then return to a low flame and continue cooking for 10 to 30 minutes. To keep the cereal from burning or to thin it out, add additional hot water, and use a flame tamer or very low heat.
Serve with milk and sweetening, possibly yogurt and roasted nuts and raisins—or find some other foods you enjoy to have with the cereal.
VARIATIONS AND ADDITIONS
Pasta
Pasta is, for many people, a beloved way of eating grain. Spaghetti, egg noodles, linguine, fettucine, fusilli, rigatoni, ziti, macaroni, lasagna—the assortment of shapes and sizes is remarkable. The versatility of pasta is easily forgotten. Aside from being served with the usual sauces—frequently tomato or cream—pasta is also excellent in casseroles, soups, and sometimes salads.
Basic Boiled Pasta
For cooking noodles, the directions are on the package, aren’t they? One pound serves four to six, generally.
Water, boiling
Salt
Oil, for cooking
Pasta (noodles, spaghetti, lasagne, macaroni, fettucini—any type)
Olive oil or butter
Salt
Pepper
Herbs of your choice
Balsamic vinegar (optional)
Start the water heating, add some salt and a couple spoons of oil, which helps keep the pasta from sticking together. When the water is boiling, fan in the noodles or spaghetti so that they can separate somewhat. Bring the water back to a boil, then reduce the heat so that the water is just boiling.
There is, of course, the 8-minute method for determining when pasta is done, but there are some other possibilities, too. I’ve heard that some famous restaurants have a spaghetti range: an empty wall or ceiling at which a string of spaghetti can be tossed. If it sticks to the wall it’s done; if not, keep cooking. Many people cook spaghetti al dente—biting a piece between two front teeth to test for proper texture—I take some out and taste it.
When cooked, drain the pasta and save the cooking liquid as you would when cooking vegetables. If you let the pasta sit at this point, it will tend to lump together, so I like to toss it with a little butter or olive oil right away, then let it sit above hot water if it’s not be served until later. (Or you may have a sauce or vegetable mixture ready to receive the pasta.) Season with salt and pepper and other herbs of your choice: garlic, fresh basil, or perhaps dried thyme. A sprinkling of balsamic vinegar is usually invigorating.

DAIRY PRODUCTS
Dairy products have been such an integral part of Western cuisine for centuries—and remain a dietary staple in parts of the world: butter or ghee for cooking and flavoring; cream for richness in soups and sauces; milk for drinking and in cakes; yogurt, well, for everything.
There are those who question the health benefits of dairy. I’m in the Julia Childs school: while whipping butter into mashed potatoes, she said, “I hear that some of you are not eating butter, well . . . you can always whip in some cream.” In any case, you will make your way with dairy as you make your way with other foods as well. I especially savor and enjoy that touch of cream in my morning coffee, eggs cooked in butter, fresh mozzarella with tomatoes, and well-crafted (frequently local) cheeses.
Milk, Buttermilk, Butter, Cream, Sour Cream, Cream Cheese (Neufchâtel), Cottage Cheese, Cheeses, Yogurt
While some people manage to sustain themselves without milk products, others find out that dairy is what makes a vegetarian diet possible and enjoyable—milk on cereal and berries, grilled cheese sandwiches, cottage cheese salads, cheesecake, and whipped cream. Milk products turn up throughout the day and throughout the menu in dressings, sauces, soups, spreads, and desserts.
As a rule, milk products need very little cooking. They tend to brown or burn easily and they frequently curdle (or separate) with heat. The smell of burnt milk is extremely pervasive and not at all appetizing, so be sure to heat or cook milk with a moderate flame. Milk will tend to burn before it gets to the boiling point, and even in recipes which call for boiling, it needn’t really be that hot.

Butter also will burn if it is heated to the same temperatures to which oils are heated for sautéing. Used together with a regular cooking oil, butter can be heated to a higher temperature. Otherwise, cook more slowly when using butter. Unless you are using ghee—where the milk solids have been removed—which keeps extremely well and can be heated to high temperatures. Cheese does not need cooking. Once melted, it begins to get tough and stringy with further cooking.
Cottage Cheese
This has unexpected versatility and is one of our favorite foods.
Cottage Cheese Salad
Often cottage cheese is served plain with fruit, when there are so many seasoning possibilities. Here it is sweet and sour with lemon and honey, but you can also enjoy a savory combination with herbs.
Cottage cheese
Choice of one or more: apple, orange, banana, pear, raisins
Sunflower seeds
Walnuts
Lemon juice
Honey or sugar
Salt
Sour cream or yogurt (optional)
Dice all the fruit and mix with the nuts and seeds. Season with lemon juice, sweetening, and a hint of salt. Add the cottage cheese. This salad can be made more creamy with the addition of sour cream or yogurt.
VARIATIONS
Ricotta Cheese
This is another inexpensive soft cheese, similar to cottage cheese but with a smoother consistency. It can be used in place of cottage cheese in any of the preceding recipes.
Sour Cream
An instant sauce for vegetables, salads, potatoes, and noodles, sour cream is also used in several soups—including beet, carrot, yam—to offset their sweetness. Yogurt can replace sour cream, not in terms of calories, but in terms of protein, tartness, moisture.
Cheese
We use mostly cheddar, Monterey Jack, Swiss, and smoked cheese with lesser amounts of Parmesan or Asiago. Many recipes using cheese appear in other sections of this book. If a meal seems to lack substance or character, cheese is often the answer, completing vegetable, grain, bean, and egg dishes, as well as soups, sauces, and salads. Here are a few recipes not mentioned in the other sections.
Closed-Faced Grilled Cheese Sandwich
The choice of cheese, the quality of the bread will make the sandwich what it is. (And for those of us still eating wheat and dairy, grilled cheese sandwiches still hit the mark.) Several condiments can enliven the sandwich!
Butter or oil
Bread
Cheese
Mayonnaise or mustard (optional)
Dried thyme or oregano (optional)
Fresh basil or cilantro (optional)
Salsa (optional)
Butter or oil the outside surfaces of the bread and put the cheese in between (slather on some mayo or mustard if you’d like). Fry over medium-low heat in a covered frying pan. Turn it over to cook the other side. Sprinkle in some dried thyme or oregano, or add some chopped fresh basil or cilantro. Or open it briefly and spoon in some salsa.
Cheese with Fruit
Dessert or snack. Taste the cheese and fruit carefully to see which combinations you prefer.
Choice of fruit: apples, pears, grapes, oranges, other
Choice of cheese: cheddar, Monterey Jack, Swiss, provolone, Edam, Gouda, cream cheese ball, other
Cut the cheese in slices, sticks, or wedges. Serve the fruit whole with knives for slicing at the table, or preslice the fruit. Apples when crisp and juicy seem to be a refreshing complement to most any cheese. A glass of wine?
Cream Cheese (Neufchâtel)
This versatile cheese product can be used straight as a spread, thinned as a sauce, or to replace cream in cooking. It is rich in both protein and calories. Neufchâtel is made in the same way as cream cheese, but with milk in place of cream so it has fewer calories. Nowadays many cream cheeses are available without all the added gum.
Cream Cheese Ball or Log
The cream cheese holds the other cheeses and seasonings together.
Cream cheese
Cheese, grated (whatever kind you have)
Blue cheese
Milk
Green onion, chopped
Salt
Pepper
Garlic, minced
Dry mustard
Parsley, minced
Thyme, oregano, or Herbes de Provence
Roasted sesame seeds
Work the cream cheese until it is creamy. Mix in blue cheese and one or more kinds of grated cheese for flavoring. Add a small amount of milk if the mixture gets too thick. Add green onion and seasonings to taste. Shape into a ball (or balls) or a log, and roll in the roasted sesame seeds.
VARIATIONS
Yogurt
This is a cultured milk product, which is easier to digest than milk, and it contains beneficial probiotic lactobacilli that can produce B vitamins in the intestines and promote healthy digestion.
HOW TO MAKE YOGURT
The bacteria in yogurt grow in milk and cause the milk to thicken over a period of three to eight hours. As part of their life processes, these bacteria convert milk sugar into lactic acid. The basic process for making yogurt is to introduce yogurt bacteria into some warm milk and keep the milk warm for several hours until it thickens.
To grow, the yogurt-making bacteria need milk which is at a hospitable temperature, 90° to 120°, or most appropriately, 105° to 110° (barely warm on your wrist). At higher temperatures these bacteria are destroyed and at lower temperatures they do not grow well, but other bacteria will. Sometimes the milk is first heated to 180° to kill unwanted bacteria, then cooled to yogurt-making temperature. To start the first batch of homemade yogurt, buy a small amount of good-quality plain yogurt. Buy one that you like, since the starter will produce yogurt of a similar flavor. After you’ve made the first batch you can, of course, use some of it to start the second.
What milk to use? We use mostly dry milk to make our yogurt, twice as much as is normally used to make milk for drinking. Concentrated (not evaporated) milk also makes an excellent creamy yogurt, diluted one to one instead of one to two.
How to keep the yogurt-milk warm until it thickens? There are several ways to do this. The yogurt-cultured milk is kept in covered bottles or pots. These bottles or pots should be thoroughly cleaned and preheated. One way to keep them warm is to place them in warm water over a pilot light on top of a gas stove, or in the oven.
No pilot light? Another way is to heat the oven to 350° for about five minutes, then turn it off and put the yogurt in, padded with towels. If the oven cools off too much, turn it on for a couple of minutes every hour or two. Often a seventy-five-watt light bulb will keep an oven, or a cardboard box, warm enough to culture yogurt. Get a cord with a socket on the end of it, then cut a circular hole in the box just large enough for the socket to fit into it. When the socket is in place, screw the light bulb in from the inside. If you are using the light bulb in an oven, the oven door should have a good spring, or it may not close well. One more method is to wrap warm milk bottles with towels and put them in a styrofoam ice chest. At Tassajara we put the yogurt bottles in wooden crates, and hang the crates in the hot baths—a perfect 108° temperature. The yogurt loves the baths as much as people do.
Yogurt should thicken completely in, at most, 8 hours. Failure can result from the milk being too hot when the yogurt was added, the mixture not being kept warm enough, the yogurt starter being defective, or antibiotics being present in the milk. You can try again with the same batch of milk if you heat it slowly to 180° to kill any foreign bacteria, cool to 110°, add some more yogurt, and start over again.
Dry-Milk Yogurt
Note: The more yogurt used in the starter, the tarter the new batch of yogurt will be.
4 cups water, at about 115° to 120°
2½ to 3 cups dry milk
1 to 2 tablespoons yogurt
Mix the water and powdered milk thoroughly together. The mixture should be at about 110°. Mix a few tablespoons of this with the yogurt, then pour the thinned yogurt back into the milk. If not already in a clean preheated bottle or pot, pour the mixture into same and cover. Set it in the warmed space you have devised for it (see above). Check in three hours, and periodically thereafter. When it has begun to thicken, refrigerate it.
Whole-Milk Yogurt
1 quart whole or skim milk
4 teaspoons yogurt
Heat the milk gently to 180° (little bubbles forming around the sides and bottom of the pot). Pour into the clean bottles and let cool to 110°. Mix a little of the warm milk with the yogurt, then divide this mixture evenly among the bottles. Cover and put in a warm place. Refrigerate when it begins to thicken.
Eggs
The protein in eggs comes closer to being completely utilizable by the body than that of any other single food. Eggs are extremely versatile and, for many people, nearly indispensable, due both to their high nutritional value and to the fact that they can be cooked in so many different ways. Eggs can be fried, poached, scrambled, boiled, or baked. They can also be added to salads, salad dressings, soups, sauces, casseroles, and desserts. Eggs carry the oil of mayonnaise and the butter of hollandaise.
As a rule, eggs are cooked with moderate heat, so that they will be tender rather than leathery. When heated too fast in a sauce or soup, eggs will scramble rather than thickening and enriching. If the heat is too high for a custard or meringue, the eggs will harden and “weep” water, rather than being soft and heavenly.
Standard Fried Eggs
Sunny side up, over easy, glorious. If you like your eggs lacy brown, you probably already know how to get them to come out that way. The main difficulty with fried eggs is getting the top of the white cooked without the white becoming leathery and the yolk becoming solid. Start with a moderately hot pan, so that when the egg goes in there is just a slight sizzle and the white barely bubbles, gradually turning white.
Eggs
Butter or oil
Put a generous amount of oil or butter in a moderately heated frying pan. (Eggs will stick less with butter.) Break the eggs into the pan. If you’re cooking more than one egg and you want them done at the same time, break them into a bowl first, then slide them gently into the frying pan together—they can be cut apart later. As they cook, spoon butter or oil on top of them to cook the upper surface. These eggs can also go over easy when they are firm, flipping them boy-scout fashion with the pan or using a spatula. (I use a rubber spatula with my nonstick pan.) Leave very briefly (half a minute possibly), then flop back and serve.
Steam-Fried Eggs
This is the combination fry-steam method.
Eggs
Butter or oil
Water or stock
Use a modest amount of oil or butter in the moderately heated frying pan. If using butter, wait for it to stop foaming and add the eggs. After the eggs are in, add a tablespoon or two of water, and cover the pan. (If these fried eggs are done on a griddle, an inverted baking pan can serve as a lid.) Leave on moderate heat. Steam from the water will cook the top of the eggs. Give them a minute or two, then take a peek. The white should be all cooked and the yolk glazed, but still runny.
VARIATIONS
Poached Eggs
At best these eggs are tender, plump, and juicy. Not without reason are they the eggs of Benedict. A warning: they can be a headache. Have a dishtowel or sponge, rubber spatula, and a perforated spoon at the ready.
Eggs
Water or stock
Vinegar
Salt
The eggs are cooked in water. Have at least a cup of water per egg, and for every cup add about ½ teaspoon of vinegar and ½ teaspoon of salt. The vinegar is to help keep the egg from spreading out once it’s broken into the water.
Heat water, vinegar, and salt to boiling, then turn heat down to medium low. As soon as the boiling stops, start putting in the eggs, depositing them at the surface as much as possible, rather than splashing them into the water. They should spread a bit, but not all over the place. Let them cook slowly for a minute or so, and then gently loosen the eggs from the pan bottom with a rubber spatula. Cook another 2 or 3 minutes, until they can be lifted from the water without breaking. Try picking them up with the perforated spoon and, if solid enough, remove from the water, then rest the spoon on the folded-up dish towel or clean sponge to allow the excess water to be absorbed. Remove the egg from the spoon to a heated platter. When all the eggs are on the platter, more water can be absorbed by tilting the platter slightly, and mopping up the water with a paper towel. From there, put the egg onto the toast or English muffin.
Eggs can be cooked this way in soups a few minutes before they are to be served. In that case allow an egg per person, with possibly an extra one for breakage.
Boiled Eggs
Sometimes vinegar is added to the water to keep the egg from spreading if there happens to be a crack in the shell.
Eggs in shell
Water
Vinegar (optional)
Soft: Bring water to a boil, then turn down to simmering. Put in the eggs for 3 minutes. Remove and drain. Run cold water over the eggs briefly to stop the cooking.
Hard: Put the eggs in cold water with a spoonful of vinegar. Heat to boiling, then cover, turn off the heat, and let sit for 6 to 7 minutes for yolks that are orange and slightly moist with the whites solid; 10 minutes for yolks that are yellow and dry. Drain off hot water and add cold water to stop the cooking. Putting the eggs in cold water will also make them easier to peel.

Scrambled Eggs
Scrambled eggs are best cooked with moderate heat, whether cooking them until they are completely dry, or just until they are slightly moist. The eggs go on cooking even when the frying pan is removed from the flame, so for moist eggs remove the pan from the fire before they are done.
Eggs
Salt
Pepper
Milk or water (optional)
Oil or butter
Beat the eggs and season them with salt and pepper. Add a little milk or water (a tablespoon or so per egg), if you like—the eggs will be softer and fluffier. Cook in a well-oiled, moderately hot pan, stirring frequently, and scraping the cooked egg off the sides and bottom of the pan. If you want them smooth, whip with a wire whisk toward the end of cooking.
Omelets
Eggs
Milk or water
Salt
Pepper
Oil or butter
Beat the eggs, add a tablespoon of milk or water per egg, and season them with salt and pepper.
The No-Stir Method: Cook in a well-oiled, moderately hot pan. (Again, eggs will stick less with butter rather than oil.) Pour in the eggs when the butter stops bubbling but is not yet browning, and a “skin” will form right away on the sides and bottom. Let the eggs cook slowly without stirring for a couple of minutes, so that the skin thickens considerably. Lift the edges of the thickened egg and tilt the pan so that the liquid egg runs underneath. Repeat this process of cooking, lifting, tilting as necessary to complete the cooking of the omelet.
The Constant-Stir Method: This method makes exceptional eggs. Pour the seasoned beaten eggs (with a tablespoon of milk or water per egg) into a well-oiled, moderately hot pan, and do the cooking over low to moderate flame. Stir continuously with a wire whisk. The eggs are meant to thicken gradually without scrambling. When they have gotten quite thick, so that there is a deep furrow following the whisk around, stop stirring and turn the heat up slightly and cook briefly so that the omelet sets.
Adding Vegetables to Omelets or Scrambled Eggs
Except for very tender vegetables such as tomatoes, avocados, sprouts, and possibly squashes, I prefer to sauté the vegetables before adding them to the eggs. Slice or dice any vegetables you happen to like or have on hand and then sauté them. If making scrambled eggs, add the beaten seasoned eggs to the vegetables and continue cooking as in the scrambled egg recipe. Omelets can be made with vegetables this same way, but the eggs tend to stick to the pan, so I prefer to remove the sautéed vegetables from the frying pan and then get the eggs started on their own—in a clean pan with fresh butter or oil. (This is a bit more work, but the eggs will definitely stick less.) I find this especially helpful for developing the “skin” of the omelet which can then be lifted to have the uncooked runny egg run underneath. The (still warm) vegetables can go on top toward the end of the cooking.
Adding Cheese to Omelets or Scrambled Eggs
Cheese doesn’t need cooking, just melting, so add it toward the end of the cooking. Any grated or dried cheese can be used inside, and cheese in strips or slices can be artfully arranged on top of the omelet.
Cream cheese or Neufchâtel, cottage cheese, or ricotta can also be used. These make eggs wonderfully soft and creamy. Omelets with milk or cottage cheese in them won’t become runny if cooked slowly. Faster cooking makes the whey separate out of the milk or cottage cheese.
Omelets are often folded in half toward the end of their cooking, so that the cheese and vegetables inside heat thoroughly. It also makes the filling a surprise.
Especially if the omelet is being served for dinner, you can accompany it with a sauce: either plain white, brown, mushroom. or cheese (see the chapter on sauces).
Seasonings for Omelets or Scrambled Eggs
One of the best ways we’ve found to season eggs is with soy sauce replacing the salt. Herbs to try with eggs include thyme, basil, tarragon, marjoram, oregano. Other seasonings to use in moderate amounts include garlic, curry powder (one friend swears by her curry powder and Parmesan cheese scrambled eggs), chili, ginger.