Now, we get to the good stuff: the ties. Once you’ve thumbed through the previous pages dozens of times and successfully tantalized your rope bunny on numerous occasions with a simple tie or two, you should be itching to move on to the next level of your rope bondage adventure. If you haven’t practiced, then be a good little sub and go back to chapter 6.
We’ll start off with some basic ties to use on one body part; this way, you can progress to tying your ravishing partner’s wrists to your metal bedframe while you go to town on his nether regions, or tie your slave’s arms together, behind her back, so you can play Kinky Police and Rowdy Protestor with her completely at your mercy. You’ll see that there are variations of many of the ties—a way to go a little further, or to turn that upper-body tie into a full-body tie. You should practice these separately and together; you never know when your feisty little sub might need a bit of extra restraint! These ties can be used for sex in a number of ways. Of course, the poses suggested here are just the tip of the iceberg; I’ll let your filthy mind do the rest of the work.
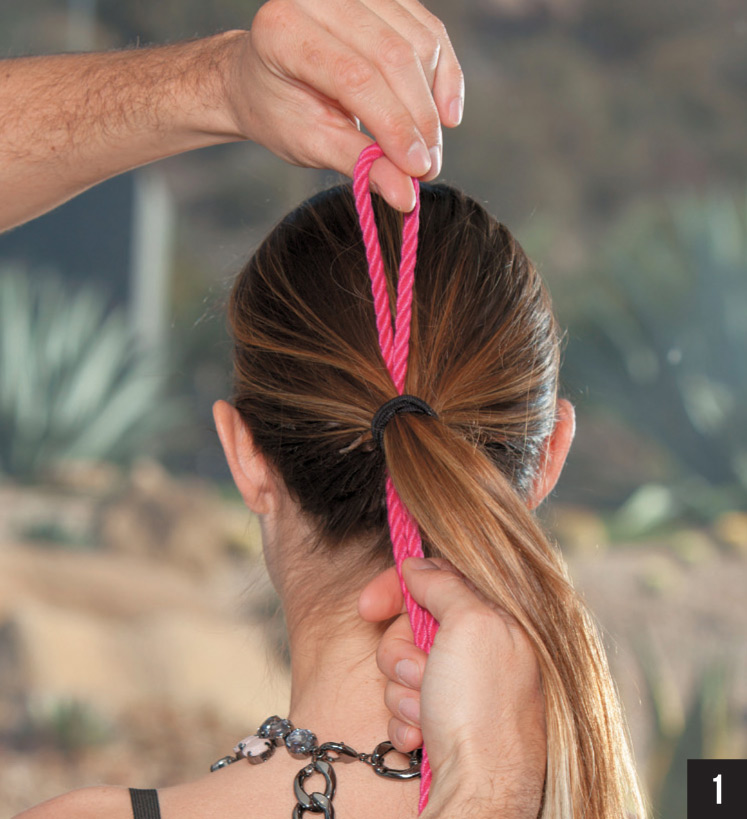
1. Start by taking the middle of the rope and make an overhand knot around the base of the ponytail.

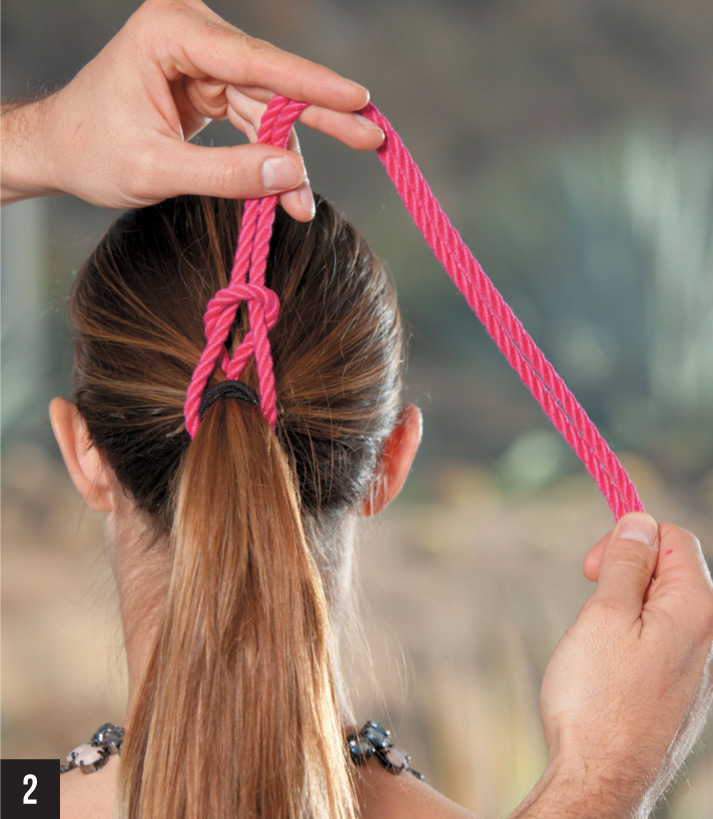
2. Take the loop part and start to tuck it down through the hair above the base of the ponytail, against the head.

3. Lift up the ponytail and pull it all the way through, leaving about an inch and a half down below.
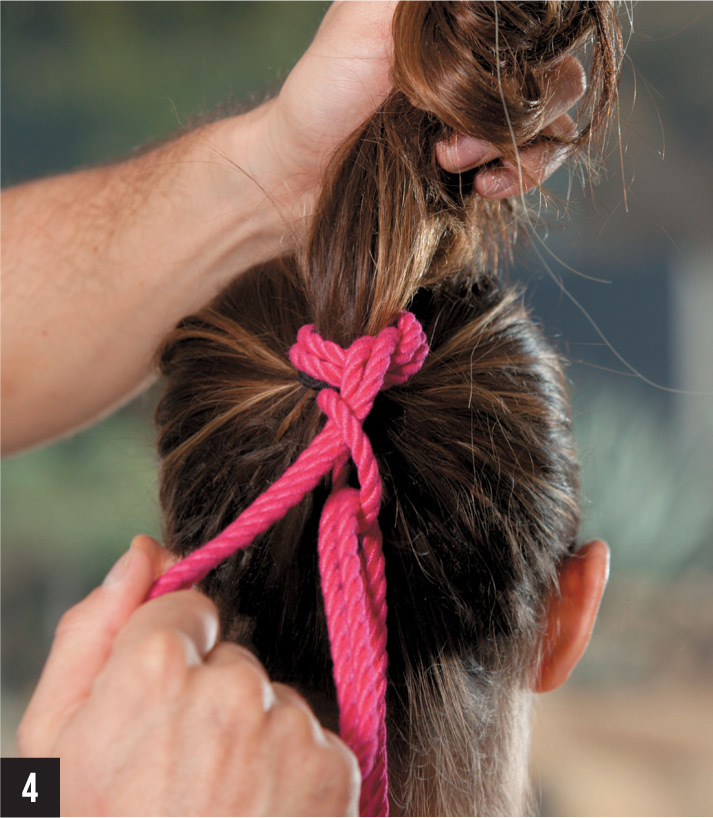
4. Now feed the free end of the rope through the loop and snug it up.

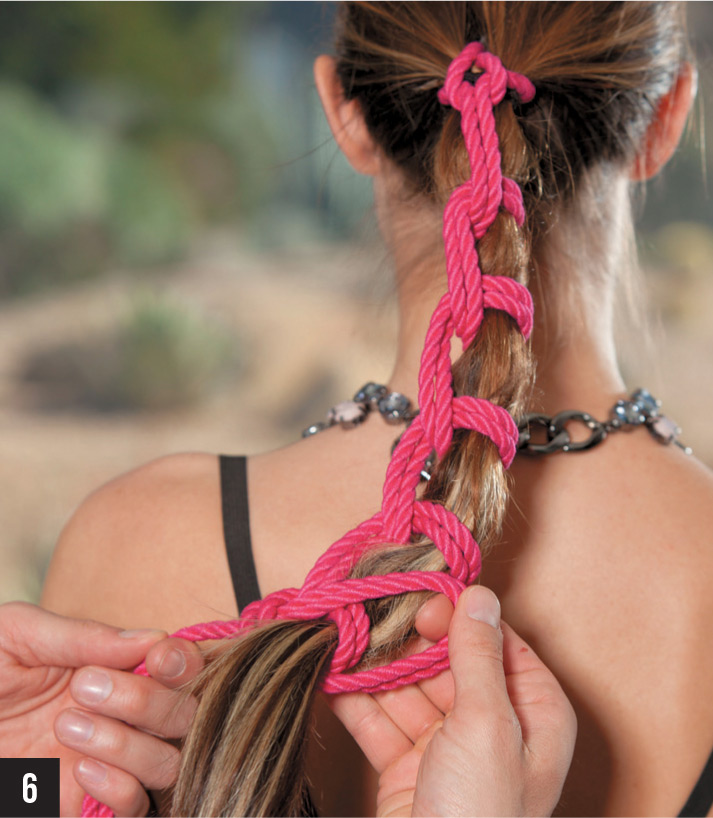
5. You have a firm base to start braiding from. Gather the hair into three sections, put the two pieces of rope into two sections, and start braiding.

6. Braid all the way to the end, then form a large loop and pull it through.
FINAL: Tighten it at the bottom and enjoy.
1. Start by pushing the loop up from the bottom, behind the hair elastic.
2. Bring the long end of the rope up over the hair and feed it through loop. This will form a secure base.

3. Now make a loop with the free end on the inside of the loop.

4. Pull it tight. The form of this turn in the rope will hold it in place.

5. Repeat all the way down.
6. When you get to the end, finish it off with an overhand knot up against the last turn in the rope.
FINAL: It looks long and neat, ready for a night out at a fetish party!
There is something very powerful in having your lover kneeling at your feet. This is a perfect tie for getting your partner into a comfortable and proper kneeling position and keeping him or her there. There are many ways to tie someone in a kneeling position, and this is the easiest to start with. It has a nice wide band across the leg, which makes it very comfortable.
1. Begin with having your partner kneel and make three wraps around his or her leg. You will find it easier to wrap if you keep the wraps up near the thigh because of the space created where the foot meets the leg. It is a natural space as shown here.
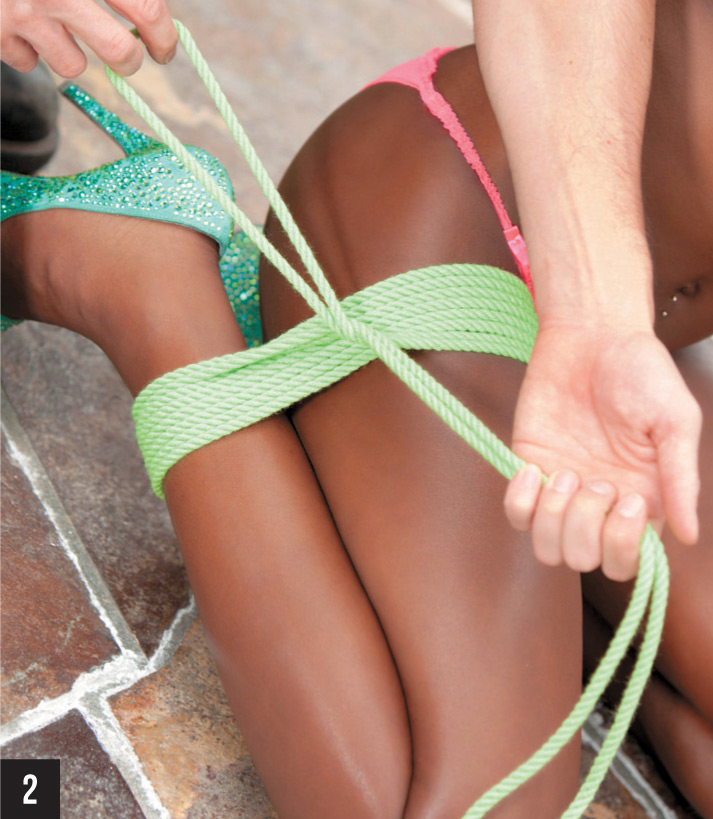
2. Finish the wrapping so you have about 14 inches (35.5 cm) left of the loop end. Cross it with the free end.

3. Now take the free end, tuck it down, and wrap it around the other wraps on the other side.

4. Pull it up again and cinch it tight. Now you are set up to finish this as a Bula Bula (page 86).

5. Push the loop over the final free end and cinch it down a second time.

6. Tuck all your ends in. You’re almost there!
FINAL: Isn’t there something romantic about having your lover kneeling tied at his or her feet while a quiet moan escapes his or her lips?
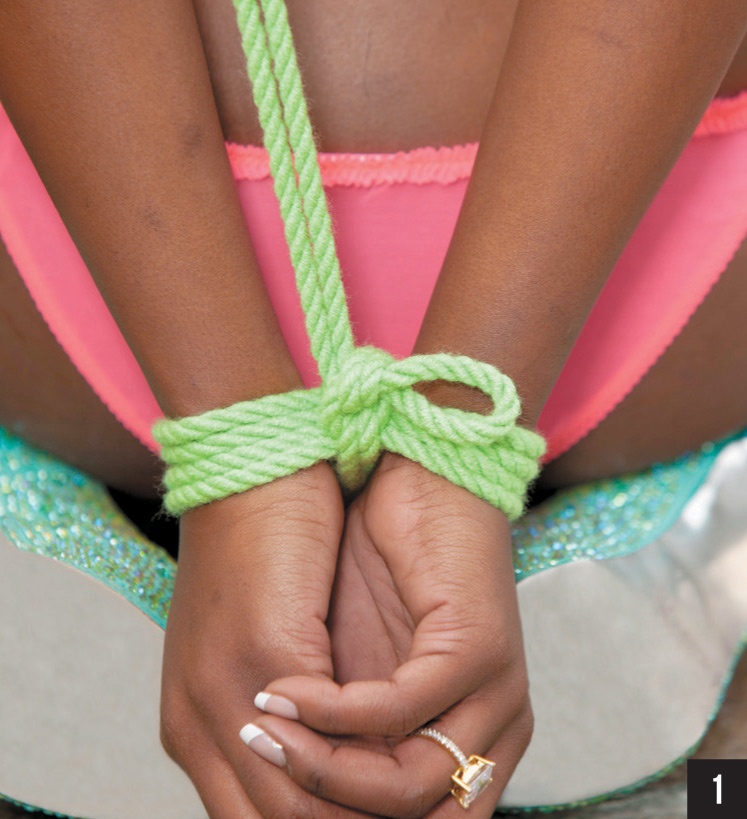
1. Begin with a basic Two-Column Tie (page 98) around the wrists

2. Bring the rope up vertically and wrap it around his or her upper arms—above the elbows. The rope will want to slip if you don’t have enough tension on it. Tip: Ask your sexy partner to push gently against the rope while you are putting the wraps on.

3. When the wraps are on, you will pass the rope around the middle, just like you did with the kneeling tie. Pick up the wraps on the other side and gently pull the arms together at the elbow and cinch it down. Tip: Not everyone’s body can do this, and there is nothing wrong with that. A way to help your body a bit is to raise your elbows upward; that pulls the elbows away from the body and gives more room for flexibility. Listen to your partner: You DON’T want to tie to the point of pain.
4. Take the rope and come over the left shoulder. Instead of crossing the chest, just drop the rope down and through the left armpit and bring it across the back. I know it is hard to see in this picture, but stay with me on this one—it is going to look awesome in a moment!
5. Come across the back, up through the right armpit, and over the right shoulder, and now back to the cinch where the elbows are deliciously trapped.

6. You should be almost out of rope. Finish the tie in a nice pretty way. Extra points if you make a bow!
FINAL: Now your partner is completely under your control! You can lift the arms gently.
Tip: Having your partner bend forward will let his or her arms come higher and make the position feel more submissive. Make sure to go slow and gently with this though; you want a sexy stretch, not a painful one.
1. Capture the wrists using the Wrists Behind tie (page 96) and come up over the right shoulder, then down through the armpit to the back.
2. Come across the back, up through the left armpit and over the left shoulder, and then back to the center.

3. You don’t even need a knot here, just a few wraps to keep it all in place.

4. Now, come up through the right armpit again, across the chest, and pull it through the left shoulder rope.

5. Come back and under the right shoulder rope. It should match this picture.
6. Form a quick Munter Hitch (page 90) and go across the chest and through the left armpit to the back and tie it off.
FINAL: Now that he’s restrained so handsomely, its time to take control of his cock. It takes a strong man to be in this kind of rope!
This is a very basic beginning to a great Futo tie (a Western name for a Japanese bondage standard). It is more complicated than the simple Two-Column Tie (page 98) but it looks very pretty and is for when you are ready to take the next step. It has the added bonus that the multiple wraps spread the tie out and make it much more comfortable than the Two-Column Tie. The knots run up and down both sides. This particular Futo has a very simple connecting of the horizontal wraps.
1. Start with a simple Bula Bula (page 86) or Sommerville Bowline (page 92) around the ankle.

2. Wrap from the bottom upward, keeping the lower leg pushed against the thigh. This tie works best when the leg is tight to the body and the wraps start high on the thigh up near the hip joint.

3. Make four wraps, then when you come around the top, bring a final half wrap around to catch the top horizontal wrap, just like this.

4. Make a simple overhand wrap around each horizontal and work your way downward like this.

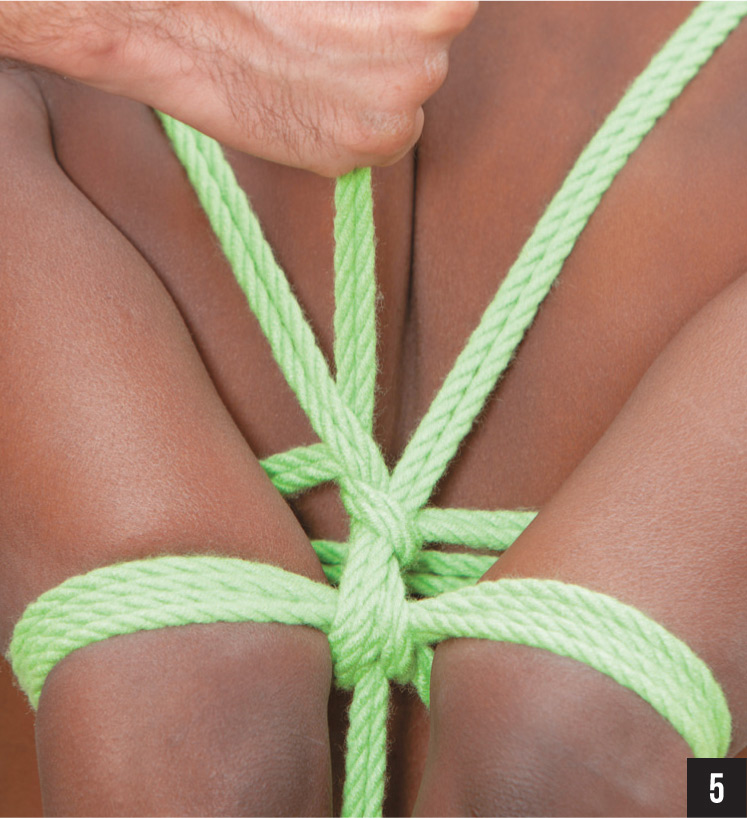
5. Once you reach the bottom and have it wrapped, tuck it under the last wrap and through. Then get your sexy rope bunny to bend her leg forward so you can do the same to the outside, working your way upward.

6. If you have a lot of rope left once you reach the top of the knee on the outside of the leg, retrace your steps, building a new layer over the top of what you just made, coming back through and back up the inside, wrapping in a twisting motion around all the verticals, just to make it pretty and keep the rope from getting tangled in the rest of your playtime.
FINAL: And what happens when you get them all tied up with their legs spread? I’m sure you can think of a few tasty things to do!
1. Here we see Allura with a simple Two-Column Tie (page 98) applied to Celeste’s ankles.

2. Come around the back with the rope and make two wraps around the shins.

3. See how she tucks the rope up and over the wraps on the other side of the vertical rope?

4. You don’t even have to tie a knot in the back if you can keep the tension on the rope. Come between the legs and up over the shin wraps.

5. Come back through and make a wrap around the vertical rope again.

6. Repeat all the way up the body, making wraps every 10 inches (25 cm). Tie just below and above the knees—not right on the joint.
FINAL: If you want, you can continue the tie all the way up the body! What a lovely way to spend a sunny afternoon on the lawn.
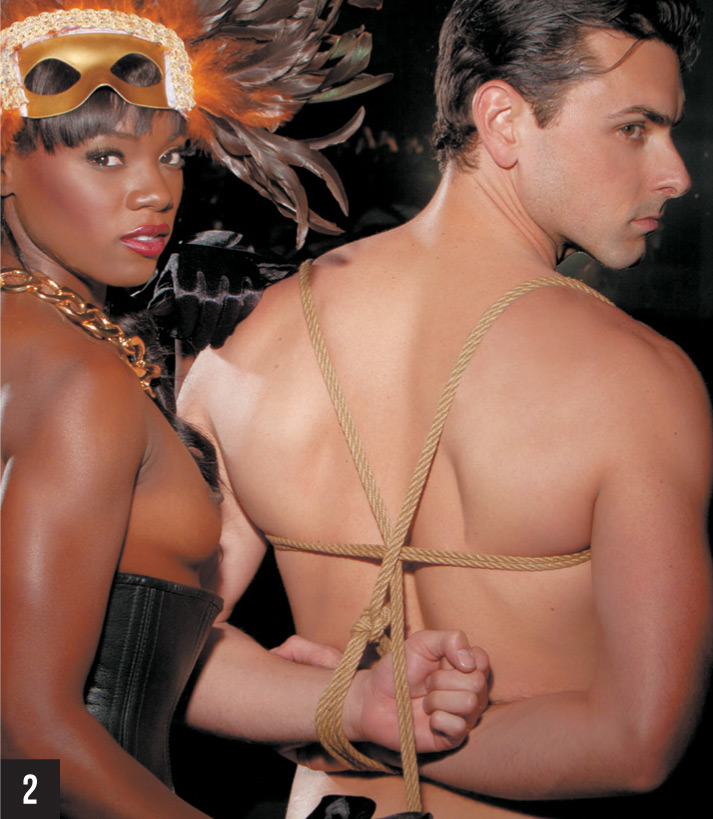
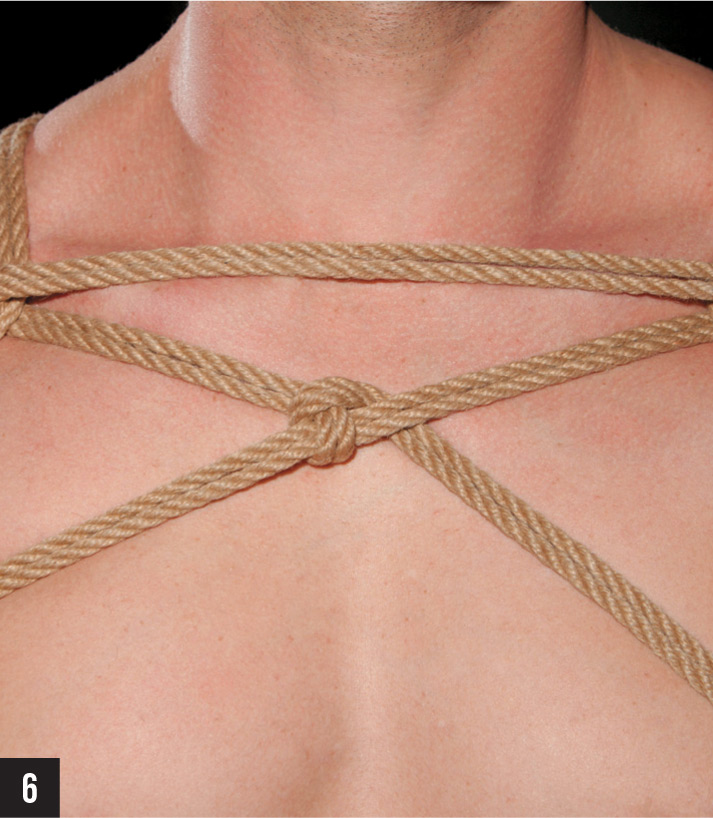
This tie builds somewhat on the foundation of some of the earlier chest harnesses. It is also an asymmetrical tie, which means if you draw a line down the middle of Ryan, our bunny, each side looks different. It is fun, strong, and when tied over clothes that are later pulled open, looks super sexy. All the main knots are in the back rather than on the front.
1. It all starts with his hands tied behind his back in a Two-Column Tie (page 98), then you start by wrapping his chest and shoulder, above his nipple line.
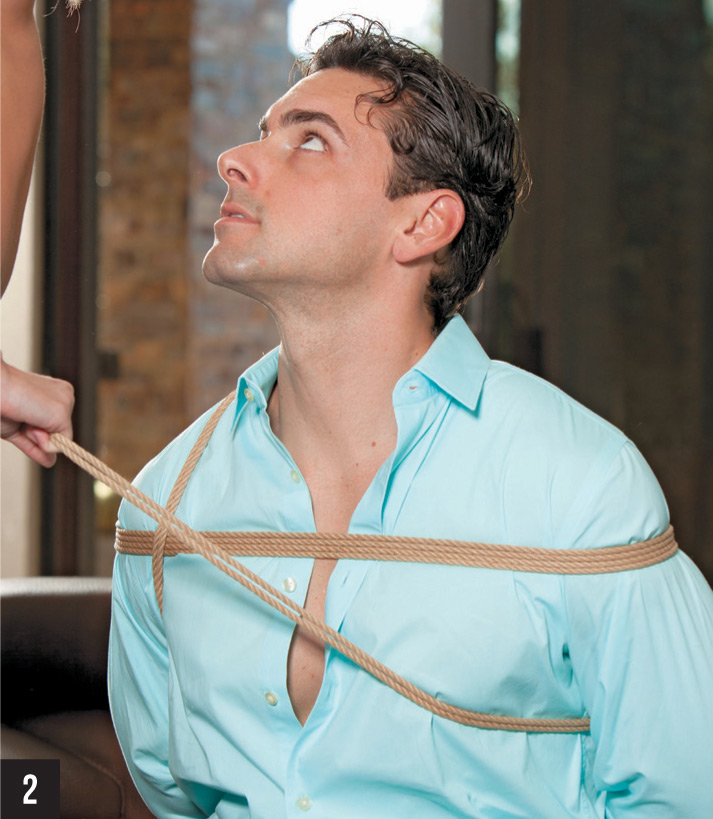
2. Get two wraps around the chest and shoulders and then, on the right-hand side, come up between his arm and chest and up over the shoulder. Then pull the rope down under his left armpit and across the front.

3. Go back the way you came. You should have a nice, neat set of wraps that look just like this, pulling on the vertical rope over his right shoulder.

4. Don’t be afraid to show him who’s boss. You’re in charge! Bend him over and put your knee on him to hold him in place as you finish the ties in the back.

5. Carry the free end of the rope and pull up the lower wrap.

6. Tuck it under and cinch it tight, then finish with a knot in the back.
FINAL: Yes, that’s right. Be a good boy and do everything the wicked lady tells you to!
No one says you have to have your partner tie you up! You can make yourself pretty all by yourself. However, like the responsible adults we are, never do any type of bondage alone, including solo. Always have someone with you; it’s good practice. Have a pair of safety scissors nearby. Here is Ana tying up her chest and those great, perky breasts!
1. She starts with a simple loop around her chest, underneath the breasts.

2. Come through the loop and reverse around the way you just came, back around the chest.
3. Look closely; see the original loop you created when you passed the rope back around the body? You are going to pull the rope through that loop.
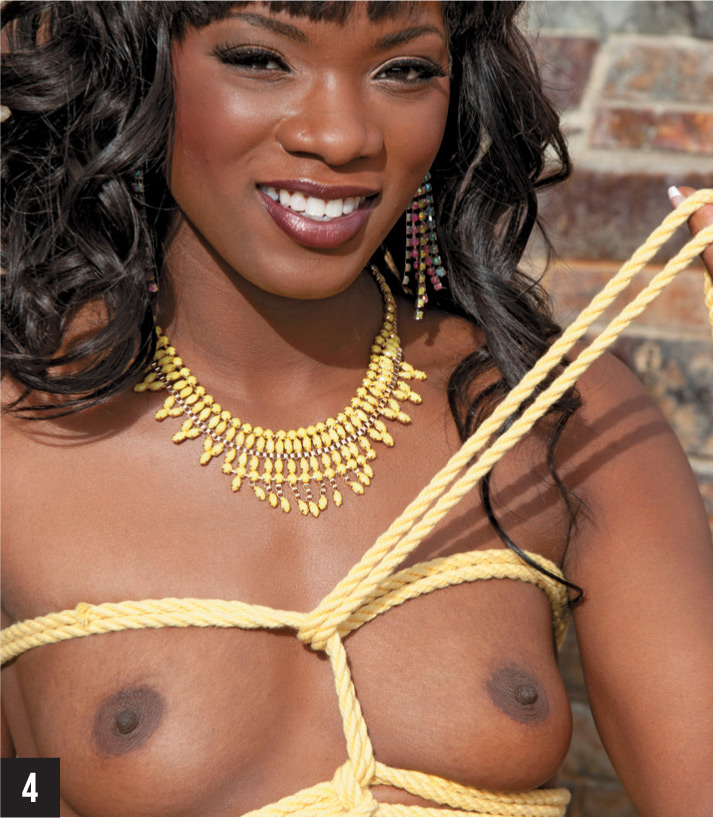
4. Now take the rope straight up between the breasts, hold it in place while you change direction and make a wrap around the chest again, this time above the breasts. Tip: If you keep the tension on the rope as you do this, it makes it more manageable and stops it from falling off your body.

5. Just like the first wrap did a double pass around the chest down below, you are going to repeat the same step above the breasts. Pass it around and then come back through the loop you just created.

6. This is where you can get creative with tying it off. You can make a pair of diagonal passes with the rope. Then you can pass the rope around to the back of the body.
FINAL: We always like to use up the remaining 3 to 4 feet (91 to 122 cm) of rope in a creative way, and this is a perfect opportunity! Here, Ana has come up her shoulders and passed the rope down to the vertical rope in between her breasts and finished with a simple weaving back and forth to finish the ends. Use any variation you like; get creative!