
BUTTER
I first made butter by putting a litre of good organic cream and a few marbles in a jar and spending 10 minutes enthusiastically shaking it, proving you don’t need fancy equipment and a country farmhouse to indulge in cooking from scratch. Seeing cream turn into a mass of glossy yellow butter surrounded by a puddle of buttermilk is the most magical process, and I really recommend having a go. When you try it, you’ll be delighted with a taste that is worlds away from the store-bought stuff, and you’ll be even more pleased because it takes nearly zero kitchen skills to prepare.
However, your butter will only be as good as your cream, so seek out the best organic cream you can find and make a big batch, then freeze some of your butter for later. You also end up with a good amount of buttermilk, which you should never throw away, as it gives a wonderful tang to cakes, cornbread and pancakes.
MAKES: 285 g (10 oz) butter, plus 650 ml (22½ fl oz) buttermilk
INGREDIENTS
1 litre (35 fl oz/4 cups) good-quality organic thin (pouring) cream
EQUIPMENT
electric stand mixer, with whisk attachment and bowl
tea towel
colander lined with muslin (cheesecloth)
large bowl
airtight container for the buttermilk
baking paper
BUTTER METHOD
1. |
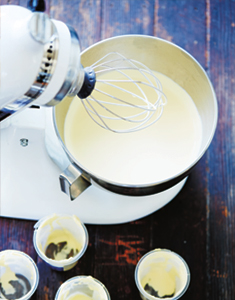
Get your mixer ready: Fit your electric stand mixer with the whisk attachment. Start mixing: Pour the cream into the mixer bowl. Start the mixer on medium–high speed. At this point I like to drape a damp tea towel over the mixer, to stop splatters of cream redecorating the kitchen. |
2. |
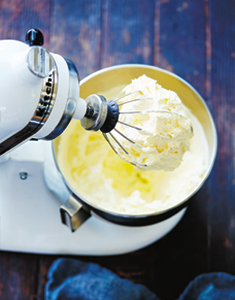
Keep mixing: After 2½ minutes of mixing, the cream will start going through four stages. First it will thicken into stiff whipped cream; you can remove the tea towel at this point. |
|
|
|
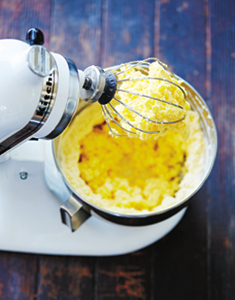
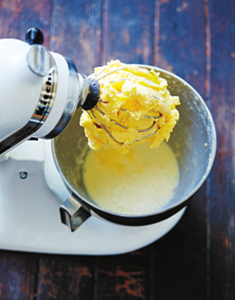
After about 5 minutes, the cream will begin to turn yellow. |
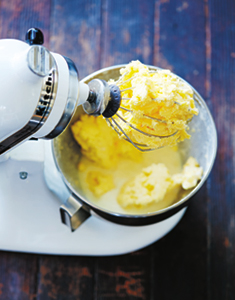
After a few more minutes, the cream will begin to split, and buttermilk will start swishing around the bottom of the bowl; the butter will resemble popcorn. |
Keep beating for a few more minutes, until the butter and the buttermilk become separated. |
3. |
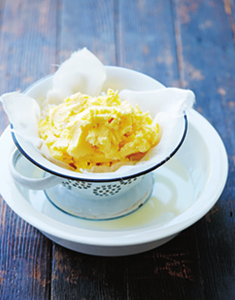
Drain the buttermilk: Set your muslin-lined colander over a large bowl. Pour the butter mixture into the colander, so the buttermilk drains into the bowl below. |

4. |
Squeeze out the liquid: Draw up the sides of the muslin and give the butter a good squeeze to release the buttermilk. Transfer the buttermilk to an airtight container; it will keep for 1 week in the fridge, or can be frozen for later use. |
5. |
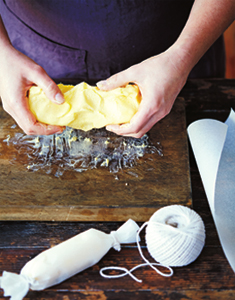
Rinse, knead and wrap: Rinse the butter in cold water, then knead to release more buttermilk. Rinse again and knead for a few more seconds to release as much buttermilk as possible; if too much buttermilk remains, the butter will go rancid. When no more buttermilk is released, add sea salt to taste, or your favourite herbs or spices. Wrap the butter in baking paper. Store in the fridge, where it will keep for up to 3 months, or freeze for up to 6 months. |
HOW TO USE
- Mix some finely chopped fresh oregano, rosemary, garlic or dill through your butter, and use on everything from grilled scallops to barbecued steaks.
- Make an amazing seaweed butter. Melt the butter slowly in a small saucepan. When nearly golden, add a sheet of shredded nori, then blend with a hand-held blender until smooth. When cool, serve with steamed fish and a side of greens.
- Make a decadent butter icing for your favourite cake.
- Use the buttermilk for making Cornbread, as a substitute for milk in cakes and pancakes, or to make buttermilk fried chicken.