 by Corina Sahlin
In my twenty-five years of organic gardening and growing tons of food (literally), I have learned several effective strategies to build quality soil. Even if you’re not a gardener, you still should be concerned about soil.
Officials at the UN warn that the world’s topsoil could be depleted in just over half a century—a major concern given that it takes a thousand years to produce three centimeters of it. Scientific American reports that about a third of the world’s soil has already been degraded. Furthermore, intensive farming is costing us thirty soccer fields of soil every minute. When soil has richer organic matter, it can withstand a longer dry spell and rely less on irrigation and fertilizer. Since our earth will have to feed nine billion people in the future, the health of our soil is a matter of life and death.
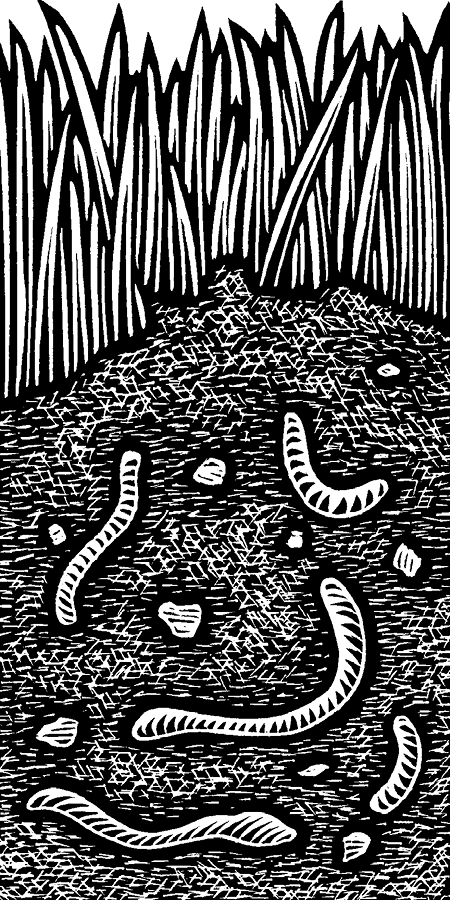
In organic farms, where soil is rarely plowed, you can find up to 450 worms per square meter. Compare that to farmed soil, where there are fewer than thirty earthworms per square meter, according to the World Wide Fund for Nature (WWF). But why should you care about these slimy invertebrates? Earthworms burrow through the earth and fertilize it with their nutrient-rich waste. They also aerate the soil so oxygen and plant roots can reach further down. Thus, earthworms help form and regenerate new soil, improving its ability to absorb water. In these times of changing climate and increasing droughts, this is hugely important. Soil that contains too few earthworms is dense, poorly aerated, and unabsorbant. The WWF calls this a “dangerous chain reaction for humanity” and encourages farming practices that are healthy for soil. Therefore, it is important to protect earthworms for the sake of soil fertility and feeding the growing population of the world.
For healthier, more fertile soil, you need to increase organic matter and mineral content, and whenever possible, you should avoid tilling the soil and leave its structure undisturbed. Kathy LaLiberte of Garden Supply writes that the small amount of necessary organic matter binds together soil particles into porous crumbs, which allow air and water to move through the soil. She explains, “Organic matter also retains moisture (humus holds up to 90 percent of its weight in water), and is able to absorb and store nutrients. Most importantly, organic matter is food for microorganisms and other forms of soil life.”
Let me show you my favorite ways to improve soil—the same strategies I have used for two decades to build incredibly productive gardens on my homestead.
Compost
One of the best-known ways to increase soil health, organic matter, and fertility is by using compost. Eliot Coleman, author of The New Organic Grower, Four Season Harvest, and The Winter Harvest Handbook, has written extensively on the subject of organic agriculture and has more than fifty years of experience in all aspects of organic farming. He says that fertile soil is filled with life, and compost is a life preserver.
John Jeavons, cofounder of the group Ecology Action and father of the modern biointensive gardening movement, explains that compost has a dual function. It improves soil structure and speeds up the formation of soil humus, which makes it easier to work with, gives it good aeration and water retention, and makes it resistant to erosion. Compost also provides nutrients for plant growth and helps make nutrients in the soil more available to plants. Fewer nutrients leach out in a soil with adequate organic matter. In his book How to Grow More Vegetables, Jeavons writes, “Improved soil structure and nourishment produce a healthy soil. A healthy soil produces healthy plants better able to resist insect and disease attacks. Most insects look for sick plants to eat. The best way to control insects and diseases in plants is with a living, healthy soil rather than with poisons that kill beneficial soil life.”
I make lots of compost on our homestead. When I dig into a chunk of my homemade compost, hundreds of earthworms wriggle in it. Earthworms are especially good composters. Jeavons writes that “their castings are 5 times richer in nitrogen, 2 times richer in exchangeable calcium, 7 times richer in available phosphorus, and 11 times richer in available potassium than the soil they inhabit.” We’re lucky because we raise dairy goats who produce lovely manure and bedding, which transforms into great compost. We also raise chickens for eggs and meat, and their droppings get incorporated into our compost scene as well.

Over the course of forty to sixty years, farmed soil will lose between forty and sixty percent of its original organic matter, notes Michigan State University.

But even if you don’t have animals, you can make wonderful compost. Compost is made with the help of prolific micro-organisms, organic matter, air, moisture, and time. The recipe for compost is like lasagna: you build layers with green and brown matter. The green is young, moist, nitrogen-rich, fresh plant matter, like kitchen and garden waste (vegetable scraps, fresh grass clippings, or discarded plants from the garden). Coleman plants alfalfa and keeps harvesting it for the green layer. Alfalfa grows fast, has deep roots, and is a strong feeder on nutrients from the lower levels of the soil and therefore is high in minerals. If you have animal manure like we do on our homestead, this is a great source of nitrogen (the green layer). Never put manure directly on the garden, since it can burn plants. The other “lasagna” layer for building compost is brown matter, consisting of older, drier materials that take longer to decompose, such as straw, sawdust, and dried leaves.
You can put your layers inside a purchased compost bin or hold together the pile with wooden crates or even bales of straw.
How to Build a Compost Pile
Start by putting down a layer (about 3 inches) of dried matter, then add a layer (about 6 inches) of green matter, then sprinkle a little bit of soil (¼ to 1 inch) on top of that layer. Moisten each layer lightly so it has the texture of a wrung-out sponge. For your initial pile, build six or more layers like this, then add to the pile for the next two months. When it reaches 4 feet high, it’s big enough. Add a cover such as a tarp, metal sheet, or plywood.
The pile will heat up (140 to 160°F) as the microorganisms inside the heap break down the organic materials. These organisms need air, which is why straw is an ideal component since it is hollow. You will know when things go wrong if the compost heap smells. This can happen if the pile is too wet or compacted and the process becomes anaerobic (without air), which encourages bad bacteria that make the heap stink. Another problem arises if there is too much green material, which produces too much heat and kills all the good stuff in the pile. Or it won’t heat up at all because there is too much dry material, in which case you have to moisten it or add some liquid fish fertilizer or blood meal.
The heat of decomposition reaches its peak a few weeks after the heap is completed and then dies down. By that point, you can turn the pile to aerate it to get the process going again. I do this by moving the materials on the pile with a pitchfork into a new heap next to it.
When the compost pile is cooled down, you can use the compost even if it’s not completely broken down and you can still distinguish some of the original materials. Put this in the garden in the fall, and it will finish decomposing by spring. You can let it go longer in the compost pile for one or two years to make it crumbly, dark, and sweet smelling. It will have the texture of a delicious chocolate cake by then.
Sprinkle the finished compost on top of a garden bed (½ inch to 1 inch yearly) and mix it into the top 2 inches of soil. Earthworms and other soil creatures will mix it in all the way.
A fun alternative to composting is vermicomposting, using earthworms to convert nutrient-dense materials, such as manures, food wastes, and green crop residues, into food for plants. Earthworm castings feed plant roots and also carry a huge load of beneficial microbes that boost the soil organism community. You can easily start vermicomposting with a small container under the sink as worm bin, and you can find a lot of free information on how to start the bin online.
Use a Broadfork—Don’t Till
When I studied organic, sustainable agriculture in college, I came across a tool called a broadfork, which is exactly what its name describes: it’s a very large fork that’s broad. It looks like a big pitchfork but with a handle on each side and a crossbar you step on, and when you thrust it into the soil and pull back on the handles, the tines break up and loosen the soil. It’s used to aerate the soil manually instead of with a rototiller. I have successfully used a broadfork in my fruitful career as a homesteader and organic gardener for over a decade and even made a demonstration video on how to use it, found on my YouTube channel here: https://youtu.be/V_crd4xGUio.
Why would you want to use a broad fork instead of a rototiller? Although rototillers make the job of tilling and plowing large patches of dirt easy and fast, they tear up lots of earthworms. Tilling also disrupts the rhizosphere, the band of soil containing plant roots, their secretions, and associated soil microorganisms. A broadfork, however, doesn’t mix and chop soil but gently loosens it, which keeps the useful little critters that are so good for the soil intact and happy.
Rototillers usually only reach and aerate four to six inches of soil, which can leave the layers underneath compacted and hardpan, messing with drainage and root growth. Broadforks, on the other hand, reach down further, loosening the soil deeper down and creating tunnels, making room for plants to reach deeper. It’s easier for deeply rooted plants to reach water during dry spells and also to reach soil nutrients in the deeper layers of the soil.
You cannot rototill soil that’s too wet because you will completely destroy soil structure by creating small bricks that tender roots can’t penetrate. This can be very frustrating because gardeners are so dependent on a dry weather spell in the spring for tilling the soil to get it ready for planting. Good luck waiting for a solid dry spell here in the Pacific Northwest! With a broadfork, you can work the soil earlier, since it doesn’t have to be so dry. This allows the gardener to plant earlier in the season.
Weed seeds can patiently wait to germinate for many years, staying dormant until a rototiller brings them to the surface by mixing and chopping the soil. With light and water, they will sprout, even if they’re very old. This doesn’t happen as much when using a broadfork, since it doesn’t mix the soil, and the old weed seeds stay deep down where it’s dark and they can’t germinate.
Broadforks work great for raised beds with wooden or stone edges, since you don’t need to lift a heavy rototiller over them. If you have an area in a garden bed that needs loosening up but would be impossible to reach with a rototiller, just whip out your broadfork and easily work around the plants.
Rototillers are noisy and stinky. When you use a broadfork, you can smell the roses and can hear the birds sing. Working in the garden with a broadfork counts as exercise! It’s a great workout!
Another key strategy for protecting soil structure is to grow in wide permanent beds prepared by a broadfork and to never step on the beds. I only step on designated pathways and never on the garden beds, because this would compact the growing areas. Raised, wide beds are perfect for planting as closely as possible in the beds. Close planting shades the soil surface, which benefits both soil life and plants by conserving moisture and moderating temperature extremes.
Grow Green Manure
Growing green manures, also called cover crops, is a wonderful way to improve and protect soil. In the north, gardeners plant cold-hardy crops such as vetch and winter rye. In my neck of the woods, it rains 100 inches per year, so I like to tuck my garden under a blanket of green to protect it from all the heavy rain in the winter. The cover crops lie dormant in the winter and begin growing again in early spring. I then use a shovel or garden fork to dig them under, a shallow procedure that kills the cover crop and feeds the soil. The channels opened up by the decaying roots of cover crops permit oxygen and water to penetrate the soil. Green manures have to decompose for at least three weeks before you can sow seeds or transplant seedlings.
You can also plant these green manures in a new garden area the year before you plant it with vegetables. The cover crop will choke out weeds and add organic matter. Harvey Ussery of Mother Earth News recommends growing legumes (field peas, soybeans, alfalfa), which contribute nitrogen and organic matter. Fast-growing grains and buckwheat generate the most organic matter and smother weeds. Mixes of grasses and clovers are great because “the grasses add a large amount of biomass and improve soil structure because of the size and complexity of their root systems, and the legumes add nitrogen to help break down the relatively carbon-rich grass roots quickly.”
The green manure can be then buried under mulch to decompose, or it can be pulled up and left on the soil to act as a mulch. Ussery warns that some cover crops are difficult to kill without tilling them, “but cutting them immediately above the crowns after seed stalks or flowers form will kill them. Use the upper ends of the plants as a mulch to help break down the roots more rapidly.” Additionally, if you keep chickens, they can till in your cover crops for you. Not only does their enthusiastic scratching kill the cover crop, but in our garden they also eat slugs or damaging insects, while at the same time fertilizing the soil with their droppings.
Some people sow cover crops under a vegetable crop. It’s fun to experiment with this: Ussery recommends sowing Dutch white clover in a bed where you also grow tall crops, like tomatoes or pole beans, because the clover grows quickly, deters weeds, and helps retain moisture. It also looks pretty and attracts beneficial insects!
Talking of mulch, even if you don’t grow green manure on your garden beds, always cover them in winter to protect the soil against cold temperatures and drying out. You can use straw or fall leaves in a pinch.
Nutrient-Rich Soil
We are what we eat, but we should also keep in mind that the food we eat is as good as the soil it grows in. Over the years, and because of industrialized farming, soil all over the world is becoming depleted of minerals. This is reflected in the nutritional content of the plants it grows. We’re missing a percentage of the minerals and trace elements that used to be there. Scientific American reports that the University of Texas studied USDA nutritional data from 1950 and 1999 for many different fruits and vegetables and found “reliable declines” in several main nutrients and vitamins in that time period. A Kushi Institute report noted that “average calcium levels in 12 fresh vegetables dropped 27 percent; iron levels 37 percent; vitamin A levels 21 percent, and vitamin C levels 30 percent.” This means that to consume the same amount of nutrition that earlier generations enjoyed, we need to eat several times the produce today.
Before you begin a fertilizer regimen, test your soil to see what you’re working with. You can generally send a sample to your local cooperative extension or university for a small fee. Many synthetic fertilizers offer a combination of three key elements: nitrogen, phosphorus, and potassium. Your plants will also need small amounts of calcium, magnesium, and sulfur. Some farmers choose to add rock dust for a natural way to reintroduce a wider variety of minerals and micronutrients. Adding fish emulsions and bone meal is another natural way to add nutrients to your soil.
Consider also that your plants can’t make use of these nutrients if they can’t absorb them. LaLiberte writes, “Most essential plant nutrients are soluble at pH levels of 6.5 to 6.8, which is why most plants grow best in this range. If the pH of your soil is much higher or lower, soil nutrients start to become chemically bound to the soil particles, which makes them unavailable to your plants.” To improve the fertility of your soil, you need to get the pH of your soil within this range, though it is a slow and careful process. Limestone and ash are sometimes used to raise the pH, and ground sulfur and pine needles are sometimes used to lower it.
I hope you are now inspired to build gorgeous, healthy soil in your garden! And the next time you encounter an earthworm, don’t recoil, but marvel at all the hard work it is doing.
Resources
Arsenault, Chris. “Only 60 Years of Farming Left If Soil Degradation Continues.” Scientific American. Accessed January 31, 2019. https://www.scientificamerican.com/article/only-60-years-of-farming-left-if-soil-degradation-continues/.
Coleman, Eliot. The New Organic Grower. White River Junction, VT: Chelsea Green Publishing Company, 1993.
———. The New Organic Grower’s Four-Season Harvest. White River Junction, VT: Chelsea Green Publishing Company, 1992.
Jäger, Karin. “Earthworm Numbers Dwindle, Threatening Soil Health.” DW.com. January 30, 2017. https://www.dw.com/en/earthworm-numbers-dwindle-threatening-soil-ealth/a-37325923.
Jeavons, John. How to Grow More Vegetables. Berkeley, CA: Ten Speed Press, 1995.
LaLiberte, Kathy. “Building Healthy Soil.” Gardener’s Supply. Last modified February 21, 2017. https://www.gardeners.com/how-to/building-healthy-soil/5060.html.
Melakeberhan, Haddish, Sieglinde Snapp, and Kim Cassida. “No Matter How You Slice It, Healthy Soil Is Important.” Michigan State University AgBioResearch. July 26, 2015. https://www.canr.msu.edu/news/no_matter_how_you_slice_it_healthy_soil_is_important.
Scheer, Roddy, and Doug Moss. “Dirt Poor: Have Fruits and Vegetables Become Less Nutritious?” EarthTalk, Scientific American. Accessed February 6, 2019. https://www.scientificamerican.com/article/soil-depletion-and-nutrition-loss/.
Ussery, Harvey. “8 Steps for Making Better Garden Soil.” Mother Earth News. June/July 2007. https://www.motherearthnews.com/organic-gardening/8-steps-to-make-better-garden-soil-zmaz07jjzsel.