Secretary of War Henry Halleck had just informed Lieutenant General Ulysses S. Grant that contrary to the earlier New York Times report that General Sigel had “whipped the Rebels”, it was Sigel’s army that was in full retreat from New Market. He went on to tell Grant that “Sigel will do nothing but run. He never did anything else.” Grant became enraged, and when Halleck recommended that Sigel be replaced by Major General David Hunter, Grant responded, “By all means ... appoint General Hunter or anyone else to the command of West Virginia.” The next day, May 19, the War Department made it official – Sigel would be gone.
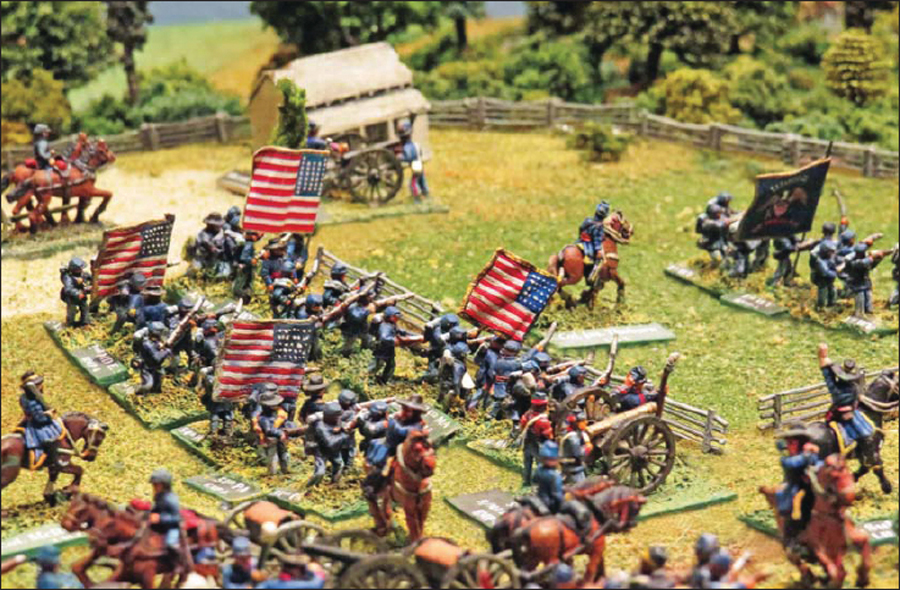
General Sullivan prepares to lead the attack against the Piedmont defenses. (Dean West)
When Major General David Hunter arrived at Sigel’s headquarters to formally relieve him of command, General Sigel was not there. While waiting for Sigel to arrive, Colonel David Strother, Sigel’s aide-de-camp, chatted with Hunter about the battle and said, “We can afford to lose such a battle as New Market, to get rid of such a mistake as Major General Sigel.” Later that night, Sigel arrived and the command of the Army of the Shenandoah officially passed to Major General “Black David” Hunter. Serious war was about to come to the Valley.
General Hunter proved to be the right man, in the right place, at the right time. Hunter was a West Point graduate and among the most senior general officers in the United States Army. He had commanded a brigade at First Bull Run, but due to excessive zeal in recruiting former slaves as soldiers while commanding the Department of the South, he had been relegated to various desk jobs since September of 1862. However, he was well aware that success in the Valley would resurrect his stagnated career, and he seized this unexpected promotion with exceptional energy and fervent ambition.
Upon taking command, Hunter was surprised and excited to find that the Army of the Shenandoah remained battleworthy and that its soldiers were angrier at Sigel’s inept generalship than demoralized by their defeat at New Market. Immediately Hunter went to work to repair deficiencies in the army’s equipment and organization, and within a short time there were noticeable improvements. Then it got better. Within a few days, Hunter received the very welcome news that Breckinridge and his veteran units had left the Valley for Lee’s army outside Richmond, leaving only Imboden’s cavalry and the green recruits of the Valley Reserves to contest his planned advance. This was an opportunity that was not to be missed. On May 26, just 11 days following their defeat at New Market, the soldiers of the Army of the Shenandoah filed onto the Valley Pike and eagerly headed south toward Staunton. It was time to give Johnnie Reb some payback.
The ever-vigilant Brigadier General John Imboden was quick to advise General Lee that, contrary to Breckinridge’s optimistic report, the Federals in the Valley were not about to accept a stalemate and were now moving south with renewed energy and spirit. This presented Lee with a conundrum. The Confederacy could not afford to lose the Valley, but Lee could not spare a single soldier from the Richmond front as he struggled to contain Grant’s relentless drive south. In addition to the major rail centers of Staunton and Lynchburg, the Shenandoah Valley remained a vital source of foodstuffs and other war materials supplying Robert E. Lee’s army outside of Richmond; it had to be protected. The Valley lay exposed, and Imboden did not exaggerate the desperate nature of the situation when he wrote to Lee, “There is no place ... where I can successfully resist him ... though I will do my best.”
The only troops that Lee could tap were 200 miles away across the mountains of West Virginia and were under the command of the eccentric, cantankerous, and argumentative Brigadier General William E. “Grumble” Jones. However, Jones was a solid tactical leader and his men were tough and experienced fighters, both exactly what Lee needed right then in the Shenandoah Valley. On May 30, Lee ordered Jones and as many troops as he could bring to move immediately from East Tennessee and take command of the Valley District Army.
Fortunately, most of Jones’ soldiers were currently deployed along the Virginia and Tennessee Railroad that ran directly from Tennessee into the Valley. Within a day, the ever-resourceful Jones gathered his superb little Trans-Allegheny army onto the creaky cars of that overused railroad and within four days, 2,400 infantry, 1,500 dismounted cavalry and a six-gun battery had been moved to the Valley, with Jones’ mounted force catching up later. When added to Imboden’s cavalry and the Valley Reserves, the Confederates now had over 5,500 men to block Hunter’s 8,500. It was a close-run thing, but the Valley was again defended.
By June 3, the Hunter’s Army had reached Harrisonburg. Their cavalry found the now-combined forces of Grumble Jones and John Imboden blocking their advance at Mount Crawford in a strong position behind the North River. On June 4, preferring a flanking maneuver to a bloody assault, Hunter sent a small diversionary cavalry force to demonstrate in front of the Mount Crawford position, while he led the bulk of the Army of the Shenandoah in a flanking march to Port Republic which he reached that night.
Despite a persistent rain, Imboden’s scouts reported Hunter’s flank march to “Grumble” who would respond with some quick marching of his own. Imboden was ordered to take all the mounted cavalry and to intercept and delay Hunter’s forces, while Jones took the rest of the force and prepared a new defensive position south of Mount Meridian.

The Armies Converge on Piedmont, June 3 through June 5, 1864.
Early on June 5, Imboden’s mounted force attacked Stahel’s cavalry outside Mount Meridian. At first, the graycoats had the advantage, but Stahel had the numbers and soon the Rebels were fleeing southward. Barely escaping with his skin, Imboden discovered that Jones was preparing a defensive line in front of the little town of Piedmont. Imboden, a native of the Valley, recommended a better position further south at Mowry’s Hill. But cranky old “Grumble” had made his decision and ended the discussion with a sharp “I command here today sir … and I’m going to fight right here.” And so the battle would be at Piedmont.
The scenario begins with the 10 a.m. turn and continues until the end of the 2 p.m. turn, for a total of 9 turns. The Union has the initiative and will be active first. The Union command has 9 turns in which to capture Piedmont. If at the end of any one turn, the Union completely controls the Piedmont town area, they have won and the game has ended. For the Union to claim control of the Piedmont town area, they must have at least three non-routed units in the Piedmont town area and there must be no Confederate units within that area.
The Confederates win if they can prevent the Union from achieving their victory condition, or if they are able to successfully occupy any section of the East Staunton Road in the northeast square of the battlefield for any three consecutive turns. This second Confederate victory option reflects General Hunter’s sensitivity to his line of communications leading back to Strasburg.
The terrain in the Piedmont area was typical of this part of the Shenandoah Valley. Most of the slopes were gentle, with occasional steep areas or impassable bluffs. Since the area was heavily farmed with freely grazing animals, all the woods are considered light woods. It is early June and the crops are low, so all the fields are treated as open ground, with no visibility blockage. The area designated as a “flood plain” is open ground. The Middle River is considered to be two inches of rough terrain and any unit crossing it ends its crossing in disorder. The smaller streams, such as “Polecat Draft,” are considered to be one inch of broken terrain.
If in any one movement action a unit goes up two elevation differences – such as going up from Level 1 to Level 3 – the movement is made at one category worse than if it was level ground. If, however, the unit only moved up one elevation level in any one movement action, the move is made as if it was level terrain. The terrain levels are indicated on the map.
These were quickly constructed that morning by scavenging fence rails from most of the farms and fields in the area. Hence, there are two lines of hasty works and not many remaining fences. Units in the hasty works in the light woods on the higher Level 3 hill – the Confederates called this position the “The Rail Pen” – have the target cover benefits of both light woods (0/-1 DRM) and hasty works (-2 DRM for all fires) for a net target benefit of (-2 DRM) against artillery fire and a (-3 DRM) against all other fires. Given the overall strength of this position – it resisted multiple determined Union attacks and was not taken until the whole position was flanked – it gives its defender the heavy cover morale benefit of (-2 MMP). The other hasty works along the cross road are in the open, so they only have the normal hasty works target benefit of (-2 DRM from all fire) and give the defender the light cover morale benefit of (-1 MMP).
The town area itself was small, and its cover and morale benefit is equivalent to a farm area in terms of target DRM benefits (-1 DRM against artillery/-3 DRM against infantry fire) and light cover (-1 MMP) morale benefit. Units fighting from inside the town area have their FPs halved, unless they are on positioned exactly on the edge of the town area and are firing at a target outside the town area. Individual buildings have no specific effect.
The “Dead Ground” is the area immediately behind the small Level 2 hill in front of the wheat field. This little hill is high enough to block visibility behind it. Confederate units in the hasty works that are on Level 3 terrain can see over this little hill, except into the indicated “Dead Ground” area of the map. Units crossing over this Level 2 hill are not seen by the units in the wheat field directly beyond or those in the hasty works until they get to the top of the little hill.
Most of the length of Crawford’s Run is a shallow sunken ravine, which is treated as two inches of light woods for any movement across it, while units moving along the ravine make the entire move as if moving through light woods. Units deployed in this ravine are visible, but receive a beneficial target -1 DRM against all fire and a -1 MMP modifier for all morale checks. Units attempting to charge across this ravine go into disorder upon leaving the ravine. The non-ravine sections of Crawford’s Run and Pole Cat Draft are considered to be one inch of broken ground. Where the ravine ends, treat Crawford’s Run as a small stream.

The northwest slope of Sheep Hill was covered with a nasty rocky brush that is treated as light woods for infantry and dismounted cavalry moving down or along a slope, but heavy woods for infantry or dismounted cavalry going upslope. Mounted cavalry and artillery treat it as rough terrain for all movements. Units can see into the rocky brush up to a distance of one inch for all scales, but units cannot see through it. Units in the rocky brush have a beneficial target -1 DRM against infantry or artillery fire, but have no target DRM benefits against artillery fire. There is no morale benefit for being in the rocky brush, as the troops did not like being there.
The area marked as the bluff is just that – a very steep bluff impassable in all directions.
Each terrain level beyond Level 1 represents a rise of about ½ inch for 10mm figures, ¾ inch for 15mm figures or one inch for 25mm figures. Level 1 is the tabletop surface and has no elevation. However, the amount of rise per level can certainly be adjusted per personal preference, as smaller elevation differences can often look more realistic depending on the terrain being modeled.
The Army of the Shenandoah begins the game deployed as shown in the northeast corner of the game board. All units must set up exactly where indicated on the map, except that one battery may be redeployed anywhere along the Union line but no closer to an enemy unit than is any other friendly formed infantry, cavalry or artillery unit. The cavalry brigades on the game board are deployed as shown on the map, but unlike the infantry, regimental designation of individual units within the brigade designations is not shown. Peale’s Sharpshooters must start in skirmish order in the woods. If not specified, leaders can come in with any unit in their command.
Most of the Army of the Valley District begins the game deployed exactly as indicated on the battle map, except that one battery may be redeployed anywhere along the Confederate line, but not within 15 inches of a formed Union unit or battery. The map symbols for the infantry regiments of Browne’s and B. Jones’ brigades include unit designations in order to show their actual historical place in the battle line. Most cavalry map symbols are not unit specific, so any unit of the appropriate brigade may be placed where these symbols appear. If not specified, leaders can start or come with any unit of their command.
Following the morning defeat of Imboden’s cavalry at Mount Meridian, General Hunter and the Army of the Shenandoah arrived at Confederate position just north of Piedmont. After clearing the northwest hill, Colonel David Strother rode up and surveyed the Confederate position and realized that this would be hard work. He would describe it as: “The enemy’s position was strong and well chosen. It was on a conclave of wooded hills commanding an open valley between and open, gentle slopes in front. On our right in advance of the village of Piedmont was a line of log and rail defenses very advantageously located in the edge of a forest.”
And hard work it was. Moor’s Brigade would assault the “rail pen” no less than three times, but each time the veteran brigades of Jones and Browne threw him back with heavy losses. As the third attack recoiled in confusion, the defending Confederates counterattacked, and only a gallant stand by a battalion of repeater-armed New York cavalry troopers, and a section of guns broke the Rebel rush and drove them back into their works. Initially seeing yet another Union repulse, Grumble Jones decided to expand on Moor’s discomfiture and ordered most of Vaughn’s Brigade to move against the disordered attackers. This potential counterstroke had unexpected consequences. The movement weakened a thin Confederate center, which already had a substantial gap and had seen its artillery support gradually driven off by superior massed Federal artillery.
After a morning of frustrated assaults, this was the opportunity that “Black David” was hoping for. He ordered Thoburn’s Brigade to turn into the thinly-held Confederate center and press the Rebel flank, while Moor renewed his frontal the attack against the “rail pen.” With pressure on both front and flank, the Confederate defense finally folded and soon the graybacks were streaming to the rear. Old “Grumble” threw in the Valley Reserves, but they were unable to contain the growing disaster. Finally, the feisty curmudgeon rallied a group of veterans, leading them in a desperate counter-charge against the advancing bluecoats, and was promptly shot in the head. That was the last straw – the retreat became a rout. The Union committed Stahel’s cavalry and the roundup of the fugitives began. While the Union lost 875 killed and wounded, the Confederate lost almost 1,400, with about 1,000 of those being captured. Despite a spirited rear-guard defense at New Hope on June 6, David Hunter became the first Union commander to lead a victorious army deep into the Shenandoah Valley, capturing Staunton, burning VMI, and threatening the vital rail center of Lynchburg. This triggered a new crisis for Robert E. Lee, which would require the dispatching the bulk of Jubal Early’s Corps to the Shenandoah Valley.
RM: Rifle muskets, RC/P: Repeating carbines and pistols, MM/P: Mixed muskets and pistols, MM: Mixed muskets, SBLC/P: Sharps breech-loading carbines and pistols.
Infantry Division – Brigadier General Jeremiah Sullivan (1 LB)
First Brigade – Colonel Augustus Moor (1 LB)
By 1864 the Union was converting its well-trained garrison artillery units to infantry regiments, hence the 5th NY is deployed as an infantry regiment.
The 116th OH was serving as the wagon train guards and enters on the 11.30 p.m. turn on the north edge of East Staunton Road.
• 18th Connecticut Infantry – 540 men – 9 figures – RM – Veteran
• 5th New York Heavy Artillery (Inf Rgt) – 600 men – 10 figures – RM – Trained
• 28th Ohio Infantry – 600 men – 10 figures – RM – Elite
• 123rd Ohio Infantry – 600 men – 10 figures – RM – Veteran
• 116th Ohio Infantry – 480 men – 8 figures – RM – Veteran
• Peale’s Battalion of Sharpshooters – 240 men – 4 figures – RM – Veteran
Second Brigade – Colonel Joseph Thoburn (1 LB)
• 2nd Maryland Eastern Shore Infantry – 480 men – 8 figures – RM – Veteran
• 34th Massachusetts Infantry – 540 men – 9 figures – RM – Elite
• 54th Philadelphia Infantry – 480 men – 8 figures – RM – Veteran
• 1st West Virginia Infantry – 600 men – 10 figures – RM – Veteran
• 12th West Virginia Infantry – 600 men – 10 figures – RM – Veteran
• 4th West Virginia Infantry – 480 men – 8 figures – RM – Trained
Artillery Battalion – Captain Henry Algeron du Pont (1 Artillery LB)
• Snow’s Battery (B/Massachusetts Light Artillery) – 3 sections of 3” rifles – Veteran
• Von Klieiser’s Battery (New York Light Artillery) – 3 sections of Napoleons – Veteran
• Holman’s Battery (B/5th US Lt Artillery) – 3 sections of 3” Rifles – Elite
• Carlin’s Battery (D/1st West Virginia Lt. Artillery) – 3 sections of 3” rifles – Veteran
Cavalry Division – Brigadier General Julius Stahel (1 LB)
Stahel’s cavalry division has been heavily engaged against Imboden’s cavalry for most of the morning, and consequently none of these cavalry units receive opening volley benefits. By this time, with the exception of Wynkoop’s Brigade, the horses are blown and hence the units must fight dismounted.
First Brigade (minus) – Colonel Andrew McReynolds (All dismounted) (0 LB)
All of McReynold’s brigade was ordered to dismount and fight on foot to support the infantry. Each unit should only use dismounted stands, recommended modeling is three stands per unit with 3 or 4 figures per stand.
• 1st Maryland Home Guard Cavalry – 360 men – 12 dismounted figures – BLC/P – Trained
• 1st New York Lincoln Cavalry – 270 men – 9 dismounted figures – RC/P – Veteran
• 1st New York Veteran Cavalry – 270 men – 9 dismounted figures – RC/P – Elite
Detachment From First Brigade – Colonel William Tibbits (All dismounted) (2 LB)
Recommend three stands of three figures each.
• 21st New York Cavalry – 270 men – 9 dismounted figures – BLC/P – Veteran
• 14th Philadelphia Cavalry – 270 men – 9 dismounted figures – BLC/P – Veteran
Second Brigade – Colonel John Wynkoop (1 LB)
Wynkoop’s Brigade has not been as heavily engaged as McReynold’s and Tibbitt’s so its horses are somewhat fresher. Hence the troops can start mounted or dismounted. If they dismount, they may only remount to retire from the battlefield. Otherwise, once dismounted they must stay dismounted.
• 20th Philadelphia Cavalry – 480 men – 12 mounted/dismounted figures – BLC/P – Veteran
• Ringgold Cavalry Battalion – 240 men – 8 mounted/dismounted figures – BLC/P – Elite
First Infantry Brigade – Colonel Buering Jones (1 LB)
Though they had minimal training, the Niter & Mining Battalion would fight like veterans.
• 36th Virginia Infantry – 540 men – 9 figures – RM – Veteran
• 60th Virginia Infantry – 600 men – 9 figures – RM – Veteran
• 45th Virginia Infantry – 300 men – 6 figures – RM – Veteran
• Bryan’s Virginia Battery (Lewisburg Artillery) – 3 sections of mixed guns – Elite
• The Niter & Mining Battalion – 240 men – 4 figures – RM – Veteran
Second Infantry Brigade – Colonel William E. Browne (1 LB)
Although they were originally formed as cavalry Brewer’s Battalion fought as exactly as infantry so they use the 60 men per figure ratio as infantry and move and fight using the Infantry Movement and Fire Tables.
• Additional Officer Figure: Major Brewer (1 LB)
• 45th Virginia Infantry – 617 men – 9 figures – RM – Veteran
• Thomas’ North Carolina Legion – 440 men – 8 figures – RM – Veteran
• Brewer’s Dismounted Cavalry Battalion – 540 men – 9 figures – RM – Elite
Valley Reserves – Colonel Kenton Harper (1 LB)
Marquis’ Battery had at least one 20-Pounder Parrott and at least one 24-pounder howitzer, hence they have a firepower of 6 FP with a normal range of 16.
• Augusta Reserve Infantry – 720 men – 12 figures – MM – Trained
• Marquis’ Battery – (The Augusta Reserve Artillery) – 2 sections of Mixed Heavy Guns (6 FP – NR 16) – Veteran
Cavalry Brigade – Brigadier General John Imboden (1 LB)
Imboden’s Brigade had also absorbed two companies of the Augusta County Mounted Reserves.
The 18th and 23rd VA’s horses were blown after the morning battle with Stahel’s cavalry and needed to rest. Hence Imboden’s Brigade must fight most of the battle as dismounted cavalry, using the Cavalry Movement and Fire Tables. However, at the 12.30 p.m. turn they can remount if desired, but must continue the remainder of the fight as mounted cavalry.
Davis’ Cavalry Battalion included at least two companies of the Rockingham Country Reserves, whose horses were fresher; hence they can fight either mounted or dismounted. However, once they dismount they can only remount to retire from the battlefield.
• 18th Virginia Cavalry* – 360 men – 12 Dismounted Cavalry Figures – SBLC/P – Veteran
• 23rd Virginia Cavalry*- 270 men – 9 Dismounted Cavalry Figures – SBLC/P – Veteran
• Davis’ Maryland Cavalry – 270 men – 9 Figures – MM – Veteran
• McClanahan’s Virginia Battery (Lewisburg Artillery) – 3 sections of mixed guns – Veteran
Dismounted “Cavalry” Brigade – Brigadier General John C. Vaughn (1 LB)
Although they were originally formed as cavalry, this brigade fought exactly as infantry, so they use the 60 men per infantry figure ratio as infantry and move and fight using the Infantry Movement and Fire Tables.
Vaughan’s Brigade also included fragments from the 16th Georgia and 16th Tennessee Cavalry along with men from the 43rd, 59th, 60th, 61st, and 62nd Tennessee Mounted Infantry.
• 39th & 3rd Tennessee, Mounted Infantry – 360 men – 6 Infantry Figures – RM – Veteran
• 1st & 12th Tennessee, Mounted Infantry – 480 men – Infantry Figures – RM – Veteran
• 3rd & 53rd Tennessee, Mounted Infantry – 360 men – 6 Infantry Figures – MM – Veteran
Confederate Reinforcements
Arrive dismounted on the south edge of East Staunton Road on the 12.30 p.m. turn.
Brigadier General William E. Jones’ “Cavalry” Brigade, Lieutenant Colonel Smith (1 LB) commanding
Although they were originally formed as cavalry, they fought as exactly as infantry, so they use the 60 men per infantry figure ratio and move and fight using the Infantry Movement and Fire Tables.
• 27th & 34th Virginia, Mounted Infantry – 360 men – 6 Infantry figures – RM – Elite
• 64th Virginia, Mounted Infantry – 440 men – 8 Infantry figures – RM – Veteran
• 8th & 21st Virginia Mounted Infantry – 360 men – 6 Infantry figures – MM – Veteran