

Sheltering Your Stove … Stove Hazards … Stove Lighting Tips … Fireplace Design … Firebuilding Strategies … Cooking Tools … Eat Constantly … Drink Often … Keep Menus Simple … Change Your Eating Habits … Eat Less Meat … Try Spice Power … Kitchen Techniques … Instant Cheer
Backpackers, like armies, travel on their stomachs. If the food doesn’t satisfy, the scenery will pale. When cooking becomes a nightmare of confusion and frustration, campers often get decidedly cranky. But if the food is good and the preparation easy the trip tends to go smoothly, even if the ground is hard and the bugs are out in force.
Knowing how to set up the kitchen for efficient operation and make the best use of the food you brought along can make the difference between misery and a successful trip.
Hopefully, you brought along a stove, now considered essential equipment by most backpackers because it provides even, dependable, controllable heat, without the need to build a fireplace, hunt for wood, nurse a fire, fight smoke and falling ashes, and deal with wildly varying heat output that often means scorched or uncooked food, and leaves you with soot-blackened pots. If you brought a stove, hopefully you brought along or memorized the operating instructions. Probably the first consideration before using a stove is to make sure there’s ample fuel to complete your meal. Refueling while dinner is underway is dangerous for both you and your dinner, what with the risks of spilling, puncture, explosion and contaminated or badly cooked food.
The second consideration is setting up the stove for maximum stability and shelter. Stability may not seem important until you’ve had a stove fall over and the dinner you’ve been hungrily awaiting ends up in the dirt. Most stoves are dangerously wobbly, so take the time to set yours up carefully. Then treat it gingerly during cooking, especially when you first place that heavy pot on the burner.
No stove works well—if at all—if not completely sheltered from wind. Few stoves offer even minimally adequate built-in wind protection. It’s up to the cook to find a sheltered spot for the kitchen. If none can be found, it must be somehow constructed. The chief ingredients are usually, fallen trees, rocks or chunks of wood, but don’t overlook equipment. A pack on its side, a couple of sleeping bags still in stuff sacks, a foam pad or a folded tarp or ground cloth may be just what you need. Take the time to rig your shelter thoughtfully before you start cooking, rather than wait until the meal is half cooked, when you run the risk of knocking over the stove.
All liquid fuel stoves need to be cleaned, some more than others. Cleaning is either manual (with a fine wire that you run through the burner orifice) or built-in (the cleaning needle is integral, operated by a lever or valve). When impurities in liquid fuel cause inevitable clogging, the stove stops or runs poorly until the orifice is reamed out. The recent change in small Optimus gas stoves (Svea 123, 8R and 99) from manual to built-in cleaning has produced some problems. When the valve-activated cleaning needle sticks or runs off the track the flame is diminished or the stove is reluctant to shut off. The solution is to remove the burner with the wrench provided, turn the stove over so the needle assembly falls out, replace the burner and rely in the future on manual cleaning.
Since all stoves are designed for maximum heat output, there are a number of operating hazards that the user should be aware of. In gas stoves the principal dangers occur during refueling. Funnels overflow, fuel bottles get knocked over, gas gets spilled on a hot stove, fuel tanks get too hot, campfires ignite nearby gasoline supplies, the cook panics during a flareup and knocks over the stove, burning himself and catching the tent on fire, a fuel check while cooking causes burnt fingers, a spill or a flare-up. Never forget that gas stoves can explode and spilled fuel can ignite in a flash. Because kerosene is far less volatile, all or most of these hazards are much reduced or nonexistent in kerosene stoves. But since the stove is red hot you can still get burned if you are less than cautious, and spilled kerosene can still burn up your tent.

Butane and propane stoves, because they’re simple, are considered safe by many campers—and this is a dangerous assumption. Cartridge type stoves are just as dangerous as gas stoves, but the dangers are different, often unpredictable and less dramatically evident. Punctured canisters can turn into torches if ignited or foul your pack if undetected on the trail. And removing a canister that’s defective or not yet empty, I can say from personal experience, can freeze your skin painfully. On rare occasions defective or poorly connected canisters spout fire like a torch without warning. Empty canisters thrown in the fire can expode, and butane stoves can erupt in tent-burning flareups when the canisters have been shaken vigorously or the temperature is too low.
Butane comes in a low-pressure steel canister which is comparatively light, but the low pressure means that the gas will not vaporize when the temperature is below the freezing point of water (32°F) at sea level. And when butane is cold or the canister is near empty the flow is very poor. So butane is inefficient below 40°F and fails entirely when colder—except at altitude. The higher you go the better butane performs.
Propane is stored under great pressure, which means that flow is excellent in cold weather or when the canister is nearly empty, but canisters must be thick-walled to withstand the pressure. Although burning time is an impressive six hours, they are too heavy (two pounds, full) to be carried by most recreational backbackers. The greatest advantage of butane and propane is that lighting the stove is no more difficult than lighting a kitchen stove that has no pilot. Simply hold a lighted match to the burner an instant before turning on the gas.
Any kind of stove will produce dangerous levels of carbon monoxide if run in an enclosed space (tent). Carbon monoxide is sneaky stuff, invisible, almost odorless. The product of incomplete fuel combustion, it reduces the blood’s ability to transport oxygen. Since high altitude has the same effect, it can be seen that the two are additive: the higher you are the more lethal carbon monoxide poisoning will be.
If tent ventilation isn’t vigorous—as when buttoned up tightly against wind or storm—a burning stove consumes nearly all the oxygen, causing the occupants of the tent to sweat, gasp and complain of headache and nausea. The danger is greatest in tube, Goretex or sealed fabric tents without vents. It is likewise greatest with the larger stoves, owing to their greater energy output and greater oxygen consumption. Pans so close to the burner that they deform the flame also contribute to incomplete combustion and therefore carbon monoxide production. If you cook in the tent, what you imagine to be high altitude sickness may, at least in part, be carbon monoxide poisoning. Beware!
Kerosene stoves can be lighted without a priming fuel by creating a wick. A twisted square of toilet paper tucked into a circle in the kerosene-filled spirit cup will light easily enough. But solid or paste primers are safer, cleaner and much easier to use. And their value goes up if you must cook in a tent. Dependable primers include ESBIT fuel pellets, Optimus priming paste, Heat Tabs, Fire Ribbon and Hexamine. Avoid lighter fluid, which is just as dangerous as white gas.
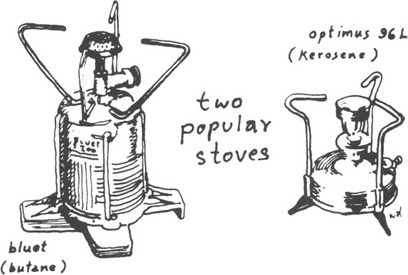
The mention of a few specific stoves and their quirks may help you deal more effectively with yours. The best all round choice at this writing is the Coleman Peak 1, in case you’re new to stoves or dissatisfied with what you have. The MSR is marvelous for melting snow by the bucket, but its simmering control is very poor and the stove is fussy at less than full throttle. The Optimus 8R, 99, and Svea 123—in fact, all white gas stoves without pumps—require priming to start, and performance drops in the cold and at high altitude when pressure inside the fuel tank is difficult to maintain. Never fill the tank more than three quarters full and never use the stove when it’s near empty or the wick will char and refuse to draw sufficient gas to the burner. Never force the built-in cleaning needle or trouble will follow. Dismantle the mechanism to get it unstuck. Beware the Bleuet S2000S’s collapsible base, which can collapse during cooking if not locked in place.
Veteran backpackers have learned that, besides sheltering the stove from all but the faintest zephyr, they can increase cooking efficiency by always using tight fitting lids. It also may be possible to reduce the space between pot and burner to about a quarter inch (optimum) by bending or otherwise modifying the stove’s pot supports. If part of your stove’s burner will not stay lit or the flame blows out from under your pot, there is a serious loss of efficiency that will waste fuel, prolong cooking time or prevent complete cooking. Move the stove or build a better windbreak, immediately.
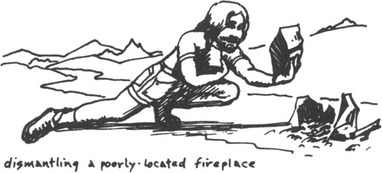
The alternative to carrying a stove, of course, is to build one out of native material and gather native fuel to fire it. My favorite cooking fireplace design is the half-dugout. There are two advantages: smaller, flatter rocks can be used to insure a more stable structure, and the fire is easier to light and easier to protect from wind. If I were faced with rebuilding a heap of blackened rocks into an efficient cookstove—assuming the location is appropriate and safe—I would first clear a circle about four feet across and sort through the rocks in hopes of finding a matched pair about the size and shape of bricks. Such rocks are never to be found, of course, so I settle for the best I can find (concave upper surfaces are better than convex).
Using the direction of the breeze, the lay of the land and the pattern of branches on nearby trees to determine the path of the prevailing wind, I place my rocks parallel to that path and also to each other—about a foot apart. On the downwind end, I place a larger rock (or rocks) to form a chimney, so the resulting structure forms a squat “U.” Then, using a sharp rock fragment as a trowel, I excavate about four inches of earth and charcoal from inside the pit. Now I am ready to place my lightweight grill across the opening, supporting it on the two “bricks” as close as possible to the chimney. Care must be taken to see that it is solid and will not slide or wobble—or my dinner may end up in the fire!
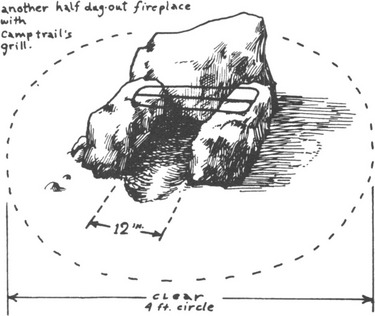
I like to set my grill about two inches above ground level and six inches above the bottom of the firepit, but the proportions must sometimes be altered. On a windy day, I dig deeper and sometimes have to block the windward end with rocks to control the draft. Where there are no rocks at all and the grill sits directly on the ground, the firepit must be deeper still. Inexperienced stove builders invariably build too large a firebox and set the grill much too high. Increasing grill height from six to ten inches probably triples the volume of wood needed to cook dinner. Small fires are easier on the cook, easier on the wood supply and heat is more easily regulated. Expert backpackers emulate the Indian and try to cook their food with the smallest fire possible.
The traditional structures for kindling a camp fire are the lean- to (match-sized twigs leaned against a larger piece) or the teepee (a cone of twigs). The most common mistake among firebuilders is not having good quantities of dry twigs, tinder, toilet paper and burnables of all sizes within easy reach before the first match is struck. I usually start with three squares of toilet paper loosely crumpled, cover that with a handful of dry pine needles, then build a tepee of the smallest, lightest twigs by tilting them against the paper from all sides.
After carefully leaning half a dozen finger sized sticks against the pile, I crouch low to block the prevailing breeze (if it is strong, I block the entrance to the fire pit temporarily with rocks) and thrust a lighted kitchen match beneath the paper with one hand while I shelter the match from stray zephyrs with the other. Once the paper is lighted, I add the match to the tepee and use both hands to shelter the embryo blaze until all the wood has caught. Care must be taken not to put the fire out by knocking down the tepee with fresh wood, by skipping the intermediate-sized sticks and adding heavy branches, or by letting the tepee burn up before adding fresh wood.
Frying pans or griddles are a nuisance for the backpacker because they require a wood fire which blackens them and thus require a heavy cloth or plastic case. Decent frying pans and griddles are not light because heavy gauge metal is needed to evenly spread the heat and prevent burning. The best compromise for the backpacker is a shallow eight or nine inch pan of thin steel or thicker aluminum, with either a ridged or waffled interior to spread heat, or a teflon coating to prevent sticking. Or cook your trout in the ashes—after first wrapping them in foil.

Though its use requires more experimentation and fiddling, an oven made from two aluminum pie pans fastened together with two spring stationary clamps and suspended over a bed of coals is far lighter and cheaper and nearly as effective. Coals must also be spread on the top pan and covered with a piece of aluminum foil. Most experienced backpackers using easily prepared dishes forget about table knives and forks and carry only a soup spoon apiece and a good-sized simple pocketknife.
A knife is an absolute necessity in the wilds, but knives have become so fashionable that some people carry far more knife than they need. Buck and other expensive heavy knives are status symbols for some, and many rationalize a need to carry (preferably in a leather holster) Swiss army knives (or imitations) that offer a bewildering assortment of heavy, bulky rarely-used gadgets. The knife I like best has a big, broad blade suitable for spreading crackers and cutting salami—and a shorter, slimmer sharply pointed blade for cleaning trout. Brightly colored handles help prevent loss. If I am traveling alone, I put a tiny single-bladed spare jackknife in the outside pack pocket containing the first aid or fishing kit.
Every backpacker needs a cup, and the more experienced choose large ones and dispense with plates. I like a 12-ounce plastic cup which costs 40¢, weighs only 1½ ounces, retains food heat, cleans easily and, when the bottom of the handle is cut, snaps more securely to a belt or nylon line.
All kitchenware must be washed daily to prevent the formation of bacteria that can cause debilitating stomach illness. A few people scrupulously boil everything in soapy water after every meal; many only scrape out pots and pans and rinse in cold water—and cross their fingers. My procedure lies somewhere in between. For a short 2-3 man trip, I carry a 4-inch square abrasive scouring cloth and a 3-inch square sponge backed with emery cloth. Both are soapless. For burned pot bottoms I take a “chore girl” and I always take a dish cloth. Completing my kit are a vial of liquid bio-degradable soap—which is very effective at cleaning skin as well as pots—and a clean diaper or small absorbent hand towel. Old threadbare towels are inefficient. Fire blackened pots are best wiped with wet paper towels, rinsed and allowed to dry before being packed away in plastic or cloth bags. And if you rub a pot with soap before putting it on the fire, the soot will come off with comparative ease.
Having set up the kitchen, it’s time to look at food, its preparation and eating. To eat well and happily in the wilds, one must set aside the rigid and ritualized habits of urban eating (like the stricture to eat three square meals and not to snack between them) and adopt, instead, an entirely different set of rules. For instance, the principal purpose of wilderness eating is to keep the body fueled and fortified and capable of sustained effort. Energy production, ease of preparation and lightness of weight must all take precedence over flavor. Actually, a thick hot dehydrated stew at the end of a strenuous day often tastes better than a juicy steak in the city.
A backpacker’s tastes usually change in the wilds. The body’s needs are altered by heavy outdoor exertion, and these needs frequently are reflected in cravings for carbohydrates (liquids, salty foods and sweets), and a corresponding disinterest in other foods (like fats, meat and vegetables). Individual meals lose much of their significance. To keep the body continuously fueled, the backpacker should eat or nibble almost constantly. Many snacks and small meals provide better food digestion, which means better utilization and energy production, than several large meals. A backpacker who makes it a rule not to let an hour pass without eating a little something will enjoy more energy and less weariness and hunger.
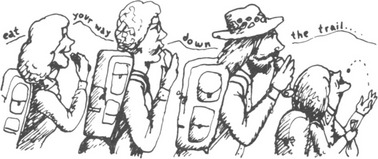
As Freedom of the Hills puts it, “As soon as breakfast is completed the climber commences lunch, which he continues to eat as long as he is awake, stopping briefly for supper.” I generally start nibbling an hour or two after breakfast if I am hiking, and I eat two lunches instead of one, the first in late morning and another in mid-afternoon. I know hikers who go a step further to escape food preparation altogether: they abolish distinct meals, eating every hour and fixing a larger or hot snack when they feel the need.
A hiker living outdoors should drink at least as often as he eats. If he is shirtless or the weather is warm his body may easily lose a gallon of water in a day! Since dehydrated food absorbs water from the body after it is eaten, still more water is needed. A backpacker can scarcely drink too much—provided he takes only a little at a time. Severe dehydration results if most of the fluids lost during the day are not replaced before bedtime.
Since water loss means salt loss, salty foods are unusually welcome. Although the body replaces salt lost normaly, continuous, excessive sweating may justify taking salt tablets. A salt deficiency (from extreme water loss) can result in nausea, aches or cramps. But overdosing on salt is dangerous too. To protect yourself, take no more than two salt tablets with every quart of water you drink. To purify suspect water, boil it or add a trace of iodine. Halazone will not kill the bugs found in really bad water such as that found in the jungle, in primitive countries and downstream of any habitation.
Since heating food greatly increases preparation, requires weighty equipment (pots, stove) and provides only psychological benefit—cooking only reduces nutritive value—more than a few backpackers avoid cooking in the wilds altogether. They find the saving in time, labor and weight more than offsets the lack of comforting warmth.
Unless you’re a gourmet and came to cook, you’ll be well advised to keep your food list and its preparation as simple as possible. In my view the importance of easy preparation can scarcely be over-emphasized. After a long hard day on the trail in bad weather, the weary, starving backpacker, crouched in the dirt over an open fire in the cold, wind and dark needs all the help he can get. At such times boiling a pot of water and dumping in the food can be heavy, demanding, exasperating work.
One of the best ways to enjoy simpler, better eating next trip is to take notes this trip. By writing down my thoughts (see the back of this book) on surpluses, insufficiencies, failures, and unfulfilled cravings, I produce a record that makes planning food for the next trip twice as easy. Why start from scratch every time? By making notes—and keeping them—food lists are continually refined, the planning ordeal is greatly reduced and you eat better each trip.

Since backpacking is decidedly strenuous, it is hardly surprising that the body’s fuel intake must increase significantly in order to keep up with demand. The body’s energy requirements and the energy production of food are both measured in calories. It takes twice as many calories to walk at 3 mph as it does to walk at 2 mph. Walking at 4 mph doubles the calorie requirements again, and it takes 2½ times as many calories to gain a 1000 feet of elevation as it does to walk at 2 mph. A variety of studies have shown that—depending on innumerable factors (like body and pack weight, distance covered, terrain, etc.)—it takes 3000-4500 calories a day to keep a backpacker fueled. Easy family trips might require 2000-2500 while climbers may need 5000.
Backpackers who take in fewer calories than their systems need will find the body compensates by burning fat to produce energy. Stored fat is efficiently converted to fuel at the rate of 4100 calories per pound. The backpacker who burns 4000 calories, but takes in only 3590 (410 fewer), will theoretically make up the difference by burning a tenth of a pound of body fat, although individuals vary widely where fat conversion is concerned.
Backpackers unused to strenuous exercise will usually lose weight, but probably not from lack of caloric energy. Exposure to the elements results in water loss, and the change from the high bulk diet of civilization to low bulk dehydrated foods tends to shrink the stomach. For most people, a little hunger and a loss of weight is beneficial to health and need not be construed as the first signs of malnutrition—as long as energy levels remain ample.
In the city we customarily eat till we are full. In the wilds, where energy expenditure is far greater, we tend to be anxious about keeping the body fueled; consequently there is a powerful instinct to stuff ourselves with food until we feel comfortably full. In the process it is easy to eat two days’ ration at one sitting and get up feeling slightly sick and bloated. The extra power is wasted since the body will not process any more than it can use. It requires some knowledge of the caloric output of foods and the body’s likely needs, but if the traveler can muster the necessary self discipline and restraint, he will discover he can eat less with no loss of energy.
This tendency to overeat, in my experience, is as little recognized as it is fundamentally important. Think back to those trips on which you ran out of food. Instead of trusting the menu you originally devised, you probably decided—on the basis of bulk alone—that you weren’t getting enough to eat, so you increased the rations. You damned the company that labeled your dinner “serves four,” because it barely filled up two of you. It probably didn’t occur to you that there might have been enough calories for four and that you didn’t have to eat till you were stuffed. The veteran traveler realizes that the slightly empty feeling in his stomach—and even loss of weight—reflects a healthy lack of bulk, not a dangerous shortage of nourishment.
Weight is usually about the same for both dehydrated and freeze-dried foods, since both processes leave about 5% water and 25% of original weight, but dehydrated foods take 2-3 times as long to rehydrate (soak), a severe drawback when you’re ravenous even before you stop to camp for the night. Air dried food contains as much as 25% water. I’m willing to simmer my pre-cooked, fresh-tasting freeze-dried stew for 20 minutes at high altitude, but an hour (and sometimes two!) is too long to wait for a less appetizing air-dried dinner to cook.
When it comes to shelf life, it’s the packaging that counts. Food in polyethelene bags is always good for a year, but the safe maximum is two years. Vacuum packed foods in foil are good indefinitely—as long as the seal isn’t broken. When the vacuum goes (easily determined visually) shelf life drops to the polyethelene level. Food vacuum packed in nitrogen in cans has no known shelf life limit, except for high fat foods (butter, buttermilk, peanut butter powders) which have a five year life expectancy.
Food is divided into three major components: fats, proteins and carbohydrates, all of which are essential to the backpacker’s diet. The ideal proportions are essentially unknown and vary according to the temperature, individual, environment and type of activity—but a rule of thumb suggests that caloric intake be roughly 50% carbohydrates, 25-30% protein and 20-25% fats.

The National Academy of Sciences says we eat 50% more protein than we can utilize. Protein serves only to maintain existing muscle. On a rigorous trip, all that’s needed is .015 ounces per pound of body weight per day. That means a 100 pound woman needs only an ounce and a half, while her 200 pound boyfriend needs a mere three ounces. More than that is wasted!
Fats are no easier to digest than proteins, but they supply more than twice the energy and release it gradually over a long period of time. The principal fat sources for backpackers are oil, butter, margarine, nuts, meat fat and cheese. The digestion of protein and fat demands the full attention of the body’s resources for a considerable period of time. Consumption should be spread through breakfast, lunch and snacks rather than being concentrated in a heavy dinner. Even relatively small amounts should not be eaten before or during strenuous exercise. The blood cannot be expected to circulate rapidly through exercising muscles and digest complex food in the stomach at the same time without failing at one function or the other—usually both.
When heavy demands are made on both the digestion system and the muscles, the body is likely to rebel with shortness of breath, cramps, nausea and dizziness. The first signs are low energy and fatigue. Carbohydrates may conveniently be thought of as pure energy. Digestion is rapid, undemanding and efficient and the energy is released within minutes of consumption. But fast energy release means that carbohydrates are completely exhausted of their power in as little as an hour, and more must be ingested if the energy level is to be maintained. The backpacker who lives on carbohydrates must eat almost continuously to avoid running out of fuel. The common sources of carbohydrate are fruits, cereals, vegetables, starches, honey and sugars.
Since fat digestion yields the most heat, it makes sense in cold country to partake just before retiring on a cold night for leisurely digestion while you sleep. There is no more potent source of fat calories than cooking oil, so I take a pull on the bottle or pour a dash in the stew when calories are needed and there’s time for digestion.
Some of the strategies I employ may help you to better eating in the wilds. I use the creative addition of spices and condiments to simple dishes to produce variety without complicating food preparation. For instance, on a relatively short easy trip, I might increase both the power and the flavor of a packaged stew by adding several of the following: freeze-dried sliced mushrooms, a pinch of Fines Herbs (spice mix), a gob of butter or margarine, parsley flakes, onion or garlic powder, a lump of cheese, crumpled bacon bar or vegetable bacon bits, tabasco sauce, and so forth. I could eat the same basic stew for a week but enjoy a different flavor every night by the restrained use of these and other seasonings. Or take another of my staple foods, applesauce. I keep it exciting day after day by the judicious use of: cinnamon, raisins, lemon powder, vanilla, chopped dates, nutmeg, ginger, nuts, honey and coconut in varying combinations.
On a long hard trip, seasonings and spices become even more vital in the battle against boring, bland meals. A dash or two of chili powder and a shake of onion flakes will turn a dreary pot of beans into spicy chili. A little curry powder will liven up the rice. Jazz up a dreary casserole with dry mustard and Worcestershire sauce. If trout are on the menu, I briefly shake the dampened fish in a plastic bag containing a few ounces of my cornstarch, cornmeal, salt, pepper, onion and garlic powder mix before frying. Trout are also good baked in a butter sauce with sage and basil.
Other versatile ingredients include: sunflower and sesame seeds, slivered almonds, fruit crystals, wheat germ, coriander, bouillon cubes, tomato, beef and chicken base, peanuts, banana flakes, various freeze-dried fruits and vegetables, bay leaves, and oregano. For many years, I carried an old tin spice can filled with a mixture of three parts salt and one each of pepper, onion, garlic and celery salts. It is still one of my favorite shakers.
I sometimes get rid of leftovers and simultaneously fortify my dinner soup with a gob of butter or a slosh of cooking oil and perhaps some bacon bar or TVP. Any leftover jerky or milk powder may also get dumped in the soup. We cook it in our one big pot and drink it out of our oversized plastic cups, accompanied with a few crackers from the lunch supply.
When there is still half an inch of soup in the pot (for flavor) I empty in a freeze dried dinner and stir in the required amount of cold water. This is contrary to the directions on the package which call for adding boiling water, but by mixing ingredients before heating I maximize valuable soaking time. At 8,000 feet the time needed to rehydrate the casserole may be twice the five minutes advertised, and twenty minutes is better than ten if you don’t like your meat hard and rubbery. When the meal is half cooked (i.e. the meat portion is no longer rock hard) I add my salt and pepper mix (to taste), mushroom slices, fine herbs mix (with restraint) and whatever other flavors or fortifications that seem appropriate on that particular evening.
With the aid of big spoons we eat the resulting stew in our unwashed soup cups. The moment the pot is empty and scraped, I fill it with water to simplify future cleaning because experience has taught me that stew allowed to dry will set up like concrete! Once the stew is off the stove a small pot or tea-kettle containing about three cups of water goes on—saving stove fuel. When the water is half heated we use a little in our empty cups to clean out the grease, polishing with a piece of paper towel. Into the hot water goes applesauce, probably premixed with cinnamon and nutmeg. By the time a few raisins and a dash of honey have been stirred in, this precooked dish is ready for consumption in the clean soup-stew cups. The final course is hot tea, along with snack foods, and it continues until bedtime. I try to remind myself that what I’m eating is low on bulk but dehydrated and concentrated: so I must drink lots of liquids and restrain myself from the urge to eat until full.
Except for beer in warm weather I’m not a drinking man, but I’ve learned that a small belt of something potent can be marvelously beneficial under certain circumstances. Spirits are low at the end of a hard day when you ease the pack off weary shoulders and grimly contemplate setting up camp and cooking dinner in the wind and dark. At such a time, nothing restores cheer by blotting out discomfort like a shot of pain-killer, even if you don’t drink.
Only oils and animal fats surpass butter and margine (about 720 calories per 3½ ounces) as a source of fat. Served in Sherpa tea at breakfast, on bread or crackers at lunch, and in soup or stew at dinner, butter palatably provides an ideal source of high yield, long-lasting energy. Parkay offers margarine in a lock-top plastic squeeze bottle designed for camping.
With all the good inexpensive dehydrated food available in the markets nowadays, there’s no excuse for carrying canned foods into the wilderness. In some areas glass and cans are now banned.
On the face of it, Instant Breakfast and its relatives like Tiger’s Milk should be ideal for backpacking, but my friends and I have reluctantly abandoned them because they dependably produce diarrhea within an hour if we are hiking.
A few drops of vanilla or a little coffee or cocoa mix help mask the slightly artificial flavor of reconstituted milk products.
I generally carry a small plastic bottle of cooking oil, even though I am not equipped to fry, and use it to fortify stews and other dishes when there is leisure for fat digestion. And I sometimes take a pull on the bottle before retiring on especially cold nights.
Molasses, though nearly 25% water, quickly converts to energy and is used like honey or jam by those who like the strong sweet flavor. And a teaspoon or two works beautifully as a gentle natural food laxative—often necessary after a change from city fare to a steady diet of low bulk, dehydrated food.
Although sticky, heavy and liquid, honey behaves well enough in a sturdy screw-capped squeeze bottle or tube. There is no quicker source of potent carbohydrate energy (300 calories per 3½ oz.), and honey is only 17.2% water. It’s sweet delicate flavor makes it valuable as a spread, dessert, syrup, frosting and sweetener for drinks.
If you’d like to know more about menu planning, recipes, specific foods, stove selection and cooking equipment, see the Food & Cooking chapters of my Pleasure Packing for the 80’s.
Eat often, well and with a minimum of fuss, and you’re bound to enjoy a satisfying trip.