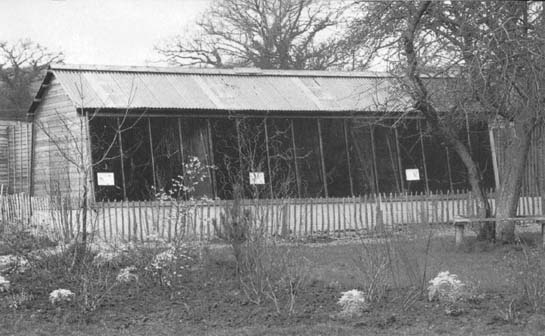
The Eagle Barn under construction
Bearing in mind the fact that birds have to be ringed and registered; that the less disturbance the birds have, the better; the easier the pens are to manage the better; then the design of the aviary/pen is very important. We have been rebuilding since 1983 and still learn something new each time we put up a new block, because however hard we try, the pens always have something that we wish we had done differently in the long run. Apart from the fact that many of our old aviaries will fall down soon if we don’t replace them, we have learnt a great deal about breeding birds since my father and mother first started The Falconry Centre. So we are building new pens to make life more pleasant and better for the birds, easier for us to manage with feeding, cleaning, breeding and ringing, but also trying to build something that blends in fairly well with the countryside.
We have tried to build for every extreme of weather conditions we have known over the last twenty years here—weight of snow up to two feet, gale force winds, freezing temperatures with very cold winds, high temperatures during droughts in summer (rare, I will admit) and most important in Britain, wet weather which needs good drainage. All these have been thought of; we have also tried to get away from quick building materials such as fence panels which, although speedy to erect, have a very short life span. I wonder now, after the hurricane force winds last year, how many people are wishing they had spent a little more on building. In the long run you get what you pay for. If you build cheaply you will regret it eventually.
If you have a choice, build pens facing west or south wherever possible, away from the freezing winds of winter. Part of the pen should always provide a sheltered area from the prevailing winds, so check from which direction your particular winds generally come. Light is vital to all species including owls. All birds love the first sunny days of spring. Light is important for both breeding, and healthy birds.
Much of what follows can be used as advice for building quarters for just one bird, used for flying, as well as for breeding pens. The same rules apply. Build well, with good materials to last. Don’t cut corners or you will probably live to regret it. They are only suggestions and ideas taken from what we have built over the years, and experience gained over the last twenty-five.
We have always found that it is better and cheaper to start from scratch rather than try and adapt from something that was designed for a different job.
Our new pens have a block or brick wall, about 2ft (60cm) high above the ground and sometimes 3ft (90cm). The timber-framed pen is then placed on top of this. This gives several advantages. Firstly the timber lasts far longer. You can use standard size panels of weldmesh, if the front of the pen is to be open, and make any extra height in the pen with the wall. It helps against the invasion of vermin such as rats. It also looks nice, clean and professional and, if block work, the wall can be painted with an exterior paint. A bath can be built onto it easily.
Apart from the really nervous birds such as the accipiters, it is so much nicer if you can see your birds through a wire front, and it solves the problem of boredom which many species can suffer from, giving them something to look at. We have bred Peregrines, Harrises, Redtails, Ferruginous Buzzards, Blyth’s Hawk Eagles, Kestrels, Redshouldered Buzzards, Caracaras, Egyptian Vultures and many Owls in open-fronted pens with many visitors looking on. We have even bred Goshawks in a wire-fronted pen, but not in front of visitors. As long as you place your pen sensibly and make sure that children, cars or dogs can’t run up too close, there should be few problems. There will of course always be some pairs of birds that don’t have the temperament to be in an open-fronted pen, and this will only be discovered by experience. But young birds put in for future breeding can be placed in open pens and settle well before getting to breeding age.
SIZE
Size of pen is something we are often asked about. Generally our rule of thumb is to build pens as spacious as we can afford. Birds can be bred in quite small pens, that has been proved many times. Being open to the public, we have a certain amount of pressure on us to give the birds as much room as possible. Anyway, I personally prefer to see our birds in good sized pens. The other thing you must remember is that a small pen may be okay for just the pair, but what sort of problems will you get if they raise six young for you? How dirty will the pen get then? Will there be enough perches?—and so on.
The size will, however, depend on the birds you are building for. Our Eagle Barn is 27ft (8.2m) to the ridge, 17ft (7m) to the eaves; each pen is 15ft (4.5m) wide and 32ft (9.8m) long. The central service passage is 8ft (2.4m) wide and there is a lower and an upper one. Even then I should have liked to build bigger, but funds and space would not stretch any further. The next barn is for medium sized raptors such as Redtails, Goshawks, Harrises and similar sized birds. This will be 14ft (4m) to the eaves, 22ft (6.7m) to the ridge, with each pen 10ft (3m) wide and 20ft (6m) long. When you consider that each barn houses twelve pairs of birds, that starts to cover a fair amount of ground area. So as I will no doubt repeat many times thoughout this book: plan ahead, looking at what you hope to achieve in the future, so that you don’t run out of space or have to build new pens in inaccessible places behind already existing ones. Suggested minimum pen sizes for birds appear on.
Probably the most important aspect to think about with size of pens is height. The higher they are the more settled the birds will be. This means you have to be careful if you build a pen nice and high, to make it long enough for the birds to fly up and down without too much difficulty. High wing-loading birds such as Peregrines may land too heavily if the pen is very high but not long enough for the bird to reduce speed. So consider the birds you are building for and use your common sense.
FOUNDATIONS
As with any building, start with the foundations (which incidentally will probably be one of the most expensive parts of your pens), getting them dug and level and ready for building the wall. Remember to build the bath at this stage. Don’t forget to leave a ground level space in the wall, for the door (you would be surprised how easy that is to forget—guess who’s done it!).
BATHS
The baths we now use are built into the concrete block wall. We put a good foundation along the centre of the open front of the pen, or if a solid walled pen, in the centre of the wall nearest to water, and build out a square or rectangle, depending on the size of the birds who will require the bath. Don’t forget to build it well away from the nest ledge or anywhere where droppings can foul the water. The rectangle is the same height as the wall and is almost filled with hardcore, the remaining few inches being lined with a mix of cement, making a shallow bath which can be flushed out with a hose. The wide 4in (10cm) sides of the concrete blocks are rounded off with the cement mix, making it comfortable for the birds to land on and good for their feet. The bottom may go green with algae, but if flushed out once a week the water stays remarkably clean. We put it in the centre of the wall to keep wings away from corners. Make sure that the concrete side closest to the woodwork is highest so that when it rains the water will overflow away from the timber. Also make sure that rainwater running off timber walls cannot wash any timber preservative into the bath. If put in a solid walled pen, drill a hole in the timber wall large enough to insert a hose and flush through the hole.
THE BASE
Next fill the pen with hardcore, the deeper the better. We put down about 9in (23cm) or more, giving less chance of rats, foxes or even one’s own dog (could a falconer’s dog possibly be that badly behaved?) digging through. The hardcore will drain the pen nicely and should stop any growth of greenery or weeds. We put a yearlong weed killer down before the hardcore. This kills everything for one year, and under the hardcore it cannot affect the birds. Tall growth of plant life in a pen causes problems, it hides vermin, keeps pens damp in wet spells, and small birds such as Little Owls or young birds just leaving the nest can get into tall wet growth and die of cold, unable to get out. On top of the hardcore we put large size gravel—1–3in (2.5–7.5cm). Smaller will just fall through the hardcore and be lost. Smaller gravel can be added on top if required. The whole result looks smart, is clean, drains excess water and can be maintained by hosing down regularly the soiled areas under perches and the like. For really heavy-landing birds such as big vultures, or Secretary Birds who spend a great deal of time walking, we put 6in (15cm) of sand on the top. You will notice that the perches are not in yet. Although this means that some of the base will have to be moved, this is easier than trying to build round perches that catch on everything and are a pain. Leave them until last when the front is put into position. The exception is if you like the idea of the made-up trees as perches get the pine poles in before the hardcore.
FRAMING
The size of the timber used varies, depending on the size of the structure and the roof it has to support. We are now using CLS which is a stress graded timber, but we are building pretty large barns. For most people 4in×2in (10cm×5cm) treated timber should be fine. This goes up onto the wall, remembering to put a damp proof course (DPC) on first, and will cheer you up as it should go up quickly. All our new pens have either a central passage or a passage running along the back. This is for servicing, cleaning, feeding, monitoring, etc. Make it wide enough to get a wheelbarrow down easily, preferably leaving the skin on your knuckles. Remember this building should last you at least twenty years; build it pleasant to work with.
The door to the pen should be from the passage. Don’t make it three foot square and have to climb over a bath to get in. Build it for human height and wide enough for the wheelbarrow to turn into the pen, 6ft 6in×3ft 6in (2m× 1m) is fine. In that way you will not brain yourself regularly. It is opening into a dark passage so you need not worry about escapes. In our Eagle Barn the doors open inwards. The nest ledge and feed ledge should also be on the passage wall. You can then enter without fear of losing the bird, watching becomes easier, feeding is done without young seeing you produce the food, eggs can be taken and young replaced with slightly less hazard, and your security should also be improved.
We generally use a material called sterling board (9 or 12mm) to clad the framing, but we have a solid roof on most of our pens so they are protected from the weather. We also use 1⁄2in (1.25cm) feather boarding 6in (15cm) wide and treated, or exterior grade plywood, or 6in×1in (15cm×2.5cm) end boarding. The passage is clad with a smooth surface using sterling board, so doors work properly, and fixing for nest and feed ledges becomes easier. The front of the pen is covered with boarding if you are building a solid walled pen or with twilweld or weldmesh or similar if the pen is to be open-fronted; 2in (5cm) mesh is fine for most birds except American Kestrels, Little Owls or smaller birds.
ROOFING
Since starting to write this we have completed the building of our Eagle Barn and Barn No 2, and I am now in no doubt about roofing. These new buildings are completely roofed over with plastic-coated steel sheets and large areas of roof lights. Some of our other pens have a netting roofing with shelter over the nest ledges. I prefer the totally roofed pens as it solves far more problems than it creates, and makes building easier and more structurally sound. The advantages are that the pen is warmer and safer for the parent birds, and you can sit safely in your house watching the pouring rain or falling snow knowing that however silly your birds are they cannot sit out getting soaked and cold. The same applies with young that have just left the nest. The food will always stay dry and not get dropped into snow by birds and then lost. If the perching is correctly placed, the birds can get plenty of sun during one end of the day or the other. If they really want to get wet then they can usually sit in what rain may be driven in on a windy day. There is also less chance of weeds growing.
The disadvantages are that the rain does not wash droppings away so you have to do that, and possibly in continuous dry weather the pen may get dusty, either from nest ledge material or dust and feather remains from plucked food. This could possibly cause asperiglosis. However, as those weather conditions are far rarer than damp weather, we are going for total roof coverage. A quick spray with a hose will lay the dust.
Needless to say, if the roof is totally covered, the front must be wire to allow for plenty of fresh air and a vent or wooden louver in the back wall of each pen will give through ventilation. In very cold weather there is condensation as the sun warms the cold roof. So far this has not seemed to worry the birds. It is a solvable problem, using under-roof insulation, which is an option we may take at a later date.
When building an open roof with one end sheltered, we use a 11/2in (4cm) mesh nylon net as covering. It is made to measure by Bridport Gundrey Netting. The important thing about any net is the thickness of the individual strands. This netting is similar to tennis-court netting and the strands are about 1/8in (3mm) thick. This means that the birds cannot cut themselves if they fly into it, and should not be able to twist the net around their toes and injure themselves. It is also very strong, very quick to put up, very light and, over a reasonable span supported with high - tension wire it should support an average weight of snow, although in heavy falls snow should be knocked off. We rebuilt one of our owl blocks with this netting as the roofing material and promptly came across the only problem that we have encountered with it—rats. If they can climb the wall to the roof they seem to love eating through it, leaving holes large enough for birds to escape. We solved this problem by putting lin (2.5cm) wire netting on top. This was fine for the owls who tend not to fly up to the roof, but would not be good for birds that are inclined to be roof climbers or hitters. This is yet another good reason for having a solid roof. A friend of mine came across an interesting problem with plastic-coated chain link, which you would think would be really good apart from needing strong support. He found one of his birds with wing feathers caught in the overlap of the chain link and having hung for some time before he found it. So, if wire is to be used, you can only go for thick-gauge welded mesh and even that will damage birds if they hit it hard with either feet or tops of heads. Netlon, a plastic windbreak material, is quite good to put beneath wire mesh roofs as long as you use the thick gauge. Remember that any thin gauge material, be it plastic, nylon, wire or whatever will cut birds. So if we were going for uncovered roofs we would make sure that no vermin could climb to the roof and we would use thick stranded nylon mesh.
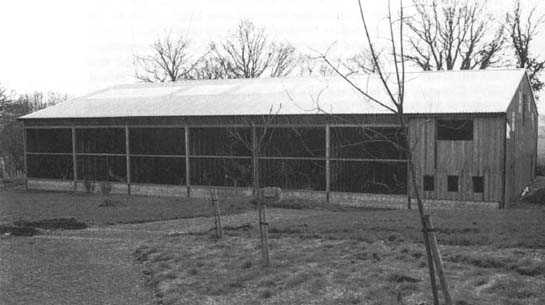
The finished Eagle Barn
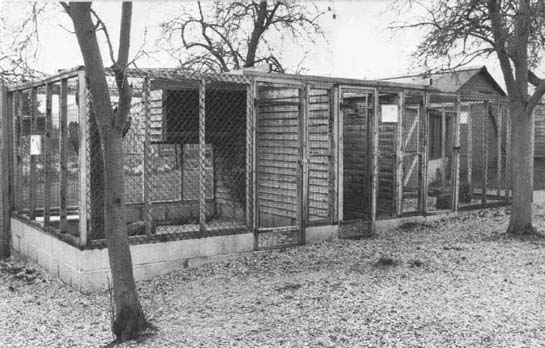
Some pens for very tame owls, with a nylon netting roof
SHELTER
Many of our old pens have just small areas covered to give birds protection. Some people cover only one or two corners; I don’t think this is enough. It is not sufficient to shelter birds from driving rain or snow, nor does it give them the chance to move about in the sheltered area. You may find that pairs will not roost together, so, if there is little shelter only the dominant bird will use it and the other may be out in all weathers. This may not harm the bird, but continual surviving of bad weather conditions is unnecessary, and may well shorten the bird’s life. Certainly, nest ledges should be very well covered so that no driving rain can enter. Feed ledges should also be covered. There is hardly anything more worrying than seeing food drop into deep snow in the pens, and even if the snow is moved how does one know that the birds haven’t lost some of their rations? All this increases my delight in the fact that our new pens are totally covered so that I don’t have to worry about these problems. If you are going for partially sheltered pens then cover the whole of one end up to half the length of the pen. If you use light-giving panels (translucent plastic types) then you can allow plenty of light into nest areas without minimising the sheltered area. Remember though that excessive heat can also cause problems so don’t put your light-giving panels directly over the nest ledge. There are now available plastic sheets that are double glazed to solve the problem of a heat build-up.
A smaller roofed set of pens
For shelter-building materials use good-sized timbers for strength and support. Our Eagle Barn roofing material is plastic-coated steel sheeting, with plenty of transparent roof lights inserted to allow sunlight into the pen. We tested the temperature in the pens last summer while building and are not worried about overheating. If we do by any chance get a very hot summer we can insulate the undersurface with no problems. Do not use asbestos as it is a dangerous material, but several types of concrete-based roofing sheets are very good and solve any heat problem. They are, however, very heavy and so need considerable support. My stables are roofed in a product called Onduline. This is a very attractive material, seems to insulate reasonably, lasts well and I like it very much. It is only affected with condensation in freezing conditions. However it does need more support than other materials and should be fixed on every ridge at the front.
The aviary, showing perches, nest and food ledges, the bath and the sheltered area
Whatever you do about roofing, don’t forget to put up good strong gutters. These are vital and will keep your pen much drier. Dig a good deep soakaway well outside the pen for the roof water to drain away.
NEST LEDGES
Throw away all nests using old car tyres. They harbour disease and insects and, in my opinion have no place in a breeding pen. Make all nest ledges as big as possible. The Eagle Barn ledges are 8ft (2.4m) wide, 15ft (4.5m) long, with a lip of 9in (23cm); the ledges in the pens for Redtails, Peregrines and the like are 4ft (1.2m) wide by 10ft(3m)long, and all nest ledges have the same 9in(23cm) lip. This length of ledge, running right across the back of the pen, is designed to be part of the structure. The supports go right across the central passage and into the pens on either side, giving the nest ledges support, and support for an upper passage for viewing. The long ledge gives the birds a limited choice of nest area ie they can choose one end or the other but still be in the area we need them in for monitoring. But even more important, it is to give babies room to spread out when they are starting to fledge, particularly if you have asked the parents to rear a good number of young. If you don’t give growing eyasses plenty of room you will find that young get very dirty, and they may push one another out of the nest before they are ready to leave it. A large nest ledge avoids this and the possible resulting injury.

Nest ledges
The lip should be high enough for you to put down a good depth of peat, pea gravel or sand and still leave the babies enough height to stop them falling out during the early stages. We put down a base of one or other of the above materials in all the nest ledges, even with nest-building birds. We have found that if the birds build a poor nest the eggs can slip through, and if they land on hard timber they don’t last long. If they have a soft landing they should be all right. Note: Always use a coarse Irish moss peat, not the fine black peat, and mix it with pea gravel. Fine peat kills hatching eggs and young.
All nest ledges should be cleared, cleaned and disinfected before each breeding season. Bacteria will undoubtedly build up. If you don’t clean them regularly, after a while infection is bound to get into eggs.
PERCHES
I don’t like to see perches nailed across corners of pens. The walls get dirty and the wooden perches season over the years, getting very hard. This can cause foot damage. Ninety-nine per cent of bumblefoot is caused by poor perches.
We have access to a number of trees, many of which need pruning at intervals, so we choose well-shaped large branches and dig them into the ground giving the effect of a tree with several perching places. These work well and look nice. If placed sensibly the walls of the pens need not get fouled, and they make excellent perches for young just learning to branch. With the Eagle Barn it was difficult to find trees large enough and even when we did they were almost impossible to manage; so we bought twelve tall poles of pine from the local woods. The diameter was about 12in (30cm), even these were pretty impossible to manage and had to go in before the roof went on. Then using a small chain saw (don’t use one if you are not experienced, find someone who will give you a hand for they are very dangerous machines) we cut mortices (square holes) in several places in the poles, we then cut tenons on the ends of various branches we had collected, and fitted them into the holes, giving us a hand—made tree with branches in all the right places. With a little imagination they can look great and are very effective even if it is a little odd to see oak branches on a pine trunk.
Avoid fruit-tree timber if you can. Once the bark comes off with time, the timber underneath has nasty and very sharp points which are not good for the birds’ feet. Oak, beech, elder or elm are good. If you plant willow branches in the ground, remember they will probably grow.
Don’t forget to have at least one perch large enough to hold a pair of mating birds comfortably. After all who wants to mate in discomfort? Perches near the nest ledge are vital for young to grab at should they slip, and for them to land on either to leave or return to the nest.
We have just added a new perch in the Eagle Barn as we did not have enough perches near the wire. If you have a really good high perch wire, then birds are far less likely to hit the front. So we put in what we call budgie bars. We thought they might not work and everyone was very sceptical, but they are a great success and the birds love them. Get a decent sized branch, one-third the length of the width of the pen. Put a rope round each end leaving two equal lengths free at each end of the perch for tying at the height you require. Attach to the purlins and, hey presto, a budgie bar. It tends to swing from side to side rather than front to back, and thus exercises the bird.
FOOD LEDGES
These are placed under the nest ledges, backing onto the service passage for access. Food ledges placed under the nest ledge tend to discourage the birds feeding there, as they prefer high perches generally. This should keep the feed ledge much cleaner. The ledge can be washed down from the service passage without disturbing young as they can’t see you. Get adult birds used to all maintenance processes well before the breeding season. The feed ledge being under the nest ledge also gives the adults a little more work to do in getting food to the young which is no bad thing, especially for the male.
The other very important reason for this placement of the feed ledge is that at no time can young see you bringing food. Young Harris Hawks, even though parent reared, will associate humans with food later in life if they see them bring food each day. With the feed ledge below the nest ledge, they see the food only when it arrives with the parent bird, thus ensuring no imprint tendencies and producing, in my opinion, nicer birds to handle if being flown.
As stated before, the food ledge should be sheltered from rain and snow to keep food pleasant for birds and visible. It should also be kept as clean as possible at all times.
If you can afford it, before the pens are finished run power to them. To be able to turn on safe, outside lights is wonderful on dark winter nights, should you be worried about the birds. Perhaps for some reason they haven’t been fed during daylight hours, or something has disturbed them and you are afraid that they won’t get up to their perches. There are many reasons and you will never regret the expense. It will also help from the security point of view.
A tip in bad weather which I learnt from Jim Weaver when I visited the Peregrine Fund at Ithaca in the United States. They have pretty cold winters over there and they also have total covered roofing. When the weather is bad, they tack up a large plastic sheet (translucent builder’s plastic is fine) with battens onto the front of the pen. It makes the pen much snugger for really cold spells, is easy to store for re-use, and is cheap and quick to install. If you are worried about circulation of fresh air, leave a small gap at the top.
OUTSIDE THE PEN
As running lawn-mowers and such like close to breeding pens is not a good idea, a strip of gravel on a hardcore base round the outside of the pens, about 3ft (1m) wide, will keep pens cleaner, tidier and more secure. The birds will always know you are there anyway, so don’t worry about the noise when you walk on it.
SOME SUGGESTED MINIMUM PEN SIZES
| Large eagles and vultures | 30ft long×15ft wide×16ft high (9×4.5×4.8m) |
| Buzzards, large falcons, eagle owls, small eagles small vultures, large hawks | 20ft long×10ft wide×12ft high (6×3×3.6m) |
| Small falcons, small hawks, small owls | 12ft long × 8 ft wide × 8ft high (3.6x2.4x2.4m) |
| Tiny owls and falcons | 10ft long × 10ft wide × 8ft high (3×3×2.4m) |