3
JAMS, JELLIES, AND PRESERVES
Homemade jams, jellies, and preserves are some of the favorite types of foods to can. They’re inexpensive to make and are usually made in small batches to achieve the right consistency, so you can make them with a small amount of fruit in a small block of time. Home-canned jams, jellies, and preserves are also delicious; they make wonderful and much-appreciated gifts for holidays, birthdays, housewarmings, and other occasions.
Introduction to Home-Canned Jams, Jellies, and Preserves
Before you get started on canning your own jams, jellies, and preserves, it’s important to know the difference between the three.
- Jam is made with crushed fruit and its juice. Most people like to leave it fairly chunky, although you can puree it or make it smoother if you and your family prefer it that way. Fruit butters are very similar to jams, although the fruit is usually pureed after it has been cooked down, to create a very smooth texture.
- Jelly is made with the juice of the fruit rather than the fruit itself, and once it jells up, it is relatively clear. It’s spreadable, but not as smooth as jam.
- Preserves are made with whole fruit or fruit cut into pieces. Preserves are quite chunky, but still spreadable, and you get more of the fruit’s texture than you would with jam.
Jam, jellies, and preserves are cooked prior to canning, so they do take a little more time than many pickles, but the flavor makes the extra time well worthwhile.
Using Pectin
Many recipes for jams, jellies, and preserves use added pectin to help them thicken properly. Pectin is a naturally occurring chemical in fruits, but some fruits have more than others. Apples have quite a bit of pectin, especially in the core and peel, while strawberries have very little. Commercial pectin is made by extracting the pectin from apples or from the peel of citrus fruits, and it comes in powdered or liquid form. Liquid pectin is sometimes preferred for more delicate or less sweet fruits. Widely available, it is usually found in the canning section of most supermarkets.
Jams, jellies, and preserves can be made without pectin if enough sugar is used or if the fruit you’re using has enough pectin in it. Using pectin, however, lets you use less sugar and also shortens the cooking time by quite a bit. Many recipes require only about 1 minute of cooking time to reach the proper thickness. Using pectin is very similar to using cornstarch to thicken a gravy or sauce.
Tips for Making Jams, Jellies, and Preserves
Here are some useful tips to making your jams, jellies, and preserves delicious and successful:
- Making these in small batches helps ensure that the fruit will cook quickly, and the color and flavor will be better.
- When you’re creating your own jam and jelly recipes, remember this guideline: For every cup of fruit you use, you’ll want to add ¾ cup of sugar. For example, 4 cups of fruit will require 3 cups of sugar. Some low-sugar recipes and recipes using apples and other highpectin fruits can use less, but this is a good general rule.
- If you are using very ripe or especially sweet fruit, add 1 to 2 tablespoons of fresh or bottled lemon juice. The acid in the lemon juice will help the mixture thicken.
- You do need to watch out for scorching or burning fruit, as the sugar in the recipe can burn quickly. The best ways to prevent this are to watch your heat, adjusting it to a lower setting if needed, and to stir almost constantly during the cooking process.
- To test your jam or preserves to see if they’re done, take a spoonful out of the pan and set it aside. If it holds its shape after about a minute, you should be ready to start canning the mixture.
Strawberry Jam
Strawberry jam may be the quintessential home-canned fruit spread. Strawberries ripen in June and in the fall, so buy large quantities during their peak seasons. Either make jam and can it right away, or wash, dry, and trim them and then freeze them in resealable bags until you’re ready to can. This recipe works equally well for blueberries, boysenberries, and elderberries. Just adjust the sugar according to the sweetness of the fruit.
|
• 5 cups hulled strawberries • ¼ cup fresh or bottled lemon juice • 6 tablespoons liquid pectin |
• 7 cups granulated sugar • 8 half-pint jars, lids, and bands |
1. Fill the canner with enough water to cover the jars. Boil the water, reduce the heat to low, place the jars in the water, and simmer until ready to use.
2. Using the low speed on a blender or food processor, pulse the strawberries once or twice so you’re left with a chunky mixture. Or place the strawberries in a gallon-sized resealable bag, and pound a few times with the bottom of a small saucepan.
3. Combine the strawberries and lemon juice in a large saucepan, and slowly stir in the pectin, mixing well. Bring to a full rolling boil over high heat, stirring constantly.
4. Add the sugar to the liquid, stirring until completely dissolved. Return the mixture to a full boil. Boil for 1 minute, stirring constantly.
5. Remove the pan from the heat. If there is any foam on the surface (harmless but unattractive), skim it with a small strainer or a spoon.
6. Ladle the hot jam into the jars, leaving ¼ inch of headspace.
7. Remove air bubbles, wipe the rims, center the lids, and screw on the bands and adjust until they are fingertip tight.
8. Place the jars in the canner and bring to a boil. Make sure there is at least 1 inch of water covering the jars.
9. Process for 10 minutes, adjusting for altitude. Remove the jars from the canner and cool.
Variations:
Try these yummy variations on strawberry jam: To make Balsamic Strawberry Jam, reduce the lemon juice to 1 tablespoon and add 3 tablespoons of balsamic vinegar. This makes the jam a little tangier and gives it a nice zing. To make Strawberry-Lime Jam, add the zest of one large lime to the strawberries during cooking.
Raspberry Jam
Raspberries are a delectable fruit, and raspberry jam is one of the most popular flavors. Look for seedless varieties of berries to make things easier for yourself. Seeded varieties need to be pressed through a sieve or processed through a food mill to remove the seeds. This recipe works equally well for blackberries and black raspberries.
|
• 3½ cups (about 5 pints) crushed raspberries • ¼ cup lemon juice |
• 7 cups granulated sugar • 3-ounce packet liquid pectin • 8 half-pint jars, lids, and bands |
1. Fill the canner with enough water to cover the jars. Boil the water, reduce the heat to low, place the jars in the water, and simmer until ready to use.
2. Using the low speed on a blender or food processor, pulse the raspberries once or twice so you’re left with a chunky mixture. Or place the raspberries in a gallon-sized resealable bag, and pound a few times with the bottom of a small saucepan.
3. Combine the raspberries, lemon juice, and sugar in a large saucepan. Bring the mixture to a full rolling boil over high heat, stirring frequently.
4. Stir in the pectin all at once and continue to boil for 1 minute, stirring constantly.
5. Remove the pan from the heat, and skim off any foam.
6. Ladle the hot jam into the canning jars, leaving ¼ inch of headspace.
7. Remove air bubbles, wipe the rims, center the lids, and screw on the bands and adjust until they are fingertip tight.
8. Place the jars in the canner and bring to a boil. Make sure there is at least 1 inch of water covering the jars.
9. Process for 10 minutes, adjusting for altitude. Remove the jars from the canner and cool.
Blackberry Preserves
Blackberries are coveted as one of the finest treats of summer. They make a beautiful jar of preserves, and canning them is one of the best ways to enjoy their delicious flavor beyond their short growing season. This recipe works equally well with black raspberries.
|
• 3 pounds fresh blackberries • 1¾-ounce package powdered pectin • ¼ cup lemon juice |
• 3 cups granulated sugar • 12 half-pint jars, lids, and bands |
1. Rinse the blackberries and pat dry. If using seeded berries, press through a sieve or food mill to remove the seeds.
2. Fill the canner with enough water to cover the jars. Boil the water, reduce the heat to low, place the jars in the water, and simmer until ready to use.
3. Combine the blackberries, pectin, and lemon juice in a large stockpot and bring to a boil.
4. Cook for 1 minute, stirring constantly. Add the sugar, stirring well, and return to a boil. Boil for 1 minute, stirring constantly.
5. Remove the pan from the heat, and let the mixture stand for 5 minutes, stirring every 30 seconds.
6. Ladle the hot mixture into the canning jars, leaving ¼ inch of headspace.
7. Remove air bubbles, wipe the rims, center the lids, and screw on the bands and adjust until they are fingertip tight.
8. Place the jars in the canner and bring to a boil. Make sure there is at least 1 inch of water covering the jars.
9. Process for 10 minutes, adjusting for altitude. Remove the jars from the canner and cool.
Variations:
To make Blackberry-Lime Preserves, add the zest of two limes to the berries during cooking. For Almond-Kissed Blackberry Preserves, add 1 teaspoon of almond extract after removing the berries from the heat.
Orange Marmalade
Orange marmalade sounds like a difficult recipe to make, but it’s really quite easy. This makes a beautiful presentation, so it’s a great home-canned product to give away as a gift.
|
• 2¼ pounds sliced oranges, peels on • Zest and juice of 1 lemon • 6 cups water |
• 9 cups granulated sugar • 8 half-pint jars, lids, and bands |
1. Fill the canner with enough water to cover the jars. Boil the water, reduce the heat to low, place the jars in the water, and simmer until ready to use.
2. Combine the oranges, lemon zest, lemon juice, and water in a large saucepan. Bring to a boil over high heat, stirring constantly.
3. Reduce the heat and boil gently, stirring occasionally, for 40 minutes. Place the lid loosely (leaving ¼ inch of space) on the pot, and continue cooking for another 30 minutes, stirring occasionally.
4. Return the orange mixture to a boil over medium-high heat, stirring constantly. Once the water is boiling, stir in the sugar. Boil, stirring occasionally, until the mixture thickens nicely, about 15 minutes.
5. Remove the pan from the heat, and test the consistency by removing a spoonful and allowing it to sit. If after 1 minute the thickness is what you would like it to be, skim off any foam.
6. Ladle the hot mixture into the canning jars, leaving ¼ inch of headspace.
7. Remove air bubbles, wipe the rims, center the lids, and screw on the bands and adjust until they are fingertip tight.
8. Place the jars in the canner and bring to a boil. Make sure there is at least 1 inch of water covering the jars.
9. Process for 10 minutes, adjusting for altitude. Remove the jars from the canner and cool.
Variations:
You can also make wonderful marmalade from tangerines or kumquats. If using kumquats, you will likely need to add a bit more sugar to taste. Grapefruit and lemon or lime marmalades are also delicious. Again, you will probably need to add more sugar until the marmalade reaches a sweetness level that you like.
Peach Freezer Jam
Peaches are at their juicy best when bought from local growers at the height of the season, usually early summer. Eat as many as you can fresh from the tree, but make this wonderful jam to enjoy their flavor long after summer has passed. Note: Ball and Kerr both make plastic canning containers specifically for freezing. They’re great for both freezer jams and for freezing small quantities of soups, stews, and other meals.
|
• 2 pounds fresh peaches • 2 tablespoons lemon juice • 4½ cups granulated sugar |
• ¾ cup water • 6 tablespoons powdered pectin • 8 half-pint jars, lids, and bands |
1. Bring a large pot of water to a boil, and use a metal colander to drop the whole peaches in. Boil for 30 seconds. Place the colander into a sink or large bowl of ice water to stop the cooking process.
2. Slip the peels from the peaches, cut in half, remove the pits, and chop the peaches finely.
3. Combine the chopped peaches and the lemon juice in a large bowl. Add the sugar, mixing well. Let stand for 10 minutes.
4. Fill the canner with enough water to cover the jars. Boil the water, reduce the heat to low, place the jars in the water, and simmer until ready to use.
5. In a small saucepan, combine the water and pectin. Bring to a boil over high heat, and boil hard for 1 minute, stirring constantly.
6. Remove from heat, and add the pectin mixture to the peach mixture. Let it stand for 3 minutes.
7. Ladle the mixture into the canning jars, leaving ½ inch of headspace.
8. Remove air bubbles, wipe the rims, center the lids, and screw on the bands and adjust until they are fingertip tight.
9. Place the jars in the canner and bring to a boil. Make sure there is at least 1 inch of water covering the jars.
10. Remove the jars from the canner and cool.
11. Let the jam stand in the refrigerator until it is set, but no more than 24 hours. Serve immediately or freeze for up to 1 year. Once frozen jam is opened, it can be kept in the refrigerator for up to 3 weeks.
Mixed Berry Jam
This simple recipe makes the best of summer berries by combining them into one delicious jam. Once you’ve learned to make it, feel free to play with the ratios. For instance, you can make it half-and-half with blueberries and blackberries, or leave out the blueberries altogether and substitute extra blackberries and raspberries.
|
• 1 cup crushed blueberries • 1 cup crushed strawberries • 1 cup crushed blackberries • 1 cup crushed raspberries |
• 4½ tablespoons powdered pectin • 3 cups granulated sugar • 8 half-pint jars, lids, and bands |
1. Fill the canner with enough water to cover the jars. Boil the water, reduce the heat to low, place the jars in the water, and simmer until ready to use.
2. Combine all of the berries in a large saucepan. Slowly stir in the pectin.
3. Bring the berry mixture to a full rolling boil over high heat, stirring constantly.
4. Add the sugar, stirring to dissolve completely. Return the mixture to a full boil. Boil hard for 1 minute, stirring constantly.
5. Remove the pan from the heat and skim off any foam.
6. Ladle the hot mixture into the canning jars, leaving ¼ inch of headspace.
7. Remove air bubbles, wipe the rims, center the lids, and screw on the bands and adjust until they are fingertip tight.
8. Place the jars in the canner and bring to a boil. Make sure there is at least 1 inch of water covering the jars.
9. Process for 10 minutes, adjusting for altitude. Remove the jars from the canner and cool.
Easy-Peasy Grape Jelly
Grape jelly is a favorite with kids and is easy to make once you get the hang of it. This recipe makes it especially easy by using bottled grape juice. It’s fun to try different types of grape juice for making jelly. Experiment with white or red grape juice as well as Concord grape.
|
• 2 cups unsweetened grape juice • 3½ cups granulated sugar |
• 3-ounce packet liquid pectin • 4 half-pint jars, lids, and bands |
1. Fill the canner with enough water to cover the jars. Boil the water, reduce the heat to low, place the jars in the water, and simmer until ready to use.
2. Combine the grape juice and sugar in a large saucepan, and bring to a boil, stirring constantly.
3. Stir in the pectin and boil for 1 minute longer, stirring constantly.
4. Remove the pan from the heat, and skim off any foam.
5. Quickly pour the hot jelly mixture into the canning jars, leaving ½ inch of headspace.
6. Remove air bubbles, wipe the rims, center the lids, and screw on the bands and adjust until they are fingertip tight.
7. Place the jars in the canner and bring to a boil. Make sure there is at least 1 inch of water covering the jars.
8. Process for 5 minutes, adjusting for altitude. Remove the jars from the canner and cool.
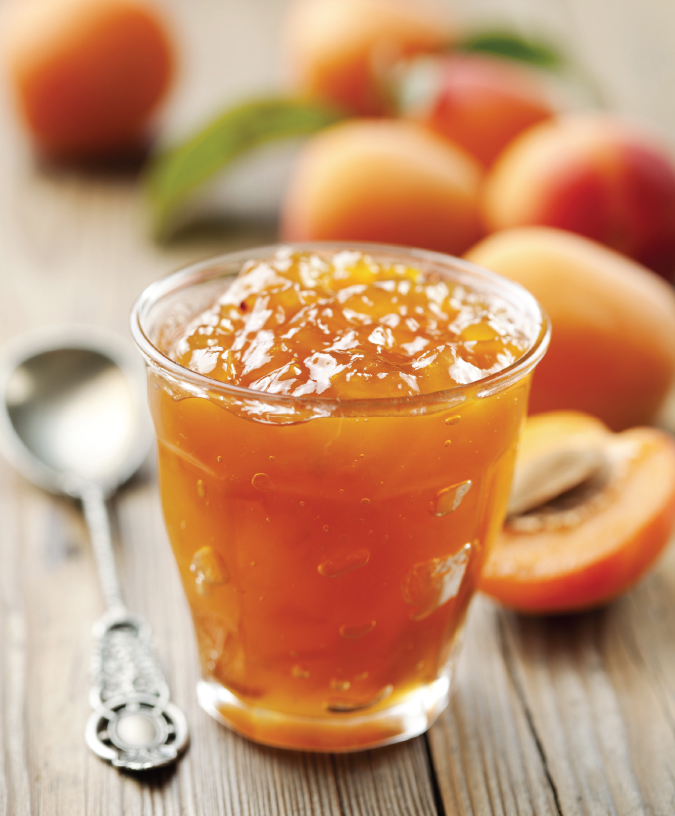
Apricot Jam
Apricot Jam
Apricots are luscious when bought ripe and in season. Making a jam of them lets you enjoy them at their peak flavor all year round.
|
• 3½ cups chopped apricots (about 30 apricots), skin on • ¼ cup lemon juice |
• 5¾ cups granulated sugar • 3-ounce packet liquid pectin • 6 half-pint jars, lids, and bands |
1. Fill the canner with enough water to cover the jars. Boil the water, reduce the heat to low, place the jars in the water, and simmer until ready to use.
2. Combine the apricots, lemon juice, and sugar in a large saucepan. Bring the apricot mixture to a full rolling boil over high heat, stirring frequently.
3. Quickly stir in the pectin, squeezing the entire contents from the package. Continue to boil the mixture for 1 minute, stirring constantly.
4. Remove the pan from the heat, and skim off any foam.
5. Ladle the hot jam into the canning jars, leaving ¼ inch of headspace.
6. Remove air bubbles, wipe the rims, center the lids, and screw on the bands and adjust until they are fingertip tight.
7. Place the jars in the canner and bring to a boil. Make sure there is at least 1 inch of water covering the jars.
8. Process for 10 minutes, adjusting for altitude. Remove the jars from the canner and cool.
Variations:
For a nice change of flavor, try Apricot-Almond Jam. Add 1 teaspoon of almond extract to the apricots after removing the pan from the heat.
Apple Butter
Apple butter was used for generations (along with dried apples, applesauce, and cider) as a way of preserving a huge apple harvest. Homemade apple butter is absolutely delicious spread on pancakes, waffles, muffins, or toast. This recipe substitutes a slow cooker for the hours of standing and stirring that making apple butter used to require. Note: Apple varieties that cook down well are best for apple butter. Try Red Delicious, Yellow Delicious, Rome, or any combination of these apples.
|
• 3 cups granulated sugar • 2 teaspoons ground cinnamon • ½ teaspoon ground cloves • ½ teaspoon ground nutmeg |
• ¼ teaspoon salt • 5 pounds apples, peeled and thinly sliced • 6 half-pint jars, lids, and bands |
1. Combine the sugar, cinnamon, cloves, nutmeg, and salt. Mix well.
2. Place the apples into the slow cooker in layers, alternating with the sugar mixture. As you add each layer of apples, press down to pack them in tightly.
3. Cover and cook on high for 1 hour. Reduce the heat to low. Remove the lid and stir well, breaking up the apples.
4. Return the cover to the slow cooker, and cook for 8 more hours or until the mixture is thick and caramel brown, stirring occasionally.
5. Reduce the heat to low and uncover. Cook for 1 hour more.
6. Fill the canner with enough water to cover the jars. Boil the water, reduce the heat to low, place the jars in the water, and simmer until ready to use.
7. Ladle the hot mixture into the canning jars, leaving ½ inch of headspace.
8. Remove air bubbles, wipe the rims, center the lids, and screw on the bands and adjust until they are fingertip tight.
9. Place the jars in the canner and bring to a boil. Make sure there is at least 1 inch of water covering the jars.
10. Process for 10 minutes, adjusting for altitude. Remove the jars from the canner and cool.
Cherry Preserves
If you have a cherry pitter (or the patience to remove the stones yourself), by all means make these preserves with fresh fruit, especially if you have your own trees. If not, this recipe uses thawed frozen cherries, which come already pitted.
|
• 6 cups (around 2 pounds) cherries, pitted • 3½-ounce powdered pectin |
• 3¼ cups granulated sugar, divided • ½ teaspoon pure vanilla extract • 6 half-pint jars, lids, and bands |
1. Fill the canner with enough water to cover the jars. Boil the water, reduce the heat to low, place the jars in the water, and simmer until ready to use.
2. Place the cherries in a large, heavy saucepan.
3. Combine the pectin with ¼ cup of the sugar, and then stir into the cherries.
4. Bring to a full boil over high heat, stirring frequently.
5. Add the remaining 3 cups of sugar and return to a boil, stirring constantly, for 1 more minute.
6. Remove the pan from the heat, and skim off any foam.
7. Immediately ladle the hot preserves into the canning jars, leaving ¼ inch of headspace.
8. Remove air bubbles, wipe the rims, center the lids, and screw on the bands and adjust until they are fingertip tight.
9. Place the jars in the canner and bring to a boil. Make sure there is at least 1 inch of water covering the jars.
10. Process for 10 minutes, adjusting for altitude. Remove the jars from the canner and cool.
