
WHAT IT TAKES
TIME: 3 hours per stool
SKILL LEVEL: Beginner
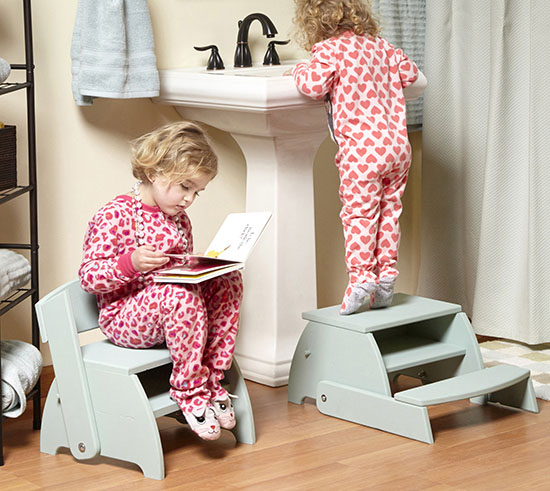
You’ll find plenty of uses for a flip-flop stool. With the back swung up, it’s the perfect chair for little kids to plunk down on. With the back swung down, it’s the perfect step stool for reaching slightly-out-of-reach faucets, shelves and cabinets—for kids of all ages.
Begin by cutting the two sides to length and laying out the boards (Photo 1 and Figure A). Note that the sides will be mirror images. To mark the curved sides, hook your tape over the lower corners then swing 15-in.-radius curves on each side. Use a pint can to create the rounded inner edges of the legs. The positions of the pivot and dowel holes are critical, so measure carefully. The pivot hole goes all the way through the board, but the dowel holes are only 1/2 in. deep. Drill the holes, then use a jigsaw to cut out the parts. Use a 1/4-in. round-over bit or sandpaper to soften all the edges.
Connect the 1x10 bottom shelf and 1x4 back brace to create an “L.” Secure this assembly to the sides so the top edge of the 1x4 is flush with the upper back corner of the sides. Use 2x4 blocks to ensure the right spacing (Photo 2).
Cut the three parts for the back assembly (Figure A). To create the curved back, drive a pair of finish nails 3-1/2 in. from the edge of a 1x6, and flex a thin piece of wood upward between the nails to create an arc. Mark the arc with a pencil, then cut it out with a jigsaw. Secure the back to the two 1x4 sides to create a U-shape. Use 2-in. bolts (Photo 3) to secure the back assembly to the sides of the stool. (Tip: To install the washer between the back assembly and the stool, tape it over the hole in the side before installing the assembly.) Finally, position the top far back enough—about 1/2 in. from the front of the sides—so the back doesn’t hit the front lip as it pivots.