WHAT IT TAKES
TIME: 1/2 day
SKILL LEVEL: Beginner
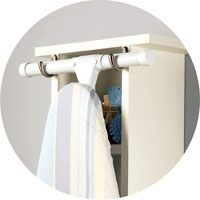
To keep your ironing gear handy but out from underfoot, make this simple ironing center in a couple of hours. All you need is a 10-ft. 1x8, a 2-ft. piece of 1x6 for the shelves and a pair of hooks to hang your ironing board.
Cut the back, sides, shelves and top. Align the sides and measure from the bottom 2 in., 14-3/4 in. and 27-1/2 in. to mark the bottom of the shelves (Photo 1). Before assembling the unit, cut a 1 x 1-in. dog ear at the bottom of the sides for a decorative touch.

Working on one side at a time, glue and nail the side to the back. Apply glue and drive three 1-5/8-in. nails into each shelf, attach the other side and nail those shelves into place to secure them. Clamps are helpful to hold the unit together while you’re driving nails. Center the top piece, leaving a 2-in. overhang on both sides, and glue and nail it into place (Photo 2). Paint or stain the unit and then drill pilot holes into the top face of each side of the unit and screw in the hooks to hold your ironing board. Mount the shelf on drywall using screw-in wall anchors.