WHAT IT TAKES
TIME: 1 day
SKILL LEVEL: Beginner
If this workbench looks familiar, it’s probably because you’ve seen one a lot like it in your father’s or grandfather’s shop. Variations of this design have been around for decades, and for good reason: The bench is strong, practical and super easy to build. You can run to the lumberyard in the morning, grab a few boards, and by noon you’ll have a perfectly functional workbench.
The workbench isn’t fancy—it’s built from standard construction lumber. But you can easily customize it with drawers or other features now or later.
If you can cut a board, you can build this bench. And you don’t need any fancy tools either. In addition to a small square and a tape measure, you’ll need a circular saw to cut the parts and a drill to drive the screws.
You’ll find all the materials at a lumberyard or home center (see Materials List). Choose lumber that’s straight and flat, and that doesn’t have too many gouges, slivers or cracks. We used Torx-head screws with self-drilling tips. But you can substitute any construction screw. If you’re not using screws with self-drilling tips, drill pilot holes to avoid splitting the wood.
Cut the parts according to the Cutting List. We used a miter saw, but a circular saw will work fine. Mark the 2x4s with a Speed square or combination square. Then carefully cut the boards to length. If you plan to stain or paint the bench, now is the time to sand the parts. And to really simplify your job, you could also stain or paint the parts before you assemble the bench.
We used an old door propped up on sawhorses as a work surface, but the floor will work too. Lay the 2x4s for the front and back of the top and shelf on the work surface and mark the centers. Remember, if you’re not using self-drilling screws, drill pilot holes for the screws. Photo 1 shows how to assemble the frames. Set the top frame aside and screw the shelf boards to the shelf frame (Photo 2).
Photo 3 shows how to build the leg assemblies. You’ll notice that the leg assemblies are 1/8 in. narrower than the inside dimension of the top. That’s so you can install the legs without binding, which would cause the pegboard to bow. Also, if the only pegboard you can find is thinner than the 1/4-in. pegboard specified, add the difference to the front and back of the shelf frame (C). For example, if you buy 1/8-in. pegboard, add 1/4 in. to parts C.
The pegboard is useful for hanging tools, but its real function is to stabilize the workbench as a brace. We added the construction adhesive to make sure the assemblies stayed strong and rigid. Be aware, though, that some of the adhesive will be visible through the holes.
The pegboard holes are a little too big to use as screw holes, so use a No. 6 countersink bit to drill pilot holes and make countersinks for the screws. Secure five evenly spaced 1-1/4-in. screws into each leg.
The next step is to attach the legs to the top frame. Apply construction adhesive to the top 3 in. of the legs. Then attach the leg assemblies with 3-in. screws (Photo 4).
Stand the workbench on one end. Then it’s simple to slide the shelf into place and line it up with the pegboard (Photo 5). Drive 3-in. screws through the shelf frame into the legs to support the shelf.
The top of this bench is 2x6s, placed tight together. The boards overhang the frame 2 in. on the sides and front. The overhang makes it easier to use clamps on the edges of the workbench. Photo 6 shows how to get started. We attached the 2x6s with trim screws, but you could substitute 16d casing nails.
The 1x10 back brace keeps things from falling off the back of the shelf, but it also stiffens the bench to prevent side-to-side rocking. Apply construction adhesive before attaching the brace with 2-in. screws.
The backboard is a 1x10 with a 1x4 shelf attached. On the side of the 1x10 you want facing out, draw a line the length of the board, 1-3/4 in. down from the top. This is where you’ll align the bottom of the 1x4. Draw a second line 1-3/8 in. from the top. Drill pilot holes with the countersink bit every 8 in. along this line. Now ask a helper to hold the 1x4 on the line while you drive 2-in. screws into the shelf through the pilot holes. After the shelf and 2x4 blocks at each end are attached, screw the backboard to the workbench (Photo 7).
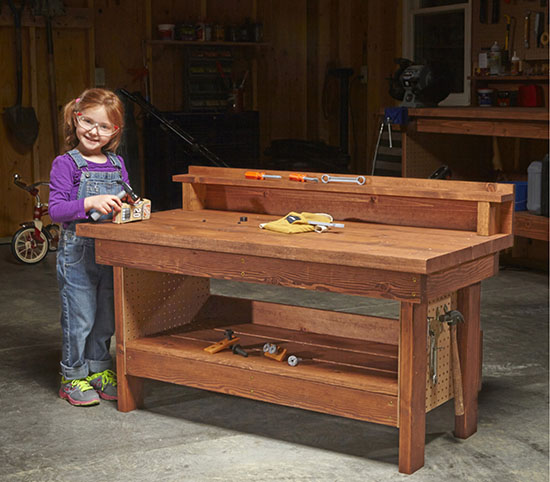
You can modify your bench to fit your space and work style. We mounted an inexpensive woodworking vise on the front of the workbench and drilled holes in the 1x4 shelf to hold screwdrivers. If you’ve got a pint-size carpenter in the family, check out the mini version of the bench here. It would make a great project to build with your kids or grandkids.
Here’s a plan for a downsized version of the workbench. All of the construction steps are the same; it’s just smaller to fit the young carpenter in your family. The height is about right for a 42- to 48-in.-tall DIYer, but you can easily increase the height just by making the legs longer.