
1
Build the bottom. Glue the bottom boards together with construction adhesive, and install three temporary cleats to hold them together until the project has been assembled.
1
Build the bottom. Glue the bottom boards together with construction adhesive, and install three temporary cleats to hold them together until the project has been assembled.
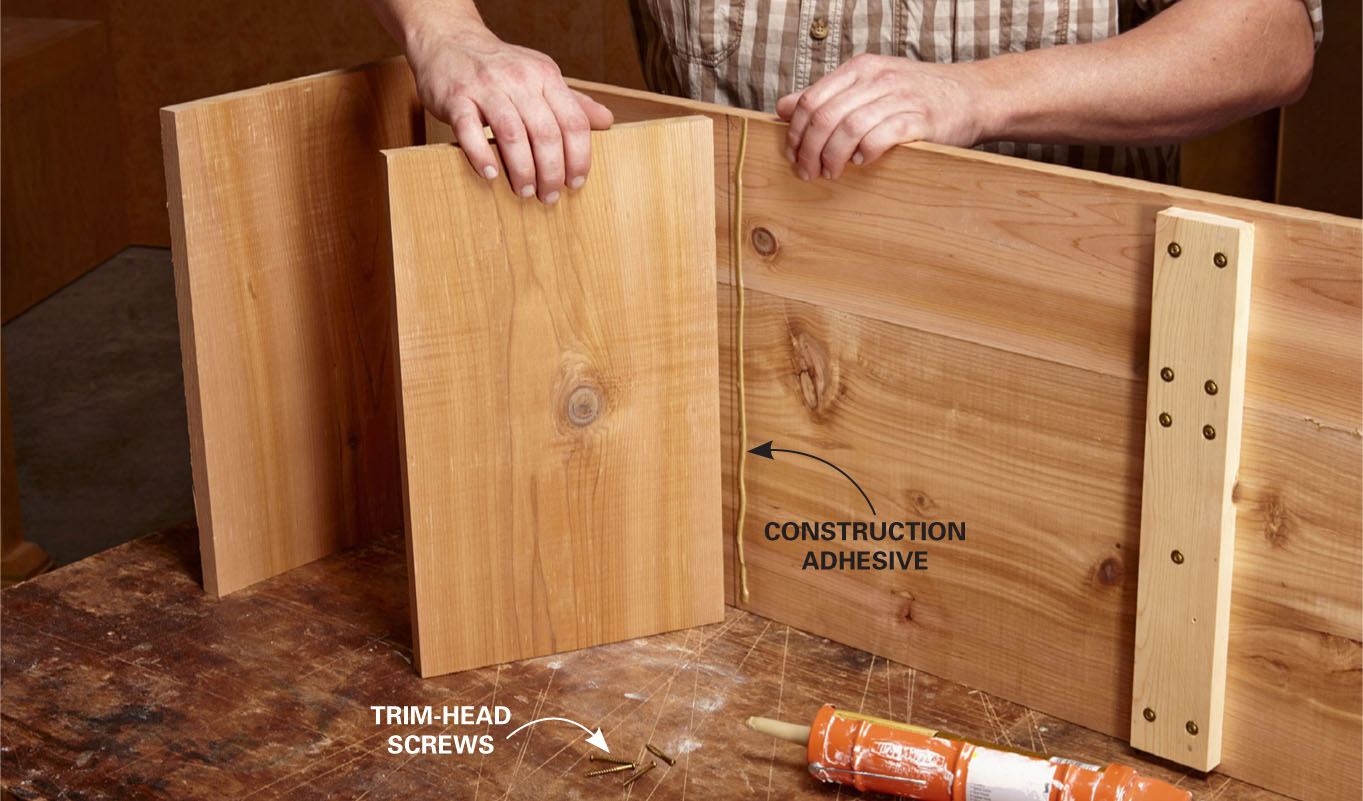
2
Install the dividers. Fasten the dividers to the bottom, and then add the sides. Join all the parts with both adhesive and trim-head screws. Scrape any excess adhesive with a putty knife.
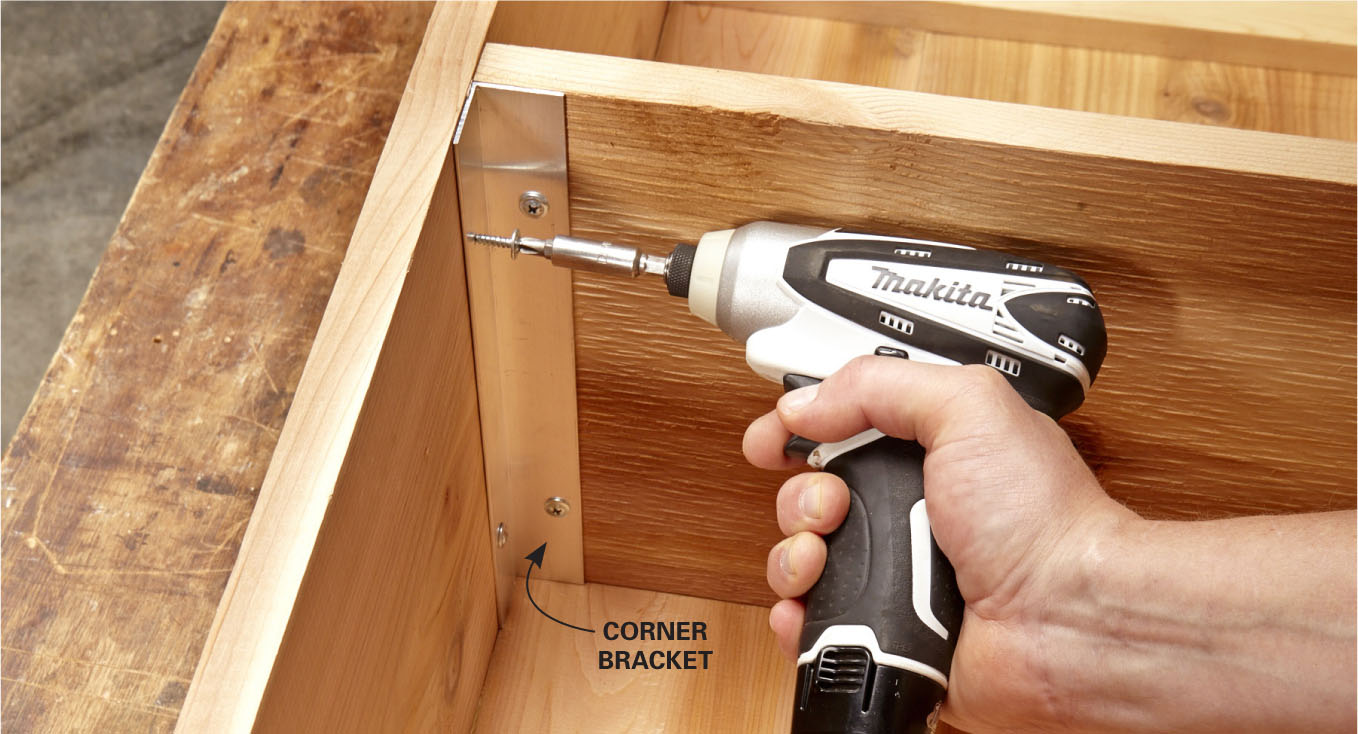
3
Add corner brackets. Cut aluminum angle stock to create corner brackets. Drill four holes in each bracket, and secure them with adhesive and screws.
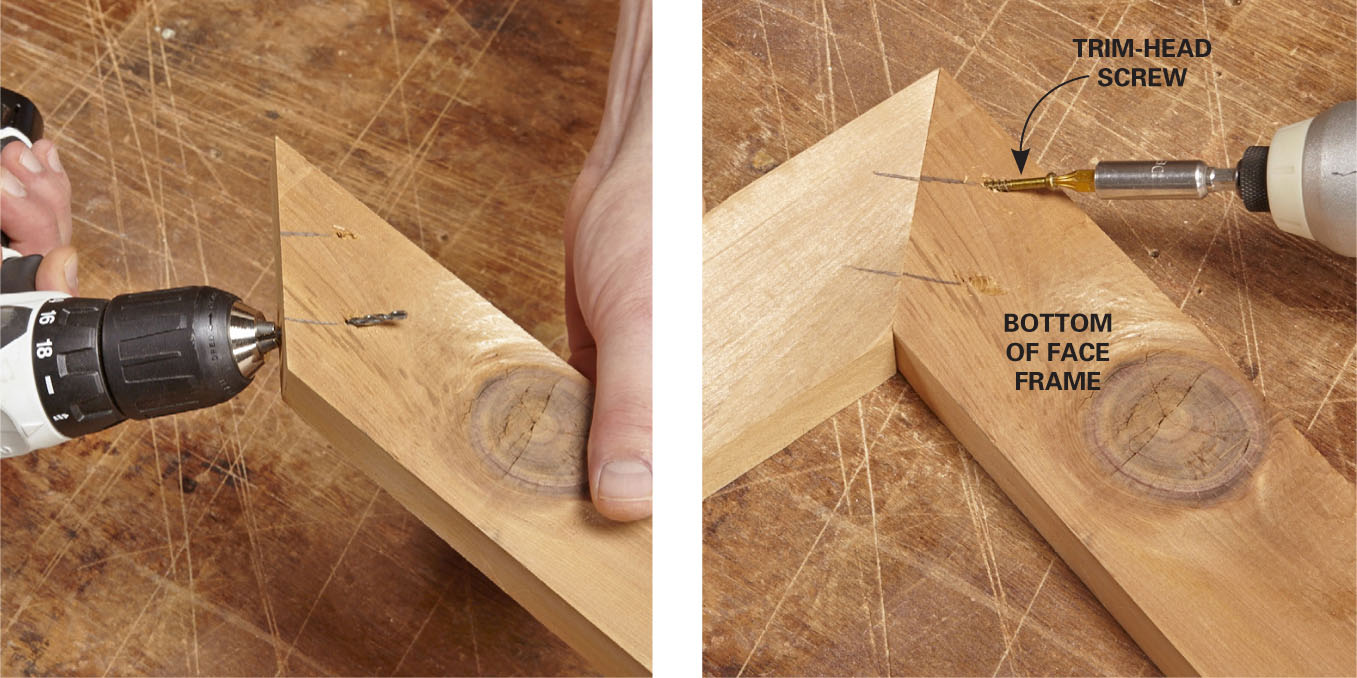
4
Build the face frame. Join the face-frame parts so that the new screws will be invisible. First, drill pilot holes through the end of one part (left photo). Then just hold the parts together and drive in screws (right photo).

