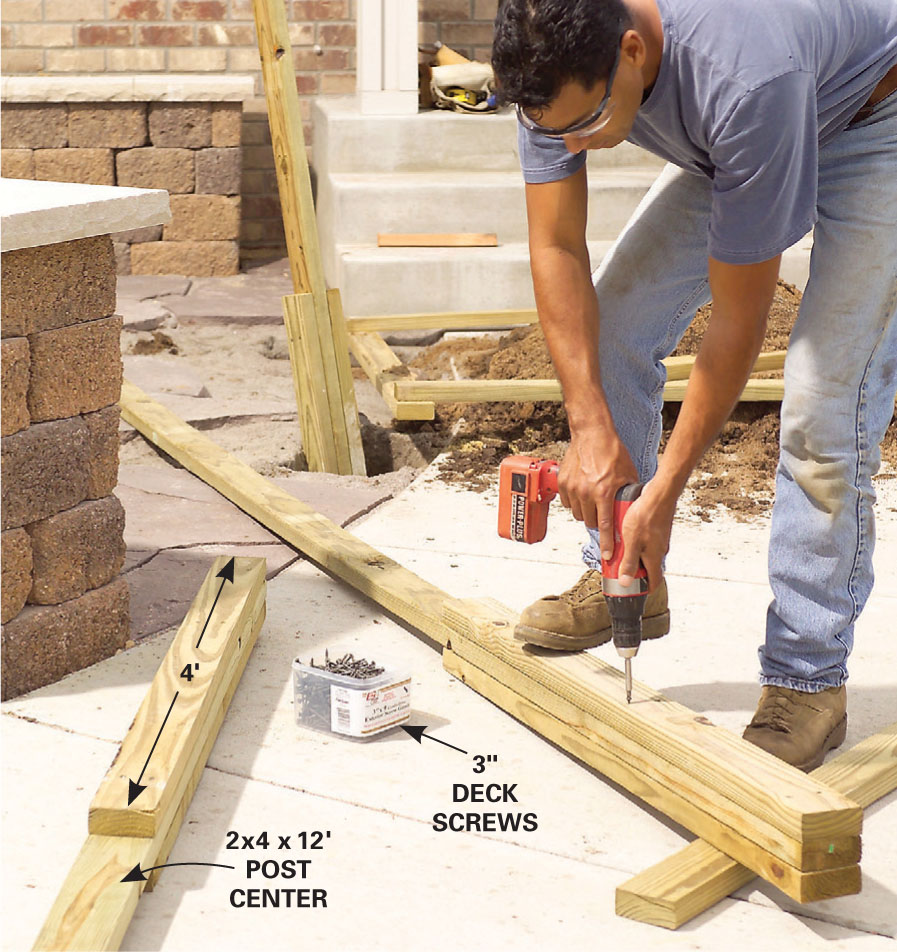
1
Stake the post positions using a rectangular 2x4 template. Remove the template and dig the postholes.
1
Stake the post positions using a rectangular 2x4 template. Remove the template and dig the postholes.
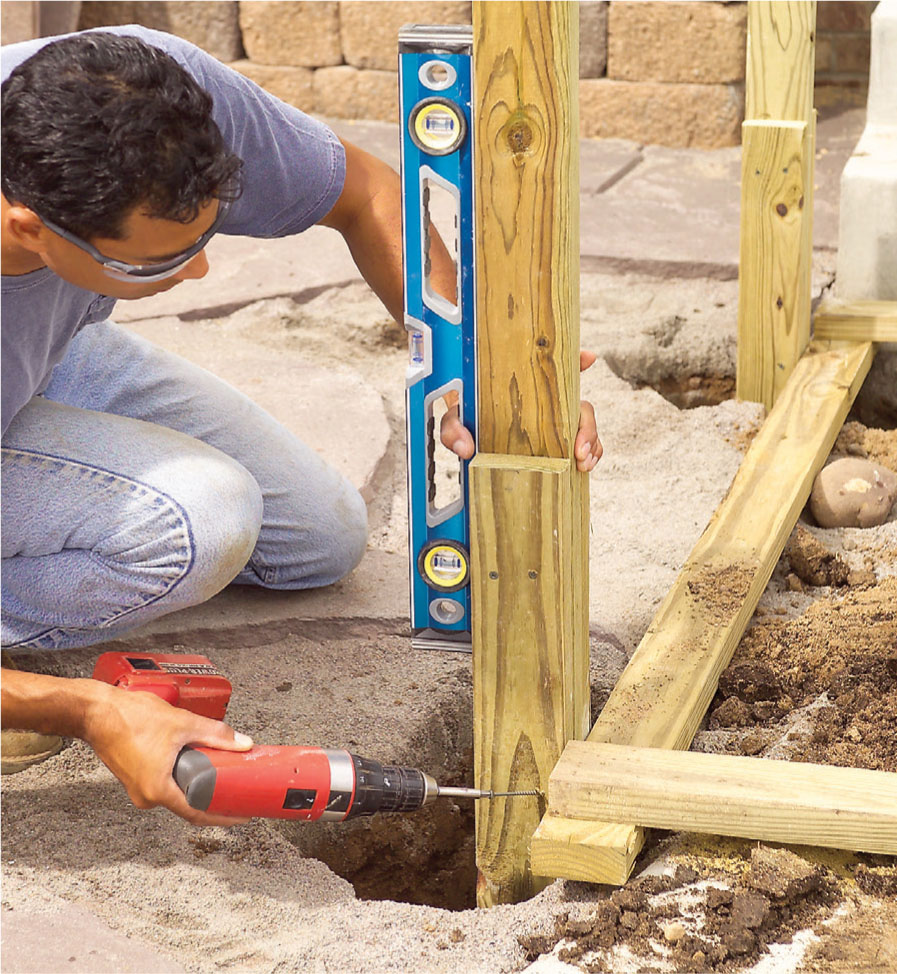
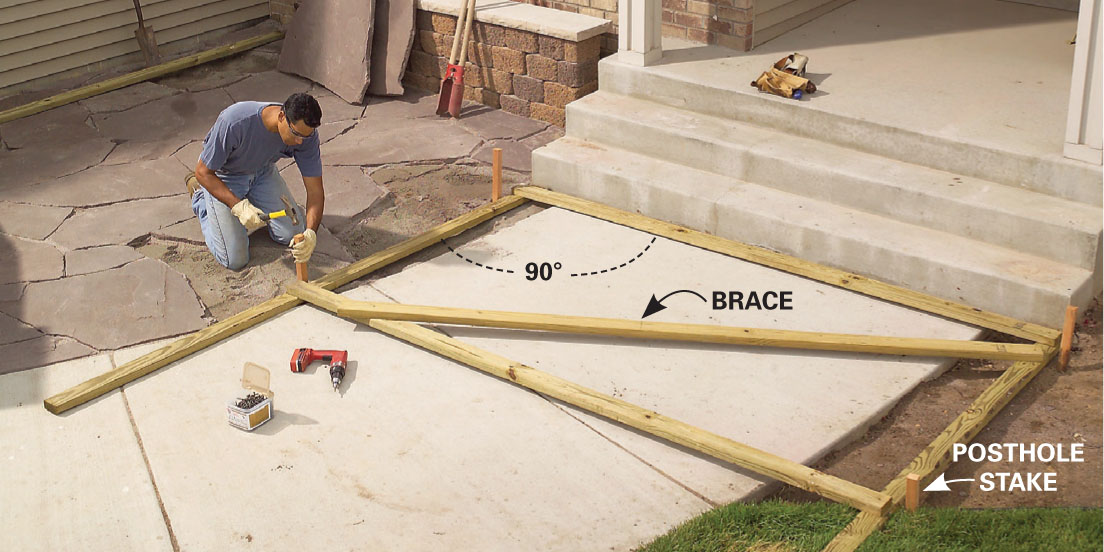
3
Drop the posts into their postholes, then plumb them both ways and toe-screw them to the template. Tamp soil around it to brace it.
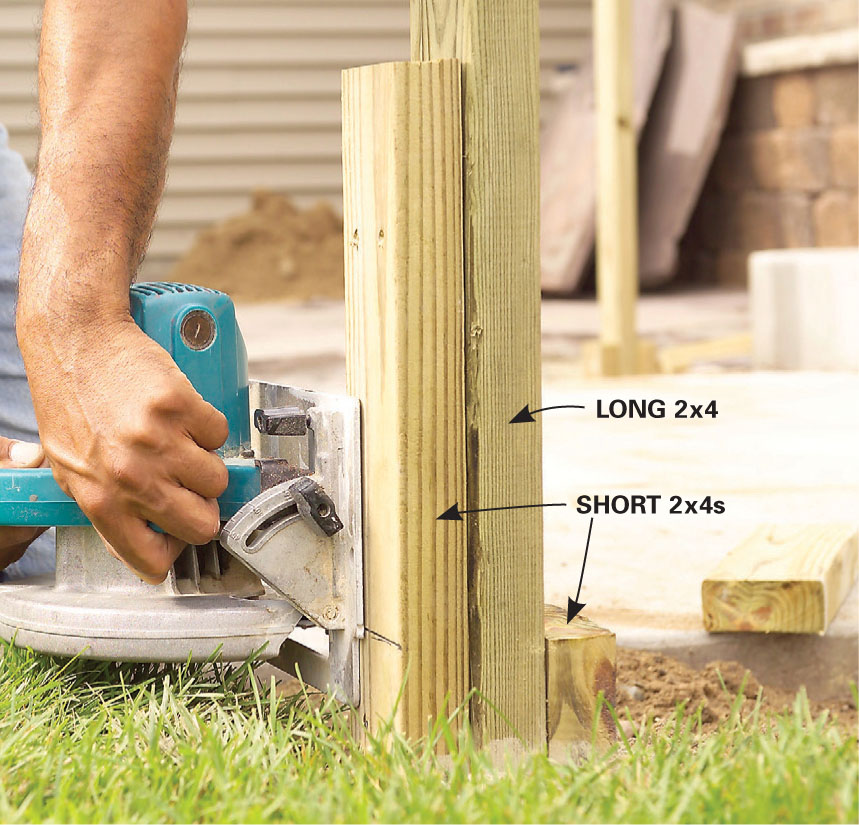
4
Mark the short side posts a few inches above grade and cut them off with a circular saw. Take care not to cut the long center post.
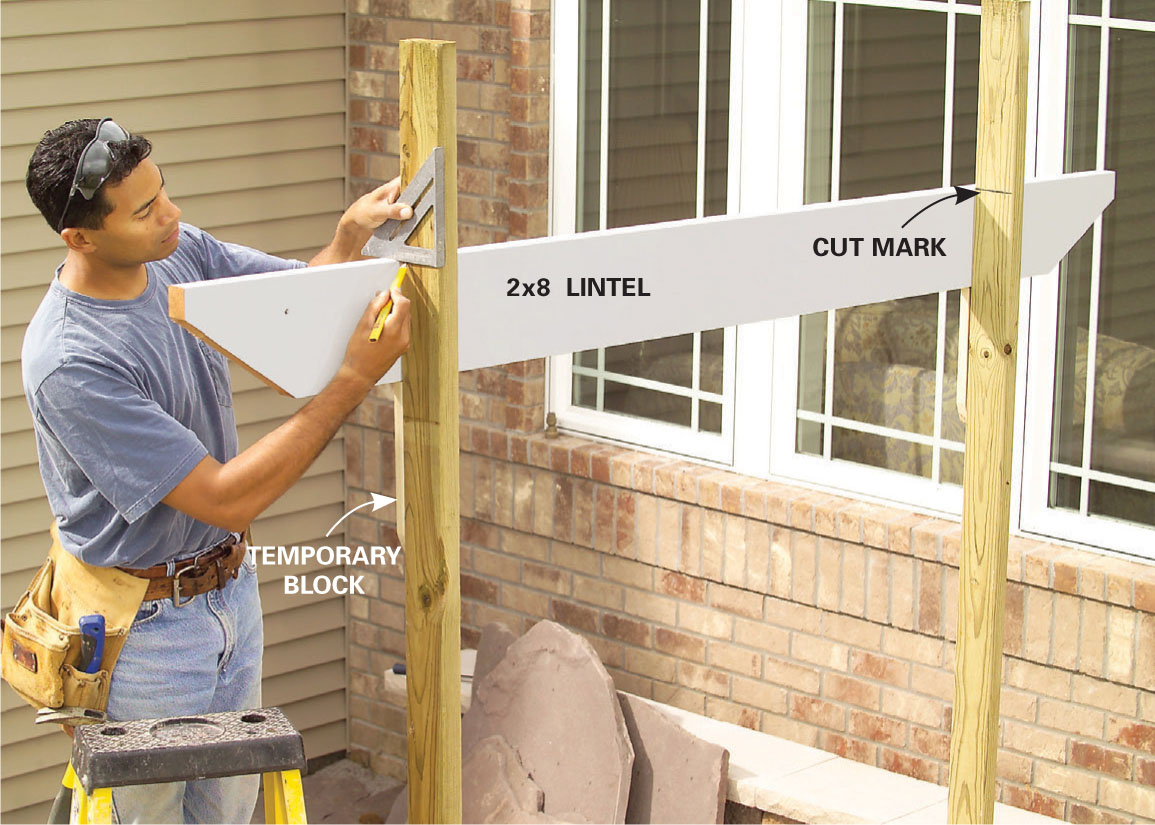
5
Cut the lintels to length, then level and rest them on temporary blocks. Mark the height of the center 2x4s, then cut them off with your circular saw.
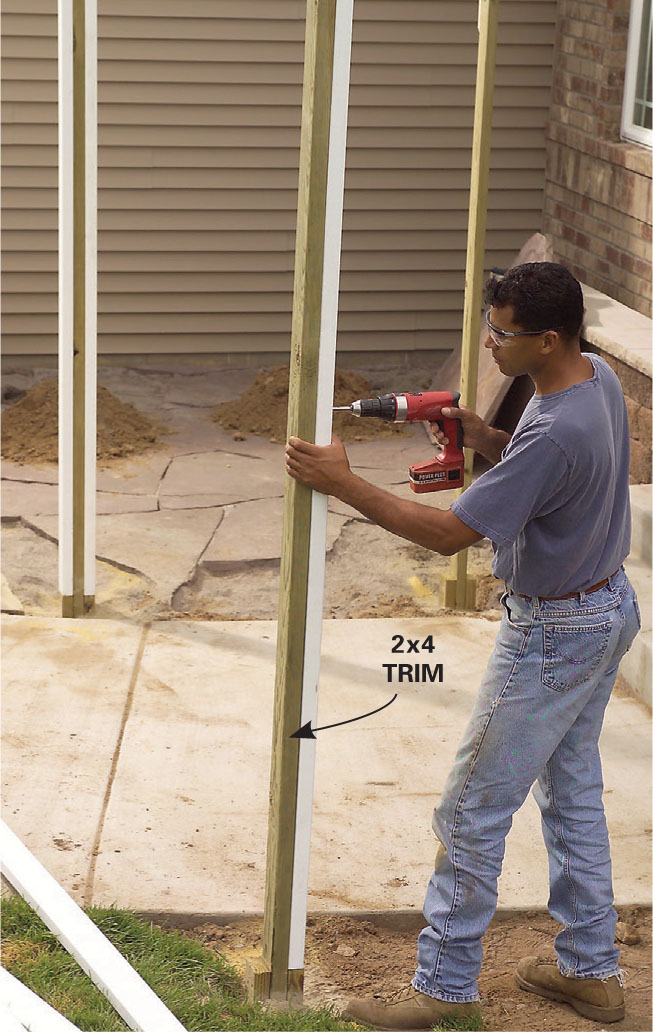
6
Cut the cedar 2x4 post trim boards to length and screw them to the center treated post. Then screw the lintels in place flush with the post top.
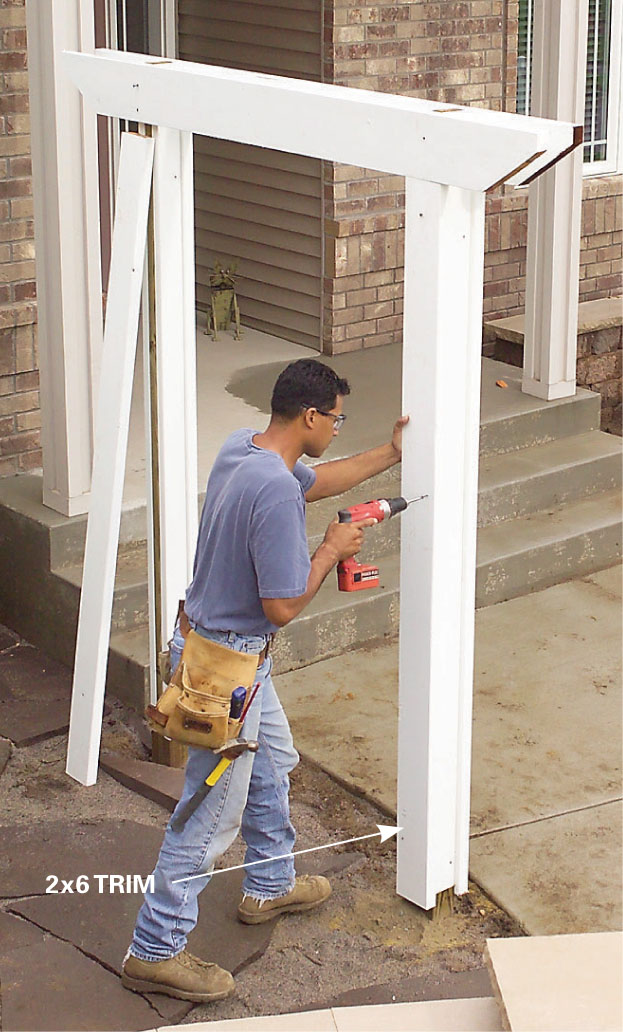
7
Cut the 2x6 post trim to fit directly under the lintel and screw it to the cedar 2x4s, keeping an even overhang on both sides.
8
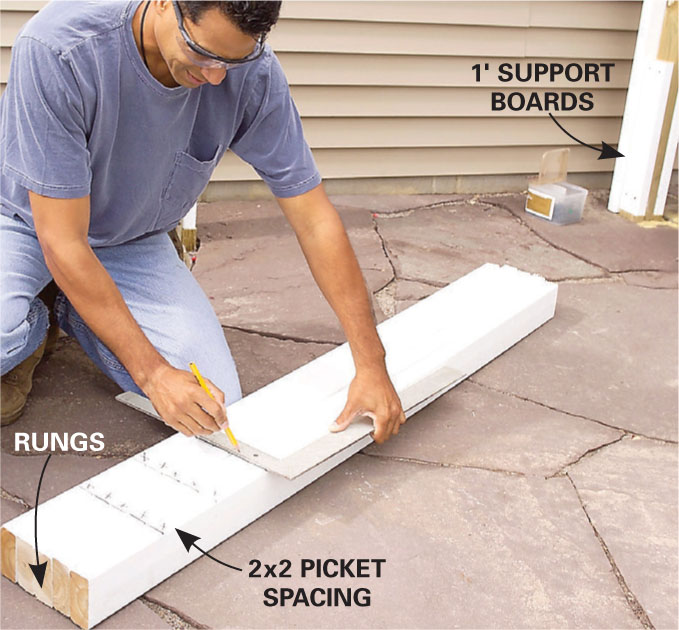
Set the trellis posts, then cut the 2x4 rungs to fit between them. Cluster the rungs and lay out the picket positions.
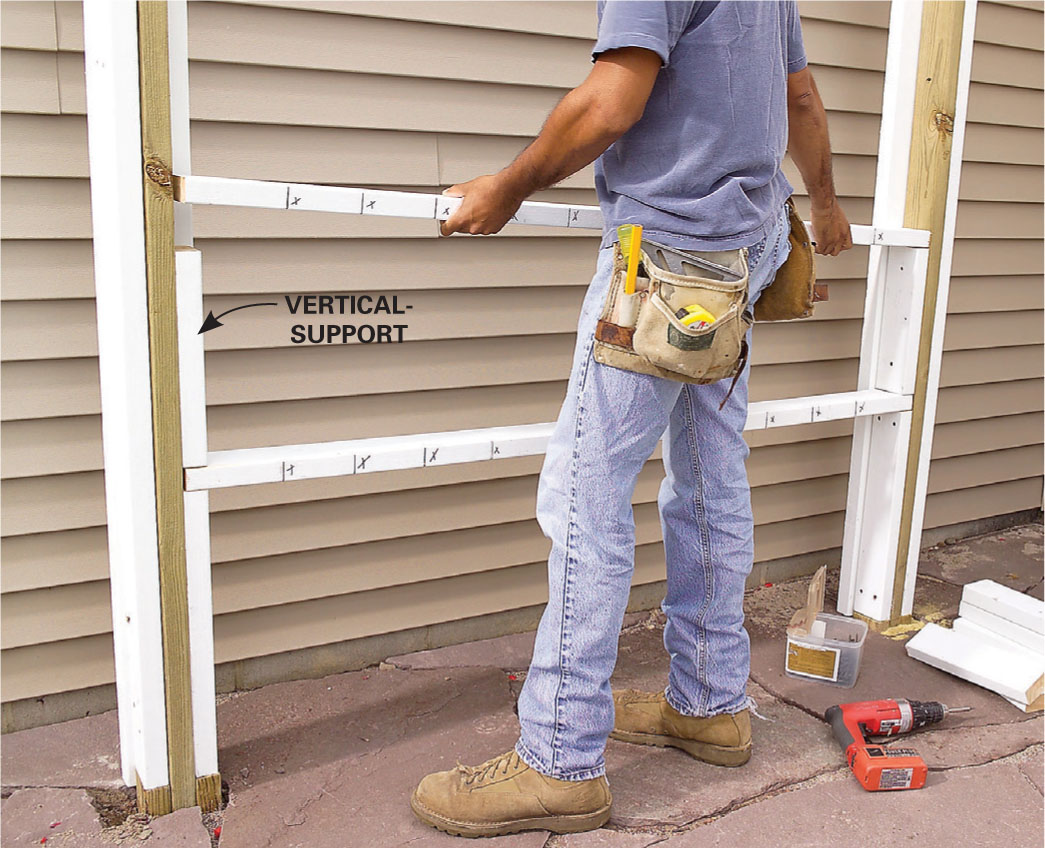
9
Stack the rungs over the vertical supports, screwing each one to the tops below it as you work. You’ll cover the joints with 2x6s later.
10
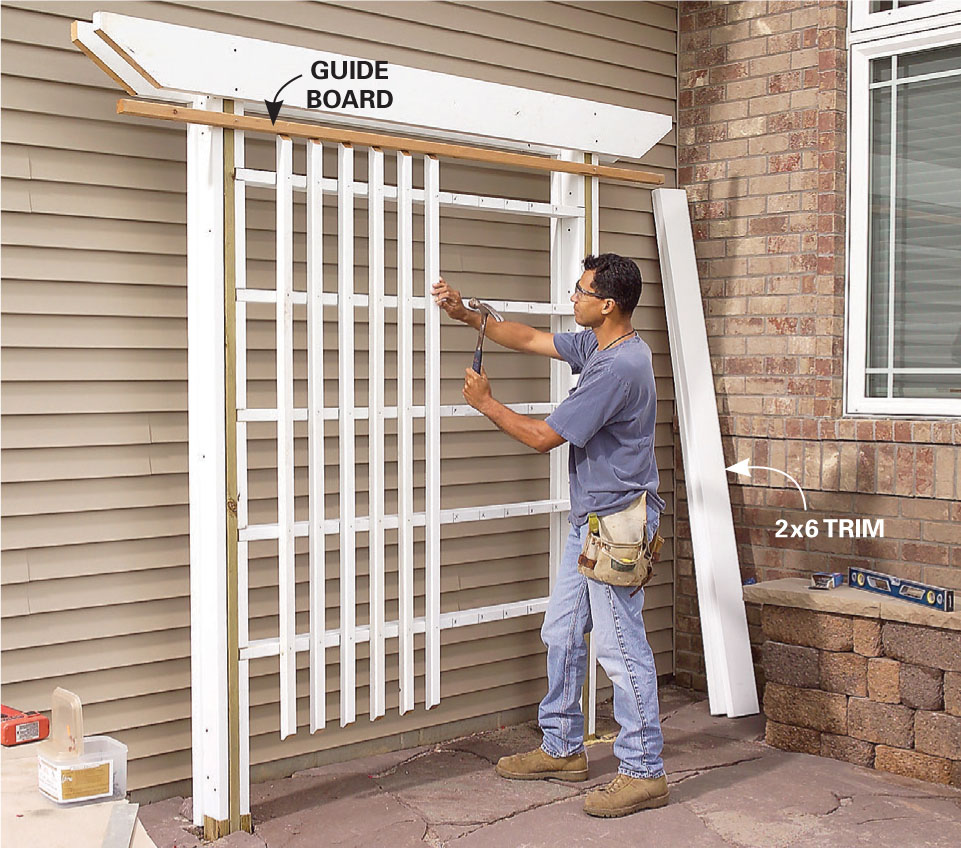
Tack a level guide board across the posts. Push the pickets against the guide and nail them to each rung with 10d finish nails. Add the last 2x6 trim boards.
You’ll save tons of time by painting or sealing the cedar parts before assembly. You’ll still have freshly cut ends to touch up, but that only takes moments.