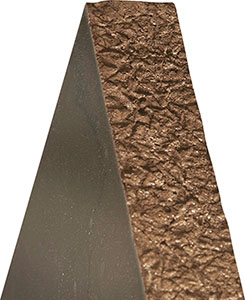
The top is made from construction grout tinted with colorant. Tile grout creates the dark veins.
WHAT IT TAKES
TIME: 1 day, plus a week for drying time
SKILL LEVEL: Intermediate
Construction grout is used mostly for heavy construction projects like anchoring steel columns. But it’s also perfect for casting projects because it has a creamy consistency that takes on the shape and texture of the form almost perfectly. Use a smooth form and you’re guaranteed a smooth, uniform tabletop. Most home centers carry construction grout in 50-lb. bags. (Quikrete Precision Grout and Sakrete Construction Grout are two brands.) Go to quikrete.com or sakrete.com to find a dealer if your store doesn’t carry it. Darken the grout by adding cement colorant to the water (Photo 2).

The top is made from construction grout tinted with colorant. Tile grout creates the dark veins.
Plastic-coated particleboard (called melamine) is perfect for form work because it’s inexpensive and smooth. Cut the form base to 31-1/2 x 31-1/2 in. and then cut 2 x 32-in. strips for the form sides. Attach the sides to the base as shown in Photo 1. The overhanging sides make dismantling the form easier; you can just whack them loose with a hammer. Coat the form with spray lubricant (Photo 1). Important: Use a lubricant that dries instead of leaving an oily coating. The label will say something like “leaves a dry film.”
Next, grab a pencil and sketch a random pattern on the form outlining the areas you’ll cover with grout first (Photo 3). The pencil lines will determine where the dark veins appear in the finished top. Set the form on a sturdy work surface and level the form with shims. Construction grout is slushy and will overflow if the form tilts. Spilled grout will leave stains, so cover the floor with plastic drop cloths.


Mixing and pouring the construction grout is a three-phase process: You’ll use most or all of the first bag to pour a pattern (Photo 3), the second to fill in the pattern (Photo 6) and the third to completely fill the form.
Turning a bucket into a giant measuring cup (Photo 2) will let you add equal amounts of water and cement colorant to each of the three bags without measuring each time. First, measure the correct amount of water into the bucket (about 4.5 liters per bag) and mark the water level on the bucket. Measure in more water to locate the other two marks (at 9 and 13.5 liters).
Next, empty the bucket and dump in the cement colorant. Much of it will remain in the bottle. To wash it out, pour in a little water, shake hard and pour again. Repeat until all the colorant is washed out. Refill the bucket with water and you’ll have tinted water, premeasured into three equal amounts. The colorant tends to settle to the bottom, so stir the colored water before each use.
Construction grout hardens fast. In warm weather, it will become stiff and difficult to work with in just 15 minutes. Minutes wasted cutting the wire mesh or searching for a tool can ruin the project. So have absolutely everything ready to go before you start mixing. It’s best to have a helper, too. To slow down the hardening, use cold water only.
Mix the construction grout in a plastic cement tub. Don’t pour the water directly from the bucket into the mixing tub; it’s too hard to control the flow. Instead, ladle the water into the tub with a smaller container. Dump in about half the bag and mix it thoroughly. Gradually add the rest of the bag as you mix. If the mixed grout stiffens before you can use it, stir it to restore the slushy consistency. If it becomes too stiff to stir, toss it. The tabletop only requires about 2-1/2 bags, so you can afford to waste some.
Photos 3 – 9 show how to complete the top. Don’t forget to turn down your compressor’s pressure to about 5 psi before you blow the tile grout (Photo 5). Cut the 2 x 2-ft. section of mesh (Photo 7) using bolt cutters. Wire cutters won’t do the job.
Resist the temptation to tear off the form as soon as the grout is hard. The longer the grout stays wet, the stronger it will get. Give it at least three days. A week is even better. To remove the form, get a helper and flip the form upside down. (Don’t let the top tip out of the form!) Then knock the form sides loose with a hammer and lift the form off the top. Don’t despair when you unveil the bland, gray top. The sealer will deepen the color and accentuate the black veins (Photo 9). Most sealers can’t be applied until the grout has cured for at least 28 days. Before you apply sealer to the top, try it on the underside to make sure you like the look. We used a glossy “stone and tile” sealer to bring out the most color. A sealer with a matte finish will have a subtler look.