1
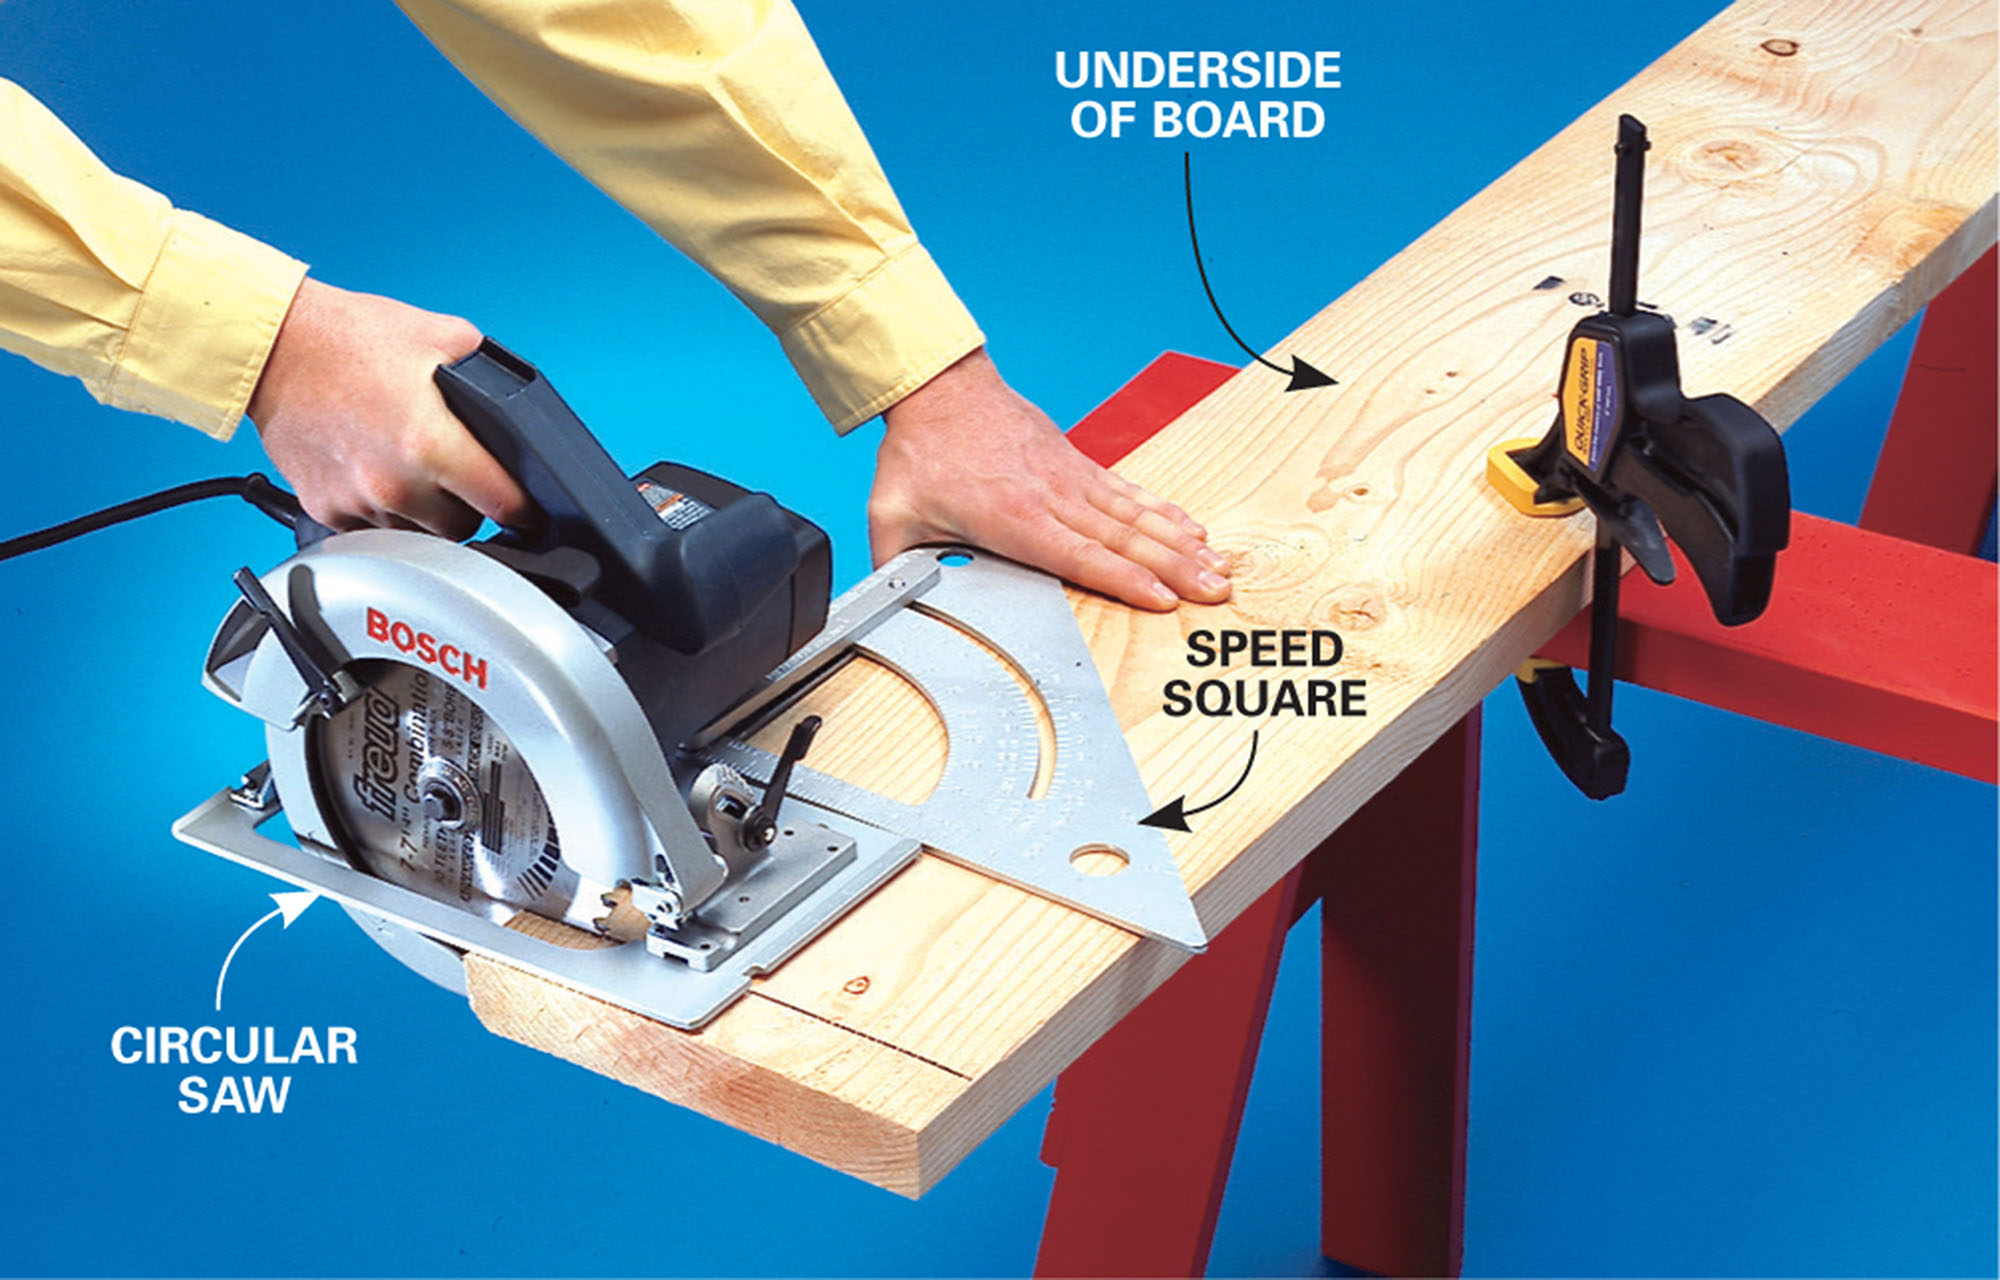
Use a circular saw to cut the seat and top boards to length. Try to cut away the checks (cracks) on both ends of the boards. If you have a Speed square, use it to guide the saw as you cut the ends square.

1
Use a circular saw to cut the seat and top boards to length. Try to cut away the checks (cracks) on both ends of the boards. If you have a Speed square, use it to guide the saw as you cut the ends square.

2
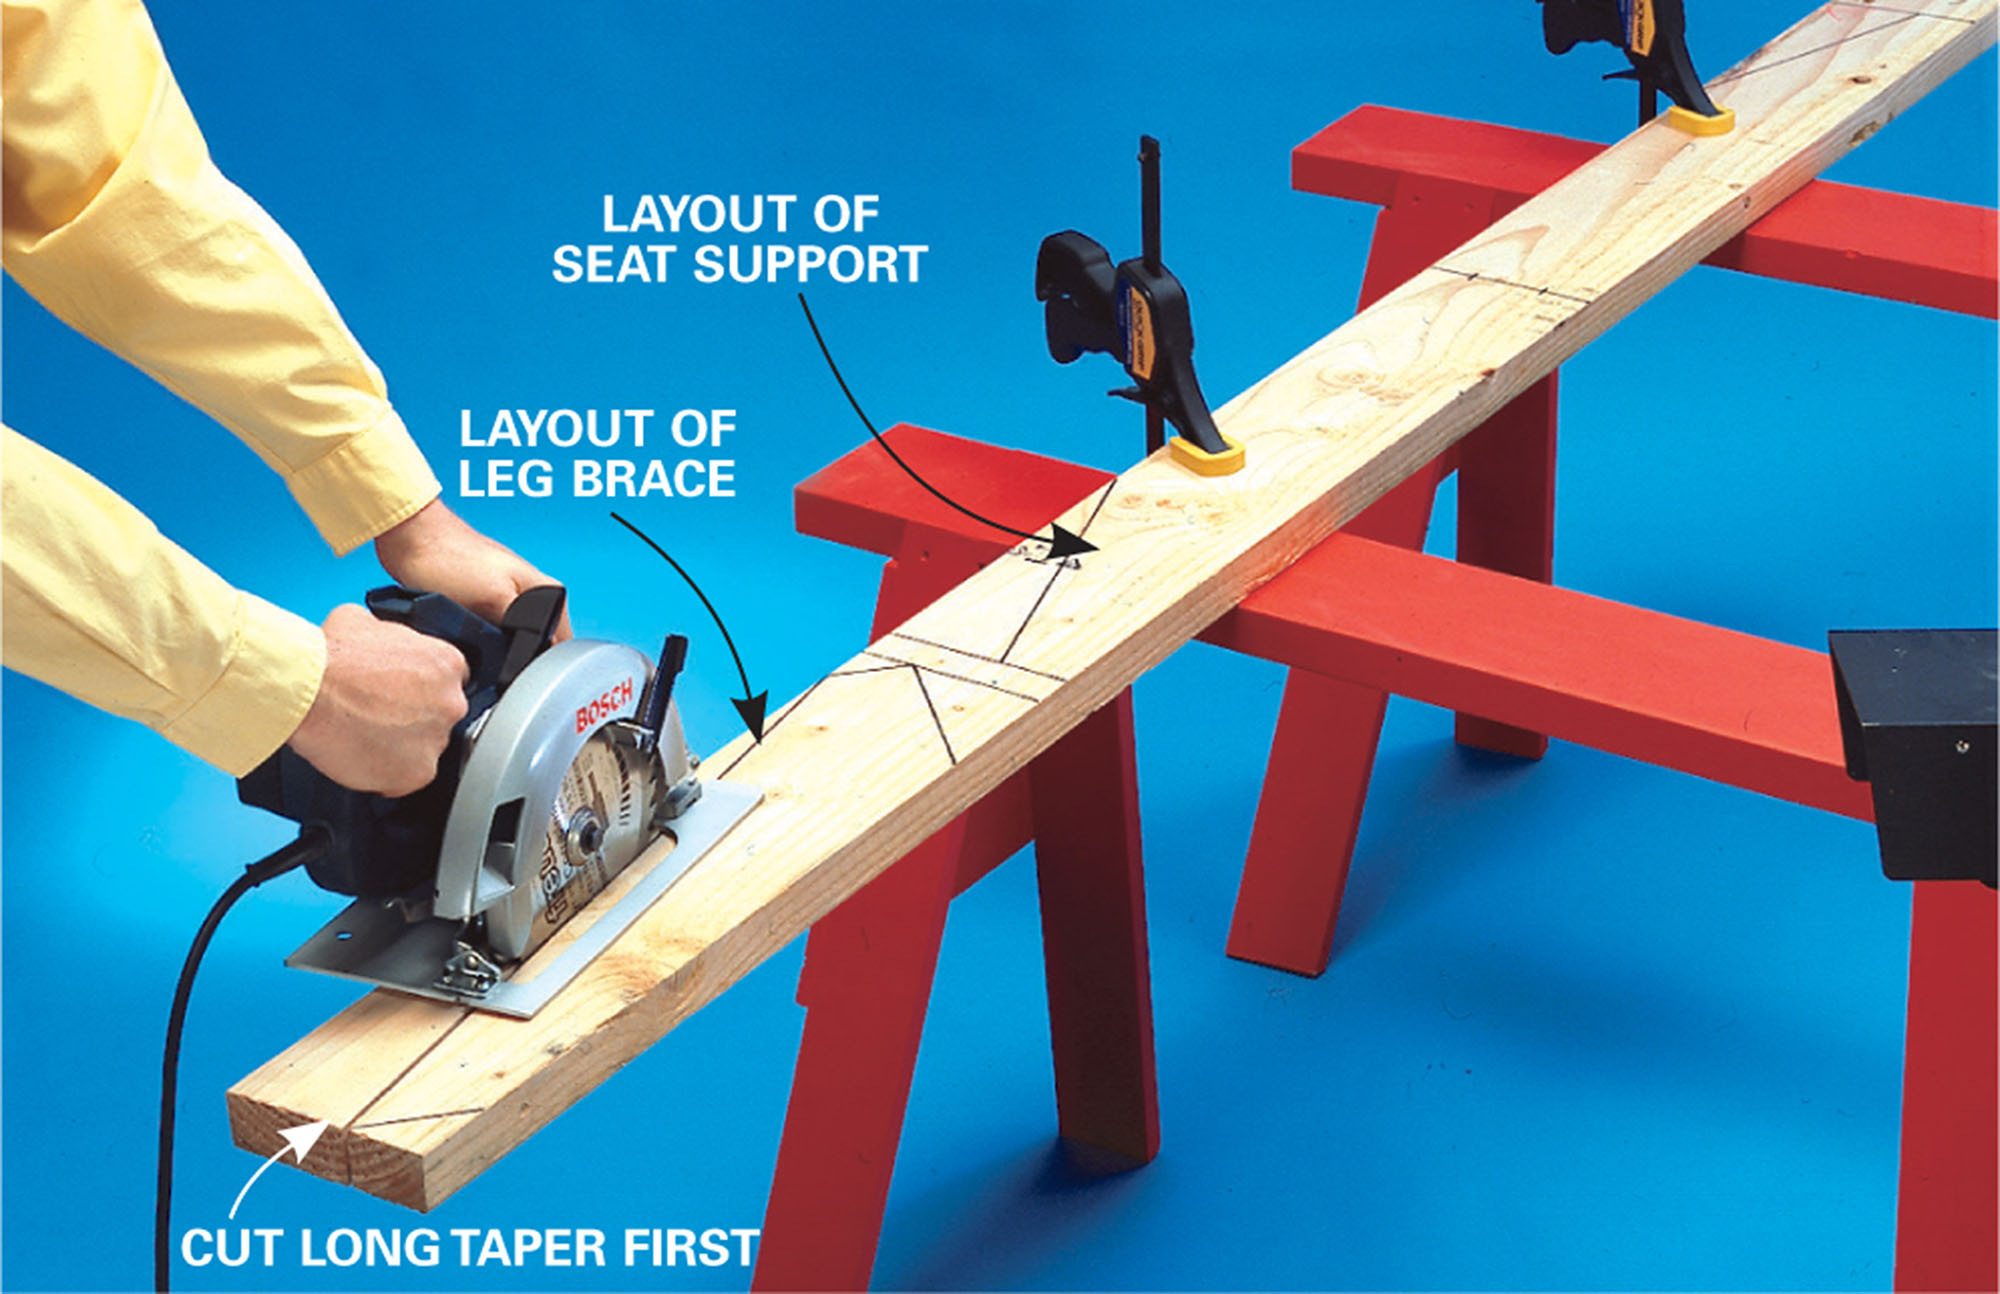
Cut the long tapered sides of the leg braces (E) and legs (B) before you cut the pieces to length. This way you can easily clamp the boards to your sawhorses to hold them as you make the cuts.

3
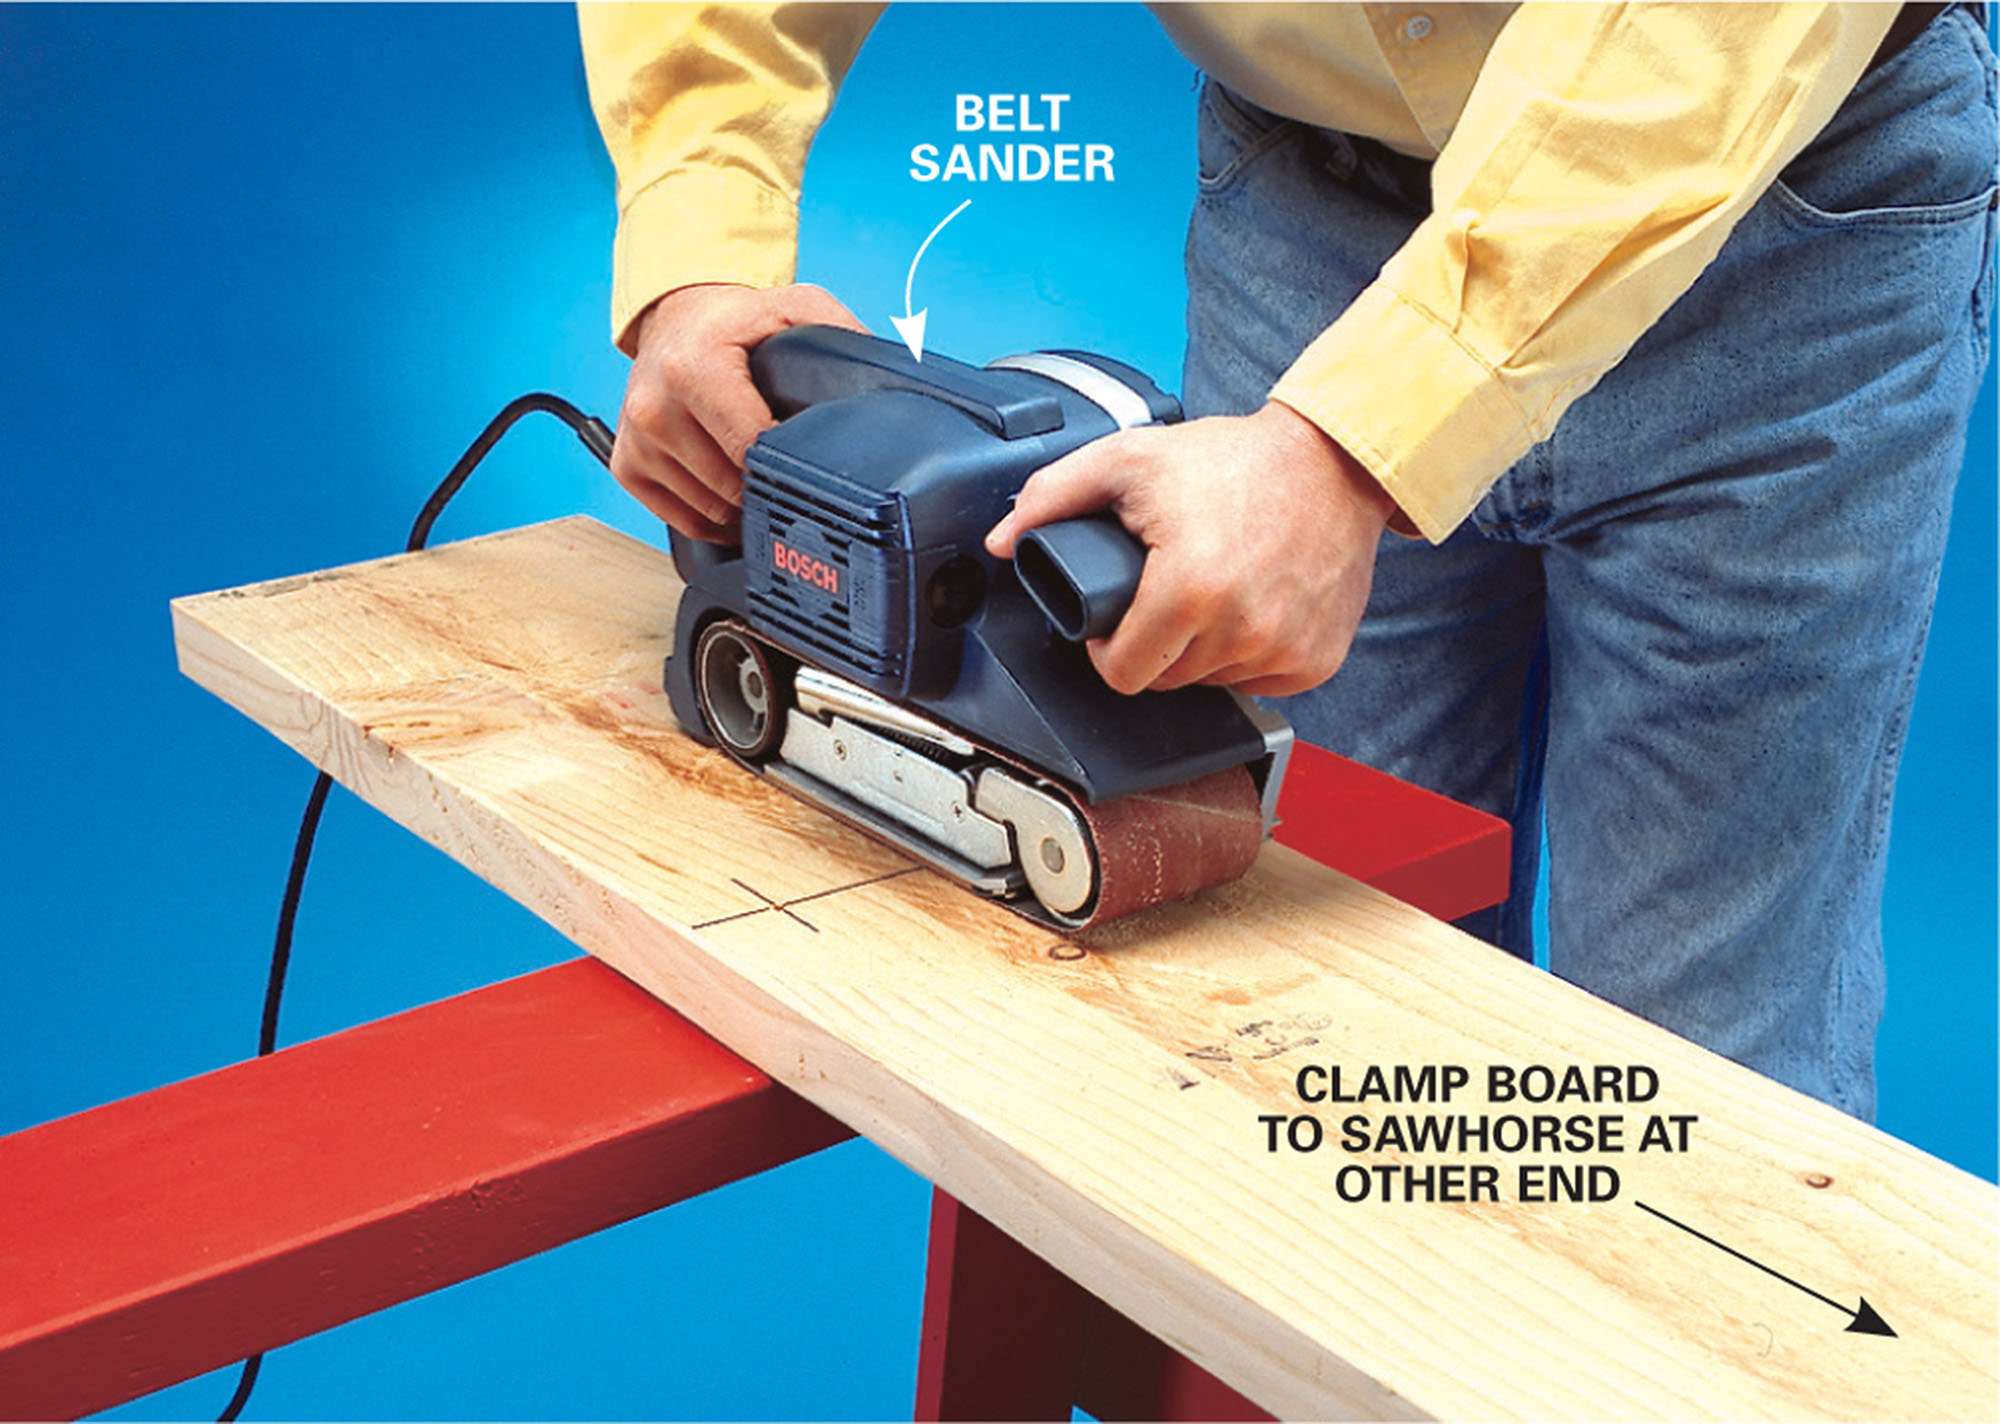
Use a belt sander and an 80-grit belt to smooth the boards. To sand board edges, clamp them upright between your sawhorses and sand them with the belt sander or by hand.

4
Drill the pilot holes for the carriage bolts in the legs. Use the holes drilled in the seat and top supports as drilling guides.

5
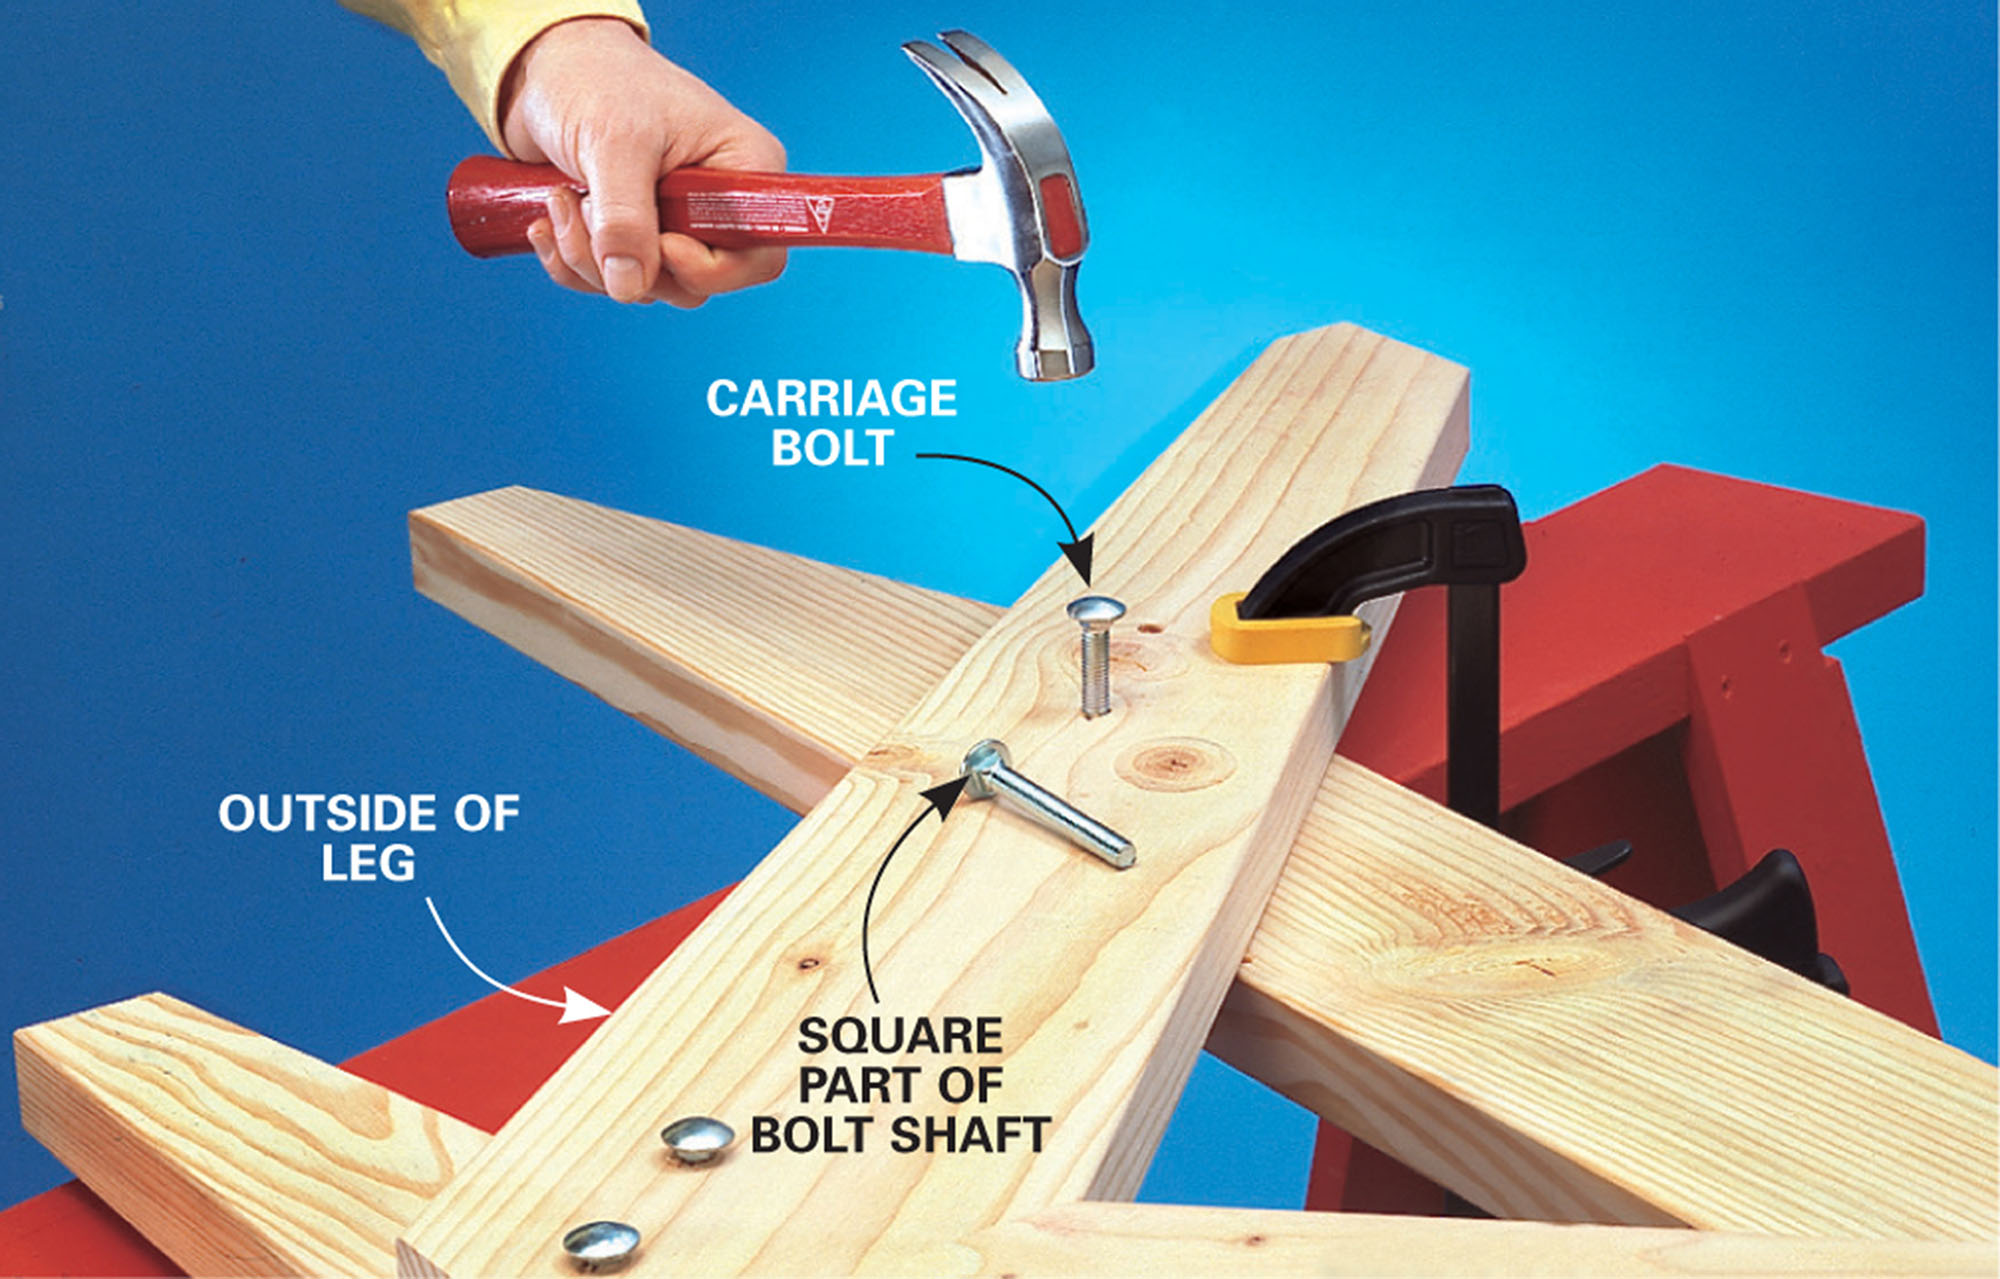
Hammer the carriage bolts into their holes. Insert them all the way to “seat” the square part of the bolt shafts securely in the wood.