Seascape Composition
Approach this drawing by first establishing the most difficult element to draw, the foreground boat, then work back in the distance. When shading in an area, let your line strokes follow the direction of the material you’re trying to create, such as the woodgrain of the boards.
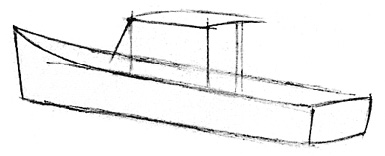
STEP 1 Sketch the Foreground Boat
With a 4H pencil, sketch the basic lines for the foreground boat. Add the curved lines of the hull and the lines of the back, or stern, of the boat. With a straightedge to guide you, sketch the side of the cabin, add the roof and the pole that supports the roof.
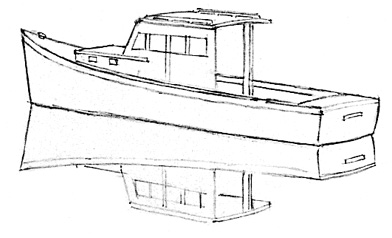
STEP 2 Add Details to the Boat
Add the structural features of the boat. Erase obsolete guidelines with a kneaded or white vinyl eraser. Follow this procedure to add the reflection of the boat.
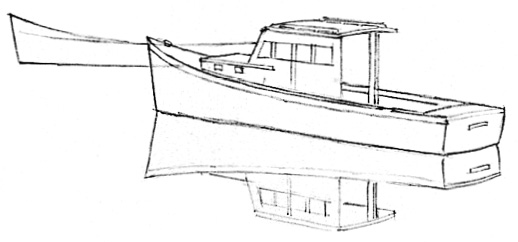
STEP 3 Add the Basic Structure of the Second Boat
Sketch the second boat with the 4H pencil. This boat is viewed straight on, so the use perspective is minimal.
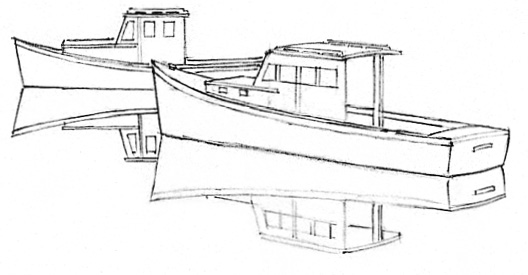
STEP 4 Add Details to the Second Boat
Sketch in the structure of the cabin. Add the reflection of the boat, and erase obsolete guidelines.
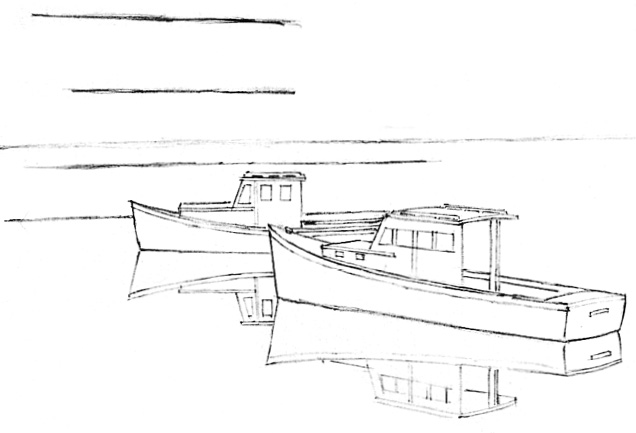
STEP 5 Sketch the Horizon and Begin the Building
You may want to use your straightedge for the following steps. Use the 4H pencil to add the horizon line, then add the horizontal lines of the building. Notice that they would converge at a vanishing point far on the distant right.
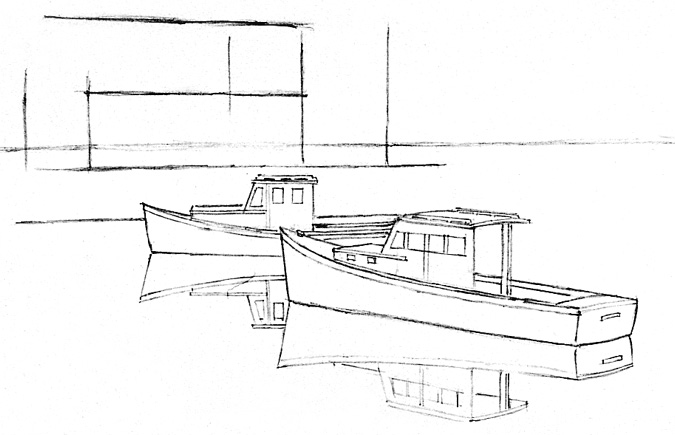
STEP 6 Add the Vertical Lines of the Building
With the 4H pencil and a straightedge, sketch the vertical lines of the building. Pay attention to their proportions and placement.

STEP 7 Form the Roofs and Gables
Add the roofs and gables with the 4H pencil and a straightedge. Some of the lines, such as the one coming from the tallest roof peak, will go toward a vanishing point on the left side.
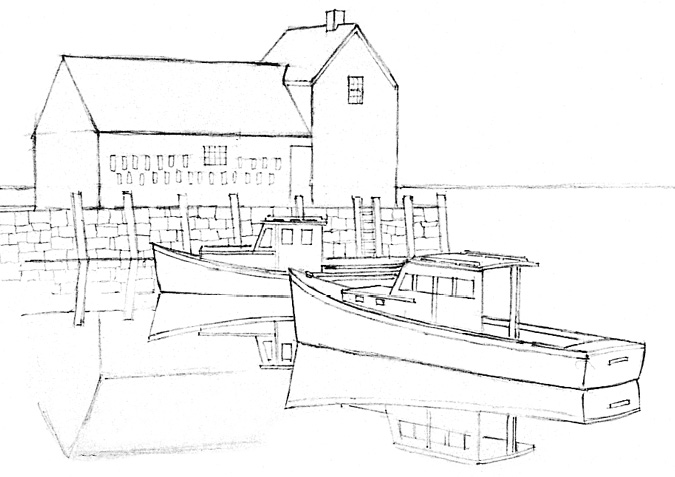
STEP 8 Add Details to the Building’s Structure
With the 4H pencil, add details to the building, including windows, door and trim and the poles and stones to the pier. You may want to check your angles with an angle ruler. Erase any obsolete guidelines.

STEP 9 Start Shading the Building and Stonework
Start shading the lighter side of the building and the stonework with a 4H pencil, remembering that the light source is at the upper right. Darken the stonework near the water line. Use the value scale to check your values as you work through the rest of these steps.
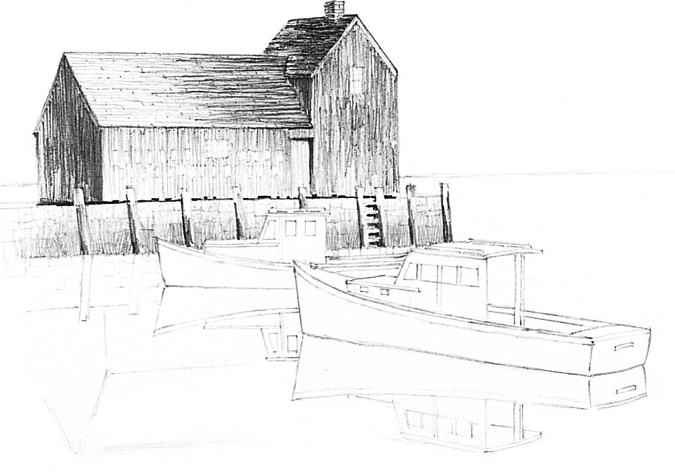
STEP 10 Add the Darker Values to the Building and Stonework
Add the darker values to the roof, the chimney and the darker sides of the building with 4H and HB pencils. Use the HB pencil for the darker areas, such as adding shadows under the building.

STEP 11 Continue Adding Darks to the Building and Stonework
Continue adding more darks and details to the building and stonework with 4H and HB pencils, as necessary. Apply the darkest darks with the 4B pencil.

STEP 12 Start Adding Values to the Boats
Add the lighter values of the boats with a 4H pencil. Make the foreground boat darker than the second boat for contrast.
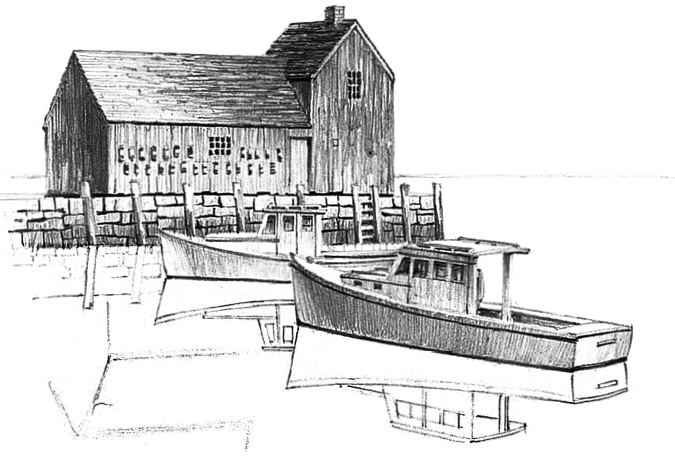
STEP 13 Add Middle Values to the Boats
Add the middle values of the boats with the HB pencil. Clean up any smudges and erase any unnecessary lines with a kneaded eraser.

STEP 14 Add Reflections and Final Darks and Details
Add reflections with back-and-forth horizontal strokes using a 4H pencil. Lightly indicate distant water and trees near the horizon. Add some darks to the boats with a 4B pencil and darken much of the foreground boat with the 4H pencil. Add some simple seagull shapes with a 4H pencil. Sign and date your artwork.
Rockport Harbor
Graphite on drawing paper
11" × 14" (28cm × 36cm)


