When I was eight years old, I had the deep privilege of being the youngest member of the Trappers and Explorers’ Club in Brookhaven, New York. We were four members in total. Our clubhouse was a disheveled garden shed with beautiful lines. Even an eight-year-old could see this. When Nancy DeFeyeter, my mother-in-law, asked me to build her treehouse, I resorted to the roots of my aesthetic.
The Trappers and Explorers’ Club house rose again.
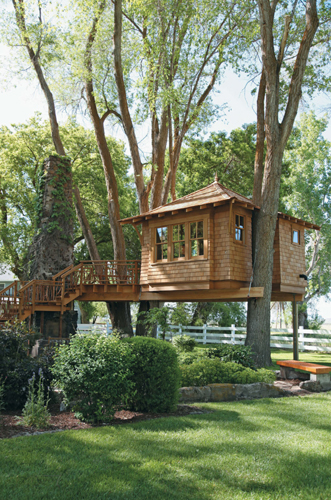
Judy and I were married just a few steps to the right of this photograph, on the original stone entrance of a house that once stood here. Siberian elms hold a new house. They grow just outside the remaining perimeter of the bygone home’s stone foundation.
The WC Ranch, outside of Merrill, Oregon, came into existence in 1969, when my wife, Judy, and her family moved up from Los Angeles. I arrived there for the first time in 1982, having grown up in densely populated suburban New Jersey, and I was stunned by its natural beauty.
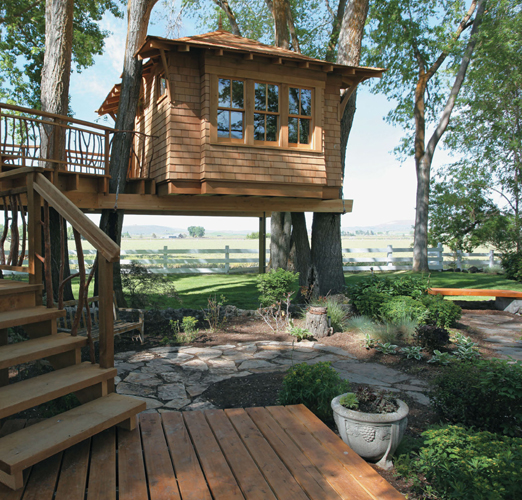
We were married there in 1986, exactly where the stairs land at the new treehouse in the sacred place we call Ellen’s garden.
A few years ago, Nancy, my mother-in-law, took me aside and claimed that she was ready. “For what?” I wondered. Maybe this was going to be the pep talk for me to get a proper career outside of treehouse building. Instead, with an excited twinkle in her eye, she said that she would like to surprise the family with a treehouse. I must admit that I felt some pressure. Nancy has always supported our unconventional career choice, and for that simple bit of grace I wanted to build her something wonderful. Walls of cedar shingle were her only request, so I designed something to match her classic and timeless style. The following spring, our newly formed company, Nelson Treehouse and Supply, sent the crew and put all hands on deck to create this special arboreal guesthouse that has every family member fighting for reservations.
Our crew consisted of five carpenters and countless family members and volunteers. We spent about a week prefabricating the walls and roof in the comfort of our shop in Fall City, Washington, and then about ten days assembling and finishing everything on-site.
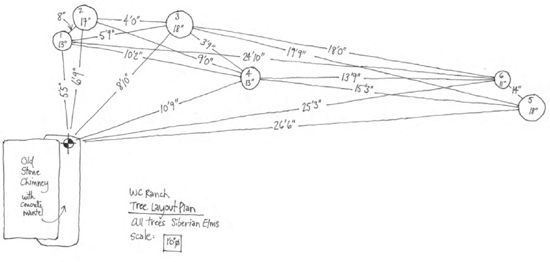
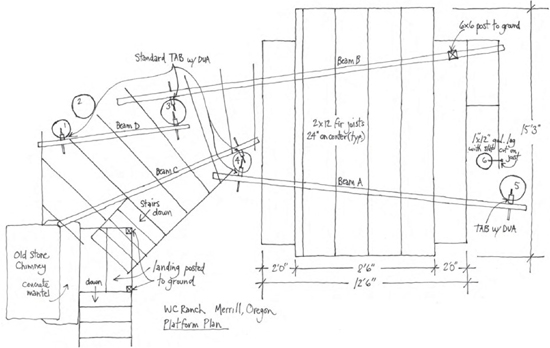
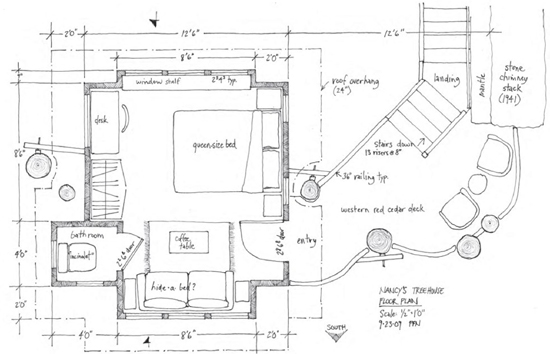
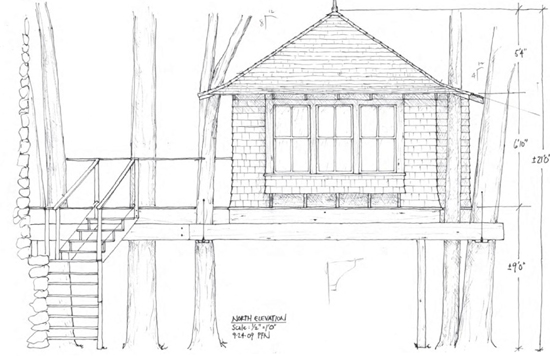
This is a representation of the four phases of drawing a treehouse plan. It starts with a scaled tree layout plan. Then, a platform plan is refined after a few passes at the floor plan. And finally, elevations are drawn.
The elevations can be anything! If your treehouse needs to be a classic single style—so be it. If it needs to be Frank Gehry—make it so!
If it is something no one has ever seen before—more power to you. Just do it!
Adjustments were made where a tree was not behaving according to plan.
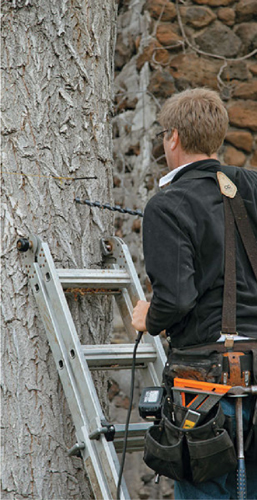
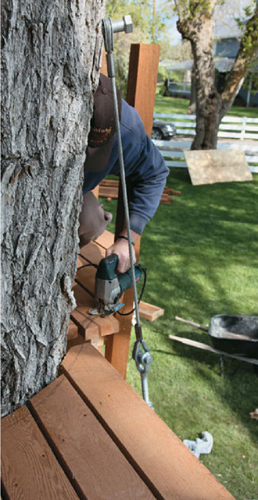
A 6-inch screw is placed about 3 inches above the drilling point to indicate the left/right orientation of the TAB. A short torpedo level placed directly on the 1-inch ship auger will guide the up/down orientation of the first boring.
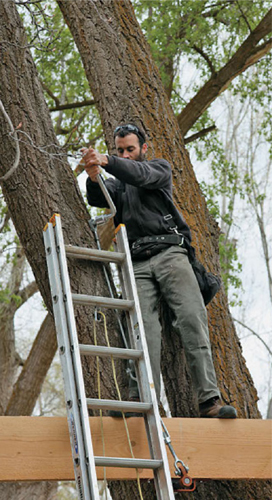
Ian Weedman turns in a 1-by-8-inch galvanized lag screw that anchors the top of the cable suspender.
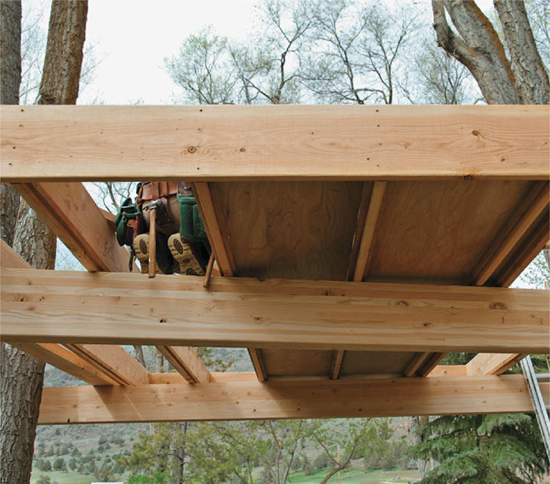
One method of insulating a treehouse floor is to drop in plywood soffit panels and R30 fiberglass batt insulation
before a ¾-inch plywood subfloor is applied to the top of the joists.
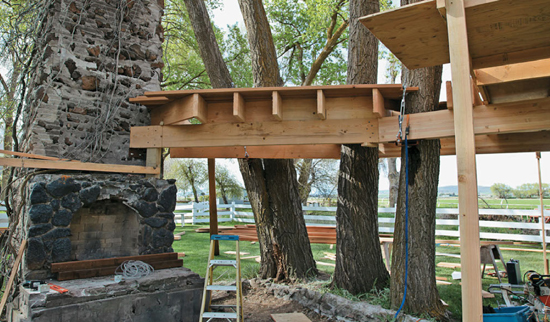
The old chimney serves as a static attachment point for the deck portion of the treehouse plan.

The floor insulation method chosen here allows easy movement between the beam and joist level. Insulating your floor is critical in cold environments, as this is the part most vulnerable to cold infiltration.
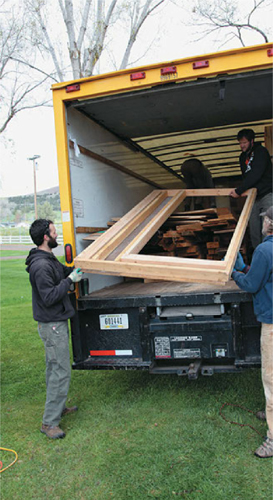
Ian and Daryl McDonald unload the prefabricated wall parts of the treehouse. Typically we prefabricate all of our walls in our home shop in Fall City, Washington, to limit the time spent on the road.
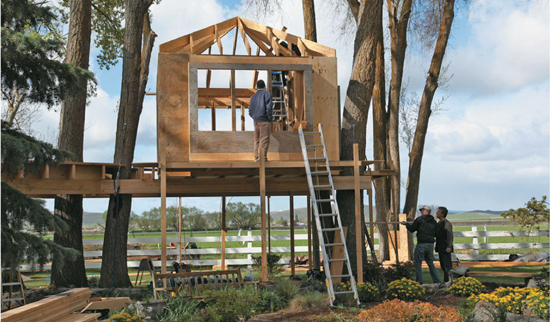
The walls are designed so that two to four people can lift them easily into place.
Once the walls have been raised, the precut roof rafters are installed.
Many things can occur simultaneously once the shell and the frame are in place. My brother-in-law, Monnie Hedges,
contemplates the window openings and hopes they were framed to the correct size.
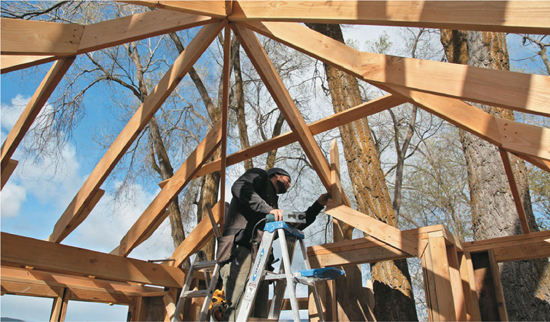
Daryl is always given the trickier tasks. In this case he is making adjustments to the roof
where one of the Siberian elms is closer to the structure than we bargained for.
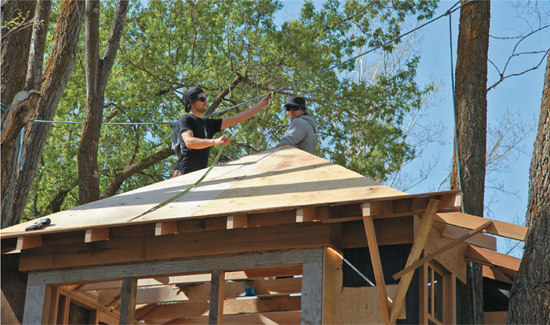
A serendipitous visit from one of my European building partners, Christopher Richter, and his nephew, Dominic,
allowed us to subcontract the roof sheathing to a capable duo.
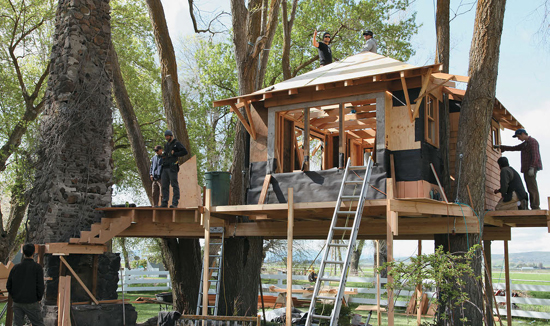
Erecting strong scaffolding out of two-by-fours and ½-inch plywood around the perimeter of any treehouse project is well worth the time it takes to install it. Make it strong and make your life ten times easier.
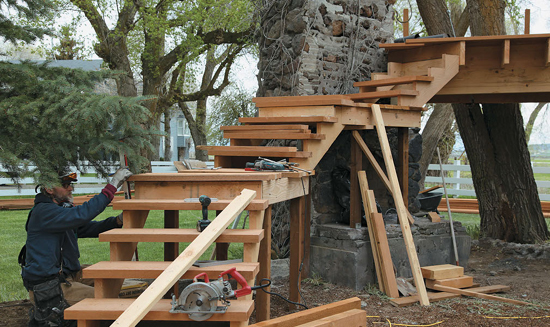
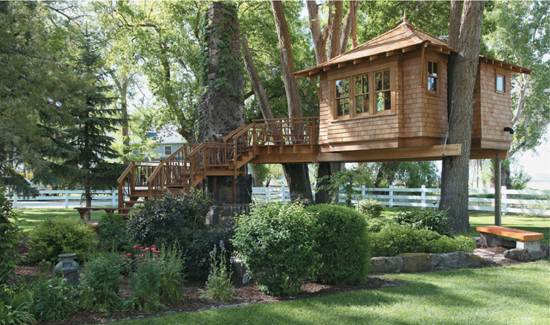
Chuck McClellan spent a good deal of time and brainpower building an elegant stairway.
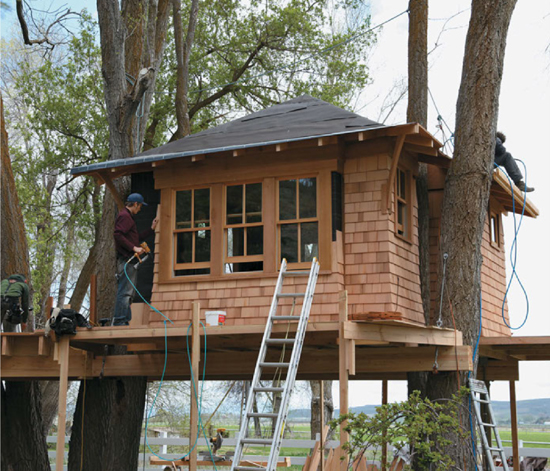
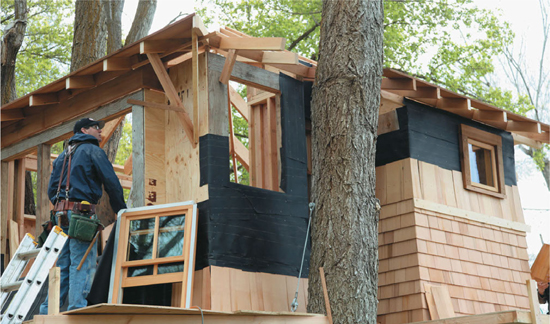
Charlie Nelson expertly weaves a corner with perfection-grade western red cedar shingles,
while Daryl starts the first course of shingles on the roof.
Rookie carpenter and family member Kevin O’Brien does his best to follow the line in a crucial finish cut.
The railings stop short of the trees so the trees can move in the wind.
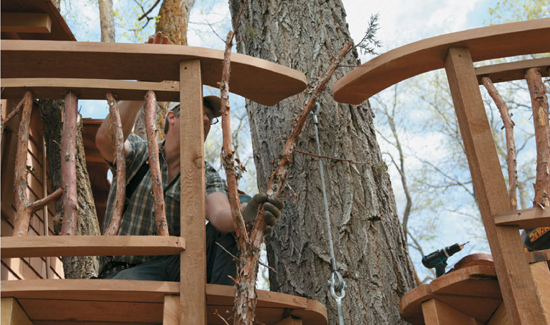
Here I am filling in some larger gaps with juniper branches that were harvested just a few steps away.
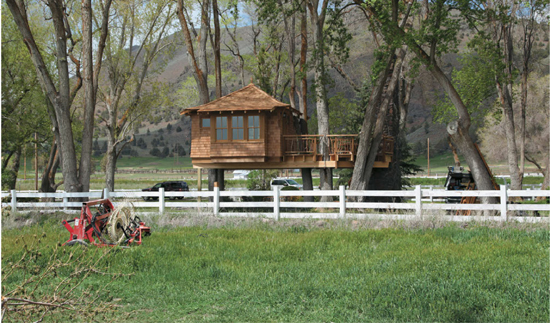
When looking back at the treehouse from the alfalfa fields, Stukel Mountain rises majestically in the background.
Treehouses have a way of uniting friends and family like nothing else. Now, in this sacred place named for a lost family member, Ellen’s garden, we forever have a reminder of the ten great days we spent together.
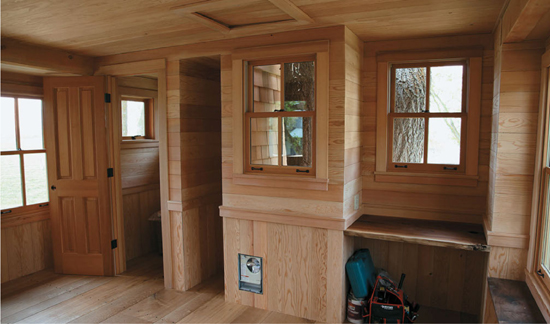
A recommended interior for any treehouse is 1-by-6-inch tongue-and-groove wood paneling—here, we used remilled Douglas fir.
In any case, avoid plaster and Sheetrock, as it they do not flex like wood does.
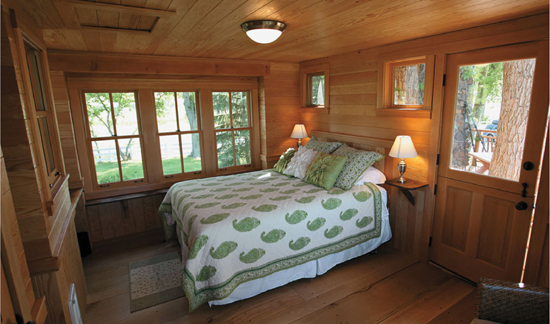
A supremely comfortable bed awaits family members, who have to reserve the special guest room well in advance.