Most beekeepers have a love–hate relationship with beeswax. When they need it, it is usually not there, or at least not in the form needed, such as beeswax foundation. When they have it, it requires quite a bit of processing to make it useable, so it is often set aside to be handled “later.” The production of wax also removes honey from the hive food stores in order to feed wax-producing bees, effectively reducing the amount of honey yield, so to maximize honey production, beekeepers try to keep as much comb in the hive as possible. Beekeepers traditionally process their wax either during honey extraction or during the winter and early spring months when other beekeeping maintenance is complete.
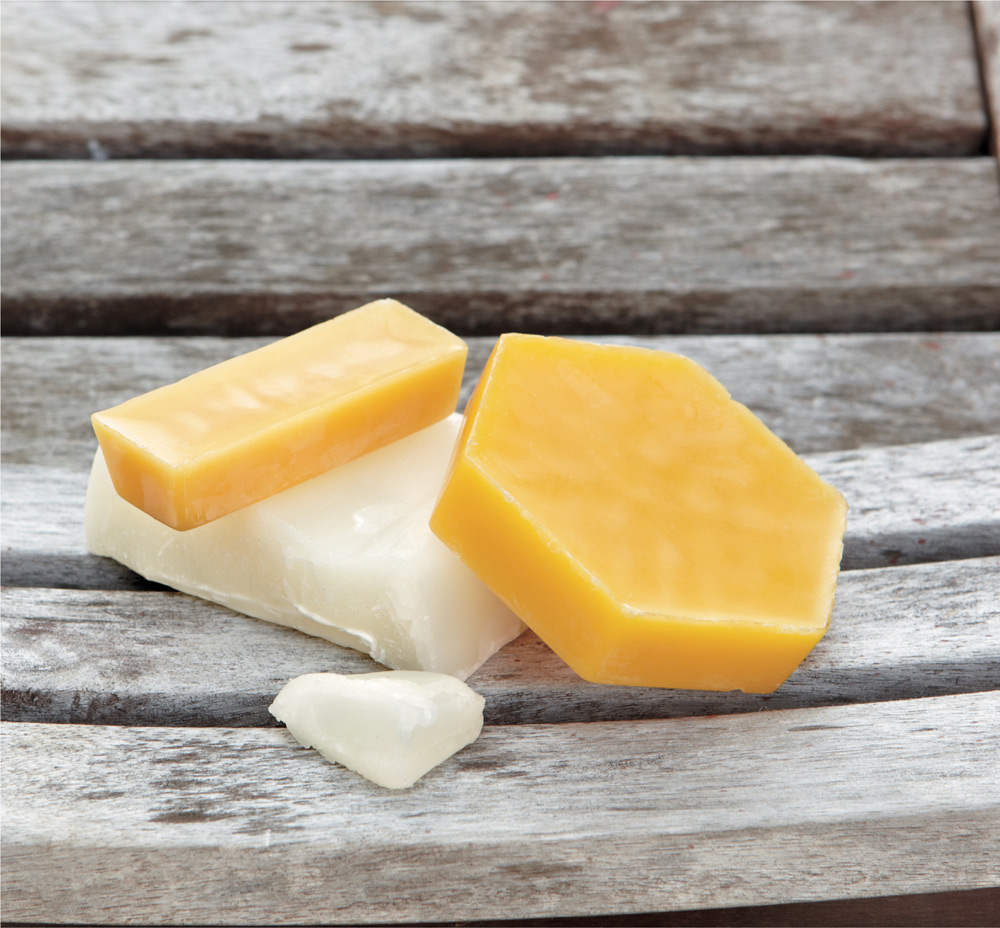
For things such as candles, especially pillar candles, the residual honey in the wax causes the wax to burn unevenly, clogging the wick. The best way to get the last of the honey out of the wax is to allow it to clarify in a heated double boiler or wax tank. Admittedly, this task is easier to accomplish with the wax tank than a double boiler, since the wax must remain in a liquid state for quite a while until all the honey has settled to the bottom. I usually let mine settle for a couple days. The best way to determine if it is done is by checking the clarity of the wax. When it is first melted, it has murkiness to it. As the honey settles, the wax begins to clarify. When the wax is clear, filter it through a clean piece of felt cloth and pour into molds to divide the wax into useable portions. I usually do a variety of different sizes, from 1-ounce (28 g) ingots up to 10–20 pound (4.5–9 kg) blocks that store easily, but are still small enough to fit into my wax melter. This ensures that I have the right size for whatever I am making. The resulting wax is still yellow and retains the signature honeylike scent, although the filtering may have lightened up the wax slightly.
My first wax processing experience was while helping another beekeeper with his honey extracting. His operation seemed huge to me at the time (he maintains around 1,200 colonies), but I have learned that in comparison to other commercial operations, his is probably on the smaller side. There are some commercial beekeeping operations that maintain upwards of 50,000 colonies. There is very little difference between how these two types of beekeepers do their wax processing, except that the large-scale operations may have a more automated version of what I experienced.
The first step in the process is to place the honey frames into a machine that cuts the cap from the top of the honey cells. The removed cappings are funneled into a trough where they are pushed through a very coarse screen before entering the processing area. The frames are moved to the honey extractor. The wax processing area may have either a centrifuge where the honey is flung to the outside, rendering the cappings virtually free of honey, or a heated chamber with a series of baffles that separate the honey from the wax.
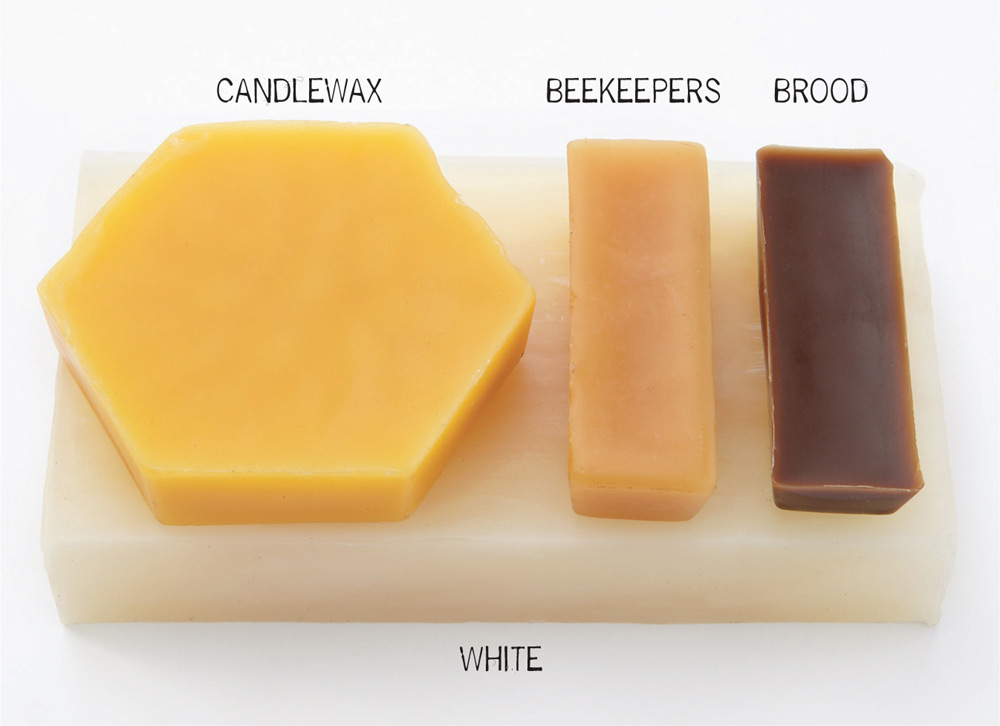
The wax that results from either of these processes is generally where the beekeepers stop. It is usually a really nice yellowish wax with a lovely honeylike smell. However, there is still some honey left in the wax. It may not be all that noticeable, but it is there. For some applications, such as lip balms, it is not a problem to a have a bit of honey in the wax, but for other applications, cleaner wax is needed.
This is the wax that comes from melting down old brood comb. Brood comb is usually replaced on a three-to five-year cycle. After the hive has reared multiple batches of brood on a frame of wax, the wax cells keep getting smaller and smaller, since the cocoon material remains. In the wild, Mother Nature has seen to the renewal of this comb, as the wax moth larvae loves to eat the brood comb. The moths are voracious eaters and can decimate a box of stored combs over the winter months, forcing the bees to build up the cell walls again before the queen can lay eggs into that space. For kept bees, beekeepers take on the role of the wax moth larvae by removing the old wax and replacing it with fresh wax foundation.
The process of rendering the wax from the cocoons, propolis, and other items in the brood comb is an arduous one. All these additional elements need to be filtered out before the wax itself can be cleaned. To do this, most beekeepers put the wax into burlap sacks, stacking press plates in between, and heat the whole works up to melt the wax. Once the wax is melted, the plates are pressed to release whatever wax remains in the slum gum and then the wax is strained off the top.
The wax that comes from this process is usually really dark. Although a lot of the bigger particles of propolis, cocoon, and slum gum are removed in this process, the microscopic bits still remain. Over time, these bits actually tint the wax, so even filtering the wax will only lighten it slightly. Although it may not look and smell as nice as yellow cappings wax, it does have its favored applications. It works really well for darker wood finishes. The light wax can have a “glazing” effect over time that is diminished when using the darker colored wax. It also works well on darker leathers. I use our dark wax to condition and polish my shoes. We also supply a local blacksmith with some dark wax. He prefers the darkest wax we have, since he uses it to seal and protect his wrought iron pieces.
Before I got into encaustic painting, I had no use for anything besides yellow wax. I loved the color, the scent, everything! So when I started making my first batch of encaustic medium, I used what I had on hand. I figured that I could make the yellow color part of my “signature” look. WRONG! Aside from my inept skills as an encaustic artist, it looked horrible. The colors were muddy and didn’t flow as well as I had envisioned, so I did some research on “white” beeswax. My hope was that I would be able to remove some of the color from the wax myself. First I tried bleaching it in the sun. That works, but only to a certain degree. Sun does lighten the color of the wax, but the presence of microscopic bits of propolis, slum gum, and possibly honey added color that could not be completely bleached by the sun.
To remove the inherent colorants in the wax, it needs to undergo a different process that most at home cannot achieve. In the past, white wax was treated chemically to separate out the propolis and other “contaminants.” This process yielded a nice, white wax, but traces of some of the chemicals remained. Not good! Today, most of the white wax is not treated chemically. It is run through a series of super fine filters that remove the “contaminants,” without the addition of harsh chemicals.
The color of the resultant wax is very light and as close to white as possible, but there is also a translucency that is not available in the yellow waxes. This translucency is what makes it great to use for encaustics. Also, since a lot of the “contaminants” are what give the wax not only its signature color and smell, but also its myriad health benefits, white wax is not my preference for use on the skin.
All of my recipes are written using percentages. The advantage to doing this is that the recipe can be easily scaled up or down. The disadvantage is that a little math is required to convert the equation into a usable recipe. Here’s how to do that.
Example recipe: | ||
Shea Butter | 31% | |
Sweet Almond Oil | 31% | |
Beeswax | 31% | |
Flavor Oil | 7% | |
1. Choose a unit of measure with which to work. Metric units, such as grams or milliliters, work best, as they are easier to multiply. They can be converted back to English units at the end of the process. The recipes in this book include gram measurements in addition to the percentages.
2. Decide the desired size of your batch. For this example we will use a 10-oz batch, which is equal to 283 grams.
3. Determine the percentage of each portion of the recipe.
Multiply the number of the full batch by the percentage for example, 283 g × 0.31(%) = 87.73 g.
4. Round to the desired precision (87.73 rounded to the nearest whole number = 88 g).
5. Finalize the recipe.
Using the sample recipe, it now looks like this: | ||
Shea Butter | 88 grams | |
Sweet Almond Oil | 88 grams | |
Beeswax | 88 grams | |
Flavor Oil | 20 grams | |
6. Use a digital kitchen scale and a plastic deli container to measure ingredients. Remember to zero out the weight of the container before weighing ingredients.
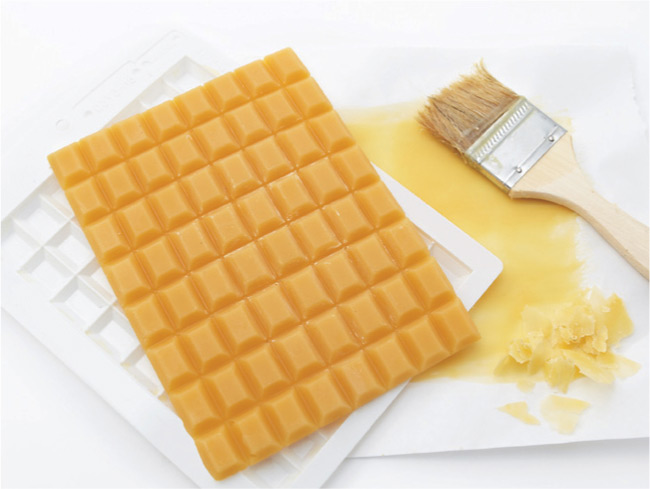
When I need small amounts of beeswax for a recipe, it can be cumbersome to break a chunk of wax off a large block or grate some wax to use. Beeswax can be purchased commercially in the form of pastilles, which are small spherical beads of wax. Since most of this wax is the highly processed “white wax,” I prefer to mold my own wax in one of two ways. The goal is to have wax that melts quickly (thin pieces work well) and is easy to measure (small).
One method is to pour the melted wax into a mold that is traditionally used to shape chocolate; the mold forms a thin block with score lines that allow the chocolate—or in our case the beeswax—to be broken at the score lines. There are approximately six squares to an ounce (28 g), (they vary a bit in depth and actual break lines). Any combination of squares should work for almost any recipe. I use this method to save any leftover wax after pouring candles.
The second method calls for pouring the melted wax onto a cookie sheet (with sides) that is lined with freezer paper. This will yield a sheet of wax that is variable in thickness, but can be broken into smaller chunks easily. I use this method when I have wax that I want to transform into flakes.
Beeswax gets brittle when it is frozen, making it easy to break off chunks as needed. I store my wax in blocks that weigh around 35 pounds (15.9 kg). Although great for storage, these heavy blocks are too big to fit into my wax tank. Since I use the most wax in winter, and weather gets cold around here, I use the great outdoors as my “freezer,” but a regular freezer can be employed to do the same thing.
Once my block is frozen, I put it in a heavy-duty garbage bag (I use the black plastic contractor bags) and drop it on the pavement behind my house. Usually, it doesn’t take more than a couple of drops to create some good-size chunks that are perfect for larger projects or to melt down and mold into smaller chunks.
The freezer is also great for helping to release candles that are stuck in metal molds. Just leave the stubborn candle in the freezer for a half hour or so, and when the mold is removed the candle should slip out fairly easily.
When using beeswax for projects that call for wax to be applied, either by brushing it on, using another type of tool to apply it, or dipping it in wax, make sure that the work surface is protected. It is a lot easier to clean up a sheet of paper than it is to clean wax off the countertop.
The joy of a newly made candle can quickly become frustration when faced with the task of cleaning up. Beeswax does not clean up easily in the “traditional” way. Soap and water won’t touch the wax unless it is hot, and even then it will only smear the wax around. I recommend acquiring a few containers that will be used exclusively for melting beeswax. That way, there is no cleanup needed and no leftover beeswax in tomorrow’s dinner. If a beeswax container does need to be cleaned, the best way I have found is to turn it into a balm by adding a bit of oil, which effectively drops the melting temperature. Then wash with hot water and some grease-dissolving dish soap. To clean a waxy bowl, wipe the bowl with oil (any oil will do) and heat the bowl with a heat gun (low heat) or in the microwave if it is safe to do so, and wipe with a paper towel. Repeat until the bowl is relatively clean and then wash with dish soap and water.
For products such as balms and creams, I like to use new plastic deli containers that can be tossed once the product is made. They are quite heat proof, food grade, sterile, and come in a variety of sizes. They also make pouring product into smaller containers relatively easy, since the plastic is malleable enough to pinch into a pour spout. I realize that this not the most eco-conscious thing to do and I reserve their use for things that require sterility, such as lotions and creams.