I see many new smiths stumble when setting up their shops, but now that you have a history of blacksmithing and, hopefully, a better understanding of how metal behaves, it should be easier to find tools for your shop. Don’t worry if you can’t find a perfect replica of the colonial blacksmith shop immortalized by Jefferson David Chalfant and other painters in the nineteenth and twentieth centuries; most blacksmiths through the ages had to make what they could with what they had, and that includes smiths in many parts of the world today.
Find a video online of smiths in developing countries if you want to see the blacksmithing spirit at its purest. These blacksmiths supply their towns with tools and household implements, using what they find; in fact, you may be surprised at the tools and items that they export to developed countries, too. They don’t have time to look for the finest Peter Wright anvil, and neither do you—you want to get blacksmithing ASAP!
As I’ve mentioned, many new smiths become very frustrated, thinking that their work is inferior because of their tools. Remember that I started the book off with how metal moves and the importance of hammer control rather than jumping right to setting up shop to save you that heartache. If you skipped the first chapter, thinking you’d get to blacksmithing quicker, go back and read it now.
A Clutter-Free Work Area
Choosing Your Site and Organizing Your Smithy
A properly set up smithy will ensure your safety and efficiency as a blacksmith. Everything should be organized and picked up off the ground to prevent you from tripping while holding a red-hot piece of iron or falling face-first into your forge fire. Because you will be using your forge, anvil, and vise most frequently, and because your hot metal will begin cooling as soon as it’s out of the fire, these three tools should be situated close to each other. The best set-up is for the forge, anvil, and vise to form a triangle and to have a quench tub, also known as a slack tub, beside the forge, all within a few steps of each other to prevent losing too much heat while your iron is out of the fire. This is especially critical if you live in an area (like I do) in which temperatures are well below freezing for half of the year, and the environmental temperature quickly robs the heat from your steel. Your shop bench, where you will do your cold work, should be adequately lit to prevent eye fatigue while filing and fitting parts.
The actual location of a forge can be outside, inside a building, or anywhere in between. When deciding on where to set up, you need to consider a few things. First, and most important, is safety. Your shop, including floors and walls, needs to be fireproof and have proper ventilation whether you’re building a shop or using an existing indoor location. You need fire extinguishers on hand to put out any type of fire because fires will happen. The building’s roofing material should be fireproof, also, to prevent an ember from the chimney, if you have one for your forge, from starting a fire on your roof. On that note, if you use solid fuel, make sure your chimney is properly installed and up to code. As you can see, the number-one concern in a blacksmith shop is fire safety.
Second, think about your neighbors. If you are close to others, remember to do unto others as you would have done to you—be a good neighbor and look into soundproofing as well as how you will control disagreeable odors, such as smoke. If you can’t build a soundproof shop, you may need to coordinate your smithing time with your neighbors’ work schedules and your town’s noise bylaws. How near you are to your neighbors also dictates your forge type because you can control the smoke by using charcoal or propane, rather than coal, as your fuel. Nothing shuts down your forge faster than an angry neighbor with the local police department on speed-dial.

To prevent heat loss in your metal and to be more efficient, your main work area needs to be within a few steps of the forge.
Other factors to consider include the cost of building a shop, your local zoning bylaws, and the size of the items you plan to forge. If you have an outdoor work area, everything should be mobile so you can get it under shelter quickly during rainy or snowy weather, or you should have fireproof tarps handy. Tarps do double duty by providing shade when you are forging outside in the hot months.
Never underestimate the importance of flooring—as mentioned, it must be fireproof, and it should also be slightly soft to prevent fatigue when you stand on it all day. Traditionally, a forge floor was made of packed dirt, stone, or brick if the blacksmith didn’t want his smithy to burn down too often. I have seen pictures in town history books of blacksmith shops with wooden floors, but such a picture is usually accompanied by a caption that details the numerous times that the shop had burned down.
While dirt is fireproof, nice to stand on, and cheap, it can be difficult to find and retrieve items that fall into it if you don’t pack it down adequately. The dust from a dirt floor can also cause respiratory issues in some people. The other flooring option for today’s shops is concrete, which is easier to clean and doesn’t swallow up dropped items. On the other hand, concrete can cause lower back and leg fatigue. Many smiths with concrete floors use rubber anti-fatigue mats where they stand at the anvil, but you must purchase fire-resistant mats designed for welding; otherwise, a regular rubber mat can catch fire if a hot iron is dropped on it, creating an awful smoke that can be hard on your lungs. The best place to get suitable fire-resistant anti-fatigue mats is your local welding shop.
In my opinion, the absolute deadliest risk in a blacksmith shop is carbon monoxide poisoning. Carbon monoxide is an odorless gas that catches you unaware, which is why you must always have proper ventilation and a carbon monoxide detector in your forge. Ventilation will also save you if you accidentally throw galvanized steel into the forge because smoke from galvanized steel contains toxic amounts of zinc and has claimed blacksmiths’ lives.
Outdoor Safety

If your forge has cement flooring, a fire-resistant anti-fatigue mat will help prevent foot, leg, and back pain.
Shop Safety
Blacksmithing is a dangerous activity, and it’s likely that you will be hurt at some point in your forge, so your safety and the safety of everyone else in your forge need to be your main priorities. First and foremost, be sure to stay hydrated regardless of the temperature in the shop; blacksmithing is hot and sweaty work. In one blacksmithing class I took, another student almost fell into the fire when he collapsed from heat stroke, and we were in an air-conditioned building.
Speaking of water, also always ensure that you have enough water on hand to put out a fire quickly. This is extremely important if you are set up outside. On a bright day, grass fires can be hard to see until they get away from you, so always keep the ground around you dampened by sprinkling water from your quench tub. Keeping a dirt floor damp, but not muddy, will also help keep the dust down and pack the dirt into hardpan.
Every blacksmith shop should have a first-aid kit, including an eyewash station. Because iron can be as hot as to 1,000° Fahrenheit (538° Celsius) while appearing cold, you need to treat all metal in a blacksmith shop as hot enough to cause serious burns. Chips of metal can go flying from hammers and tools, bits of wire can dislodge from wire wheels, and scale from iron can end up in your eyes, requiring a way to wash out your eyes.
On the same topic, while forging, wear eye and hearing protection. A chip of metal in the eye can blind you, and the ringing of an anvil can cause permanent hearing loss over time. Also wear protective clothing made of flame-retardant material, such as wool, cotton, or linen. A leather blacksmith’s apron is a good investment to protect both your body and your clothes from burns. Wear closed-toe boots, but never tuck your pants into bootlegs because hot scale from the iron can fall into your boots and burn you.
Regarding gloves, do not wear gloves other than on your chisel hand while hot punching or chiseling with nonhandled tools. Leather gloves are good insulators, but they shrink when hot; by the time you realize you’re being burned, the gloves may be stuck to you, making the burn worse. On top of that, if the gloves aren’t tight enough, they can get caught in any moving implements, such as a bench grinder, in your shop. If you treat every piece of iron as if it’s hot, you will be much safer in the long run.
A glove on your hammer hand can also predispose you to repetitive-strain injuries because you will need to hold your hammer tighter, leading to increased strain on the tendons and ligaments because they—rather than your arm muscles—absorb the hammer recoil. When they are not tense, muscles are much more elastic than tendons and ligaments are, and they naturally stretch and shrink with normal use that would tear tendons and joint ligaments.
If the piece of metal is not long enough—generally less than 1 foot long—to safely handle without being burned, you will need to use tongs. New blacksmiths often don’t properly fit the tongs to the metal, which is very dangerous. If the tongs do not fit the metal properly, the metal can fly off with tremendous force, leading to burns, cuts, bruises, broken bones, or eye damage. Properly fitted tongs hold the steel without any wiggling or slipping.
Protect Your Shop
Safety Tips
Finding and Setting Up an Anvil
With what you’ve learned so far, you are ready to start looking for anvils, and maybe you have some ideas about places you might not have looked otherwise. For example, instead of spending hours looking for an antique anvil or spending much more money than your budget allows, as some other smiths may do, venture out to a scrap steel pile and begin forging sooner rather than later.
Before you begin looking for an anvil, you need to remember that the tools may make the craftsman, as the saying goes, but the blacksmith makes the tools. Throughout the ages, blacksmiths have used many different styles of anvils, but an anvil is simply something to hammer and bend hot iron on.
When choosing an anvil, look for three things: adequate working surface, mass, and rebound (see sidebar “What to Look For in an Anvil”). If a block of steel has those three qualities, its shape and its former uses do not matter. Look for an anvil that weighs more than 75 pounds for general forging and that is made of steel, not cast iron. Cast-iron anvils are known as anvil-shaped objects, or ASOs, by blacksmiths because they chip and break easily. Unfortunately, these are the easiest to find because they are sold by most welding and agriculture-supply stores. Spend your time and money at a scrap yard or farm auction rather than buying a cast-iron anvil.
Many beginning smiths think that a chunk of railway track makes a good substitute for a good London-pattern anvil. I find that railway track doesn’t have enough mass under where you’re hammering—unless it is stood on end—to work as a decent anvil under heavy forging with even a hand hammer. On top of that, railway track can be harder to find than a simple block of steel that would hold up better as an anvil.
Once you have an anvil, you will need a properly weighted and anchored anvil stand to keep it from bouncing. An anvil that weighs a few hundred pounds will work well sitting directly on the ground, but smaller anvils will bounce around too much for efficient forging. A stand can be anything from a tree stump to a fabricated metal stand as long as it adds weight to the anvil, is level and stable, and has a way to anchor the anvil to it. A quick search online will give you many different ideas.
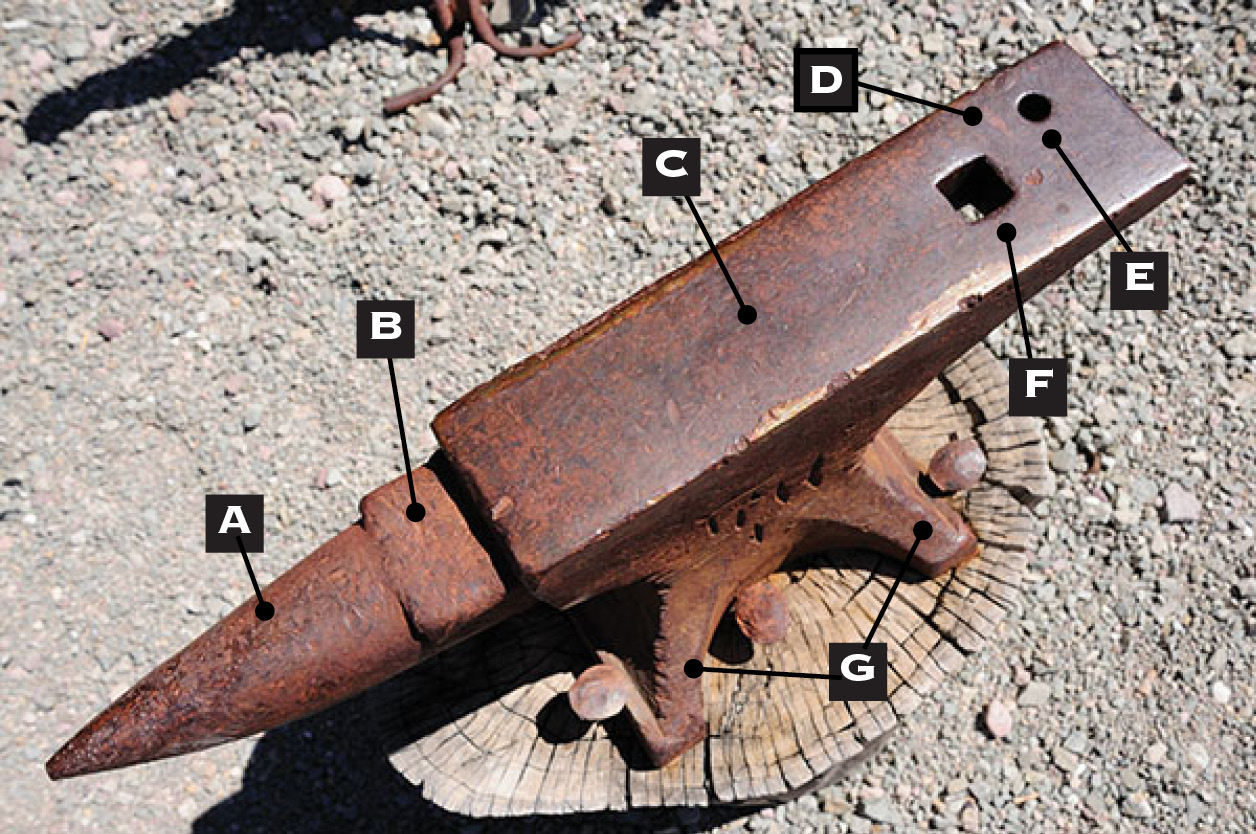
Parts of an Anvil
Start with a simple block of steel, round one end of the face to create a horn, and cut a notch in the other end to let you drill hardy and pritchel holes—voilà, you have an anvil.
Get to Know the Hundredweight System

What to Look For in an Anvil
Building a Forge
The forge is the heart of the blacksmith’s shop, and it consists of three things: a fuel source, a place to hold the fire so you can stick your iron into it, and an air source to get the fire hot enough. It needs to produce adequate heat to make the steel malleable enough to work under hammer, which means 2,500° Fahrenheit (1,371° Celsius) to get the iron hot enough to forge-weld. If your forge doesn’t reach welding temperatures, you are severely limiting the amount of work you can do and how efficiently you can do it; blacksmithing at near-welding temperatures is much easier than at cooler temperatures.
There are a few different fuel choices, and your fuel source determines which type of forge you need to build or buy. The most common fuels are solid fuels—coal and charcoal—and gas fuels, such as propane. A solid-fuel forge consists of a firepot with an air inlet that comes in from either the bottom or the side of the firepot. A propane forge is made of an insulated enclosure heated by a special torch. While you can make a propane forge cheaply, a solid-fuel forge is much easier to make, and solid fuel is often less expensive if you know where to look.
Most blacksmiths in North America and Europe today feel that coal is the best fuel to forge with and would not touch charcoal. While coal creates a denser fire and generally works well, it does have some downsides. Proper blacksmithing coal is usually very difficult to find; on top of that, it produces more noxious smoke than charcoal or propane, so your neighbors might not be too appreciative of your new hobby.
What many smiths, particularly beginners, don’t realize—because most books gloss over the fact—is that charcoal has been the primary fuel for blacksmithing throughout history. In fact, there are many professional smiths around the world today who still use charcoal. I have used charcoal as my primary fuel source because scrap wood, which would have been thrown away otherwise, was very plentiful on my farm. I find that a simple forge built for charcoal is best suited for beginner blacksmiths. If you can’t find scrap wood to make into charcoal, you can purchase charcoal from any store that sells barbecue supplies. Just make sure that you buy actual charcoal, not the briquettes, because briquettes are designed for slow, low-temperature burning and do not get hot enough to use in a blacksmith forge.
As for forges, I have seen them made out of old large-truck brake drums, barbecue grills, wheelbarrows, oil drums, sheet metal, and cast iron; if they are made correctly, they work better than the riveter’s forges that you find at most farm auctions. I started out with the latter but found that I was able to control my temperature and get my iron up to heat faster in a side-draft forge that I made out of an old 55-gallon oil drum and a piece of scrap pipe. To make your forge last longer, use ½-inch steel and insulate it with either firebrick or a fire-safe clay. You can find firebrick and different refractories at a fireplace store or online. You can also find many traditional fire-clay recipes that use bentonite clay, which is easily found in cheap unscented cat litter mixed with wood ash or sand, if you don’t wish to purchase or can’t find a commercial product.
If you are making a bottom-draft forge for charcoal, your firepot must be deeper than what you’d need for coal because charcoal is less dense than coal; this is why many smiths find that charcoal doesn’t get hot enough. I feel that a firepot depth of 5–5½ inches works better for charcoal than the common coal depth of 3½–4 inches. With the increased depth, I have used softwood charcoal—which is the least dense of all types of charcoal and is considered unusable by many smiths—to forge-weld in a duck-nest style of tuyere. The walls of any solid-fuel forge should be at least ½-inch-thick metal to withstand the heat generated; any thinner, and it will burn through quickly.
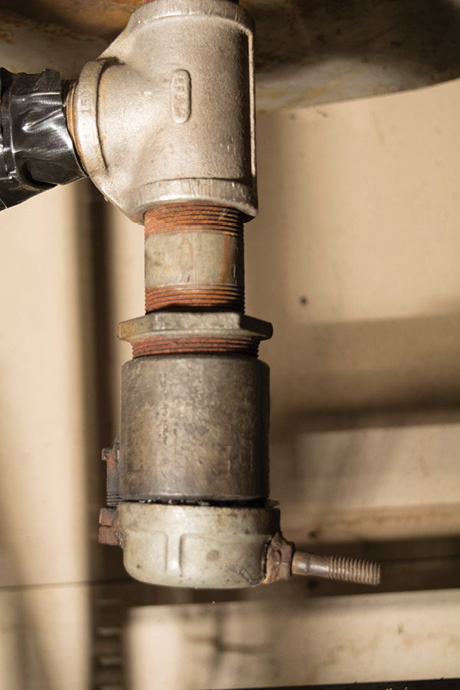
You can make an ash dump very simply from a threaded plumbing pipe found at your local hardware store.
DIY Side-Draft Forge
What Is a Box Bellow?
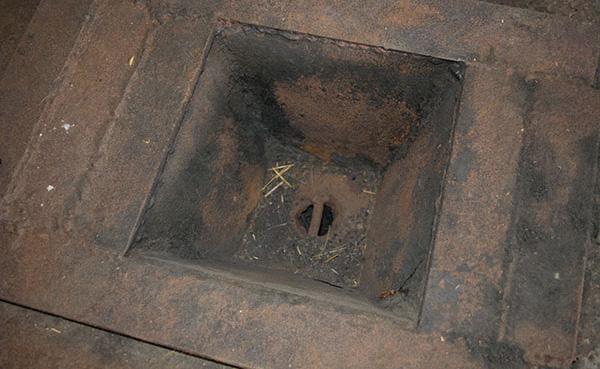
You can make up your own firepot with scrap steel and a welder. For charcoal, the firepot needs to be around 5–51⁄2 inches deep.
Making Your Own Charcoal
Essential Tools
Vise
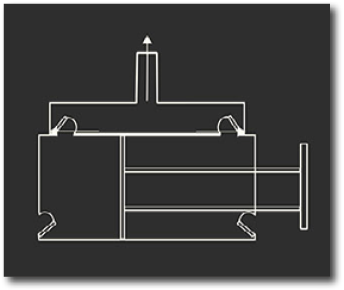
A post vise, also known as a blacksmith or leg vise, will make your life a lot easier, and you should be as particular about it as you are about your anvil. In fact, a proper post vise is one of the few things that a new blacksmith should either try to find as an antique or purchase new because they are difficult to make correctly. Depending on your area, there may be an abundance of post vises from farm auctions. If this is the case, grab one up. Most are in the 4–6-inch jaw-width range and can handle more work in a blacksmith shop than a larger machinist vise can; this is because the post supports the jaws of the vise, transferring the force of the hammer blows to the ground rather than causing the screw and mounting bolts to take all of the stress. A large machinist vise will suffice if you have no other options, but you should dedicate some time to looking for a proper post vise.
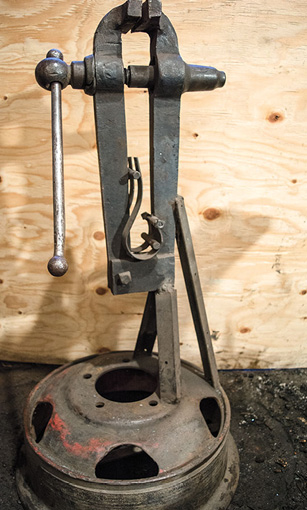
A post vise is the best vise design for blacksmithing. It can be mounted to a weighted tire rim to be stable but mobile.
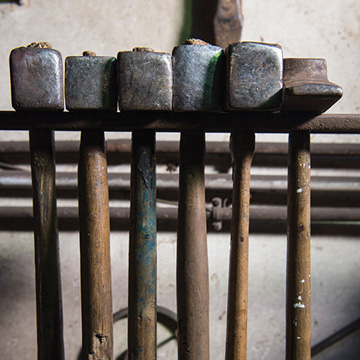
Hammers
Hammers are tools that have evolved differently in different regions of the world, but all types work well enough—if they are properly dressed—so that they can’t be blamed for poor workmanship. Beginners can find good used hammers for very little money at garage sales, antique stores, or auctions. Sometimes a hammer will require a new handle, but handles are readily available at hardware stores. If you wish to purchase a new hammer, you can find decent hammers at most welding or farm-supply stores.
A blacksmith should have a selection of hammers of between 2 and 4 pounds, depending on how strong he or she is. To start out, you will want a cross-peen, a rounding hammer, and a ball-peen. Remember that hammer accuracy and your endurance make a bigger difference in how much forging you can do in a day than the weight of a hammer. However, initially overdoing the weight can cause muscle and tendon damage, so build up gradually to larger hammers.
Your hammer must be properly prepared before you use it; otherwise, you will end up with rough hammer marks and sore forearms from holding your hammer too tightly. With a grinder or sharpening stone, polish and round any sharp corners on the hammer’s face and peen to prevent sharp hammer dings that make a forged piece look unfinished and amateur. A proper hammer face is slightly convex with smooth edges. As I previously mentioned, to help prevent carpal tunnel in your hammer wrist and tendonitis in your elbow, as well as to improve your accuracy, flatten the sides of the handle. A flattened handle lets you relax your grip and still keep the hammer from rolling in your hand.
Hammers
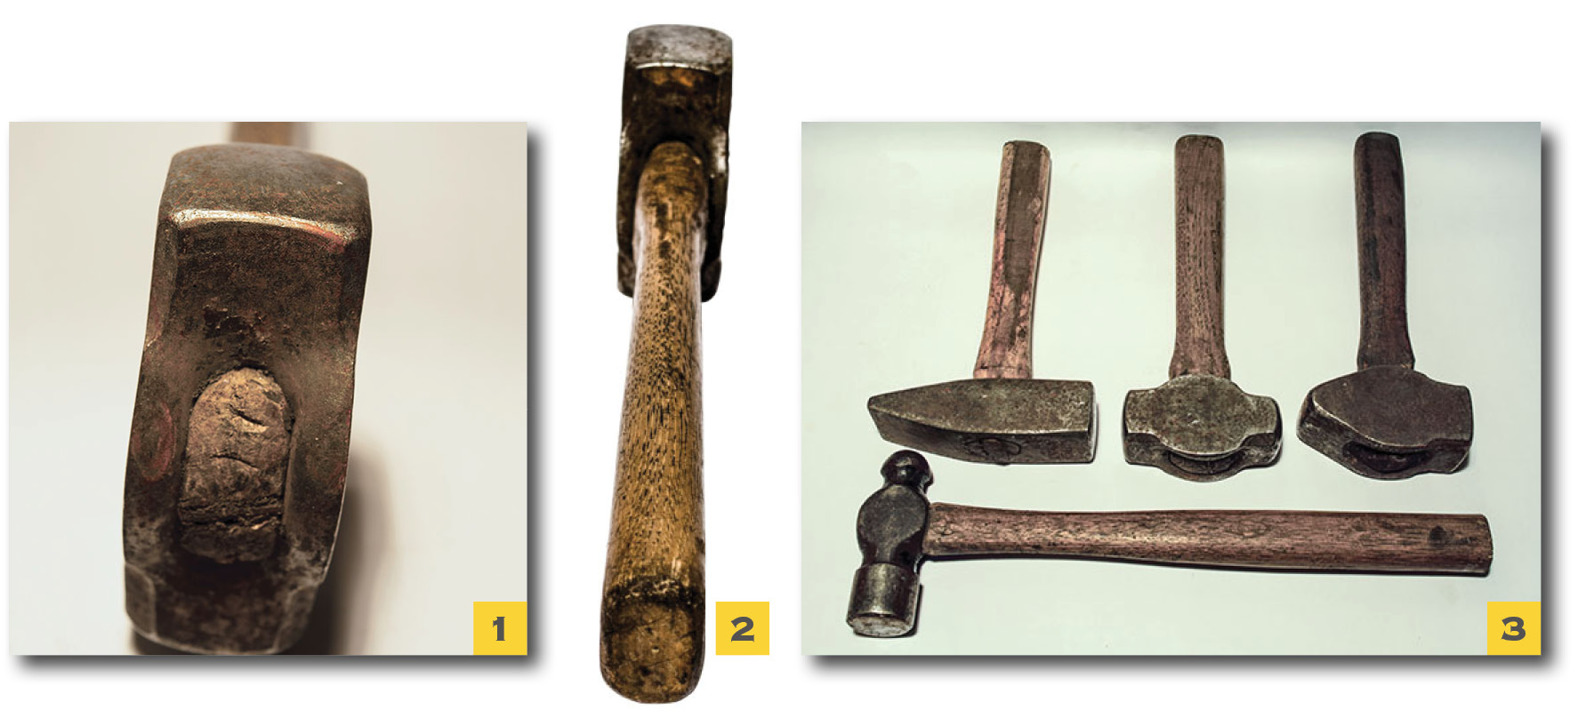
1. The face of your hammer should be slightly convex, with no sharp edges. 2. A flattened handle facilitates better accuracy and a more comfortable grip. 3. Top, left to right: A hardware-store cross-peen, a rounding hammer, and another style of cross-peen. Bottom: A ball-peen, or engineer’s, hammer.
Hand Tools
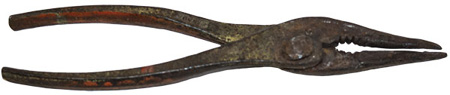
As you forge more items, your collection of specialized hand tools will grow. To start, you will want a collection of punches, chisels, files, and tongs; you need two sets of punches and chisels: one for use on hot metal and another for cold work. Punches and chisels used on hot metal can have finer points and angles than those used on cold metal because hot iron is easier to cut. You can forge your hand tools yourself, find them used at auctions or garage sales, or purchase them new. I don’t recommend spending the money on purchasing new tools because you can often buy them used for much less money.
As you develop as a blacksmith, you will begin to collect tongs to hold hot steel of various sizes and shapes. You may luck out and find some tongs at good prices, but, like smiths of old, you can make any tongs that you need. I will cover making tongs later in the book.
Other hand tools are used to isolate and smooth metal. Butchers and fullers are special types of dull chisels used to isolate sections of metal, while flatteners and set hammers are used to smooth the metal. To set shoulders on tenons, you will need to make monkey tools, which are simply rods of various diameters with different-sized holes drilled in them. The tenon fits snugly in the drilled hole, and you hammer the monkey tool down onto the shoulder to square it up.
Mark Your Hand Tools
Chisel Cutting Edges
File Tips
Scrolling Pliers
Hand Tools
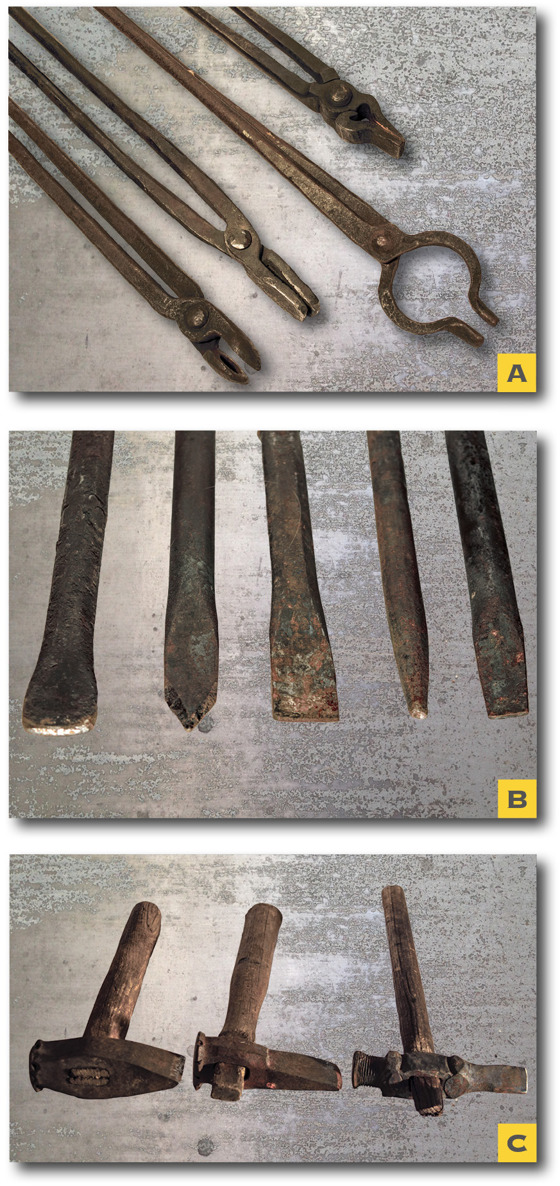
A. A good starter collection of tongs includes, from left to right: horseshoe tongs, flat bit tongs, bolt tongs, and another pair of flat bit tongs made from horse hoof nippers. B. A collection of hand chisels, punches, and fullers, including a decorative eye and nose punch for the horse head in the projects. C. These are examples of handled tools. From left to right: butcher, hot cut, and slot punch.
An old ball-peen hammer can be forged into an easy handled chisel, fuller, or punch. Just forge the ball-peen out and heat-treat it.
Measuring Devices
You will also want a way to measure curves and bends from your layout. A long piece of soft wire or string will be a lifesaver when it comes to measuring final dimensions of scrolls and other curves. Some smiths make a measuring wheel, which is simply a pizza cutter with graduations marked into it so that you can count the number of revolutions it takes to follow the piece in question, but it is not necessary. I personally use a cheap sewing tape on cold metal and wire on hot metal. Other handy measuring devices include calipers for measuring the diameter of stock and metal squares to ensure that you are perfectly square when it matters.
Anvil Tools
Working alone or with a striker, you will rely on many different anvil tools. The anvil tools you will use most frequently are a hardy, various fullers, swages, and a chiseling plate. A hardy is simply a chisel with a square shank that sits in the hardy hole of the anvil to cut hot metal. There are two styles of hardy that I have come across in my years of blacksmithing: most smiths use a straight-edged hardy, but a growing number are using a curved-edge hardy. I find that while the straight-edged hardy works well, a curved edge bites into a bar better, preventing it from skipping and making extra cut marks that you’ll need to hide. On the other hand, a straight-edged hardy is less likely to end up getting damaged by your hammer because the center of the hardy has cut through the iron before its edges. For the beginner smith, either type of cutting edge works, but make sure it has a shoulder to keep it from getting wedged into the hardy hole if you cut cooler metal with it.
Some smiths will make their hardies with tapered shafts and no shoulders so that they are more solid when in use, but I don’t recommend this style for new smiths because many anvils have the heel broken off from a hardy wedging in with use, and new smiths are more likely to try to cut cold metal with their hardies. If you cut cold steel with a shoulderless hardy, you risk breaking the heel of your anvil off. All other hardy tools need to have a shoulder—the cutoff is the only hardy tool that can get away without a shoulder because it is cutting through hot metal. Any others could break the heel off your anvil if the shank is too large for the anvil’s hardy hole.
The easiest way to cut off metal when it is hot is to use your hardy in the anvil, but you must take care to not damage your hammer face when using your hardy. To properly use the hardy, begin by hammering straight down onto the cutting edge. If you are cutting square metal, continue by rotating to the corner, hammering, rotating to the flat, hammering, and repeating until you are almost through the metal. At this point, you can either break it off with a pair of tongs or continue to cut it off with hammer blows off to the side of the cutting edge. To cut round steel, simply continue to rotate the rod while overlapping the cuts.
A single smith should also have a collection of spring fullers to fuller and isolate metal similar to the matched anvil and top tools that would be used with a striker. The simple spring fuller is a project presented later in the book. It can be made with differing widths of bar and round rod to make different sized fullers. It is designed to be wedged solidly into the hardy with a wooden wedge.

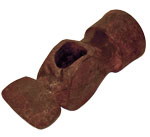
A nail header hanging from the first nail it created.
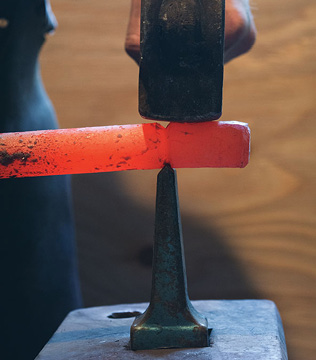
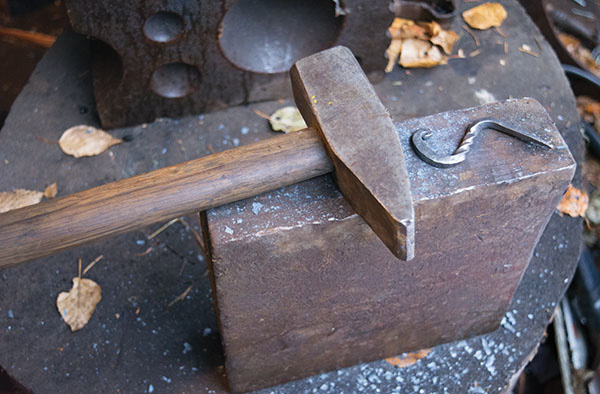
Use a hardy to cut off hot metal.
Anvil tools
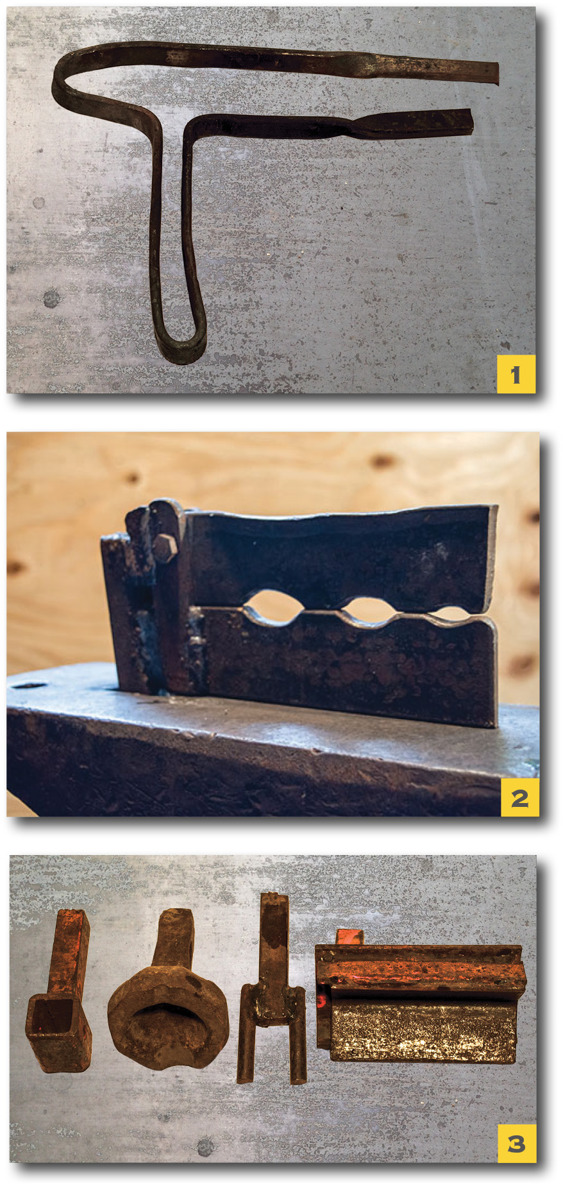
1. You will learn how to make a spring fuller later in this book. 2. Another style of fuller that can be made with access to a welder. 3. Investing in a welder will make your life much easier when it comes to making anvil tools. From left to right: A saddle anvil for forging branches and forks, a cupping or dishing swage, bending forks, and a V swage made from angle iron.