Chapter 3: Steel Types and Heat-Treating

As I’ve alluded to, modern steel is not composed of pure iron molecules; rather, it is an alloy containing varying levels of carbon and other trace elements, such as chromium, molybdenum, and vanadium, to name a few. Beginning blacksmiths should stick to low-carbon mild steel because it is the most forgiving of all the steel types when it comes to the forging temperature. It is also the most malleable alloy and the easiest to forge. Of course, as you progress, you will want to expand into other steels for tools and blades, so you should learn how to properly heat-treat metal, particularly if you are using scrap iron. Scrap iron can be anything from low-carbon mild steel to tool-steel alloys that require special heat-treating.
To save money, you can often salvage metal for free or almost free if you know where to look. If you are planning on paying for scrap, always compare prices between scrap steel and known alloys from a steel supplier. Often, there is not very much of a price difference and, particularly if you are serious about making and selling good-quality tools and knives, it is better to know what you are working with rather than having to guess the alloy—and then have your tools break because you guessed wrong. In this scenario, the best case is that you spent a lot of time forging a tool that broke before you sold it; the worst case is that the tool injured or even killed someone. That being said, it is very rewarding to be able to make something with your own hands from iron you recycled for free; if properly forged and heat-treated, such metal can make very serviceable tools for you to use and sell.
Treat It Right
Salvaging Steel
As I’ve said, salvaging steel can be a very rewarding endeavor for a blacksmith. You find a piece of metal, perform some tests to determine what it is best suited for, and make it into something completely different. On the other hand, it can be frustrating if the piece breaks because of a fault in the steel. More often, though, breakage is due to the smith’s heat control or because the smith guessed the alloy wrong, not because of the steel itself. The best tip for forging salvaged steel is to treat all of it as high-carbon steel—never forge it too cold and, most importantly, never fully quench it in water unless you need to harden it and you have already tested it.
When salvaging steel to recycle in your forge, always try to match uses. While this won’t prevent issues during forging, it will help give you an idea of the minimum forging temperature, how the metal will handle various quenches, and what type of project it should be used for. For example, you can expect that a vehicle axle would be good for making into hammers because axles are meant to take abuse and maintain their strength and shape, and most axles are made from 4140 alloy steel. At the same time, if you misjudge what type of steel it is, you could end up with a broken coat hook if you forge it down into a dark orange color or quench it in water.
Regardless of whether you are using purchased steel of a known alloy or scrap steel, you need to know how steel works to best select the right type of steel for a given project as well as to understand how to properly heat and cool it. As you progress into toolmaking, it is in your best interest to read more on metallurgy.
Common Steel’s Generalized Carbon Levels
Tips for Better Salvaging
Heat-Treating
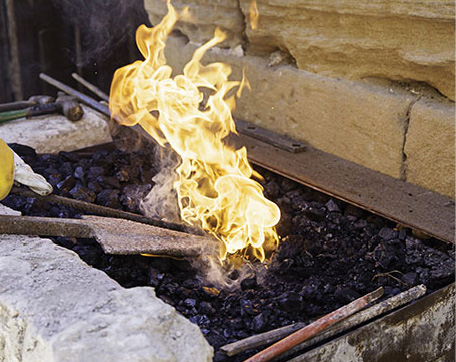
Before you start forging scrap metal, you need to understand how steel changes with heat and cooling. Steel has the miraculous property of hardening when cooled quickly, but at the expense of becoming brittle. How hard it can get changes primarily with the amount of carbon in the steel. For most blacksmiths, the carbon is the critical molecule in steel. As the amount of carbon increases, the steel’s hardening ability increases as well. Mild steel has very little carbon and can only be hardened in certain instances, which makes it great to use in most household items but not useful for tools or knives. If steel with greater than 0.4% or 40 points of carbon is hardened without tempering, it can become brittle and is often the reason why some smiths curse using salvaged steel: it breaks because they didn’t realize they were forging higher carbon steel and treated it like mild steel.
Heat-treating steel requires three steps: annealing/normalizing, hardening, and tempering. The following is the simplified, down-and-dirty version of heat-treating that will serve you well most of the time. I encourage any blacksmith to learn metallurgy because it will help you make tools and other projects that will last longer, work better, and save you the frustration of watching the knife or chisel you just made shatter.
Spark-Testing Unknown Steel
Carbon Content
Adding Carbon to Steel
Annealing/ Normalizing Steel
To normalize or anneal steel, slowly cool it after forging to let the steel’s grain structure relax and refine. This reduces the chances that the steel will shatter when it is hardened. For the basic blacksmith, normalizing means to slowly cool the steel near the fire, while annealing means to very slowly cool the steel in an insulating material such as ash or vermiculite from a garden-supply store. Because this is the simplified version of metallurgy for beginning blacksmiths, I won’t go into detail about how the speed of cooling changes the grain structure, but suffice it to say that normalizing neither softens nor refines the grain of the steel as much as full annealing does. Normalizing is fine for lower carbon steel, but you should fully anneal any steel with greater than 0.6% or 60 points of carbon to be safe. If in doubt, fully annealing a piece of steel will do no harm other than taking a little more time.
To normalize or anneal steel, first heat it to slightly above that alloy’s critical temperature. At that point, the steel grain is as hard as it can be, but if you go too hot, the grain structure can become too large, making it more prone to fracturing. Every alloy has a different critical temperature that you should try to figure out, but for most items that the beginner smith produces, simply wait until a magnet won’t stick to the steel. If you wish to move into bladesmithing, you will need to be more precise about temperatures.
When you reach the desired temperature, remove the metal from the fire and either place it along the edge of the fire or bury it in ash or vermiculite, depending on whether you want to normalize or anneal the steel. After it is cooled, you will be able to easily file the steel into shape without prematurely dulling your file. If you can’t file it, you need to reanneal it.

Thick, Then Thin
Hardening
Once your tool is softened, you need to harden it. By cooling the iron quickly, the carbon molecules in the steel cannot precipitate out as they would normally, and you lock the steel grain into its hardest form: martensite.
How you quench the steel is very important. Many blacksmiths quench their steel in three different liquids—salt water, water, and oil—although some don’t bother with salt water. These different quenchants cool the steel at different speeds due to their thermal conductivity. Salt water cools the fastest and can make higher-carbon steel very brittle due to thermal shock; water and oil cool progressively more slowly. Steel is just like Goldilocks—the rate of cooling needs to be just right. Depending on the steel you use, it may need to be cooled in either water or oil to ensure that it becomes hard but not too brittle. If you begin making knives in which warping is an issue, heat the quenchant to slow its rate of cooling and minimize how much it shocks the steel.
Hardenability Test
Did You Know?
Tempering
After you have quenched your steel, you need to relax the martensite to make the steel less brittle by tempering it. To do this, heat the steel slowly and quench when it reaches a certain temperature. The temperature you bring it to will determine the toughness of the steel—as the steel becomes hotter, it becomes softer and therefore less brittle.
You can temper the metal by heating the whole piece either in an oven or over the fire, or you can temper it progressively by heating it from a part that needs to be softer. “Letting the colors run,” as progressive tempering is called, is best for tools such as punches and chisels in which you want one end to be hard and the other completely soft. To do this, you simply heat the tool up to critical temperature and then quench only the tip of the tool to harden it. After hardening, quickly polish the tip of the tool and watch for the proper temper color to show up. As soon as the temper color you want reaches the tip of the tool, quench the whole tool. This leaves the working end hard and properly tempered while gradually softening to the end you hit with the hammer and so prevents breaking and chipping at a sudden change of hardness.
Quenching Safely with Oil
Tempering Colors
