Introduction
We live in a world surrounded by data. Whether you are using a mobile app, playing a game, browsing a social networking website, or buying your favorite accessory from an online store, companies have set up different services to collect, store, and analyze high throughput information to stay up to date on customer's choices and behaviors. These types of setups, in general, require complex software and infrastructures that can be expensive to provision and manage.
Many of us have worked on aggregating data from different sources to accomplish reporting requirements, and most of us can attest that this whole data crunching process is often very demanding. However, a more painful trend has been that as soon as the results of this data are found, the information is out of date again. Technology has drastically changed over the last decade, which has resulted in real-time data being a necessity to stay relevant for today's businesses. Moreover, real-time data helps organizations improve on operational efficiency and many other metrics.
We also need to be aware of the diminishing value of data. As time goes on, the value of old data continues to decrease, which makes recent data very valuable; hence, the need for real-time analysis increases even further.
In this chapter, we'll look at how Amazon Kinesis makes it possible to unleash the potential of real-time data insights and analytics, by offering capabilities such as Kinesis Video Streams, Kinesis Data Streams, Kinesis Data Firehose, and Kinesis Data Analytics.
Amazon Kinesis
Amazon Kinesis is a distributed data streaming platform for collecting and storing data streams from hundreds of thousands of producers. Amazon Kinesis makes it easy to set up high capacity pipes that can be used to collect and analyze your data in real time. You can process incoming feeds at any scale, enabling you to respond to different use cases, such as customer spending alerts and click stream analysis. Amazon Kinesis enables you to provide curated feeds to customers on a real-time basis rather than performing batch processing on large, text-based log files later on. You can just send each event to Kinesis and have it analyzed right away to find patterns and exceptions, and keep an eye on all of your operational details. This will allow you to take decisive action instantly.
Benefits of Amazon Kinesis
Like other AWS serverless services, Amazon Kinesis has several benefits. Most of the benefits have already been discussed in terms of other services, so I will restrain myself from going into the details. However, here is the list of the benefits of using Amazon Kinesis' services:
- Easy administration
- Low cost
- Security
- Pay as you go capabilities
- Durability
- High scalability
- Choice of framework
- Replayability
- Continuous processing
- Highly concurrent processing
Amazon Kinesis provides different capabilities, depending on different use cases. We will now look at three of the major (and most important) capabilities in detail.
Amazon Kinesis Data Streams
Amazon Kinesis Data Streams is a managed service that makes it easy for you to collect and process real-time streaming data. Kinesis Data Streams enable you to leverage streaming data to power real-time dashboards so that you can look at critical information about your business and make quick decisions. The Kinesis Data Stream can scale easily from megabytes to terabytes per hour, and from thousands to millions of records per second.
You can use Kinesis Data Streams in typical scenarios, such as real-time data streaming and analytics, real-time dashboards, and log analysis, among many other use cases. You can also use Kinesis Data Streams to bring streaming data as input into other AWS services such as S3, Amazon Redshift, EMR, and AWS Lambda.
How Kinesis Data Streams Work
Kinesis Data Streams are made up of one or more shards. What is a shard? A shard is a uniquely identified sequence of data records in a stream, providing a fixed unit of capacity. Each shard can ingest data of up to a maximum of 1 MB per second and up to 1,000 records per second, while emitting up to a maximum of 2 MB per second. We can simply increase or decrease the number of shards allocated to your stream in case of changes in input data. The total capacity of the stream is the sum of the capacities of its shards.
By default, Kinesis Data Streams keep your data for up to 24 hours, which enables you to replay this data during that window (in case that's required). You can also increase this retention period to up to 7 days if there is a need to keep the data for longer periods. However, you will incur additional charges for extended windows of data retention.
A producer in Kinesis is any application that puts data into the Kinesis Data Streams, and a consumer consumes data from the data stream.
The following diagram illustrates the simple functionality of Kinesis Data Streams. Here, we are capturing real-time streaming events from a data source, such as website logs to Amazon Kinesis Streams, and then providing it as input to another AWS Lambda service for interpretation. Then, we are showcasing the results on a PowerBI dashboard, or any other dashboard tool:

Figure 5.1: An image showing the simple functionality of Kinesis data streams
Exercise 12: Creating a Sample Kinesis Stream
Let's go to the AWS console and create a sample Kinesis stream, which will then be integrated with Lambda to move the real-time data into DynamoDB. Whenever an event is published in the Kinesis stream, it will trigger the associated Lambda function, which will then deliver that event to the DynamoDB database.
The following is a high-level diagram showcasing the data flow of our exercise. There are many real-world scenarios that can be accomplished using this architecture:

Figure 5.2: An image showing the data flow of the architecture
Suppose you run an e-commerce company and want to contact customers that put items in to their shopping carts but don't buy them. You can build a Kinesis stream and redirect your application to send information related to failed orders to that Kinesis stream, which can then be processed using Lambda and stored in a DynamoDB database. Now, your customer care team can look into the data to get the information related to failed orders in real time, and then contact the customers.
Here are the steps to perform this exercise:
- Go to AWS services and search for Kinesis. Once it has been selected, you will be redirected to the Kinesis dashboard. Here, you can view the services that have been created for all four different flavors of Amazon Kinesis:

Figure 5.3: A screenshot of the Amazon Kinesis dashboard
Note
Our focus for this exercise is Kinesis Data Streams. We will look at other Kinesis services later in this chapter.
- Go to Data Streams and click on Create Kinesis stream:

Figure 5.4: A screenshot showing how to create Kinesis streams
- Provide the name of the Kinesis stream. Let's name it kinesis-to-dynamodb. Also, provide the estimated number of shards that you will need to handle the data. As we discussed earlier, read and write capacities are calculated based on the number of configured shards. Since we are creating it for demonstration purposes, let's put its value as 1.
You will notice that the values against write and read get changed based on the number being provided against the number of shards. Once you are done, click on Create Kinesis Stream:

Figure 5.5: A screenshot showing the process of naming the Kinesis stream and estimating the number of shards
- Once the stream has been created, you will notice the status of the stream as Active. Now, you are ready to use this stream for your incoming data:

Figure 5.6: A screenshot showing the status of the stream after creation
So, we have created a Kinesis data stream and we will integrate it now with DynamoDB using an AWS Lambda function.
- Let's go ahead and create a new table in DynamoDB that will store the data coming from the Kinesis Data Stream. Go to AWS services and search for DynamoDB. Then, click on Create table:
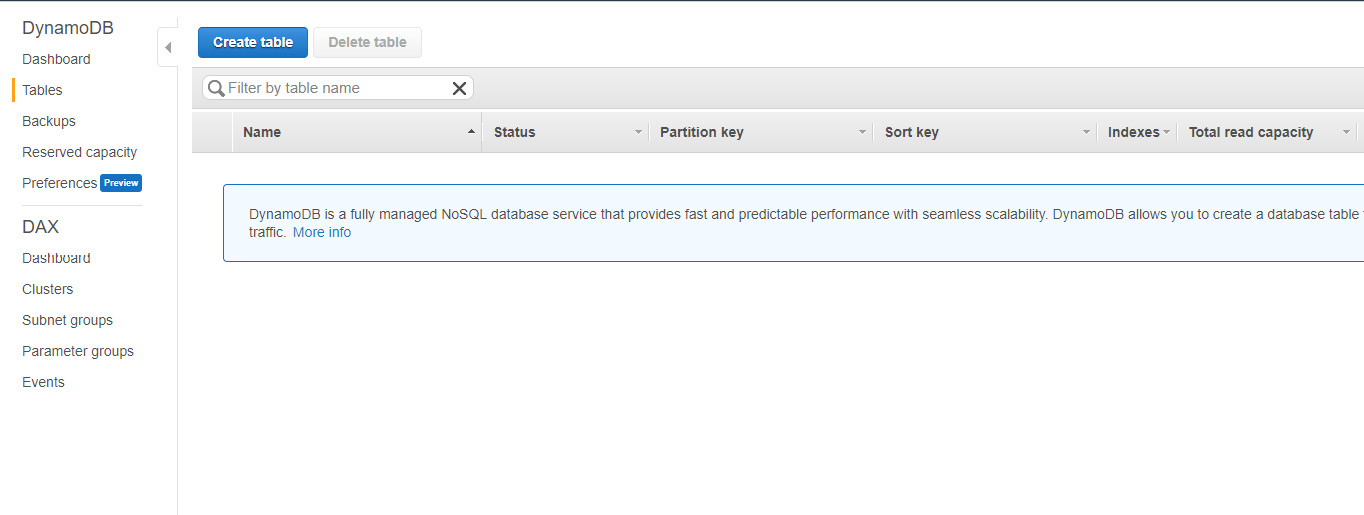
Figure 5.7: A screenshot showing how to create a new table
- Name your table sample-table and specify the createdate column partition key. Click on Create. This will create the required destination table for you:

Figure 5.8: A screenshot showing the creation of the destination table
- In the AWS Lambda service, write a Lambda function to fetch the records from the Kinesis data stream and store them in DynamoDB.
- Click on Create function under Lambda service. Click on Blueprints and search for kinesis-process-record. Click on kinesis-process-record template:

Figure 5.9: A screenshot showing the creation of the function under the Lambda service
- Give a name to the Lambda function. Create a new role, which will allow Lambda to insert records into the DynamoDB database. Take a look at the following screenshot to find out which policies you need to attach to the role:

Figure 5.10: A screenshot showing the creation of a new role for the function
- Provide the required details about the kinesis stream. You can set up the appropriate value of the batch size, depending on the flow of messages. For now, we will keep the default value. Once you are done, click on create function:

Figure 5.11: A screenshot of setting the appropriate value for the batch size
- When you create a Lambda function from a blueprint, you need to create the function first, before changing any code.
- Go to the section function code and replace the nodeJS code with the one provided in the kinesis-lambda-dynamodb-integration.js file.
We are populating two columns in this code. The first one is the createdate column, which was also defined as PK in our DynamoDB table definition earlier, in step 7. We are using the default value for this column. The second column is the ASCII conversion for the base64 data, which is coming in as a part of the Kinesis data stream. We are storing both values as data in our DynamoDB table, sample-table. Then, we are using the putItem method of the AWS.DynamoDBclient class to store the data in a DynamoDB table:

Figure 5.12: A screenshot of the code that's used to populate the two columns
- Go ahead and save the code. To execute it, we need to create a Kinesis test event that will trigger the Lambda function and store the event data in the DynamoDB database. Click on Configure test event, provide a name (for example, KinesisTestEvent), and click on Create.
- Once the test event is created, go ahead and execute the lambda function. Your lambda function should get executed successfully. Execute it couple of times and you should start seeing data into your table in DynamoDB database.

Figure 5.13: A screenshot showing the execution of the Lambda function that we created earlier
This concludes our exercise on Amazon Kinesis data events and their integration with the DynamoDB database, via the AWS Lambda service.
Amazon Kinesis Firehose
Let's suppose you're working with stock market data and you want to run minute-by-minute analytics on the market stocks (instead of waiting until the end of the day). You will have to create dynamic dashboards such as top performing stocks, and update your investment models as soon as new data arrives.
Traditionally, you could achieve this by building the backend infrastructure, setting up the data collection, and then processing the data. But it can be really hard to provision and manage a fleet of servers to buffer and batch the data arriving from thousands of sources simultaneously. Imagine that one of those servers goes down or something goes wrong in the data stream; you could actually end up losing data.
Amazon Kinesis Firehose makes it easy for you to capture and deliver real-time streaming data reliably to Amazon S3, Amazon Redshift, or Amazon Elasticsearch Service. Using Amazon Firehose, you can respond to data in near real time, enabling you to deliver powerful interactive experiences and new item recommendations, and do real-time alert management for critical applications.
Amazon Firehose scales automatically as volume and throughput varies and it takes care of stream management, including batching, compressing, encrypting, and loading the data into different target data stores supported by Amazon Firehose. As with other AWS services, there is no minimum fee or setup cost required, so you only pay for the data being sent by you by adjusting streaming data quickly and automating administration tasks.
Amazon Firehose allows you to focus on your application and deliver great real-time user experiences rather than being stuck with the provisioning and management of a backend setup:

Figure 5.14: A diagram showing the functionalities of Amazon Kinesis Data Firehose
Exercise 13: Creating a Sample Kinesis Data Firehose Delivery Stream
In this exercise, we'll go to the AWS console and create a sample Kinesis Data Firehose delivery stream. As part of this exercise, we will deliver data to an S3 bucket:
- On Amazon Kinesis Dashboard, go to Data Firehose and click on Create delivery stream:

Figure 5.15: A screenshot showing how to create a Firehose delivery stream
- Provide the delivery stream's name. Let's call it Kinesis-firehose_to_S3. Now, there are two options here to specify the source of data. The first one is Direct PUT, which you can use as a source if you want to send data directly from applications, such as IOT, CloudWatch logs, or any other AWS application. The second one is the Kinesis Stream, which you can use if you have data coming via a regular Kinesis stream. Let's take Direct PUT as the source for this exercise. We will discuss using a Kinesis stream as a data source in a later part of this chapter:

Figure 5.16: A screenshot showing how to specify the source of data
Click Next to go to Step 2: Process records.
- On this page, you can transform the records as required. As we discussed earlier in this chapter, Firehose allows you to do ETL with streaming data. To do the transformations, write a Lambda function. Let's skip this option for now:
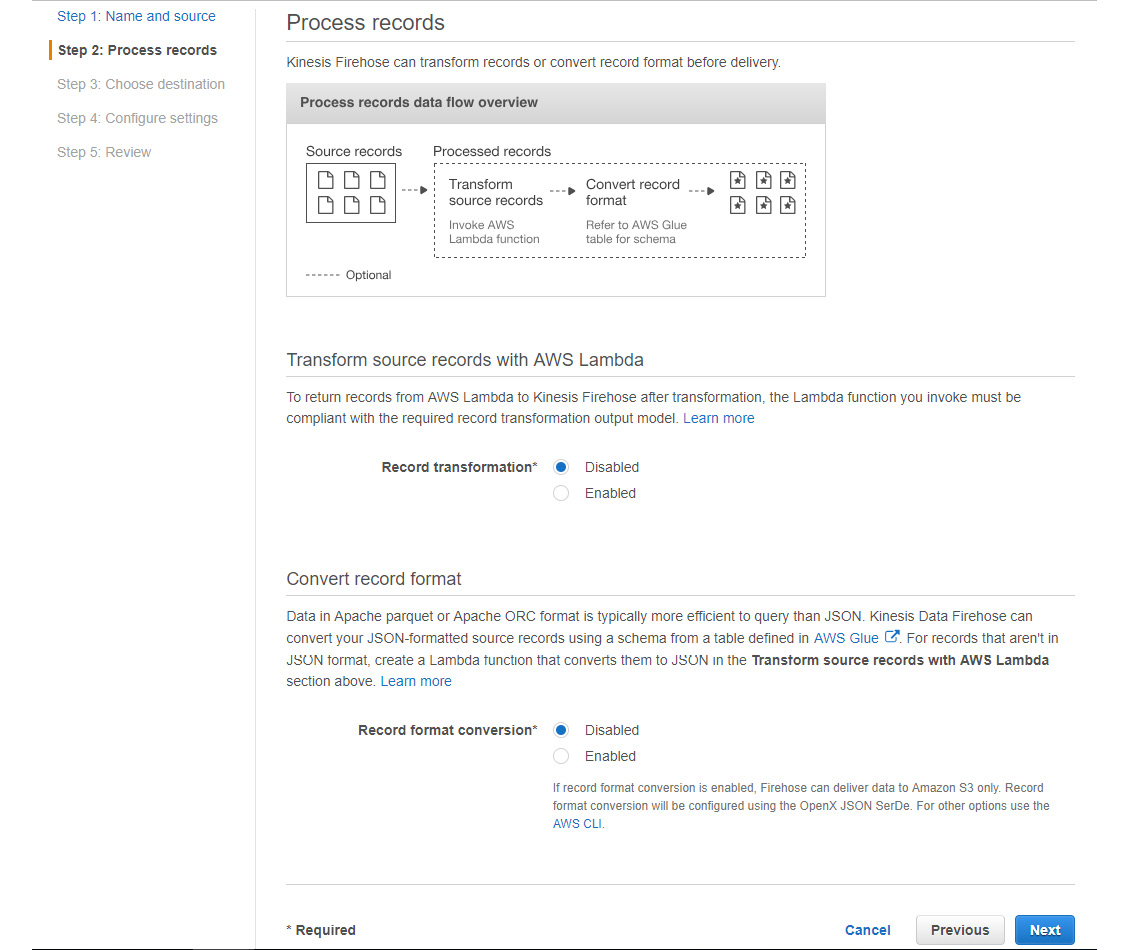
Figure 5.17: A screenshot showing the options for Record transformation
Just click on Next to move to Step 3: Choose destination.
- Kinesis Firehose also allows you to convert data formats on the go (for example, Parquet to JSON). You can write a Lambda function to easily achieve this. Let's skip this option for now, and click on Next to move to Step 4: Configure settings.
- On this page, you need to select the destination of your streaming data. As we discussed earlier, you can send your data to different destinations, such as S3, Redshift, or the Elasticsearch service. For this demo, we will choose Amazon S3 as the destination.
Specify the S3 bucket details, such as where you want to save the data. Here, you can specify an existing bucket or create a new one. Leave the prefix blank. Once you are done, click on Next to move to Step 4: Configure settings:

Figure 5.18: A screenshot showing how to create a new bucket or provide details about an existing one
- Here, you can configure the buffer conditions, encryption, and compression settings. Buffer settings enable Firehose to buffer the records before they get delivered to S3. Let's set the buffer size as 1 MB and the buffer interval as 60 seconds. When either of these two conditions are met, the records will be moved to the destination.
Note that you can specify the buffer interval to be between 60 and 900 seconds:

Figure 5.19: A screenshot showing the configuration of the buffer conditions, encryption, and compression settings
Let's keep encryption, compression, and error logging disabled, for now.
- Also, you need to specify the role that will be used to deliver the data to S3. We will go ahead and create a new role now:

Figure 5.20: A screenshot showing how to specify the role that will be used to deliver the data to S3
- At this point, we need to create a new role, so we will open a separate AWS window and search for Roles. Click on Create role. We will go back to proceed from step 6 once the role has been created (step 12):

Figure 5.21: A screenshot showing the creation of a new role
- Select AWS service under trusted entity and choose Kinesis from the list of services that will use this role. Once you select Kinesis, Kinesis Firehose will appear as the possible use case. Click on Permissions:

Figure 5.22: A screenshot showing the selection of the trusted entity type and service for the role
- Attach the Permission policy now. Search for S3 and attach the AmazonS3FullAccess policy with the role, and click on Review:

Figure 5.23: A screenshot showing the attachment of the permission policy
- Click on Review. Provide a name for the role, and click on Create role:

Figure 5.24: A screenshot showing how to add the role name and description
- Now, the role has been created, so let's put in the required information on the screen from step 6:

Figure 5.25: A screenshot showing the fulfillment of details like the IAM Role and policy name
- Click on Review to verify the settings for Kinesis Firehose:

Figure 5.26: A screenshot showing the verification of settings for Kinesis Firehose
- Click on Create delivery stream, and your Firehose delivery stream should be created successfully:

Figure 5.27: A screenshot showing the successful creation of the delivery stream
- Let's try to ingest some sample data into our delivery stream and verify whether it reaches the destination.
Click on the delivery stream to go to the details page for that stream. Under Test with demo data, click on Start sending demo data. This will start ingesting test data into the Firehose delivery stream:
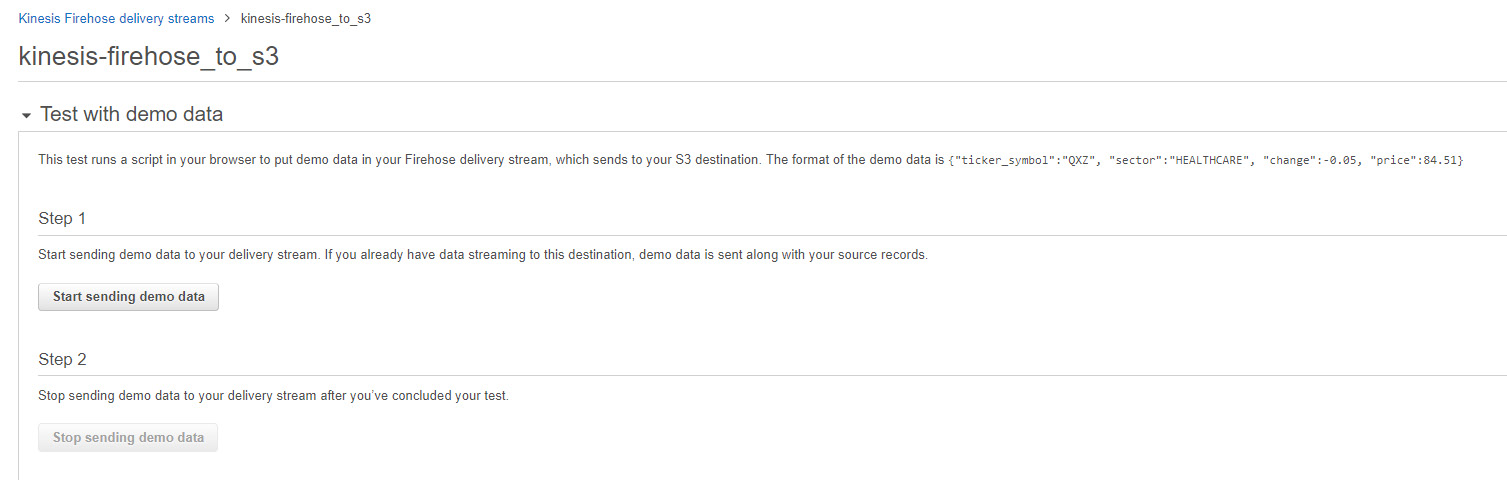
Figure 5.28: A screenshot showing the details of a particular stream
- Once data ingestion has started, you should see the following message:

Figure 5.29: A screenshot showing the confirmation about demo data being sent to the delivery stream
You will have to wait for a few seconds (20 seconds) for the data to be ingested. Once data ingestion is done, you can click on Stop sending demo data.
- Now, it is time to verify whether the data has been delivered successfully to S3 or not. Go to the S3 location that we configured earlier to receive the data, and you should see the data there:

Figure 5.30: A screenshot showing the data has been successfully delivered
Note that there might be some delay for data to appear in S3, depending on your buffer settings.
This concludes our demo of Amazon Kinesis Firehose delivery streams.
Activity 6: Performing Data Transformations for Incoming Data
In the last exercise, we worked on a Kinesis Firehose demo that was integrated with Lambda to move real-time data into S3. You may have noticed a Lambda function in the architectural diagram, but we didn't use it in our exercise. There was a data transformation section (step 3) in the last exercise that we kept disabled.
Now, as part of this activity, we will perform data transformation for incoming data (from Firehose) by using a Lambda function, and then store that transformed data in the S3 bucket. With data transformation, we can solve many real-world business problems. We are going to create a Kinesis Firehose data stream, transform the data using a Lambda function, and then finally store it in S3. The following are some examples of this:
- Data format conversion, such as from JSON to CSV, or vice versa
- Adding identifiers
- Data Curation and Filtering
- Data enhancements, like the addition of date or time
Here are the steps to perform this activity:
- Start by creating a Kinesis Firehose data stream, and follow the steps that we followed in the last exercise.
- We disabled data transformation using Lambda in the last exercise. This time, enable the Transform source records with AWS Lambda option.
- Once it has been enabled, create a Lambda function to do the data transformation on incoming data.
- There are already some sample functions provided by Amazon. So, for the sake of simplicity, pick one of them, as well. Try out General Firehose Processing. You can read more about it on the AWS website, if required.
- Once the Lambda function has been created, ensure that it has the required privileges.
- Keep the rest of the settings as is.
- Now, configure an Amazon S3 bucket as the Firehose destination, like we did in the ast exercise.
- Send the test data from the Test with demo data section by clicking on Start sending demo data:

Figure 5.31: The Test with demo data window
- Go to the S3 location that was configured earlier to receive the data, and you should see the data file. Upon downloading this data file and opening it with Notepad, you should see the data in the CSV format, as shown here:

Figure 5.32: Screenshot showing data in the CSV format
Note
The solution for this activity can be found on page 161.
Amazon Kinesis Data Analytics
You are now able to consume real-time streaming data using Amazon Kinesis and Kinesis Firehose, and move it to a particular destination. How can you make this incoming data useful for your analysis? How can you make it possible to analyze the data in real time and perform actionable insights?
Amazon Kinesis Data Analytics is a fully managed service that allows you to interact with real-time streaming data, using SQL. This can be used to run standard queries, so that we can analyze the data and send processed information to different business intelligence tools and visualize it.
A common use case for the Kinesis Data Analytics application is time series analytics, which refers to extracting meaningful information from data, using time as a key factor. This type of information is useful in many scenarios, such as when you want to continuously check the top performing stocks every minute and send that information to your data warehouse to feed your live dashboard, or calculate the number of customers visiting your website every ten minutes and send that data to S3. These time windows of 1 minute and 10 minutes, respectively, move forward in time continuously as new data arrives, thus computing new results.
Different kinds of time intervals are used, depending on different use cases. Common types of time intervals include sliding and tumbling windows. Sharing different windows intervals is out of the scope of this book, but the students are encouraged to look online for more information.
The following diagram illustrates a sample workflow for Amazon Kinesis Analytics:

Figure 5.33: An image showing the workflow of Amazon Kinesis Analytics
You can configure the Amazon Kinesis Data Analytics application to run your queries continuously. As with other serverless AWS services, you only pay for the resources that your queries consume with Amazon Kinesis Data Analytics. There is no upfront investment or setup fee.
Exercise 14: Setting Up an Amazon Kinesis Analytics Application
In the AWS console, set up the Amazon Kinesis Analytics application. We will also look at the interactive SQL editor, which allows you to easily develop and test real-time streaming analytics using SQL, and also provides SQL templates that you can use to easily implement this functionality by simply adding SQL from the templates.
Using a demo stream of stock exchange data that comes with Amazon Kinesis Analytics, we will count the number of trades for each stock ticker and generate a periodic report every few seconds. You will notice that the report is progressing through time, generating the time series analytics where the latest results are emitted every few seconds, based on the chosen time window for this periodic report.
The steps are as follows:
- Go to the Data Analytics tab in the Amazon Kinesis dashboard and click on the Create application button to open the Create application form. Provide the application's name. Let's call it kinesis-data-analytics, and click on Create application. You can leave the Description blank:

Figure 5.34: A screenshot showing the creation of the Kinesis Analytics application
- Once the data analytics application has been created successfully, you should get the following message on the screen:

Figure 5.35: A screenshot showing the success message, stating that the Kinesis Analytics application was created successfully
- Now, you need to connect this application with the source of the streaming data so that our analytics application starts getting data. Click on Connect Streaming data.
- You can choose either an existing Kinesis stream or a Kinesis Firehose delivery stream. Alternatively, you can configure a new stream as well. We will configure a new stream here, so let's select Configure a new stream:
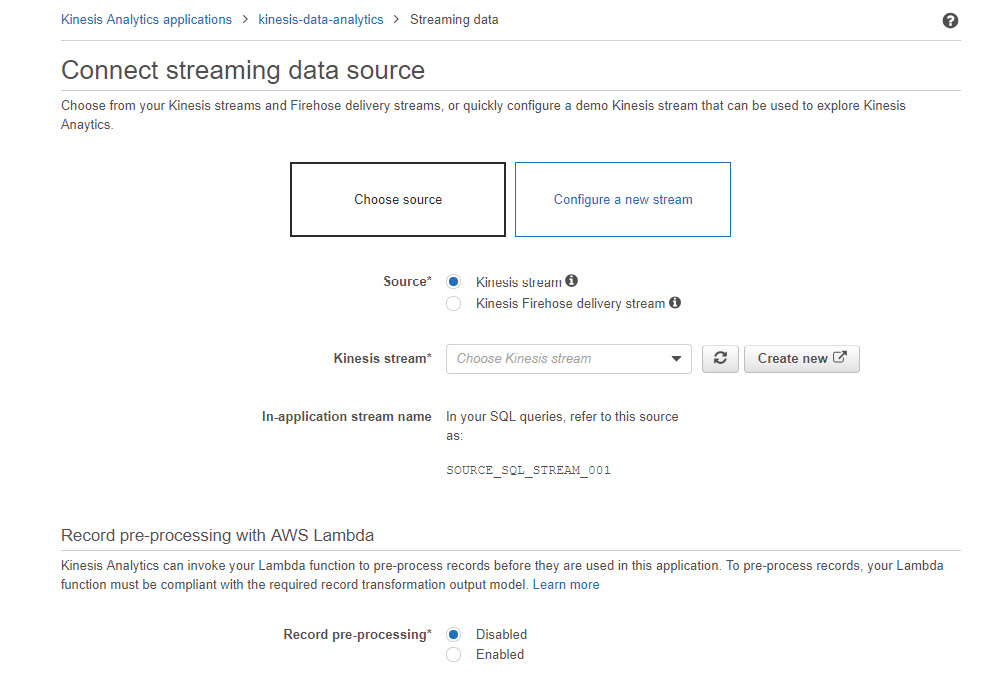
Figure 5.36: A screenshot showing how to connect the application with the streaming data source
- Click on Create a demo stream. This will create a new stream and populate it with sample stock ticker data:

Figure 5.37: A screenshot showing the creation of the demo stream
- As you can see in the following screenshot, new demo stream creation involves the following steps:
Creating an IAM role, creating and setting up a new Kinesis stream, populating the new stream with data, and finally, auto-discovering the schema and date formats:

Figure 5.38: A screenshot showing the status of different processes while the demo stream is being created
- Once the setup for the demo stream is complete, it gets selected as a source for the Kinesis data stream. The name of the stream in this example is SOURCE_SQL_STREAM_001. It takes you back to choosing the streaming data source, with the newly created stream selected:

Figure 5.39: A screenshot displaying the name of the created stream, and its details
- Also, you will notice the sample of the data being generated by the Kinesis data stream. Please note that this schema has been auto-discovered by the Kinesis data analytics application. If you see any issues with the sample data or want to fix it, you can edit it or retry schema discovery.
We will keep the other options disabled for now and move on:

Figure 5.40: A screenshot displaying a sample of the data generated by the stream
- Click on Save and continue and you should be redirected to the Kinesis data analytics application page. Now, the Kinesis data stream setup has been completed, and we can start configuring other settings for our data analytics application:
Note
You have the option to connect reference data with the real-time streaming data. Reference data can be any of your static data or output from other analytics, which can enrich data analytics. It can be either in JSON or CSV data format, and each data analytics application can be attached with only one piece of reference data. We will not attach any reference data for now.

Figure 5.41: A screenshot displaying the READY status of the Kinesis Data Analytics application
- Now, we will go ahead and set up real-time analytics. This will enable us to write SQL queries or use an SQL from many templates that are available with it. Click on Go to SQL editor under Real time analytics.
Click on Yes, start application in the pop-up window:

Figure 5.42: A screenshot showing the dialog box to start an application
Now, we are in the SQL editor. Here, we can see the sample data from earlier that we configured in the Kinesis Data Stream. We will also notice a SQL editor, where we can write SQL queries.
- You can also add SQL from templates. For our demo, we will pick on SQL from the template and fetch the real-time results:

Figure 5.43: A screenshot showing the SQL editor used for writing SQL queries
- Click on Add SQL from templates and choose the second query from the left, which aggregates data in a tumbling time window.
You will see the SQL query on the right-hand side. Click on Add this query to the editor:

Figure 5.44: A screenshot showing the list of SQL queries that are generated when the Aggregate function in a tumbling time window is selected
- If you see any issue with the sample data, you can click on Actions to take the appropriate step:

Figure 5.45: A screenshot showing a list of different actions that can be used in case of issues with sample data
- Once your query appears in the SQL editor, click on Save and run SQL:

Figure 5.46: A screenshot showing the options to save and run SQL
- Once SQL is executed against the stream data, you will start to see results, as shown in the following screenshot:

Figure 5.47: A screenshot showing real-time analytics once SQL is executed
- Now, the Kinesis data analytics application is running this SQL against live streaming data every 10 seconds because that is the window that's specified in the SQL query. You will notice a change in the results in the following screenshot as compared to our last screenshot. This is because the results were refreshed while the screenshots were being taken:

Figure 5.48: A screenshot showing a list of data that changes every 10 seconds
So, you have accomplished the task of querying the streaming data in real time, using simple standard SQL statements.
- Next, configure the destination of your real-time analysis. You can send this analysis to a Kinesis stream or a Kinesis Firehose delivery stream, and publish it on your BI dashboards. Alternatively, you can store them in Redshift or DynamoDB using the Firehose delivery stream. Go to the Destination tab and click on Connect to a destination:

Figure 5.49: A screenshot showing the Destination tab, where an application can be connected to any stream
After clicking on Destination, you should see the following screenshot:
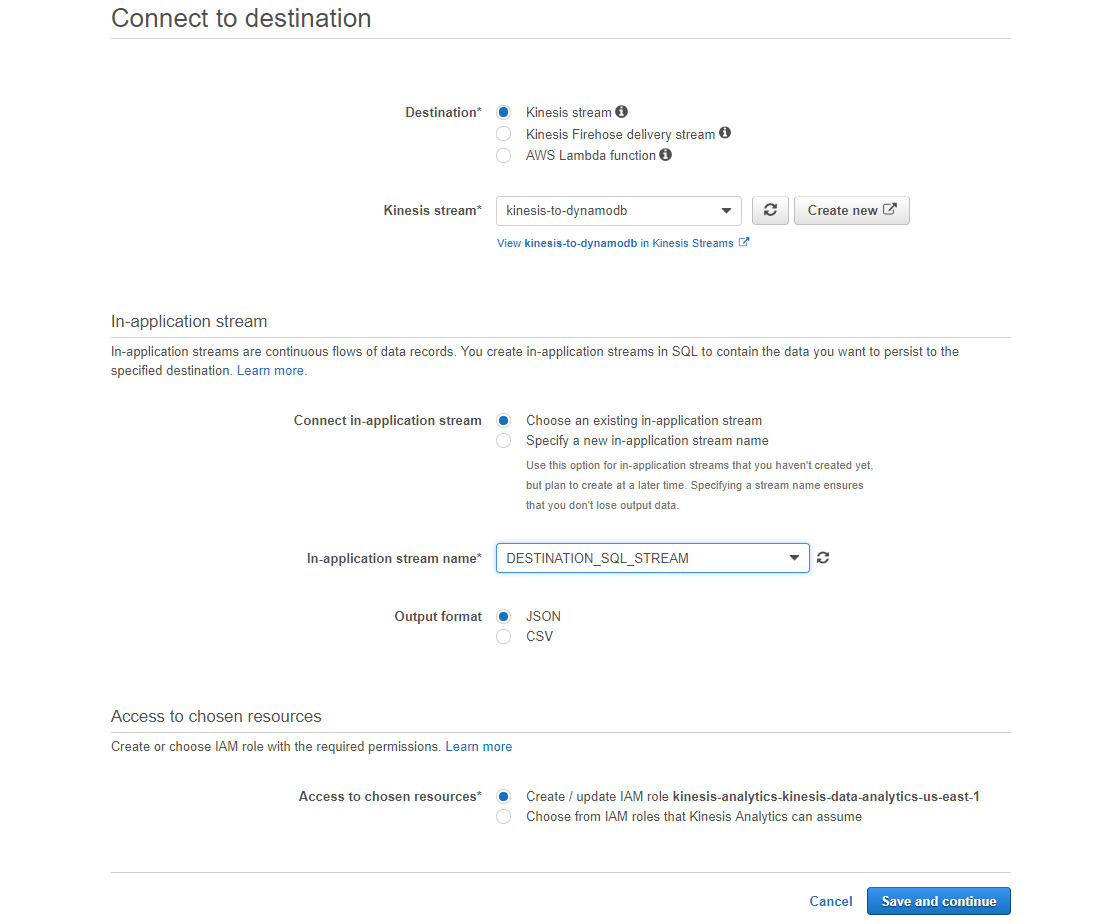
Figure 5.50: A screenshot showing the different suggested destinations once the Destination tab has been selected
- Choose an existing Kinesis stream, and choose DESTINATION_SQL_STREAM for the in-application stream name; click on Save and continue.
Now, you have completed the setup for the Kinesis data analytics application.
- You can review the settings for Source, Real-time analytics, and Destination on the application dashboard, as shown in the following screenshot. Note that at this point, your data analytics application is running real-time analytics using SQL statements on real-time data ingestion, which is happening via a Kinesis stream, and sending the query output to another Kinesis stream:

Figure 5.51: A screenshot showing the settings for the source, real-time analytics, and destination for the application
- Once you have collected the required information, you can click on Actions to stop the data analytics application (and later, to start it again, as required):
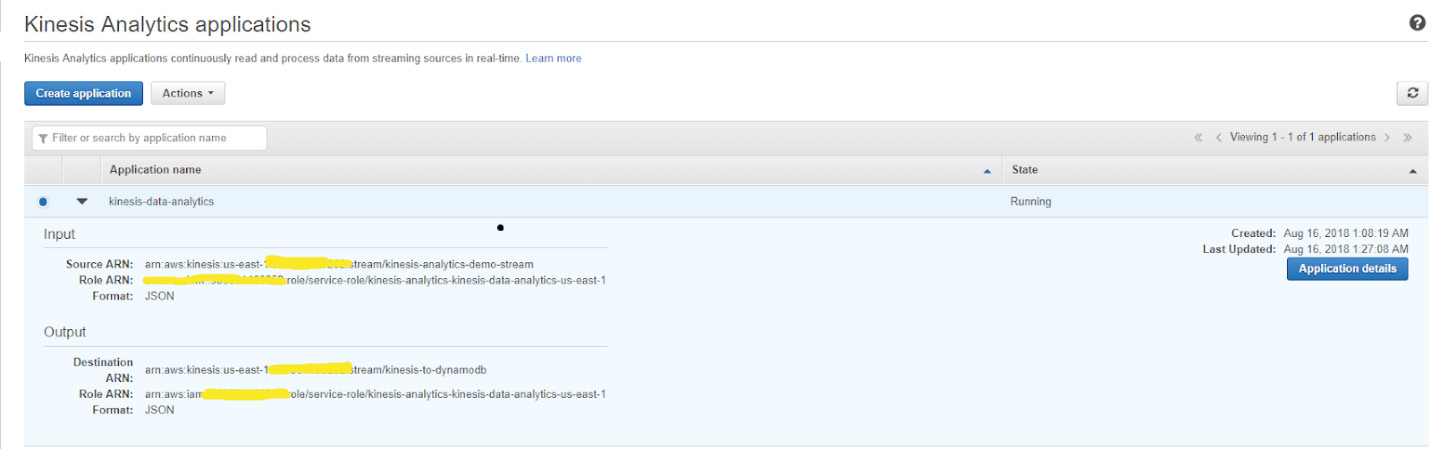
Figure 5.52: A screenshot showing the status of the application once we have stopped running it
This concludes our exercise on the Kinesis Data Analytics application.
In our last exercise, we created a Kinesis Data Analytics stream, where we could analyze data in real time. This is very useful when you want to understand the impact of certain data changes in real time, and make decisions for further changes. It has many real-word applications as well, such as in dynamic pricing on e-commerce websites, where you want to adjust the pricing based on the product demand in real time.
Sometimes, there can be a requirement to join this real-time analysis with some reference data to create patterns within the data. Alternatively, you may just want to further enhance your real-time data with some static information to make better sense of your data.
Activity 7: Adding Reference Data to the Application and Creating an Output, and Joining Real-Time Data with the Reference Data
Earlier in this chapter, we saw that the Kinesis Data Analytics application provides capabilities to add reference data into existing real-time data. In the next activity, we will enhance our test stock ticker data (that was produced natively by Kinesis Data Streams) by joining it with static data. Currently, our data contains abbreviations for company names, and we will join it with our static dataset to publish full company names in the query output.
Note
There is a reference data file named ka-reference-data.json, which is provided in the code section. This is a JSON-formatted sample file. You can use either CSV or JSON as the format of the reference data.
Here are the steps to complete this activity:
- Make sure that you have Kinesis data analytics in working condition, and that you are able to do real-time analysis, like we accomplished in the last exercise.
- Create an S3 bucket and upload the ka-reference-data.json file into the bucket.
- Go to the Kinesis data analytics application and add the reference data. Provide the bucket, S3 object, and table details, and populate the schema using schema discovery.
- Make sure that the IAM role is configured properly.
- Now, you should have the real-time streaming data and reference data available in the Kinesis Data Analytics application.
- Go to the SQL prompt and write the SQL statement to join the real-time streaming data with the reference data and out the company details whose names are provided in the reference file.
- You should be able to see the output with both the ticker symbol and the company name as an output in real time, and it should get refreshed every few minutes.
Note
The solution for this activity can be found on page 165.
Summary
In this chapter, we focused on the concept of real-time data streams. We learned about the key concepts and use cases for Amazon Kinesis Data Streams, Amazon Kinesis Data Firehose, and Amazon Kinesis Data Analytics. We also looked at examples of how these real-time data streams integrate with each other and help us build real-world use cases.
In this book, we embarked on an example-driven journey of building serverless applications on AWS, applications that do not require the developers to provision, scale, or manage any underlying servers. We started with an overview of traditional application deployments and challenges associated with it and how those challenges resulted in the evolution of serverless applications. With serverless introduced, we looked at the AWS Cloud computing platform, and focused on Lambda, the main building block of serverless models on AWS.
Later, we looked at other capabilities of the AWS serverless platform, such as S3 storage, API Gateway, SNS notifications, SQS queues, AWS Glue, AWS Athena, and Kinesis applications. Using an event-driven approach, we studied the main benefits of having a serverless architecture, and how it can be leveraged to build enterprise-level solutions. Hopefully, you have enjoyed this book and are ready to create and run your serverless applications, which will take advantage of the high availability, security, performance, and scalability of AWS. So, focus on your product instead of worrying about managing and operating the servers to run it.