

DIFFICULTY: INTERMEDIATE
RECOMMENDED HAIR LENGTH: EAR LENGTH OR LONGER THE HAIR MUST BE ABLE TO WRAP OVER THE CUSHION
For this hairstyle, we referenced late 1760s and early 1770s portraits and prints to develop a style with a bit of volume in the front, rows of curls and buckles and three small braids up the back to finish. With this hairstyle, you can add accents of pearls and flowers or sport the proto-pouf or a fancy cap. We also used only Cynthia’s own shoulder-length hair. As a redhead, Cynthia has a lot of very thick hair, giving us a lot to work with. Those with longer hair will easily achieve this style; those with shorter hair will want to experiment with the false toupee, chignon and buckles to achieve this look.
• Large powder brush
• Rattail comb
• Alligator hair clips
• Teasing comb with wire pick
• Hairpins (short & long)
• ½-inch (1.2-cm) curling iron
• Size 11 (8-mm) and size 15 (10-mm) knitting needles
• Bobby pins
• Small rubber hair ties or leather thongs
• Flowers, cap or other decoration
1. Follow the instructions here to pomade and powder the hair.

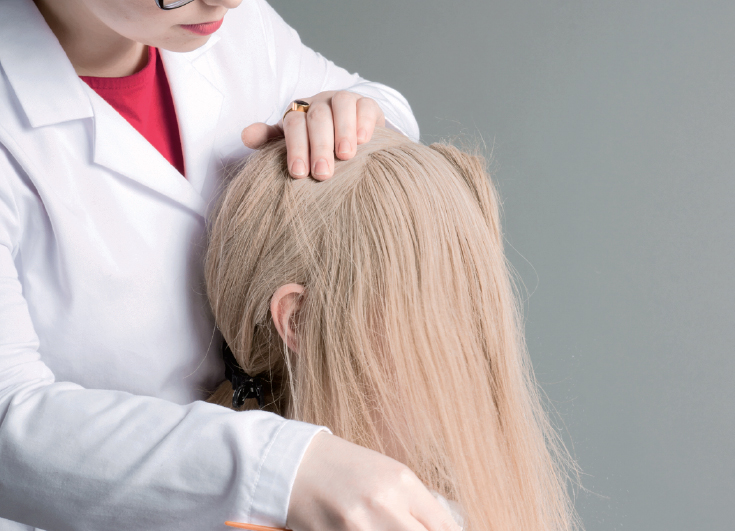
2. Once satisfied, part the front of the hair from ear to ear. Clip the back of the hair out of the way.
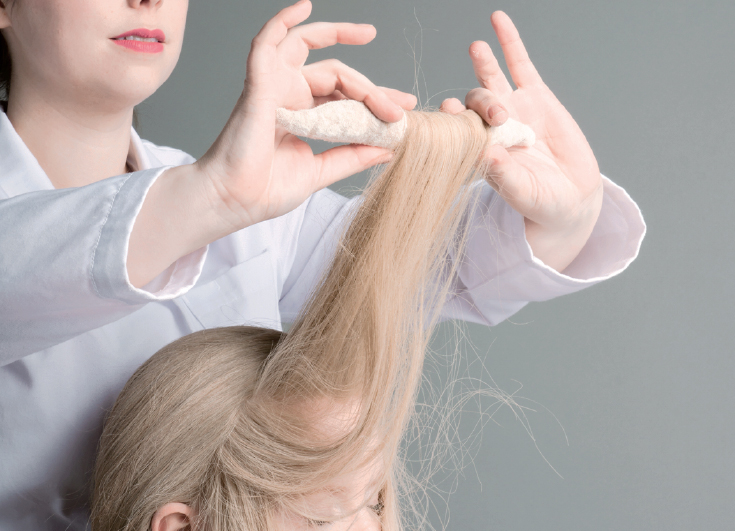
3. Tease the back side of the hair at the crown. Then wrap the ends of the hair around the banana cushion, rolling it away from the face. Continue rolling the hair over the cushion until you reach the head. Secure the roller on either end with short hairpins, pushing the pins through the cushion, rotating the ends around to catch hair on the scalp, and back up into the cushion to secure it into place.

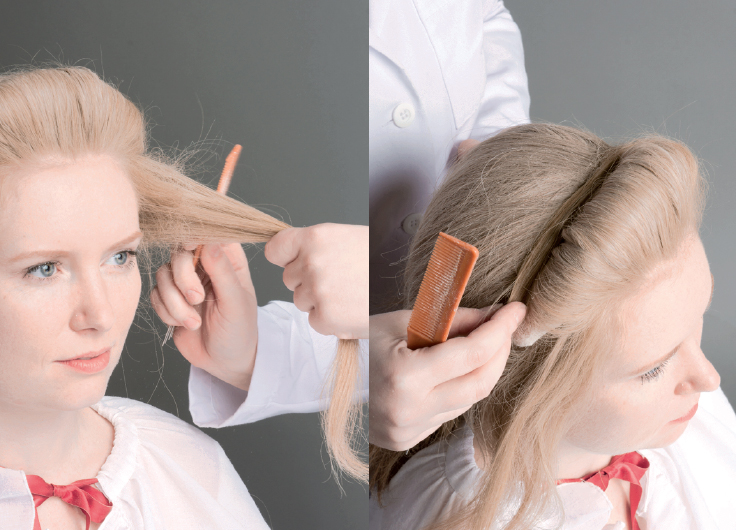
4. Using the pick, carefully spread the hair out to either side of the cushion to completely cover it. Pin the hair from behind to secure it into place. Ideally, you’ll have a really clean finish for this part of your hair.
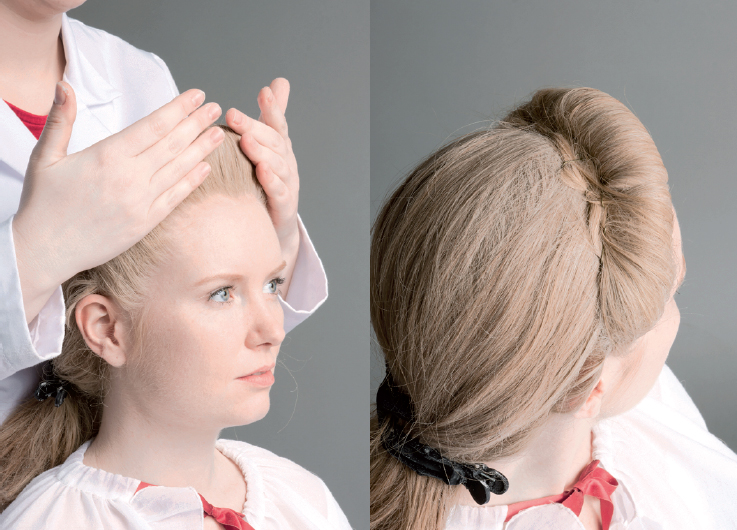
5. If some of the hair falls out of the roller, it’s OK, just tease it a bit and shape it over the hair cushion and pin into place. Once the hair is smoothed over the cushion, gently smooth the front of the hair with a small bit of common pomatum warmed up in your hands.

6. Now we move on to the row of curls that will sit immediately behind the front cushion. Part the hair so you have a chunk of hair that goes to about 2 inches (5 cm) from the end of the front of the hair, and is about 1 inch (2.5 cm) thick. The leftover hair on either side, above the ear will be used to make vertical buckles later on.
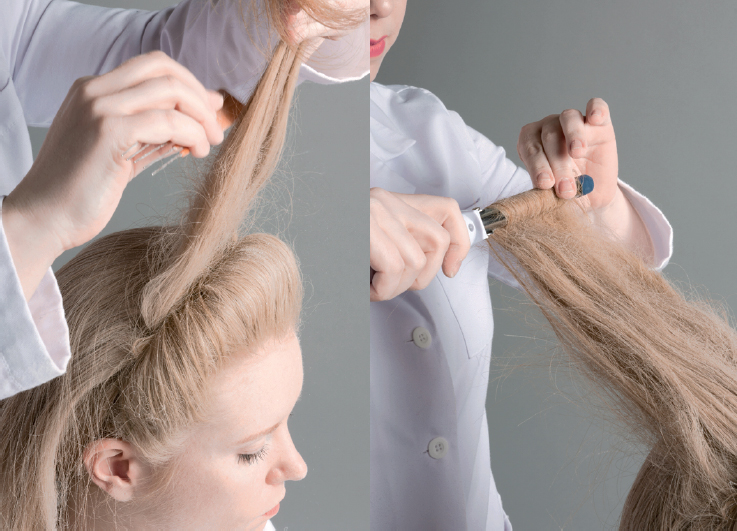
7. Tease the hair, then curl the end of the hair around the ½-inch (1.2-cm) curling iron in the direction you’re going to roll the hair.
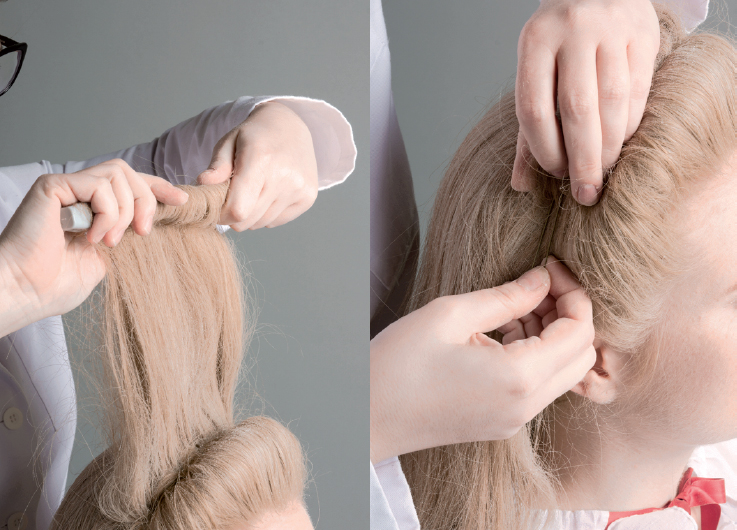

8. Release the curling iron, then roll the ends of the hair around the size 11 knitting needle. Roll the hair down to the head, then carefully remove the knitting needle. Using long hairpins, weave them up and down inside the curl to secure it to the head. Take some small hairpins and gently slide them between the front of the hair and the buckle so they’re connected and smooth. Use your wire pick to smooth the curl and make sure there are no gaps. Pin as necessary.
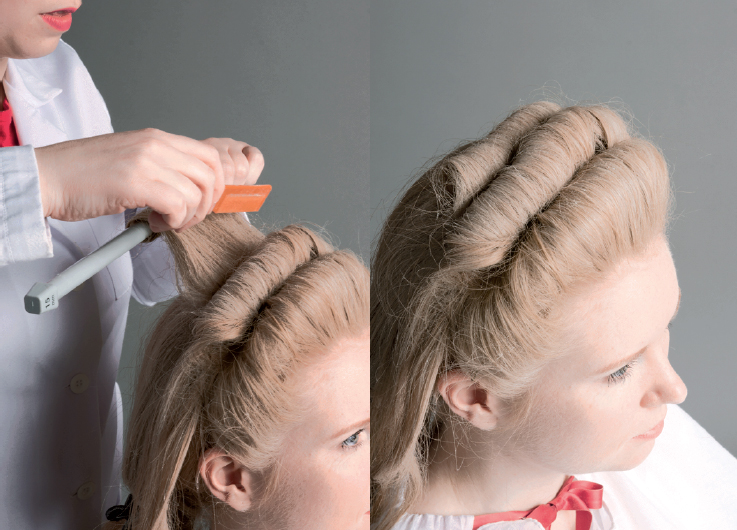
9. If you have a lot of hair, repeat steps 6 through 8 for a second row, making it ever so slightly shorter than the first.
10. Now for the vertical buckles. Part the hair down the back of the head into three sections. Note: the ones next to the ears must have the same amount of hair! Clip the middle section of hair out of the way.
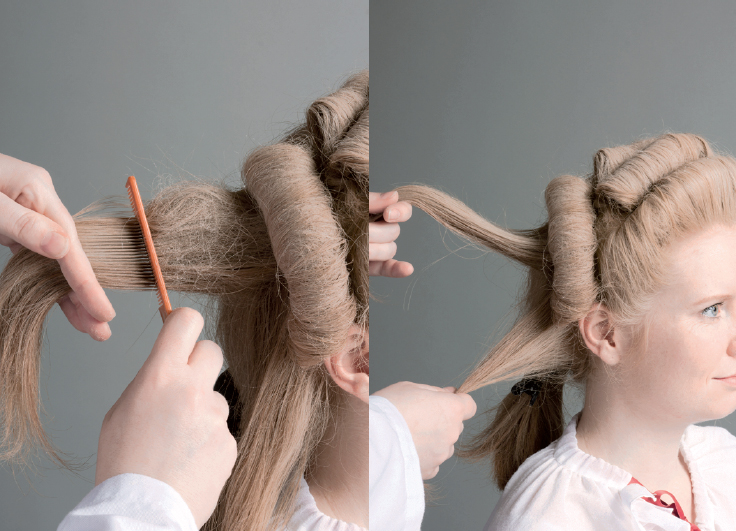
11. The easiest way to achieve long, vertical buckles is to work two separate buckles and then work the hair together at the “join.” Start with the top buckle first. As always, tease that hair until it stands awkwardly out on its own, the moment that you let it go, you laugh, and want to take a picture—that’s the amount of teasing we’re looking for here.
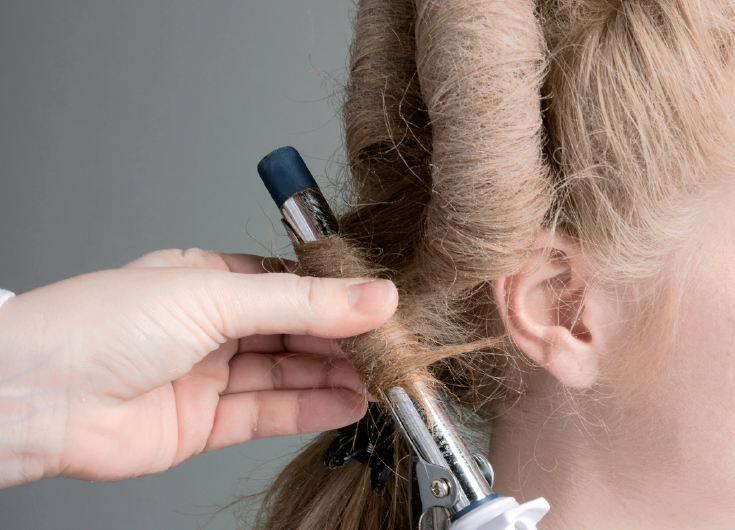
12. Curl the hair with the ½-inch (1.2-cm) curling iron in the direction you’re going to roll it. In general, buckles curl upwards or forward. Release the curling iron once you feel heat through the layers of hair.
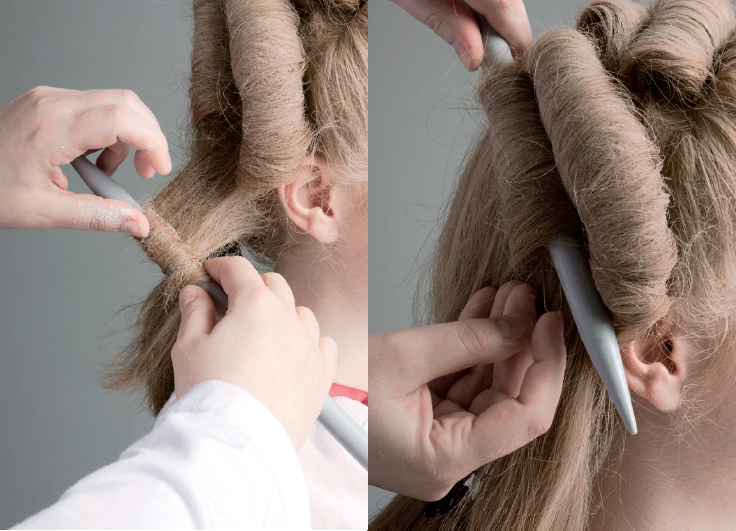
13. Using the size 11 knitting needle, roll the hair toward the scalp, paying particular attention to the angle of the finished roll.
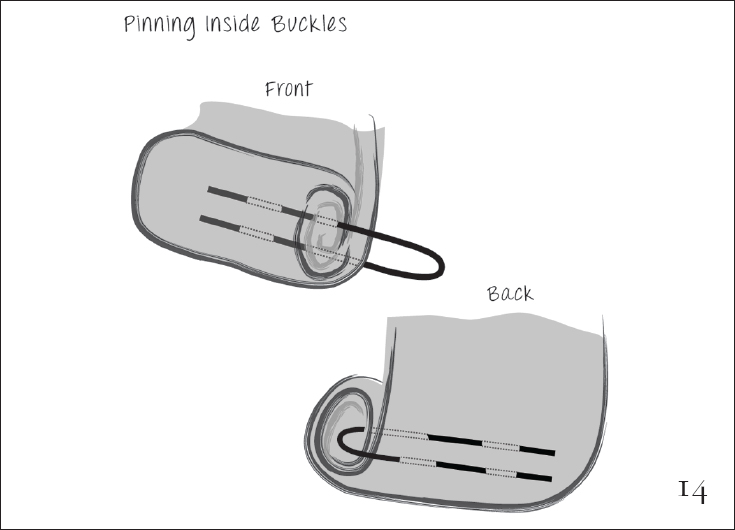
14. Once the curl is where you want it, carefully remove the knitting needle and secure the buckle with large hairpins on either side, weaving them up and down inside the curl toward the scalp to secure the hair to the head.

15. Repeat steps 11 through 14 for the lower buckle, making sure that when you’re rolling the hair on the knitting needle that the opening of the curl matches the top one, and the angle looks pretty on the face.

16. Gently work the curls together where they meet using a pick. Though this step is optional, it creates a very cool über-buckle look popular in the early 1770s.
17. Pinning the bottom of the lower buckle is a bit tricky; you might want to do a little cheaty-poo and sneak a bobby pin in there for extra hold. If you’re feeling saucy you can allow the bottom curl to eventually work its way out and hang ever so elegantly down the neck, but try to avoid that “Prom Night 2001” look.
18. Now the hard part—repeat steps 11 through 17 for the opposite side, making sure that the angle and the size of the curls are as identical as possible. Symmetry is so dang difficult, but it looks so good!
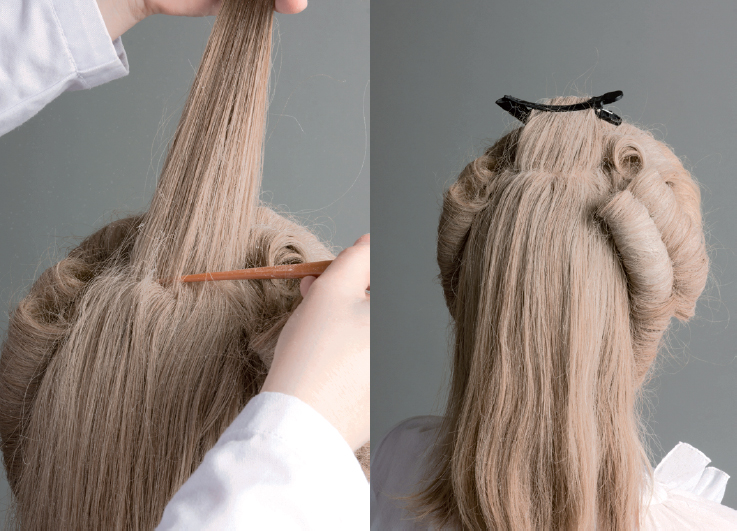
19. While there are many different ways to do the back of the hair, we chose three small braids for Cynthia’s style. This is a great way to easily work short hairs at the neck into the hairstyle. Part off a small bit of hair horizontally at the top of the back and clip out of the way. It should take up the width of the leftover hair and be about 1 inch (2.5 cm) thick. This is going to be a small buckle that will cover up the ends of the braids to create a clean and pretty finish.

20. Divide the remaining hair into three even sections. Braid all three sections as shown, tying off the ends with small hair elastics or leather thongs, for the purists.
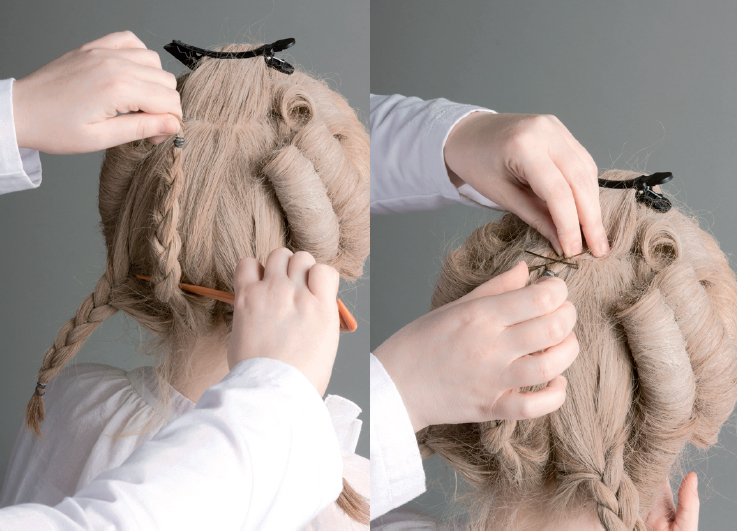
21. Using your rattail comb to help with a clean fold, pull up the end of the braid toward the top of the head, and pin into place with hairpins and/or bobby pins. Repeat for the remaining two braids.
22. Using small hairpins, secure parts of the braid to the scalp to keep a neat, tidy and secure appearance. Warm up some common pomatum in your hands and smooth any flyaways that might have escaped.

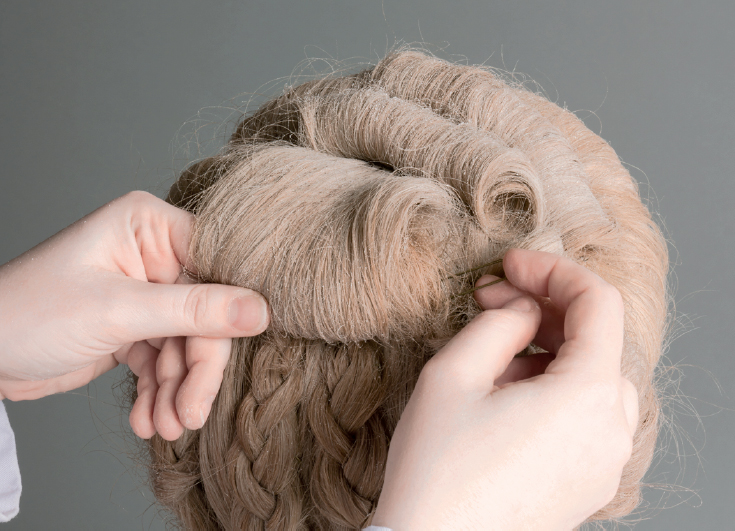
23. Going back to that last bit of undressed hair at top of the head, tease the hair and follow steps 11 through 14, making sure that the direction of the curl is toward the back of the head so it will cover up the ends of the hair and the modern hair elastics.
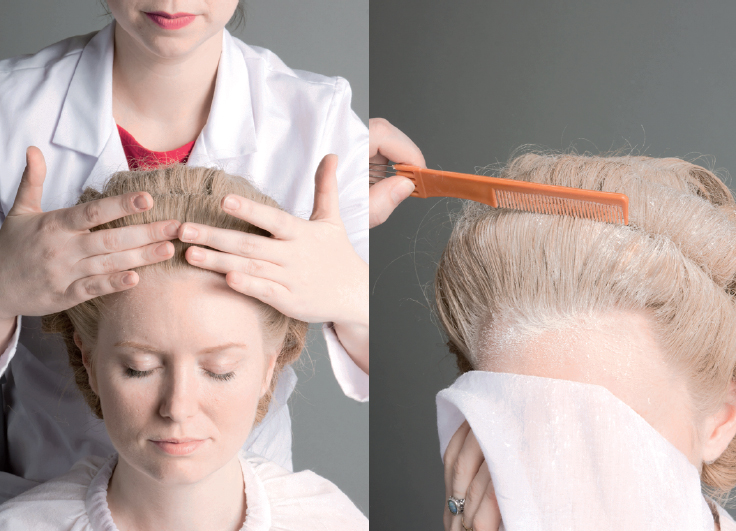
24. To finish, smooth any flyways on the front of the hair with pomatum warmed up in your hands, and apply a final dusting of powder. If you’re feeling particularly French, this can be quite a heavy application, but English and American women weren’t very keen on the powder quite yet, so your application can be much, much lighter. It’s up to you.
Your late 1760s/early 1770s hairstyle is now complete! Add the flowers, feathers or other decoration as you like. Even though they’re “just” decorations, these bits and pieces are amazing at hiding any little imperfections that you might see. A fashionable cap or proto-pouf will also top this coiffure wonderfully.