
DIFFICULTY: EASY TO INTERMEDIATE
RECOMMENDED HAIR LENGTH: MID-BACK TO WAIST SHOULDER-LENGTH HAIR WILL NEED A SMALLER DONUT
Here it is, the donut you’ve all been waiting for. This iconic hairstyle is baked into the very definition of eighteenth-century hair today. It is the smooth, tall, powdered coiffure of your dreams, but did you know that this is also one of the easiest hairstyles in the book? The donut style is achievable for anyone with hair about shoulder-length or longer, but in this case the longer the hair the better. Read on to learn how to quickly and easily do this classic eighteenth-century ’do.
• Large powder brush
• Rattail comb
• Alligator hair clips
• Elastic hair bands (if needed)
• U-shaped hairpins (short & long)
• Teasing comb with pick
• ½-inch (1.2-cm) curling iron
• Size 50 (25-mm) knitting needle
• Bobby pins
• Flowers, cap or other decoration

1772–1775 coiffure beignet

1. Follow the instructions here to pomade and powder the hair.

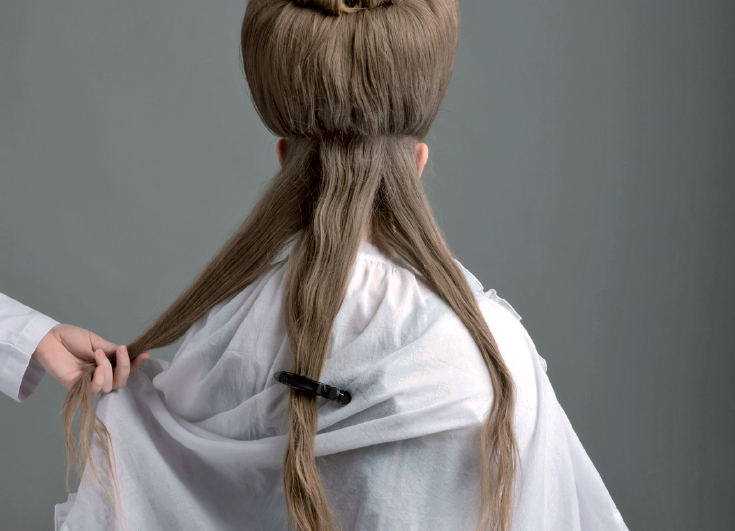
2. Start by carefully parting the hair with the rattail comb, working around the head in sections in a “circular” fashion from ear to ear. Divide the hair into multiple sections: two chunks on each side, a top back chunk, and a top bottom chunk.

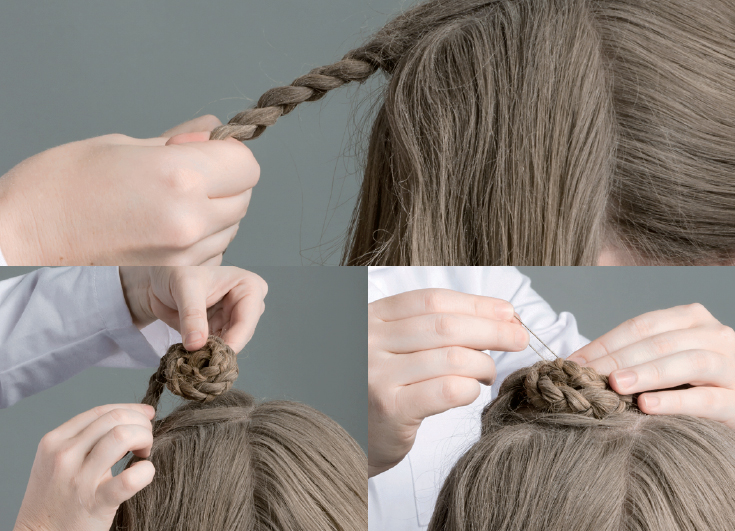
3. For those with very long and thick hair, [5] we’re going to anchor the donut by making a hair nub. To do this, section out a small hank of hair on the very top of the head and tightly braid it. Tie off the end with an elastic hairband, then twist the braid up to make a nub on top of the head. Pin in place with a couple hairpins.

4. Now place the donut atop the head and centered over the braided nub. Using long hairpins, secure the donut to the nub down in the hole. This is a little tricky, but just make sure the donut is properly fastened to the head.
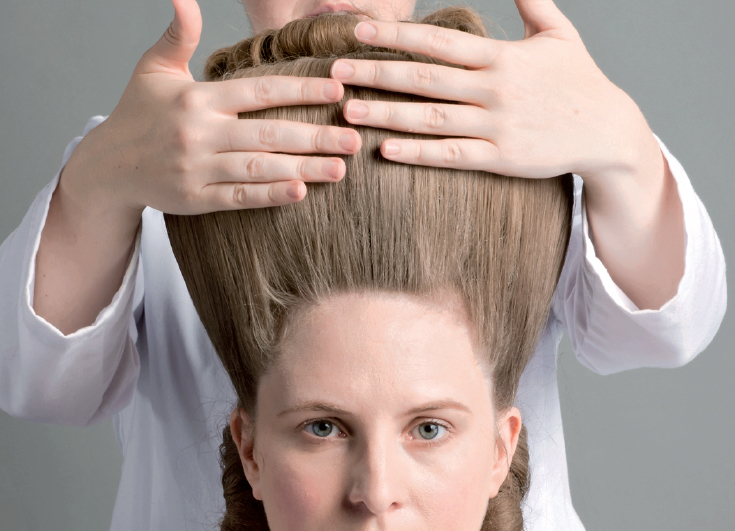
5. It’s time to start frosting this pastry. Starting from the front and working in 2- to 3-inch (5- to 8-cm) sections, tease the roots of the hair a little, then smooth the hair up and over the donut and back down into the hole in the center. Using the U-shaped hairpins, secure each section of hair inside the donut hole, stabbing the ends of the hairpins into the cushion. You can tuck all the loose ends of the hair down into the donut hole and later top your style with a cap or pouf, but for this tutorial we are going to finish the ends of the hair later on, so we have left them loose and free of the hole.


6. Continue around the head teasing and smoothing the hair up and into the hole and pinning to secure. Use your pick and comb to very lightly smooth the sections of hair together for a uniform look.
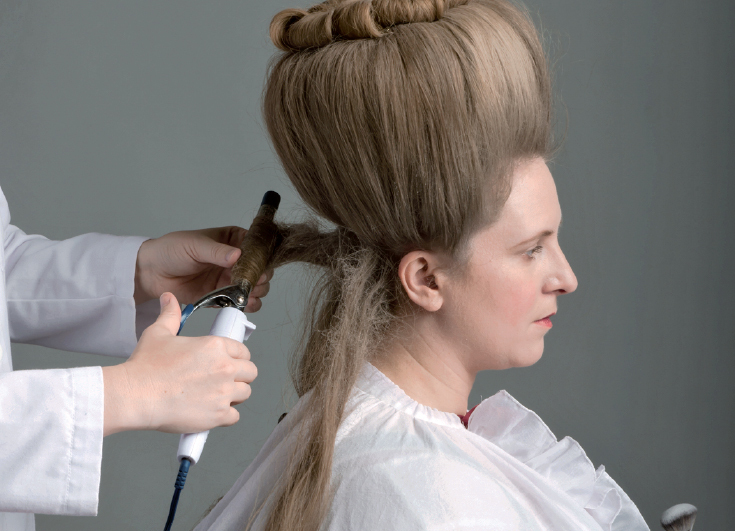
7. Since we’ve left the ends of Laurie’s very long hair free, we’re going to finish the top of the hair by curling these ends in small sections. This was a popular way to “decorate” the top of these tall hairstyles and is also—thankfully— very easy to do! Section the hair into 1- to 2-inch (2.5- to 5-cm) pieces and wrap around the ½-inch (1.2-cm) curling iron. Slip the curling iron out and use a couple small hairpins to hold the curls in place.

8. Curl and pin the ends of the hair all around the top of the donut until it all looks balanced and pleasing.

9. Start by sectioning the hair into three parts.

10. The large buckles are created with the hair behind each ear. Due to their size we recommend working the hair in two sections and then joining them with the comb later on for a cohesive look. Section the hair behind the ears into two pieces—a top and a bottom—and then tease the heck out of both pieces independently.

11. When your buckle hair is sufficiently standing out on its own, roll up the ends with your ½-inch (1.2-cm) curling iron to help guide the curl. Release.

12. Starting with the lower buckle, roll the hair onto the knitting needle starting from the ends of the hair and working toward the scalp. These buckles are fairly vertical and at a slight angle toward the back, so be sure to angle your roller to match as you go along. Once you’ve rolled the hair up nice and tight, carefully slip the knitting needle out, spread the hair out with your fingers, and secure the buckle by weaving a large hairpin on the inside of the buckle roll, working the hairpin so it points downward.
13. Repeat the teasing, curling, rolling up, spreading and pinning for the upper buckle, then very carefully work the hair together to join both buckles visually and create one big honkin’ piece. This is a little tricky so take your time—it doesn’t have to be perfect, just cohesive. Buckles are definitely an area where “practice makes perfect.”
14. Repeat steps 10 through 13 for the other side of the head. You can also use these techniques to make as many buckles as you like and position them all over the back of the head, whatever floats your big hair boat.

15. Using the tail of the comb to guide the loop, determine how long you’d like the chignon loop to be, then tie off the hair with an elastic band at the end where it will meet the base of the donut. Because Laurie has such long hair, this elastic band is pretty high up the section, but the placement of this band will vary based on your hair length and how you’d like to treat the chignon.

16. Loop the chignon up again and place the hair band at the base of the donut, securing with two crossed bobby pins.

17. We’re now left with a long hank of hair. For this tutorial, we’re going to smooth this up and over the donut, blending it seamlessly with the vertical hair from the first part of this tutorial. Use your pick and comb to blend the hair in, and pin at the top with hairpins.
18. Curl the loose end of the hair with the ½-inch (1.2-cm) curling iron, then roll this curl under and secure with hairpins.

19. Finally, hide the hair band and pins from step 16. You can use any number of decorations here such as feathers, fake flowers or ribbons. We tied a simple bow with silk ribbon and used straight pins to secure it to the style.

20. To finish everything off, warm up some pomade in your hands and very gently smooth the hair in the front and around the sides of the donut, moving your hands in the direction the hair is going. This tames any flyaways.

21. At this point, your coiffure of great proportion is complete. Although for this tutorial we did not apply more powder, you may wish to powder the style even more, particularly if the hair is looking greasy or “wet” in any section. Very lightly apply powder with the large blush brush or swansdown puff. Brush away any powder residue from the forehead and pass a fine-toothed comb very gently over the hair to break up any powder clumps.
You did it! You have achieved the high hair of the early 1770s! Now that you know the basic construction, feel free to play around with this style. Try curling your hair beforehand for a textured coiffure, or adding more buckles at the back. There is scope for creativity and personal expression, so have fun!