
Ostrich plumes were all the rage in the 1770s. The impressive plumage added even more height to the already tall hairstyles and adorned a variety of hats as well. Of plumes Léonard writes, “… there resulted from this combination a curling which could hold three white plumes … The Dauphine at this moment has a head seventy-two inches [76.75 inches today] long, from the lower part of the chin to the top of her head-dress.” [8]
• Ostrich feathers (plumes, drabs or spads)
• Scissors
• Utility knife
• Seam ripper
• #30 heavy thread in an inconspicuous color
• Dull knife or scissors
• Long hairpin (optional)
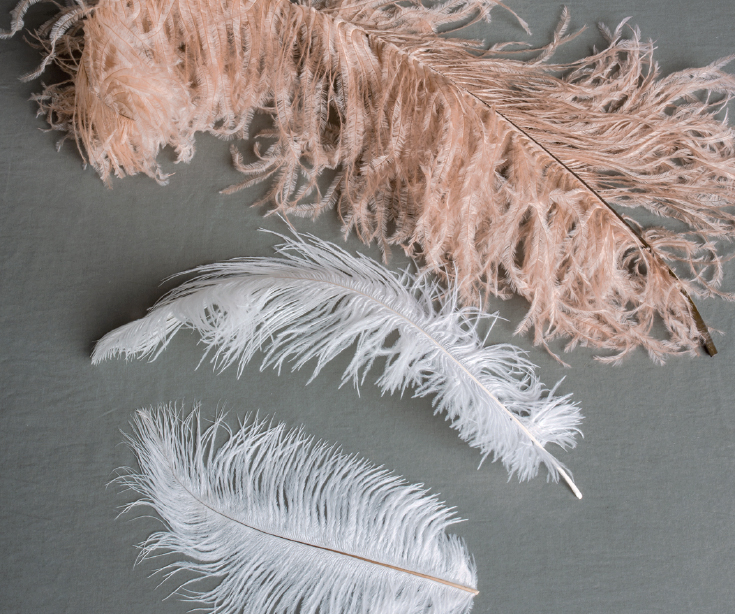
Ostrich feathers are not as straightforward as one would think. There are three different types of feathers you should know about.
We often use “plume” to describe any ostrich feather, but they are specifically the feathers that come from the wing of the bird. They are typically 20 to 30 inches (51 to 76 cm) long, very full and have lovely heavy ends that dip gracefully. They’re also the most expensive and hard to find.
Ostrich drabs are the most common ostrich feathers found in craft stores. Drabs come from the ostrich’s shoulder and are about 10 to 22 inches (25 to 56 cm) long. Compared to plumes, the fibers are much shorter, but are typically full. Drabs make good, affordable hat decoration.
Spads come from the tail of the ostrich, are about 18 to 22 inches (46 to 56 cm), and are somewhat thin and spindly. Spads are the least expensive, but are the least attractive—although several spads can be combined and shaped to create a fuller, more drab- or plume-like appearance.
In this tutorial, we will share a few techniques for combining feathers and curling the fronds and strategies for attaching feathers to hats and hair.
1. In this example, we are using plumes, which are very full and floaty. They can be a little tricky to work with but give a splendid result. However, if plumes are not available, joined drabs and spads can also create beautiful plume-like appearance.

2. Prep your feathers by stripping away any fluff from the base of the quills about 3 inches (8 cm) up from the bottom. This will give you something to attach the hairpin to later.

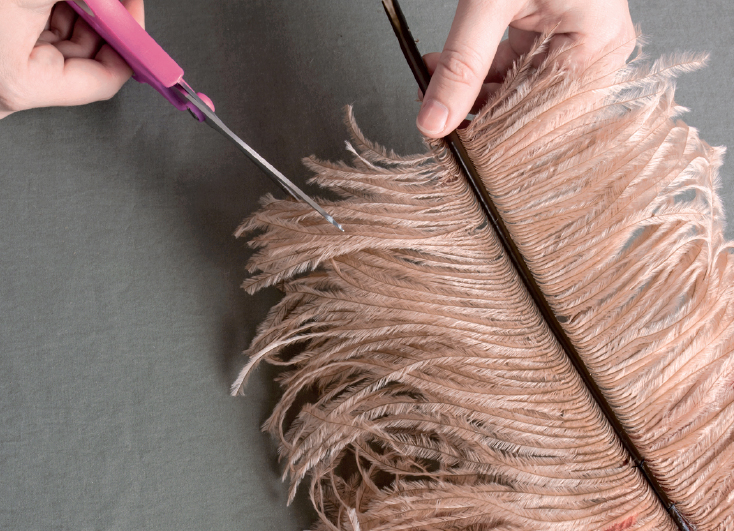
3. The first thing to do is curve the quills. Open a pair of scissors and using one blade, gently crease the quill between your thumb and the blade of the scissors, all along the quill. You don’t want to make big creases—just every ½ inch (1.2 cm) or so, press the quill to the blade, all the way down the quill, again and again, until the quill curves how you like. Do this to both feathers before stacking them.
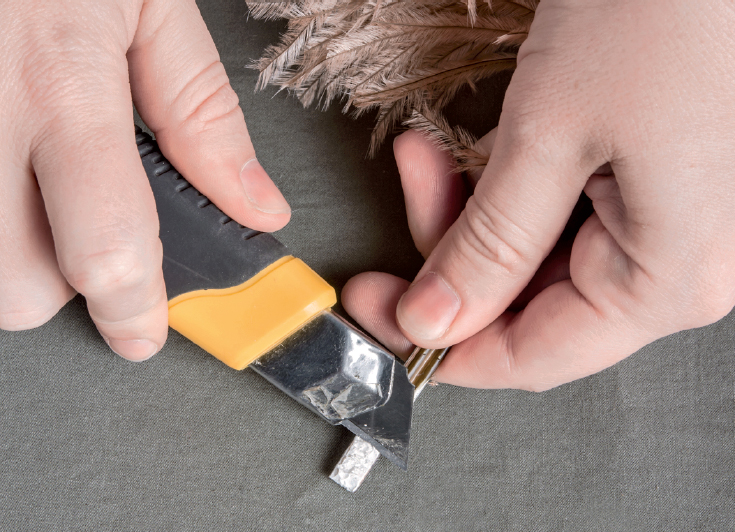
4. Before sewing the feathers together, you may need to skiv the quills toward the base so they lay atop one another nicely. This technique works best with drabs or spads. With a small, sharp knife, carefully carve away the underside of the quill that will lay on top. The interior of quills are hollow, so a correctly skived quill should “nest” with the other nicely.

5. Now you’re going to sew the quills together. Starting from the thickest end, very carefully punch a hole through the quill with a seam ripper. Try to avoid splitting the quill, but if this happens don’t fret. You only need an anchor point to start the thread.
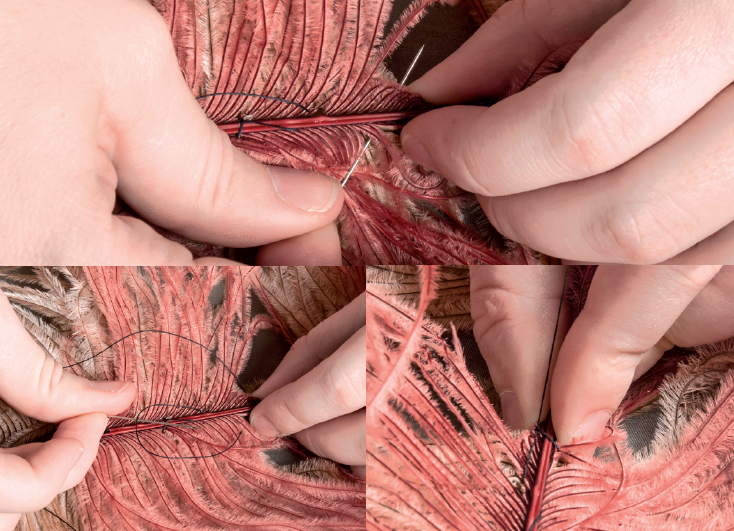
6. Work from the underside of the feathers. With an inconspicuous thread color, pass the needle through the first hole at the base of the stacked quills. Tie the thread securely and wrap it around the quills to bind them together. Make a little knot by passing the needle through the thread loop twice and carry on up the quill. Do not cut the thread, just continue up the quill. Every ½ to 1 inch (1.2 to 2.5 cm) or so, wrap the thread around the two quills and tie off in a little knot before continuing on. When you’ve reached a few inches from the end, tie off the thread securely and clip close to the knot.
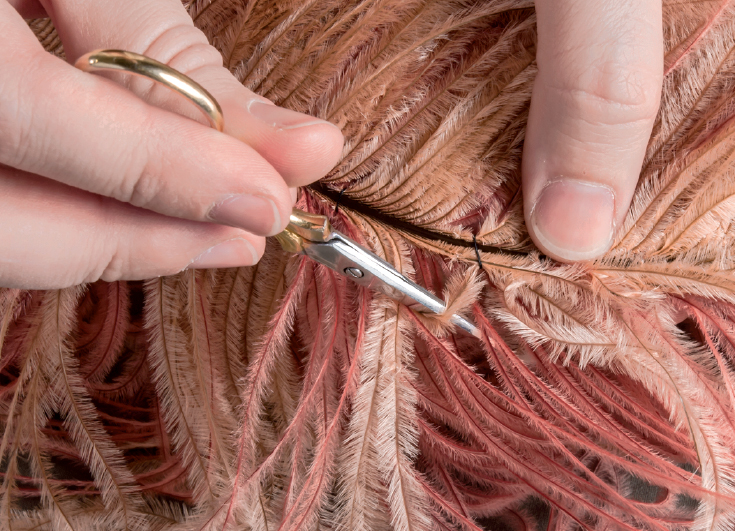
7. Some of the feather fronds will be caught in the thread. Use a small pair of scissors to gently pull them out and back into the desired position.
8. Trim to shape your feather as desired.
9. If you are using drabs or spads for your project, you may wish to curl the fibers to give the effect of a plume. Heat curling can give a good result, but is temporary. Instead we will carefully curl the fronds with a dull blade, such as a small pair of not-very-sharp scissors. This a careful operation and requires a delicate hand.

10. Separate each frond individually and place it between the dull edge of the knife and your thumb.
11. Gently and loosely pull your knife and thumb along the frond to curl it. This takes practice—you will break fronds—but you’ll have the hang of it in no time.
12. Plumes are one of those “assets” that can be put on and taken off of hats and hair whenever needed.
13. Secure your feathers to your hat with just a couple loose tacking stitches at the base and further up the quill.
14. Additionally, you can stitch a long hairpin to the bottom of the quill and wear the feathers in your hair. Carefully poke three holes through the bottom of the quill with a seam ripper. Try not to split the quill but don’t freak out if you do—it will still hold.
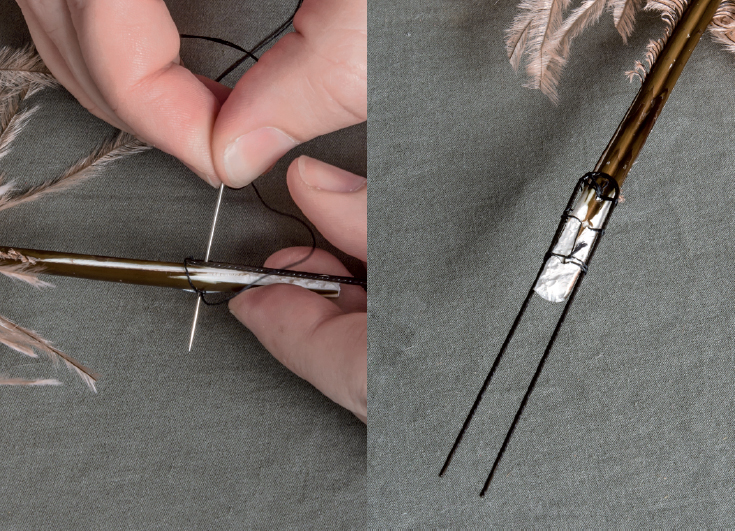
15. Knot your thread and pass it through the top hole in the quill, then wrap around each side of the top of the hairpin in a figure-eight pattern, each time stitching through the hole.
16. Move down the quill to the next hole and repeat with the figure-eight pattern, taking at least two stitches on each side of the hairpin. Continue to the last and bottom-most hole, repeat the stitches, tie off and clip the thread.

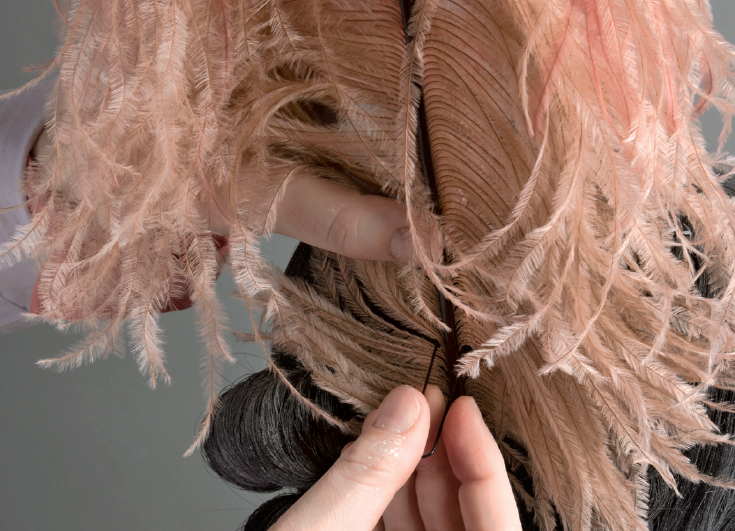
17. To sport your new plumes, slide the hairpin into the back of the hair, so the plume is anchored into place. Next, slide hairpins into the hair cushion to secure the plume and keep it vertical. You don’t want a droopy ostrich plume that looks like it’s trying to take flight off the back of your head! Secure as needed.