
Quintessentially Georgian, papillote curls are the go-to method for curling your hair in the eighteenth century. This interesting method uses folded and twisted papers (the “papillotes”) to hold the curl in place [4] and protect it while it is heated through with the papillote iron, a special heat-setting tool made for the purpose. We’ve substituted an electric flat iron, which works a treat. While this curling method takes a long time, it is the most accurate means of curling the hair. This tutorial will show you how to easily achieve this curl.
1. Work some common pomatum through a ½- to 1-inch (1.2- to 2.5-cm) section of hair. If your hair is fine or short, 1 inch (2.5 cm) should be fine, but if you have very long or thick hair, you will have to work in smaller sections.

2. Wrap the hair tightly around your finger to create what we would call a pin curl today. Carefully slide the hair off your finger and pinch the curl to hold it.


3. Place the long side of the triangular tissue paper beneath the curl, right up on the roots. Fold the left point of the triangle over to the right, covering the curl. Then fold the bottom edge of the paper up over the curl and lastly, fold the right bottom edge upwards, again over the curl. Twist the ends on the right side together to hold everything together. This takes practice! If you’re having trouble getting the paper to stay, use a small double-pronged curl clip to hold it in place before the next step.
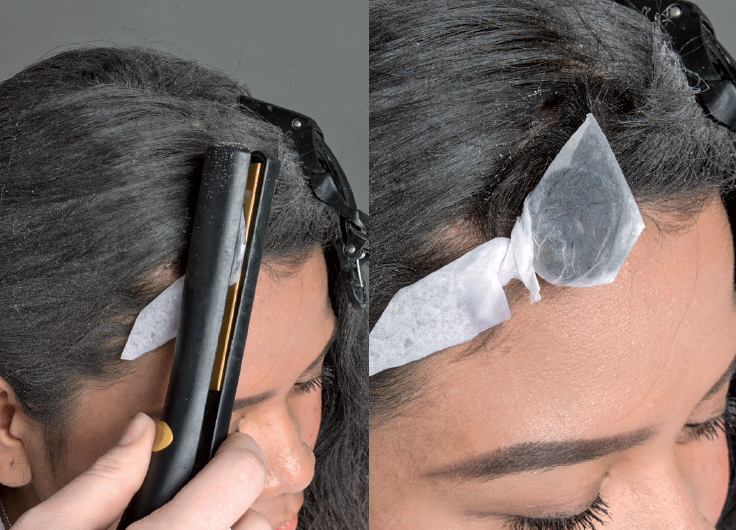
4. Pinch the papered curl between a small, very hot flat iron for 20 to 45 seconds. When you remove the flat iron, the paper will have an oily, smooshed appearance.

5. Once all the papillotes are complete, smoosh them again with the flat iron for good measure.
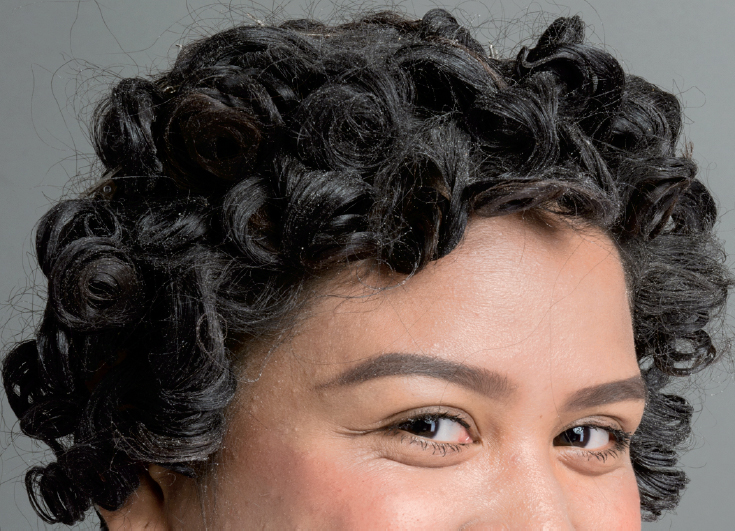
6. When the papillotes are completely cool, remove the paper from the hair and allow the curl to fall free, or gently pull and separate the hair. If the curl has not set, wrap it back up and heat it through with the flat iron again.
Hooray! You’ve just finished your first set! Don’t worry if you thought it was difficult, it gets easier with practice!
