The battlefield at Salamanca is one of the more unspoilt battlefields of the Peninsular War. Indeed Wellington would recognise it in an instant were he alive today. It is situated some 6km south of Salamanca and is centred on the small village of Los Arapiles. This sprawling village was held by the Light Companies of the Coldstream and 3rd Foot Guards, and although the French secured a footing on the outskirts, it remained in Allied hands throughout the day. The two most dominant features are, of course, the Arapiles, two peculiar-shaped hills that appear to have been dropped on the plain from heaven. It is quite an easy climb to the top of the Lesser Arapil, which was held by Wellington’s men during the battle, and from here one can gaze out to the north, behind the hill, and picture the two armies as they took up their initial positions running north–south.
The small chapel at the edge of the French position is still standing. Across the valley stands the Greater Arapil, which was occupied by Marmont during the battle, and away to the west of the Lesser Arapil is the village of Los Arapiles itself, with the San Miguel Hill behind it. It was from this hill that Wellington watched the opening stages of the battle. Looking further west from Lesser Arapil, across the main road south from Salamanca, is the village of Miranda de Azan, which is now 1km west of the main road. It is best to begin any tour of the battlefield from here, because this is where Packenham’s 3rd Division struck Thomières’ troops. It is possible to follow Packenham’s route along a track south from Aldea de Tejada all the way to Miranda, although the woods which hid his division from the French have long gone. The slopes up which the 3rd Division marched are still free of any building, even today.
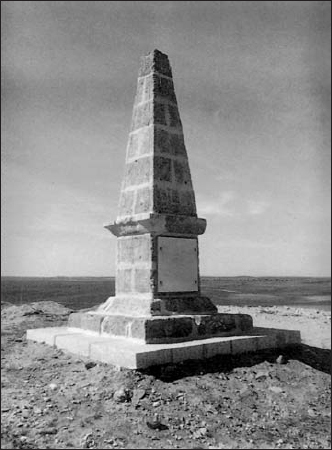
The obelisk on top of the Greater Arapil on the battlefield at Salamanca. It has been cleaned up recently and its base strengthened.
From Miranda travel back to Los Arapiles and take a track south out of the village to the slope up which Leith’s 5th Division advanced to attack. From the top you can look down on the valley below and imagine Maucune’s division with Clausel’s division on its right, and visualise Le Marchant’s cavalry charging from the rear of Los Arapiles. From here go back to the village, turn right - to the east - and make for the Greater Arapil. This is a steeper climb than the Lesser Arapil, but from the top one can see all the way to Salamanca itself, and the area where Wellington’s divisions formed up. It also puts paid to the myth that Marmont could not see behind Wellington’s front line. He certainly would not have been able to see Pakenham’s advance, but even on a grey day it is possible to see most of the ground behind Los Arapiles. Looking directly west from the Greater Arapil, it is easy to follow the attacks made by Leith and Le Marchant, and to appreciate just how far the fugitives from Thomières’ routed division would have had to come in order to retreat to the woods to the south-east of the battlefield. It is easy to follow the attack of Cole’s 4th Division, whose battalions advanced from between the Lesser Arapil and the village of Los Arapiles. A small stream marks to within a few yards the position of Stubbs’s brigade as it attacked. As Cole advanced, Pack threw his Portuguese brigade forward in support, up the slopes of the Greater Arapil, which remain unchanged. The steep ledge which caused them to put down their muskets in order to climb it, is easy to find.
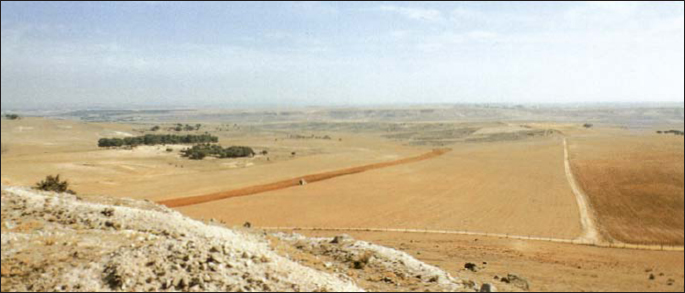
The valley to the east of the two Arapiles. The French troops advanced south behind the ridge in the distance. Foy’s troops remained there throughout the day watched by the 1st and Light Divisions which were away to the left.
Wellington’s victory was secured by Clinton’s 6th Division advancing from behind the San Miguel Hill. Away to the south-east lie the woods where the French retreated. The wood has thinned, but only slightly, and the rocky ridge which allowed Ferey’s men to fire over the heads of their comrades in front is clearly visible.
With a few extra days it is possible to follow the campaign all the way from Tordesillas to Los Arapiles, and on to Garcia Hernandez. Wellington’s position on 20 June at San Cristobal is clear, and it is easy to find the sites of the fights close to the villages of Castrejon and Canizal. The course of the celebrated parallel march can be traced with good maps, as can the fords over the Tormes. Traces of the Salamanca forts also remain. The old bridge at Alba de Tormes, where Wellington had hoped to ensnare Marmont’s army, still stands. Further east lies Garcia Hernandez, which is dominated by the heights of La Serna. There are three obvious defiles, all with roads running over them, so it is difficult to pinpoint the exact point at which Foy’s squares were broken by the charge of Bock’s dragoons.
Five days are really necessary to study this fascinating campaign thoroughly, although the area of the main battlefield can be tackled in just one day. Accommodation is plentiful in Salamanca, where there is a parador as well as several other hotels.