Breakfast

 Lemon Blueberry Buttermilk Sheet Pan Pancakes
 Strawberry and Cottage Cheese Jars
Sausage, Egg, and Cheese Breakfast Sandwiches
Italian Sausage and Ricotta Frittata

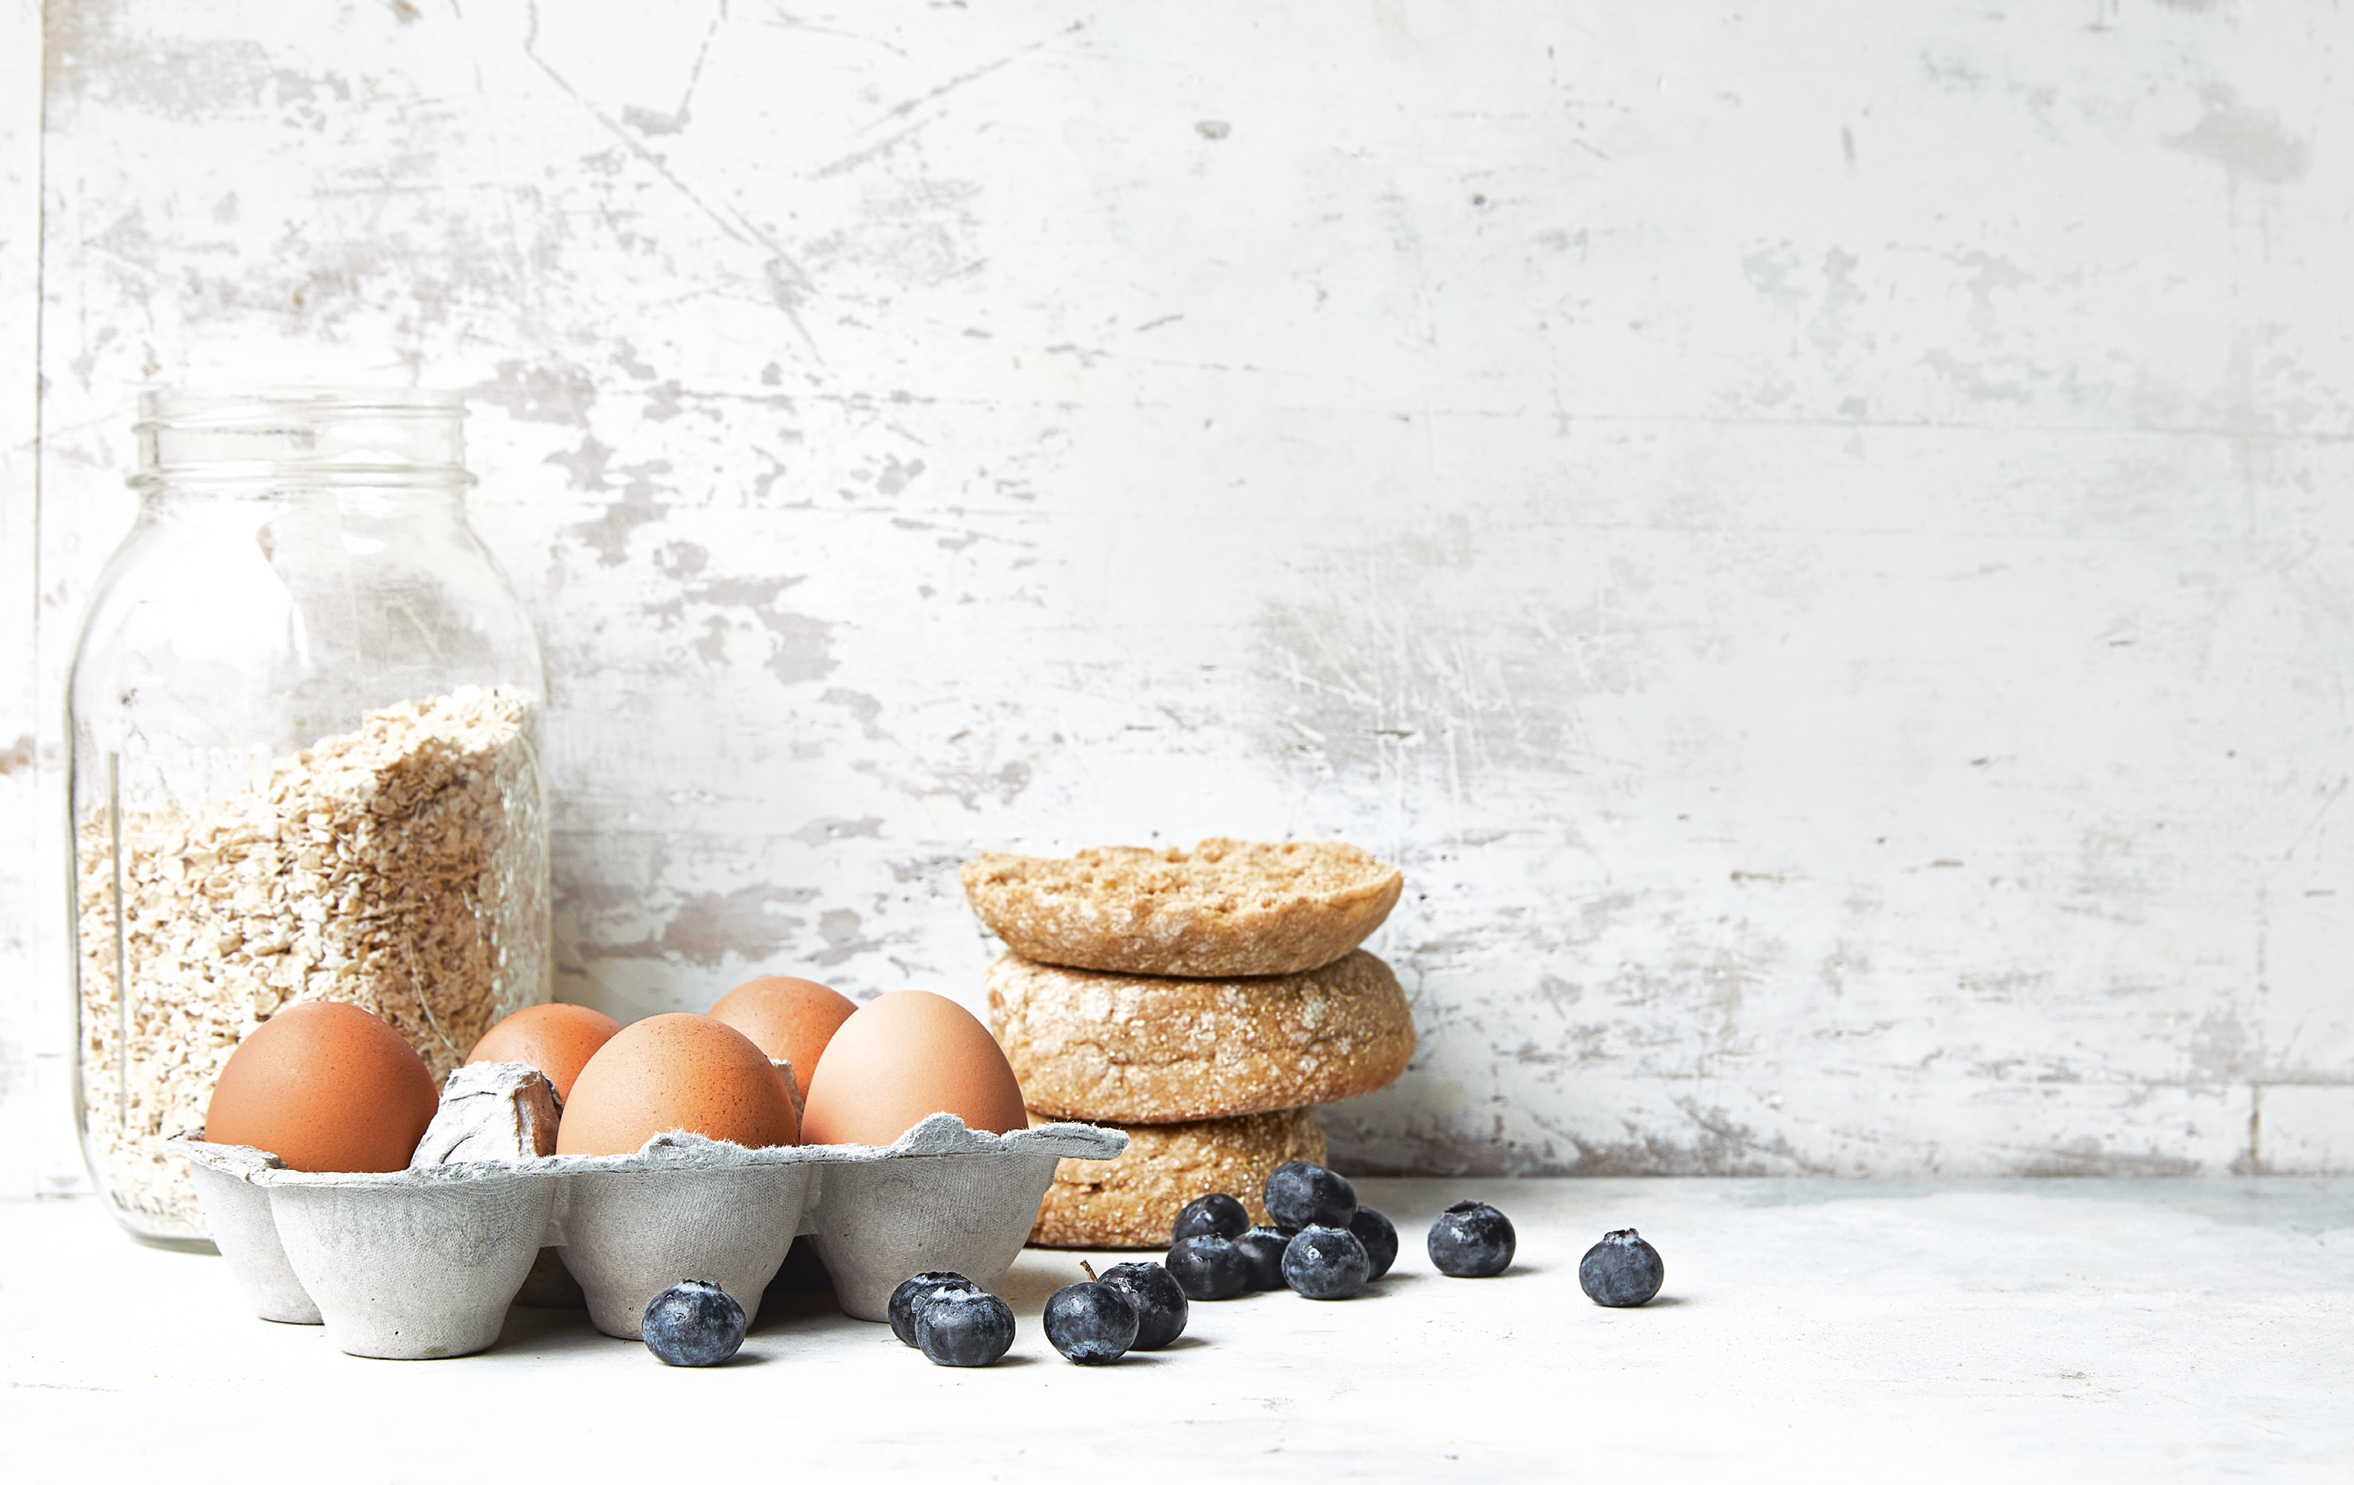
 Instant Pot Egg White Steel-Cut Oats
Almond Flour Banana Crumb Muffins
Breakfast-on-the-Run Bowls


You know those days when you wake up feeling like your best self? Eyes wide open, fully you, and just ready for the day? I always try to pick apart the pattern so I can choose to make those days happen more often. Usually my feel-awesome day starts with exercise, maybe an inspiring podcast, and always a solid breakfast. But your morning meal doesn’t have to be time-consuming or complicated: This simple breakfast bowl is my go-to on most weekday mornings.
SERVES 2
4 large hard-boiled eggs (see below for air fryer directions)
1 cup halved cherry tomatoes
1 small Hass avocado
½ lemon
1 teaspoon extra-virgin olive oil
⅛ teaspoon kosher salt
Freshly ground black pepper
Pinch of crushed red pepper flakes (optional)
Cut the hard-boiled eggs in half and place in 2 bowls. Top each bowl with ½ cup tomatoes and half of the avocado. Squeeze lemon juice over the avocado and drizzle with the olive oil, then season with salt, black pepper to taste, and red pepper flakes (if using).
Air-Frying Eggs: There are so many ways to boil an egg, from making them on the stove or in an Instant Pot, to using an air fryer. Most mornings, I turn to my air fryer to make them because they practically cook themselves unattended. No water, and no need to stand near the stove while they cook. Place cold eggs in the air fryer and cook at 250°F for about 17 minutes. If you like your yolk a little soft, run the eggs under cold water and peel them right away to stop the eggs from cooking. If you like the yolk firm, wait about 5 minutes before peeling.
Variations:
Add leftover veggies from the night before.
Add cucumbers and olives for a Mediterranean twist.
Add leftover grains like quinoa or farro.
Per Serving (1 bowl) • Calories 285 • Fat 21.5 g • Saturated Fat 5 g Cholesterol 422 mg • Carbohydrate 10 g • Fiber 5 g • Protein 14 g Sugars 4 g • Sodium 356 mg
Piña Colada Yogurt Bowls

Yogurt bowls are my favorite quick-and-easy breakfast when I’m not in the mood for eggs. You can use any plain yogurt as the blank-canvas base, then top it with your favorite fruit, nuts, granola, etc. This sweet and crunchy piña colada version is topped with pineapple, toasted almonds, and coconut. You don’t need to add sugar or sweeteners, because the pineapple is sweet enough. To make these ahead, toast the almonds and coconut and pack them separately. Keep the fruit packed in separate containers, then combine everything just before eating.
SERVES 4
½ cup unsweetened shredded coconut
¼ cup slivered almonds
3 cups nonfat plain, Greek, or dairy-free yogurt
2 cups finely diced fresh or canned pineapple in juice
FRIDGE: UP TO 4 DAYS
Preheat the oven to 325°F.
On a small sheet pan, spread the coconut and almonds in an even layer. Toast for 3 to 5 minutes, until the coconut is golden brown.
SERVE NOW: For each serving, spoon ¾ cup yogurt into a small bowl. Add ½ cup pineapple with some of its juice and 3 tablespoons of the almond/coconut mixture and stir well. Eat immediately.
MEAL PREP: Pack the fruit, almond/coconut mixture, and yogurt in separate containers, or use a 3-compartment meal prep container for each serving and place ¾ cup yogurt into the large part of the dish. In the smaller compartments, place 3 tablespoons almond/coconut mixture on one side and the pineapple on the other. When ready to eat, combine and stir well.
Per Serving (1 bowl) • Calories 289 • Fat 14 g • Saturated Fat 9 g Cholesterol 4 mg • Carbohydrate 30 g • Fiber 4.5 g • Protein 14 g • Sugars 24 g • Sodium 149 mg
Avena (Oatmeal Smoothie)
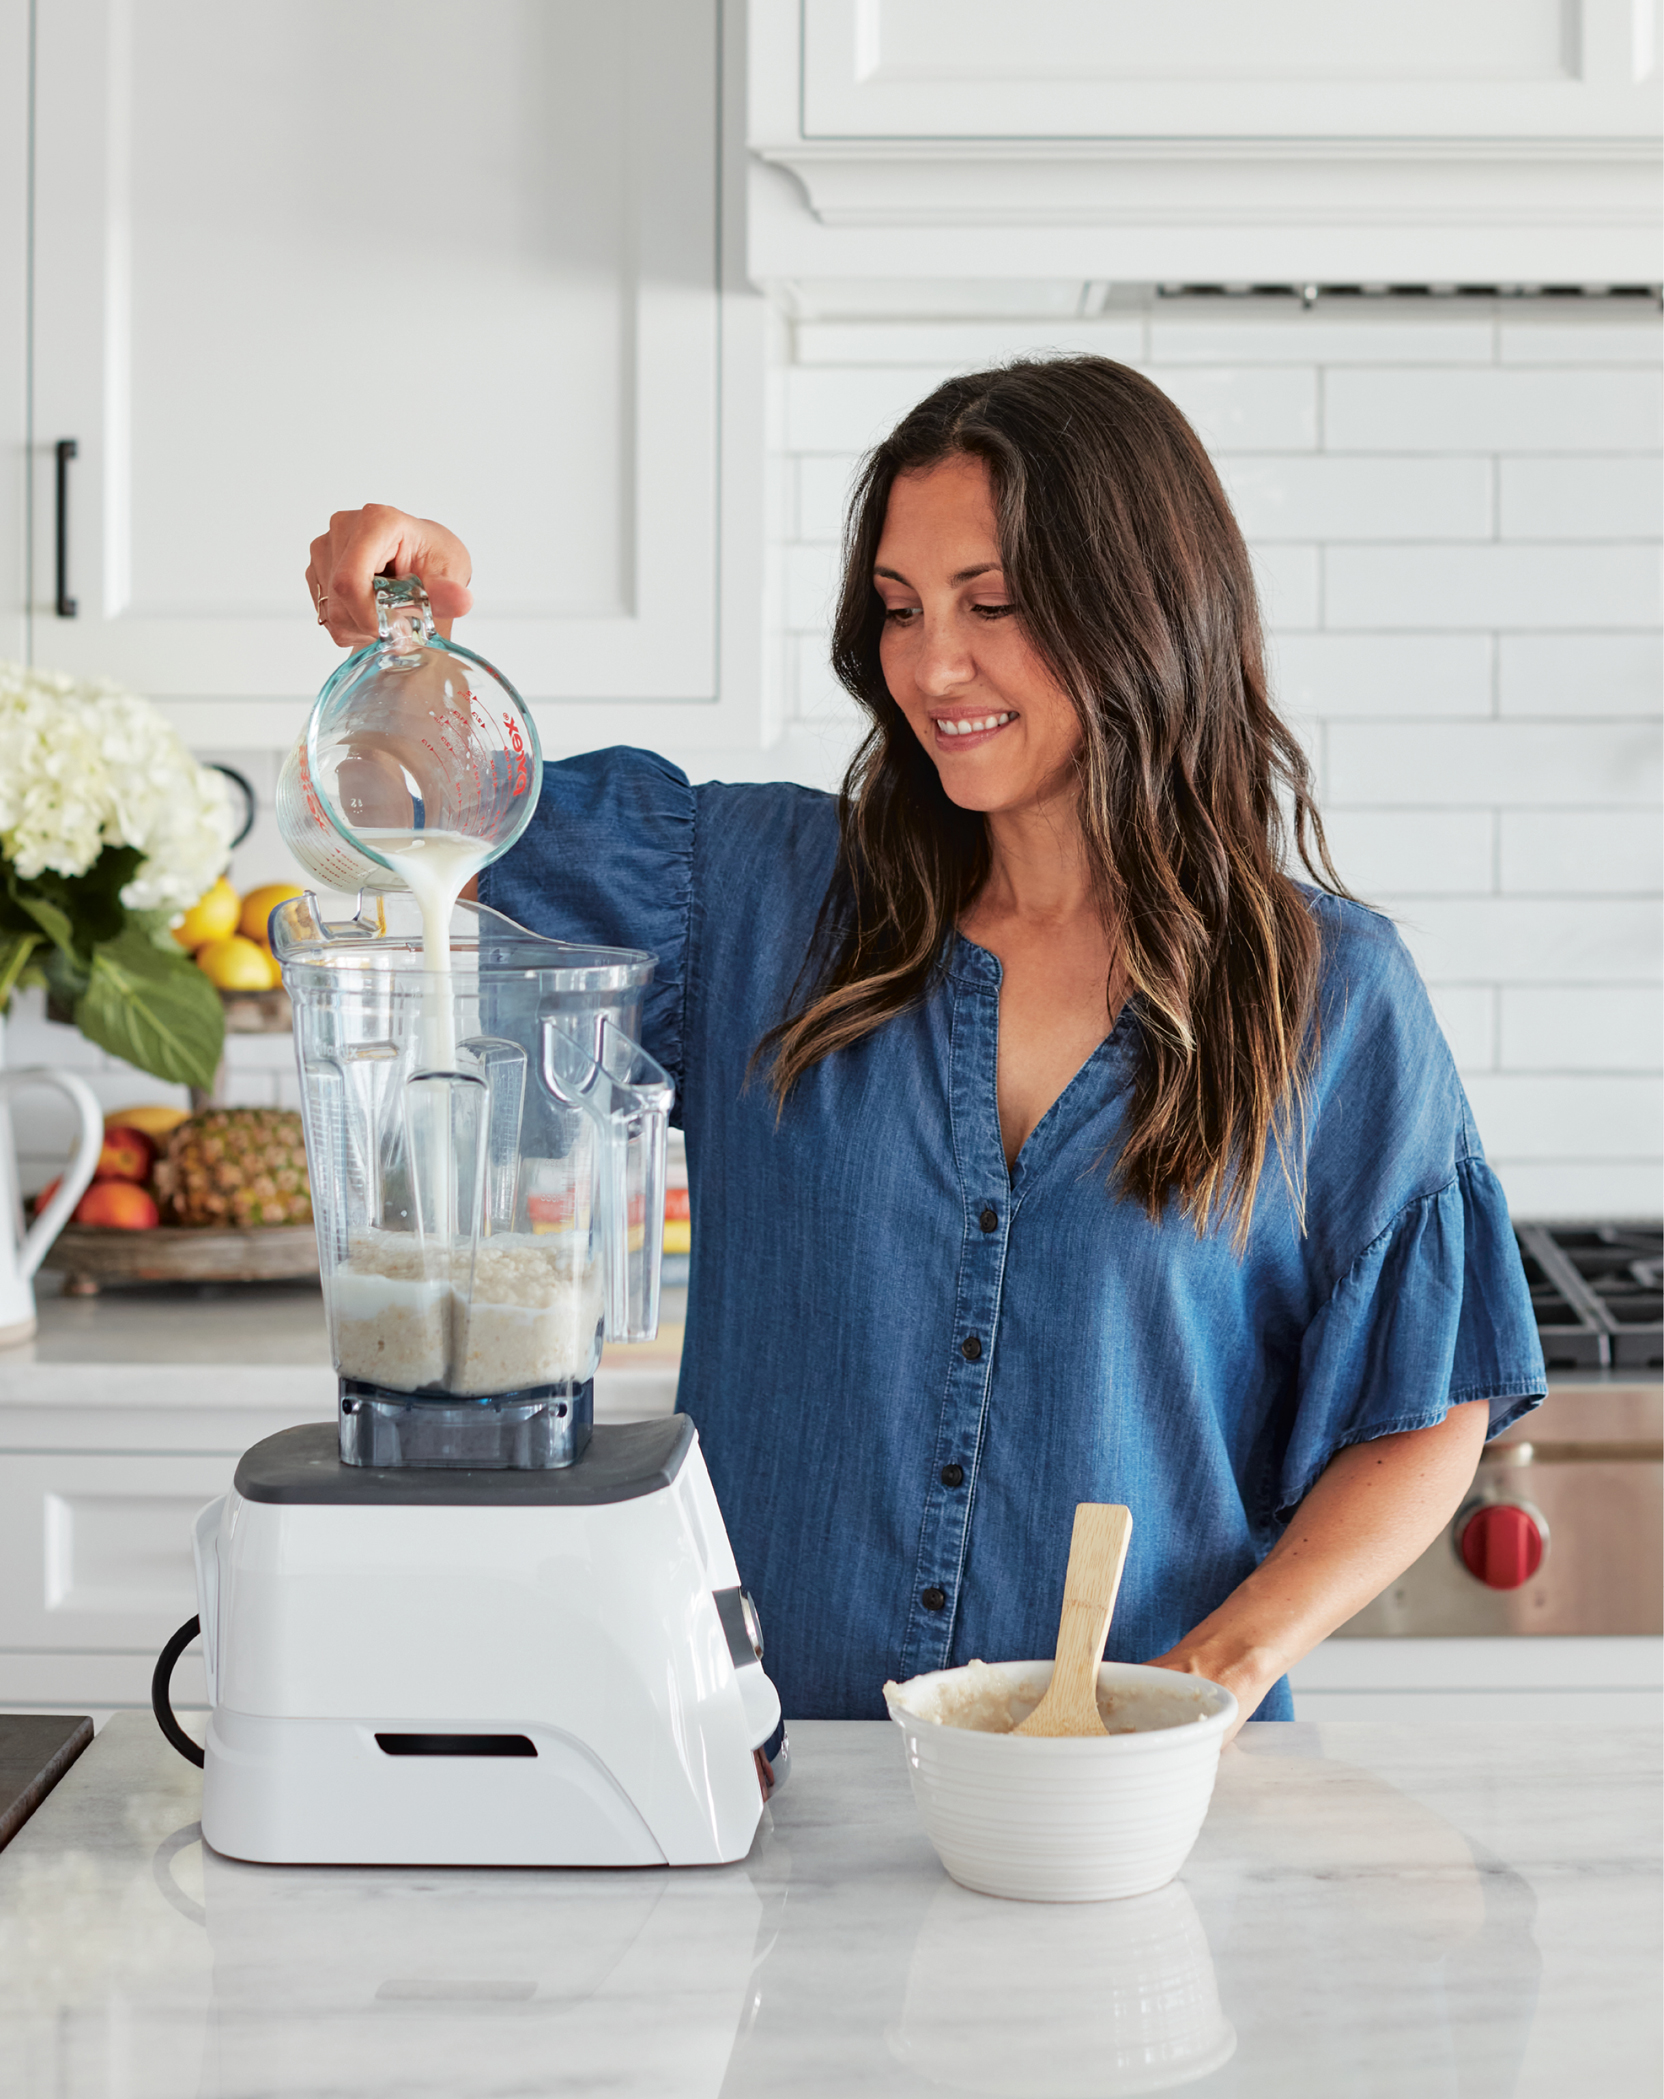
An easy breakfast on-the-go and an inspired way to add whole grains and fiber to your morning! Oat milk is the latest dairy-free milk trend, and I’m not surprised. I’ve been drinking oatmeal smoothies (aka avena) all my life! Served over ice with lots of cinnamon, it’s a popular and refreshing beverage in Colombia and South America. Karina, my oldest daughter, would request it for breakfast at least three times a week when she was younger. Cooking the oats in water first is key since it gives your smoothie the creamiest texture. I also love including collagen peptides in my smoothies (my nails, skin, and hair have never looked better!), but that’s totally optional.
SERVES 4
1 cup quick-cooking oats*
1½ cups fat-free milk or dairy-free milk of your choice
4 tablespoons raw sugar
2 teaspoons ground cinnamon
4 servings collagen peptides (optional)
2 cups crushed ice
*Read the label to be sure this product is gluten-free.
FRIDGE: UP TO 4 DAYS (COOKED OATMEAL, WITHOUT THE MILK)
Cook the oats in 2 cups water in a small pot over medium heat. When it boils, cook for about 1 minute, stirring often until it becomes thick and starts bubbling. Remove from heat and let it cool for 5 minutes.
Pour the milk, sugar, and cinnamon into a high-powered blender. Add the cooled oats, collagen peptides (if using), and ice. Blend on high until very smooth.
SERVE NOW: Serve chilled in a glass over ice.
MEAL PREP: After cooking the oats, you can refrigerate the oatmeal for up to 4 days. When ready to eat, for each serving blend one-fourth of the cold oatmeal with 6 tablespoons milk, 1 tablespoon raw sugar, ½ teaspoon ground cinnamon, 1 serving collagen peptides, and ½ cup ice.
Per Serving (1½ cups) • Calories 158 • Fat 1.5 g • Saturated Fat 0.5 g • Cholesterol 2 mg • Carbohydrate 32 g • Fiber 2.5 g • Protein 6 g Sugars 17 g • Sodium 43 mg
Breakfast Fried Rice

Bacon and eggs meet Chinese-American takeout! Fried rice is one of my favorite foods (in fact, I would often eat it for breakfast during my college days!), so loading it up with bacon and extra eggs just makes good food-sense to me. I use brown rice (it’s a complex carb that takes longer to break down, which means you’ll stay fuller longer) and riced cauliflower, which helps bulk up the portions and adds a healthy dose of nutrients (bonus!).
SERVES 4
6 large eggs
⅛ teaspoon kosher salt
Cooking spray
4 slices center-cut bacon, chopped
8 scallions, white parts minced, green parts thinly sliced
2 cups riced cauliflower (raw or frozen)
2 cups leftover cooked short-grain brown rice, cold
3 tablespoons reduced-sodium soy sauce* or gluten-free tamari
1 teaspoon toasted sesame oil
2 teaspoons Sriracha sauce
*Read the label to be sure this product is gluten-free.
FRIDGE: UP TO 4 DAYS
FREEZER: UP TO 3 MONTHS
In a medium bowl, whisk the eggs and season with the salt.
Heat a large nonstick skillet over high. When hot, coat with the cooking spray, add the eggs, and quickly scramble for 1 to 2 minutes. When the eggs are cooked through, remove them from the pan and set aside.
Add the bacon and cook until browned, 4 to 5 minutes, then use a slotted spoon to transfer the bacon onto a paper towel. Leave 1 teaspoon of bacon fat in the pan, then add the scallion whites and cook for 30 to 60 seconds. Add the riced cauliflower and cook until soft, about 5 minutes.
Add the rice and soy sauce and cook for 2 to 3 minutes, stirring frequently, until heated through. Return the egg and bacon to the pan and toss with the sesame oil, Sriracha, and scallion greens.
MEAL PREP: Divide the rice among 4 airtight containers, about 1¼ cups each. To reheat from the fridge, microwave the rice in 30-second intervals until heated through. To reheat from frozen, transfer the rice to the refrigerator to thaw, or reheat in the microwave from frozen in 30-second intervals until heated through.
SKINNY SCOOP Not a fan of cauliflower? No worries, you can swap any riced veggie you wish—try it with riced broccoli, carrots, etc. You can also use ham instead of bacon, or make it meatless, easy-peasy!
Per Serving (1¼ cups) • Calories 285 • Fat 11.5 g • Saturated Fat 3.5 g • Cholesterol 282 mg • Carbohydrate 29 g • Fiber 3.5 g • Protein 16 g Sugars 3 g • Sodium 717 mg
Baked Oatmeal Cups, Four Ways
The best way to avoid the free donuts in the office break room is to pack your own heart-healthy breakfast that’s loaded with fiber, keeping you full until lunch. These portable oatmeal cups are a cross between baked oatmeal and a muffin. They are perfect to make ahead for the week or to pop in the freezer to have them handy throughout the month. You can eat them cold right out of the refrigerator or warm them up for a satisfying and filling start to your day.
SERVES 6
BASE
Cooking spray
2½ cups old-fashioned or quick-cooking oats*
1½ cups unsweetened vanilla almond milk
½ teaspoon vanilla extract
¼ cup lightly packed light brown sugar
¼ teaspoon kosher salt
½ teaspoon baking powder
½ teaspoon ground cinnamon
½ cup unsweetened applesauce
MIX-IN OPTIONS
(See following)
*Read the label to be sure this product is gluten-free.
FRIDGE: UP TO 4 DAYS
FREEZER: UP TO 3 MONTHS
Preheat the oven to 350°F. Generously spray a standard 12-cup muffin tin with cooking spray.
Make the oatmeal: In a food processor, pulse the oats about 15 times until fine (they should be a similar consistency to instant oats, with a few bigger pieces). Transfer to a large bowl and add the milk and vanilla. Set aside to allow the oats to absorb the milk, about 5 minutes.
In a small bowl, combine the brown sugar, salt, baking powder, and cinnamon. Add to the bowl of soaked oats along with the applesauce and mix-in options (see following). Gently fold until thoroughly combined. With a heaping ⅓ measuring cup, scoop the oatmeal mixture into the prepared muffin tin.
Bake, rotating halfway through, until set, about 25 minutes. Let cool in the pan for 10 minutes. Carefully remove with an offset spatula or paring knife, then transfer to a wire rack to cool completely. Once cooled, store in an airtight container or zip-top plastic bag.
To reheat, microwave for about 30 seconds (or 1 minute if frozen) or until heated through.
Mix-in options
Apple Cinnamon
1 tablespoon unsalted butter
2 large apples, peeled and diced into ½-inch pieces
1 teaspoon light brown sugar
½ teaspoon ground cinnamon
In a small skillet, melt the butter over medium heat. Add the apple, brown sugar, and cinnamon and sauté, stirring to evenly coat the apple, until softened, about 3 minutes. Transfer to the bowl with the soaked oats and continue with the recipe.
Per Serving (2 oatmeal cups) • Calories 238 Fat 5 g • Saturated Fat 1.5 g • Cholesterol 5 mg • Carbohydrate 45 g • Fiber 6 g • Protein 5 g Sugars 19 g • Sodium 136 mg
Peaches and Cream
1 tablespoon unsalted butter
2 medium peaches, peeled and diced into ½-inch pieces
⅛ teaspoon ground nutmeg
⅛ teaspoon ground ginger
½ cup nonfat Greek yogurt
In a small skillet, melt the butter over medium heat. Add the peaches, nutmeg, and ginger and gently sauté, just until the peaches are evenly coated, about 1 minute. Transfer the peaches and the yogurt to the bowl of soaked oats and continue with the recipe.
Per Serving (2 oatmeal cups) • Calories 227 Fat 5 g • Saturated Fat 1.5 g • Cholesterol 5 mg • Carbohydrate 40 g • Fiber 5 g • Protein 7 g • Sugars 16 g • Sodium 142 mg
Blueberry Banana
1 large ripe banana, mashed
1 cup wild blueberries
Transfer the mashed banana and whole blueberries to the bowl of soaked oats and continue with the recipe.
Per Serving (2 oatmeal cups) • Calories 213 Fat 3 g • Saturated Fat 0.5 g • Cholesterol 0 mg • Carbohydrate 43 g • Fiber 5.5 g • Protein 5 g • Sugars 14 g • Sodium 136 mg
Mixed Berry
2 cups mixed berries (I like chopped strawberries, whole blackberries, and whole raspberries)
1 teaspoon granulated sugar
In a small saucepan, combine the berries, sugar, and ¼ cup water over medium heat. Bring to a gentle boil, then reduce the heat to medium-low. Simmer the berries, stirring often and mashing them gently with a wooden spoon. Cook until thickened, 8 to 10 minutes. Remove from the heat and let cool for 3 minutes before transferring to the bowl of soaked oats. Continue with the recipe.
Per Serving (2 oatmeal cups) • Calories 202 Fat 3 g • Saturated Fat 0.5 g • Cholesterol 0 mg • Carbohydrate 40 g • Fiber 6 g • Protein 5 g • Sugars 14 g • Sodium 135 mg

Stuffed Bagel Balls

Tommy is obsessed with Bantam Bagel balls stuffed with cream cheese! But since they’re often sold out when we try to buy them at our neighborhood Starbucks or in the frozen aisle of the supermarket, I was determined to make them at home for him. We usually eat half on a Sunday morning or for a special occasion, like his birthday, and freeze the rest—they reheat well and taste like they’re fresh out of the oven. Just pop them in the microwave for a few seconds until they are heated through and soft.
SERVES 8
1 (8-ounce) package ⅓-less-fat cream cheese
2 cups (10 ounces) unbleached all-purpose or white whole wheat flour, plus more for dusting*
4 teaspoons baking powder
1½ teaspoons kosher salt (use less if using table salt)
2 cups nonfat Greek yogurt (I like Stonyfield)
1 egg white, beaten
Olive oil spray
OPTIONAL TOPPINGS
Everything bagel seasoning, sesame seeds, poppy seeds, dried garlic flakes, dried onion flakes
*For gluten-free bagel balls, swap the flour with Cup4Cup gluten-free mix. Add 5 minutes to the bake time.
FREEZER: UP TO 3 MONTHS
Place the cream cheese block on a small cutting board and cut into 16 cubes of equal size. Transfer to the freezer while you make the dough so it stays cold and firm.
In a medium bowl combine the flour, baking powder, and salt and whisk well.
Add the yogurt and mix with a fork or spatula until well combined. It will look like small crumbles.
Place the dough onto a lightly floured work surface. Knead the dough a few times until it is tacky, but not sticky (the dough should not stick to your hands), and no longer lumpy. You may have to add more flour to your hands and work surface.
Divide the dough into 16 balls of equal size. Working one at a time, flatten each ball, then place 1 cube of cream cheese in the center of each. Cover the cream cheese with the dough, seal well so no cream cheese leaks out while baking, and roll into a ball.
Brush the dough with egg white and sprinkle with toppings of your choice (if using).
Oven Method:
Preheat the oven to 375°F. Adjust an oven rack to the top position, about 6 inches from the heating element. Place parchment paper or a silicone baking mat on a baking sheet. If using parchment paper, spray with oil to avoid sticking.
Bake the dough balls for 22 to 25 minutes, until golden. Let cool at least 10 minutes before eating.
Air Fryer Method:
Spray the basket to avoid sticking.
Preheat the air fryer to 330°F. Add just enough dough balls to the air fryer basket to make a single layer without overcrowding. Cook for 11 to 12 minutes, turning halfway, until golden. Remove from the air fryer and place on a wire rack to cool for at least 10 minutes before eating. Repeat with the remaining batches of dough balls.
MEAL PREP: Bake as directed. Once the bagel balls are cool, transfer to zip-top plastic bags and freeze for up to 3 months. Reheat in batches in the microwave in 30-second intervals until heated through in the center, about 1 minute. Let them cool for 2 to 3 minutes before serving, as the centers will be very hot.
SKINNY SCOOP You can get super creative with the cream cheese filling and toppings! Try adding chopped scallions to the cream cheese and top with dried onion, or add chopped lox to the cream cheese and top with sesame seeds. For a sweeter option, add chopped raisins and cinnamon to the cream cheese and top with cinnamon and sugar.
Per Serving (2 balls) • Calories 215 • Fat 5.5 g • Saturated Fat 3 g Cholesterol 17 mg • Carbohydrate 29 g • Fiber 1 g • Protein 12 g Sugars 2 g • Sodium 568 mg
Lemon Blueberry Buttermilk Sheet Pan Pancakes

Sheet pan pancakes—essentially, a giant pancake baked in the oven—is the most genius way to whip up pancakes. Make them once, and you’ll never make them any other way again! No more waiting, flipping, and eating in shifts. All you need is a good-quality rimmed sheet pan and some parchment paper so they don’t stick. They come out golden and fluffy, speckled with blueberries throughout.
SERVES 8
Cooking spray
1½ cups unbleached all-purpose flour
½ cup white whole wheat flour
2 tablespoons granulated sugar
2 teaspoons baking powder
1 teaspoon baking soda
1 teaspoon kosher salt
2 tablespoons unsalted butter, melted and cooled slightly
2 cups low-fat (1%) buttermilk
2 large eggs
Juice and grated zest from 1 medium lemon
2 teaspoons vanilla extract
1½ cups blueberries
OPTIONAL TOPPINGS
Confectioners’ sugar, pure maple syrup, honey, or light whipped cream
FRIDGE: UP TO 4 DAYS
FREEZER: UP TO 2 MONTHS
Preheat the oven to 425°F. Spray a rimmed 13 × 18-inch sheet pan with cooking spray (this will keep the parchment in place). Cut a piece of parchment paper to cover the bottom completely. Place on the sheet pan and spray more oil on the parchment and around the sides of the sheet pan.
In a medium bowl, whisk together the flours, sugar, baking powder, baking soda, and salt. In another medium bowl, whisk together the butter, buttermilk, eggs, lemon juice and zest, vanilla, and ¼ cup water until thoroughly combined.
Add the wet ingredients to the dry ingredients and whisk until just combined. Do not overmix (or worry if there are some lumps).
Gently fold in the blueberries with a spatula.
Pour the batter into the prepared sheet pan. Spread evenly with a spatula, then tap the sheet pan on the counter a few times to settle the batter. Bake, rotating the pan halfway through, until golden and set, about 15 minutes.
Let cool for 5 minutes in the pan. Place a large cutting board over the top of the pan and flip the pancake onto the cutting board. Cut into 16 squares. Add toppings as desired and serve.
MEAL PREP: Cool completely before transferring to an airtight container. To reheat from the fridge, microwave for 40 seconds, flipping halfway through. To reheat from frozen, microwave for 45 seconds. Flip and cook for an additional 45 seconds, or until heated through.
Per Serving (2 squares) • Calories 214 • Fat 5 g • Saturated Fat 2.5 g • Cholesterol 57 mg • Carbohydrate 35 g • Fiber 2.5 g • Protein 7 g Sugars 9 g • Sodium 503 mg
Strawberry and Cottage Cheese Jars

I’m crazy for cottage cheese, especially the type that comes with fruit on the side. But many brands sold in the dairy aisle don’t contain much actual fruit! Plus, they can be highly processed; some even contain high fructose corn syrup. That’s what inspired me to start making them from scratch. Believe it or not, these are so easy—they take just about 20 minutes, start to finish. Strawberries are my favorite, but any fruit will work, so feel free to swap in others, like peaches or raspberries.
SERVES 4
2½ cups (13.5 ounces) fresh strawberries, hulled and diced into ¼-inch pieces
2½ tablespoons raw sugar
¾ teaspoon cornstarch
½ teaspoon fresh lemon juice
3 cups 1%-fat unsalted small curd cottage cheese
FRIDGE: UP TO 5 DAYS
In a medium saucepan, combine the strawberries, sugar, cornstarch, and lemon juice over medium heat. Bring to a boil, stirring occasionally. The strawberries will release juice without any mashing required.
Reduce the heat and simmer, stirring occasionally, until the sauce is thickened, 12 to 15 minutes. Remove from the heat and let cool to room temperature. It will thicken slightly as it cools. Serve with the cottage cheese.
MEAL PREP: Divide the cottage cheese and the strawberry sauce among meal prep containers, keeping the sauce separate from the cottage cheese until ready to eat. (Use a meal prep container with compartments or use separate containers for the cottage cheese and sauce.)
SKINNY SCOOP Cottage cheese is available in different curd sizes—usually small, medium, or large. It’s an excellent source of protein for relatively few calories. It is also packed with many nutrients, including B vitamins, calcium, phosphorus, and selenium.
Per Serving (¾ cup cottage cheese + scant ⅓ cup strawberry sauce) • Calories 183 Fat 2 g • Saturated Fat 1 g • Cholesterol 7 mg • Carbohydrate 20 g • Fiber 2 g Protein 22 g • Sugars 17 g • Sodium 691 mg
Sausage, Egg, and Cheese Breakfast Sandwiches

Skip the drive-through during the morning rush and make your own breakfast sandwiches ahead of time to reheat and eat during the week. Double the recipe and you’ll have enough for the month. For a delicious variation, swap out the sausage for ham, or make them vegetarian by omitting the meat. Rise and dine!
SERVES 4
Olive oil spray
4 small chicken or turkey breakfast sausage links* (3¼ ounces total), casings removed
¼ cup diced yellow onion
½ medium red bell pepper, diced
1 garlic clove, minced
⅛ teaspoon kosher salt
Freshly ground black pepper
4 large eggs
1 tablespoon fat-free milk
4 light whole grain or gluten-free English muffins, split
4 slices (2 ounces) cheddar cheese
*Read the label to be sure this product is gluten-free.
FRIDGE: UP TO 4 DAYS
FREEZER: UP TO 3 MONTHS
Preheat the oven to 350°F. Spray an 8 × 8-inch nonstick, silicone, or glass baking dish with olive oil spray.
Spray a medium nonstick skillet with oil and heat over medium heat. Add the sausage and cook, breaking it up with a wooden spoon or spatula, until just cooked through, 3 to 4 minutes. Transfer to a plate and set aside.
In the same skillet, add the onion, bell pepper, garlic, salt, and black pepper to taste. Sauté until softened, stirring often so the garlic doesn’t burn, about 3 minutes. Transfer the veggies to the same plate with the sausage and let cool for 5 minutes.
In a large bowl, beat the eggs just until uniform. Add the milk, sausage, and veggies and mix to combine. Transfer the mixture to the prepared pan and bake until set, 18 to 20 minutes.
Let the mixture cool in the pan for 5 minutes, then slice into 4 equal squares. Alternatively, you can cut the eggs into 4 rounds using a 3¾-inch cookie cutter.
SERVE NOW: Toast the English muffins to desired doneness, divide the egg squares among the bottoms of the English muffins, top each with a slice of cheese, and add the muffin tops.
MEAL PREP: Do not toast your English muffins before assembling the sandwiches. Tightly wrap each sandwich individually in plastic wrap or foil. Store the sandwiches in the refrigerator or freezer. To reheat from the fridge, unwrap the sandwich and microwave until heated through, 45 to 60 seconds, or reheat in the toaster oven. If reheating from frozen, microwave for 2 minutes, flipping halfway through, until heated through.
Per Serving (1 sandwich) • Calories 283 • Fat 13.5 g • Saturated Fat 5.5 g • Cholesterol 216 mg • Carbohydrate 28 g • Fiber 8.5 g • Protein 19 g Sugars 3 g • Sodium 510 mg
Breakfast Quesadillas
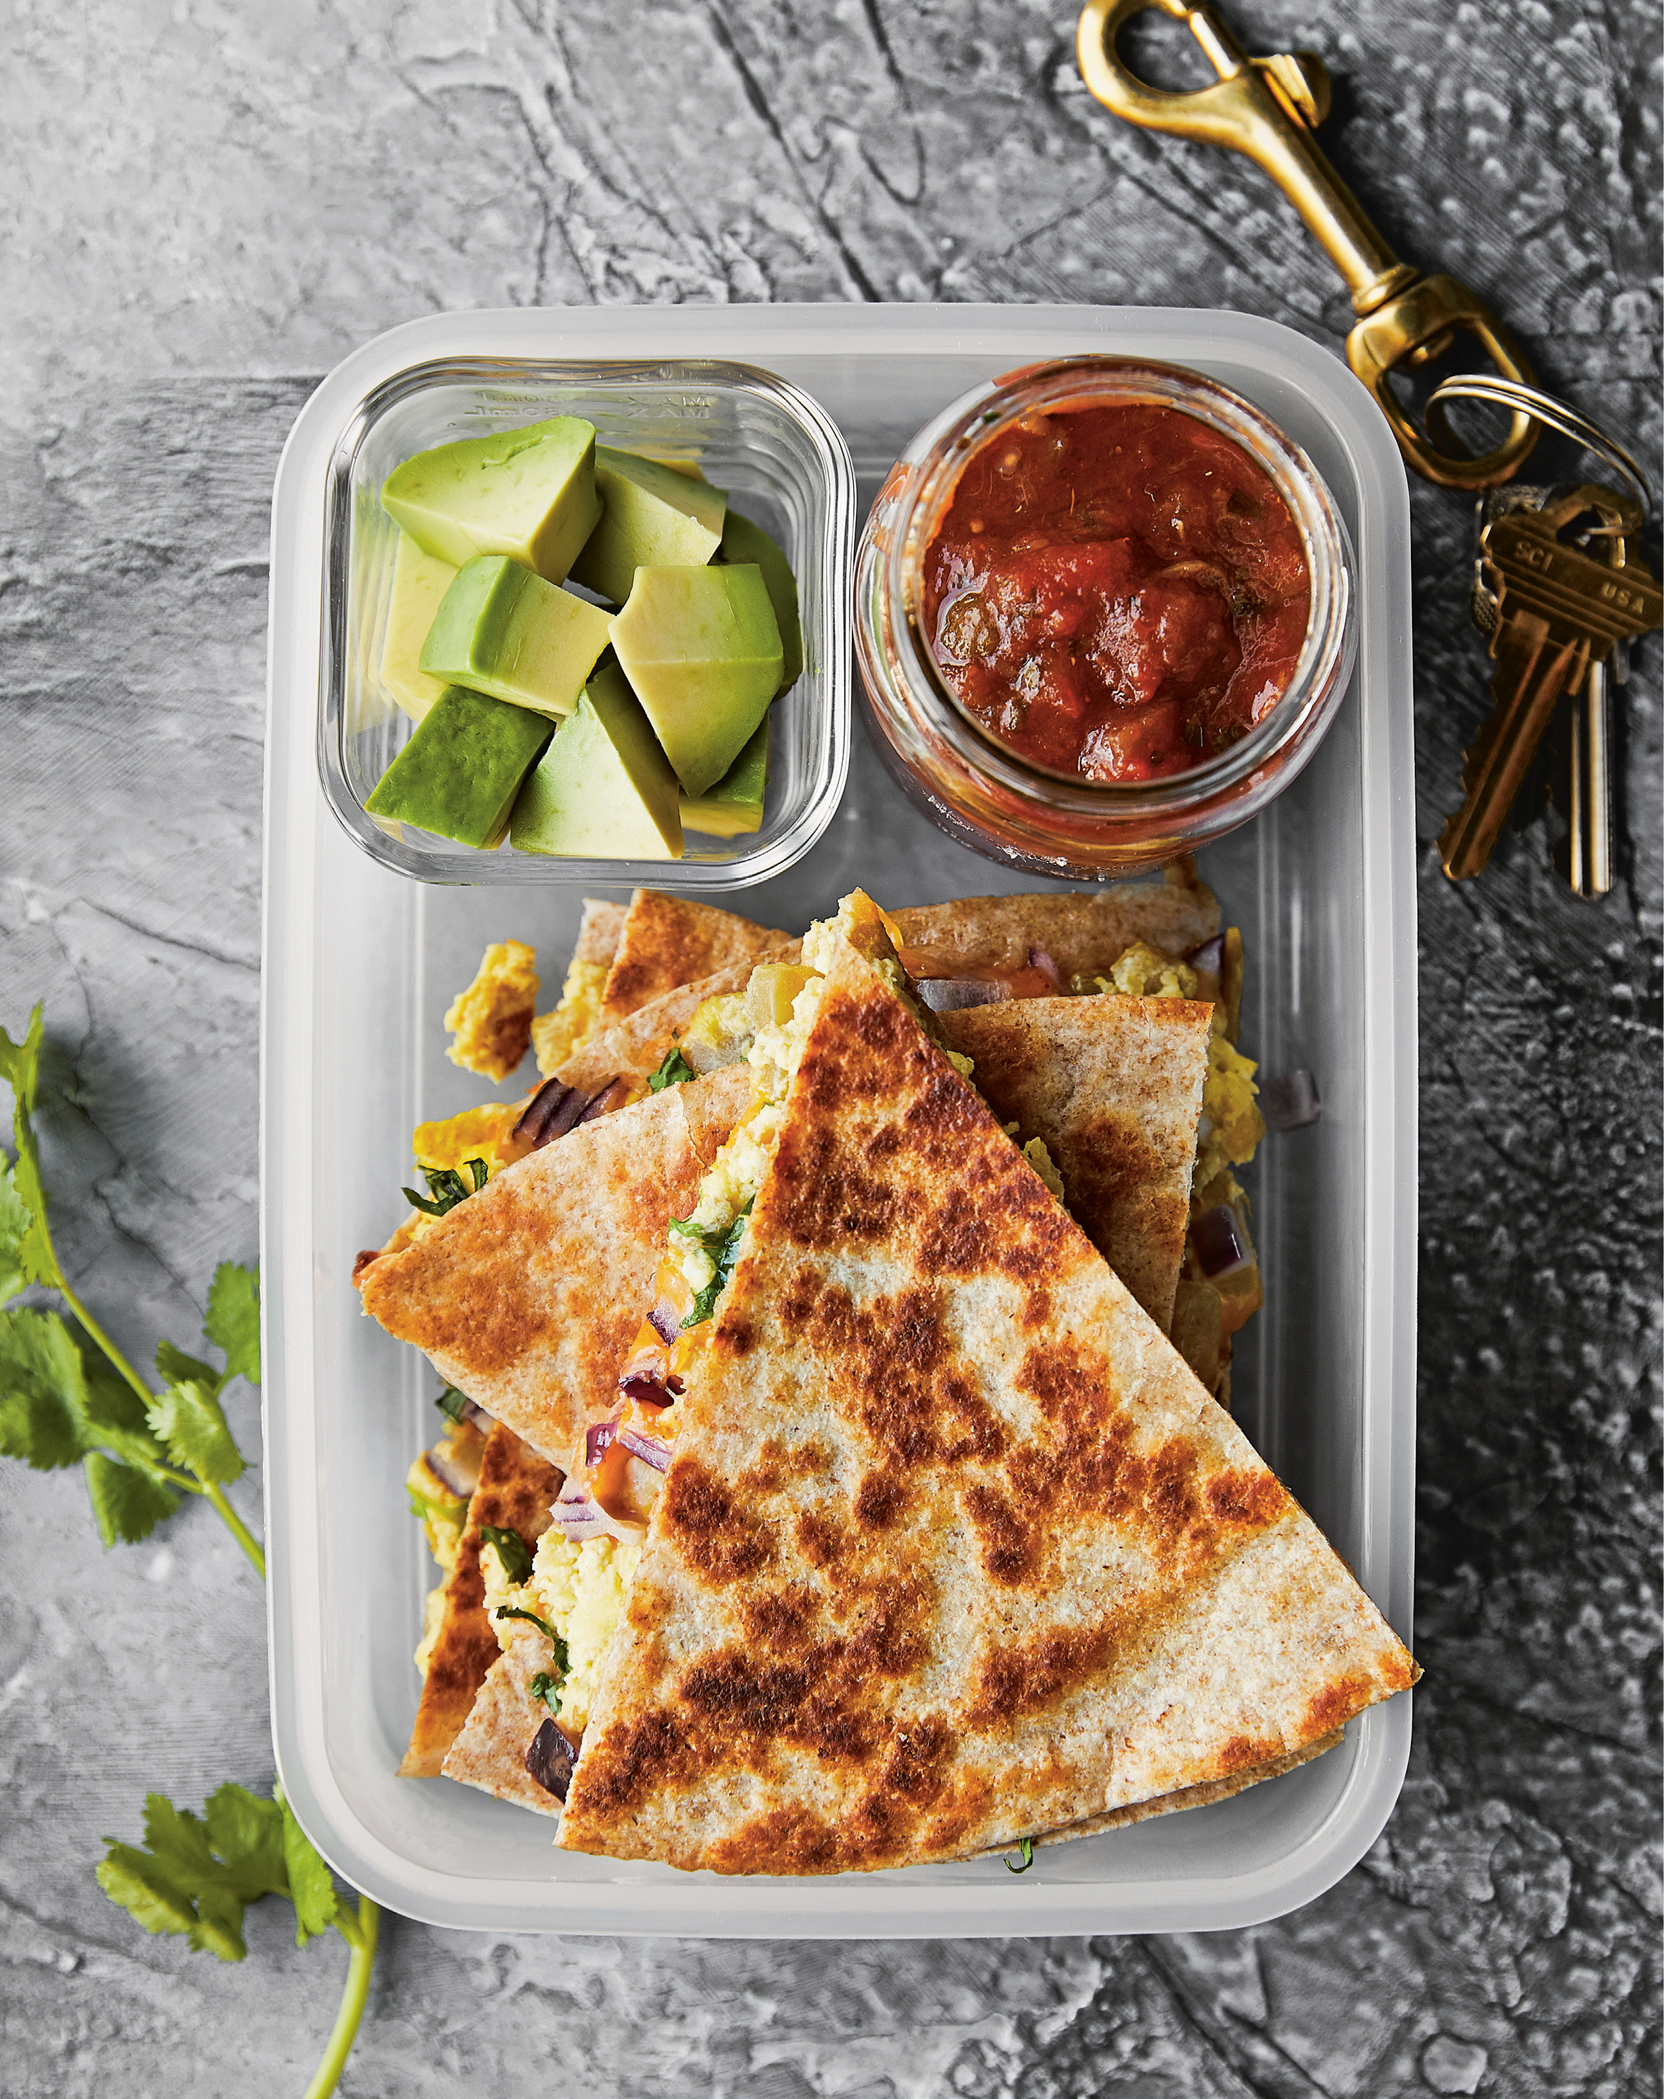
Combining two of my favorite things—quesadillas and eggs—this dish totally speaks my food love language! Fluffy scrambled eggs, green chiles, avocado, fresh herbs, and of course, cheese—I really can’t think of a better way to start your morning.
SERVES 4
6 large eggs, beaten
1 (4-ounce) can diced green chiles, drained
¼ teaspoon kosher salt
Olive oil spray
4 large (8-inch) low-carb whole wheat or gluten-free tortillas
1⅓ cups shredded reduced-fat cheddar or Mexican blend cheese*
¼ cup chopped fresh cilantro
¼ cup chopped red onion
1 cup jarred or homemade salsa, for serving
1 small (4-ounce) avocado, cut into 4 wedges, for serving
*Read the label to be sure this product is gluten-free.
FRIDGE: UP TO 5 DAYS
In a medium bowl, whisk the eggs, chiles, and salt.
Heat a large nonstick skillet over medium heat, spray with olive oil, and add the eggs. Let the eggs set on the bottom, then stir a few times until scrambled and cooked through, about 3 minutes. Transfer to a plate and set aside. Wipe the skillet clean.
Reheat the skillet over medium-high heat and spray with oil once it is really hot. Place a tortilla in the skillet and mound ⅓ cup cheese on the lower half, leaving about 1 inch around the edge. Top with one-fourth of the eggs, cilantro, and red onion, then fold in half. Cook until the cheese is melted through and the tortilla is golden on the bottom, 2 to 3 minutes. Set aside and repeat with the remaining 3 tortillas. Cut each into wedges. Serve hot with salsa and avocado.
MEAL PREP: Place the quesadillas and salsa into separate airtight containers and store in the fridge. When ready to eat, serve at room temperature or reheat (see Skinny Scoop). Add the avocado the morning you plan on eating the quesadillas to avoid browning.
SKINNY SCOOP Quesadillas are some of my favorite things to meal prep, but I don’t recommend reheating them in the microwave, or they’ll get soggy. Instead, I eat them at room temperature if I’ve packed them to take with me, or if I’m home I reheat them on a skillet or in my air fryer.
For recipes with avocado for meal prep, it’s best to cut the avocado the morning you are going to eat it and wrap the rest tightly with plastic wrap. A squeeze of lime juice on the avocado will help prevent it from browning.
Per Serving (1 quesadilla + ¼ cup salsa + 1 ounce avocado) • Calories 337 • Fat 21 g Saturated Fat 7.5 g • Cholesterol 299 mg • Carbohydrate 26 g • Protein 25 g Fiber 14.5 g • Sugars 4 g • Sodium 1,148 mg
Italian Sausage and Ricotta Frittata

My husband Tommy’s dad is a Brooklyn-born Italian, and this is the only frittata his family prepares for parties, holidays, or even simple family lunches or dinners. I’ve had it on many a Sunday while visiting his family, and I’ve always loved the flavorful simplicity of this dish. I lightened mine up using less ricotta and Italian chicken sausage, and Tommy never even knew! Serve this with a salad, olives, and some good Italian bread.
SERVES 4
Cooking spray
8 large eggs
½ cup freshly grated Pecorino Romano cheese
¼ cup chopped fresh parsley
¾ teaspoon kosher salt
Freshly ground black pepper
2 links Italian chicken sausage,* casings removed
½ cup part-skim ricotta cheese (I like Polly-O)
Whole wheat Italian bread, for serving (optional)
*Read the label to be sure this product is gluten-free.
FRIDGE: UP TO 4 DAYS
Adjust an oven rack to the second highest position. Preheat the oven to 350°F. Lightly spray a 10-inch ovenproof skillet with cooking spray.
In a medium bowl, whisk the eggs, Pecorino, parsley, salt, and pepper to taste. Set aside.
In the ovenproof skillet over medium heat, add the sausages and use a wooden spoon to break them up into small pieces. Cook until browned and cooked through, about 4 minutes.
Add the egg mixture to the skillet, and use a tablespoon to dollop it with the ricotta. Bake until the top is set, 16 to 18 minutes.
Switch the oven to broil (high) and cook the frittata an additional 3 to 4 minutes, until the top is browned.
With a spatula, carefully slide the frittata out of the skillet onto a cutting board and cut into 4 even wedges.
MEAL PREP: Divide among 4 airtight containers and store in the fridge. When ready to eat, reheat and serve with Italian bread (if using).
Per Serving (1 wedge) • Calories 296 • Fat 18.5 g • Saturated Fat 7.5 g • Cholesterol 420 mg • Carbohydrate 4 g • Fiber 0 g • Protein 27 g Sugars 0.5 g • Sodium 834 mg
Classic Egg Salad

You can always find at least one batch of egg salad in my refrigerator. It’s the perfect, simple make-ahead dish for breakfast or lunch, and sometimes I even eat it right out of the bowl with a spoon! I also love it over whole grain toast or in a wrap.
SERVES 4
6 large hard-boiled eggs, peeled and roughly chopped
3 tablespoons mayonnaise
1 teaspoon finely chopped red onion
¼ teaspoon kosher salt
Freshly ground black pepper
⅛ teaspoon sweet paprika, for garnish
Chopped fresh chives, for garnish
FRIDGE: UP TO 4 DAYS
Combine all the ingredients in a medium bowl and refrigerate until ready to eat.
SKINNY SCOOP For variations, add pickle juice or diced pickles, capers, or Dijon mustard. You can also add veggies like chopped celery or carrots, or swap the chives for fresh dill.
Per Serving (½ cup) • Calories 191 • Fat 16 g • Saturated Fat 3.5 g • Carbohydrate 1 g • Cholesterol 320 mg • Fiber 0 g • Protein 10 g Sugars 1 g • Sodium 337 mg
Instant Pot Egg White Steel-Cut Oats

Steel-cut oatmeal is the ultimate wholesome comfort breakfast food, especially when you pile on good-for-you toppings and add-ins. For instance, mixing in egg whites is a total game-changer! It makes the oatmeal so fluffy and contributes extra protein. And you can’t even taste it (a bonus for picky eaters). Fresh fruit and peanut butter are my favorite oatmeal toppings. Keep in mind that the base of this recipe is basically a blank canvas, so you can play around with different nut butters and dried fruit options, in addition to other toppings, like maple syrup, walnuts, and cinnamon. I make a big batch once on the weekend (thanks to the Instant Pot, it’s so easy!) and have breakfast ready for the week. Transfer them to individual mason jars and refrigerate, then pop them in the microwave for breakfast on-the-run.
SERVES 5
1 cup steel-cut oats*
3 cups water
½ cup unsweetened nut milk or milk of your choice
1 tablespoon honey
1 teaspoon vanilla extract
½ cup egg whites (from 3 large eggs)
1¼ cups fresh fruit (sliced strawberries and banana is my favorite combo)
5 tablespoons smooth peanut butter
2½ teaspoons hemp seed hearts
*Read the label to be sure this product is gluten-free.
FRIDGE: UP TO 6 DAYS
Combine the oats and water in your Instant Pot (or any electric pressure cooker) and stir. Cover and cook for 6 minutes on high pressure. Allow the pressure to naturally release.
In a medium bowl, whisk the milk, honey, vanilla, and egg whites. Add to the oats, stirring constantly to mix in without making scrambled egg whites. Divide among 5 bowls. Top each bowl with ¼ cup fresh fruit. In a small microwave-safe bowl, melt the peanut butter in the microwave for 30 seconds or less. Whisk and drizzle 1 tablespoon over each bowl. Top each with ½ teaspoon hemp seeds.
MEAL PREP: Divide the oats among 5 glass jars or microwave-safe containers and let cool before storing. When ready to serve, microwave for 2 to 3 minutes, until warmed through. Top as directed.
SKINNY SCOOP To make this on the stove, in a large pot bring 4 cups water to a boil. Stir in the oats and cook until they begin to thicken, about 5 minutes. Reduce the heat to low and simmer, uncovered, stirring frequently, until thickened and cooked, about 30 minutes. Remove from the heat, let cool slightly for 5 minutes, then add the remaining ingredients.
Per Serving (generous ¾ cup oats + toppings) • Calories 295 • Fat 12.5 g • Saturated Fat 2.5 g • Cholesterol 0 mg • Carbohydrate 35 g • Fiber 5.5 g • Protein 12 g • Sugars 9 g • Sodium 131 mg
Almond Flour Banana Crumb Muffins

In our house, the bananas seem to get ripe faster than we can eat them…sound familiar? But that’s never a problem, because my family loves when I bake banana muffins, so the riper the better! These muffins are loaded with bananas, and instead of using wheat flour, I make them gluten- and grain-free with almond and coconut flours. For the crumb topping, I simply chop up the almonds and mix them with brown sugar. They come out so incredibly moist!
SERVES 12
1 cup almond flour
⅓ cup coconut flour
2 teaspoons baking powder
½ teaspoon baking soda
¼ teaspoon kosher salt
2 tablespoons unsalted butter, at room temperature
⅓ cup unpacked light brown sugar
2 large eggs
3 medium very ripe bananas, mashed (1⅔ cups)
½ teaspoon vanilla extract
CRUMB TOPPING
¼ cup finely chopped almonds
¼ cup packed light brown sugar
ROOM TEMPERATURE: UP TO 2 DAYS
FRIDGE: UP TO 5 DAYS
FREEZER: UP TO 3 MONTHS (TO REHEAT, MICROWAVE FOR A FEW SECONDS UNTIL WARM OR THAW IN THE FRIDGE)
Preheat the oven to 325°F. Line a standard 12-cup muffin tin with liners.
In a medium bowl, whisk together the flours, baking powder, baking soda, and salt. Set aside.
In a large bowl, combine the butter and sugar and cream together with an electric mixer. Add the eggs, bananas, and vanilla. Beat at medium speed until thick. Scrape down the sides of the bowl. Add the flour mixture, then blend at low speed until just combined.
Make the almond-crumb topping: In a small bowl, combine the almonds and sugar.
Scoop the batter into the muffin tin, then evenly divide the crumb mixture over the top. Bake until a toothpick inserted in the center comes out clean, 35 to 40 minutes. Let cool and serve.
MEAL PREP: Once completely cool, wrap the muffins individually in plastic wrap and store.
Per Serving (1 muffin) • Calories 175 • Fat 8.5 g • Saturated Fat 2 g Cholesterol 36 mg • Carbohydrate 21 g • Fiber 3 g • Protein 5 g Sugars 13.5 g • Sodium 185 mg
Greek Yogurt Raspberry Loaf
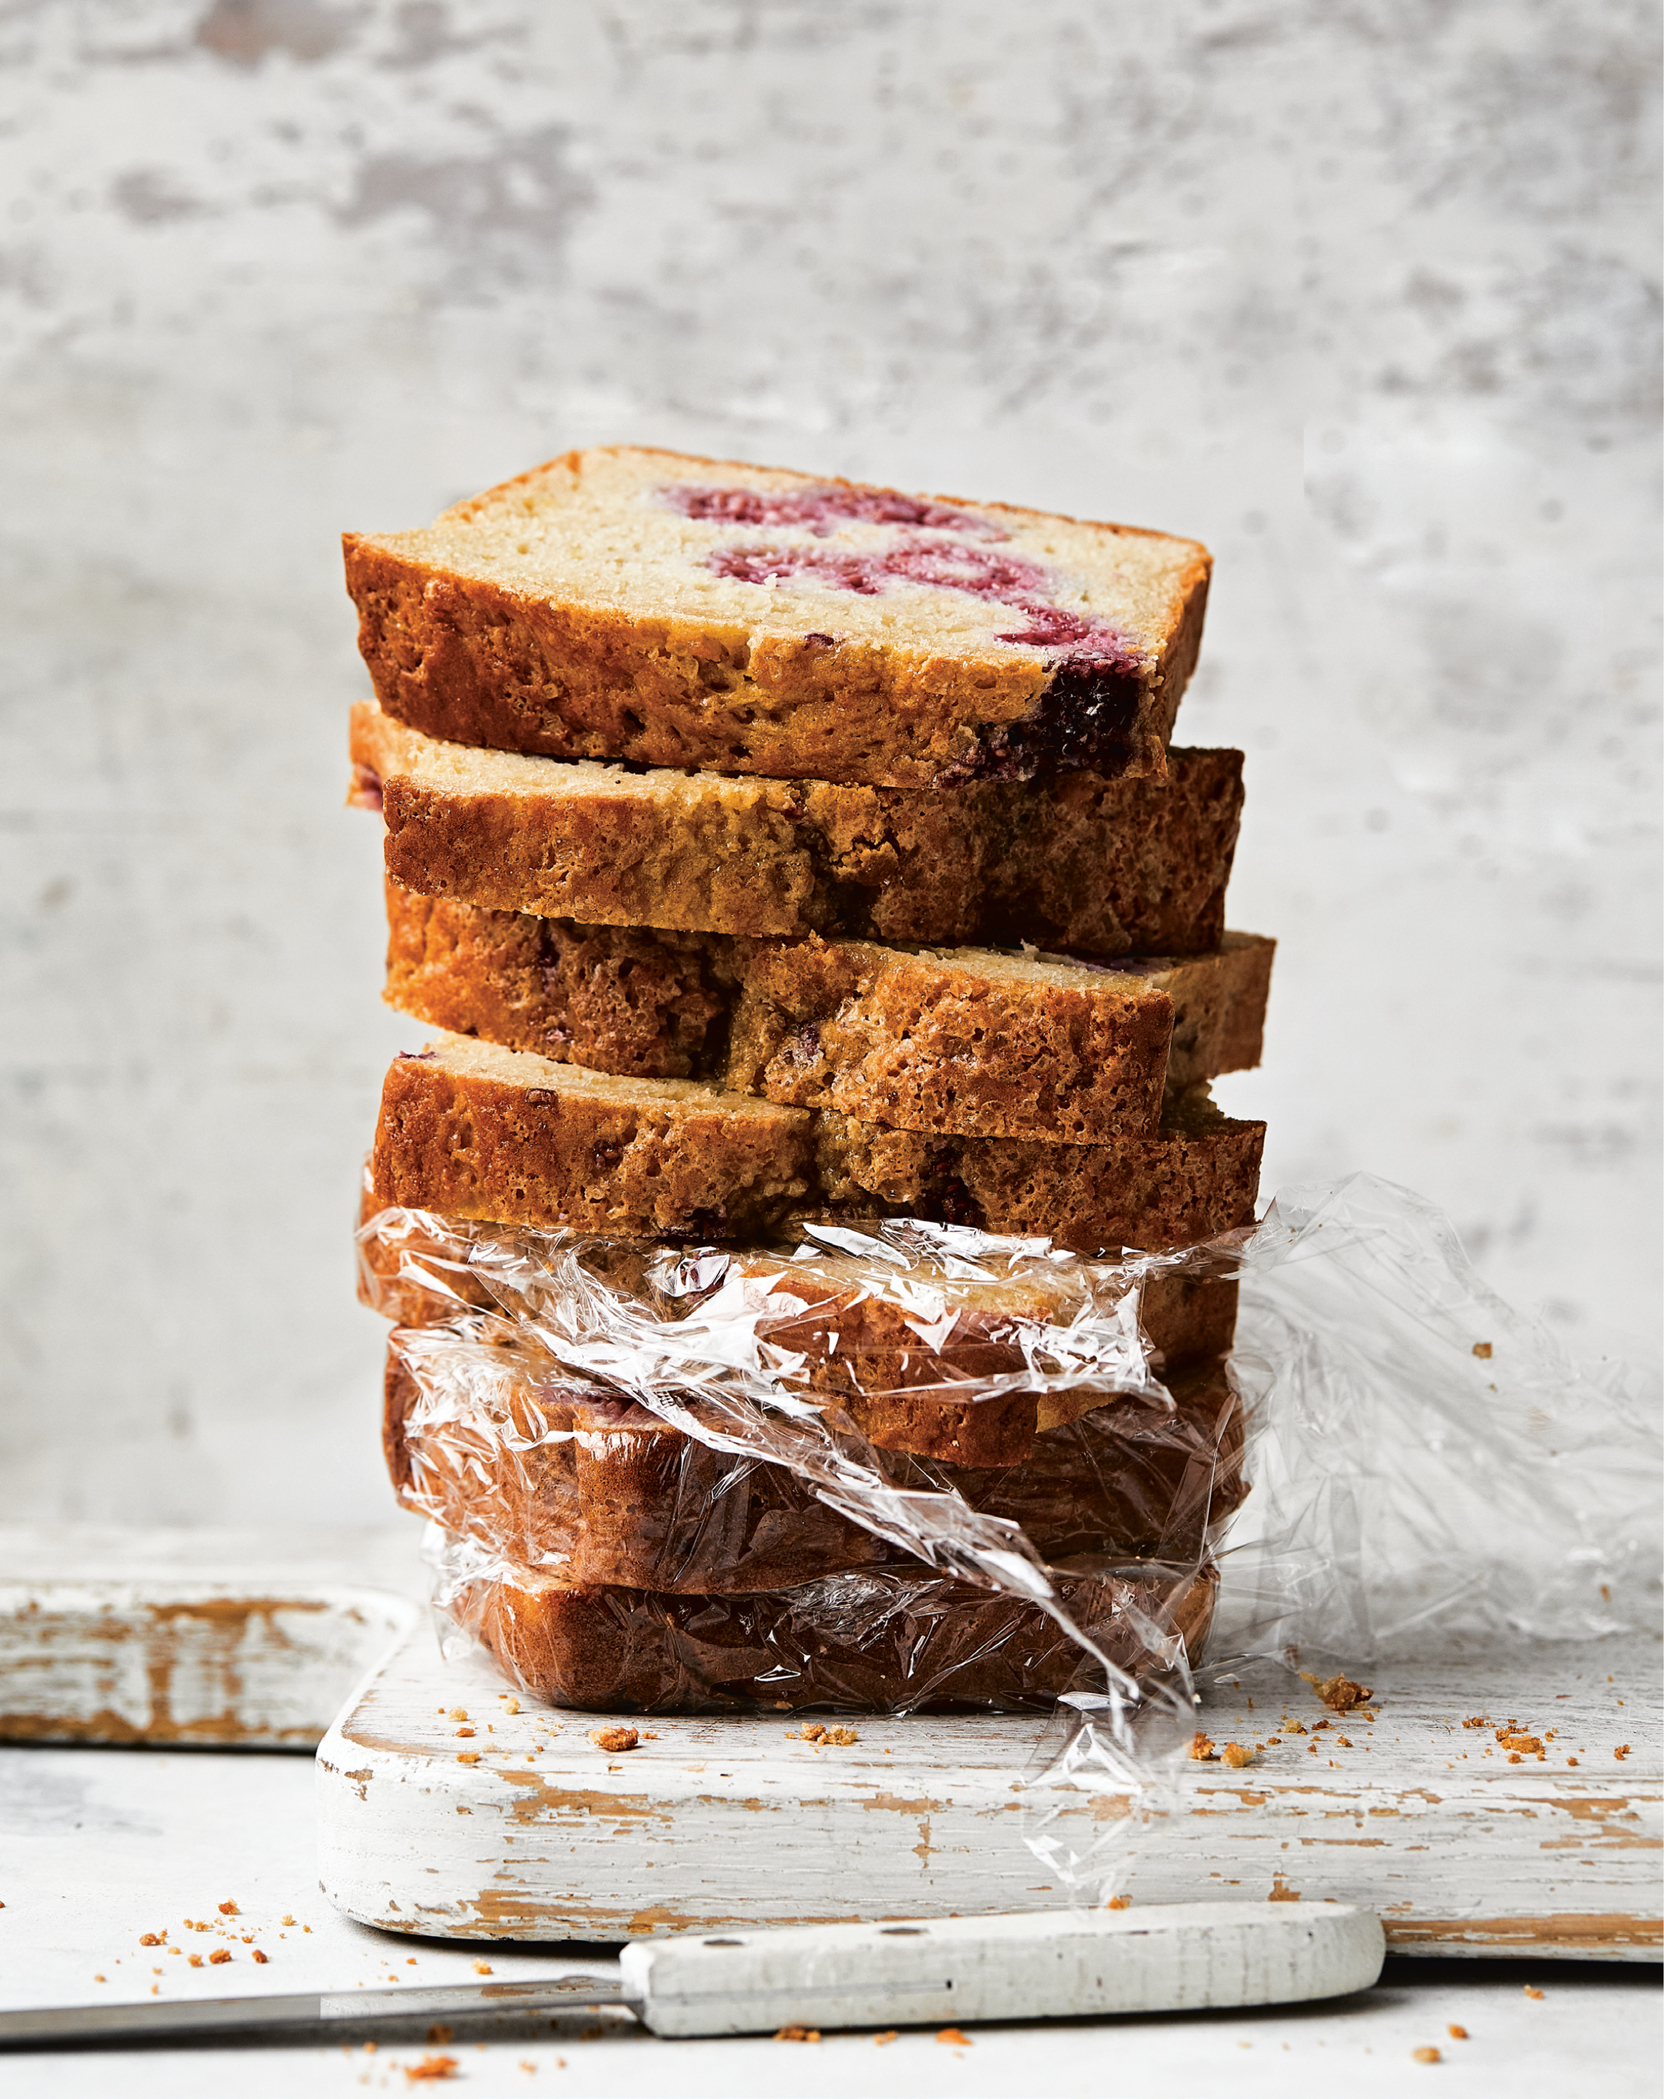
As much as I love to bake, I don’t have the time for it each day—there’s just too much going on during the week. Instead, I bake on the weekends with my kids and freeze whatever we don’t eat (quick breads like this freeze really well). Having a small stash of home-baked goodness, like this moist Greek yogurt loaf, in your freezer will bring much-appreciated comfort on busy mornings.
SERVES 12
Olive oil spray
1½ cups fresh raspberries
1¾ cups all-purpose flour
1½ teaspoons baking powder
½ teaspoon baking soda
½ teaspoon kosher salt
¾ cup turbinado sugar
3 tablespoons unsalted butter, at room temperature
2 large eggs
3 large egg whites
1 teaspoon vanilla extract
Grated zest from 1 lemon
1 cup nonfat plain Greek yogurt
FRIDGE: UP TO 4 DAYS
FREEZER: UP TO 3 MONTHS (TO REHEAT, MICROWAVE FOR A FEW SECONDS UNTIL WARM OR THAW IN THE FRIDGE)
Preheat the oven to 350°F.
Spray a 5 × 9-inch loaf pan with oil.
In a medium bowl, toss the berries with 1 tablespoon flour and set aside.
In a large bowl, mix the remaining flour with the baking powder, baking soda, and salt.
Reserve 1 tablespoon sugar and set aside. In another medium bowl, use an electric mixer on medium speed to beat the butter and remaining sugar until fluffy, about 2 minutes.
In a small bowl, use a whisk to beat the eggs, egg whites, and vanilla until smooth. Add to the butter-sugar mixture and mix with an electric mixer on medium-high speed until combined, about 30 seconds. Add the lemon zest and briefly mix until combined, about 10 seconds. Add the flour mixture and mix on low speed until combined, about 30 seconds. Fold in the yogurt with a spatula, then fold in the raspberries. Pour into the prepared pan and sprinkle with the reserved 1 tablespoon sugar.
Bake until the top is golden and a toothpick inserted in the center comes out clean, 50 to 55 minutes. Let cool for 1 to 2 hours before eating.
MEAL PREP: Let the loaf cool, then cut into slices and wrap the slices individually in plastic wrap. Transfer the wrapped slices to a large zip-top storage bag and store.
Per Serving (1 slice) • Calories 174 • Fat 4 g • Saturated Fat 2 g Cholesterol 39 mg • Carbohydrate 29 g • Fiber 1.5 g • Protein 6 g Sugars 13 g • Sodium 197 mg