Big Batches & Planned-Overs


 Pollo Asado (Latin Rotisserie-Style Roasted Chicken)
 Chicken and Broccoli Rabe Wraps
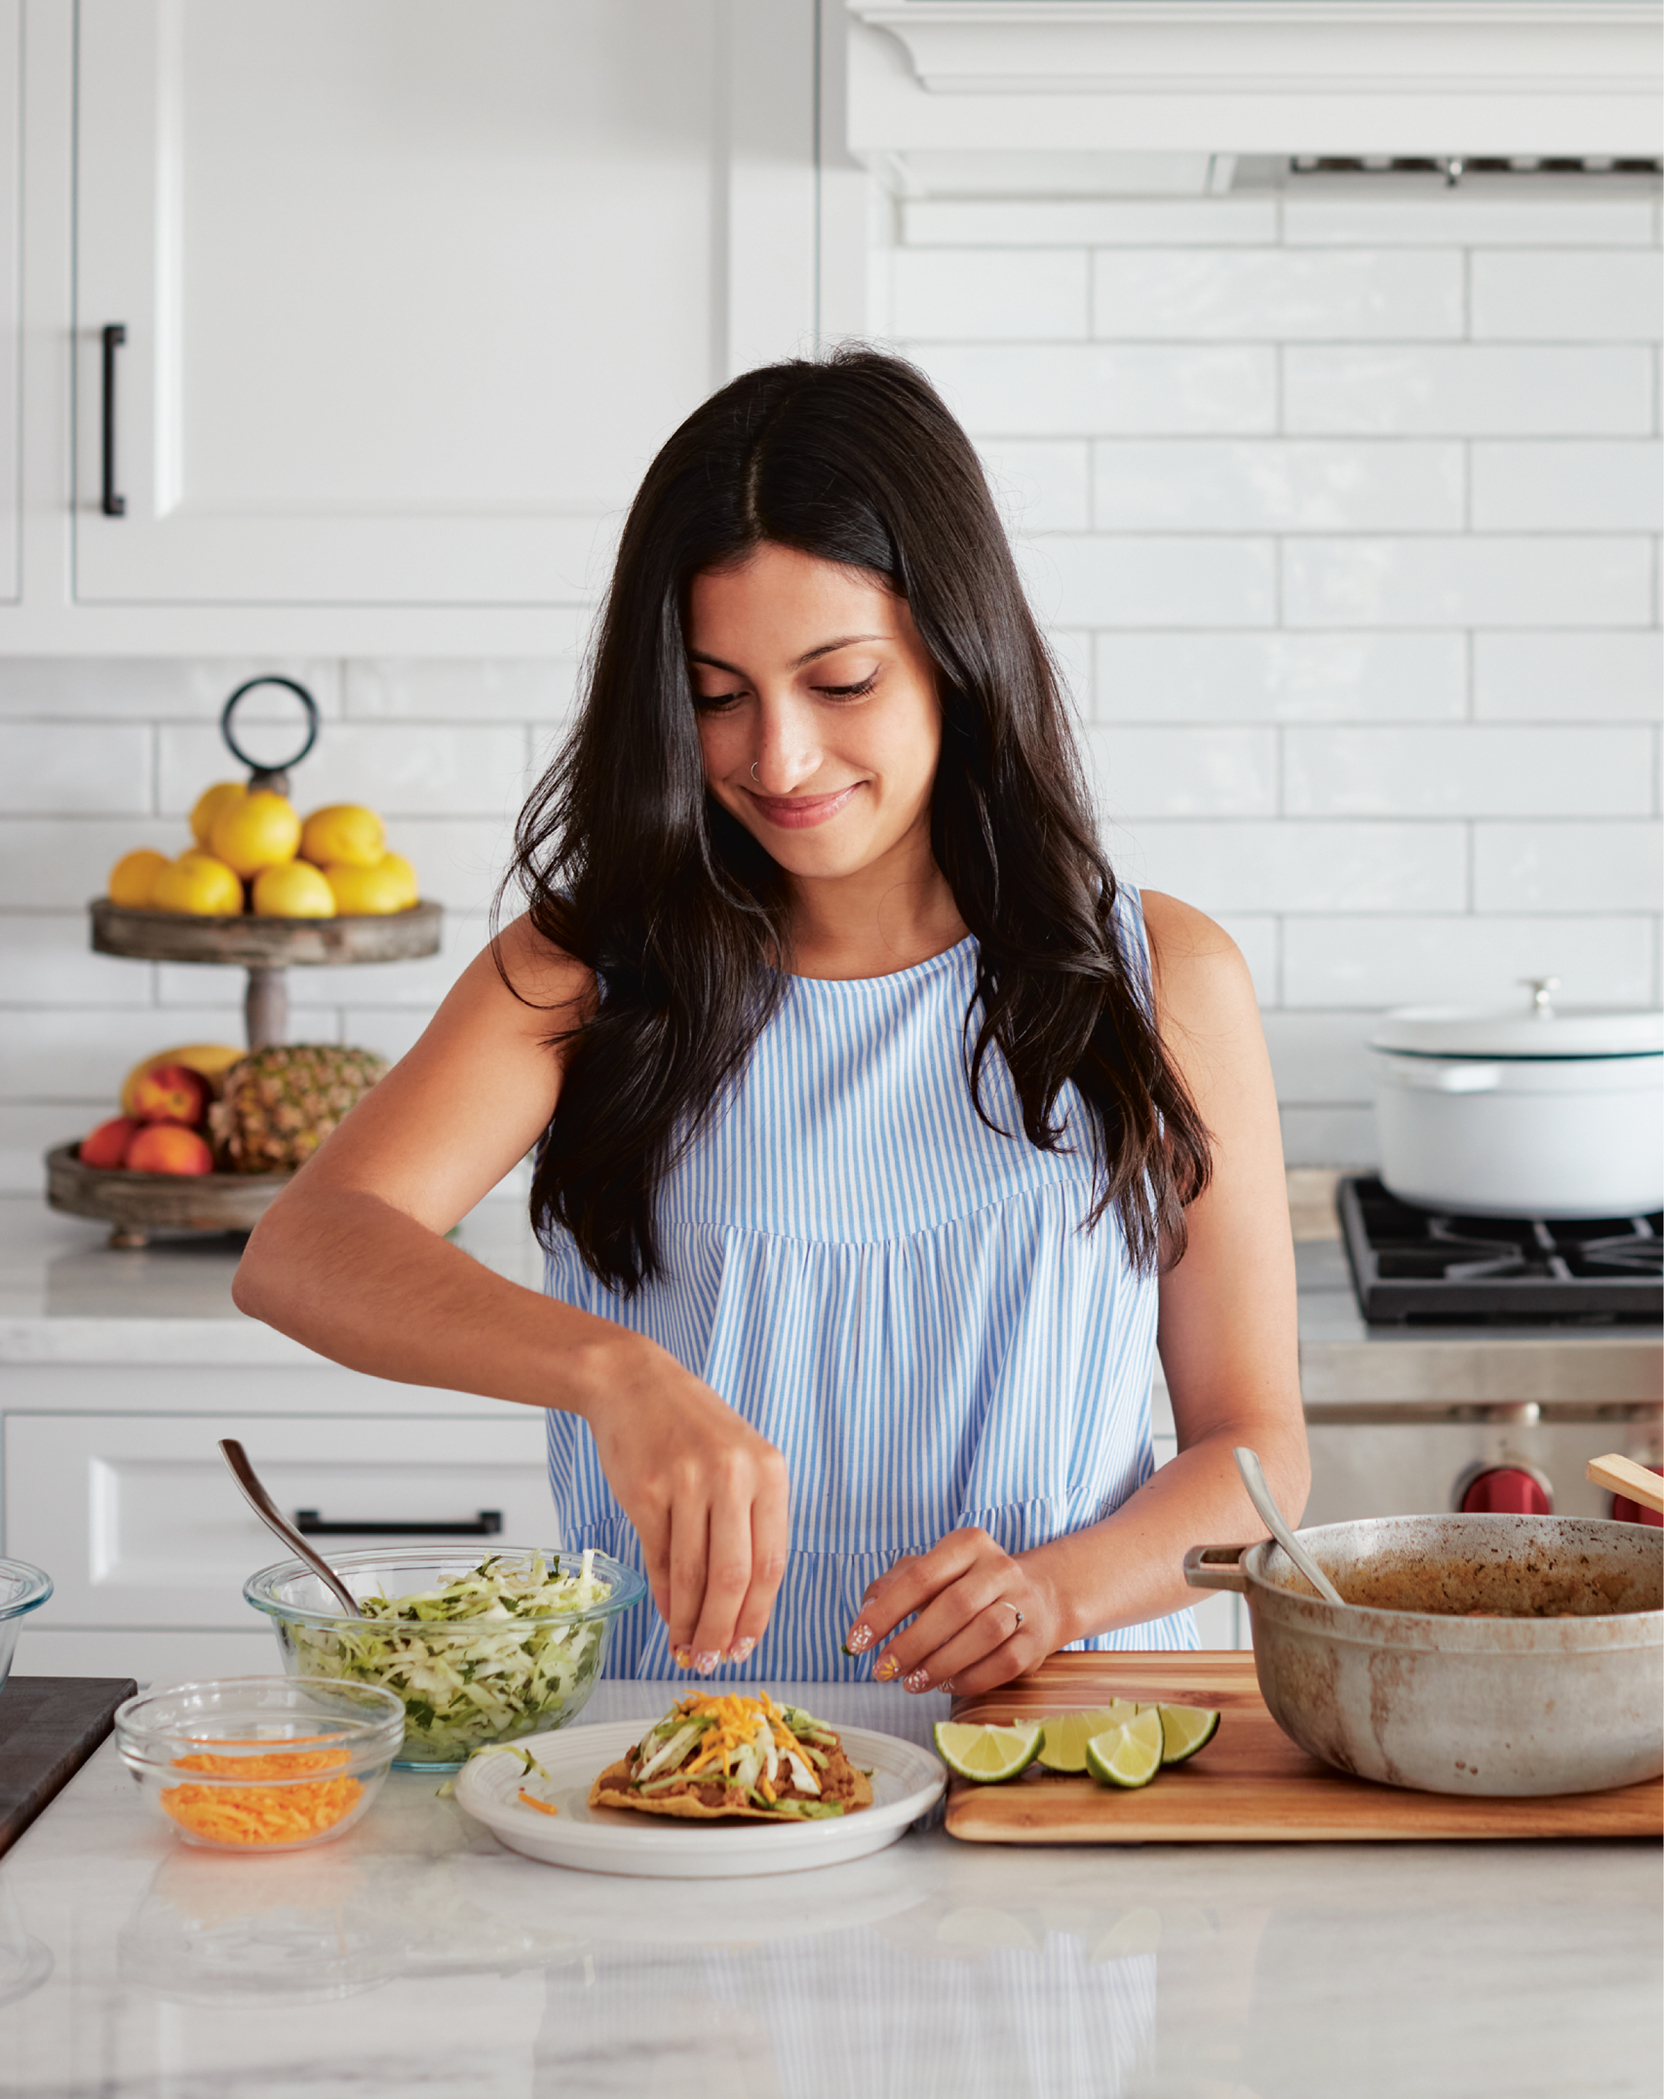
Rotisserie Summer Chicken Bowls with Smoked Paprika Aioli
Sheet Pan Herb Salmon with Broccolini and Tomatoes
Salmon Fried Rice with Asparagus
 Slow Cooker Italian Pulled Pork
Pork Shoulder Ragu with Cauliflower Polenta
Five-Spice Glazed Pork Tenderloin
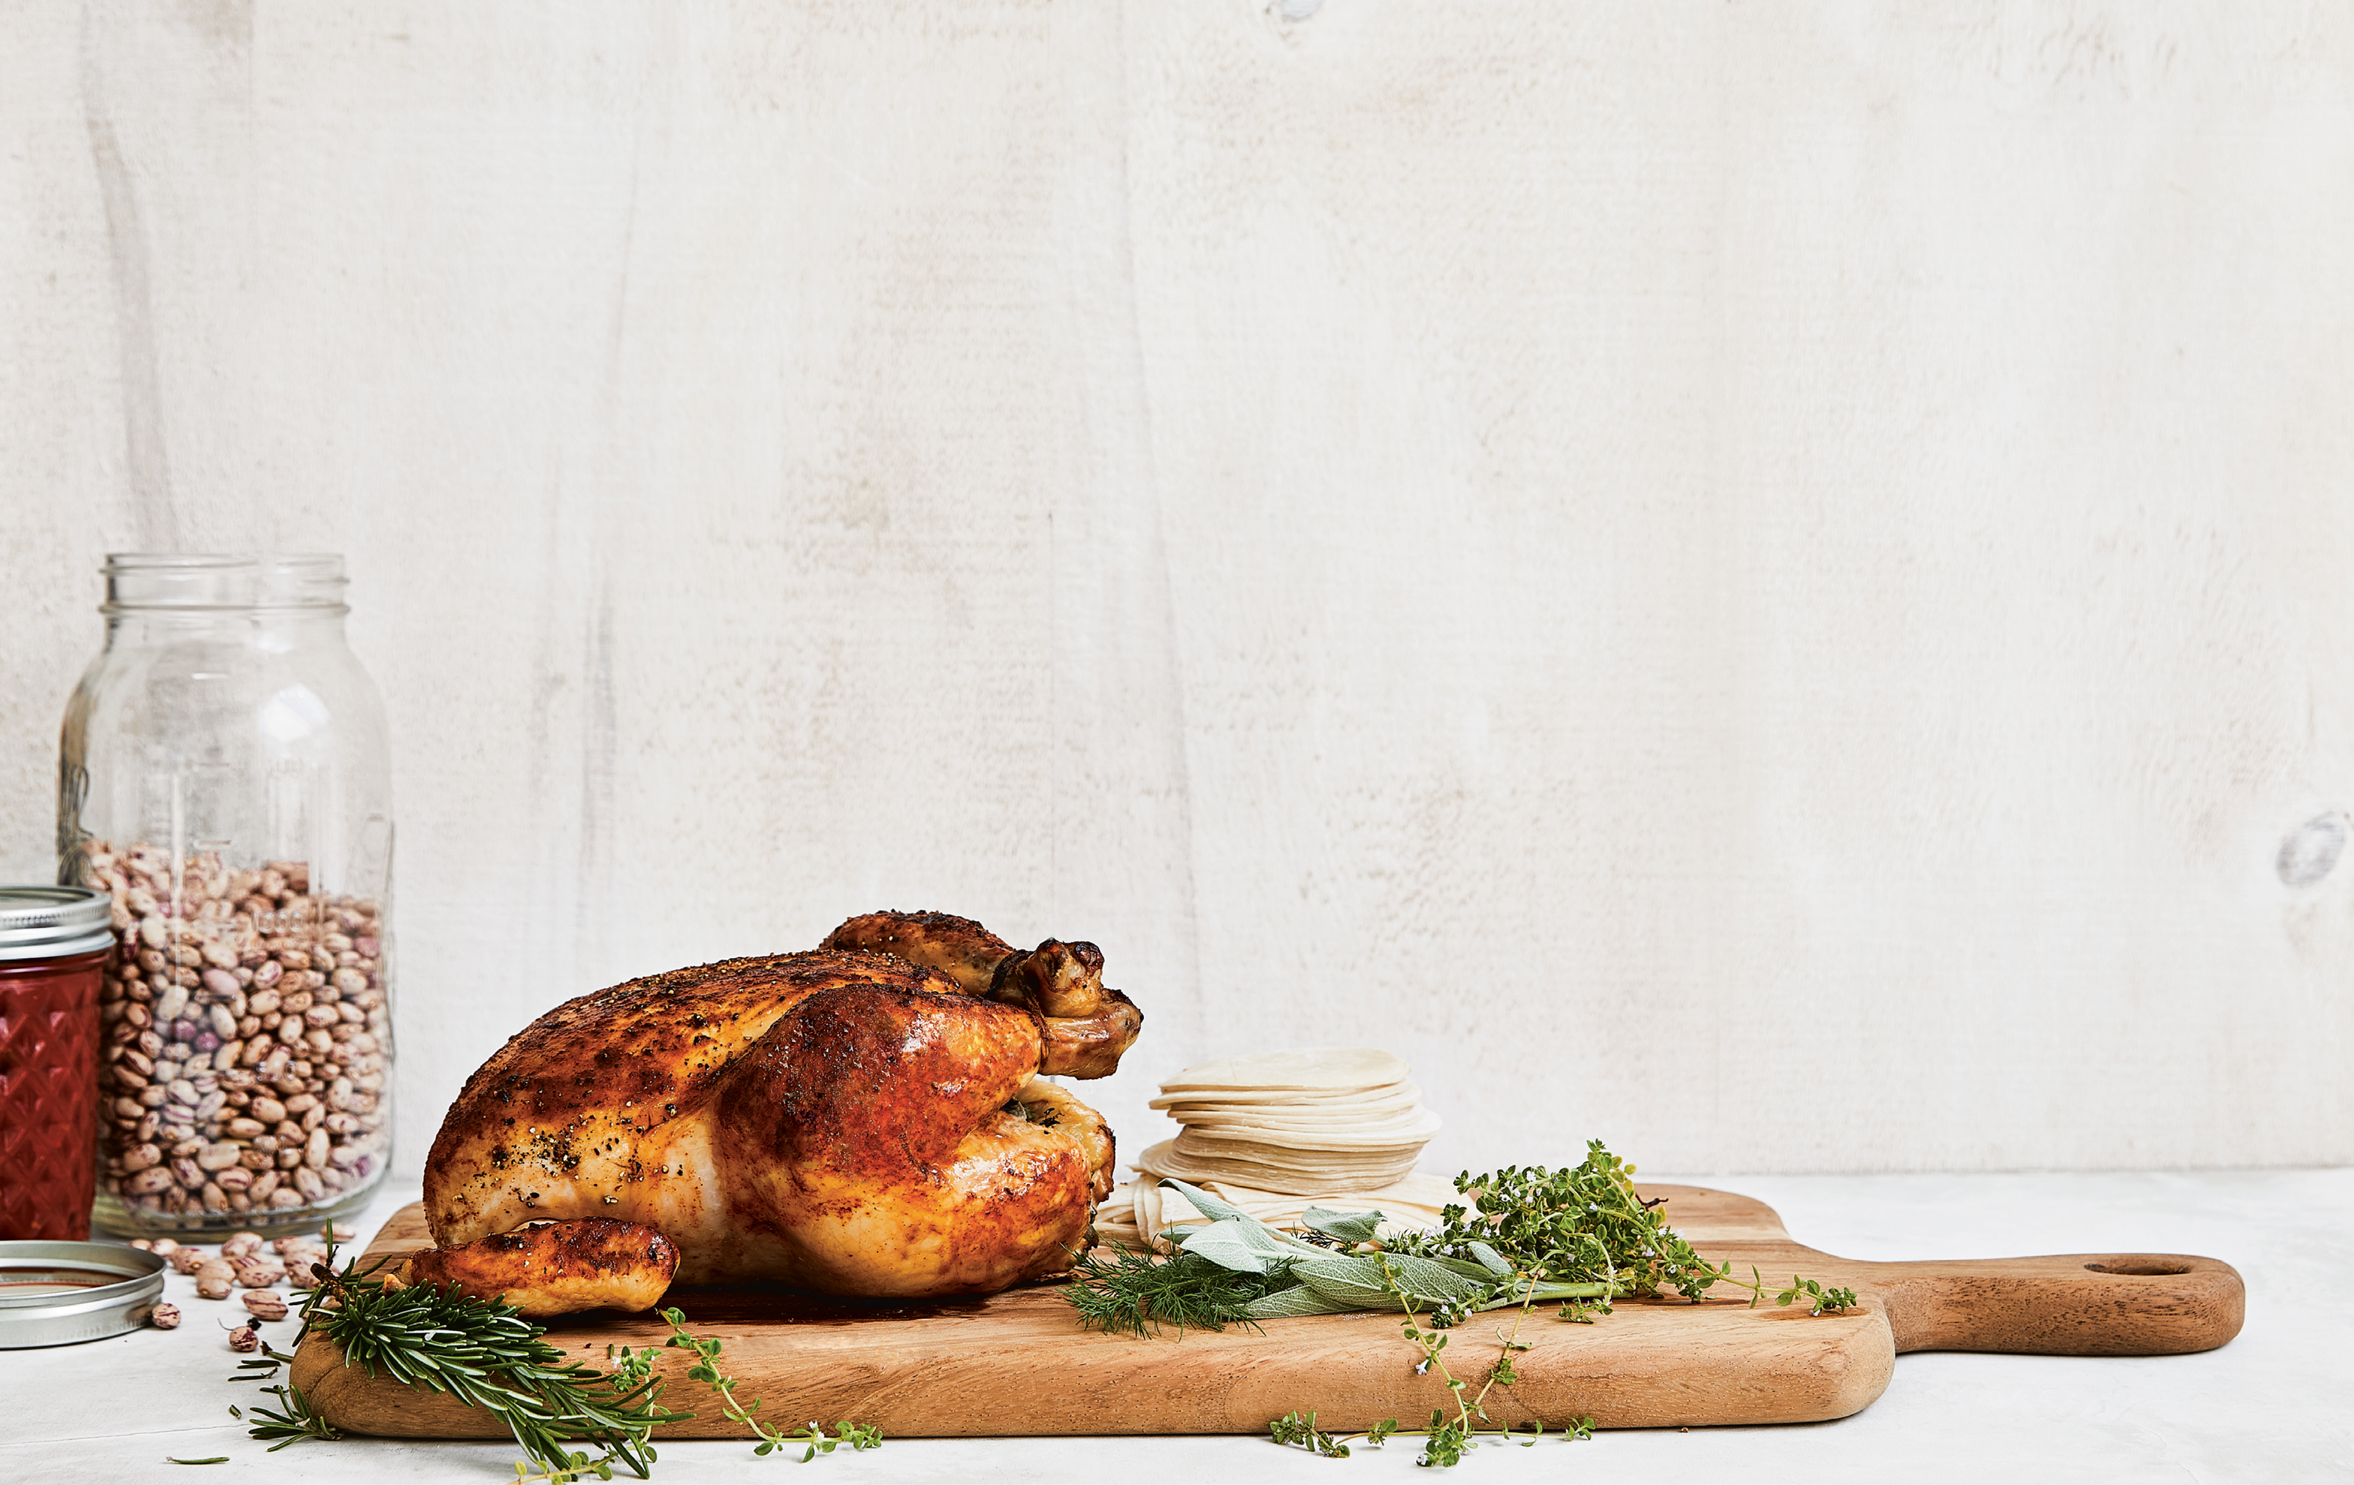
Paprika Roasted Whole Chicken

BIG BATCH
When I want a crispy-skinned, golden, and juicy roasted chicken for dinner, this is my go-to, tried-and-true recipe. Of course, nothing beats the convenience of picking up a rotisserie chicken from the grocery store, but making it from scratch is so much tastier and more satisfying. And this recipe is so simple that after making it a few times you’ll know it by heart. One of my favorite meal-prep tricks is cooking two birds at the same time; one for dinner that night, and the other to transform into weeknight dishes. This trick maximizes time and money without sacrificing a drop of flavor. The following pages have lots of suggestions to make planned-overs if you cook a second bird.
SERVES 4
1 (3½- to 4-pound) whole chicken, giblets removed, patted dry with paper towels
2 teaspoons kosher salt
1 teaspoon sweet paprika
½ teaspoon garlic powder
¼ teaspoon black pepper
2 sprigs of fresh rosemary
2 sprigs of fresh thyme
2 sprigs of fresh sage
2 medium shallots, quartered
FRIDGE: UP TO 4 DAYS
Season the chicken inside and out with the salt, paprika, garlic powder, and pepper. Refrigerate it uncovered for at least 1 hour or up to overnight.
When ready to roast the chicken, preheat the oven to 425°F.
Transfer the chicken, breast side up, to a roasting pan or large rimmed sheet pan, and stuff the cavity with the rosemary, thyme, sage, and shallots.
Roast the chicken with the feet toward the back of the oven for about 50 minutes. Remove and baste the chicken with the pan juices, then continue roasting until the juices run clear and the chicken is no longer pink when the thigh is pierced with a paring knife near the joint, or the internal temperature is 160°F (insert a meat thermometer between the thickest part of the leg and the thigh), 5 to 10 minutes more.
Let the bird rest for 10 minutes before carving. Serve the chicken with or without skin.
SKINNY SCOOP It’s best to use an organic air-chilled chicken, which is fed a better diet and also tastes better. Nutritional values will vary depending on which part of the chicken you eat, and if you serve it with or without the skin.
Big Batch: Make two chickens and carve and refrigerate the second one to use for planned-over recipes on this page, this page, and this page.
Per Serving (¼ skinless chicken) • Calories 288 • Fat 10.5 g • Saturated Fat 3 g Cholesterol 127 mg • Carbohydrate 4 g • Fiber 1 g • Protein 42 g Sugars 2 g • Sodium 685 mg
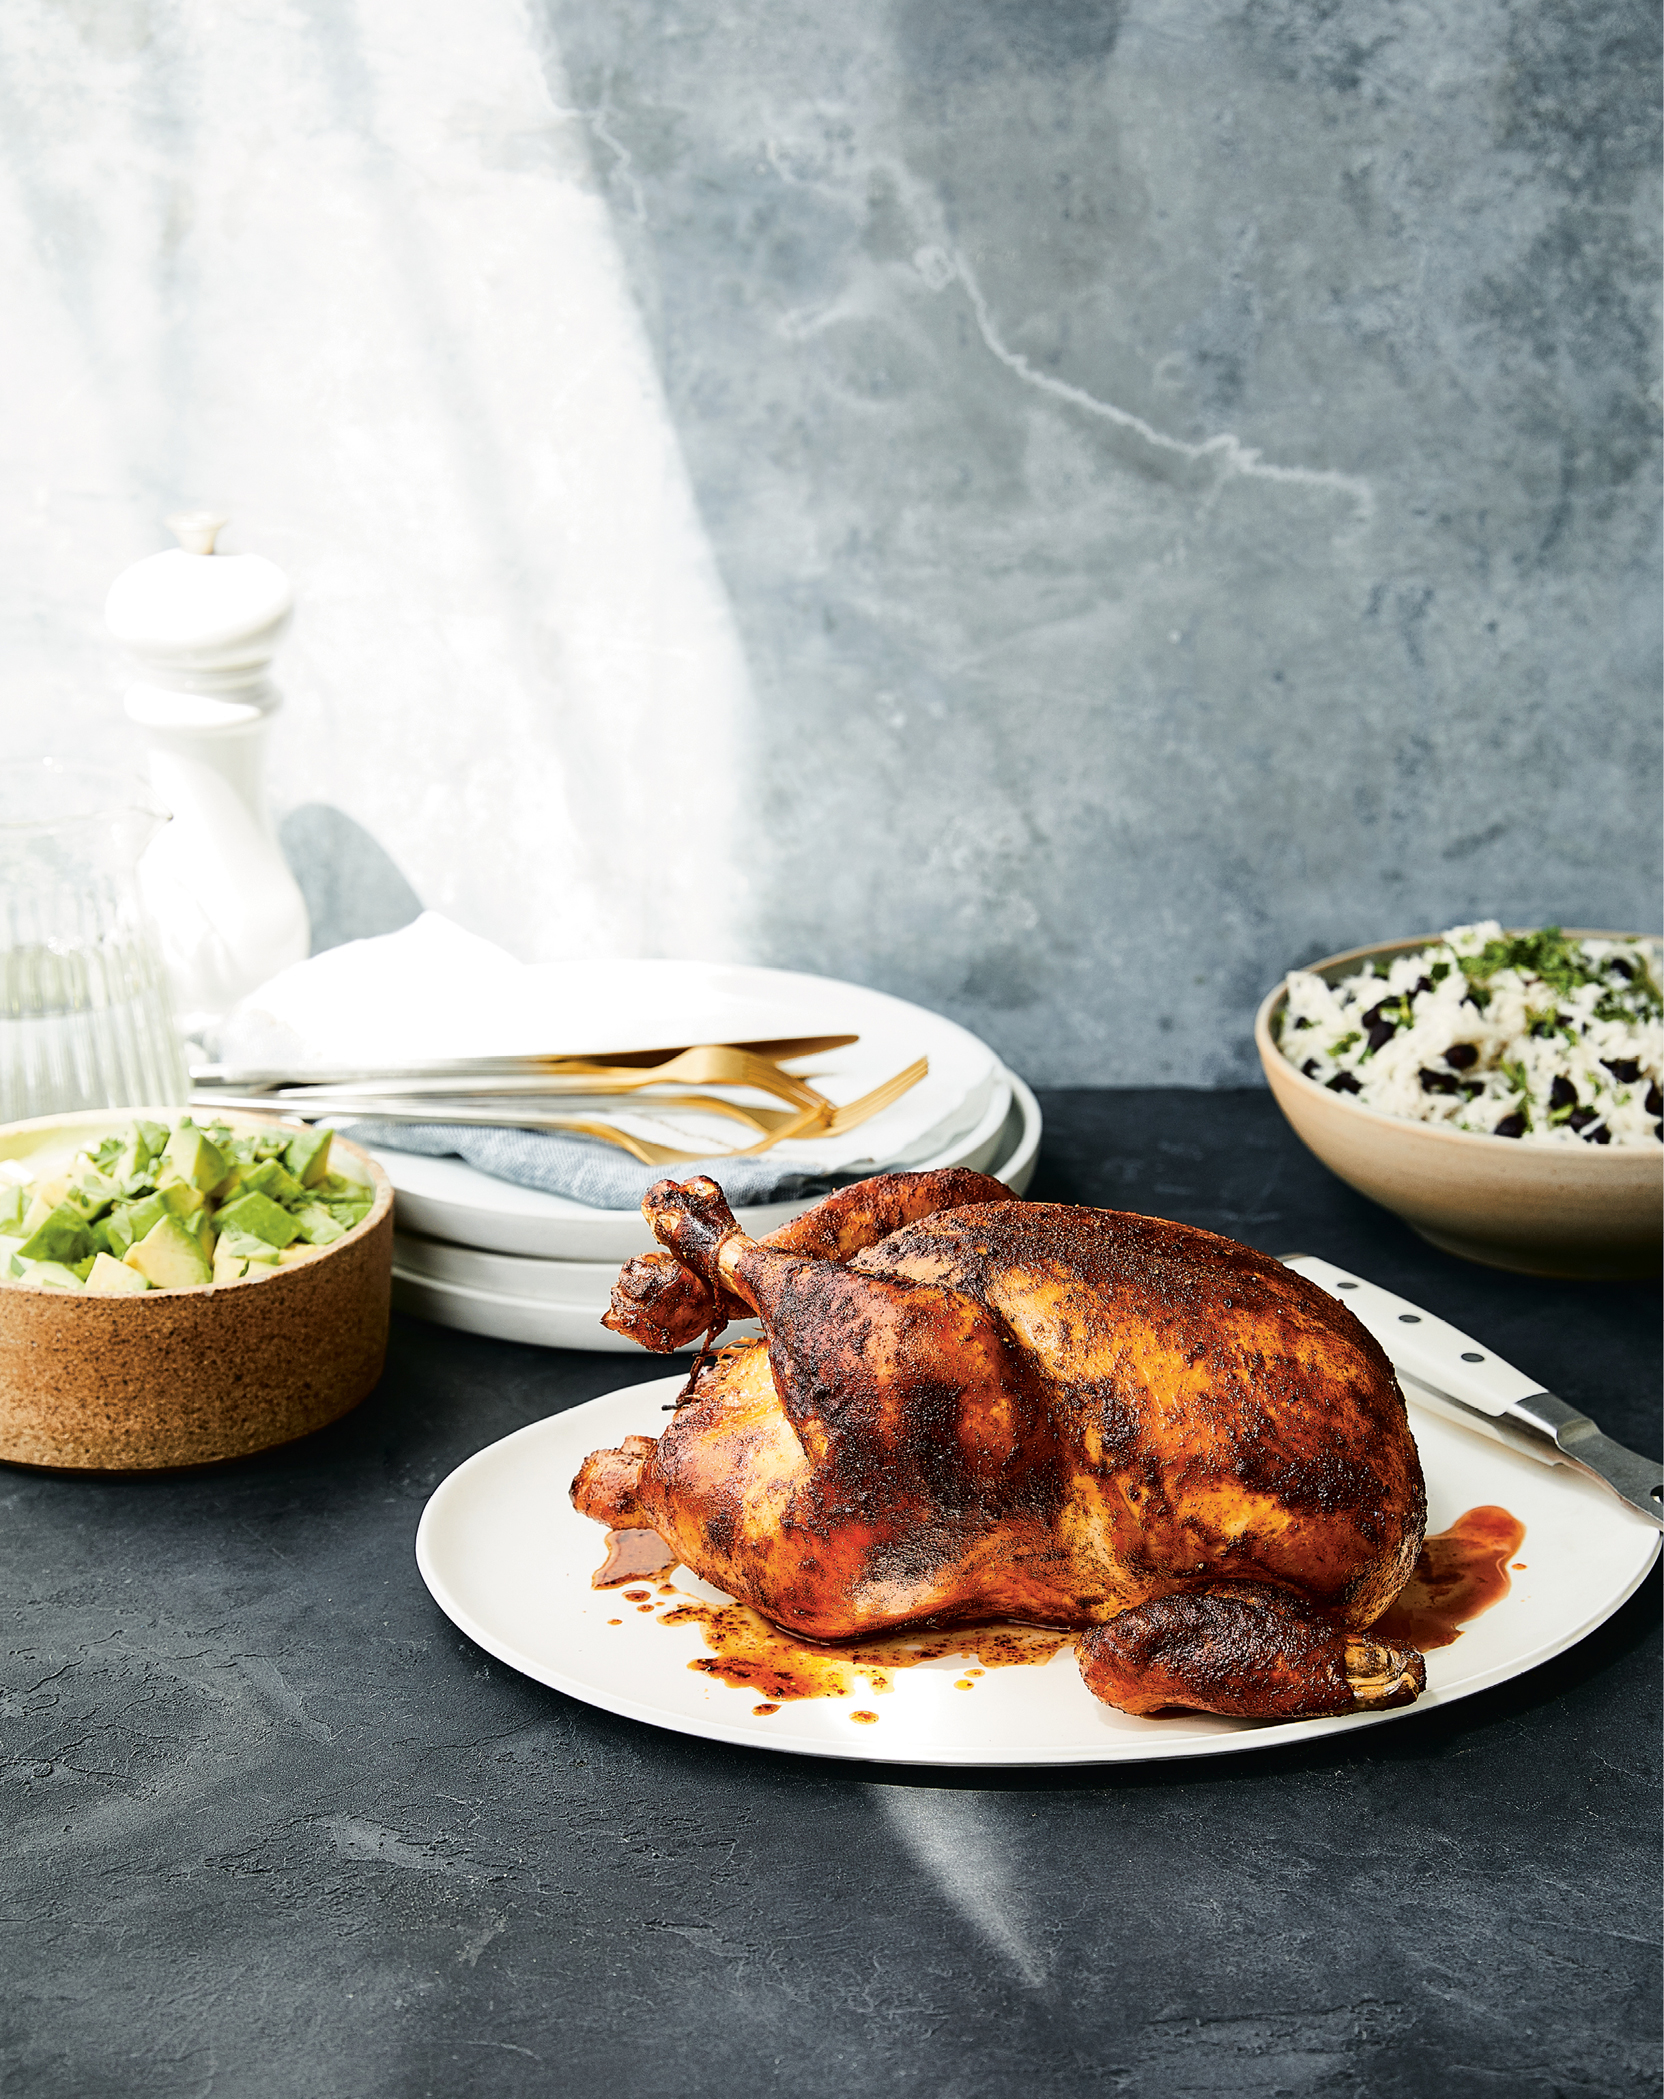
Pollo Asado (Latin Rotisserie-Style Roasted Chicken)
BIG BATCH
If you’ve been a Skinnytaste fan for a while, then you know how much my family loves our Latin food! On nights when there’s no time to cook, we often find ourselves picking up roasted Peruvian or Colombian pollo a la brasa, complete with an avocado salad and rice and beans on the side. Since it’s so much better making it from scratch, I came up with my own that my family loves! Achiote is the turmeric of Latin American cuisine and it will dye almost anything it comes across a vibrant red-orange. It’s worth it, though! But if you can’t find it, you can use sweet paprika in its place.
SERVES 4
1 (3½- to 4-pound) whole chicken, giblets removed, patted dry with paper towels
4 tablespoons white or apple cider vinegar
1 tablespoon mild cayenne pepper hot sauce, such as Frank’s RedHot
2 teaspoons kosher salt
½ tablespoon ground oregano
1 teaspoon ground annatto or achiote (or sweet paprika)
1 teaspoon garlic powder
½ teaspoon ground cumin
FRIDGE: UP TO 4 DAYS
Place the chicken in a large container and rub the vinegar and hot sauce all over it, inside and out. In a small bowl, combine the salt, oregano, annatto, garlic powder, and cumin, and season the chicken inside and out with the mixture to evenly coat (it’s best to wear gloves so you don’t stain your hands). Refrigerate for 8 to 24 hours.
When ready to roast the chicken, preheat the oven to 450°F.
Transfer the chicken, breast side up, to a roasting pan with a rack, or to a large, rimmed sheet pan.
Roast the chicken with the legs toward the back of the oven until it starts to brown, about 20 minutes. Reduce the oven temperature to 350°F and continue cooking until the juices run clear when the thigh is pierced with a knife, or when the internal temperature between the thickest part of the leg and the thigh is 165°F, 45 to 55 minutes more.
Let the chicken stand uncovered for 10 minutes before carving. Serve with or without the skin.
Big Batch: Make two chickens and carve and refrigerate the second one to use for planned-over recipes on this page, this page, and this page.
Per Serving (¼ skinless chicken) • Calories 278 • Fat 10.5 g • Saturated Fat 3 g • Cholesterol 127 mg • Carbohydrate 1 g • Fiber 0.5 g • Protein 41 g • Sugars 0 g • Sodium 826 mg
Chicken and Broccoli Rabe Wraps

PLANNED-OVER
I can’t think of a more perfect, portable lunch than a wrap: it doesn’t require heating, you don’t need utensils, and the filling combos are endless. My favorite combination is this Italian chicken wrap filled with garlicky broccoli rabe and roasted peppers—it’s delish and a great way to repurpose chicken from Paprika Roasted Whole Chicken (this page) or Pollo Asado (this page). You can also use the breast meat from a rotisserie chicken. That’s a wrap!
SERVES 2
½ bunch (5 to 6 ounces) broccoli rabe, washed, 2 inches trimmed off stems
Kosher salt
1 tablespoon extra-virgin olive oil
2 garlic cloves, thinly sliced
Freshly ground black pepper
2 large (9- to 10-inch) whole wheat tortillas (I use Toufayan)
⅔ cup (about 5 ounces) jarred roasted red peppers, drained, patted dry, and sliced
6 ounces grilled boneless chicken breast or rotisserie chicken, thinly sliced, or leftover breast meat from Paprika Roasted Whole Chicken (this page) or Pollo Asado (this page)
Cut the broccoli rabe lengthwise into 1-inch pieces. Bring a large pot of salted water to a boil. Add the broccoli rabe and blanch for about 2 minutes. Drain and set aside in a colander.
Heat a medium skillet over medium heat. Add the olive oil, and when it is hot, add the garlic and cook until golden, 30 to 60 seconds. Add the broccoli rabe and season with ¼ teaspoon salt and pepper to taste. Cook until fragrant, stirring frequently, 1 to 2 minutes.
Working one at a time, place a tortilla on a work surface. Add half of the red peppers to the bottom third of the tortilla. Place half of the chicken on top, slightly overlapping the peppers, then top with half of the broccoli rabe.
Lift the edge nearest you and wrap it around the filling. Fold the left and right sides in toward the center and continue to roll into a tight cylinder. Slice in half and wrap the halves tightly in plastic wrap until ready to eat. Repeat with the remaining tortilla and filling.
SKINNY SCOOP You can double the ingredients to make 4 wraps, but it’s best to assemble this the morning you plan on eating it so the wrap doesn’t get soggy.
Per Serving (1 wrap) • Calories 405 • Fat 14 g • Saturated Fat 2 g Cholesterol 72 mg • Carbohydrate 35 g • Fiber 4.5 g • Protein 33 g Sugars 4 g • Sodium 975 mg
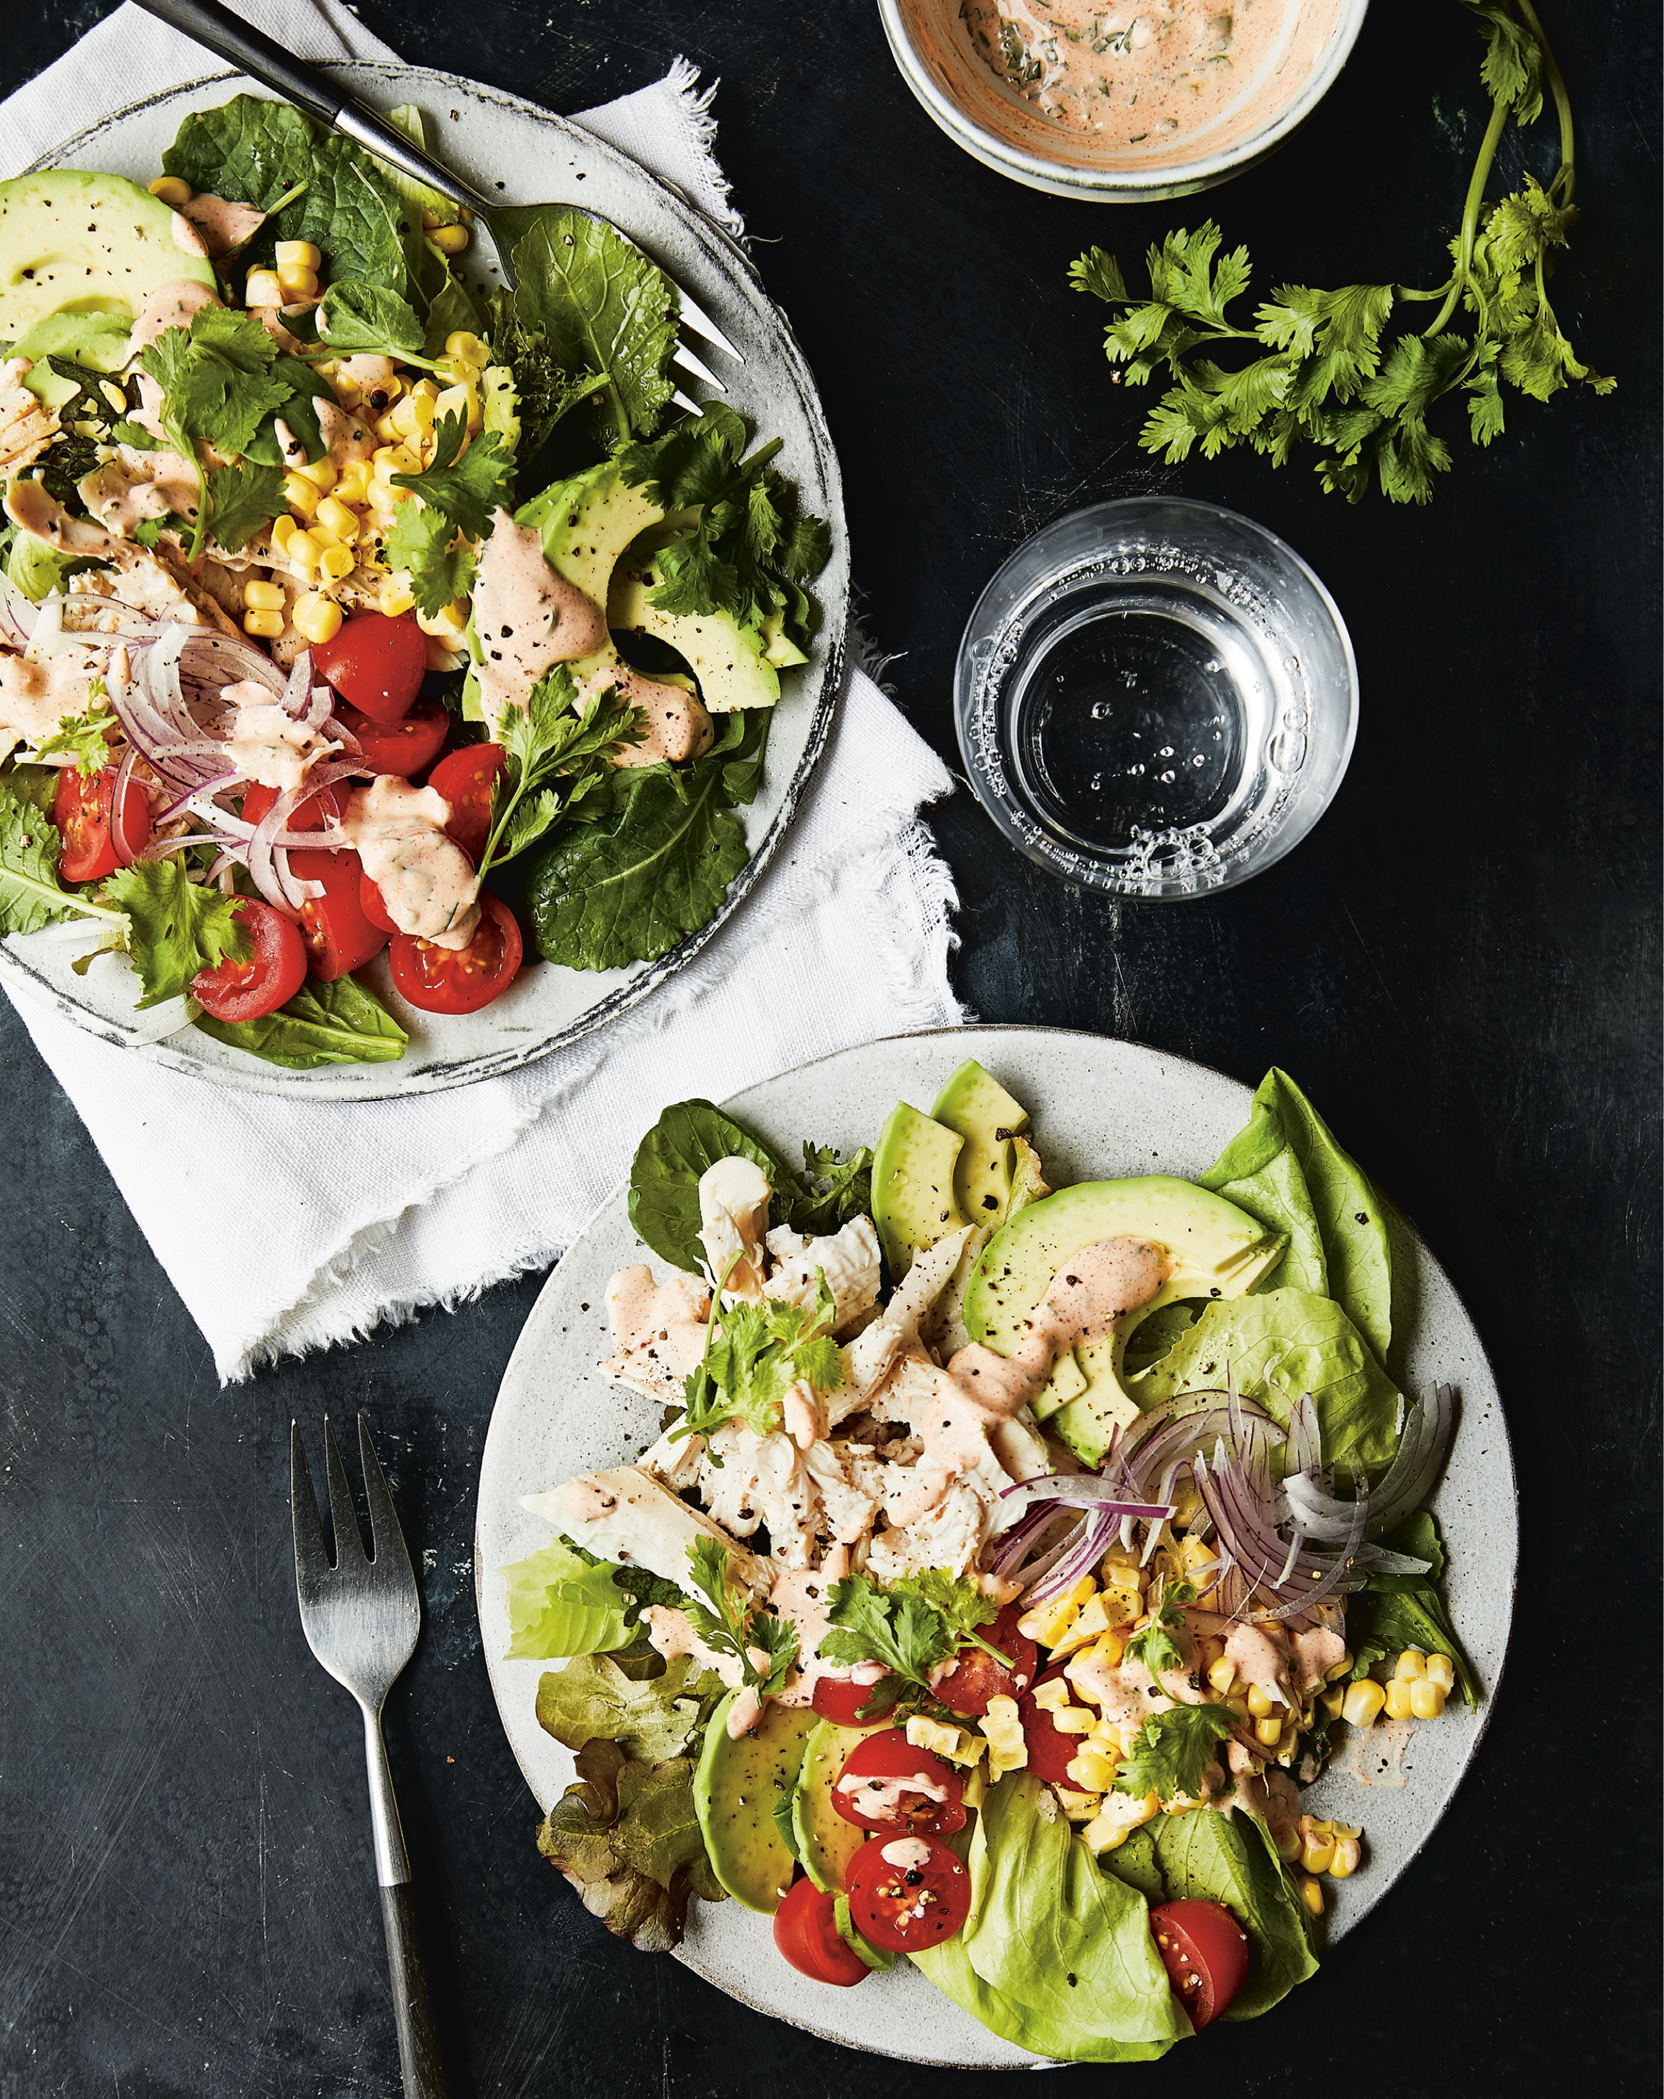
Rotisserie Summer Chicken Bowls with Smoked Paprika Aioli
PLANNED-OVER
The base of this bowl is mixed greens topped with leftover rotisserie or roasted chicken, summer corn, tomatoes, and avocado, drizzled with a quick smoked paprika aioli. Since it takes the same amount of time to roast two chickens as it does one, I usually double up (see Paprika Roasted Whole Chicken on this page or Pollo Asado on this page) and turn the leftovers into new dishes throughout the week. Or to save time, I pick up an already cooked rotisserie chicken from the store instead. This summer salad is quite substantial, making it an easy weeknight dinner for four (or cut the recipe in half and pack it for lunch).
SERVES 4
SMOKED PAPRIKA AIOLI
½ cup light mayonnaise
Juice of 1 large lime
1 teaspoon smoked paprika
1 tablespoon finely minced fresh cilantro
SALAD
6 cup mixed baby greens
1 pound leftover Paprika Roasted Whole Chicken (this page) or rotisserie chicken, skin and bones removed, torn into bite-size pieces (half white, half dark; about 3 cups)
1⅓ cups halved grape tomatoes
1⅓ cups steamed corn, from 2 fresh (or frozen) ears
½ small red onion, slivered
1 small (4-ounce) Hass avocado, sliced
Chopped fresh cilantro, for garnish
Make the aioli: In a small bowl, combine the mayonnaise, lime juice, paprika, and cilantro and blend until smooth. If it’s too thick, you can add a little water to loosen.
Make the salad: Divide the baby greens, chicken, tomatoes, corn, red onion, and avocado among 4 plates. Drizzle each with 2½ tablespoons aioli, garnish with cilantro, and serve.
Per Serving (1 bowl) • Calories 511 • Fat 35 g • Saturated Fat 6 g Cholesterol 96 mg • Carbohydrate 20 g • Fiber 6 g • Protein 33 g Sugars 5 g • Sodium 280 mg
Chicken Souvlaki Pitas
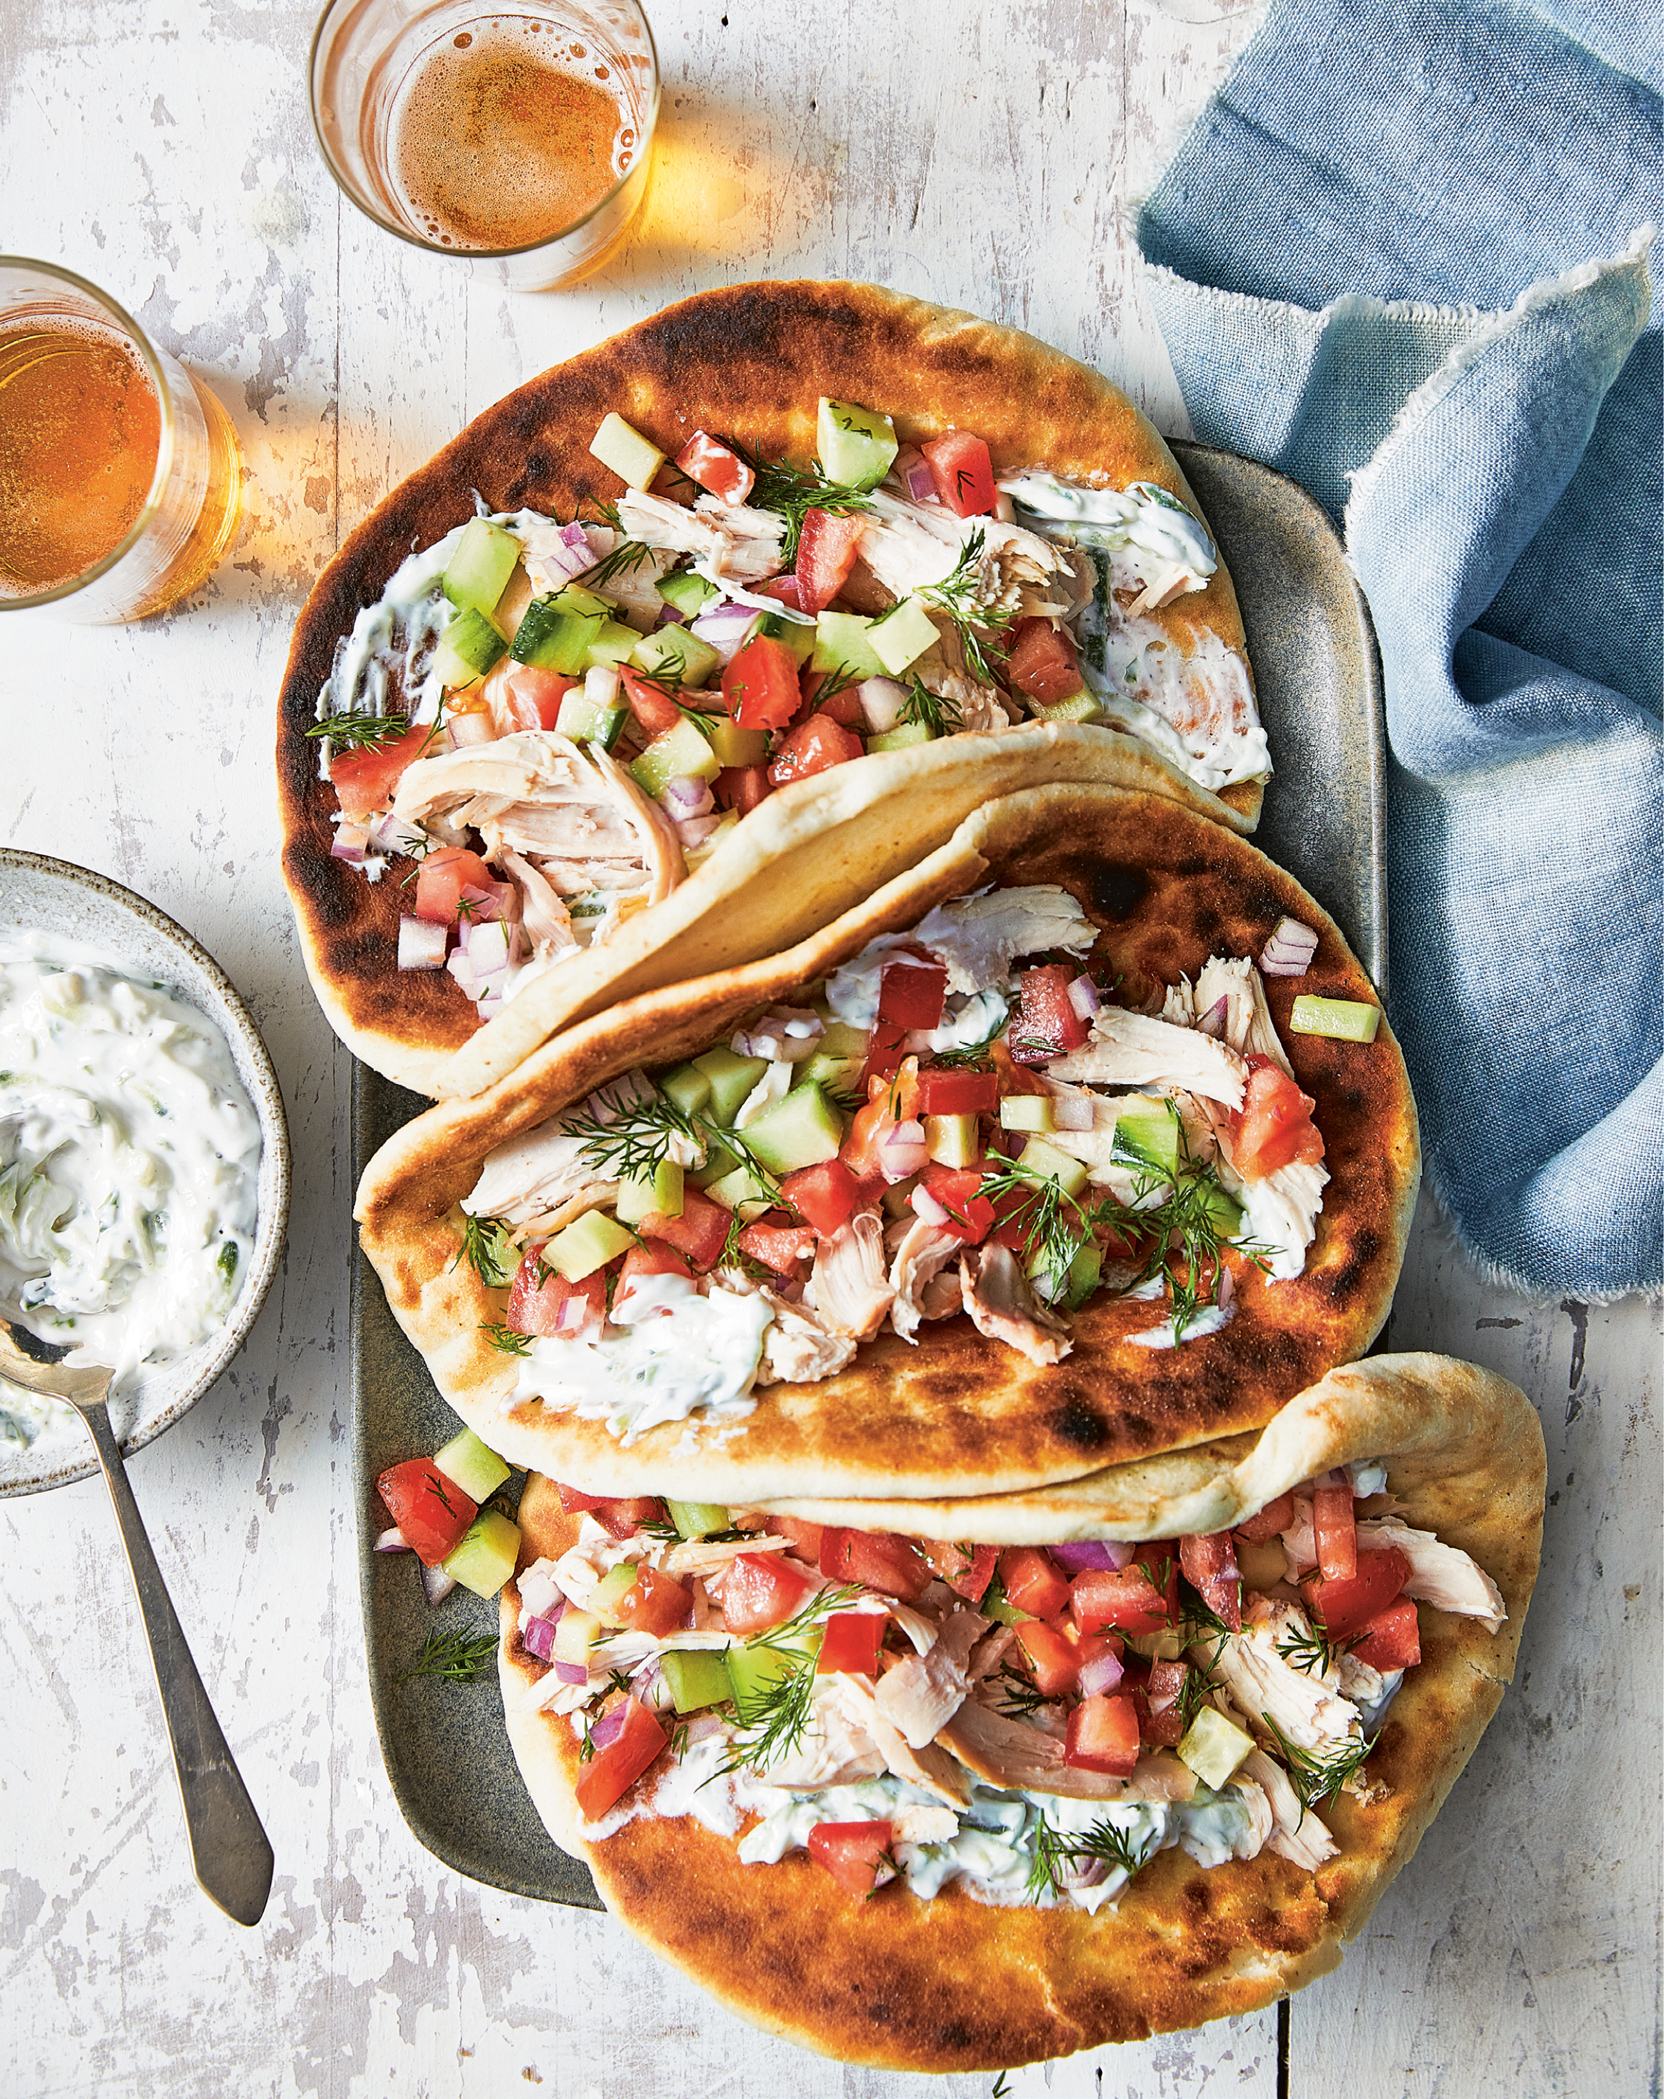
PLANNED-OVER
These chicken souvlaki transform leftovers into a Greek delight in under 20 minutes—start to finish! Rotisserie chicken (or leftovers from a homemade roasted chicken on this page) can be pretty awesome, particularly on busy weeknights when you don’t want to cook a whole dinner from scratch but you still want a tasty home-cooked meal. Serve the chicken on warmed pita or gyro bread with a quick cucumber-tomato-dill salad and some homemade tzatziki. To make it gluten-free, skip the pita and serve over brown rice to make it a bowl.
SERVES 4
TZATZIKI
¾ cup whole-milk Greek yogurt
½ small cucumber, peeled, grated, and squeezed dry
1 garlic clove, minced
½ teaspoon fresh lemon juice
½ teaspoon kosher salt
Freshly ground black pepper
SALAD
1 small cucumber, peeled, seeded, and chopped
½ cup diced tomato
2 tablespoons chopped fresh dill
2 tablespoons chopped red onion
½ teaspoon kosher salt
Freshly ground black pepper
Juice of ½ lemon
GYRO
4 (7-inch) pre-oiled gyro breads (such as Kontos) or naan breads
Olive oil spray
10 ounces cooked skinless rotisserie chicken breast, shredded, or leftover Paprika Roasted Whole Chicken (this page)
Make the tzatziki: In a medium bowl, combine the yogurt, cucumber, garlic, lemon juice, salt, and pepper to taste. Mix well to combine.
Make the salad: In another medium bowl, combine the cucumber, tomato, dill, red onion, salt, pepper to taste, and the lemon juice. Toss well to combine.
Adjust an oven rack 4 to 6 inches from the heating element and preheat the broiler to high. Spritz the bread on both sides with olive oil, then transfer to a baking sheet and broil until golden and warmed and pliable, 1 to 2 minutes on each side.
Drain the salad, then put it back in the bowl.
To assemble: Spread some tzatziki on the warmed pita and top with the chicken and salad, with the remaining tzatziki on the side.
Per Serving (1 sandwich) • Calories 396 • Fat 8.5 g • Saturated Fat 2.5 g • Cholesterol 69 mg • Carbohydrate 48 g • Fiber 2 g • Protein 34 g Sugars 7 g • Sodium 912 mg
Herb Turkey Breast with Gravy

BIG BATCH
Everyone needs a basic turkey breast and gravy recipe to keep in their back pocket! This recipe is also great for intimate Thanksgiving or Friendsgiving dinners when you don’t want to cook a whole turkey. Of course, the best part is always the leftovers. Slice this up and make a killer, warm open-faced turkey sandwich with gravy or a chilled Turkey Cranberry Salad (this page) or Personal Turkey Pot Pies (this page).
SERVES 10
1 tablespoon unsalted butter, at room temperature
2 garlic cloves, minced
2 teaspoon chopped fresh sage
1 teaspoon chopped fresh thyme
1 teaspoon Bell’s Seasoning
1½ teaspoons kosher salt
1 (3-pound) boneless skin-on turkey breast
GRAVY
3 cups turkey or chicken broth*
2 fresh sage leaves
1 sprig of fresh thyme
½ teaspoon Bell’s Seasoning
⅓ cup all-purpose flour or gluten-free flour mix
¼ teaspoon kosher salt
Freshly ground black pepper
*Read the label to be sure this product is gluten-free.
FRIDGE: UP TO 4 DAYS
FREEZER: UP TO 3 MONTHS
Preheat the oven to 350°F.
Prepare the turkey: In a small bowl, combine the butter, garlic, sage, thyme, and Bell’s Seasoning with the salt to make a paste. Using your fingers, carefully loosen the skin from the breast meat and spread the butter mixture under the skin and all over the turkey breast.
In a shallow roasting pan, place the turkey skin side up and roast until the turkey is completely cooked through, basting once halfway through, until the thickest part of the breast reaches an internal temperature of 160°F, 40 to 45 minutes.
Adjust an oven rack 4 to 6 inches from the heating element and preheat the broiler to high. Brown the turkey under the broiler for 2 to 3 minutes, watching closely to make sure the skin does not burn. Transfer the turkey breast to a cutting board and loosely tent with foil. Let it rest for 15 minutes, reserving the pan juices for the gravy.
Prepare the gravy: While the turkey is resting, place 2 cups of the broth, the sage, thyme, and Bell’s Seasoning in a medium pot and bring to a boil over medium-high heat. Cover and reduce the heat to low, simmering for about 10 minutes to let the flavors meld.
Place the remaining 1 cup room-temperature broth and the flour into a small blender and puree. When the turkey is done resting, add the pan juices and the flour mixture to the pot of simmering broth and cook over medium heat, stirring occasionally, until thickened, about 5 minutes. Stir in ¼ teaspoon salt and black pepper to taste, and discard the sage and thyme.
SERVE NOW: Thinly slice the turkey breast and serve with the gravy.
Big Batch: Thinly slice the leftovers and store in the refrigerator or freezer for planned-over recipes on this page and this page.
Per Serving (4 ounces + generous ¼ cup gravy) • Calories 243 Fat 11 g • Saturated Fat 3.5 g • Cholesterol 92 mg • Carbohydrate 4 g Fiber 0 g • Protein 31 g • Sugars 0.5 g • Sodium 535 mg
Personal Turkey Pot Pies
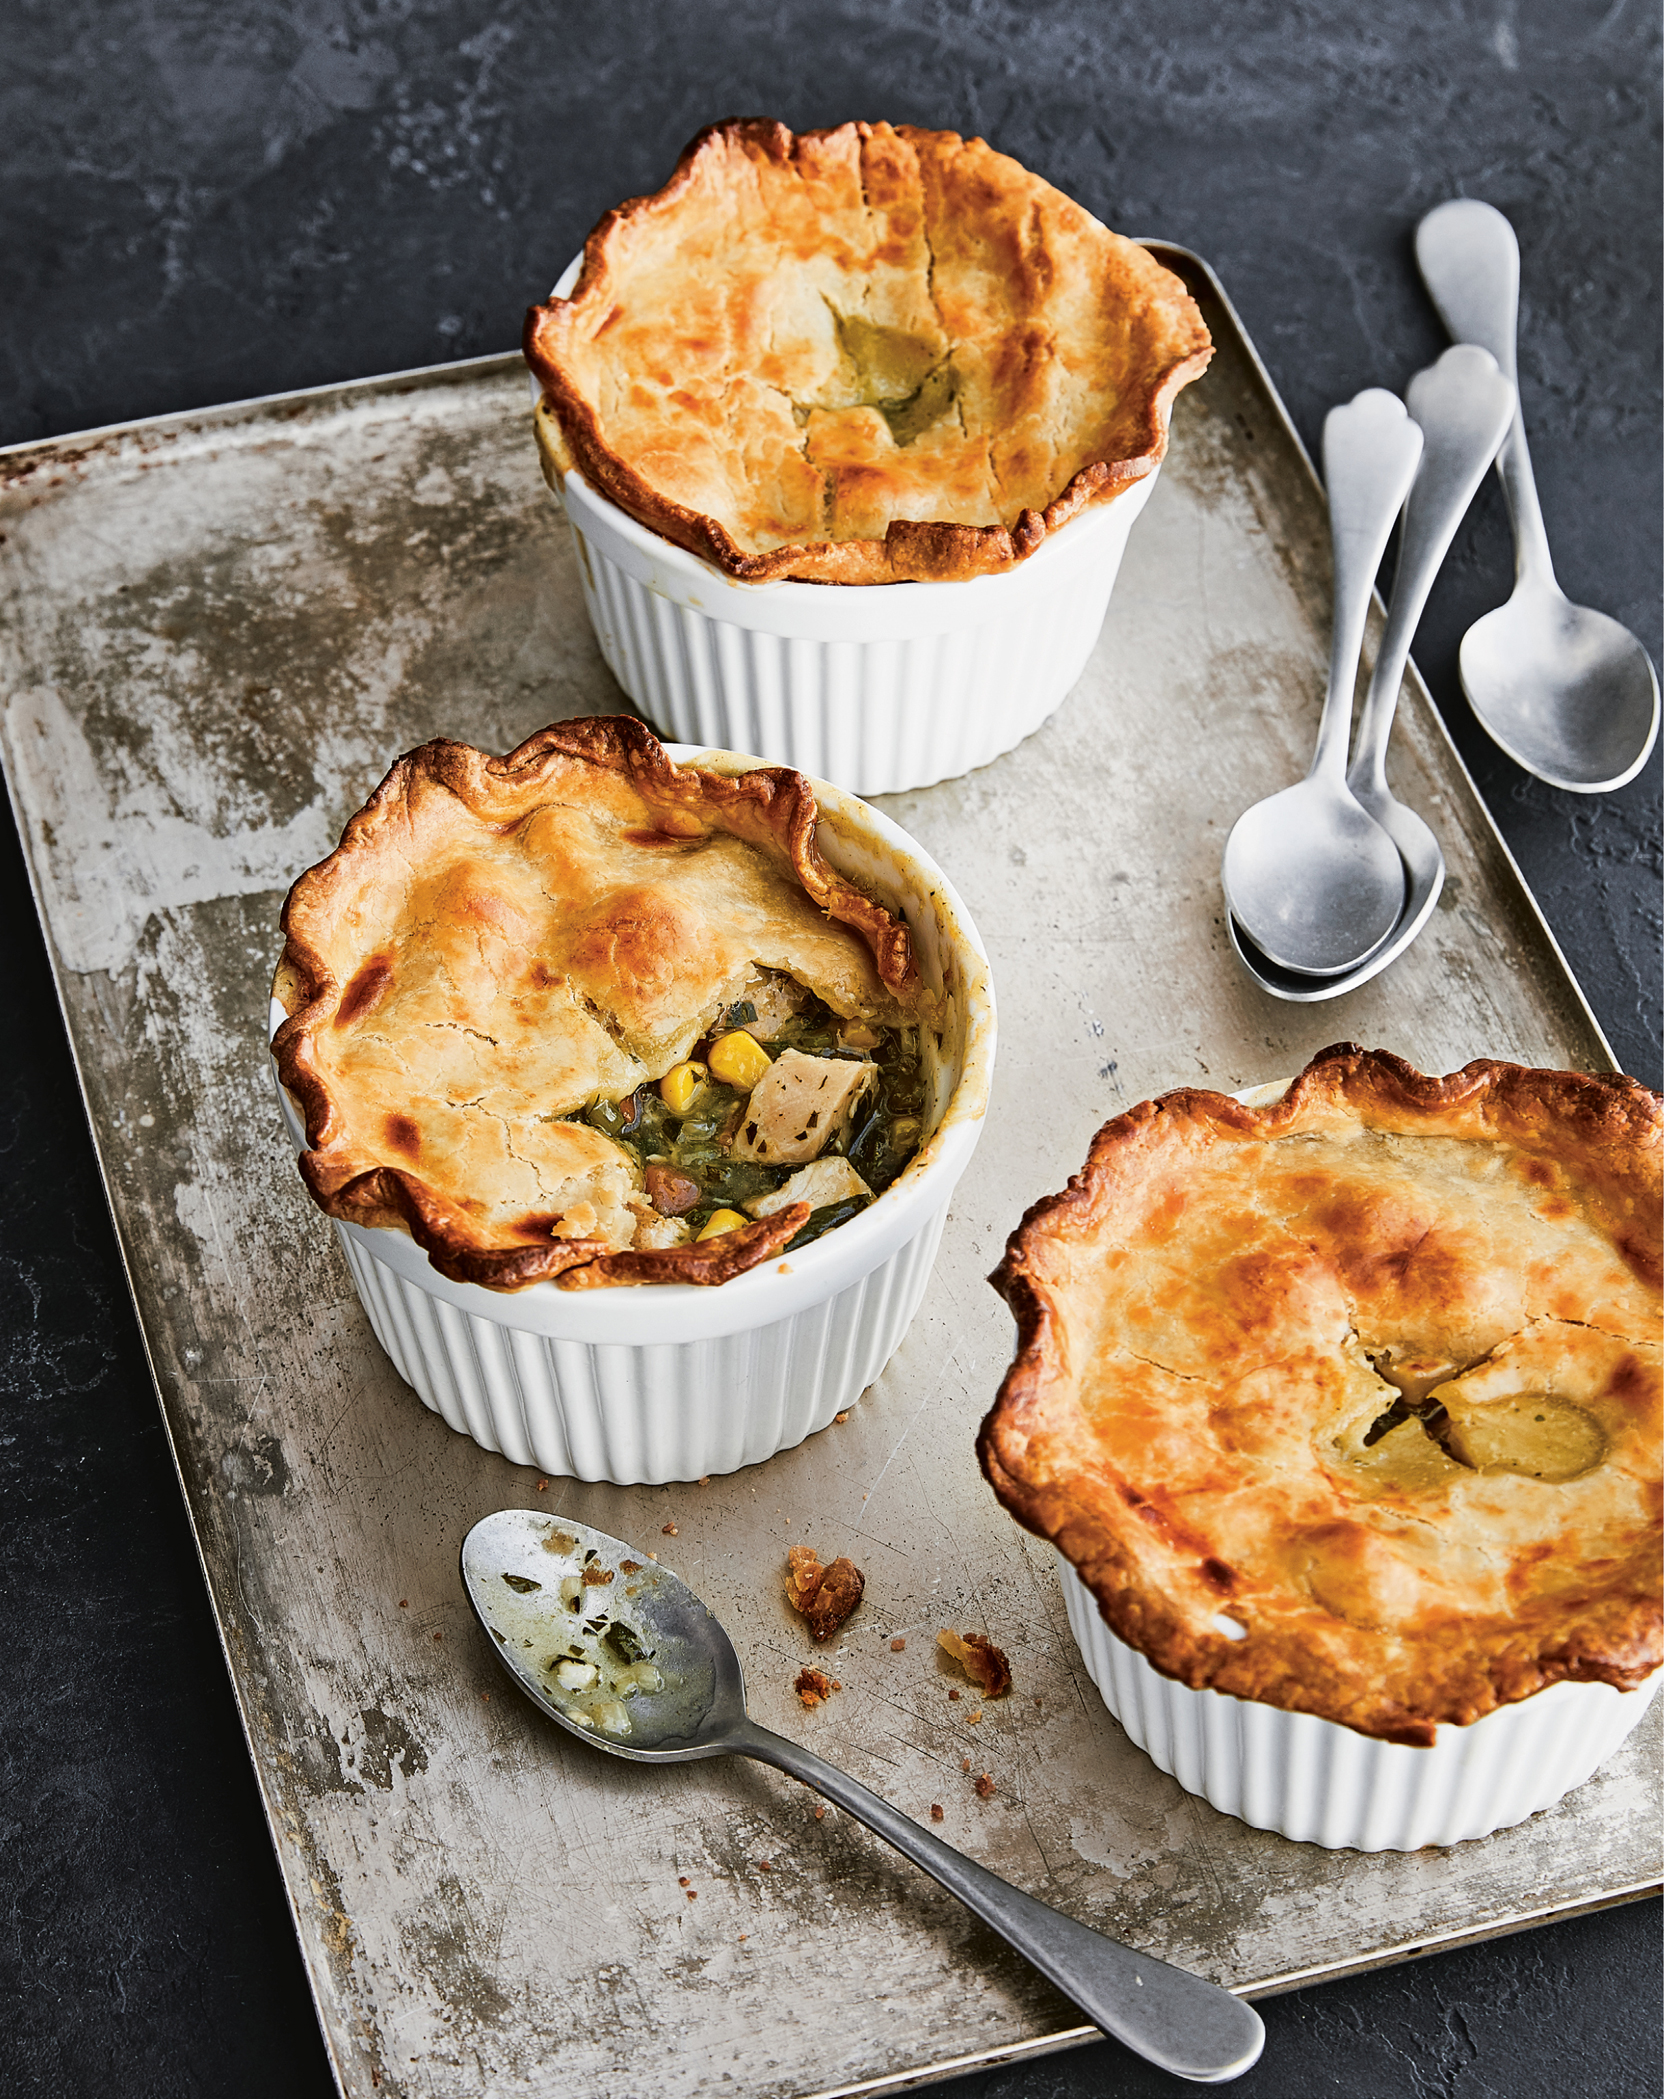
PLANNED-OVER
When I was a teenager I always came home from school ravenous. My mom worked full-time cooking in her luncheonette, and one of the few frozen foods my mom kept stocked at home were personal turkey pot pies. I just loved them! Making these pot pies from scratch is an easy way to use up leftover turkey (see Herb Turkey Breast on this page)—they’re slimmed down since the only crust is on the top. If you don’t have leftover turkey, chicken also works.
SERVES 4
½ tablespoon olive oil
1 large shallot, chopped
3 tablespoons chopped fresh parsley
1 tablespoon chopped fresh thyme
1 tablespoon chopped fresh sage
2 small celery stalks, chopped
5 ounces frozen mixed vegetables
2¼ cups turkey or chicken broth
½ teaspoon chicken or turkey bouillon (I like Better Than Bouillon)
½ teaspoon kosher salt
⅛ teaspoon freshly ground black pepper
3 cups small-diced leftover cooked turkey breast, skin removed (see Herb Turkey Breast, this page)
2½ tablespoons cornstarch
½ package (about 7 ounces) refrigerated pie crust (I like Pillsbury)
1 large egg, beaten
FRIDGE: UP TO 4 DAYS
FREEZER: UP TO 3 MONTHS
In a large, deep nonstick skillet, heat the oil over medium heat. When the pan is hot, add the shallot, parsley, thyme, and sage and cook until almost soft and fragrant, 2 to 3 minutes. Add the celery and cook until the vegetables are soft, 3 to 5 minutes. Add the frozen mixed vegetables, 2 cups broth, the bouillon, salt, and black pepper, and bring to a boil. Simmer for about 5 minutes, stirring frequently, until the flavors meld. Add the turkey.
Meanwhile, combine the remaining ¼ cup broth with the cornstarch in a bowl and mix well to dissolve. Add to the skillet and cook over medium-low heat, stirring until thickened, 4 to 6 minutes. Remove from the heat and transfer to 4 oven-to-freezer-safe mini metal or foil pie plates. Let the filling cool completely in the pie plates on a sheet pan.
Preheat the oven to 400°F.
When ready to bake, roll out the pie crust and cut out 4 rounds slightly larger than the pie plates and place each piece over the turkey filling. Crimp the edges or fold over the edge of the pie plate and poke holes in the top of the dough with a knife. Brush with the egg and immediately bake on the sheet pan for about 35 minutes, or until the crust is golden.
FREEZE AND SERVE LATER: Freeze the pot pies without the egg wash: flash freeze for 1 to 2 hours, then cover each tightly with plastic wrap or transfer carefully to zip-top plastic bags. To cook, remove from the freezer, brush the pie crusts with egg wash, and place on a baking sheet. Bake at 400°F for 50 to 55 minutes, or until golden and heated through in the center.
Per Serving (1 pie) • Calories 449 • Fat 17 g • Saturated Fat 5.5 g • Cholesterol 131 mg • Carbohydrate 38 g • Fiber 3 g • Protein 36 g Sugars 2 g • Sodium 1,011 mg
Turkey Cranberry Salad
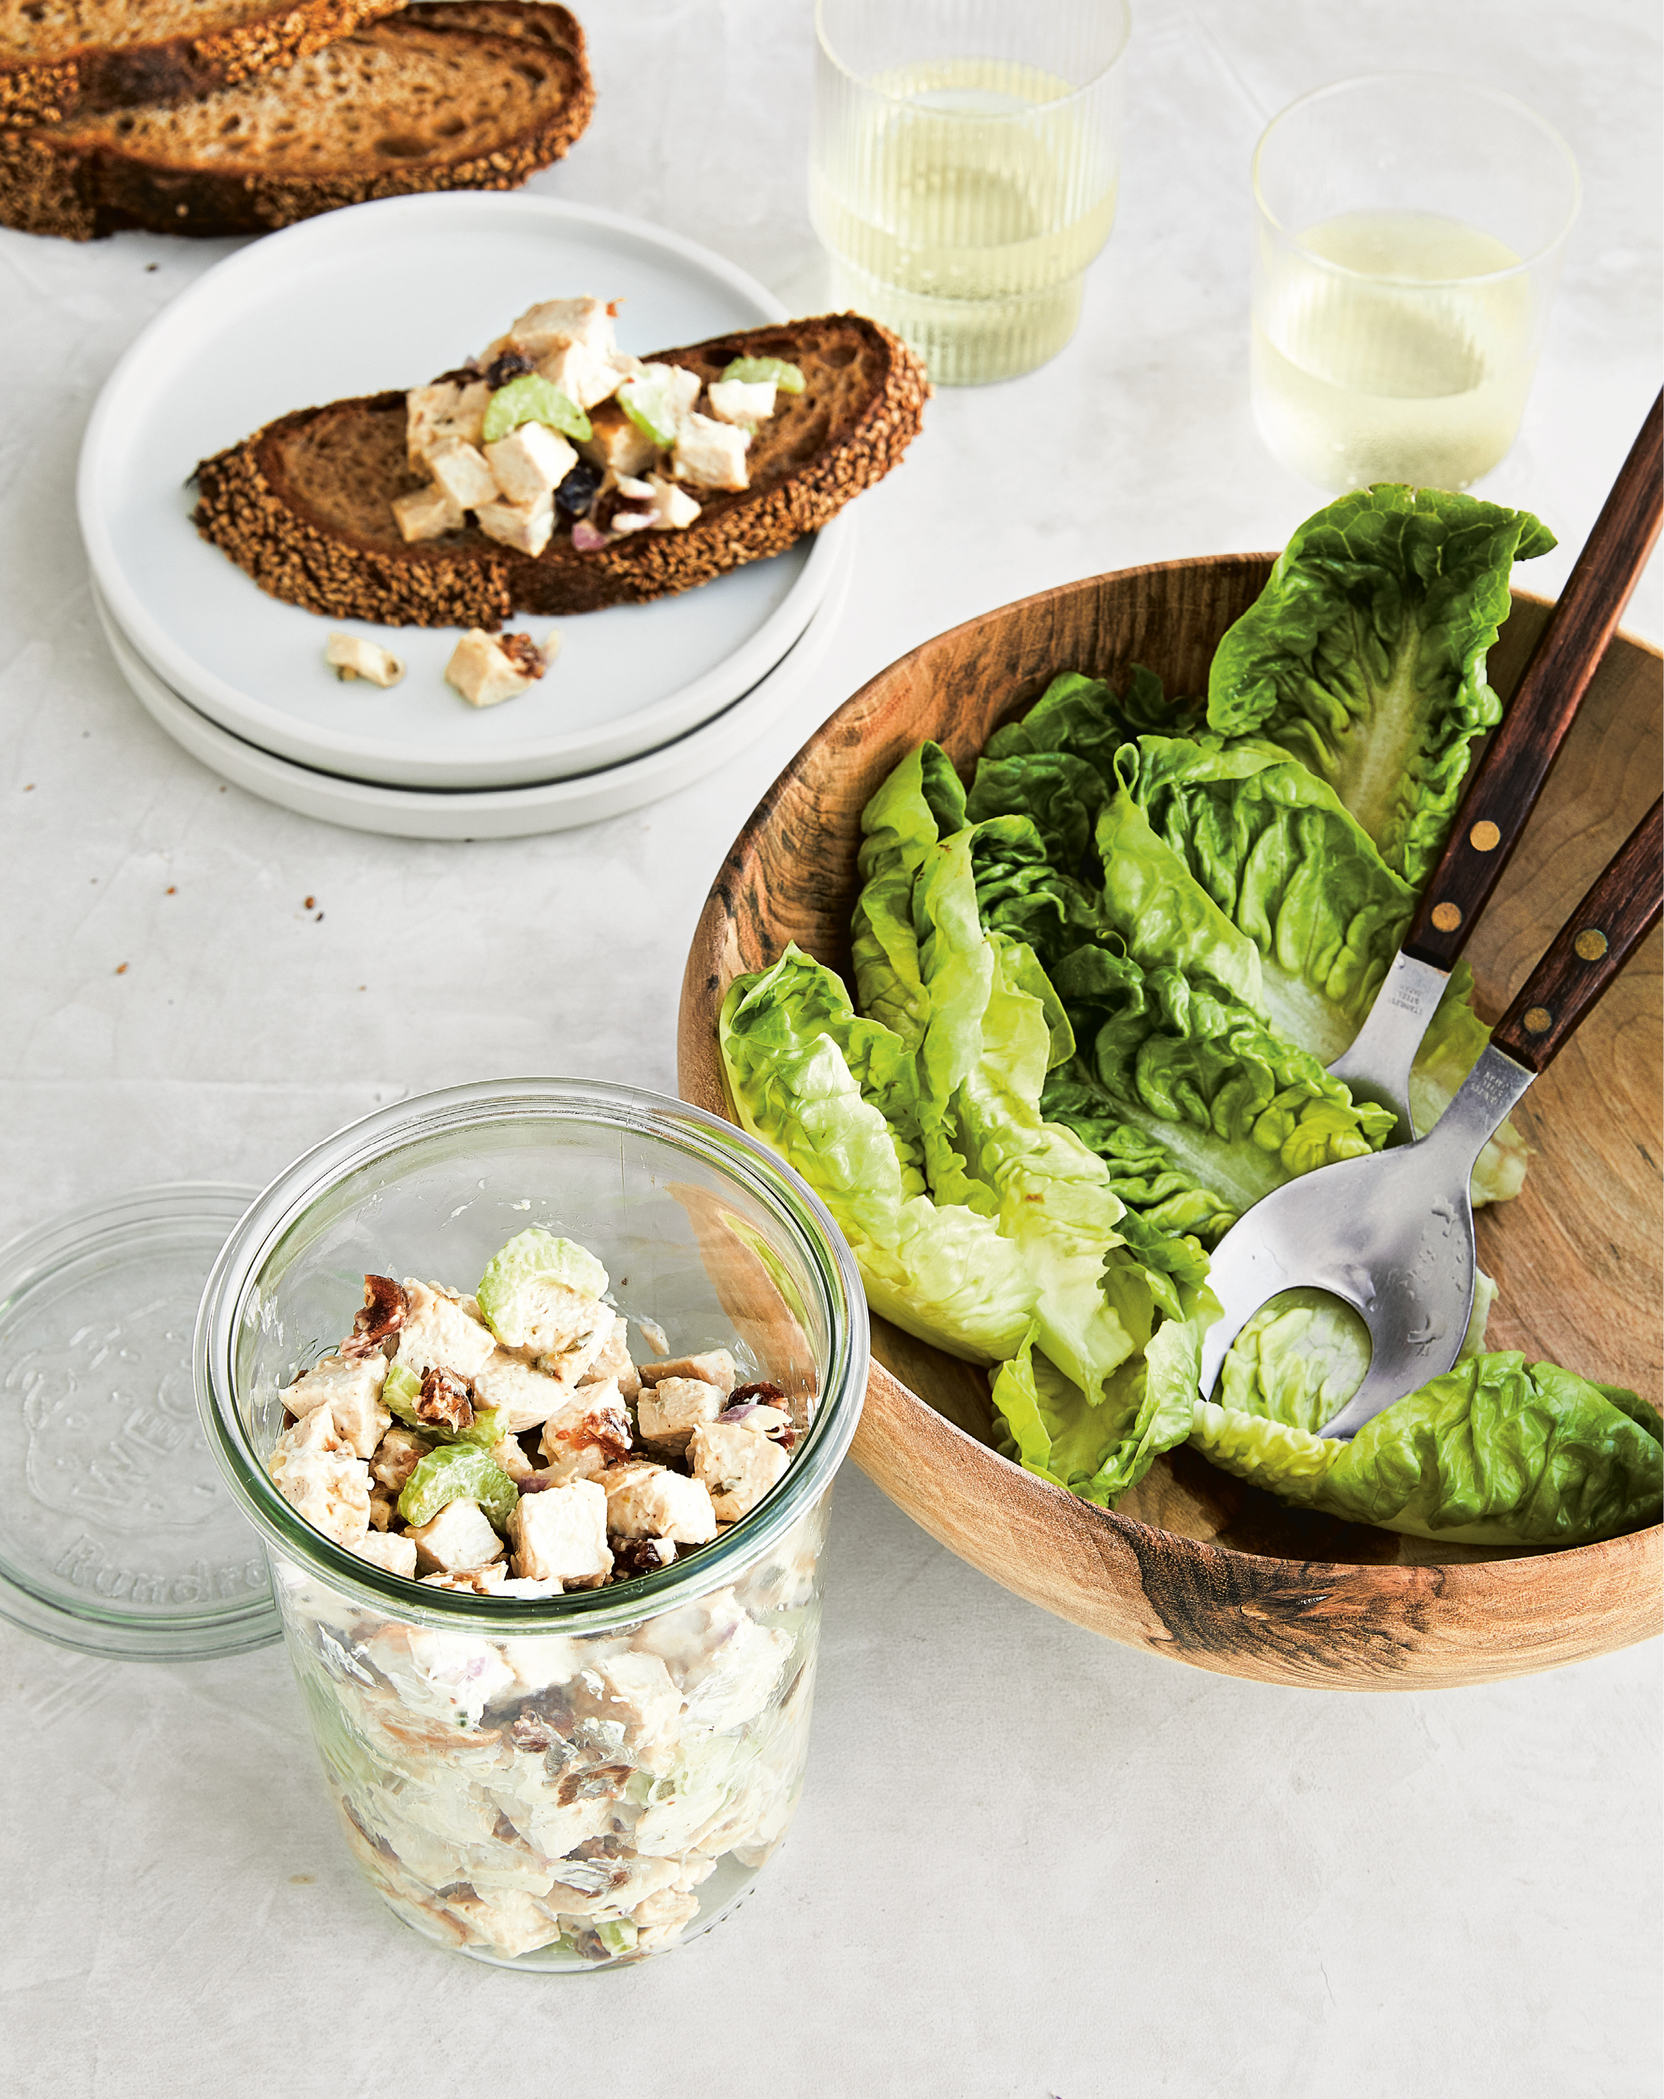
PLANNED-OVER
This is my go-to turkey salad when I have Thanksgiving leftovers. It’s similar to a Waldorf salad, and you can even add apples, walnuts, or pecans—delish! I usually eat it with a spoon right out of the refrigerator, but it’s also great served in a wrap, as a sandwich, or over a bed of greens.
SERVES 4
12 ounces leftover cooked turkey breast (see Herb Turkey Breast, this page), diced
⅓ cup sliced celery
¼ cup light mayonnaise
3 tablespoons dried cranberries
1½ tablespoons chopped red onion
FRIDGE: UP TO 4 DAYS
In a medium bowl combine the turkey with the celery, mayonnaise, cranberries, and red onion, and stir until combined.
Per Serving (generous ½ cup) • Calories 182 • Fat 5.5 g • Saturated Fat 1 g Cholesterol 76 mg • Carbohydrate 6 g • Fiber 0.5 g • Protein 26 g Sugars 4 g • Sodium 152 mg
Sheet Pan Herb Salmon with Broccolini and Tomatoes
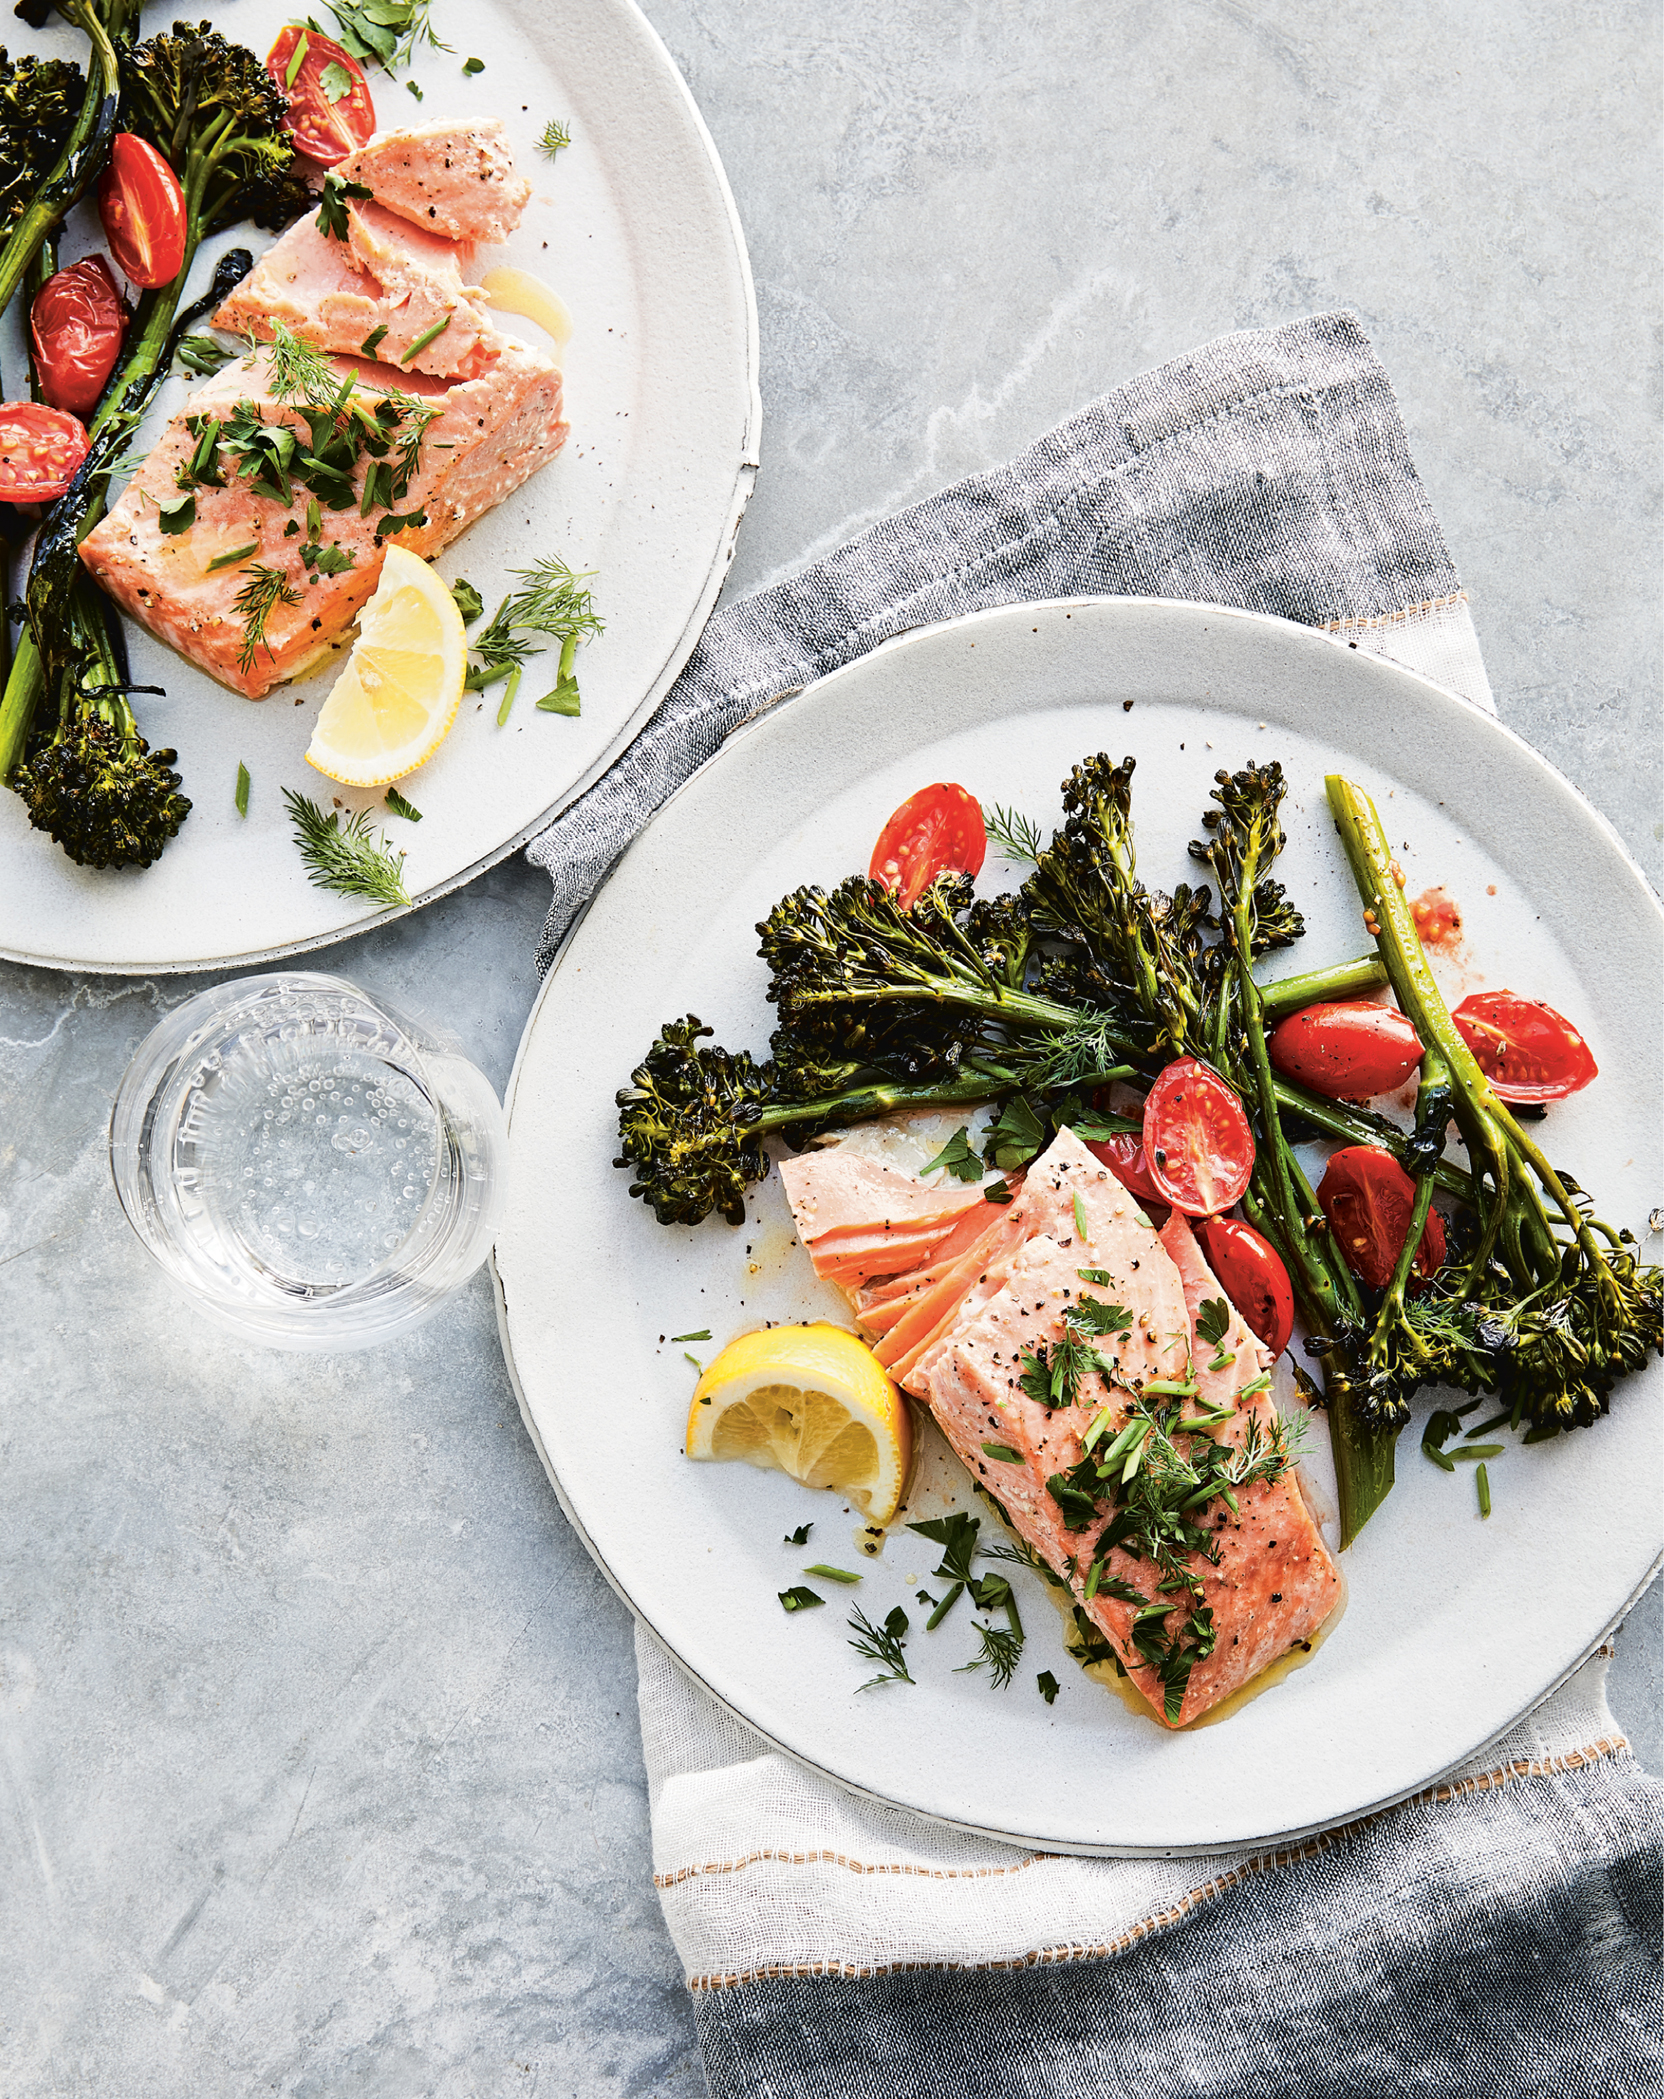
BIG BATCH
This easy sheet pan dinner takes the guesswork out of cooking fish. The salmon is cooked on a bed of lemons and herbs, and then it’s finished with fresh lemon juice and herbs while the veggies cook on a second sheet pan. The fish is so juicy and flavorful, and the best part is it makes enough for two or three meals. Serve half for dinner tonight with the roasted broccolini and tomatoes, and save the second piece to transform into planned-overs you’ll be excited about! Try the Spicy Salmon Poke Bowls (this page), Salmon Fried Rice (this page), or Salmon Niçoise Salad (this page). The key to using salmon the next day is to not overcook it, or it will get too dry.
SERVES 4 FOR 2 MEALS
Olive oil spray
2 lemons
10 sprigs of fresh parsley
2 tablespoons plus 2 teaspoons extra-virgin olive oil
2 (1½-pound) fillets wild salmon, skin on (1 to 1½ inches thick)
1 teaspoon kosher salt
Freshly ground black pepper
12 spears (12 ounces) broccolini, ends trimmed (from 2 to 3 bunches)
1½ cups grape tomatoes, halved
2 tablespoons chopped fresh dill
1 tablespoon chopped fresh chives
1 tablespoon chopped fresh parsley
FRIDGE: UP TO 2 DAYS
Position two oven racks in the center and top third of the oven. Preheat the oven to 350°F. Spray 2 large sheet pans with olive oil.
Slice one lemon into thin rounds and cut the second lemon into wedges for serving later. Place the lemon slices on one of the large sheet pans arranged in two areas where you will place the fish on top. Top the lemon slices with parsley and drizzle with 1 teaspoon olive oil. Transfer the salmon to the pan over the lemon slices, skin side down. Drizzle 1 teaspoon olive oil over the flesh side of the fish and rub all over, and season with ½ teaspoon salt and pepper to taste.
On the second sheet pan, place the broccolini and tomatoes and toss with 2 tablespoons olive oil, ½ teaspoon salt, and pepper to taste. Spread out in an even layer.
Roast the salmon on the center rack and the vegetables on the upper rack, cooking until the salmon is just barely opaque in the middle, about 20 minutes depending on the thickness of the fish. If you like the fish more well done, cook for about 5 minutes more. Toss the vegetables halfway through.
When the salmon is cooked, remove from the oven, top each piece with the fresh herbs, and serve with broccolini, tomatoes, and lemon wedges.
Big Batch: Let the second piece cool, then cover and refrigerate for up to 2 days. Use it as planned-overs in Spicy Salmon Poke Bowls (this page), Salmon Fried Rice (this page), or Salmon Niçoise Salad (this page), or in any salad or grain bowl.
Per Serving (6 ounces salmon + 3 spears broccolini + ¼ cup tomatoes) • Calories 370 • Fat 19.5 g • Saturated Fat 3 g • Cholesterol 94 mg • Carbohydrate 11 g • Fiber 6 g Protein 38 g • Sugars 4 g Sodium 371 mg
Salmon Fried Rice with Asparagus

PLANNED-OVER
Fried rice is the ultimate planned-over food because it requires day-old cooked rice (or you can use frozen cooked rice), otherwise it won’t be dry enough to fry. Here I used leftover salmon from the Sheet Pan Herb Salmon (this page). You can also swap the asparagus for bok choy or snow peas or even use up any leftover broccolini. The salmon can also be swapped for shrimp or chicken, or leftover Five-Spice Glazed Pork Tenderloin (this page), if you prefer.
SERVES 4
1½ pounds leftover Sheet Pan Herb Salmon, skin removed (this page)
2½ teaspoons vegetable or canola oil
1 tablespoon chopped fresh ginger
2 garlic cloves, chopped
4 medium scallions, thinly sliced, white and green parts separated
1 bunch thin asparagus (about 1 pound), ends trimmed, cut into 1-inch pieces
3 cups cold leftover cooked brown rice (preferably short-grain)
2 large eggs, beaten
1 cup shredded red cabbage
2 tablespoons soy sauce* or gluten-free tamari
1 tablespoon unseasoned rice vinegar
1½ teaspoons toasted sesame oil
Sriracha or chile-garlic sauce, for serving (optional)
*Read the label to be sure this product is gluten-free.
FRIDGE: REFRIGERATE WITHIN 2 HOURS OF COOKING FOR UP TO 3 DAYS
FREEZER: UP TO 3 MONTHS
Flake the salmon into small chunks with a fork or knife. Set aside.
Heat 1 teaspoon oil in a large nonstick wok or deep skillet over medium-high heat.
Add the ginger, garlic, and scallion whites and cook, stirring, until fragrant, about 1 minute. Add the asparagus and 2 tablespoons water and cook, stirring occasionally, until crisp-tender, 3 to 4 minutes. Transfer to a plate.
Add the remaining 1½ teaspoons oil and swirl around in the skillet to evenly coat. Then add the cooked rice in an even layer. Cook, without stirring, for 2 to 3 minutes, or until the bottom of the rice becomes slightly crispy. Continue to cook, stirring occasionally, for 1 to 2 minutes, or until combined. With a spoon or spatula, push the rice to one side of the wok or skillet. Crack the eggs onto the other side. Cook, constantly stirring the egg, for 30 to 60 seconds, or until cooked through. Mix the rice and egg to thoroughly combine.
Return the asparagus, along with the cabbage and scallion greens, to the skillet and toss until warmed. Stir in the soy sauce, rice vinegar, and sesame oil. Gently fold in the salmon and toss, and serve immediately. Serve with Sriracha or chile-garlic sauce (if using).
Per Serving (scant 2 cups) • Calories 518 • Fat 19.5 g • Saturated Fat 3 g Cholesterol 184 mg • Carbohydrate 43 g • Fiber 6 g • Protein 43 g Sugars 3 g • Sodium 639 mg
Spicy Salmon Poke Bowls
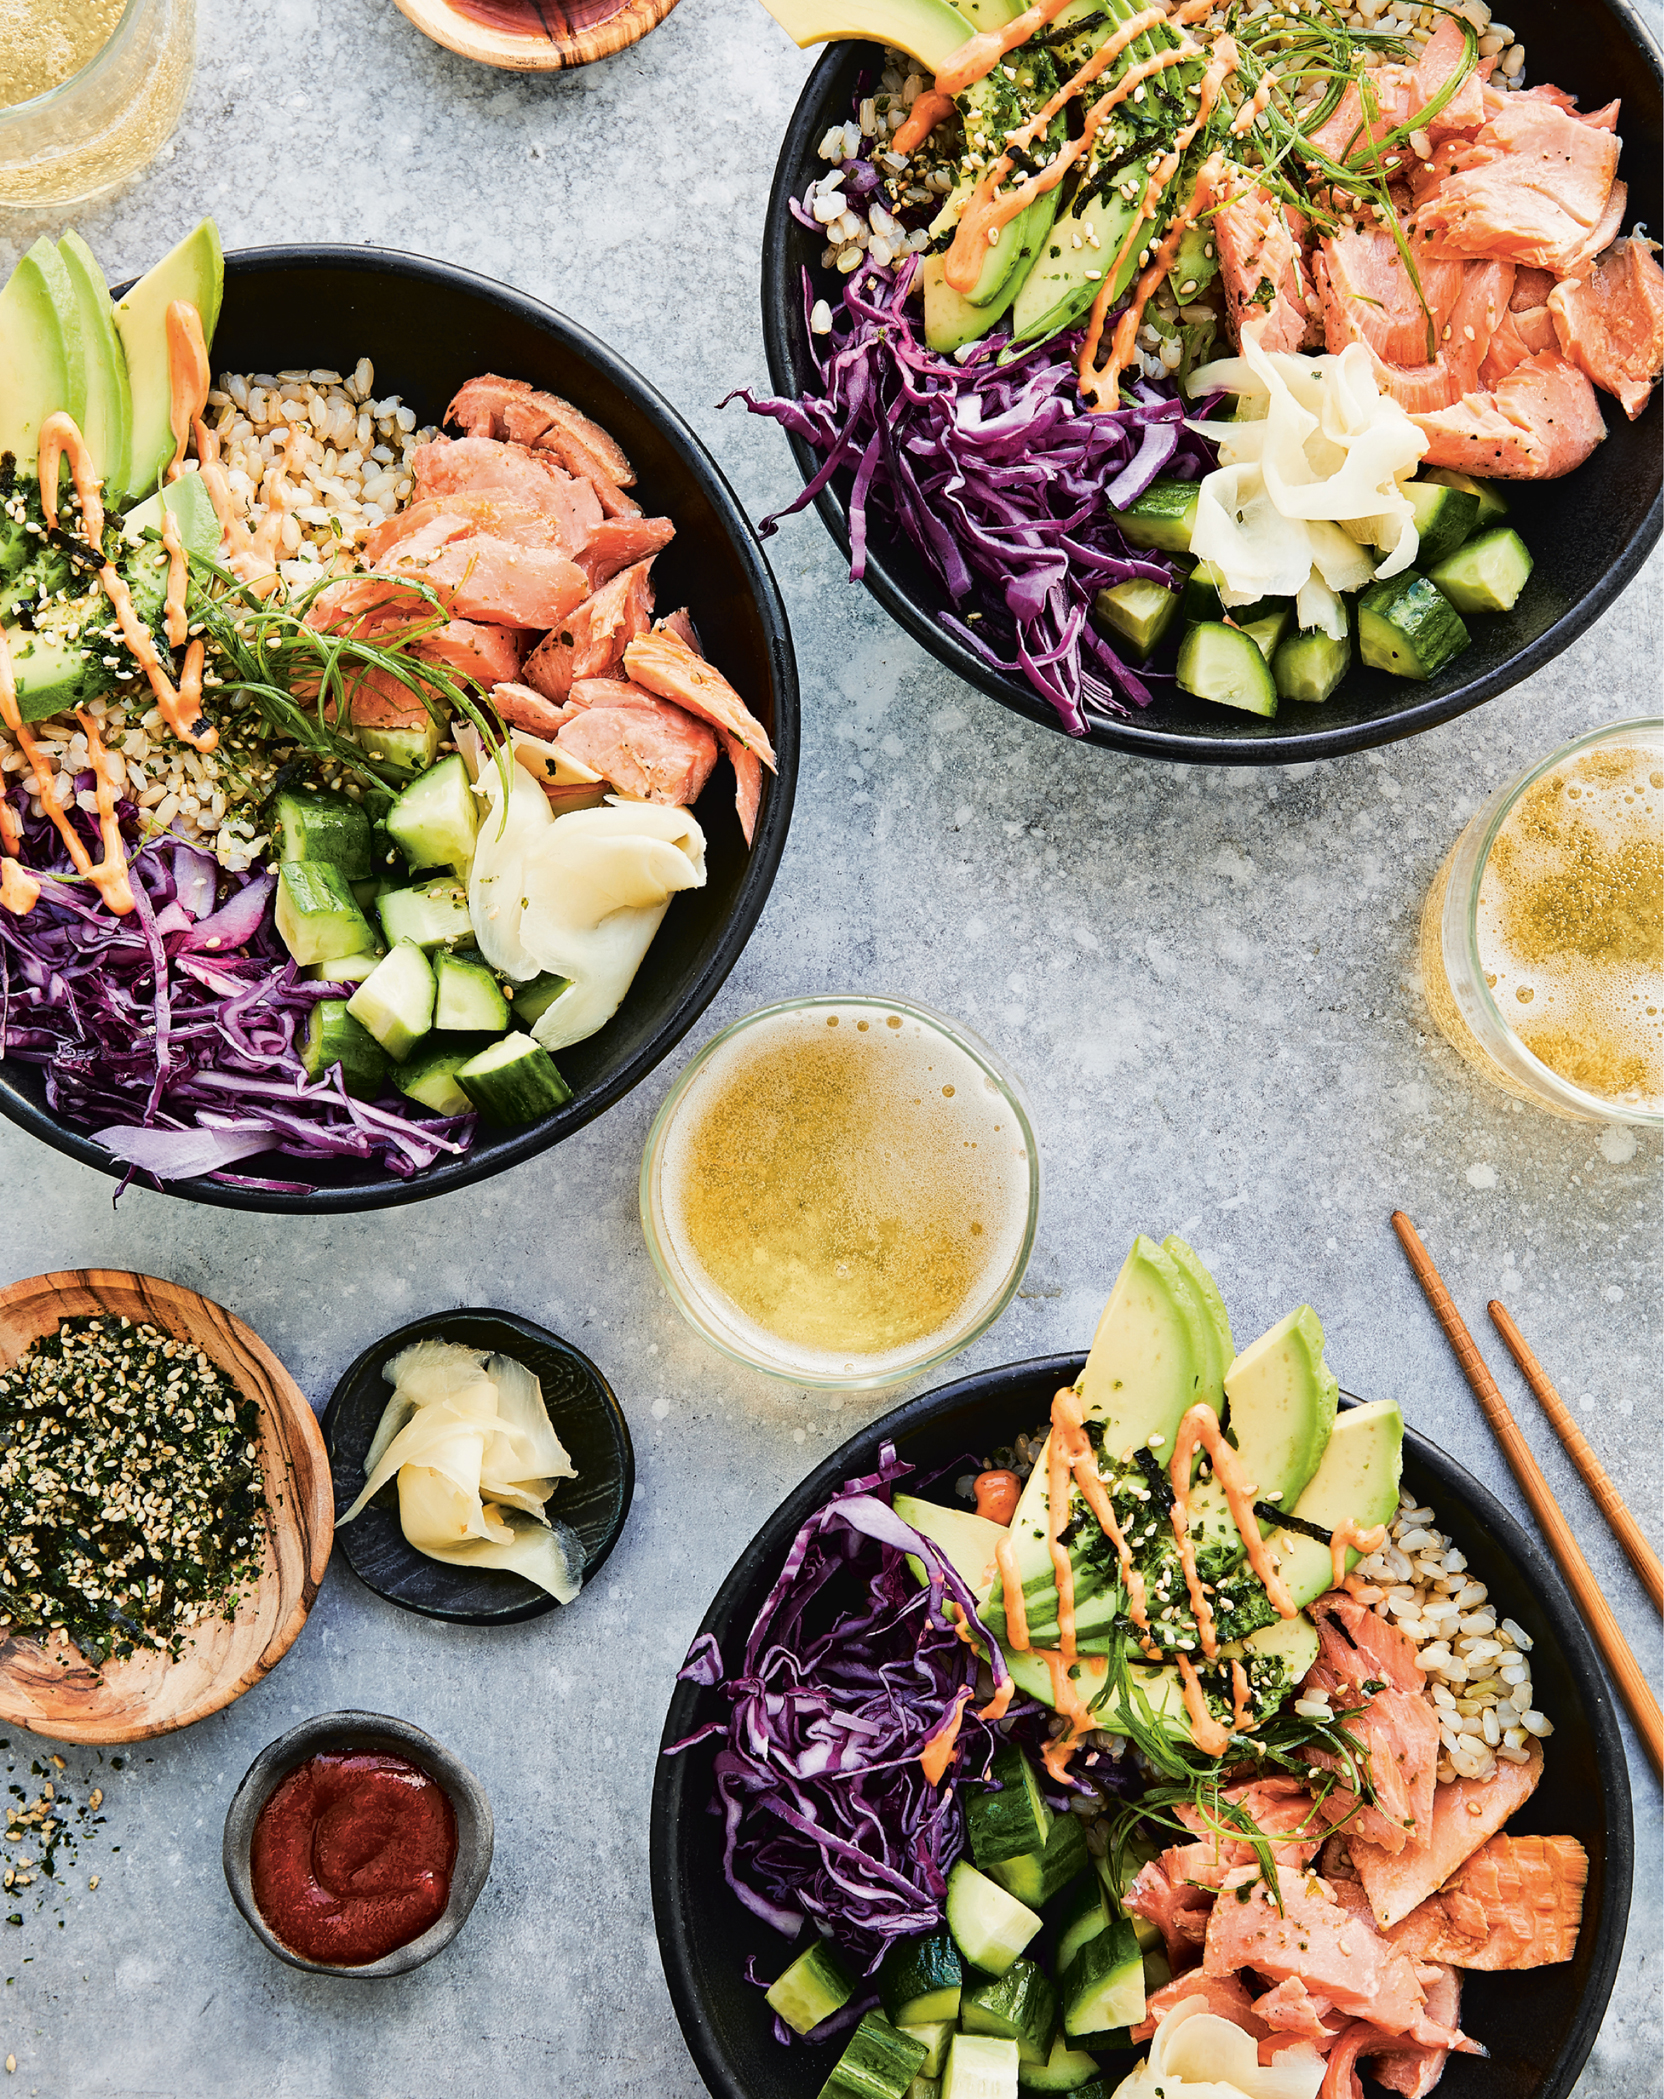
PLANNED-OVER
I usually make my poke bowls with raw tuna, especially when my friend Paulie goes tuna fishing and shares his catch! But I know that a lot of people don’t have access to fresh tuna, or they get nervous about buying it, so these salmon poke bowls are an easy substitute. And now that I’ve tried these bowls with salmon, I may never go back to tuna! The key is to not overcook your salmon, so it’s on the medium-rare side.
SERVES 4
SPICY MAYO
¼ cup light mayonnaise
1½ tablespoons Sriracha sauce
SALMON
1½ pounds leftover Sheet Pan Herb Salmon (this page), cold
4 tablespoons reduced-sodium soy sauce* or gluten-free tamari
2 teaspoons toasted sesame oil
1 teaspoon Sriracha sauce
BOWLS
2 cups cooked rice (short-grain brown, sushi white, or black forbidden rice)
4 Persian cucumbers, diced into ½-inch cubes
1 medium (5-ounce) Hass avocado, sliced
½ cup shredded red cabbage
Jarred pickled ginger (optional)
2 scallions, green parts only, sliced for garnish
1 tablespoon furikake or black sesame seeds
Reduced-sodium soy sauce* or gluten-free tamari, for serving (optional)
Sriracha sauce, for serving (optional)
*Read the label to be sure this product is gluten-free.
FRIDGE: UP TO 2 DAYS
In a small bowl, combine the mayonnaise and Sriracha and thin with 1 tablespoon water to drizzle.
Flake or cut the cold salmon into large chunks. Drizzle with the soy sauce, sesame oil, and Sriracha and gently toss to combine. Set aside while you prepare the bowls.
Place ½ cup rice in each of 4 shallow bowls. In each bowl, arrange 6 ounces salmon, one-fourth of the diced cucumber and avocado, 2 tablespoons of the red cabbage, some pickled ginger (if using), and one-fourth of the scallion greens.
Drizzle with the spicy mayo, then top with the furikake and serve with extra soy sauce and Sriracha on the side (if using).
Per Serving (1 bowl) • Calories 513 • Fat 25 g • Saturated Fat 3.5 g • Cholesterol 96 mg • Carbohydrate 34 g • Fiber 5 g • Protein 37 g Sugars 5 g • Sodium 939 mg
Salmon Niçoise Salad
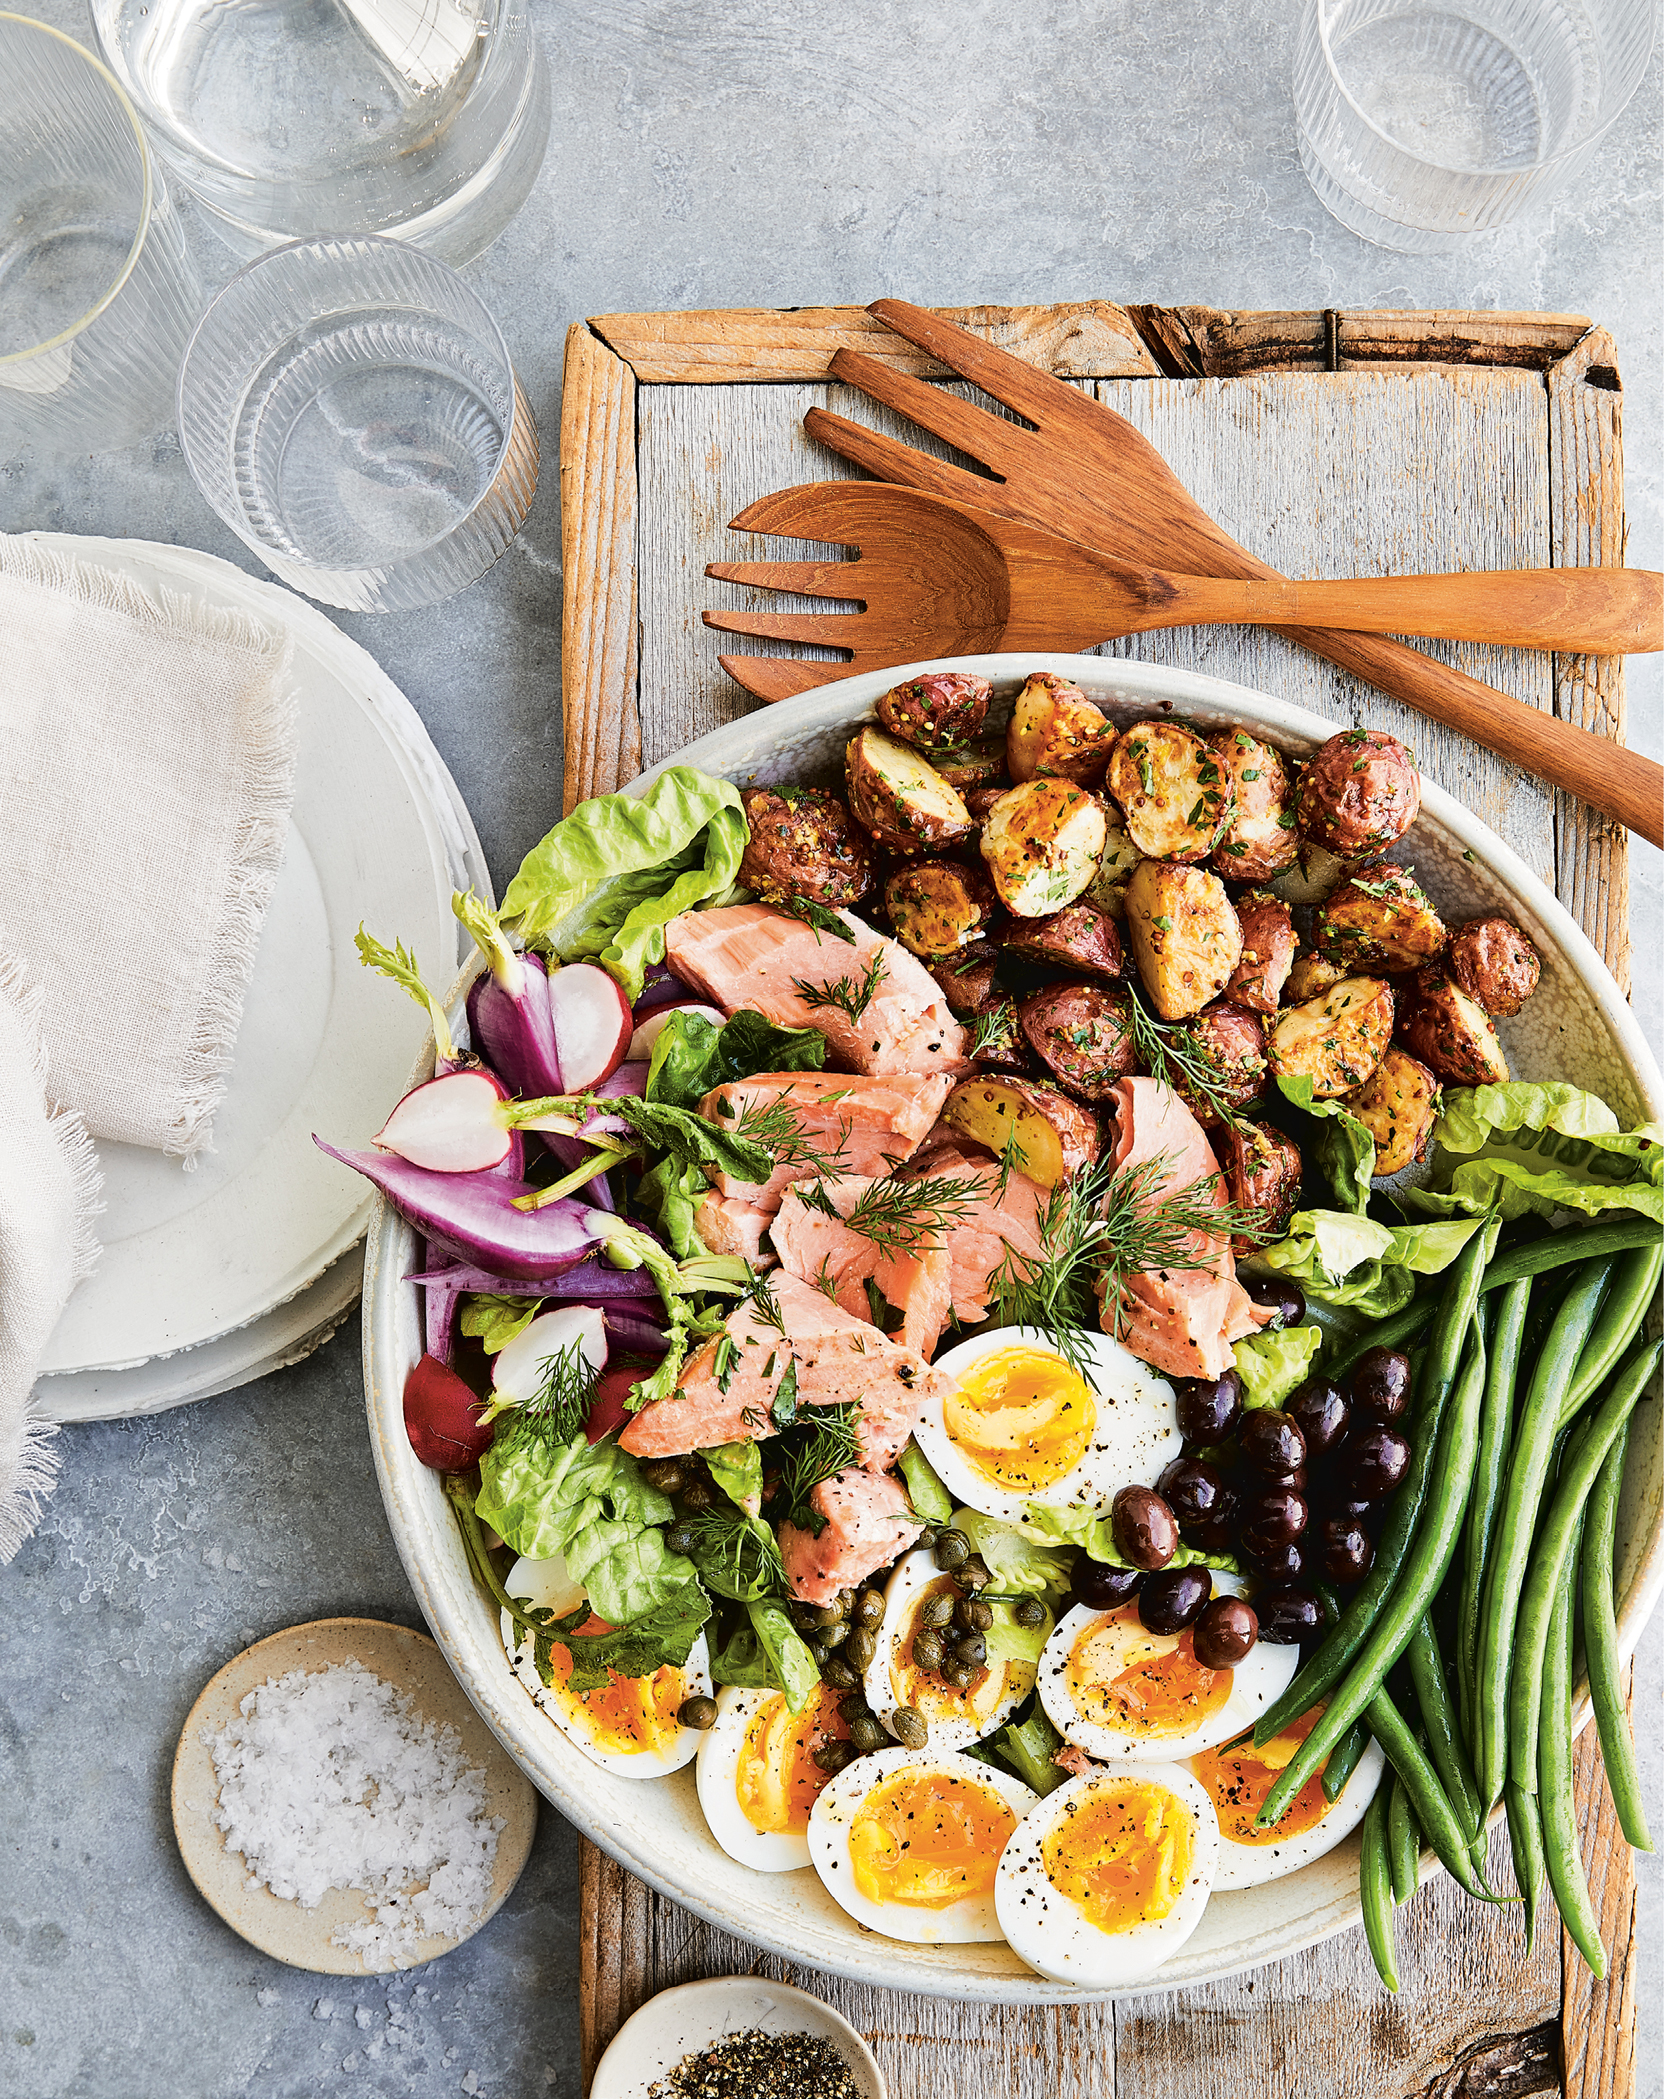
PLANNED-OVER
There are a few things that any reputable Niçoise salad must have…potatoes, briny olives, and green beans. But instead of using the usual tuna, I used leftover salmon instead as a riff on this French classic. I’m not a fan of boiled potatoes, so here I roasted them and then tossed them with whole-grain mustard, which really elevates the entire salad. And since I’m not big on salad dressing, I simply finished this with a drizzle of olive oil and some lemon juice.
SERVES 4
1½ pounds leftover Sheet Pan Herb Salmon (this page)
POTATOES
1 pound baby red or Yukon Gold potatoes, quartered
1 tablespoon olive oil
½ teaspoon garlic powder
Kosher salt
Freshly ground black pepper
2 teaspoons whole-grain mustard
Grated lemon zest from ½ lemon
½ tablespoon finely chopped fresh flat-leaf parsley
SALAD
Kosher salt
4 large eggs
12 ounces green beans or haricots verts, ends trimmed
2 heads Bibb or Gem lettuce, roughly chopped (about 6 cups)
½ cup mixed or Niçoise olives, pitted
4 radishes, quartered
2 tablespoons capers, drained
Freshly ground black pepper
4 teaspoons extra-virgin olive oil
Juice of 1 lemon
¼ cup chopped fresh dill
Remove the salmon from the refrigerator and break it up into bite-size chunks. Set aside.
Make the potatoes: Preheat the oven to 400°F. Add the potatoes to a 9 x 9-inch baking dish and toss with the olive oil, garlic powder, ½ teaspoon salt, and black pepper to taste, until evenly coated.
Bake for 30 to 35 minutes, tossing halfway through, until tender when a knife is inserted in the center. Transfer to a bowl and toss with the mustard, then season with ⅛ teaspoon salt, the lemon zest, and the parsley.
Make the salad: Set a large bowl of ice water by the stove. Bring a large, wide pot of water to a boil and season generously with salt. Gently add the eggs to avoid cracking, and cook for exactly 7 minutes for slightly runny yolks or 12 minutes for just-set yolks. Transfer the eggs to the ice bath and let cool completely, then peel. Add the green beans to the pot of boiling water and cook for 45 seconds. Immediately transfer to the ice bath and let cool completely, then dry. When the potatoes are done, assemble the salad.
On each plate, arrange one-fourth of the lettuce, salmon, potatoes, olives, green beans, radishes, and capers next to one another (or assemble on a large platter). Cut the eggs in half carefully, then place 2 halves on each plate, cut side up. Season the eggs with salt and pepper to taste, and finish everything else with the olive oil, lemon juice, and dill.
Per Serving (1 salad) • Calories 530 • Fat 26.5 g • Saturated Fat 4.5 g • Cholesterol 277 mg • Carbohydrate 30 g • Fiber 6.5 g • Protein 44 g Sugars 4 g • Sodium 867 mg
Slow Cooker Italian Pulled Pork
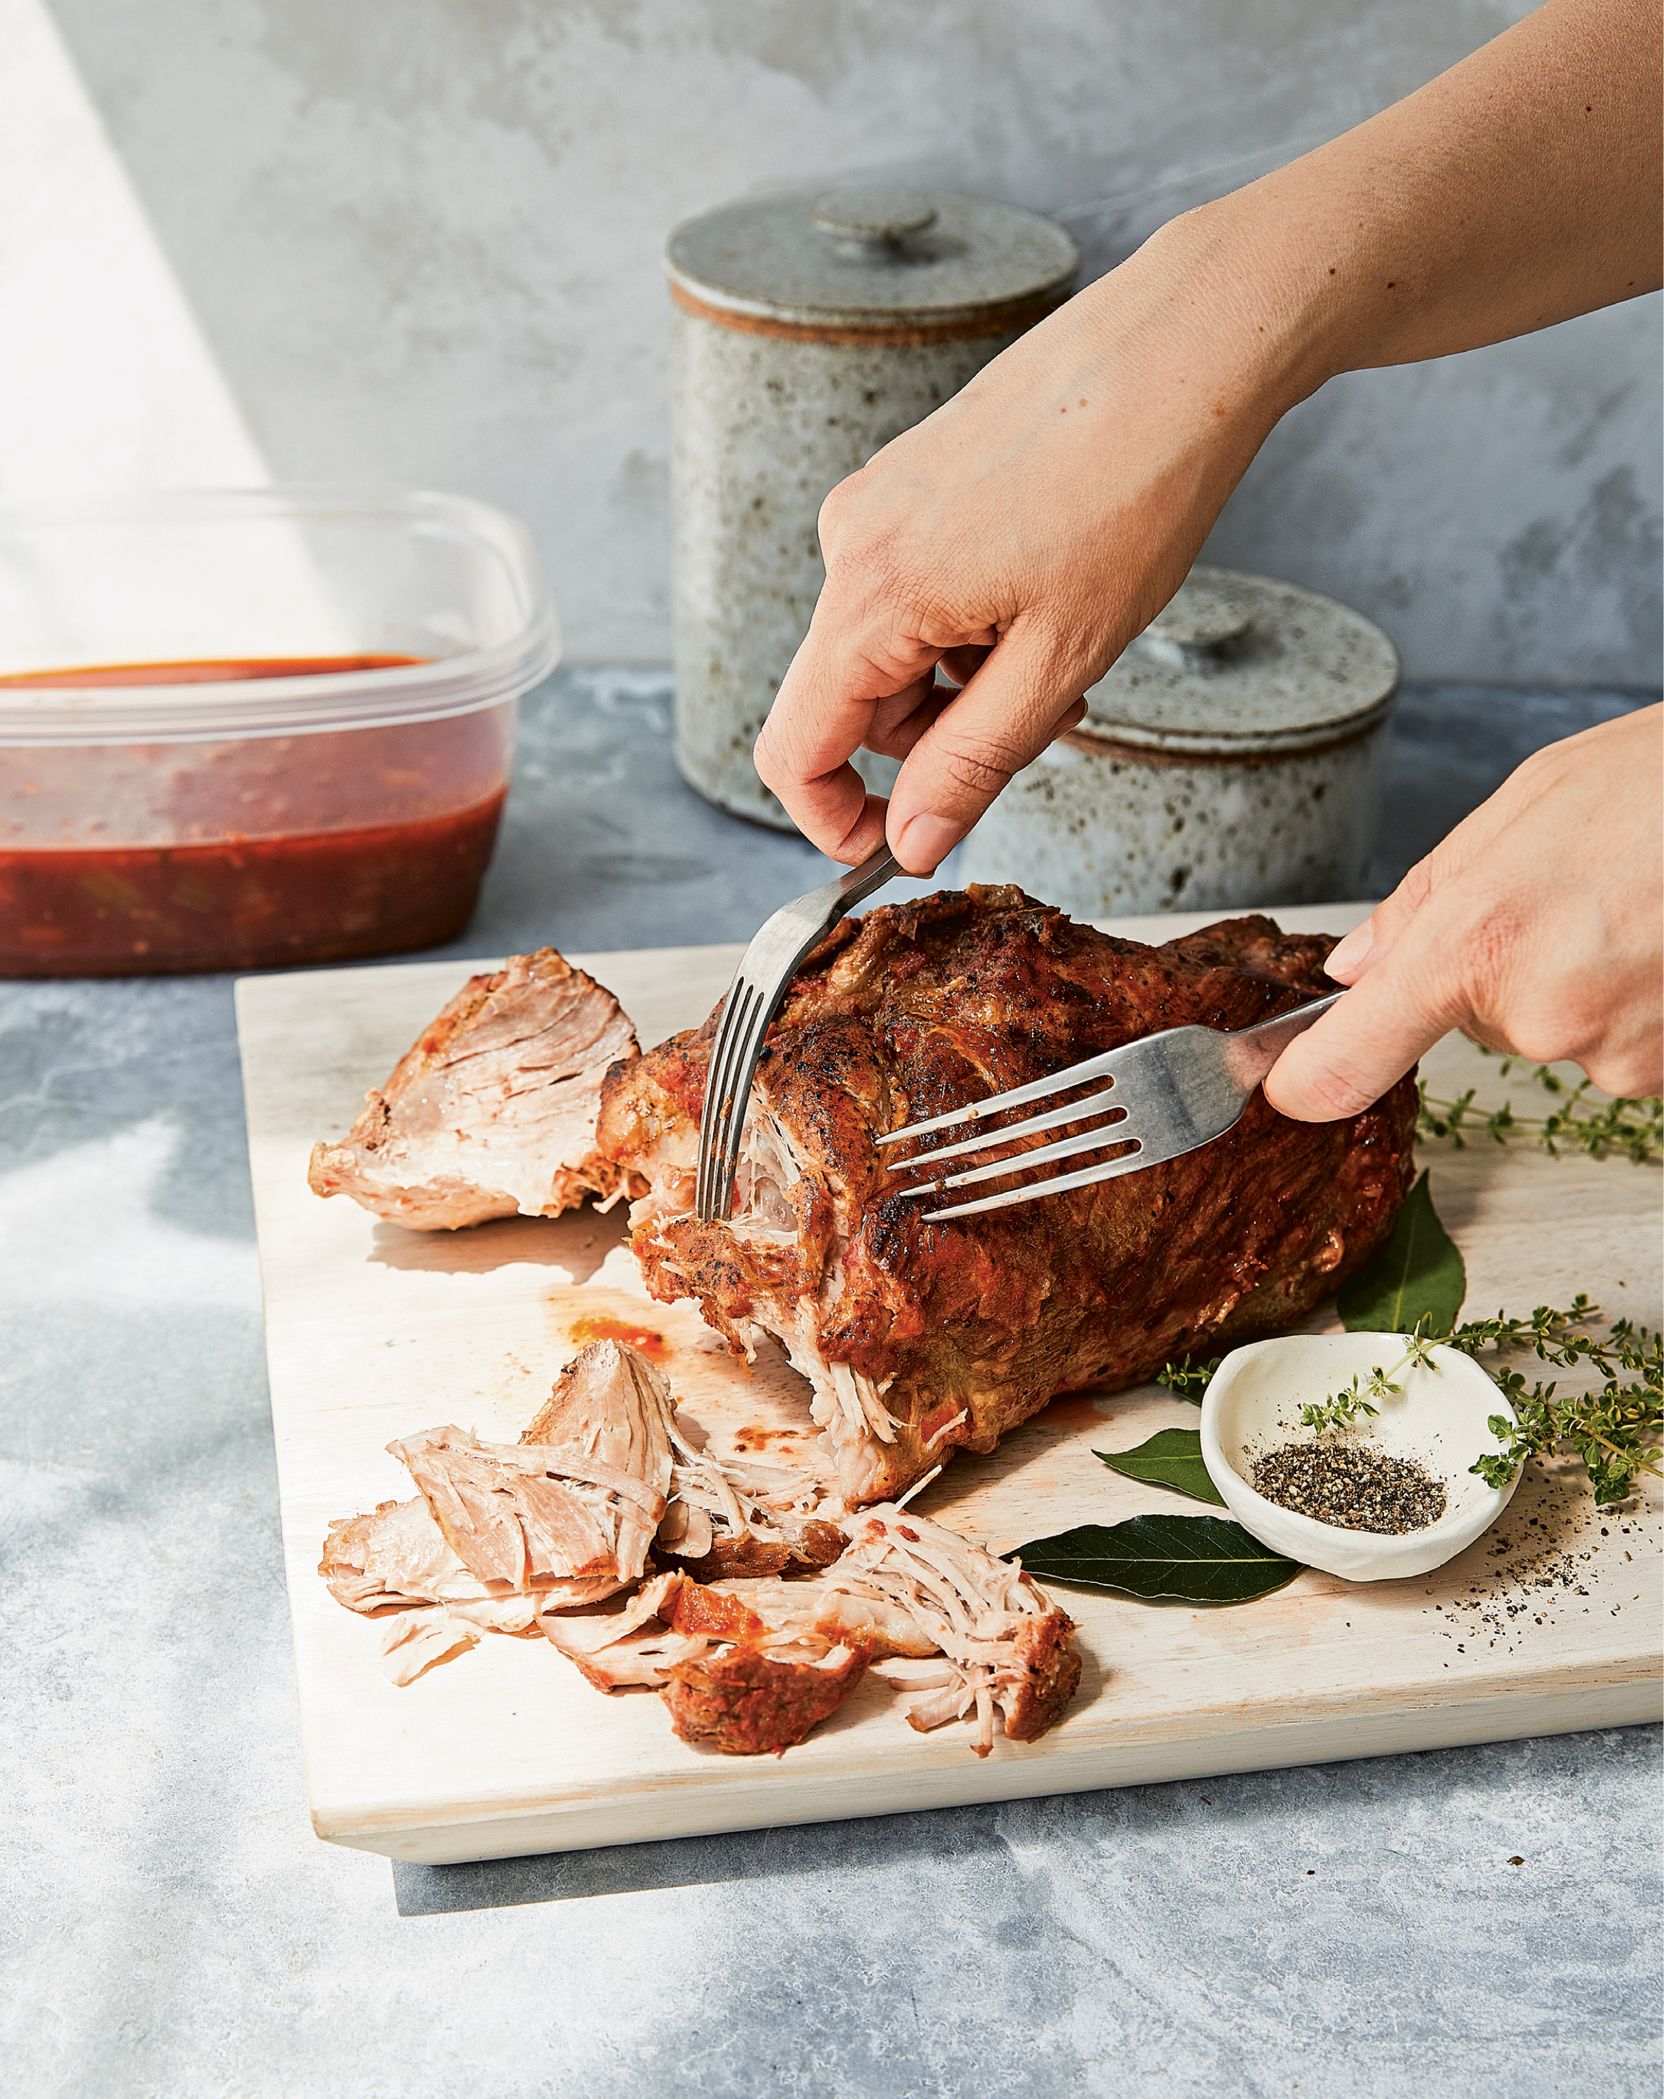
BIG BATCH
Testing new recipes in the slow cooker is challenging because you have to wait all day (without tasting!) before you know if it’s a hit. Trust me, I’ve had many fails! My husband, Tommy, is always a little skeptical when I am testing something new for dinner in the slow cooker, and he’s ready to order takeout…just in case! But this pork dish was so good the first time I made it, he even went back for seconds. Dinner win! It’s sort of like a pork ragu and it’s yummy on sliders, Parmesan-style, or over whole wheat pasta, mashed potatoes, or spaghetti squash. The possibilities are endless! Browning the pork and sautéing the onions are a must for me when slow-cooking for developing flavor in the final dish, so don’t skip that step!
SERVES 12
2 teaspoons olive oil
1 medium onion, chopped
1 carrot, chopped
1 celery stalk, chopped
¼ cup chopped fresh parsley
Kosher salt
3 garlic cloves, smashed with the side of a knife and chopped
¼ cup dry white wine
1 (28-ounce) can crushed tomatoes (I like Tuttorosso)
4 pounds boneless pork butt or shoulder roast, trimmed of fat cap and excess fat (about 3¾ pounds trimmed)
2 bay leaves
3 sprigs of fresh thyme
FRIDGE: UP TO 4 DAYS
FREEZER: UP TO 6 MONTHS
In a large skillet over medium-low heat, add the oil, onion, carrot, celery, parsley, and ½ teaspoon salt. Cook for about 8 minutes, stirring until soft. Add the garlic and cook for about 2 minutes more, until fragrant. Add the wine and cook to reduce, about 2 minutes more, then transfer to the slow cooker. Add the crushed tomatoes and stir. Depending on the brand of tomatoes you use, you may have to adjust the amount of salt that you add.
Season the pork all over with 1½ teaspoons salt. Brown the pork in the skillet over medium-high heat for about 4 minutes on each side. Transfer to the slow cooker, add the bay leaves and thyme, then cover and cook on high for about 5 hours or on low for 9 to 10 hours, until the meat is tender and easily pulls apart with two forks.
Remove the pork to a cutting board, discard the herbs, and use two forks to pull the pork apart, leaving some large chunks, then mix it back in with the sauce.
For an Instant Pot: Cut the pork into 4 pieces and season. Press sauté, spray the pot with oil, and sauté the meat in batches for 5 minutes on each side; set aside. Add the oil and vegetables and cook for 5 minutes. Add the wine and cook for 2 more minutes; press cancel to stop. Stir the pot well to prevent burning, then add the pork and remaining ingredients. Cook on high pressure for 50 minutes, natural release. Shred the meat with two forks.
Big Batch: Store leftovers in airtight containers to use for Pork Shoulder Ragu with Cauliflower Polenta (this page).
Per Serving (generous ¾ cup) • Calories 228 • Fat 7 g • Saturated Fat 1.5 g • Cholesterol 100 mg • Carbohydrate 6 g • Fiber 1.5 g • Protein 34 g Sugars 3 g • Sodium 411 mg
Pork Shoulder Ragu with Cauliflower Polenta
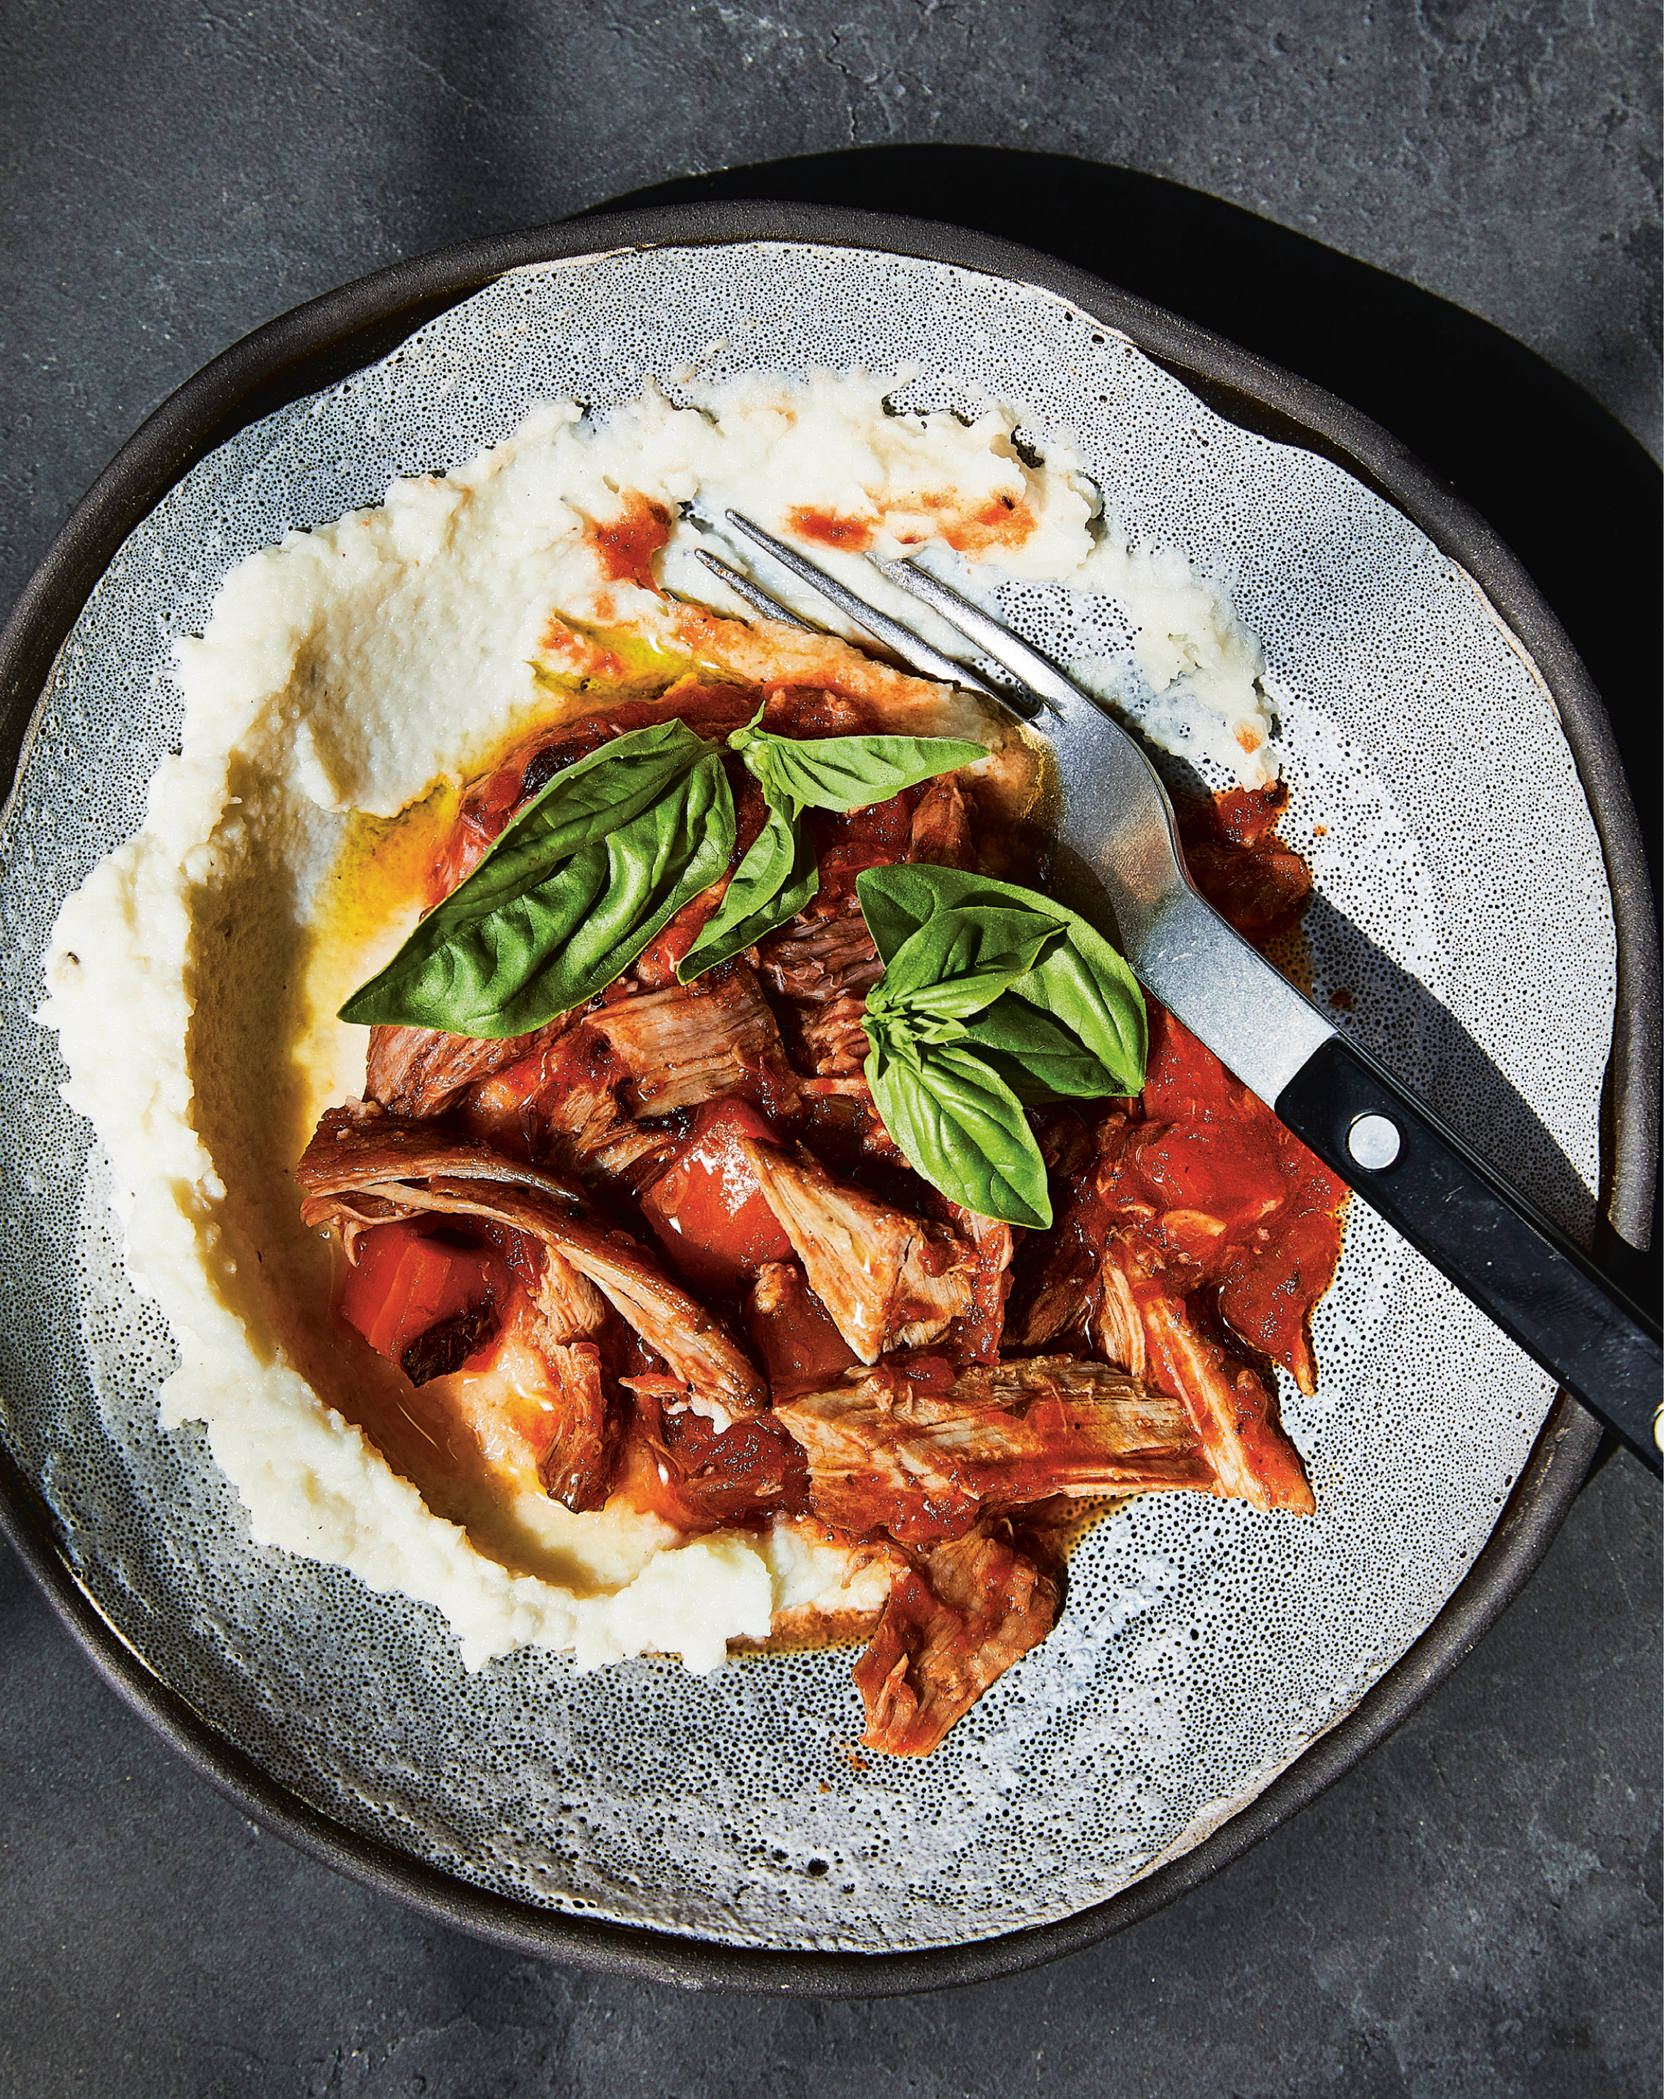
PLANNED-OVER
Yesterday’s Slow Cooker Italian Pulled Pork (this page) gets turned into tonight’s cauliflower “faux-lenta” (grain-free polenta)—a perfect pairing! Cauliflower is such a versatile vegetable; this creamy cauliflower puree has the buttery, comforting texture of a polenta without all the calories and carbs. Serve it with plenty of Parmesan on the side, for sharing.
SERVES 4
1 medium head (about 1½ pounds) cauliflower, cut into florets
3 garlic cloves
1 tablespoon unsalted butter
¼ cup 2% milk
⅓ cup freshly grated Parmesan cheese, plus more for serving
2 ounces light cream cheese
½ teaspoon kosher salt
Freshly ground black pepper
3 cups leftover Italian Pulled Pork (this page), reheated
Chopped fresh basil, for garnish
FRIDGE: UP TO 4 DAYS
Fill a large pot with water, bring to a boil, and add the cauliflower and garlic. Boil until the cauliflower is soft when pierced with a knife, 12 to 15 minutes. Drain well and return to the pot. Add the butter, milk, Parmesan, cream cheese, salt, and pepper to taste. Puree with an immersion blender until smooth. (A regular blender will work, but be sure to let the mixture cool before blending and fill only halfway in the blender so it doesn’t explode on you.)
SERVE NOW: Add 1 cup cauliflower to each of 4 shallow serving bowls. Top each with ¾ cup pork, garnish with basil, and serve with more grated Parmesan.
MEAL PREP: Refrigerate the pork and the “polenta” in separate containers, then reheat in the microwave when ready to serve.
Per Serving (1 cup cauliflower polenta + ¾ cup ragu) • Calories 376 Fat 15 g • Saturated Fat 6.5 g • Cholesterol 124 mg • Carbohydrate 18 g Fiber 6 g • Protein 43 g • Sugars 8 g • Sodium 778 mg
Instant Pot Colombian Beans


BIG BATCH
Colombian-style beans is the meal I remember my mom cooking the most when I was a kid. I never really liked beans growing up, but that changed on one of my adult trips to Colombia. I was generously offered rice and beans with avocado on the side for lunch at every home I visited. Different regions of the country make the beans in unique ways. In Bogota, where my mom is from, they use ripe yellow plantains (which sweeten the beans) and serve it with chicharrón. When I make a big pot of beans in my Instant Pot, I like to use a smoked ham hock for a smoky flavor, but if you want to make your beans vegetarian you can just leave it out. To make this a meal, serve the beans over white or brown rice and with avocado on the side. Leftovers can be used in a filling for pupusas (see this page) or Bean and Turkey Tostadas (this page).
SERVES 18
1 pound dried cranberry, pinto, or red beans
½ tablespoon olive oil
1 small onion, chopped
3 medium scallions, chopped
5 garlic cloves, crushed through a garlic press
2 teaspoons kosher salt
1 teaspoon ground cumin
½ teaspoon achiote or annatto powder (optional for color)
¼ teaspoon garlic powder
¼ teaspoon ground turmeric
2 medium tomatoes, chopped
¼ cup finely chopped fresh cilantro
1 smoked ham hock
1 bay leaf
1 sprig of fresh thyme
1 medium yellow plantain, cut into ¼-inch dice
FRIDGE: UP TO 4 DAYS
FREEZER: UP TO 6 MONTHS
Rinse the beans and put them in a medium bowl. Cover with water by 2 inches and let soak for at least 8 hours or as long as overnight. Drain and discard the water.
Set your Instant Pot (or any electric pressure cooker) to the sauté setting. When hot, add the oil, onion, scallions, garlic, 1 teaspoon salt, cumin, achiote (if using), garlic powder, and turmeric and stir to combine. Cook for 2 to 3 minutes, until soft, then add the tomatoes and cilantro and cook for another 2 to 3 minutes, until soft. Press cancel, transfer to a bowl, and set aside.
Add the beans to the Instant Pot with 6 cups water, then add the ham hock, bay leaf, thyme, and remaining 1 teaspoon salt.
Cover and cook on high pressure for 40 minutes. Let the beans natural release, uncover, remove the ham hocks, and let cool. Remove the bay leaf and thyme and discard.
Set the Instant Pot to the sauté setting. Add the plantain and tomato-onion mixture to the beans and let it boil, stirring frequently to prevent burning, 20 to 25 minutes, until the plantains are tender and the beans are thickened to your liking.
Once the ham hocks have cooled, remove the meat from the bones and add it back to the beans. Discard the bones and skin.
SERVE NOW: Serve ½ cup beans with a side of white or brown rice, avocado, and hot sauce.
FREEZE AND SERVE LATER: Let the beans cool to room temperature, then transfer to freezer-safe containers. To reheat, microwave the beans from frozen or thaw overnight in the refrigerator before reheating.
No Instant Pot, No Problem! Add ¼ cup more water and cook, covered, on low heat for about 2 hours, then uncover and cook as directed.
Big Batch: Store leftover beans in airtight containers to use for pupusas (this page) and tostadas (this page).
Per Serving (½ cup) • Calories 119 Fat 1.5 g • Saturated Fat 0.5 g • Cholesterol 3 mg • Carbohydrate 20 g Fiber 5 g • Protein 7 g Sugars 3 g • Sodium 137 mg
Bean and Turkey Tostadas
PLANNED-OVER
We always have tostada shells on hand in the pantry (Charras brand are the best!) because my daughter Karina loves cleaning out my leftovers to make tostadas, which inspired these planned-overs. They are perfect for lunch, and you can double the portion for a hearty dinner. Leftover beans can easily be transformed into refried beans, although here I simply mashed them with a fork since they’re soupy enough. If you have some pupusas (this page) in your freezer, you can use them in place of tostada shells for an epic tostada!
SERVES 4
QUICK SLAW
2 teaspoons olive oil
1 tablespoon fresh lime juice
2 cups shredded cabbage
2 scallions, chopped
⅓ cup chopped fresh cilantro
¼ teaspoon kosher salt
Cooking spray
½ pound 93% lean ground turkey
½ tablespoon ground cumin
½ teaspoon smoked paprika
½ teaspoon garlic powder
¼ teaspoon chili powder*
½ teaspoon kosher salt
1 cup leftover Instant Pot Colombian Beans (this page)
4 tostada shells (I like Charras Original)
1 cup shredded reduced-fat cheddar or Mexican cheese blend*
1 lime, cut into wedges for serving
*Read the label to be sure this product is gluten-free.
Preheat the oven to 425°F. Line a large baking sheet with foil.
Make the slaw: In a medium bowl, mix the olive oil and lime juice. Add the cabbage, scallions, cilantro, and salt and toss to coat. Set aside.
Heat a large skillet over medium-high heat and spray with oil. Add the ground turkey, cumin, paprika, garlic powder, chili powder, and salt. Brown the meat, using a wooden spoon to break it into small pieces, until cooked through, 7 to 9 minutes.
Mash the leftover beans with a fork.
Assemble the tostadas: Spread ¼ cup mashed beans on the bottom of each tostada shell, then spoon one-fourth of the turkey into each tostada. Place in the preheated oven and bake for about 5 minutes, until heated through. Top with the cheese and place back into the oven to melt, 2 to 3 minutes more. Remove from the oven, top with the slaw, and serve with the lime wedges.
Per Serving (1 tostada) • Calories 323 • Fat 17 g • Saturated Fat 6 g Cholesterol 59 mg • Carbohydrate 24 g • Fiber 4.5 g • Protein 24 g Sugars 3 g • Sodium 601 mg
Five-Spice Glazed Pork Tenderloin

BIG BATCH
Five-spice powder is a seasoning mix used widely in Chinese cooking. Combined with honey, hoisin, garlic, soy sauce, sesame oil, and brown sugar, this marinade lends an irresistible flavor to pork tenderloin, reminiscent of char siu (Chinese BBQ pork). We love this served with rice and steamed greens such as bok choy, kale, or broccolini. Make use of the leftover pork for Quick Five-Spice Pork Ramen (this page).
SERVES 8
⅓ cup reduced-sodium soy sauce* or gluten-free tamari
4 tablespoons honey
4 garlic cloves, minced
1 tablespoon hoisin sauce*
2 tablespoons packed brown sugar
1 tablespoon rice wine (mirin)
½ teaspoon toasted sesame oil
½ teaspoon ground Chinese five-spice powder
¼ teaspoon ground white pepper
2 pork tenderloins, about 1 pound each
*Read the label to be sure this product is gluten-free.
FRIDGE: UP TO 3 DAYS
FREEZER: UP TO 3 MONTHS
Combine the soy sauce, 2 tablespoons of the honey, garlic, hoisin sauce, brown sugar, rice wine, sesame oil, five-spice powder, and white pepper in a bowl to make the marinade.
Reserve 2 tablespoons of the marinade and set it aside. In a large bowl or baking dish, rub the pork loin with the rest of the marinade. Cover and refrigerate for at least 8 hours or up to overnight. Cover and refrigerate the reserved marinade.
Position a rack in the upper third of the oven and preheat to 425°F.
Line a roasting pan with foil and place a wire rack on top. Place the pork (discarding the marinade it was in) on the rack, then pour 1½ cups water on the bottom of the pan (to prevent the oven from smoking).
Transfer the pork to your preheated oven and roast for about 25 minutes.
Meanwhile, in a small bowl combine the reserved marinade with the remaining 2 tablespoons honey and ½ tablespoon hot water. This is the sauce you will use to baste the pork. After about 25 minutes, baste the pork with two-thirds of the baste, flip it, and baste the other side as well. Roast for 10 to 12 minutes more, or until a meat thermometer reads 160°F.
Adjust an oven rack 4 to 6 inches from the heating element and turn the broiler to high. Broil the pork for about 2 minutes to crisp the outside, keeping an eye on it so it doesn’t burn.
Remove from the oven and let the pork rest for 10 minutes before slicing. Slice each tenderloin into 8 pieces and baste with the last bit of reserved BBQ sauce.
SERVE NOW: Serve with rice and steamed greens such as bok choy or broccoli.
Big Batch: If you plan on making the Quick Five-Spice Pork Ramen (this page), refrigerate or freeze any leftovers. Thaw in the refrigerator overnight before reheating.
Per Serving (2 slices) • Calories 153 Fat 2.5 g • Saturated Fat 1 g Cholesterol 74 mg • Carbohydrate 7 g Fiber 0 g • Protein 24 g Sugars 6 g • Sodium 213 mg
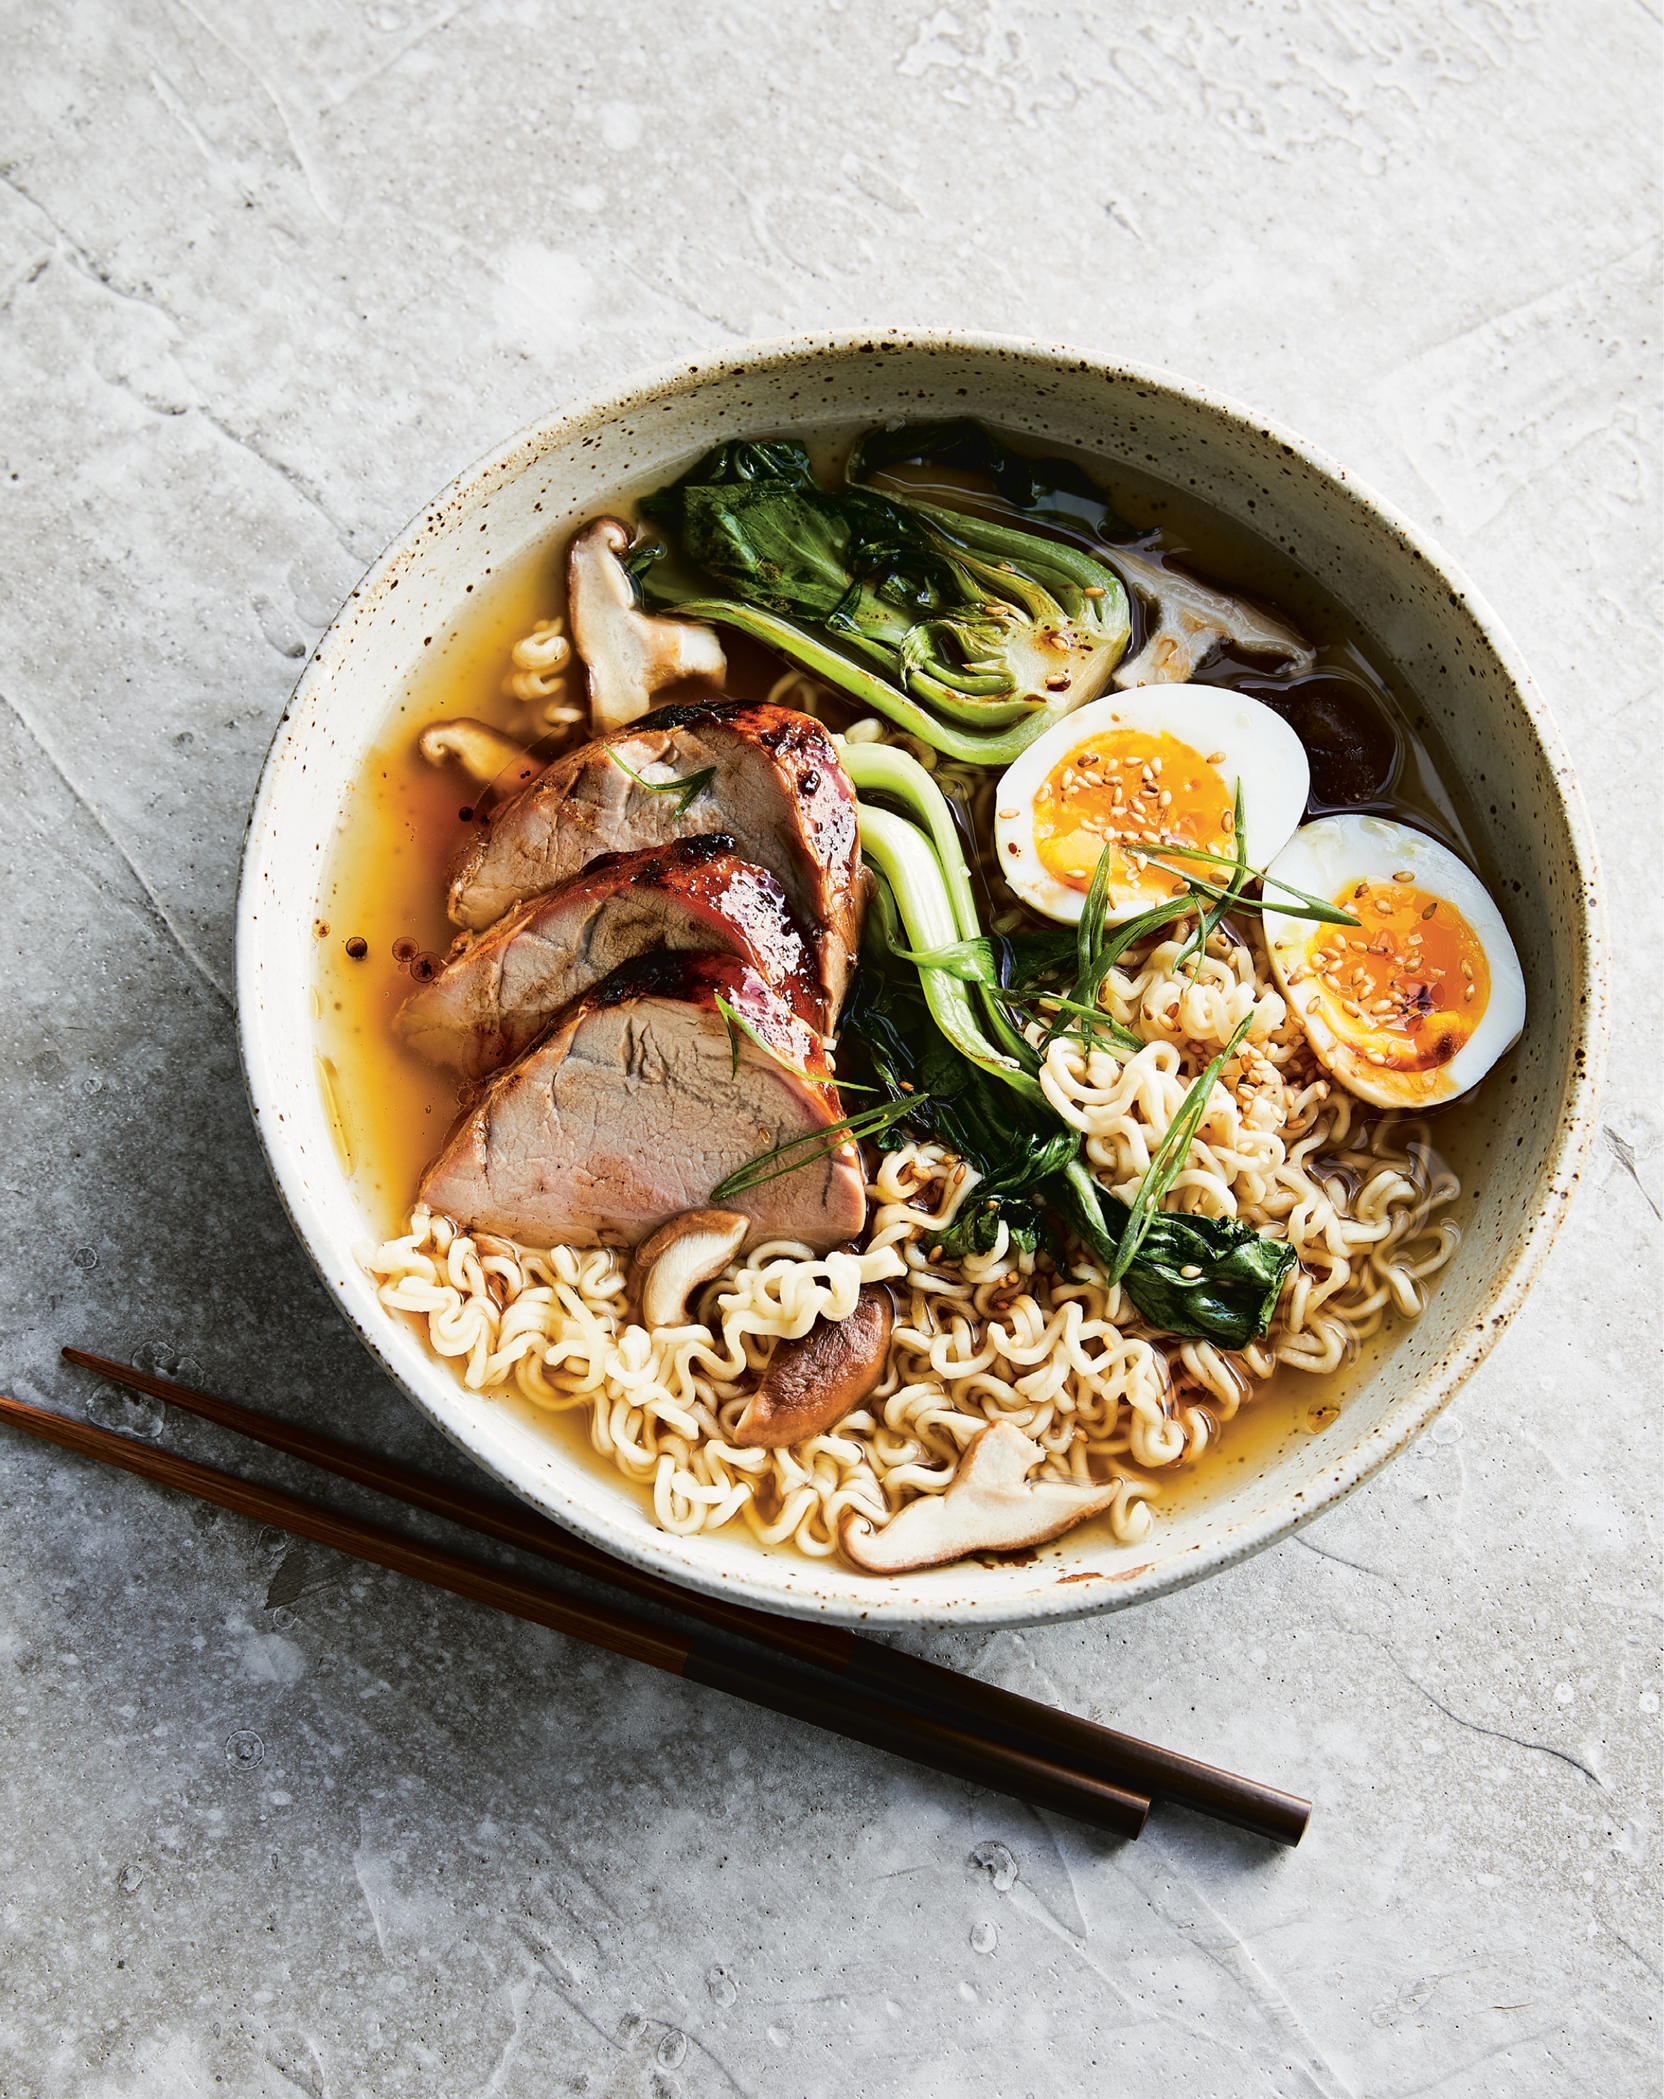
Quick Five-Spice Pork Ramen
PLANNED-OVER
Instant ramen noodles are synonymous with quick, easy meals, but this is not like the ramen you had in your college days, void of protein and veggies. Each bowl is filled with crisp baby bok choy, shiitake mushrooms, thinly sliced pork tenderloin, ramen noodles, and an egg with a gloriously runny yolk, all floating in a gingery broth (throw away those seasoning packets!). The only thing that makes it better is a drizzle of Sriracha at the end. And because we’re making it a planned-over dish using leftover Five-Spice Glazed Pork Tenderloin (this page), it’s still a quick dish! The leftover pork freezes well, so you can have this whenever a ramen craving strikes. And of course, this can be made with chicken or tofu instead if you’re not a fan of pork.
SERVES 4
4 large eggs
6 cups low-sodium beef or chicken broth
2 medium scallions, white and green parts separated, sliced
4 thin slices fresh ginger, cut into matchsticks
2 garlic cloves, minced
¼ teaspoon freshly ground black pepper
1 tablespoon reduced-sodium soy sauce
4 baby bok choy, halved lengthwise and crosswise
2 (3-ounce) packages instant ramen noodles, seasoning discarded
½ cup sliced shiitake mushrooms
6 ounces leftover Five-Spice Glazed Pork Tenderloin (this page), thinly sliced (if frozen, thawed)
1 teaspoon sesame seeds, for garnish
Sriracha sauce, for serving (optional)
Bring a small pot of water to a boil over high heat. Add the eggs to the water and cook for about 6 minutes for a perfectly runny yolk, or a few minutes longer for a firm yolk. Run under cold water or transfer to an ice bath right away to stop the cooking, then peel.
Bring the broth to a boil in a large pot with the scallion whites, ginger, garlic, pepper, and soy sauce. Cover and cook for about 5 minutes, until fragrant.
Add the bok choy and partially cook for about 5 minutes, then add the ramen noodles and mushrooms. Simmer for 3 to 4 minutes, until the bok choy is tender and wilted and the noodles are cooked. Add the sliced pork tenderloin and heat in the broth for the last minute.
Divide the soup among 4 bowls (1½ cups soup with 1½ ounces pork slices), and add 1 soft-boiled egg, cut in half, along with the scallion greens and sesame seeds. Serve the Sriracha alongside (if using). This is best when eaten right away.
Per Serving (1½ cups + egg + pork) • Calories 295 • Fat 10 g Saturated Fat 4 g • Cholesterol 223 mg • Carbohydrate 23 g Fiber 1.5 g • Protein 28 g • Sugars 7 g • Sodium 744 mg
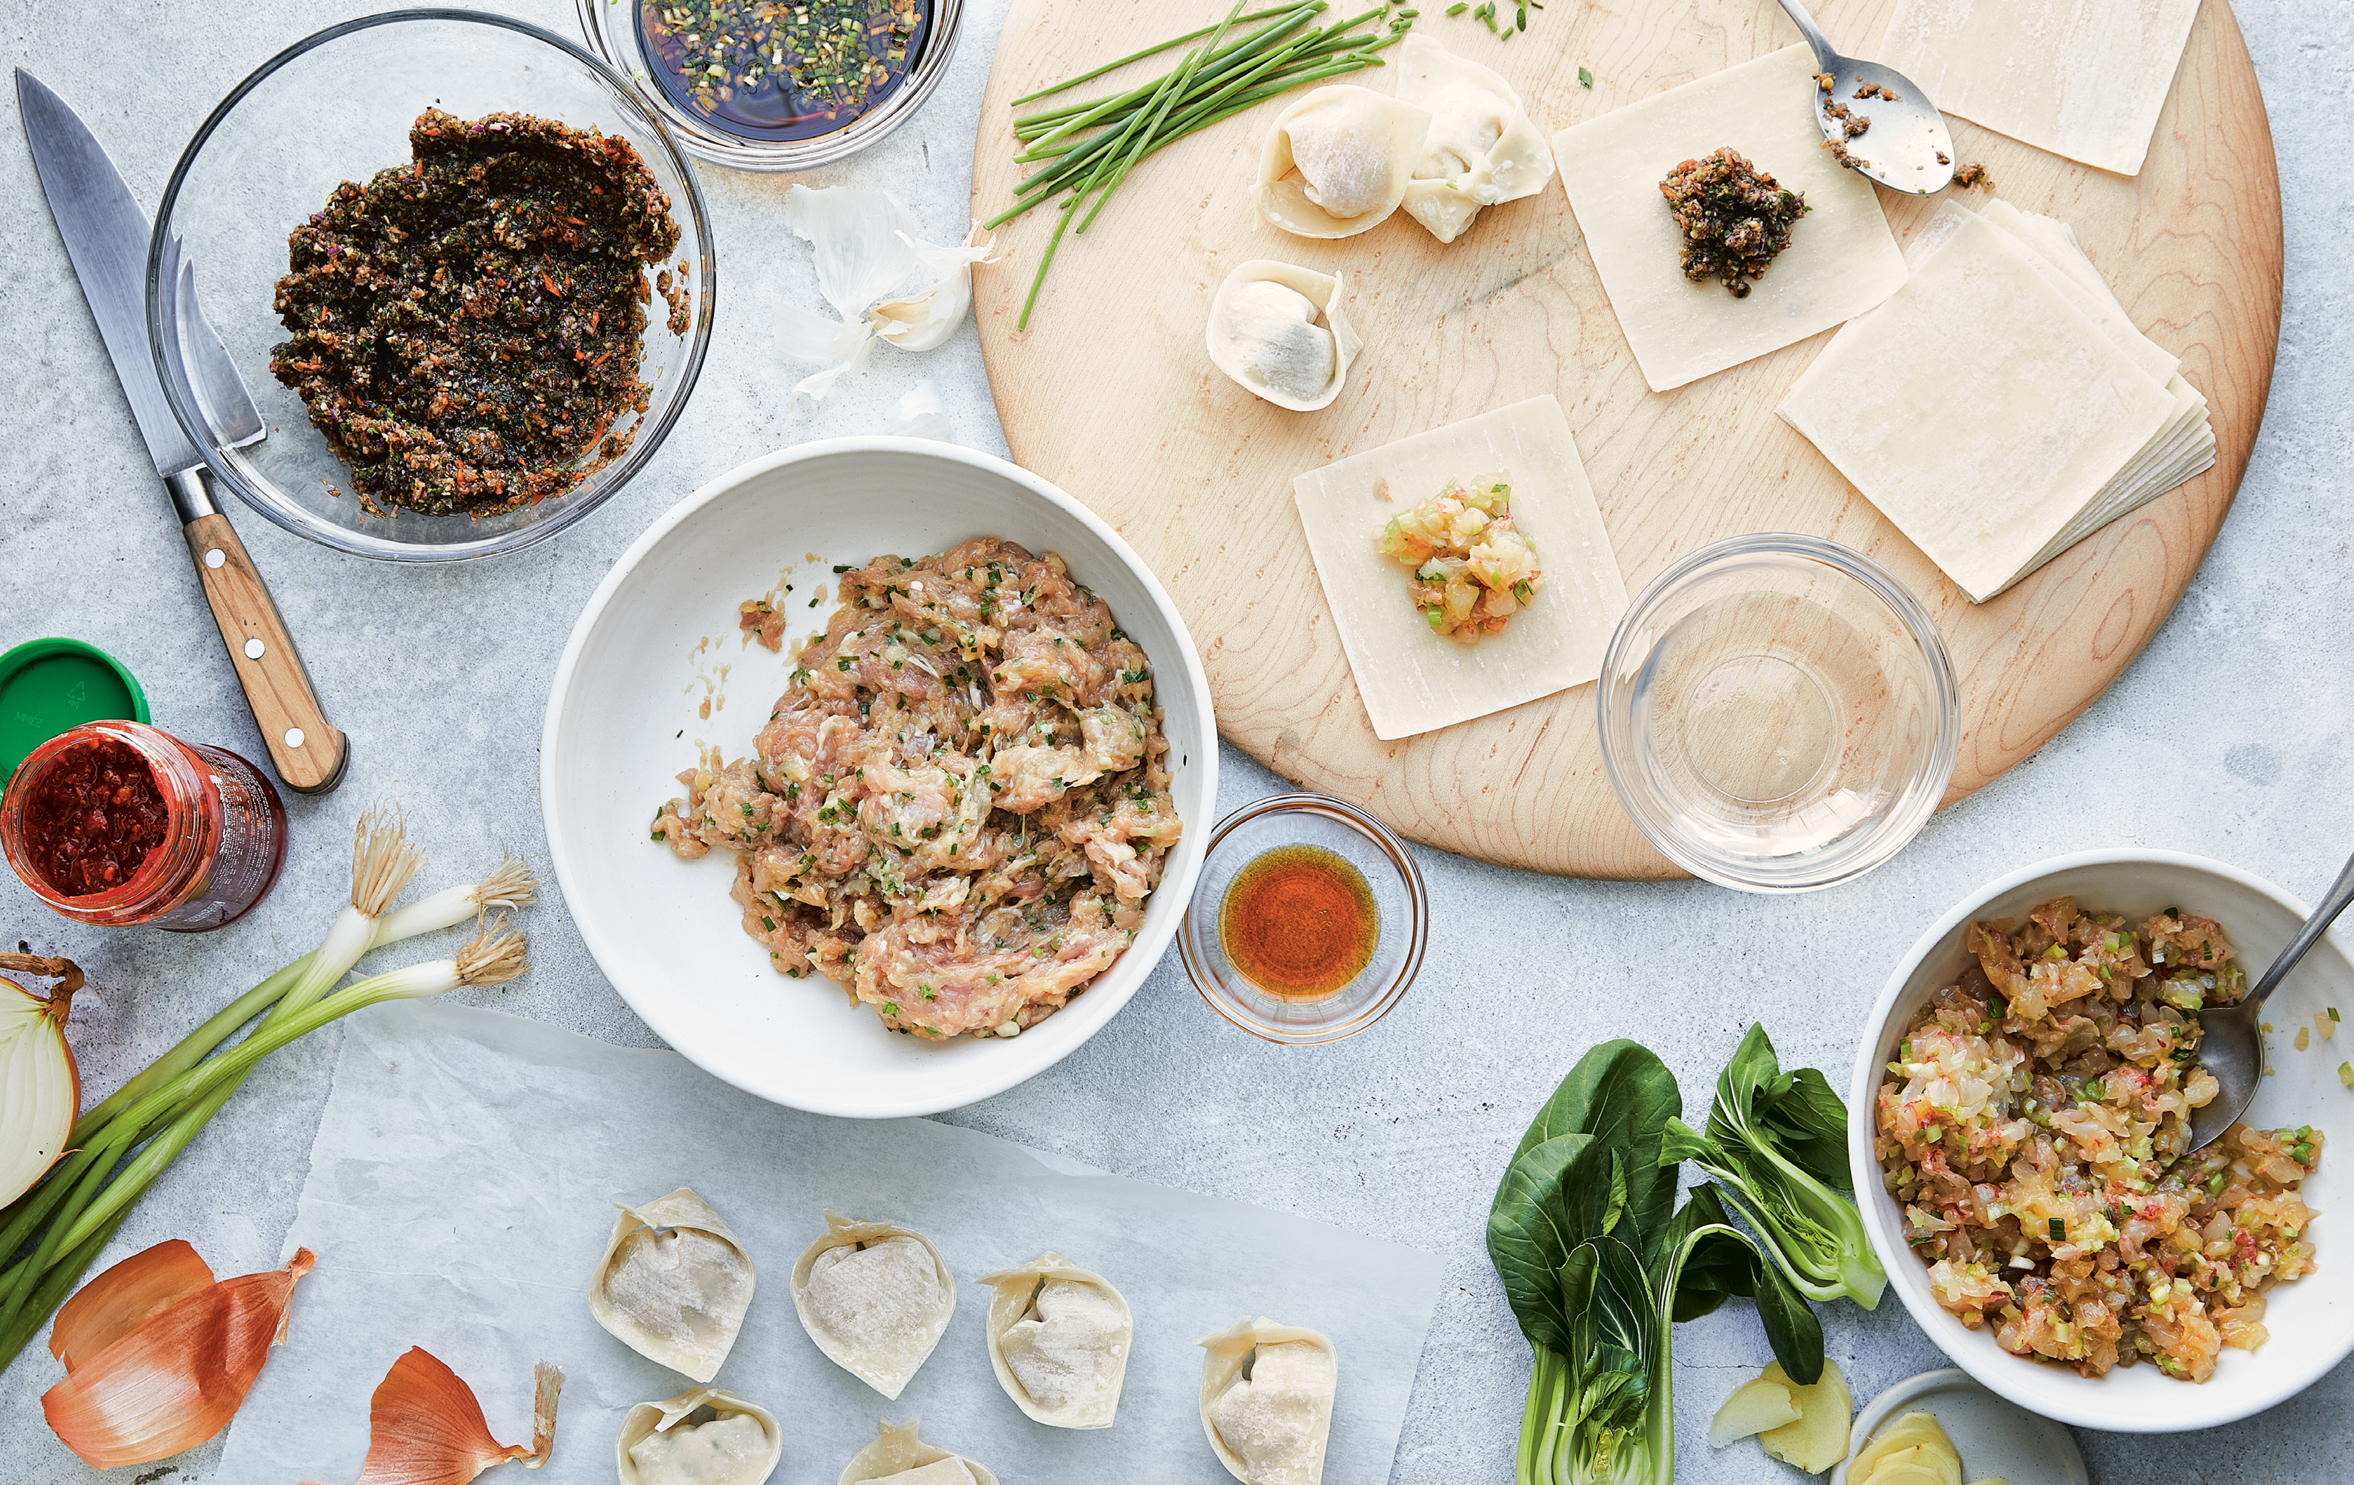
Homemade Wontons, Three Ways
BIG BATCH
Let’s just say we LOVE dumplings and wontons in my house. We travel long and far to find the best wonton spots in Flushing and Chinatown in NYC, but they’re also fun to make at home from scratch…and easy thanks to packaged wonton wrappers. Wontons keep in the freezer for months; this means that with a little prep you’re less than 10 minutes away from a home-cooked Chinese meal! You can serve them steamed with Soy Dipping Sauce (see below), or you can use them to make your own homemade Wonton Soup (this page). Here I’ve created three versions—a spicy vegetarian wonton, a shrimp and celery wonton, and a chicken chive wonton. It’s hard for me to pick a favorite, they are all so good!
SERVES 5
50 store-bought wonton wrappers
FREEZER: UP TO 6 MONTHS
Spicy Veggie Wontons: In a food processor, combine the mushrooms, onion, bok choy, scallions, coleslaw mix, basil, ginger, and garlic and process until smooth. Transfer to a large bowl and add the soy sauce, sambal oelek, and sesame oil and mix well.
Shrimp and Celery Wontons: Combine all the ingredients in a medium bowl.
Chicken Chive Wontons: Combine all the ingredients in a medium bowl.
Place one wonton wrapper in the center of a cutting board, keeping the rest covered in plastic wrap. Place ½ tablespoon of the filling in the center of the wonton wrapper. Using your finger, brush the perimeter of the wrapper with a little water. Fold the wonton wrapper in half, forming a triangle, squeezing out as much air as possible, and seal. Fold the corner ends up and press the ends together. Repeat until all the wontons are filled.
SERVE NOW: Fill a large pot with 2 inches of water. If using a bamboo steamer, cook in batches of five, 1 inch apart. If using a steamer basket, cook in batches of five. Place the steamer in the pot, cover, and steam for about 7 minutes, until the dumpling wrappers are slightly translucent.
Serve with Soy Dipping Sauce (recipe follows) or add them to your homemade Wonton Soup on this page.
FREEZE AND SERVE LATER: Place the wontons on a parchment-lined plate, cover them loosely with plastic wrap, then place them in the freezer until completely frozen, about 1 hour. Transfer them to a plastic bag. Cook directly from frozen, adding 1 to 2 minutes to the cooking time.
SKINNY SCOOP Cabbage leaves work great as a liner in the steamer basket to keep the dumplings from sticking to the bottom.
Spicy Veggie

1 cup minced portobello mushrooms
½ small onion, diced
1 cup chopped bok choy leaf, white and leafy part
2 medium scallions, diced
2½ cups packaged coleslaw mix (green cabbage, carrots, red cabbage mix)
1½ tablespoons chopped fresh basil
1 tablespoon grated fresh ginger
1 garlic clove, minced
1 tablespoon reduced-sodium soy sauce
1 tablespoon sambal oelek (Sambal chile paste)
1 tablespoon toasted sesame oil
Per Serving (10 wontons) • Calories 277 Fat 4 g • Saturated Fat 0.5 g • Cholesterol 7 mg • Carbohydrate 51 g • Fiber 3 g • Protein 9 g Sugars 2 g • Sodium 642 mg
Shrimp and Celery
1½ pounds peeled and deveined raw large shrimp, finely chopped
1 medium celery stalk, finely chopped
3 medium scallions, finely chopped
2 tablespoons sherry cooking wine
1 tablespoon reduced-sodium soy sauce
2 teaspoons sesame oil
½ tablespoon grated fresh ginger
1 garlic clove, minced
Per Serving (10 wontons) • Calories 381 Fat 3.5 g • Saturated Fat 0.5 g • Cholesterol 170 mg • Carbohydrate 49 g • Fiber 2 g • Protein 32 g Sugars 0.5 g • Sodium 910 mg
Chicken Chive
1¼ pounds ground chicken
½ cup minced fresh chives
2 tablespoons sherry cooking wine
1 tablespoon reduced-sodium soy sauce
1 tablespoon grated fresh ginger
2 teaspoons toasted sesame oil
1 garlic clove, minced
Per Serving (10 wontons) • Calories 421 Fat 12 g • Saturated Fat 3 g • Cholesterol 105 mg • Carbohydrate 47 g • Fiber 1.5 g • Protein 28 g Sugars 0 g • Sodium 633 mg
SOY DIPPING SAUCE
This basic soy dipping sauce is perfect for serving with wontons. A little goes a long way, and the leftovers are also great over steamed rice or greens.
SERVES 4
3 tablespoons reduced-sodium soy sauce* or gluten-free tamari
1 teaspoon sugar
2 tablespoons seasoned rice vinegar
1 tablespoon sesame oil
1 garlic clove, crushed
1 scallion, diced
*Read the label to be sure this product is gluten-free.
FRIDGE: UP TO 7 DAYS
Mix the ingredients in a small bowl and serve with steamed wontons. To store, transfer to a small glass jar with a fitted lid and refrigerate.
Per Serving (1½ tablespoons) • Calories 50 Fat 3.5 g • Saturated Fat 0.5 g • Cholesterol 0 mg • Carbohydrate 5 g • Fiber 0 g • Protein 1 g Sugars 4 g • Sodium 521 mg
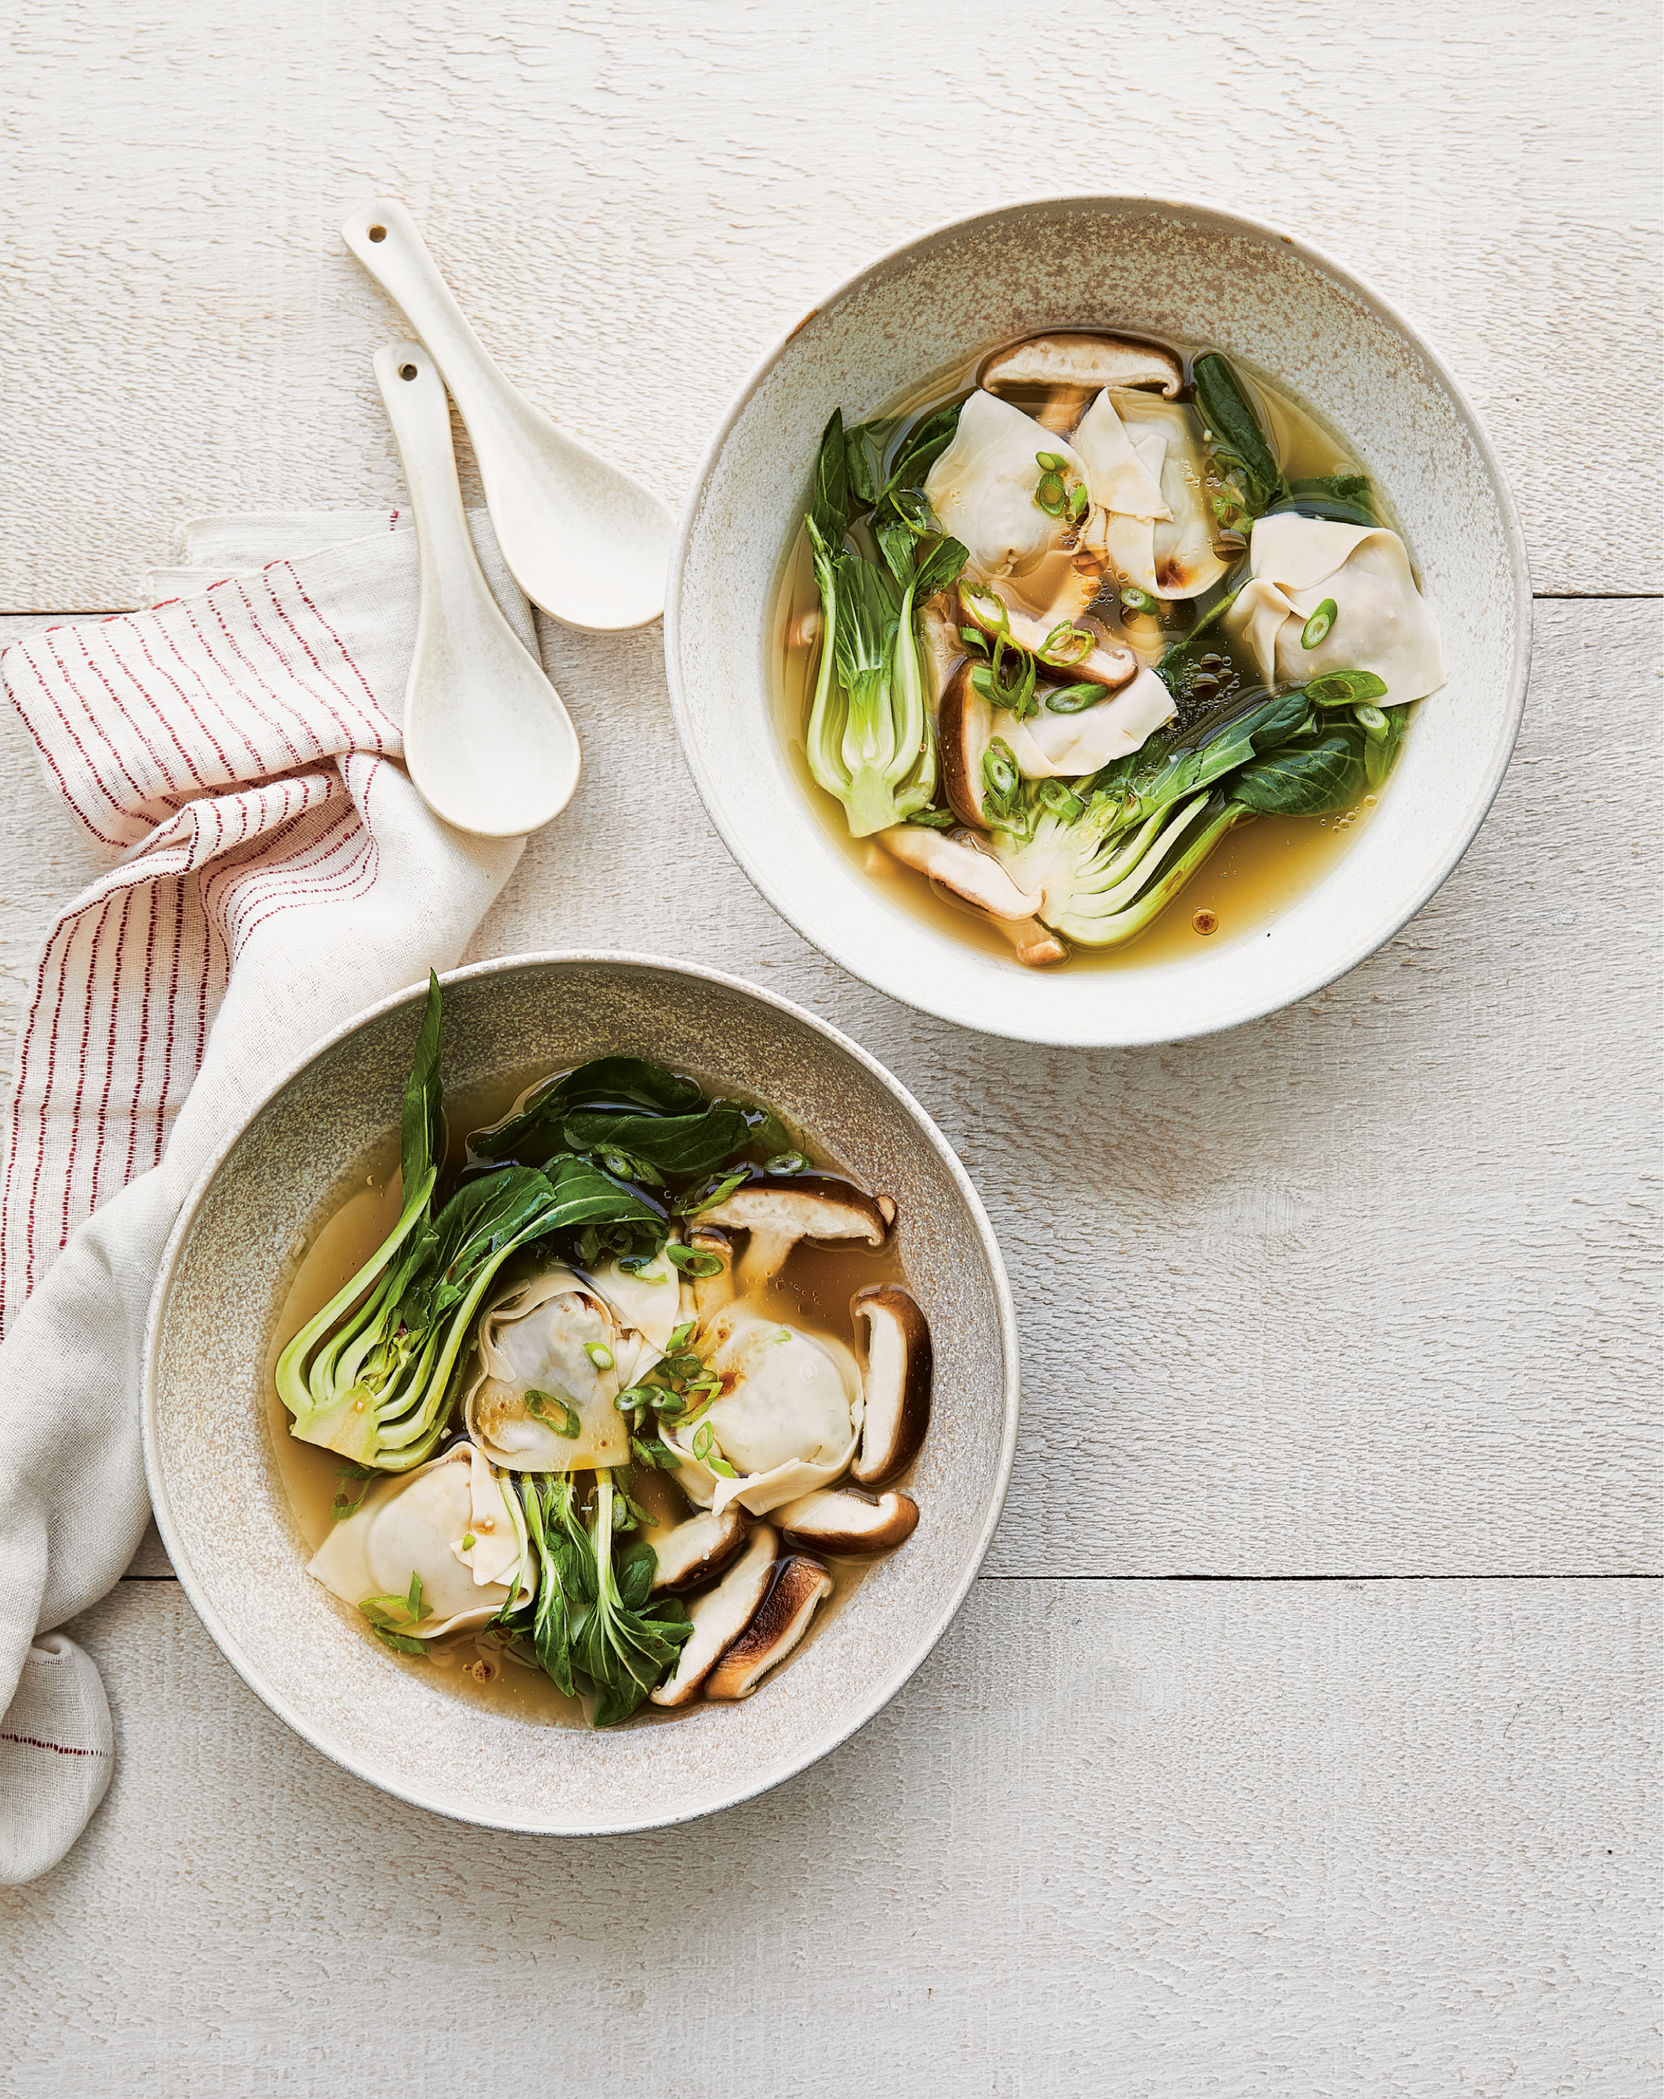
Wonton Soup
PLANNED-OVER
This quick and easy wonton soup is loaded with veggies, and thanks to the frozen wontons, it takes under 15 minutes to make. Any of the wontons on this page work in this soup…and I’ve even made it with a mix of all three flavors when that’s all I had left in my freezer. I’ve also made this soup with store-bought wontons from Trader Joe’s or Costco! You can use whatever veggies you have on hand—sub baby bok choy with spinach or kale, and if you don’t like mushrooms, just leave them out or add some bean sprouts. For added protein you can add shrimp, leftover sliced roast pork (see this page), cooked chicken, or tofu. Like it spicy? Top your bowl with red chili oil or sambal oelek.
SERVES 4
6 cups low-sodium chicken or vegetable broth
1-inch piece fresh ginger, thinly sliced
1 garlic clove, minced
4 baby bok choy, halved lengthwise
20 frozen wontons, Chicken, Veggie, or Shrimp (this page)
1½ cups sliced shiitake mushrooms
1 tablespoon reduced-sodium soy sauce
1 teaspoon toasted sesame oil
Scallions, green parts only, sliced, for garnish
FRIDGE: UP TO 4 DAYS
FREEZER: UP TO 6 MONTHS
Bring the broth to a boil in a large pot. Smash the sliced ginger with the side of a knife to bring out the flavor and add to the pot with the garlic. Cover and cook over medium heat for about 5 minutes.
Add the bok choy and partially cook for about 5 minutes, then add the frozen wontons and mushrooms and simmer for 3 to 4 minutes, until the wontons are heated through and the bok choy is tender and wilted. Remove and discard ginger. Stir in the soy sauce and sesame oil. Divide the soup among 4 bowls. Garnish with scallions.
SERVE LATER: Refrigerate or freeze broth without wontons. Reheat on the stove, adding the wontons and cooking for about 3 minutes, or until heated through.
Per Serving (1½ cups) • Calories 273 • Fat 8 g • Saturated Fat 1.5 g • Cholesterol 53 mg • Carbohydrate 30 g • Fiber 2 g • Protein 18 g Sugars 2 g • Sodium 772 mg
Gyro Loaf
BIG BATCH
Gyro sandwiches are characterized by their meat filling—usually a combo of lamb and beef roasted on a vertical spit. Unless you live next door to a Greek restaurant or you have a vertical spit lying around at home (I don’t!), this is a great homemade version I often make at Tommy’s request. Rather than making it on a spit, I form the meat (I use half ground lamb, half ground turkey) into a flat loaf and bake it like a meatloaf. Once it cools, I slice the loaf into thin strips and pan-fry them to get that signature crispy texture. Lamb is a must here—using half turkey doesn’t change the flavor much but it certainly cuts back on the fat. To make this a Greek-style meal, we like to turn it into a gyro platter and serve the meat over crisp greens with cucumbers, tomatoes, olives, and tzatziki (see the recipe for Greek Gyro Salad, this page).
SERVES 8 (MAKES 2 LOAVES)
1 large red onion, roughly chopped
8 garlic cloves
1 tablespoon salt
1 tablespoon ground oregano
1 tablespoon dried rosemary
1 tablespoon ground marjoram
1 tablespoon ground cumin
1 teaspoon freshly ground black pepper
1 pound ground lamb
1 pound 93% lean ground turkey
Juice of ½ lemon
FRIDGE: UP TO 4 DAYS
FREEZER: UP TO 6 MONTHS
Adjust an oven rack to the center of the oven. Preheat the oven to 350°F. Line a sheet pan with foil.
Place the onion, garlic, salt, and spices into a food processor and process until finely minced. Transfer to a stand mixer fitted with a paddle and add the meats and lemon juice. Process on medium-high speed until the meat becomes very smooth, sticky, and pasty, 3 to 5 minutes. It should not resemble meatloaf. Using a spatula, scrape all the meat from the edges of the bowl and transfer to the prepared sheet pan.
Divide the meat and form two 4 × 10-inch loaves, about 1½ inches thick, smoothing down the top and edges (the loaves should be flat on the top and sides, like a rectangle).
Bake for 45 to 55 minutes, until cooked through in the center with an internal temperature of 155°F. Remove from the oven, let it cool for 10 minutes, then transfer to a cutting board. Slice one loaf into sixteen ¼-inch-thick slices and refrigerate or freeze the second loaf for another night.
SERVE NOW: Heat a nonstick skillet over medium-high heat and brown the meat for 1 to 2 minutes on each side. Serve over salad (Greek Gyro Salad on this page), with rice pilaf, or in a pita with tomatoes, tzatziki, and red onion to make a sandwich.
Big Batch: Use leftovers for the Greek Gyro Salad (this page) or freeze to serve later. Let the loaves cool without slicing and wrap them in plastic, then transfer to freezer bags. Thaw overnight, slice, and pan-fry until crispy, about 2 minutes on each side.
Per Serving (4 slices) • Calories 264 Fat 18.5 g • Saturated Fat 7 g Cholesterol 83 mg • Carbohydrate 4 g Fiber 1 g • Protein 21 g Sugars 1 g • Sodium 496 mg
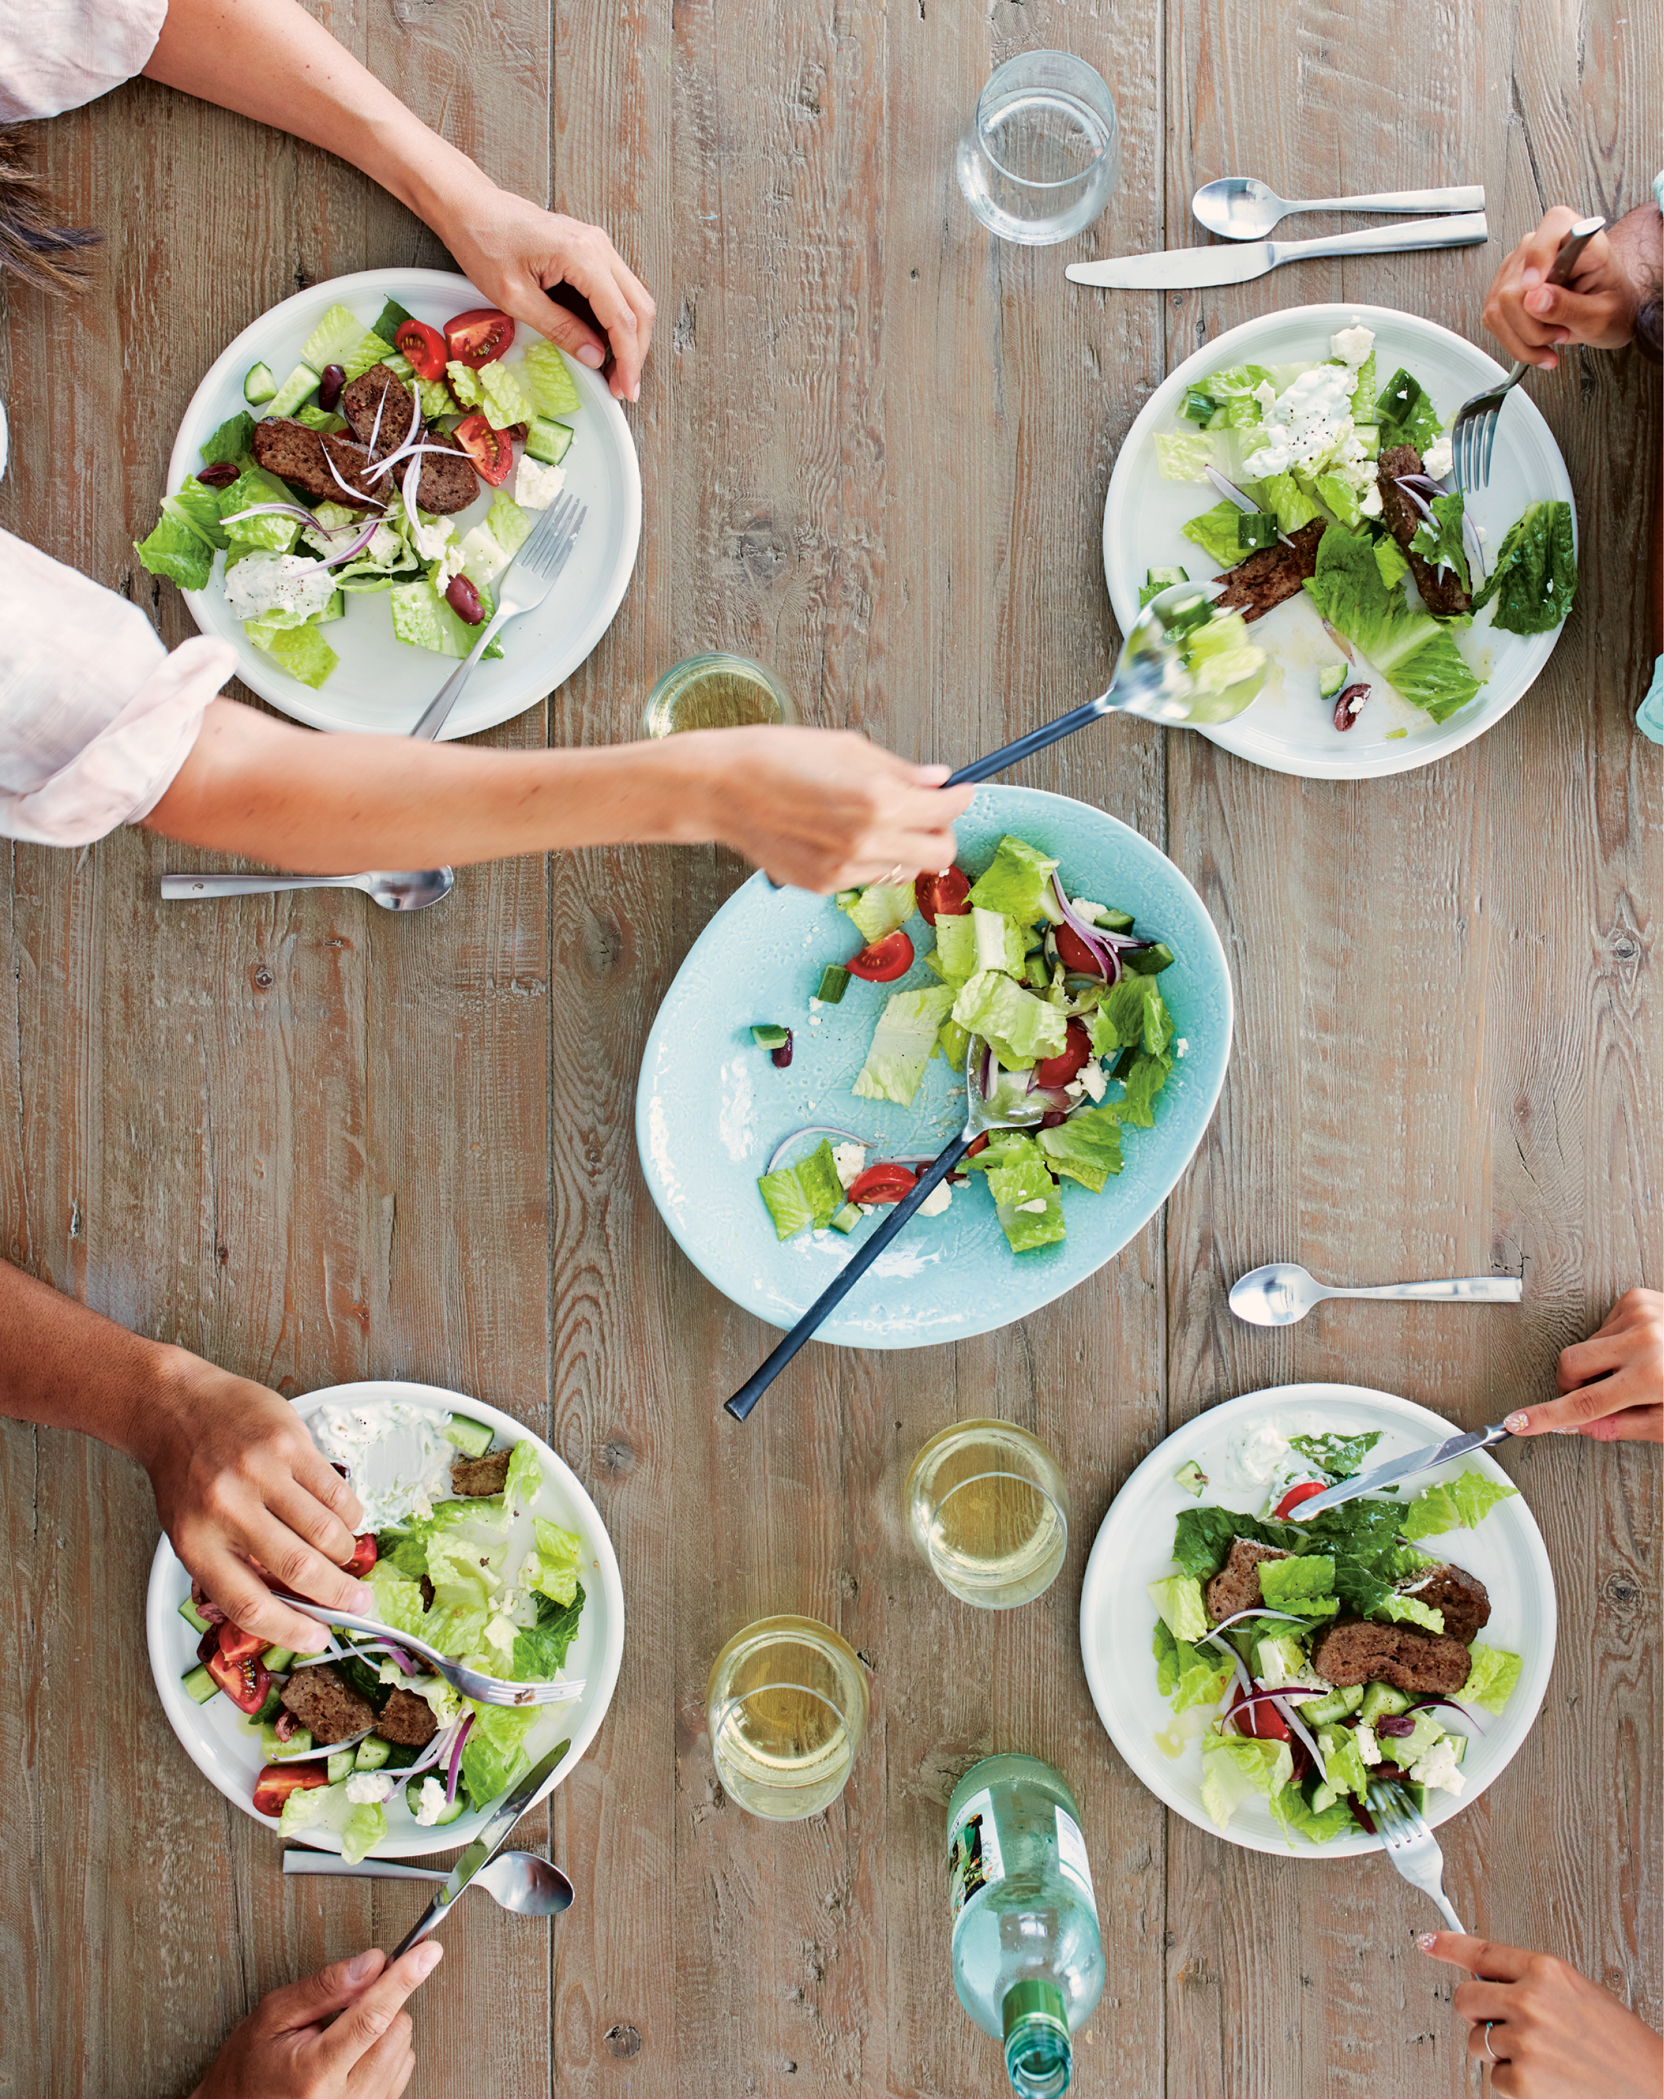
Greek Gyro Salad
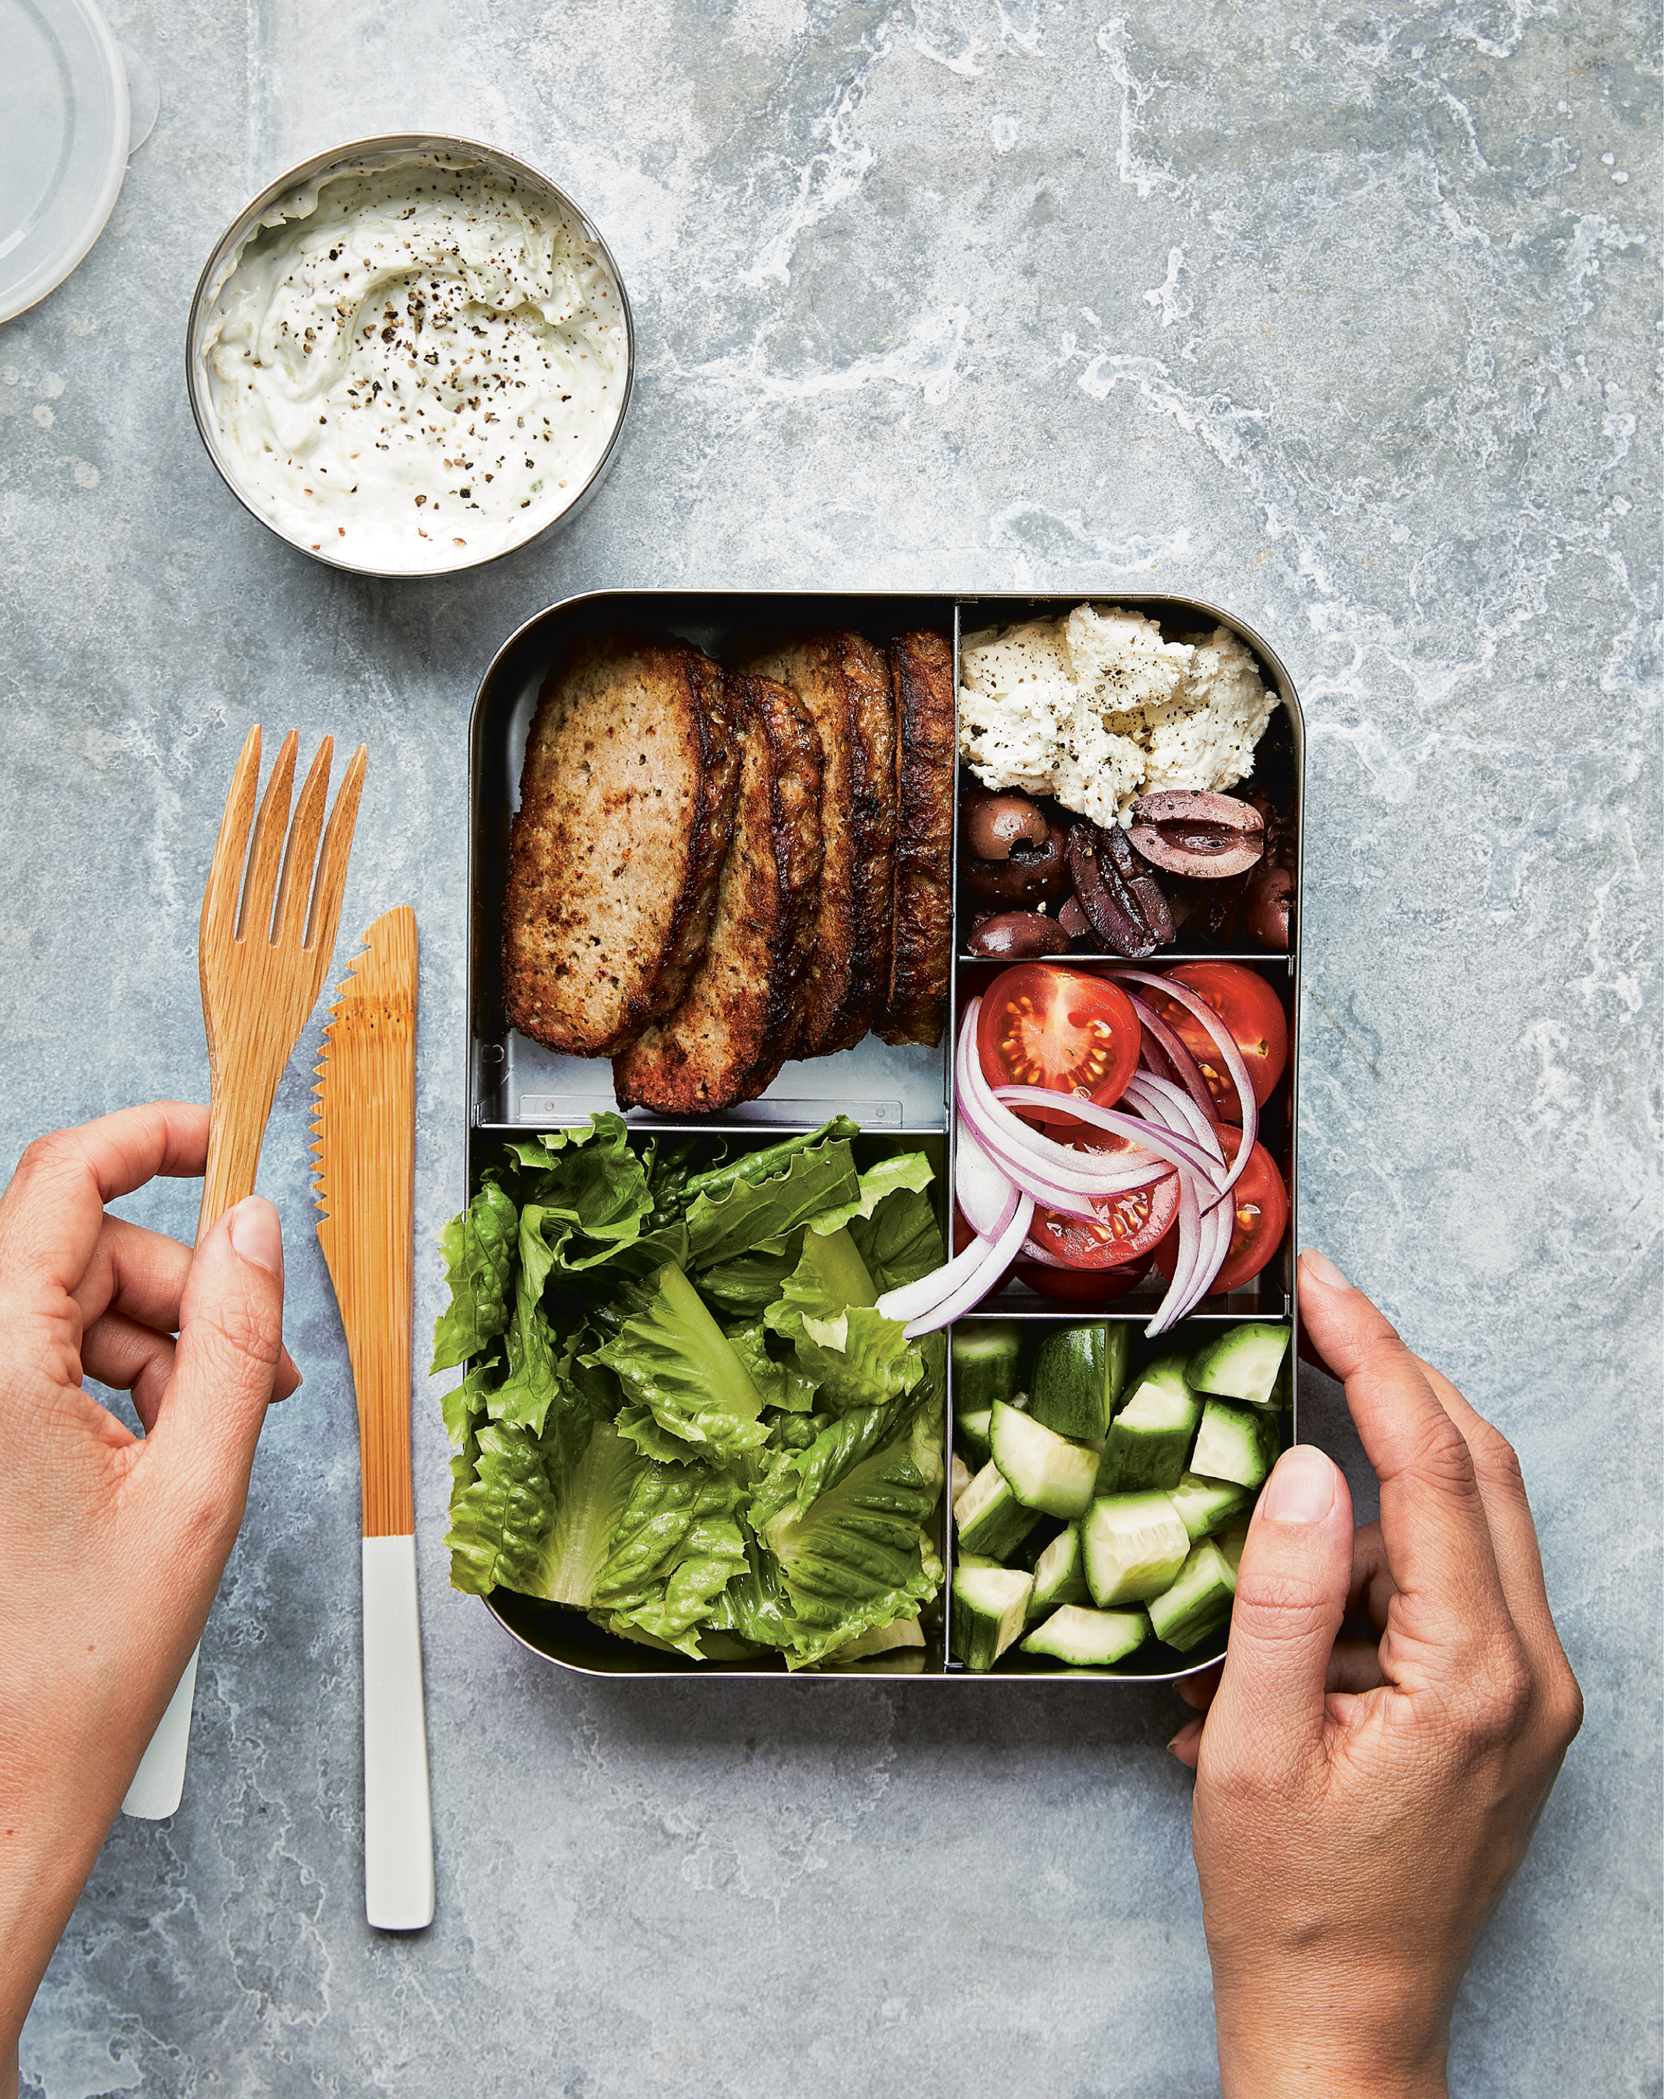
PLANNED-OVER
I’m usually a big fan of gyro sandwiches, but whenever we go for Greek food, I skip the pita and get the delicious strips of lamb over a big salad. Once I started making my own gyro meat (using half turkey and half lamb; see this page), this became our go-to way to eat it at home! Tommy likes his over iceberg, but I always serve mine over romaine—feel free to use whatever lettuce you prefer. Homemade yogurt Tzatziki sauce (see this page) as a dressing is a must; if you’re meal prepping, just pack it on the side.
SERVES 4
1 cooked Gyro Loaf (this page), sliced into 16 slices
6 cups chopped romaine or iceberg lettuce
4 Persian cucumbers, diced
⅛ small red onion, sliced lengthwise
3 Campari tomatoes, quartered
¼ cup pitted Kalamata olives
2 ounces crumbled feta cheese
1 cup Tzatziki sauce (this page)
FRIDGE: UP TO 4 DAYS
Heat a skillet over medium-high heat and brown the meat for 1 to 2 minutes on each side, until heated through and slightly crisped.
SERVE NOW: In a large bowl, combine the lettuce, cucumbers, and onion. Divide among 4 plates (1½ cups each) and top with the tomato wedges, olives, feta, and meat. Drizzle with the tzatziki sauce.
MEAL PREP: Divide the salad in 4 meal prep containers, top each with 4 slices of meat, and pack the tzatziki on the side. Eat cold or heat the meat if desired.
Per Serving (1 salad) • Calories 404 • Fat 24 g • Saturated Fat 10.5 g • Cholesterol 102 mg • Carbohydrate 19 g • Fiber 6 g • Protein 29 g Sugars 7 g • Sodium 902 mg
Basil Pomodoro Sauce
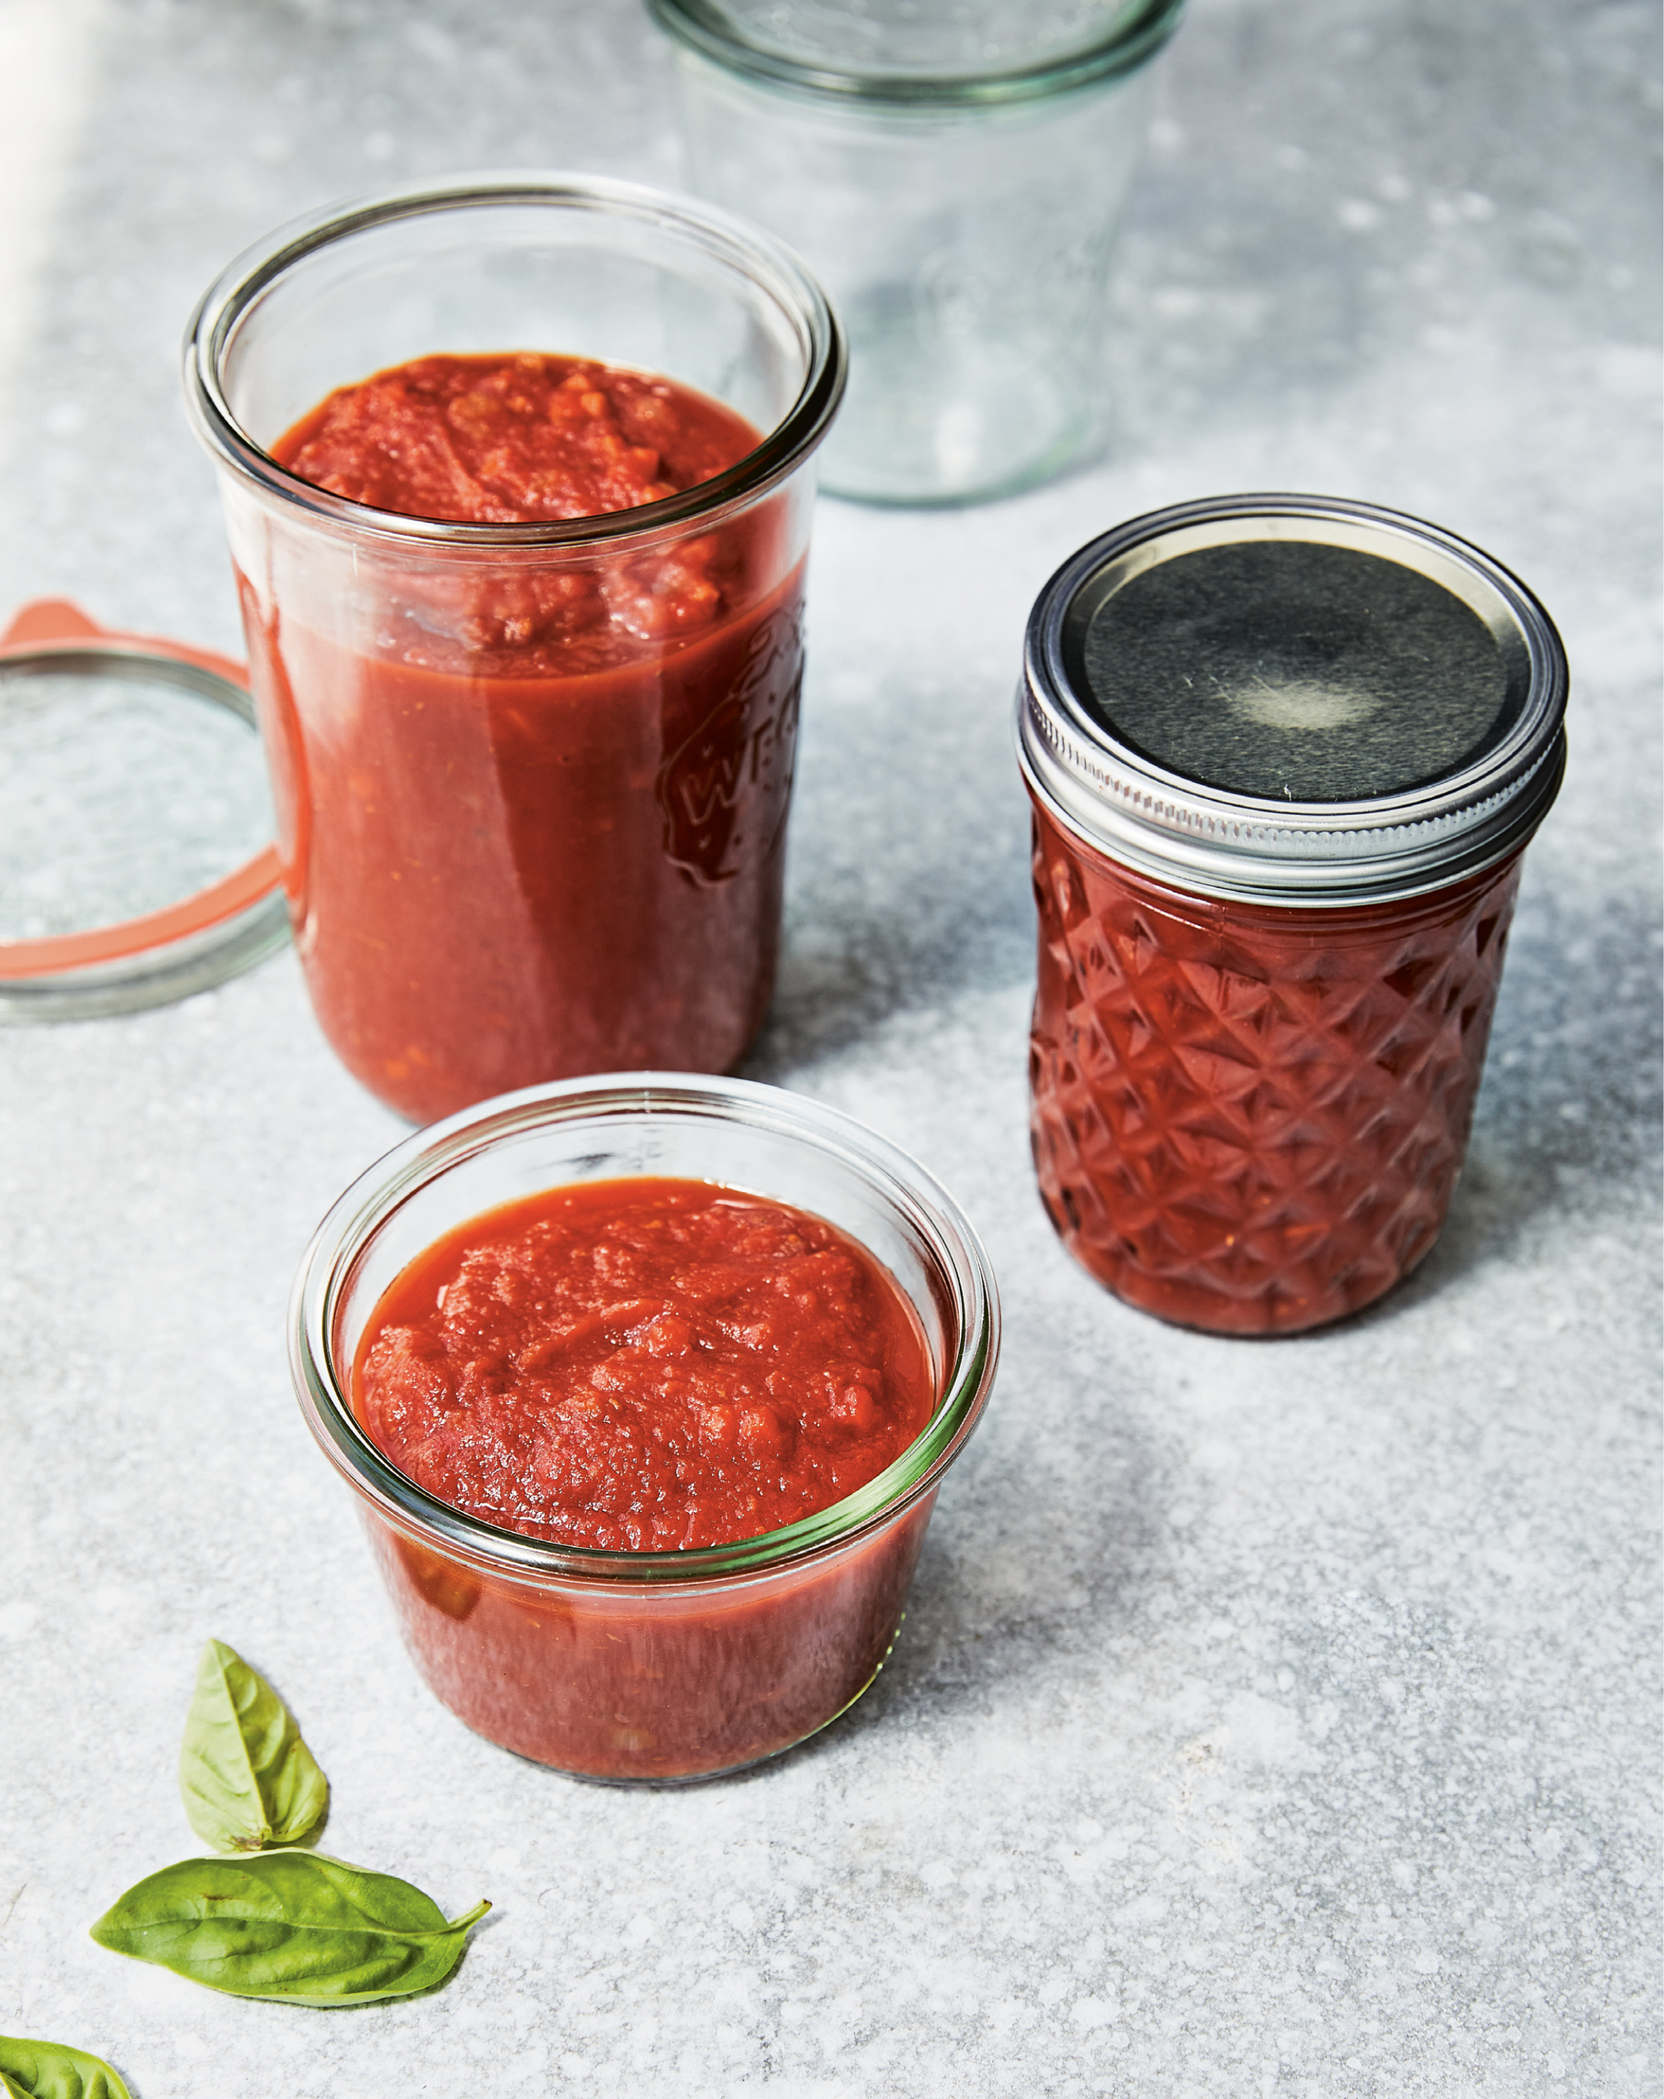
BIG BATCH
Everyone needs a basic tomato sauce to keep frozen for those nights you want to whip up a quick pasta dinner, or to use in Eggplant Parmesan (this page), Roasted Vegetable Lasagna (this page), Zucchini Rollatini (this page), etc. This simple Pomodoro sauce is made with just a few ingredients: extra-virgin olive oil, crushed tomatoes, garlic, onions, and carrots to slightly sweeten the sauce…and of course lots of fresh basil. I don’t add salt because the canned tomatoes I love, Tuttorosso New World Style, already have salt. If you use a different brand, you may have to adjust the salt to your taste. Pasta sauce is one of the easiest things to make as well as a great starter recipe for freezer cooking.
MAKES 7 CUPS
6 garlic cloves
1 tablespoon extra-virgin olive oil
½ large onion, finely chopped
1 cup finely chopped carrots
Kosher salt
2 (28-ounce) cans crushed tomatoes (I like Tuttoroso)
⅓ cup chicken or vegetable broth*
16 large fresh basil leaves, torn with your hands
*Read the label to be sure this product is gluten-free.
FRIDGE: UP TO 4 DAYS
FREEZER: UP TO 6 MONTHS
Smash the garlic with the side of a large knife by using the palm of your hand over the knife to apply pressure.
Heat a medium to large saucepan over medium heat. When it’s hot, add the oil and garlic and sauté until golden and fragrant, 1½ to 2 minutes. (Tip: Because I don’t use a lot of oil, I tilt my pan to one side, so the garlic is submerged in the oil and cooks evenly.) Remove the garlic and set it aside.
Add the onion and carrots to the pot with a pinch of salt and sauté, stirring on medium-low heat until soft, 5 to 6 minutes. Add the crushed tomatoes, broth, and garlic, cover, and simmer on medium-low for about 20 minutes, until the vegetables are soft. Remove from the heat, stir in the basil, and adjust the salt to taste if needed.
Big Batch: Let the sauce cool, then divide it into 1- or 2-cup freezer-safe containers. Label the containers with the name, portion size, and date. To thaw, transfer to the refrigerator 1 to 2 days before using, or you can heat the frozen sauce over low heat on the stovetop.
Per Serving (½ cup) • Calories 45 • Fat 1 g • Saturated Fat 0 g • Cholesterol 0 mg • Carbohydrate 9 g • Fiber 2 g • Protein 2 g • Sugars 4 g • Sodium 274 mg