CANNING SAFELY
ALL CANNING REQUIRES LEARNING SOME FOOD SAFETY RULES
Botulism and other types of food poisoning can occur in both home-canned and commercially canned food. Food poisoning can be deadly. When you decide to preserve food for you and your family, you are the one responsible for seeing that it is pre-served safely.
Any food you can should be of top quality, not a reject you don’t want at your table. Overripe, damaged, diseased, or moldy produce or meat that hasn’t been stored properly is more likely to spoil in canning than quality food.
Cleanliness is always important. Wash produce thoroughly before processing it. Wash jars, rims, lids, and canners in hot, soapy water and rinse well before use.
Follow canning recipes exactly when it comes to jar sizes and processing times. And process food in the correct type of canner.
USE PRECISE MEASUREMENTS
Changing the amount or proportion of ingredients in a recipe can make the processing time unsafe, especially in fruit and vegetable mixtures canned in a water-bath canner.
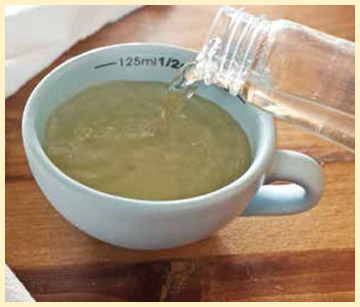
Never alter the amount given for vinegar, lemon juice, or citric acid which is used to acidify recipes.
Don’t alter the amount of fluids added to recipes, unless the recipe suggests it for certain circumstances.
Use the jar size called for in the recipe. Altering the size can make the processing time unsafe.
If you discover that your pressure canner isn’t working correctly, or that you made a mistake in following the recipe or timing, and the food has been canned for more than 24 hours, you probably need to discard that food. At the very least, consult with a canning expert at your Cooperative Extension office or other reliable source (see Chapter 20).
If you discover a mistake before 24 hours has passed, you can reprocess the food or freeze it.
Dispose of spoiled canned food where children and pets can’t find it. Foods suspected of being contaminated with botulism are hazardous waste and need to be treated before disposal. Wearing gloves (botulism can be absorbed through skin), carefully place unopened jars in a large pot, cover with water, and boil for 30 minutes. Wash gloves with hot water and soap before removing them. Discard jars with contents.
CLEAN, HOT JARS AND LIDS
Wash all jars, lids, and rims with hot, soapy water and rinse well before using.
Sterilize jars that will be processed in a boiling water canner for less than 10 minutes. Jars going into a pressure canner do not need to be sterilized.
Keep jars and lids waiting to be filled submerged in clean hot water.
Fill jars while hot and have water simmering in the canner to place them in as you fill them.
FOOD POISONING
Any canned food that looks or smells bad should be discarded. Do not taste it.
If a jar appears to be unsealed, don’t taste the food inside.
Signs of spoiled food include leaking jars, mold, dried food on top of contents, discoloration, bulging lids, spurting gas or liquid when opened, or lids that lift too easily. Discard those jars.
Botulism can occur in sealed jars if the food was processed incorrectly. It’s most likely to occur in low-acid foods.
PREPARING FOOD
WASHING, PEELING, CORING, AND CUTTING ARE ALL PART OF FOOD PREPARATION
Often the most tedious and time-consuming part of canning is the food preparation. But preparing food correctly ensures that it will taste good and process correctly.
Some food preparations seem complex, but after you have processed a bushel or two you will get the hang of it and become faster at the process.
While children may not be able to safely help with the actual canning process, they can often help you prepare the food. They can take pride in helping the family store healthy food and may be more inclined to eat it. Many of us who are interested in canning today remember helping someone can when we were younger.
WASHING AND PEELING
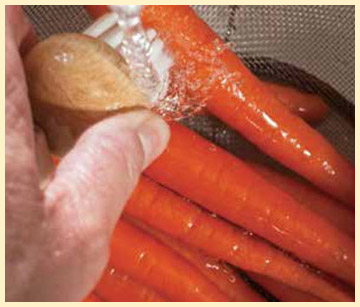
Scrub root vegetables with a brush under running water to remove all dirt. Any purchased produce that was waxed needs to be washed with soap to remove the wax.
Soak cabbage and spinach in 1 tablespoon salt to a gallon of water to remove insects.
Don’t wash berries, grapes, and peaches until just before you use them.
Some fruits and vegetables don’t require peeling. Check the recipe first.
SLICING AND DICING
You are less likely to be cut with a sharp knife because you use less pressure to cut.
Check the recipe. Food may be measured before cutting or by cups of cut, peeled produce.
The thickness and size of food pieces can make a difference in processing time.
For food that discolors as it sits, slice directly into a color-preservative solution of 1 cup lemon juice or 3 grams ascorbic acid to 1 gallon water.
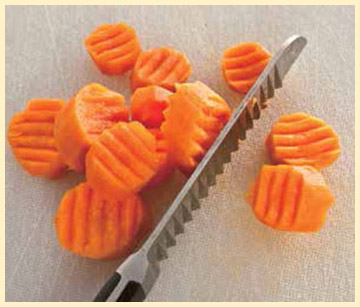
Sometimes the way you prepare the raw ingredients can make them visually appealing as well as tasty. Instead of plain round carrot slices, make them waffle or wavy slices. Children often find small pieces more appealing than larger ones.
Remember to consult the recipe for how thick some foods should be sliced. The thickness of the food may determine the processing time. Don’t puree or mash foods unless the recipe calls for it, because the density of the product will change the processing time.
Your kitchen sink is one of the most contaminated places in your home—as dirty as your toilet. Before washing produce in it, scrub it with hot, soapy water, fill it with hot water, add ½ cup bleach, and let it soak 5 minutes. Then drain and rinse. Empty produce-washing and-rinsing water frequently. Scrub any counters that produce will sit on. Keep washed and unwashed produce separate.
BLANCHING
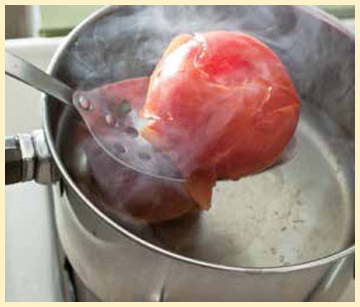
Blanching is dipping food in simmering water then plunging it into cold water. Putting food in a colander makes it easier.
Blanching makes peeling easier on some foods and is used on other foods to inactivate enzymes that cause spoilage or off flavors.
For peeling, dip food in simmering water for about 1 minute. For inactivating enzymes, follow the recipe for the produce you’re using.
Don’t leave food in simmering water too long. It can destroy texture and flavor.
PRECOOKING FOOD
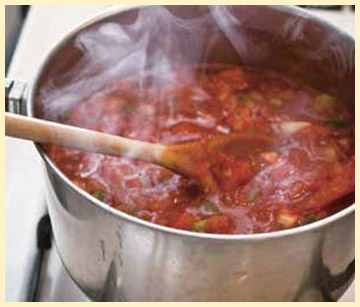
Many recipes call for precooking the ingredients before they are canned. This can be a few minutes or hours.
Precooking is used to soften foods so they can be blended, to flavor them with spices, to increase food safety, or to shorten processing time.
Follow recipe directions and don’t under- or overcook food. This can alter the flavor or texture or cause food to spoil.
Jars are usually filled with the hot food immediately after precooking.
METHODS OF CANNING
HOT PACK AND COLD PACK ARE THE TWO METHODS OF PROCESSING; JAMS, JELLIES, AND PICKLES ARE ALSO CANNED
In earlier days food was often cooked in a large pot and poured into jars, and the jars were left on the table to hopefully cool, contract, and seal. This method of canning, called the open-kettle method, is no longer recommended. We modify this method today by precooking the food, pouring it into hot, clean jars, and then processing it in a water-bath canner or pressure canner. This is called a hot pack.
If prepared raw food is packed into jars, and then a hot fluid is poured in around them before processing, it is called the raw pack or cold pack method, although it really isn’t cold. These foods are also processed in a canner.
HOT PACK
Many recipes call for the food to be precooked or at least heated to boiling and then poured into jars.
Hot-packed jars have less shrinkage of food during processing and are less likely to have excess headspace in the jars after processing.
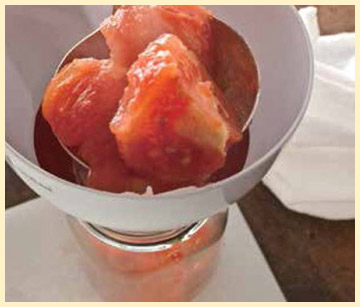
Use a funnel to pour hot food into the jar to avoid wasting food.
Try to get equal amounts of solid food and cooking liquid in each jar. All food should be surrounded and covered by fluid.
COLD OR RAW PACK
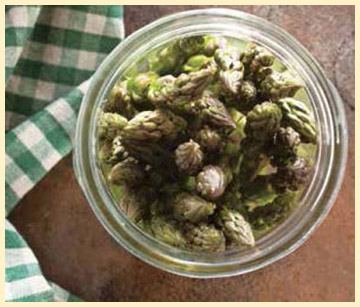
A few recipes call for raw food to be arranged in jars, and then a hot fluid is poured over them before processing.
Cold-packed foods often experience shrinkage during processing. Most foods should be packed tightly in jars because of this.
Beans, peas, corn, and potatoes should not be packed tightly into jars for cold packing. They expand during processing.
Fluid should completely cover and surround the food in each jar. Remove the bubbles before processing.
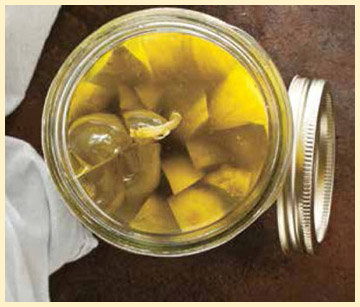
Pickles can be made by the hot pack or cold pack method or by allowing them to ferment in crocks. To can fermented food for long-term storage, it is processed in a canner, usually a water-bath canner because it is very acidic.
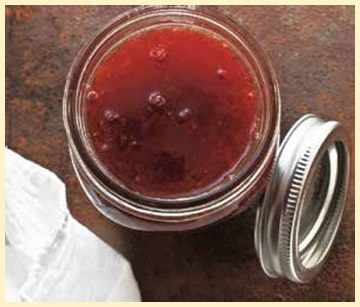
Jams and jellies are hot packs because the food is cooked before the jars are filled. In earlier days wax was melted and poured on top of jelly and jam jars to form a seal. Today jams and jellies are processed in a canner or are stored in the freezer.
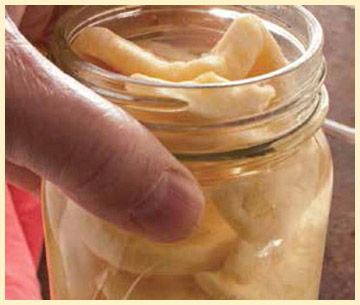
Headspace is the amount of space left between the food in the jar and the top of the jar rim. It varies in different recipes depending on the method used to pack the jars and the food. Pay attention to this detail. If too much or too little space is left, the jars may not seal correctly and food can spoil. If the jars do seal, the food may not look or taste as good as properly filled jars.
CANNING JAMS AND JELLIES
Jams, jellies, and preserves are always precooked, because heat is required to make the fruit juice gel.
Foam is often produced during the cooking process. This should be skimmed off before pouring food into jars.
Jars must be sterilized before jam or jelly is poured into them. Home-canned jam and jelly make better gel in halfpint or smaller jars.
Don’t process jars more than 5 minutes, or they may soften and lose their gel.
CANNING PICKLES
Pickles are generally canned in a water-bath canner. They can be hot or raw packed.
Do not boil vinegar mixes longer than the recipe calls for, or you may weaken the acidity and affect the preservation of the pickles.
Follow the recipe for headspace and make sure you remove bubbles before processing.
You may want to use wide-mouth jars when canning whole cucumber pickles. Don’t wedge the pickles in so tightly that they are hard to remove.
FILLING JARS
PROPERLY FILLING YOUR JARS WILL RESULT IN A GOOD SEAL AND THE BEST TASTING, SAFEST FOOD
Canning jars should always be warm or hot when they are filled. Until they are ready to be filled, they should be submerged in a pot of simmering water. Your lids and rims should also be kept in warm water, but read the directions on the lid package to see if any temperature recommendations are given.
A dishwasher with a warm cycle can also be used to keep your jars and lids hot and ready for you.
Get all your ingredients measured, mixed, precooked, or heated before removing the jars. Lift them with tongs or jar lifters, drain water, and set them on clean dishcloths or paper towels upside down on the counter. Invert each one just before you fill it. In some recipes, you add salt or spices to each jar before you fill it. Make sure to read all the recipe instructions so this doesn’t come as a surprise to you after you have filled the jars.
PROPER FILLING OF JARS
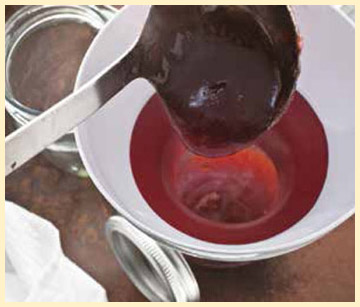
It’s very hard to pour food into jars from a hot pot, even with a funnel. Using a ladle gives you better control.
If you are raw packing food into the jars, make sure your hands are clean.
Fill jars so they have the recommended amount of headspace. Until you get a feel for that, measure the first jar and compare the others to it.
Adjust jars so they have equal amounts of solids and fluids if possible.
REMOVING AIR BUBBLES
When jars are filled, especially if raw packed, pieces of food may trap air bubbles on their surfaces and between them.
When the food is heated during processing, the air bubbles rise to the top of the jar and create a big air space.
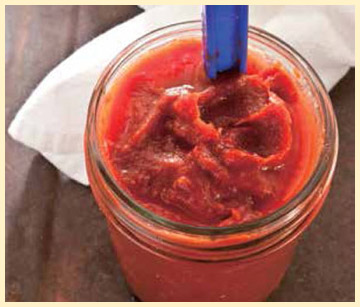
After filling jars, slowly run a bubble stick through the food and between the jar sides and the food to release bubbles. Don’t stir.
Add more food or fluid if the bubble removal creates space.
Your canner should be on the stove pre-heating with some water in it. Filling the canner rack and then lowering it into the canner can be very hard, especially when it’s full of quart jars. It’s easier to lower individual jars into the canner.
Canning recipes often approximate the number of jars the food will fill. Never process a half-full jar or stuff excess food into the jars; maintain the recommended space between the food and the rim. Check to make sure you have removed bubbles. Using a smaller jar for the excess doesn’t work because processing times will usually be different. If you are not canning a second batch you can add the excess to, use the food immediately or freeze it.
WIPING THE RIM
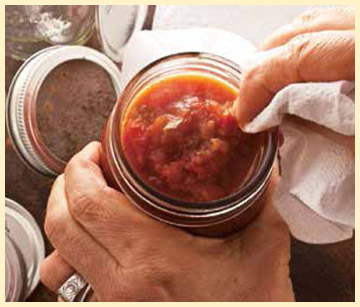
Before placing the lid on the jar, wipe the rim with a moist paper towel.
This step is important because any food or liquid on the rim will prevent a good seal.
When moving jars into the canner, they must be kept upright so that food doesn’t slosh and possibly get under the lid.
Even a bit of fat or salt grains can prevent a good seal, so make sure rims are wiped clean.
PUTTING ON THE LIDS
After the rim is clean, place the lid on the jar with the ring of sealant down.
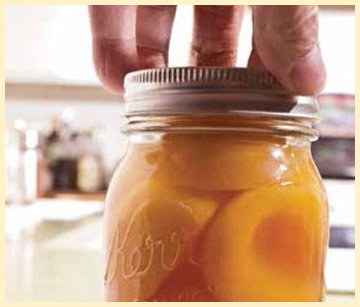
Place a screw band on the jar and, holding the lid in place with your fingers, tighten the screw band.
Tighten the band firmly but don’t over tighten. Air needs to escape during processing.
Keep the jar flat on the table while you put on the lid and band and don’t move jars until the lid is secure. Keep jars upright when you move them.
PROCESSING JARS
THERE ARE TWO WAYS OF PROCESSING: WATER-BATH AND PRESSURE CANNING
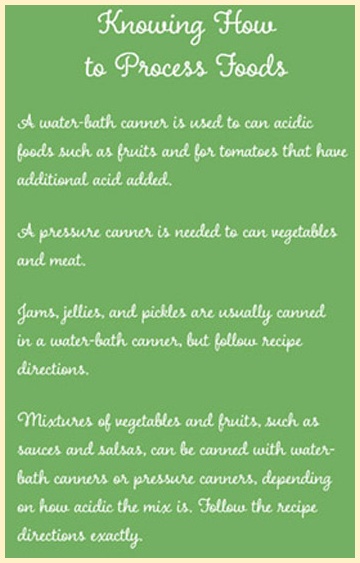
Once you have your jars properly filled, they are ready to process. Your recipe will tell you what type of canner to use. That canner should be pre-heating on your stove before you begin filling the jars.
Water-bath canning takes the least amount of time but is not suitable for all types of food. Some foods canned in a pressure canner can take a very long time to process one batch.
If you have your timer in your pocket to keep track of time, you can leave the kitchen for short periods but don’t go too far. Canning jars have been known to explode. Stay vigilant and keep the water boiling or the pressure at the right setting, or you will have to start timing all over.
FILLING AND ADJUSTING CANNERS
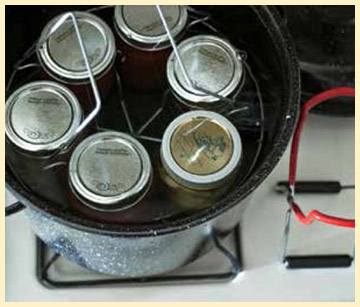
Fill water-bath canners half-full of water and begin heating as you fill the jars.
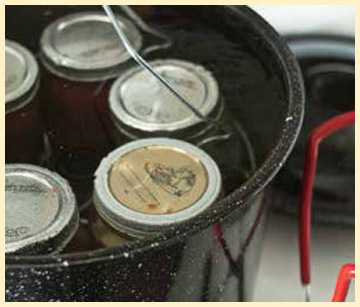
After the jars are in the canner, remove or add water to get the level to the proper 2 inches above the jars.
For pressure canners, read your instruction manual for how much water to put in to preheat and process.
If the pressure canner has a rubber gasket on the lid, make sure it’s clean before use.
For water-bath canners it’s a good idea to have some boiling water in another pot to add to the canner if the water level drops. Cooler water will cause the canner to stop boiling and you’ll need to start timing all over.
Expect your first canning adventure to take longer than planned. As you gain experience and get a feel for how to manage your time, you’ll be able to process many batches in the same day if you need to.
In the good old days, women often got together and had canning parties at each other’s houses. If you enjoy company in the kitchen, the big job will seem like fun with many hands helping and much gossiping going on. Add some good music and a little wine (or beer), and canning won’t seem so hard at all. And in today’s world you don’t need to restrict your helpers to women; you can invite the guys, too.
WHEN TO START TIMING
For water-bath canners, start timing as soon as the water begins to boil after the jars have been put in the canner.
Pressure canners must vent before you actually begin timing the canning process.
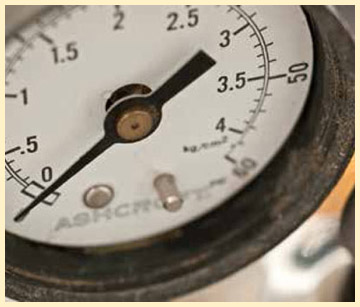
After pressure canners have vented, close the vent and wait for the dial to reach the right pressure or for the weights to begin rocking or jiggling to begin timing.
Timing is critical to food safety, so set a timer or pay close attention to a clock.
VENTING STEAM ON PRESSURE CANNERS
Follow your canner directions for the amount of water to add to a pressure canner.
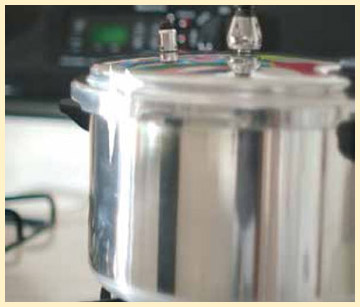
Put the lid on and bring the water to a boil with the vent open on high heat. Steam should come out of the vent.
Let steam vent for 10 minutes. Then close the vent or add weights and lower the heat to a medium setting.
The heat is lowered because you may need to raise it after the pressure is reached to keep the correct pressure.
REMOVE, COOL & STORE
PROPER COOLING IS PART OF THE PROCESSING, AND STORING FOOD CORRECTLY KEEPS IT SAFE
Before you begin your canning adventure, make sure you have a safe spot where the jars can sit and cool for up to 24 hours. Children and other curious people should not handle the jars during the cooling process.
When the jars are cool and you have checked the seals and labeled them, it’s time to move them to storage. A plastic storage cap is highly recommended. This is put on over the lid, after the screw band is removed. It keeps the lid clean and rust free in storage and gives you something to cover an opened jar with if it isn’t used completely. (Refrigerate opened jars.)
COOL DOWN IS PART OF PROCESSING TIME
Never try to hurry the cooling process. Food continues to cook during this time and is built into the recipe timing.
Don’t place canners in cold spots or in cold water to cool. This may break jars or ruin the canner.
Jars should sit in water-bath canners for at least 5 minutes after boiling has stopped.
Wait 10 minutes after the dial reads zero, or the lid safety lock is released, before removing jars from pressure canners.
CAREFULLY REMOVE JARS
Jars and the canning water will still be hot when you remove jars, so use caution.
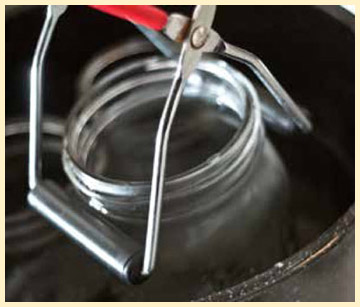
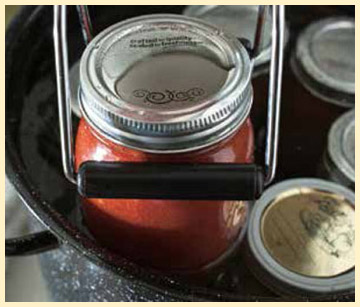
You may be able to use hot pads to remove jars from pressure canners, but you will need a jar lifter for water-bath canners.
The jar lifter grips go right under the screw band. Don’t try to lift jars by gripping farther down the sides.
Lift jars straight up; try not to tilt or jostle them. They will be wet and slippery.
Home-canned goods should be stored in a cool, dry, dark spot. The temperature should not go above 85°F or below freezing. While they may look beautiful, jars of canned food shouldn’t be stored where sunlight shines on them. This could heat the contents and cause seals to break or cause discoloration.
As you can batches, rotate the oldest food in storage to the front of the cupboard so you use that first. Dust and examine stored food every few weeks. Canned food is heavy, so make sure your shelves are sturdy and won’t collapse into a disastrous mess.
Wash all jars, especially the lids, before opening them for use. If stored jars have been in contact with floodwater, exposed to leaky sewer pipes, or in a house fire they should be discarded. If jars have been frozen, examine them carefully for cracks, bulging lids, or loose lids and discard damaged jars. In this case, the food could be discarded if the jars are undamaged, and the jars can be sterilized for reuse.
COOLING JARS
Wipe off water and any boiled-over food and place hot jars on cloths or racks to keep cold surfaces from cracking them.
Jars should have at least an inch of space between them or from a wall.
Make sure jars are not in a cold draft but don’t cover them.
Don’t tighten screw bands after you take jars from the canner. Don’t push on the jar lid until the jars feel cool.
REMOVING RIMS AND TESTING SEALS
As jars sit and cool, you may hear a pop as the jars seal. Jars will seal at various times.
After the jars feel cool to the touch (up to 24 hours), remove the screw bands.
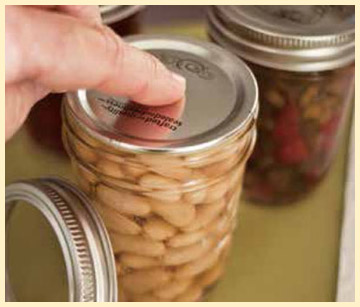
The center of the lid should look sucked in if the jar sealed. Pushing on the lid won’t show any movement.
The jar will sound a clear ring if the lid is tapped gently with a spoon. If sealed, label and store jars.
