STRAWBERRY JAM
TURN A BOUNTIFUL SPRING STRAWBERRY HARVEST INTO A SWEET TREAT THAT LASTS ALL YEAR
The bountiful strawberry harvest generally occurs in early summer before you have tired of trying to preserve things. But if this is a hectic time, you can freeze the strawberries and turn them into jam later.
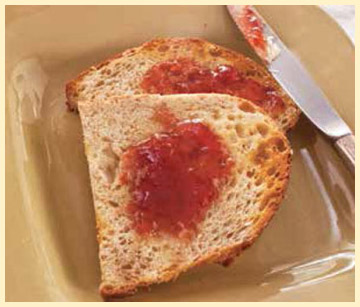
There’s nothing more delicious than Strawberry Jam slathered on toast, unless, of course, it’s Straw-berry Jam spread on a big flaky biscuit! Strawberry Jam is also good on pound cake or drizzled over a scoop of ice cream.
Jam differs from jelly in that it is thicker and pieces of fruit and seeds can be distinguished in the finished jam. It’s very hard to strain out strawberry seeds for jelly, as they are so small. Strawberry Jam can also be frozen. Yield: 8 half-pint jars
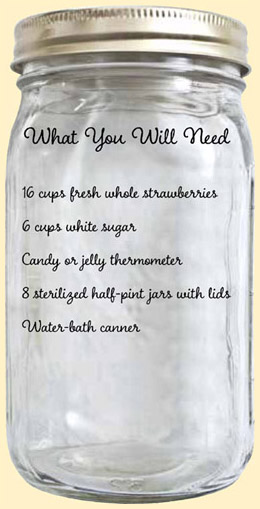
STRAWBERRY JAM
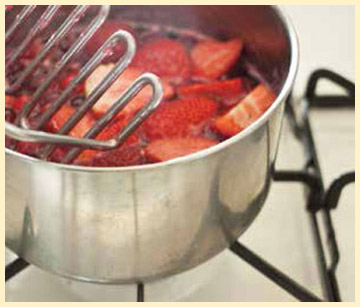
Wash strawberries and remove stems. Slice in quarters and put in a saucepan. Crush with a potato masher or back of ladle.
Be sure you have 8 cups strawberries and juice. Add sugar. Bring to a boil slowly, stirring constantly until sugar dissolves.
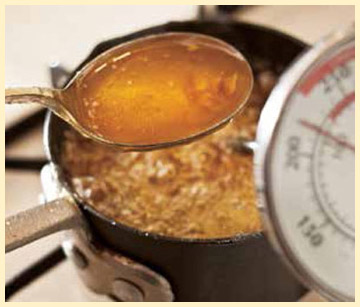
Turn up heat and cook quickly, 35 to 40 minutes, until mix thickens and reaches 220°F; stir often. Turn off heat.
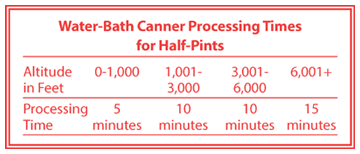
Pour hot jam into sterile jars. Leave ¼-inch headspace. Wipe rim, put on lids, and process.
Jams, jellies, and preserves call for sterilized jars. If they are processed longer to kill bacteria, the gel can be lost. Refer to page 17 to find out how to sterilize jars. Until you’re ready to use them, jars must be kept submerged in boiling water. If you use a dishwasher with a sterilize setting, keep the jars warm inside the dishwasher until you’re ready to use them. Check the lid box to see what sterilization method is recommended.
CRUSHING STRAWBERRIES
Slicing and crushing the strawberries releases the juice, which is needed to dissolve the sugar.
After crushing the strawberries, you must carefully measure out 8 cups of fruit and juice, as the ratio of fruit to sugar determines the gel.
Stir the jam frequently while the sugar is dissolving. Don’t let the sugar scorch on the pan.
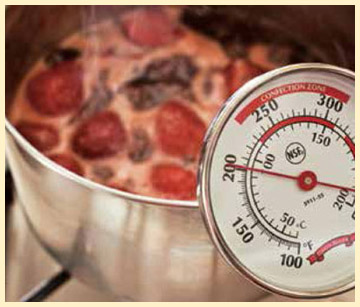
Place the thermometer in the pot as soon as the jam begins cooking and keep it there.
KNOWING THE JELLING POINT
If you have a candy or jelly thermometer, watch it carefully and turn off the heat when the jam temperature reaches 220°F.
If you do not have a thermometer, cook and stir until the jam looks thick and shiny.
Jam will be a bit thicker when it cools. To check the consistency, place a spoonful in the freezer for 5 minutes.
You can continue to cook jam that isn’t thick enough, but overcooked jam will get grainy and taste like caramelized sugar.
GRAPE JELLY
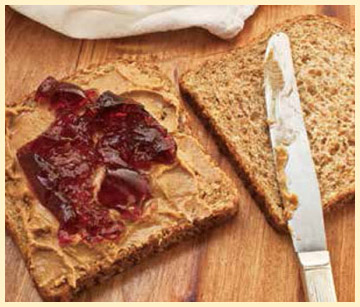
WHAT’S A PEANUT BUTTER SANDWICH WITHOUT GRAPE JELLY?
Concord grapes are the premier grapes for making jelly, but any grapes, including wild grapes, can be turned into jelly. A few underripe grapes in the jelly batch increase the natural pectin level and help the jelly to set well.
Jelly making is even more exacting than making jam, but grapes are one of the easiest fruits to turn into jelly. Jelly making also takes time, as it can take hours for the juice to strain through a jelly bag.
Besides making good peanut butter and jelly sandwiches, Grape Jelly can be mixed with chili sauce for a meatball marinade (see Reduced-Sugar Grape Jelly on page 226 for recipe) or used to attract Baltimore orioles to the yard, as they adore a dish of grape jelly. Yield: 8 half-pint jars
GRAPE JELLY
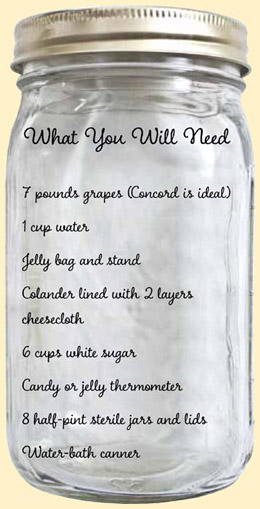
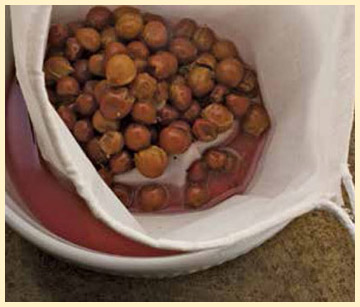
Wash grapes, place in pot, and crush. Add water, bring to a boil, reduce heat, and simmer 10 minutes.
Place grapes in jelly bag and collect juice. Don’t squeeze the bag; it may take a couple of hours. Place juice in refrigerator for about 8 hours.
Measure 8 cups juice. Place juice in lined colander over saucepan and strain. Add sugar to juice. Heat to 220°F.
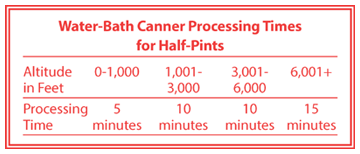
Remove from heat, skim off foam, pour into jars, and leave ¼-inch headspace. Wipe rim, top with lids, and process.
When fresh grape juice sits for a few hours, natural chemicals in the juice turn into tiny crystals called tartrate crystals or wine dia-monds. These are harmless but may leave an unpleasant gritty sensation in the jelly. If the juice sits for a while and is then strained, it will catch the crystals that developed. Cook-ing doesn’t destroy the crystals.
USING A JELLY BAG
Wet jelly bags before using. For a large batch of jelly, you need several bags—or lots of patience to strain batches.
If you don’t have jelly bags, line a colander with 2 layers of dampened cheesecloth for the first and second straining.
Some people make a large jelly bag from thin cotton material, like an old T-shirt. Anything used will be stained permanently.
Don’t squeeze the bags; this makes poor-quality juice and jelly. It can take several hours for each bag to drain.
REMOVING FOAM
Use large saucepans when cooking jelly, as the juice will foam and rise in the pan.
As the juice cooks, keep stirring to reduce the height of foam, and don’t allow juice to boil over.
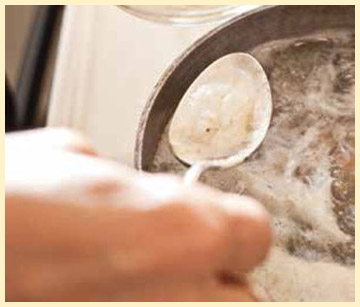
You can skim as the juice is cooking or wait until you remove it from the stove.
Special jelly skimmers are made to catch the foam, or foam will cling to a wooden or metal spoon. Work quickly so jelly doesn’t start to firm up.
APPLE BUTTER
BEFORE PEANUT BUTTER BECAME POPULAR, ALMOST EVERY HOME HAD A STASH OF APPLE BUTTER
Every housewife used to have her own apple butter recipe—from dark and spicy to light and sweet. Apple butter is thicker and smoother than applesauce. The spices are more prominent in apple butter than in applesauce. This recipe is a moderately spicy one; you can adjust the spices to your family’s preferences.
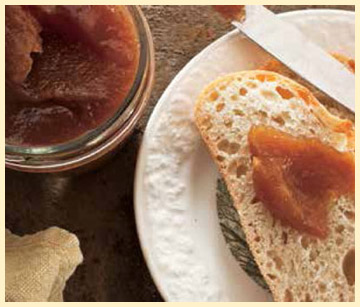
Apple butter is generally used as a condiment, smeared on bread or graham crackers for a quick snack. However, it can be used to make quick breads and muffins with a spicy apple taste. In Pennsylvanian Dutch cooking, apple and other fruit butters are usually used as sauces for meats. In some old recipes real butter is added to the fruit. Yield: 8 pints
APPLE BUTTER
Wash, peel, core, and cut up apples. Combine apples, vinegar, and cider or juice in a saucepan. Simmer until soft, about 15 minutes.
Place soft apples in a food strainer or push through a colander. Return strained apples to saucepan along with sugars and spices.
Cook on low heat 4-5 hours and stir often. To test for doneness, place a spoonful on a plate. If liquid doesn’t separate out at the edges, it is done. Remove from heat.
Pour apple butter into sterilized jars. Wipe rims, top with lids, and process.
Pear Butter: Use about 8 pounds peeled, cored pears in place of apples. Allow pears to ripen on the counter until soft before using them.
Peach Butter: Use about 10 pounds peaches in place of the apples. Peel peaches by dipping in boiling water and then cold, and then slipping off the skin. Remove pits.
COOKING THE APPLE BUTTER
Apple butter takes a long time to cook down to the right spreading consistency. It must be watched carefully during this time.
This is the one place in canning where a slow cooker might work to cook down the apples.
During cooking, the sugar caramelizes and adds to the flavor. Don’t let it burn, however, because that flavor isn’t appealing.
Enlist the help of friends or older children and make stirring the butter a shared ritual.
KNOWING WHEN IT’S DONE
After hours of cooking, the apple butter should look thick and slightly shiny.
Scoop out a big spoonful and place it on a plate. Let it cool a few minutes.
If it stays mounded in the center and no fluid seeps out to make a ring around it, it’s done.
If fluid leaks from the apple butter, it needs to be cooked a little longer.
PEACH PRESERVES
THE WARMTH OF THE SUN IS CAPTURED IN LUSCIOUS PEACH PRESERVES
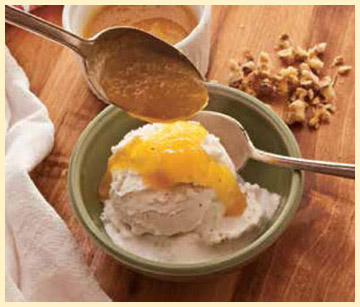
These sunny Peach Preserves will bring warmth to the coldest winter days. They are a sweet treat on toast or spooned over vanilla ice cream. They are also excellent smoothed over pound cake.
This is a very simple recipe and a good place to begin your jelly-, jam-, and preserve-making experience. It’s a quick way to use a small surplus of peaches.
Choose ripe, juicy peaches. If they don’t seem ripe enough, let them sit on the counter covered with dish towels for a few days.
Never use moldy peaches in canning, and cut out all brown, rotted spots. Overripe peaches do not make good preserves. Yield: 7 half-pint jars
PEACH PRESERVES
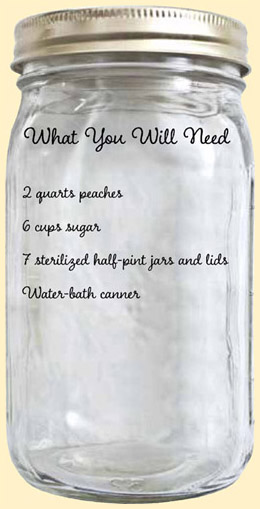
Wash and peel peaches. Remove pits and slice.
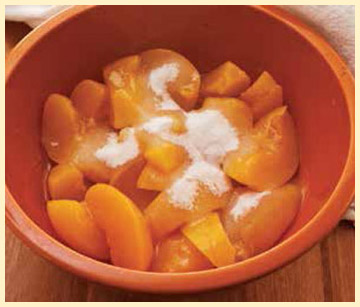
Layer peaches and sugar in a bowl. Place in refrigerator for 12 hours.
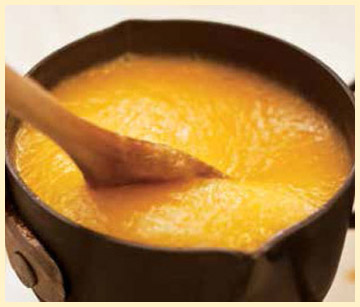
Transfer peach-sugar mixture to a saucepan. Heat to boiling and gently boil until mix thickens and becomes clear, about 45 minutes. Stir frequently.
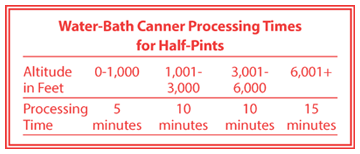
Pour into hot, sterile jars, leave ¼-inch headspace. Wipe rims, top with lids, and process.
Jelly is made from strained fruit juices and is thick but nearly clear. Jam contains pureed fruit and sometimes seeds. It has a uniform consistency that is thick enough to spread. Preserves have larger, identifiable pieces of fruit and are softer than jam. Conserves are like preserves but they have things like nuts and coconut added. Marmalades are like jelly that has fruit pieces folded into it.
BRINGING OUT THE JUICE
Sugar draws the fluid out of fruits. The peaches are layered with sugar and allowed to sit overnight.
Keep the peaches and sugar in the refrigerator to keep insects out of the mix. Cover the bowl to avoid picking up any flavor from other foods.
The sugar will partially dissolve in the peach juice.
There will be enough fluid to keep the sugar from scorching in the pan as cooking begins.
COOKING THE PEACHES
Peaches have enough pectin and acid that when combined with the right amount of sugar will generally make a nice gel.
Cook the mixture slowly; keep it at a gentle boil. Stir frequently to keep the mixture from scorching.
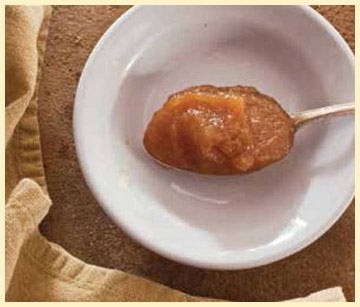
Preserves do not get as thick as jam. The mixture should look thick and shiny when finished, but will pour off a spoon when warm.
If foam develops, quickly skim it off just before pouring preserves into jars.
BACON & TOMATO JAM
THIS ODD-SOUNDING JAM IS DELICIOUS ON TOAST
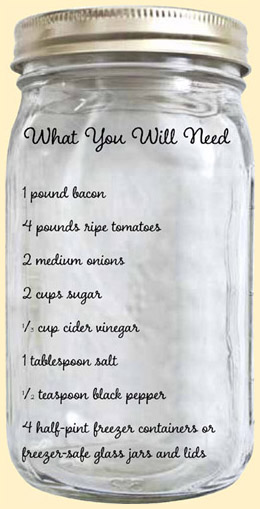
This is actually an older recipe that has had a recent surge in popularity. It’s different and intriguing and a good way to use up a few extra ripe tomatoes.
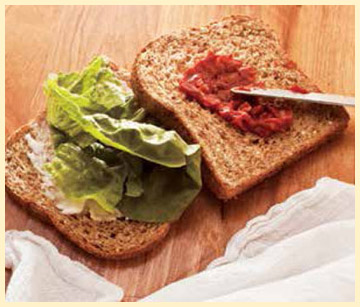
Try it on toast or mixed with scrambled eggs. A piece of smoked turkey on a nice roll with this jam is also tasty.
A big platter of home-fried potatoes served with Bacon & Tomato Jam slathered over them is a mouthwatering treat and a great way to present this jam.
You can add spices such as red pepper or garlic, if you like. The salt could be left out. Sugar is necessary to get the thick texture, and artificial sweeteners will not work as substitutes. Yield: 4 half-pint jars
BACON AND TOMATO JAM
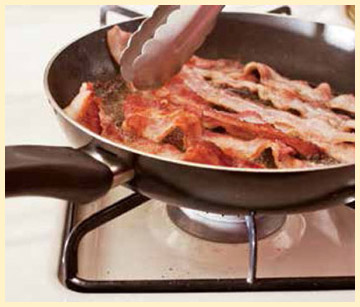
Fry bacon until crisp; drain off grease. Break into small pieces.
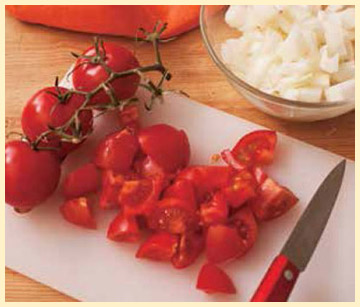
Wash tomatoes, remove core, and chop into small pieces. Peel onions and mince into small pieces.
Place tomatoes, onions, sugar, vinegar, and spices in saucepan. Bring to a boil. Add bacon pieces.
Cook at a simmer, stirring frequently, until mixture is very thick, about 1 hour. Pour into clean freezer containers and cool. Freeze all jam that will not be eaten within 4 days. Keep unfrozen jam in refrigerator.
This is one recipe you can try in your micro-wave. Put all the ingredients except the bacon in a microwave-safe bowl. Do not cover the bowl. Microwave in 5-minute bursts, stirring between each burst. It will take from 30 to 45 minutes for the mixture to thicken. Fry the bacon and fold it into the thickened jam. Refrigerate and use quickly or freeze for storage.
This recipe with bacon has not been tested by the USDA or any other reputable agency for a safe processing time. It is not safe to can this jam and store it on the shelf. After you make this jam, it should be frozen for storage or kept refrigerated and eaten within a few days. Bring it to room temperature before serving.
PREPARING THE BACON
Use your favorite brand of bacon or use bacon ends and pieces to save money.
Cook the bacon with a bacon press or weigh it down so it cooks evenly and completely. It should be cooked until crisp.
Drain the bacon on paper towels and crunch it up into small pieces.
You can also purchase real bacon bits or precooked bacon to use in this recipe.
PREPARING TOMATOES AND ONIONS
You do not need to peel the tomatoes in this recipe, although you can do so if you like.
Dice the tomatoes into small pieces and mince the onion as finely as possible.
Stir the mixture often as it cooks. In the last few minutes, as the moisture cooks off, stir continuously.
The jam is done when it is thick and glossy and mounds on a spoon.
ORANGE MARMALADE
SWEET, YET TANGY, THIS OLD-TIME FAVORITE MAKES AN EXCELLENT GIFT
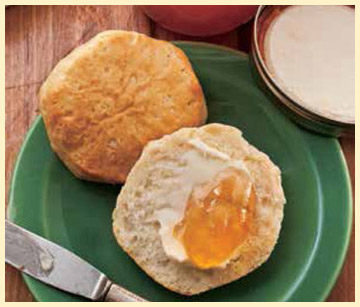
Orange marmalade speaks of English high tea and a plate of scones. You either like it or you don’t. If you do, you may want to use this recipe to make fresh homemade marmalade—it’s an excellent way to preserve excess backyard oranges.
This recipe makes a pretty gift, especially with a plate of scones or tea cookies. It also serves as an excellent company dessert when spread over orange pound cake.
Orange marmalade is sometimes used in cooking, especially with poultry like duck or goose.
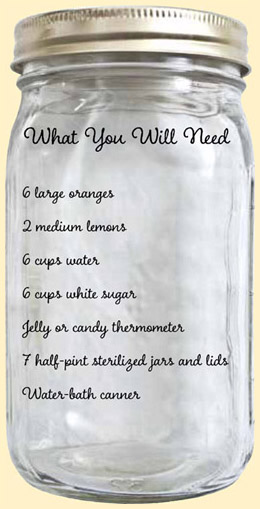
Tangerines can be used for some of the oranges, and limes can be used in place of the lemons. Yield: 7 half-pint jars
ORANGE MARMALADE
Separate the peel from the oranges and lemons and save. Chop the peeled fruit and remove the seeds.
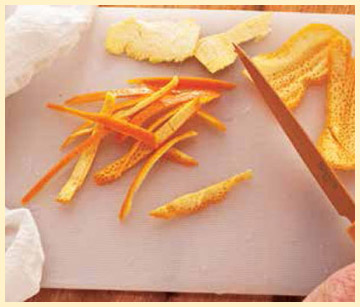
Take saved peels and slice into thin strips. Place peel, fruit, and water in saucepan and simmer 5 minutes. Remove mixture from heat and refrigerate for 12 hours.
Add sugar to mixture and heat slowly, stirring to dissolve sugar. Then briskly boil, stirring occasionally, until temperature reads 220°F, about 30 minutes.
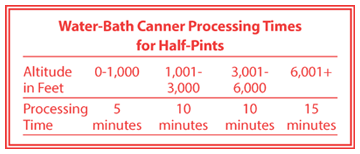
Pour marmalade into jars, leave ¼-inch headspace. Wipe rim, top with lids, and process.
Make a less bitter marmalade by removing all the peel and white membrane from 6 oranges and 2 lemons. Chop fruit, remove seeds, place in a pan, and simmer 10 minutes. Mix 1 package low-sugar pectin with 4 cups sugar. Measure 4 cups fruit and juice in pan. Stir sugar-pectin mixture into fruit, increase the heat; boil 1 minute, stirring constantly. Process like regular marmalade.
PREPARING THE PEELS
The peel contributes to the flavor and texture of the marmalade, giving it a bitter taste.
The white membrane under the peel contains pectin, which causes the marmalade to gel.
Wash the skin of the oranges and lemons carefully in hot water before peeling and remove any wax or coatings.
Use a sharp knife and slice the peel into very tiny pieces. The peel can also be coarsely grated.
COOKING THE MARMALADE
The first cooking breaks down enzymes and allows oils from the peels to seep out to flavor the mix.
The peels will soften during the resting period, and flavors will intensify.
When you add the sugar and bring the mixture to a boil, use a jelly thermometer for best results.
At 220°F the mixture will be thick and shiny and will cling to a spoon held over the pot, dripping off very slowly. Do not overcook.
