CANNED SPINACH
GREEN GOODNESS THAT MAKES A GREAT DIP
Greens are difficult to store in any fashion. However, the greens that are commonly cooked before eating can be canned. You can use this recipe to can collard and turnip greens, as well.
Choose young tender leaves, without fungal diseases or heavy insect damage. The greens should be canned shortly after they are harvested and should not be allowed to wilt before cooking.
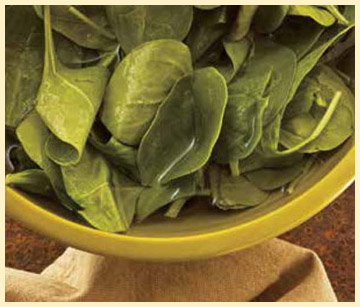
Spinach comes in a puckered leaf variety called savoy and a smooth leaf variety. Both are good for canning.
Canned spinach can be used as a side dish or in many recipes for soups, souffles, quiche, and pasta. Having some canned spinach on hand makes entertaining easy. It makes many excellent dips and spreads. Yield: 9 pints
CANNED SPINACH
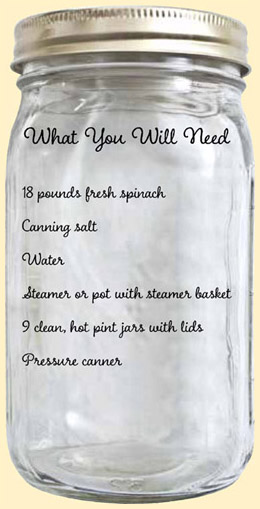
Wash spinach carefully. Soak in a solution of 1 cup salt per gallon of water for 15 minutes. Drain and discard water.
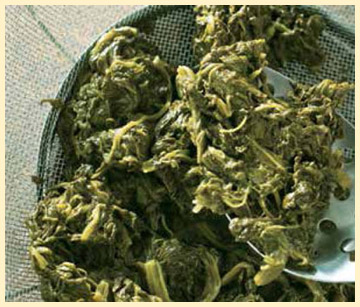
Cut heavy ribs and stems from leaves. Put spinach in steamer; steam until well wilted, 3 to 5 minutes. Drain. Get 2 quarts of water boiling.
Put ½ teaspoon salt in each jar. Pack wilted greens loosely in jars, leaving 1-inch headspace. Pour boiling water in jars, maintaining headspace.
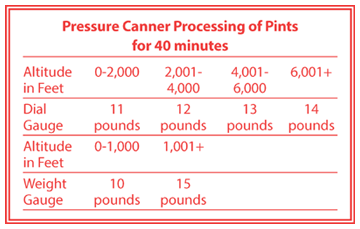
Remove bubbles, wipe rims, top with lids, and process.
Drain 1 pint canned spinach and place it in a bowl. Add ½ cups sour cream, 1 cup mayonnaise, ¼ cup thinly sliced green onions, 1 package dry vegetable soup mix, and ½ cup finely chopped water chestnuts. Blend ingredients until smooth; refrigerate, covered, for 12 hours. Serve in a hollowed bread bowl with crackers. Yield: about 4 cups
PROPERLY WASHING GREENS
Spinach and other greens can be tricky to wash, as the leaf folds often hide grit and insects.
Soak greens that might hold insects in cold salt water (1 cup salt per gallon) for 30 minutes.
Drain off the salt water and rinse with cold clean water. Really sandy greens may need several washings.
Inspect the leaves as you wash, discarding thick stems and ribs and rotted or diseased areas.
WILTING THE GREENS
Wilting greens is better than boiling them, as fewer nutrients are lost and the texture is better.
Place the greens in the steamer basket in small quantities. It takes 3 to 5 minutes to steam wilt the greens.
Keep steamed greens covered and warm while you steam additional batches. Properly wilted greens will look soft and dark green.
Pack greens loosely in the jars; do not tamp the spinach down. Fill spaces with boiling water. Salt can be omitted from this recipe.
CANNED PUMPKIN OR SQUASH
CANNED PUMPKIN IS GREAT FOR PIES, BAKING, OR SIDE DISHES
Pumpkins and winter squashes are pretty interchangeable in recipes. In fact, commercially canned pumpkin is actually from a tan-colored squash. Mature winter squash and pumpkins have a thick outer skin, called the rind, which allows them to be stored for quite some time in a warm, dark spot.
Since pumpkin and squash take a bit of preparation to be suitable for cooking, having canned pumpkin or squash on hand is a big time-saver.
Canned pumpkin and squash are not only for pies. They are used in main dishes like soups and stews and as a side dish.
CANNED PUMPKIN OR SQUASH
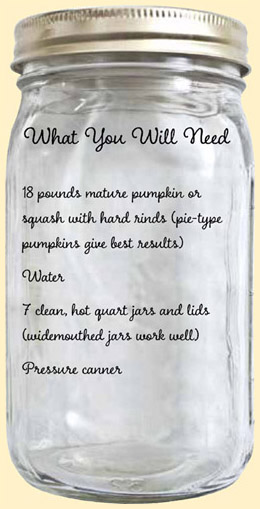
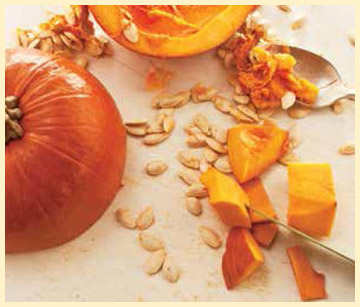
Scrub the outside of the pumpkins to remove any dirt. Split the pumpkins and remove seeds and pulp.
Cut the pumpkin flesh into 1-inch chunks and slice off the outer rind. Place the chunks in a pot of water and bring to a boil. Boil 3 minutes.
Use tongs to place chunks in jars. Pour hot cooking water over the chunks, leaving 1-inch headspace. Do not mash chunks.
Remove bubbles, wipe rims, top with lids, and process.
Pumpkins and squash should be fully ripe and firm for canning. Frosted or frozen pumpkin and squash should not be used. Yield: 7 quarts
Pumpkins and squash are native to the Americas. In earlier times they were cut in chunks and smoked or dried for preser-vation as well as stored whole inside the home. The seeds were carefully saved and roasted for a treat. As the story goes, pioneers hollowed out pumpkins, filled them with milk and a little sugar, and then set them to roast in a fire—the precursor to pumpkin pie.
CLEANING AND CUTTING UP PUMPKIN
Cleaning a pumpkin is quite messy. Protect your work surface and have something handy to dispose of the unwanted “goo” inside.
Slice the pumpkin in half and remove the seeds and pulp. You can save the seeds to roast if you wish.
Scrape the walls of the pumpkin clean with a spoon. Then cut the pumpkin into chunks.
Carefully stand a chunk on end and slice off the outer rind. There is a color change between the rind and the flesh.
PREPARING PUMPKIN FOR RECIPES
For canning, you want to leave the pumpkin in chunks about 1-inch thick. Don’t mash or puree the pumpkin before canning.
Mashed pumpkin will not heat properly in the canner and may spoil. Chunks also allow versatility in later uses.
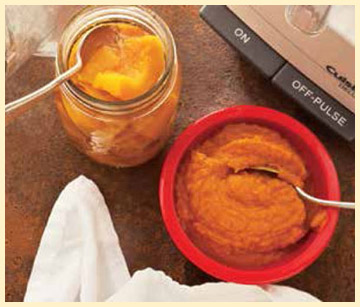
It’s easy to puree or blend canned pumpkin chunks in a blender of food processor, or you can use a potato masher.
Spices are easily blended into mashed or pureed pumpkin. Excess mashed pumpkin can be frozen.
CANNED PEAS WITH PEARLS
A SPRING-INSPIRED SIDE DISH THAT’S SURE TO PLEASE
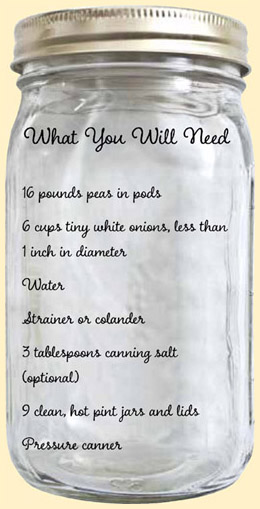
Peas grow best in cool weather, in early spring over most of the country. Even a small patch can give you more peas than you can eat fresh. At this time of year there are few other things to can, so the peas can get your full attention.
Peas for canning should be young and small. Use only peas that you shell out of the pod, not peas in edible pods for canning.
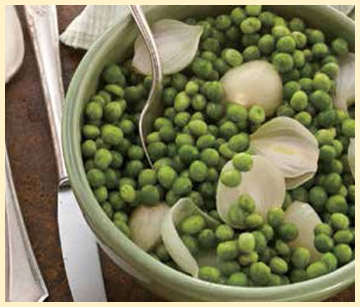
This recipe combines two spring favorites: small onions and peas. The flavors are a good blend and reminiscent of spring any time of the year. If you can’t find the small onions, the peas can be canned without them.
This recipe can easily be frozen. Yield: 9 pints
CANNED PEAS WITH PEARLS
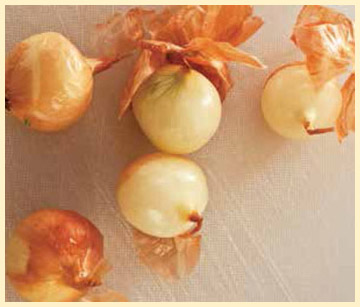
Shell peas. Working with small batches, dip onions in boiling water, then cold, and slip off skins. Cut off roots.
Place whole, peeled onions in a pot, cover with water, and bring to a boil; boil 3 minutes. Add peas and additional water to cover, bring to a boil; boil 2 minutes.
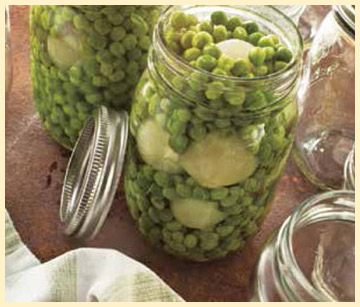
Place ½ teaspoon salt (if using) in each jar. Loosely fill with peas and onions; add cooking water, leaving 1-inch headspace.
Remove bubbles, wipe rims, top with lids, and process.
Small onions are sometimes for sale in gourmet markets. You can purchase seeds to grow your own pearl-type onions, some-times called pickling onions, but an easy substitute is the small Dutch onion sets sold in early spring. Choose white sets (tiny bulbs) and look for the more rounded ones. The sets are often sold in bulk, which allows you to pick the perfect size and shaped bulbs.
PEELING THE PEARLS
Work with a few onions at a time. Place onions in a strainer or small colander, dip in boiling water, then dip quickly into cold water.
Push the papery onion skins, which will now be soft, back toward the root end of the onion.
With a sharp knife, trim off the root pad just above the skins you pushed back; discard the skins.
Leave the tip on the onion, as it will help hold the onion layers together. Trim any skin off the top.
PACKING PEAS AND PEARLS
Don’t overcook the peas and onions; they should still be firm when you pack them. Add salt to each jar, if desired.
Lift the onions from the pot with a slotted spoon and try to divide them evenly among the jars.
Use a slotted spoon and a jar funnel to get peas into the jars. Pack loosely to 1 inch from rim.
Make sure all peas and onions are completely covered by cooking water in the jar before processing.
CANNED GREEN BEANS
EASY TO GROW, EASY TO CAN, AND GREAT EATING YEAR-ROUND
The second most popular item to can is probably green beans. They are easy for gardeners to grow and easy to find in farmers’ markets. They are usually available all summer.
Choose tender, thin young beans. Older beans are tough and tasteless. Beans can be various shades of green or purple or mottled. Purple beans usually turn green when cooked.
“Stringless” varieties are popular in home gardens, but older “string” beans may have a richer bean fla-vor. The string should be pulled off the pod before cutting the beans.
Yellow wax beans are canned just like green beans. And yellow and green beans can be mixed for pretty jars.
CANNED GREEN BEANS
Go through beans and discard those that look discolored, moldy, or bug eaten. Select young, tender pods with small beans inside.
Wash beans and trim off both ends. Cut or “snap” beans if desired.
Place beans in pot with enough water to cover. Bring to a boil and boil 5 minutes. Remove from heat.
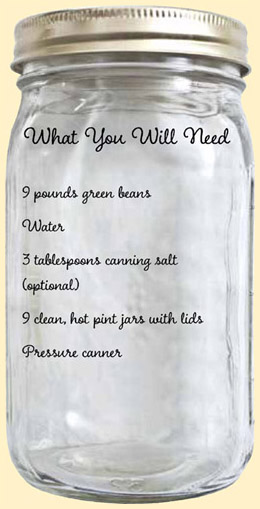
Put ½ teaspoon salt (if using) in each jar. Fill with beans and cooking water, leaving 1-inch headspace. Remove bubbles, wipe rims, top with lids, and process.
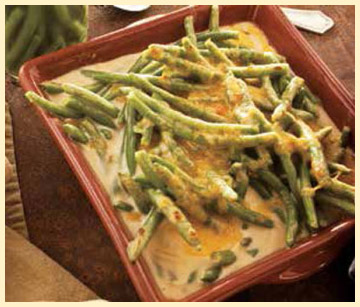
Green beans can be served as a simple side dish or as part of an elaborate party casserole. Yield: 9 pints
Drain 2 pints canned beans. Combine 1 can condensed cream of mushroom soup, ½ cup milk, and ⅛ teaspoon black pepper; stir until smooth. Add ¾ cup fried onion rings and the beans and stir. Transfer to a casserole dish; bake at 350°F 25 minutes. Remove and top with 2 cups cheddar cheese shreds and onion rings; return to oven 5 minutes. Yield: 6 servings
WAYS TO CUT BEANS
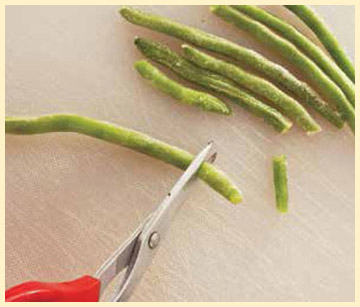
Some people simply snap beans into pieces. They can also be cut with a knife or kitchen shears. Beans can be left whole if small.
French-style beans are cut into narrow strips down the length of the bean.
“Frenching,” or shredding, beans can be done with a knife, but a special machine makes it easier.
You can find bean cutters at specialty stores, and some food processors have adaptors or built-in shredders.
FILLING THE JARS
Salt can be omitted or reduced in this recipe.
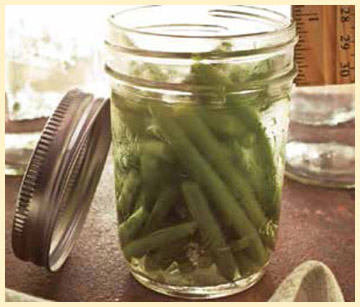
Pack beans loosely in jars, as some swelling occurs in processing. Shake jars gently to settle pieces.
Leave the required 1-inch headspace at the top of the jars, but make sure all the beans are covered with cooking fluid.
Make sure to run a bubble stick through the beans and along the jar sides and adjust fluid if needed.
CANNED BEANS
HERE’S HOW TO CAN LIMA, BLACK, NAVY, KIDNEY, AND OTHER BEANS
Beans store well dried, but having some cooked canned beans can be a big time-saver in the kitchen.
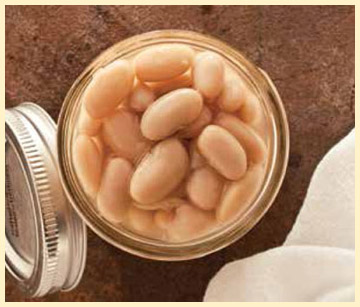
Beans that are dried can be soaked overnight in two changes of water, boiled for 30 minutes, and then canned. Alternatively, beans can be picked fresh and shelled for canning. Fresh beans should be mature, with the pods just starting to dry. The beans inside should still feel soft.
There are dozens of types of shell beans, from pintos to old heirloom soup beans. All can be canned.
Beans are extremely versatile in the kitchen and a source of protein for vegetarian meals. A whole meal can be made from beans, or they can be served as a side dish. Yield: 9 pints
CANNED BEANS
Shell beans and wash thoroughly.
Place beans in a large pot of water and bring to a boil. Boil 1 minute.
Put ½ teaspoon salt in each jar. Fill jars with hot beans; add some cooking water. Leave 1 inch space to rim.
Remove bubbles, wipe rims, top with lids, and process.
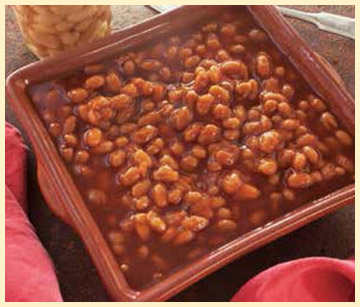
Brown 1 pound ground meat and 1 small onion, chopped. Drain grease. Drain 2 pints navy or other soup beans, saving 1 cup liquid. In a large casserole, mix ½ cup packed brown sugar, 1 cup catsup, 1 teaspoon seasoned salt, ¼ teaspoon black pepper, and reserved bean juice. Stir in meat and beans. Bake at 350°F 1 hour, until thick. Yield: 6 servings
SHELLING BEANS
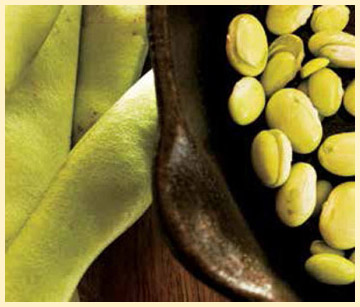
Squeeze a pod between your fingers and it will generally pop open; if not, snip off the tip and use your finger to open. Limas may need to be cut down the side.
Use your thumb to rake out the beans and drop them into a container. This should go fast and easy.
Periodically sort through the beans and remove any that look underdeveloped or moldy or have insect holes.
Make sure to wash the beans after shelling.
LEAVE ENOUGH SPACE
Beans are very apt to swell during cooking and push the fluid under the seals, preventing a good seal.
Pack beans loosely in jars, never tamp them down. Shake jars gently to settle beans.
Leave an inch of space at the top of the jars, between the beans and the rim.
Use a bubble stick to dislodge air before processing. If jars don’t seal, refrigerate the beans and use immediately.
VEGETABLE SOUP MIX
COMBINE YOUR FAVORITE VEGETABLES FOR A CUSTOM BLEND
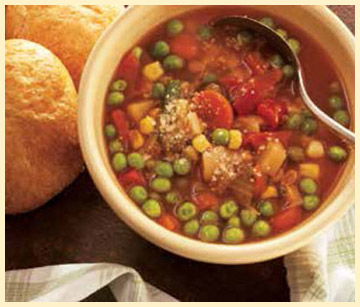
What could be better than a bowl of steamy hot soup or stew on a cold winter day? Combine it with a loaf of homemade bread and you have a feast.
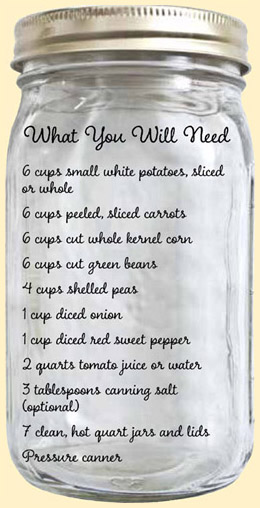
This recipe is a good way to use up small amounts of vegetables and to have a quick start for making hearty soups or stews. You can omit some vegetables if you increase the others, but be sure you always use 26 cups of vegetables.
If you add meat and thick gravy to these vegetables, it’s a stew. If you add broth and noodles, it’s soup; you could add chicken, beef, or other meat to the soup, too.
Make sure the vegetables are fresh and of top qual-ity. Peel and cut as required. Yield: 7 quarts
VEGETABLE SOUP MIX
Prepare vegetables by washing, peeling, and cutting; keep pieces to about 1-inch thick. If potatoes are left whole, they must be 1 inch or less across.
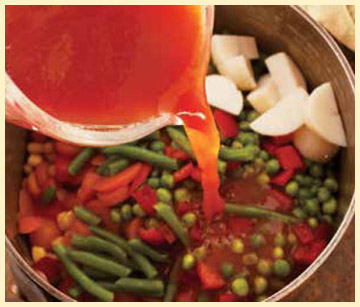
Place all the vegetables in a large pan with enough tomato juice or water to cover. Bring to a boil; boil 5 minutes.
Add 1 teaspoon salt to each jar, if desired.
Fill jars with hot vegetables and cooking fluid to 1 inch from top. Remove bubbles, wipe rims, top with lids, and process.
Do not use leafy greens, cabbage, broccoli, Brussels sprouts, cauliflower, sweet potatoes, winter squash, pumpkin, or cream-style corn as substitutes in this recipe. Dried beans should not be added (fresh or fully rehydrated lima beans can be added in small quantities). Don’t add meat, mushrooms, or meat broths. These foods may cause spoilage in storage. Add spices and herbs after the jars are opened.
COOKING THE VEGETABLES
Using tomato juice to cook the vegetables gives them a better flavor.
Try to keep pieces less than 1-inch thick so vegetables cook evenly.
Salt can be omitted or reduced in this recipe, but do not use salt substitutes.
To see if vegetables are cooked correctly, test carrots or potatoes. They should be slightly soft but not falling apart.
SOME VEGETABLE SUBSTITUTIONS
Turnips can be substituted for potatoes or carrots. Rutabagas could be used, but they may develop a strong flavor that overpowers the mix.
Green peppers or any sweet pepper can be substituted for the red peppers. If hot peppers are used, reduce the quantity.
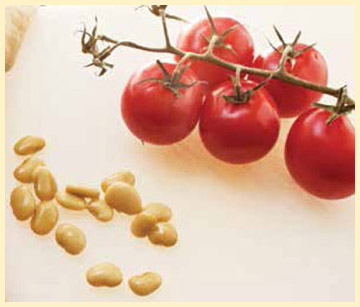
Chopped tomatoes can be substituted for any vegetable.
Okra can be used as a substitute for one of the vegetables. Peeled and chopped zucchini can also be used.
