DRIED TOMATOES
DRIED TOMATOES ADD A UNIQUE, GOURMET TASTE TO MANY DISHES
Sun-dried tomatoes are one of those gourmet food items that have worked their way down to ordinary cooks. The salty, tangy, almost smoky flavor of dried tomatoes complements many foods. Mediterranean cooking frequently uses them, probably because the dry sunny climate of that region makes it easier to dry tomatoes.
Sun drying tomatoes isn’t easy in other places because tomatoes have a high water content and other places lack hot, dry weather. But it’s worth a try if you have an abundance of tomatoes and enjoy the taste. Dried tomatoes are for special recipes and are not the preferred way to preserve your tomato harvest.
DRIED TOMATOES
Wash tomatoes. Cut small ones in half, larger ones in quarters. Remove seeds, if desired.
Mix citric or ascorbic acid with 2 quarts water. Submerge batches of tomatoes for 10 minutes; drain.
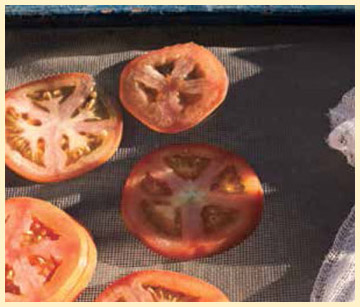
Spray screens with cooking spray. Arrange tomato pieces on screen; be sure they do not touch. Sprinkle lightly with salt. Cover with cheesecloth. Dry until leathery, with no obvious moisture (2 to 3 days).
When dry, pack pieces in jars and store tightly sealed in the freezer.
Choose perfectly ripe tomatoes for this recipe. Cherry tomatoes can be dried in halves or whole. Yield: 5 half-pint containers
You won’t be able to call these sun-dried tomatoes, but they will taste just as good. Pretreat the tomatoes as in the recipe. Spread the tomatoes on trays lined with parchment paper and place in a 140°F oven, leaving the door cracked open. Dry until leathery—this may take 24 hours or more. Cool before packaging. For long-term storage, refrigerate or freeze.
THE SUN-DRYING PROCESS
Screens should be made of food-safe plastic, fiberglass, or stainless steel, never galvanized wire.
Wait until a stretch of hot, dry weather is predicted to begin. Long sunny days are needed; don’t wait too late in the season.
Elevate the screens off the ground. Cover the food with cheesecloth or the lightest-spun garden row cover to keep out insects.
If dew is common in your area, move the trays indoors at night. This also protects food from animals.
PROPERLY DRIED TOMATOES
It can take several days for the tomatoes to dry completely.
Starting with meaty, paste-type tomatoes will make drying faster and produce a better product.
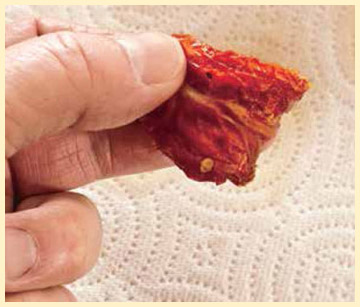
Properly dried tomatoes are more rubbery than crisp. They bend rather than snap. They should show no droplets of moisture on the surface.
Store dried tomatoes in tightly sealed containers. Add a bit of powdered milk twisted in cheesecloth to absorb moisture. Refrigerate.
MAKING RAISINS
MAKE YUMMY HONEY-COATED RAISINS FROM EXCESS GRAPES
Commercial raisins are often coated with honey. Honey is a natural preservative as well as a sweetener. The raisins you make in this recipe will taste much like commercial raisins without any other chemical preservatives.
Raisins are great natural snacks, or you can use them in cooking. Grapes have been dried in the sun for thousands of years to make raisins, but they dry quickly and easily in a food dehydrator and are a good starter project for learning food-drying techniques.
Raisins can be made from any grapes, although seedless work best. Light-colored raisins are made from white or green grapes. The grapes should be fully ripe and sweet. Yield: 3 cups
MAKING RAISINS
Wash grapes. If grapes have seeds, cut in half and remove.
Bring water to a boil and stir in sugar to dissolve. Cool to barely warm, add honey, and stir well.
Soak grapes in honey mixture for 5 minutes; drain. Arrange grapes on dehydrator trays.
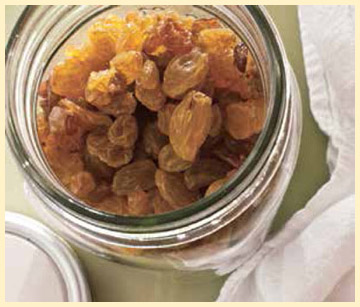
Follow dehydrator directions for drying. Expect 15 to 20 hours drying time. Store dried grapes in tightly sealed containers.
Use Rice to Absorb Moisture
All food pieces may not get equally dry. Put the dried food in a large glass or plastic container with a tight-fitting lid. Add 1 cup dried white rice and stir or shake the container every day. (If moisture appears on the sides, return food to dehydrator.) The rice and very dry pieces will absorb any remaining moisture. After a few days, remove rice and package for storage.
Alternative Pretreatment: Put grapes in a colander and dip into boiling water for 30 seconds and then quickly plunge into ice water; drain. Add 1 teaspoon crystalline ascorbic acid or 6 crushed plain 500-milligram vitamin C tablets (sold as vitamins) for each 2 cups water; stir to dissolve. Cover grapes with water; soak 5 minutes; drain; begin drying process.
THE HONEY DIP
Choose honey that has a light color and mild flavor for this dip. Make sure the sugar water is cool before adding honey.
All honey could be substituted for sugar, but the raisin would have a strong honey flavor.
This recipe makes about 2 cups of honey dip. You may need to double the amount to cover all the grapes.
Let the excess honey dip drip off the grapes before arranging them on dehydrator trays.
STORING RAISINS
Follow the directions for conditioning dried fruit in the Green Light sidebar to make sure raisins are perfectly dry.
Package the raisins in small quantities. If some mold, only that package will need to be discarded.
Use glass or food-grade plastic containers with tight lids for storage. Recycled food containers are fine if they are washed with hot water and soap and dried.
Raisins may also be packaged with vacuum-type food bags. Store all containers out of direct sunlight.
BANANA CHIPS
THIS SNACK IS CRISPY, SWEET, AND NUTRITIOUS
Banana chips are another good beginner’s project in food drying. Bananas are available all year-round for experimentation at reasonable prices. And banana chips are delicious, satisfying the sweet tooth as well as offering up some good nutrition.
This recipe uses a juice dip as a pretreatment. You can also use the honey dip described in the recipe Making Raisins (page 198). However, bananas discolor when exposed to air, and the juice dip helps preserve their color better than honey does. Unsweetened pineapple, lemon, or lime juice or a combination of juices could also be used in this recipe.
Banana chips can be eaten as snacks or used in homemade trail mixes, on cereal, and in cooking. Choose ripe but firm bananas. Yield: 2 cups
BANANA CHIPS
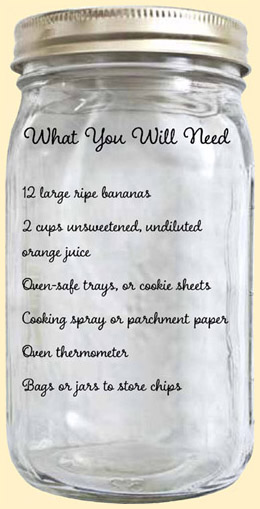
Peel bananas. Remove any soft spots. Put orange juice in a bowl. Slice bananas ¼-inch thick directly into juice. Let chips soak 5 minutes.
Coat trays or sheets with cooking spray or line with parchment paper. Drain banana chips and place slices on trays; do not let them touch.
Place trays in oven with thermometer inside. Prop oven door open 1 to 2 inches. Heat to 140°F to 160°F. Rotate trays every 3 to 4 hours. Dry until crisp, about 10 hours. Cool and package in bags or jars.
Ovens need to be propped open when they are used to dry fruits and vegetables so moisture can escape. Keep children and pets away from the open oven while it’s on. It can take a long time to oven dry food, and the time should be continuous. Make sure you won’t need to leave the house until the food is dried.
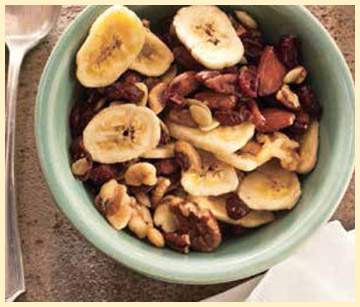
Mix banana chips with dried cherries, cranberries, apricots, raisins, apples, or nuts. You can also add chocolate, peanut butter, butterscotch, or vanilla chips, or candy-coated choc-olates. Small pretzel sticks or dry cereals can be added, as well. For a spicy mix, spread some of the ingredients on a tray and lightly spray with cooking spray. Then toss with packaged dry taco seasoning mix.
THE DIP
Use unsweetened, undiluted pure orange juice for the dip. Pasteurized juice is fine.
The juice acts as a pretreatment and color preserver. Make sure you have enough juice to totally cover the banana slices.
Slice peeled bananas right over the bowl so they don’t turn dark when exposed to air. Don’t soak longer than 5 minutes.
Let the bananas drain and air-dry well before drying begins. The juice dip is edible.
OVEN-DRYING PROCESS
Arrange banana chips on cookie sheets or trays lined with parchment paper or sprayed with cooking spray.
Parchment paper or cooking spray keeps chips from sticking to the trays or sheets as they dry.
Arrange slices so they don’t touch. Arrange cookie sheets or trays so there’s space between them and between them and the oven walls.
Set the oven at 140°F and prop the door open. To help chips dry evenly, rearrange the sheets every few hours.
DRIED APPLES
DRIED APPLES ARE GOOD FOR SNACKS OR COOKING
Apples store well fresh, but drying them can reduce storage space and make for some pretty tasty eating. They are lightweight but sweet and nutritious snacks for camping and hiking trips. Dried apples are also good cooked in a number of ways. Dried apple pie is an old pioneer favorite.
Choose firm, crisp types of apples, such as Golden Delicious, Granny Smith, McIntosh, or Rome, rather than softer ones for drying. Most people peel their apples before drying, but some choose to dry apples with the peel on.
Dried apples can even be used to make decorative wreaths and potpourri. This recipe calls for the apples to be dried in a dehydrator, but apples are good candidates for sun and oven drying, too. Yield: 6 cups
DRIED APPLES
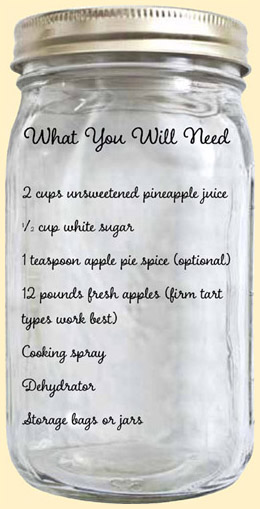
In a saucepan heat pineapple juice, sugar, and spice, if using; stir just until sugar dissolves. Allow to cool.
Wash, peel, core, and quarter apples. Slice quarters into ¼-inch-thick pieces directly into cool juice mix. Soak 10 minutes.
Drain apples well. Coat trays of dehydrator with cooking spray. Make sure slices are not touching.
Dry until leathery, about 12 hours. Pieces should not stick together or show moisture. Cool and package in bags or jars for storage.
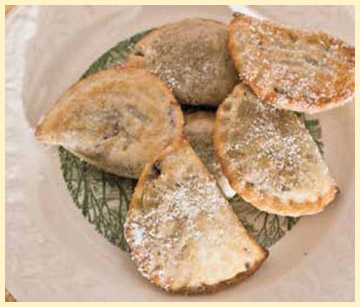
Place 6 cups dried apples, 3 cups water, 1 tablespoon lemon juice, 1 teaspoon cinnamon, ½ teaspoon nutmeg, and 1 cup packed brown sugar in a pot. Simmer until soft. Roll out a prepared piecrust; cut into 6-inch circles. Drain apples and put a spoonful on each. Fold over and crimp. Deep fry at 360°F until brown. Yield: about 10 fried pies
If you are drying apples to make a wreath, leave the peel on and slice apples into thin rounds instead of quarters. It takes a lot of apples to make one wreath. After they are dried, there should be a hole in the center; string them on a wire or cord. Use dried cranberries or cherries, cinnamon sticks, dried flowers, and ribbons to add color to the wreath.
PREPARING THE APPLES
You can buy electric or hand-cranked machines that will peel and core apples for you.
If you peel by hand, at least buy an inexpensive apple corer-slicer to save time.
Try to keep the slices at an even thickness so they dry at the same rate. Thinner pieces dry faster.
Slice apples directly into the pretreatment juice to keep the color from darkening. Make sure the dip is cool. The spice can be omitted from the dip.
TESTING FOR DRYNESS
Apples will normally dry in about 12 hours, but could dry as soon as 6 hours, depending on the machine and other factors.
Check the apples at 6 hours and every hour after. Dried apples are leathery rather than crisp.
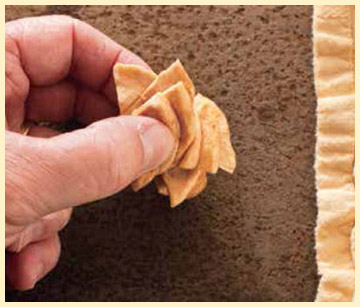
Pile a few pieces on top of each other, top sides facing in, and press down with a finger. If the pieces don’t stick together, the apples are dry enough.
Cool apples before packaging.
DRIED CHERRIES
DRIED CHERRIES ARE FULL OF NUTRIENTS AND ANTIOXIDANTS
Dried cherries are available in stores but are quite expensive. If you have cherry trees or are near a cherry-growing region where they are sold at farmers’markets, you can dry cherries yourself and save money.
Dried cherries have all the antioxidants and vitamins that fresh cherries have. They add a gourmet touch and sweet, tangy nutrition boost to cookies, candies, and other baked goods.
Tart cherries are best for drying, although you can use sweet cherries, too. Just be sure they are fresh and fully ripe. Cherry-pitting machines are available to help with that time-consuming prep step. See the Cherries in Syrup recipe (page 46) for tips on how to hand pit cherries. Yield: 3 cups
DRIED CHERRIES
Remove stems from cherries; wash and pit. Cut each cherry in half.
Spray dehydrator trays with cooking spray. Arrange cherry halves on trays so that they do not touch each other.
Dry cherries until raisin-like. This can take up to 36 hours.
Allow cherries to cool; package in bags or containers for storage. Dried cherries need conditioning; see Making Raisins recipe (page 198).
Michigan State University researchers found that adding tart cherries to ground meat decreased the amount of HAAs, dietary compounds found to cause cancer in animals that form when meat is cooked. They also slowed spoilage. Cherries add antioxidants and vitamins and make meat juicier while reducing calories. Cherry flavor isn’t apparent in the meat.
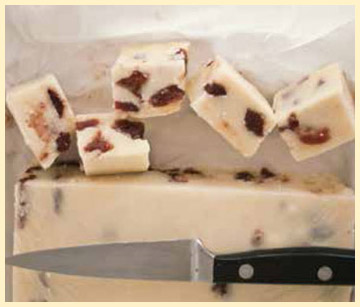
Finely chop 1 cup dried cherries. Place 2 12-ounce packages vanilla baking chips, 1 can sweetened condensed milk, and 2 tablespoons butter into bowl. Microwave on High about 6 minutes (butter is melted and chips will blend smooth). Add ½ teaspoon cherry flavoring; stir in cherries. Pour into a parchment-lined pan and cool. Yield: 2 pounds
PREPARING CHERRIES
Wash cherries just before you plan to use them. Sort through and remove any soft, moldy, or bird-pecked fruit.
Pit the cherries. You can dry them whole or in halves, so it’s fine to pull them apart to get the pit out. Halves dry faster.
Cherries don’t need a pretreatment if they are dried in halves.
If you want to dry cherries whole for appearance, pit them and dip in boiling water for 30 seconds before drying.
LETTING CHERRIES COOL
It can take a long time to dry cherries, even in a dehydrator. After 24 hours, check them every hour or so.
Cherries shrink and become raisin-like when dried. The color will get darker.
After removing cherries from the dehydrator, allow them to cool for an hour or so before packaging. Packaging while warm causes condensation.
Condition dried cherries as described in the Making Raisins recipe.
FRUIT LEATHERS
KIDS, BIG AND LITTLE, LOVE FRUIT LEATHER—MAKE YOURS HEALTHY AT HOME
If you worry about what might be in that fruit leather you buy at the store, make your own. Warning: You may never get much fruit leather to store, as it is so good when freshly made, the family will eat it right up.
This recipe makes the fruit leather in the oven, but it can be made in the dehydrator, too. It’s a good family activity for cold winter days. This recipe calls for fresh fruit, but thawed frozen fruit or drained, canned fruit can also be used.
Applesauce, yours or commercial, can be used in all fruit leathers to make them sweeter and a bit more pliable when dried. Yield: 2 trays
FRUIT LEATHERS
Dip apricots in boiling water and then in cold; slip off skins. Remove pits. Wash and hull strawberries.
Process fruit until smooth. Add applesauce and honey; blend to mix.
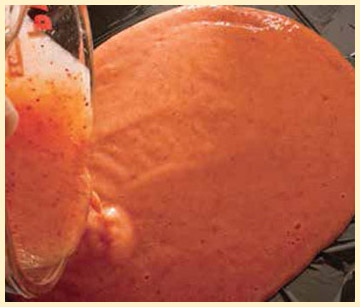
Line cookie sheets with plastic wrap or parchment paper; smooth out wrinkles. Spread on the puree.
Place in oven, prop open door 1 to 2 inches, and heat to 140°F. Dry until center doesn’t dent to touch, about 18 hours. Peel plastic off, cut leather, and cool. Wrap tightly in plastic wrap to store.
All kinds of fruit and even vegetables can be used in fruit leathers. Spices can be added to pureed fruit and nuts, or coconut can be added, too. Blueberries, cranberries, and citrus fruits should be mixed with other fruit. Melons should not be used. Apples, peaches, pears, plums, cherries, grapes, carrots, pineapple, mangoes, bananas, and rhubarb are all good for leather.
For short storage, leathers can be made with sugar, but it may crystallize in long storage. Corn syrup can replace honey in the recipe. Artificial sweeteners, with the exception of aspartame, can be used to sweeten leathers. Use up to ½ cup honey, corn syrup, or sugar to 2 cups fruit. Follow label directions on artificial sweeteners when substituting for sugar. Fruit leather can be made without sweeteners.
POURING THE PUREE
Line cookie sheets with either plastic wrap or parchment paper that has had the wrinkles smoothed out.
Puree should be quite thick. It should be like soft butter, spreadable but not runny.
You need 2 cups puree for each cookie sheet. Don’t use too much puree or the leather won’t dry correctly.
Spread the puree out to ⅛-inch thickness. It should be even and not touch the sides of the sheet. Leave ¼ inch around the edges.
CUTTING AND ROLLING
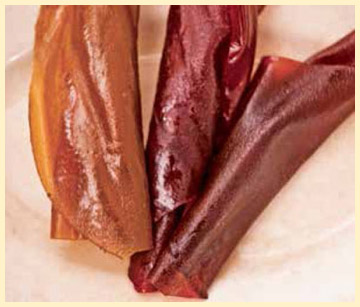
To test for doneness, touch the center of the fruit leather. Your finger should not leave a dent. The leather should look shiny.
Cut leather while it is still warm. You can cut it into rectangles or use cookie cutters to cut out shapes.
Rectangles can be rolled around fillings, such as a bit of peanut butter or chocolate.
Wrap each piece of leather tightly with plastic wrap. Store in containers at room temperature for 1 month. Freeze for longer storage.
