This warehouse was ‘kit-bashed’ using DPM and Pikestuff kits. The DPM modular pieces were used for the brown part of the building. The Pikestuff kit was for a modern diesel locomotive shed that was cut in half and used as a loading bay.
BUILDINGS
A little work makes your buildings look very different.
A couple of decades ago, the choice of buildings for modellers was limited. There were cardboard kits and plastic kits and the only alternative was to build your own. Now we also have a range of downloadable kits, laser-cut kits and ready-made resin buildings. In addition, there are a lot of laser-cut parts available for the scratch-builder.
IMPROVING RESIN BUILDINGS
For some years now it has been possible to buy many types of buildings and accessories made from resin in well-detailed fully assembled form in both OO and N scales. These are real time savers if you are prepared to have a building on your layout that will look similar to the building on a layout of another modeller. Ready-assembled buildings made from polyresin are a very good way to make a low-relief town, a farm, small town, coal mine or station quickly. These buildings do not require painting or assembly and are available from a number of companies, including Bachmann Scenecraft in both OO and N scale, Harburn Hobbies (Harburn Hamlet), Hornby (Skaledale for OO scale) and Scenix.
The Bachmann Scenecraft range is one of the largest and includes, for example, locomotive depots, a coal mine, an art deco station, footbridges, goods sheds, signal boxes, warehouses, houses, office blocks, bus depot, a container terminal crane, a milk depot, low-relief buildings and many more. In addition, models are made of preserved stations such as Highley and Shillingstone.
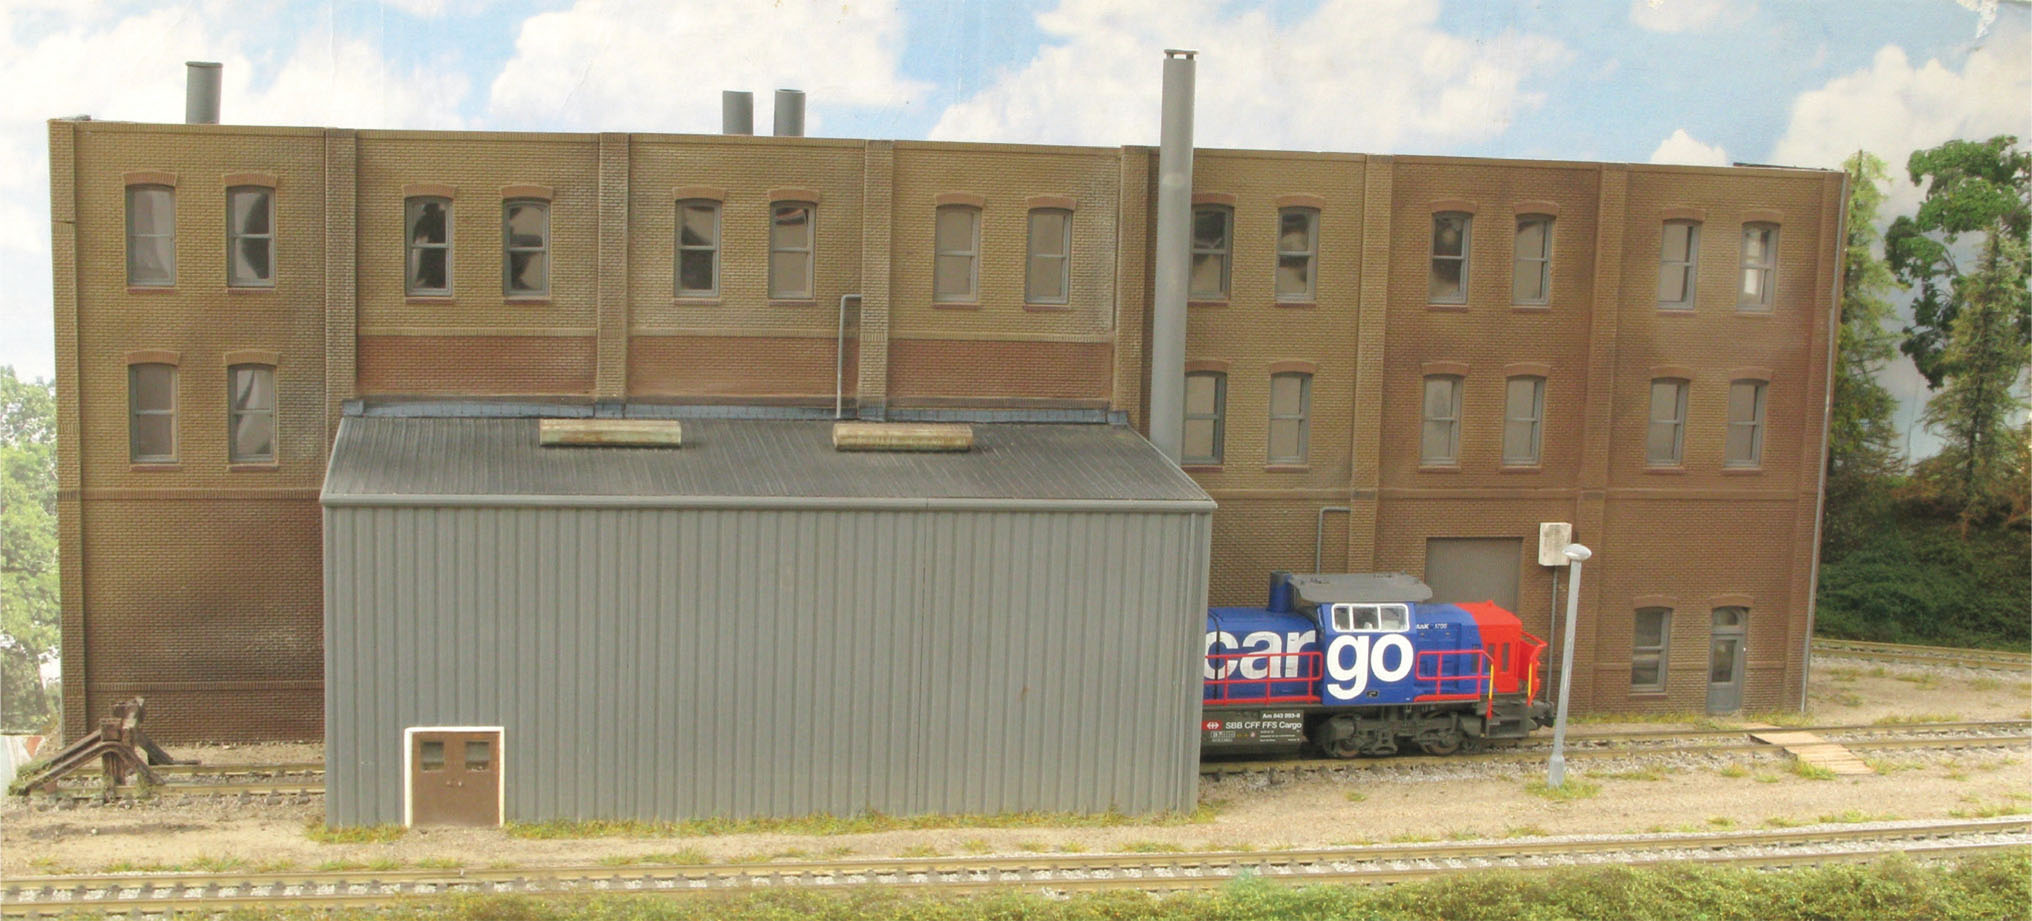
This warehouse was ‘kit-bashed’ using DPM and Pikestuff kits. The DPM modular pieces were used for the brown part of the building. The Pikestuff kit was for a modern diesel locomotive shed that was cut in half and used as a loading bay.
Another building made from a Pikestuff kit that has been adapted from a locomotive shed and painted, then weathered. Additional pipes and so on are plastic tubing.
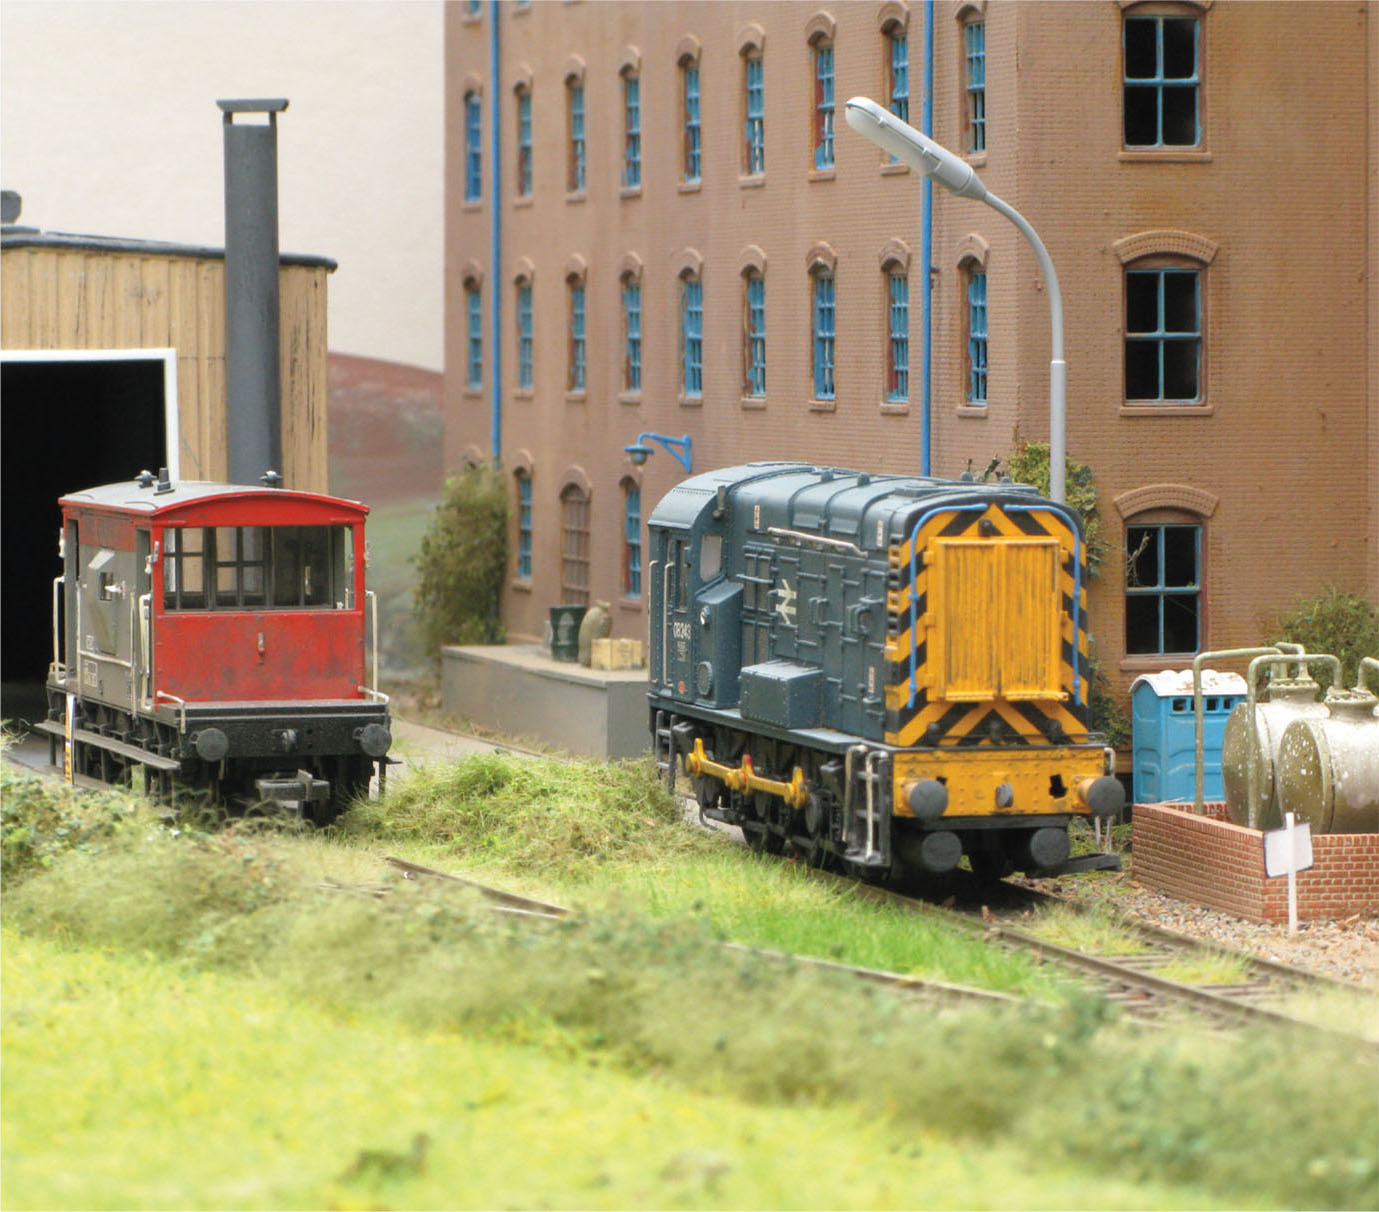
The warehouse is by US company Atlas and the loading shed is by Pikestuff. Both have been ‘Anglicized’.
The buildings can be used straight out of the box, but it is always best to personalize them, which can include adding signs or posters to industrial, office or station buildings as a quick way to make the building ‘bespoke’ to your layout. Various companies sell miniature signs and posters in all the popular scales. These include Gaugemaster, Sankey Scenics and Trackside Signs. Alternatively, why not make your own bespoke signs using a digital camera and scaling them up or down on your PC and printing them at home?
Weathering with acrylic paints or weathering chalks makes a huge difference to the appearance of a building. After all, what building in real life is not weathered by age? Adding interior lights using the Hornby Skale Lighting system or doll’s house lights means that your layout gains life if you run it with the room lights dimmed. It is necessary to black out the interior walls of the buildings because light does shine through resin.
Attach weeds and creeping ivy to the walls by using one of the foliage mats available from Busch, Heki, miniNatur, Noch and Woodland Scenics. The material is easy to tear off from the main piece and tease out to suit the area that you need to cover – use a few drops of PVA glue to fix it to the wall. As the adhesive is drying, use your fingers to sprinkle on fine scatter material to soak up any excess adhesive. Climbing roses and other flowering rambling plants can be made easily by teasing out some of the coloured texture foliage mats sold by the 4D Modelshop and other companies. Laser-cut rambling roses made from thin laser-cut card are now available from Noch. A couple of pots with plants either side of the front door of a cottage make a nice little touch. Such pots are available ready planted from Gaugemaster and Noch. Just put a dab of PVA adhesive on to the base of the pot and position it in place.
If you are using a row of the same type of cottage or house, just painting the doors different colours using a small paintbrush with acrylic paints will make a huge visual difference. You may need a couple of coats of paint to cover the original. Use a fine or micro-paintbrush. Adding curtains to some of the windows is a good way to make your buildings different to those seen on other layouts. Curtains or blinds can be made from scraps of different-coloured paper, thin card or tissue. Contact adhesive or Sellotape can be used to fix the curtains in place inside the building and having some curtains open and some closed adds visual variety. Net curtains can be made from light tissue paper. Windows can be made to look dirty by scrubbing them with sandpaper or dribbling diluted watercolours down them. If you brush liquid poly on to the windows they will turn frosty for a wintry scene. Cutting the windows is quite easy to do with a sharp craft knife so as to create the illusion of a broken pane, which looks good on industrial buildings in a rundown area.
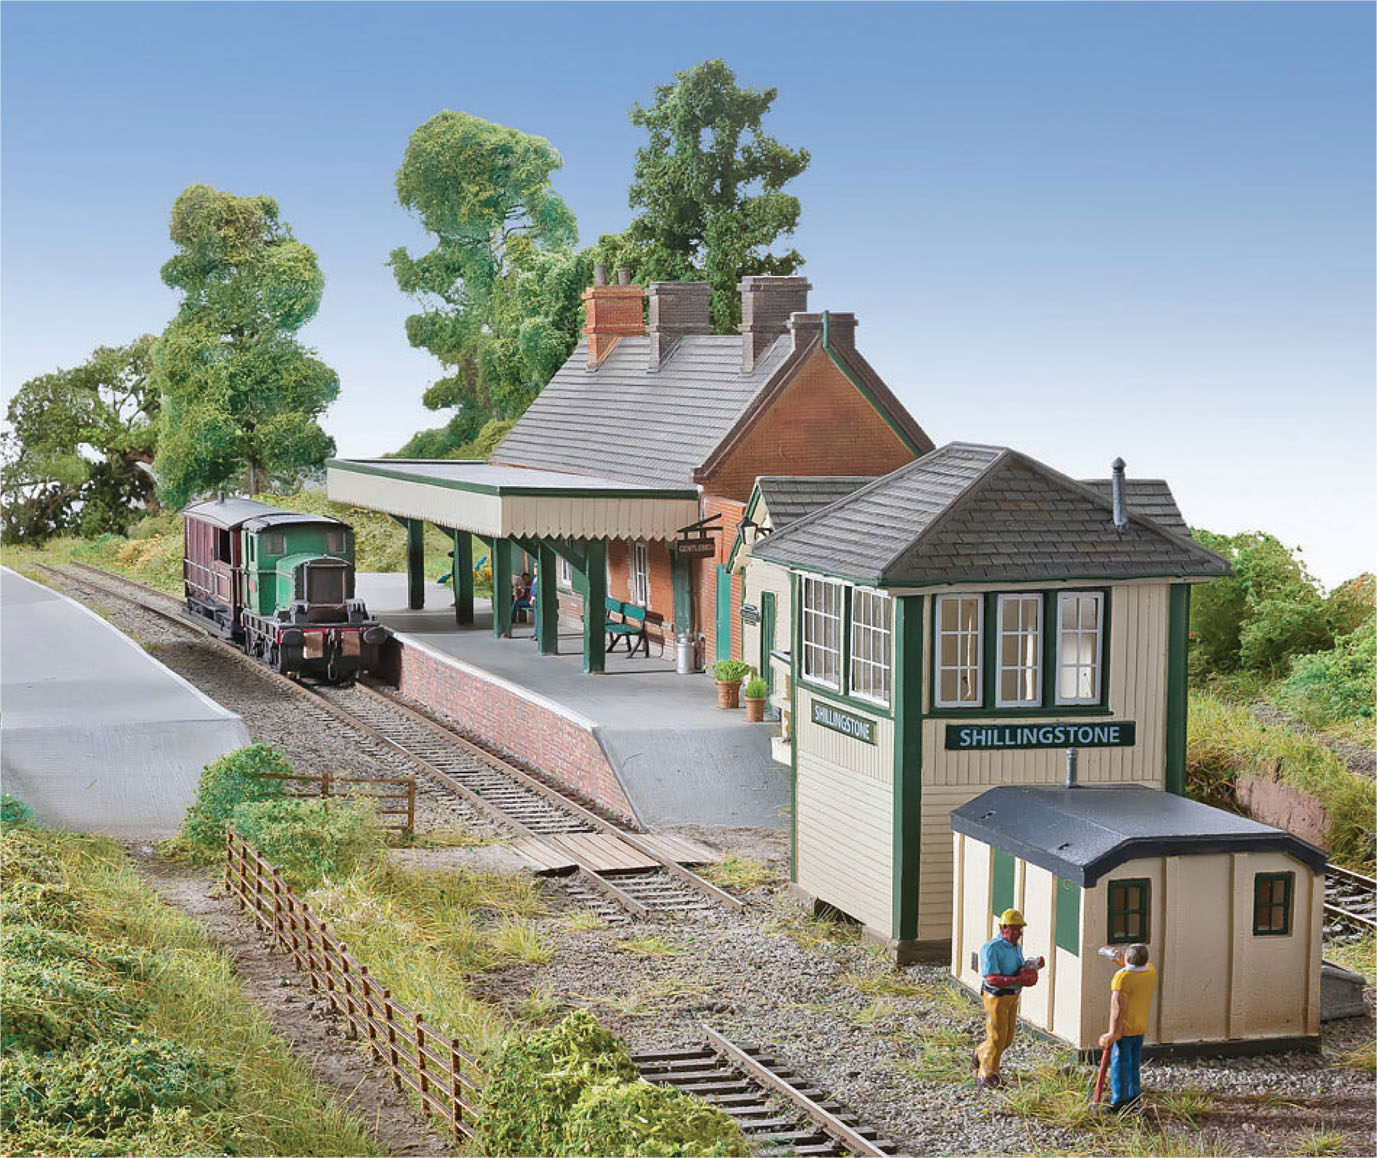
Bachmann is working with various heritage lines to produce a selection of Scenecraft buildings for both N and OO scales. These include buildings from the Bluebell Railway, the Great Central Railway, the North Dorset Railway Trust and Severn Valley Railway. This model is based on Shillingstone station as it appeared in June 2013.
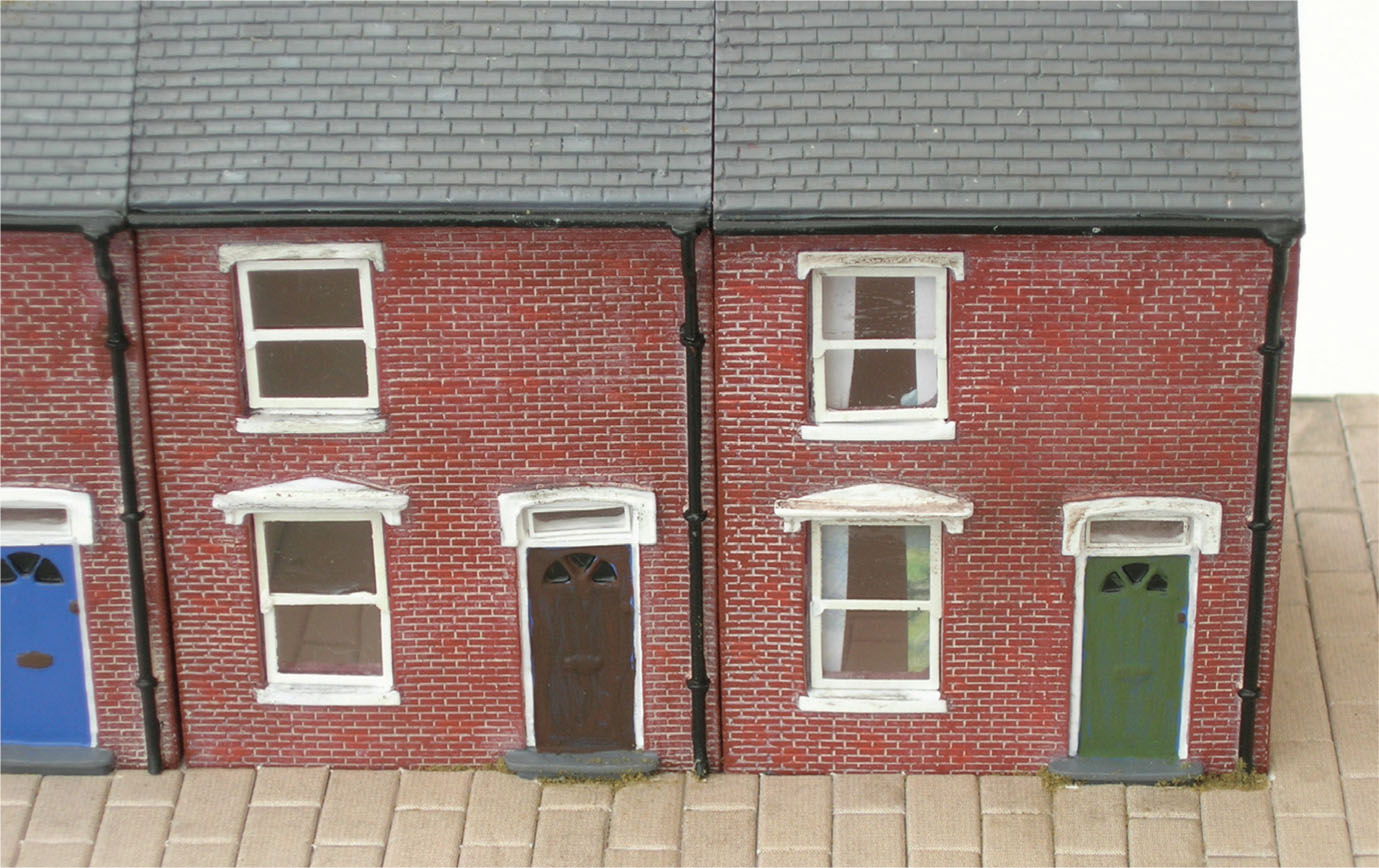
The Skaledale cottage on the left is untouched. The one to the right has had curtains added and looks much more realistic.

This concrete works by Bachmann Scenecraft has been weathered with dyes and real sand was sprinkled on to a little matt varnish.

Bedding in resin ready-painted buildings is very important. Static grass fibres and real sand was sprinkled on to spread PVA adhesive to mask the tiny gap between the building and the land.
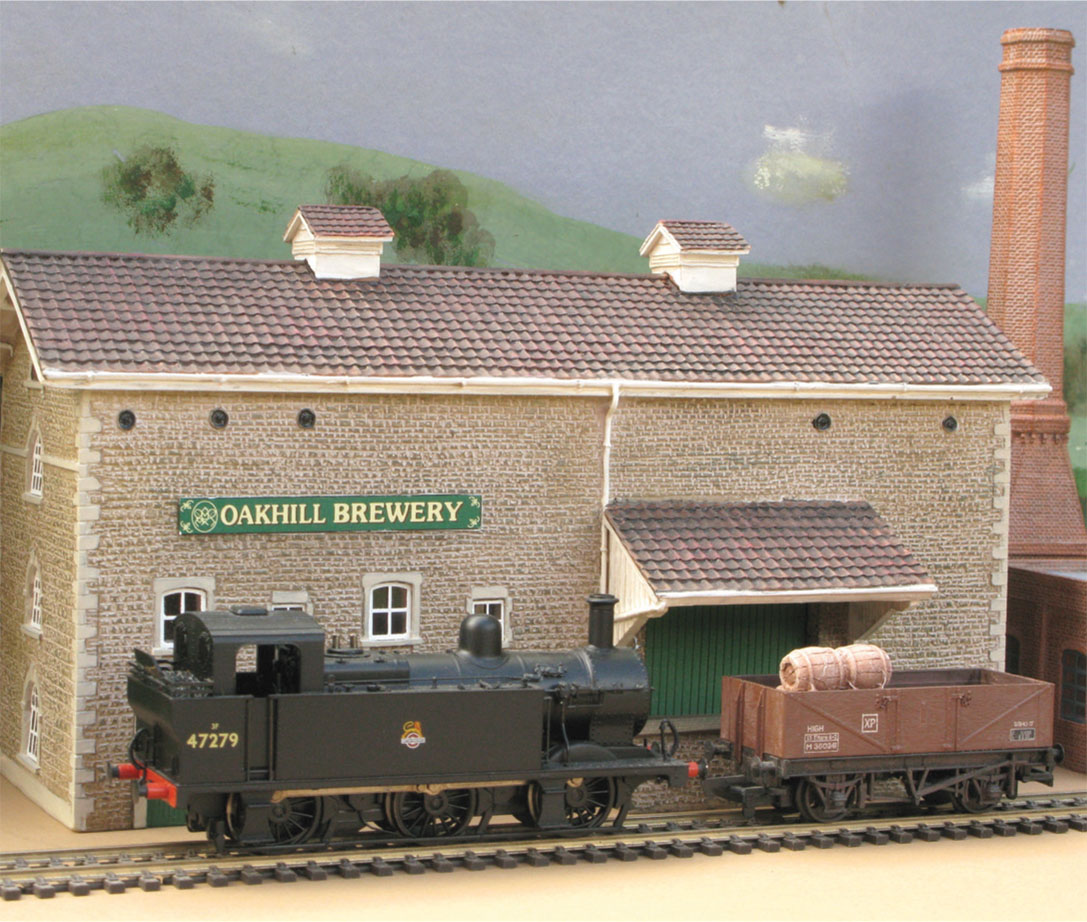
Resin ready-made buildings provide a quick way of adding an industry to a layout in OO and N scale. Here is the Bachmann Scenecraft Brewery.
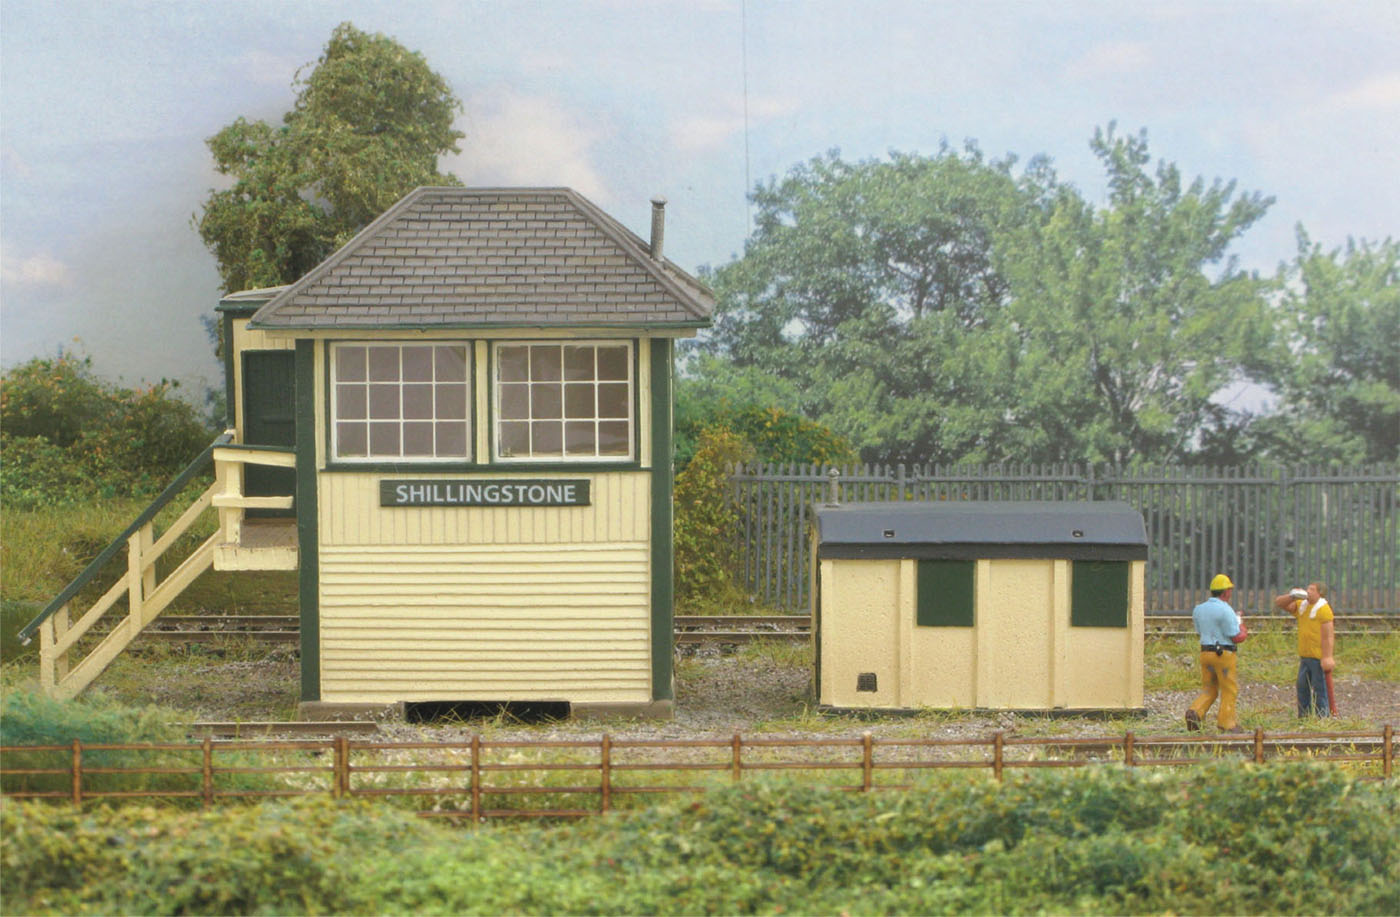
The Shillingstone signal box and plate-layer hut are straight out of the box by Bachmann Scenecraft.
Resin cuts quite cleanly with a sharp saw, which makes the possibility of ‘kit-bashing’ buildings simple by adding extensions using plastic card or laser-cut timber. Alternatively, sometimes two resin buildings can be joined together. To extend a resin building it is worthwhile using texture material such as that by Redutex. It does not matter too much that it will not be exactly the same colour as that of the main building, because extensions rarely feature the identical-colour brick or stonework.
Some of the US manufacturers, including Woodland Scenics, produce ready-built plastic buildings. These are known as ‘built-ups’. These buildings are usually made from plastic and, once weathered, they look quite good, so long as you chose a building that does not look out of place on a UK layout.
WEATHERING RESIN BUILDINGS
Within a few years of a real building being erected it starts to look a little dirty or tired. Resin buildings straight out of the box look good, but can look even better by using a few simple techniques. Start by studying photographs of real buildings to see what effects you need to reproduce. Weathering the roofs is one of the most important things to do because these catch the eye first. This can be done by drybrushing. To do this, use a flat paintbrush just dipped into acrylic paint. Take off any excess paint with a kitchen tissue. Brush up and down gently along the roof tiles. Some paint will stick to the raised detail on the tiles. Once the paint has been applied, partially rub it off using a tissue so that the weathering remains between the tiles. Roofs, particularly in coastal areas, might see various amounts of bird droppings from the ridge which can be reproduced with a little white paint on the tip of a paintbrush.
The walls of a building can be weathered using dry-brushing, or this can also be done using an airbrush, charcoal or chalk pastels. Running some diluted watercolour paints through the brick or stone courses will immediately create highlights. Using weathering dyes is another method. These dyes are water- or alcohol-soluble and provide good adhesion even on glossy paint finishes and smooth metals. They dry matt and can be sprayed with an airbrush, or brushed on with a flat paintbrush. Starting at the top of buildings, use thin washes of the dyes and, as with the other methods, let the diluted dye drip down through the brickwork. Humbrol’s washes are yet another good way to weather buildings. The Humbrol website has a good video demonstrating how to do this.
With all weathering techniques, unless you want your building to look very dirty go easy on them. You can always add additional weathering later, but it is not so easy to take layers of dirt off.
WORKING WITH DOWNLOADABLE KITS
During the last few years, several companies have introduced kits that can be purchased on the Internet, then downloaded and printed at home using your PC and printer. The printed paper then needs to be stuck to cardboard during the assembly process.
Model Railway Scenery, Scalescenes and Smart Models are just three of these Internet-based enterprises that have expanded the growing range of building-card kits, enabling the creation of structures that can easily be modified to suit individual modeller’s requirements. The kits offer good value for money, though of course the cost of your own printing ink does need to be added to the price of the kit, in addition to the cardboard.
These companies also produce an increasing range of ships, boats, road surfaces, brick and stone papers and much more, so are useful for the scratch-builder or kit-basher. If you want to try one of their kits before buying, there are various sample kits available on their websites that are free of charge. These are three of the companies that retail such kits:
TOOLS AND MATERIALS
Tools and materials needed for making downloadable kits consist of:
HOW TO USE DOWNLOADABLE KITS
The stage by stage process starts by visiting the website and choosing the item(s) that you want to purchase. Make your payment online and the PDF file(s) may then be downloaded via an email that will be sent to you. Usually two PDF files are received to download. One of these is the kit comprising of several A4 full colour pages. The other PDF contains illustrated A4 instructions. The instructions are easy to follow and there is a common set of symbols that are used. Once the files are downloaded they can be saved to your computer and printed as many times as you like. The building kits can be ordered in a variety of photo-based textures, including brick (various colours and bonds), concrete or stone. This is useful because it reduces the chance of your building looking like that of another modeller.
Scalescenes Builder’s Yard downloads cover roads, pavements, brickwork, stonework, concrete, arches, furniture and much more. These do not come as two PDFs because the general instructions on how to use these can be found on the Scalescenes website.
In my experience, before you print any of the sheets it will be worthwhile cleaning the print nozzles on your printer to ensure that you get the best possible print quality for the sheets. A poor print quality may ruin your model. It is also best to turn the printer to its ‘best quality’ print capability to get the best colour reproduction that your printer will produce. Make sure that you have a supply of spare ink cartridges because there is nothing more frustrating than having printed the first sheet to run out of ink and further ink supplies can be days away. Using better-quality paper (photographic paper for signs and so on) rather than economy paper will give a better end result. If the paper has a slight gloss to it, the model can be sprayed with matt varnish on completion.
The printed paper needs to be stuck to cardboard during the assembly process. The detailed instructions will tell you which thickness of card is suitable. Good-quality cardboard is available from art shops or Hobbycraft, though for some parts cereal packets are perfectly adequate. In addition to the kit, you will need a self-sealing cutting board, a sharp craft knife, spare new blades, a glue stick, a steel ruler and a selection of thicknesses of cards. A little acrylic paint will be needed at the end of the assembly process, together with a thick felt-tipped pen (usually black). A matt varnish aerosol is useful also for the last stage in the building process. Read the instructions and work your way through the assembly process step by step before cutting any of the parts.
The instructions will suggest using a glue stick to fix the printed paper on to the backing card. I find that a glue stick works very well indeed, provided that the entire area to be fixed is covered with glue. A glue stick is also useful because it allows a little ‘slide’ before the glue sets. Ensure that your glue stick is relatively new and has not dried out before you start work on the kit. Replace the blade in your craft knife as soon as it gives any indication of becoming ‘tired’ because blunt blades can make a mess of cutting the paper.
Bare edges on the cardboard or paper can be coloured using a thick felt-tipped pen or diluted acrylic paints. Drainpipes, guttering and final details can be added from plastic parts and fixed to the building with PVA or contact adhesive.
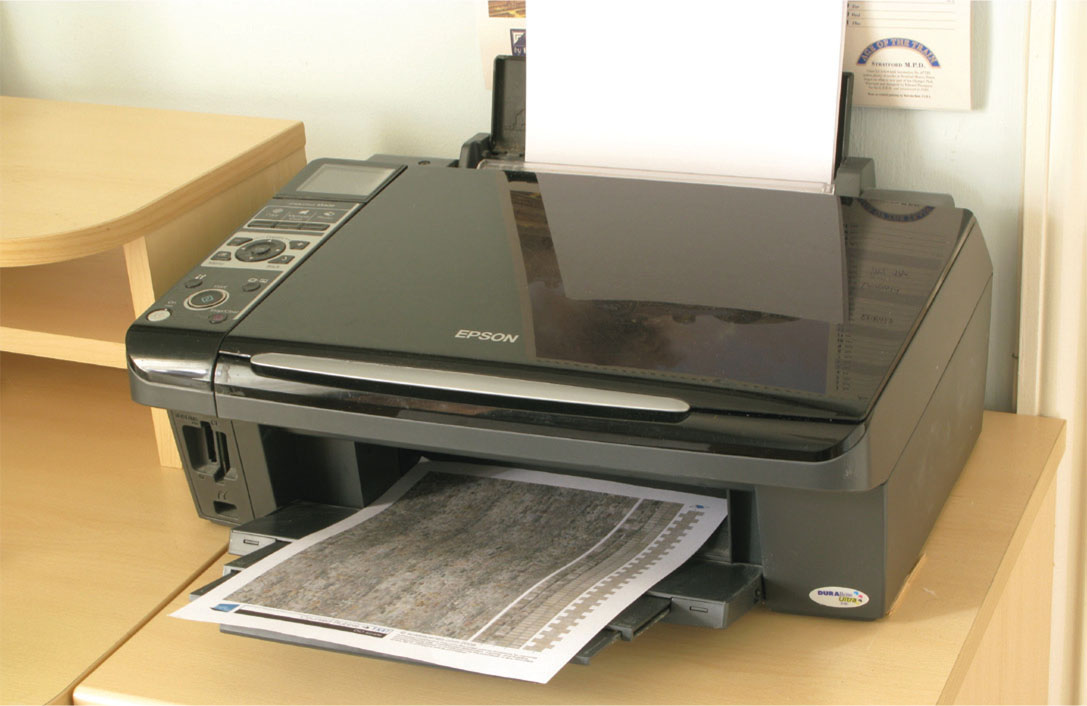
The PDF files can be printed on your own printer after being downloaded from www.scalescenes.com or one of the other websites that offers downloadable kits.
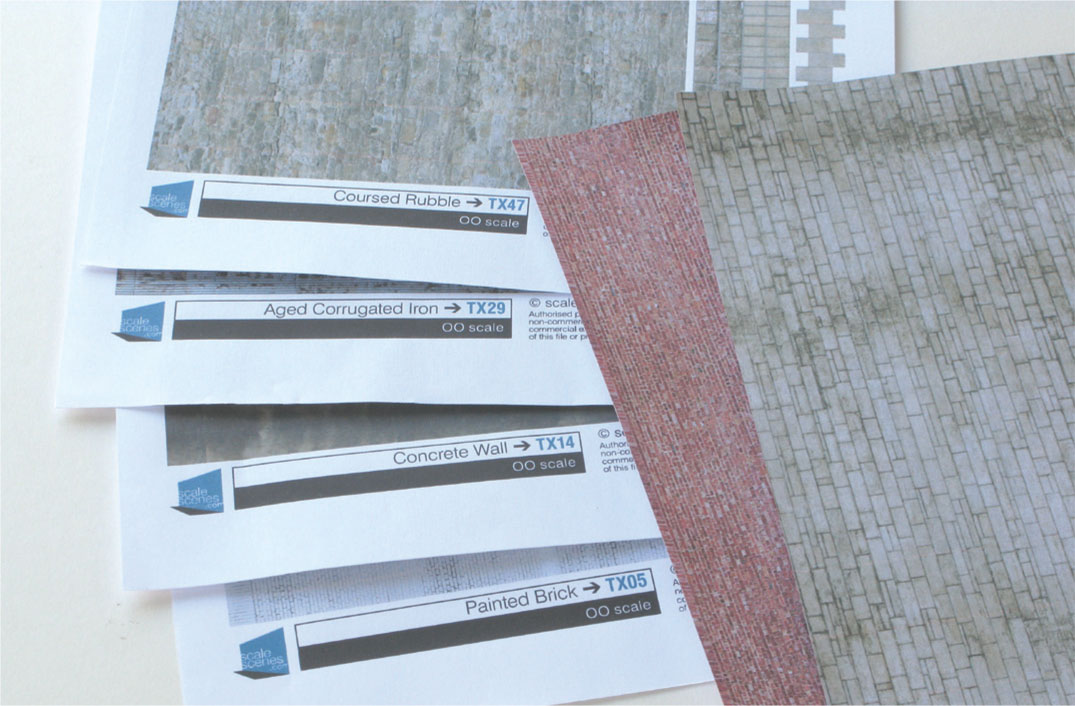
The kits can usually be ordered in a choice of finishes to make your building as individual as possible.
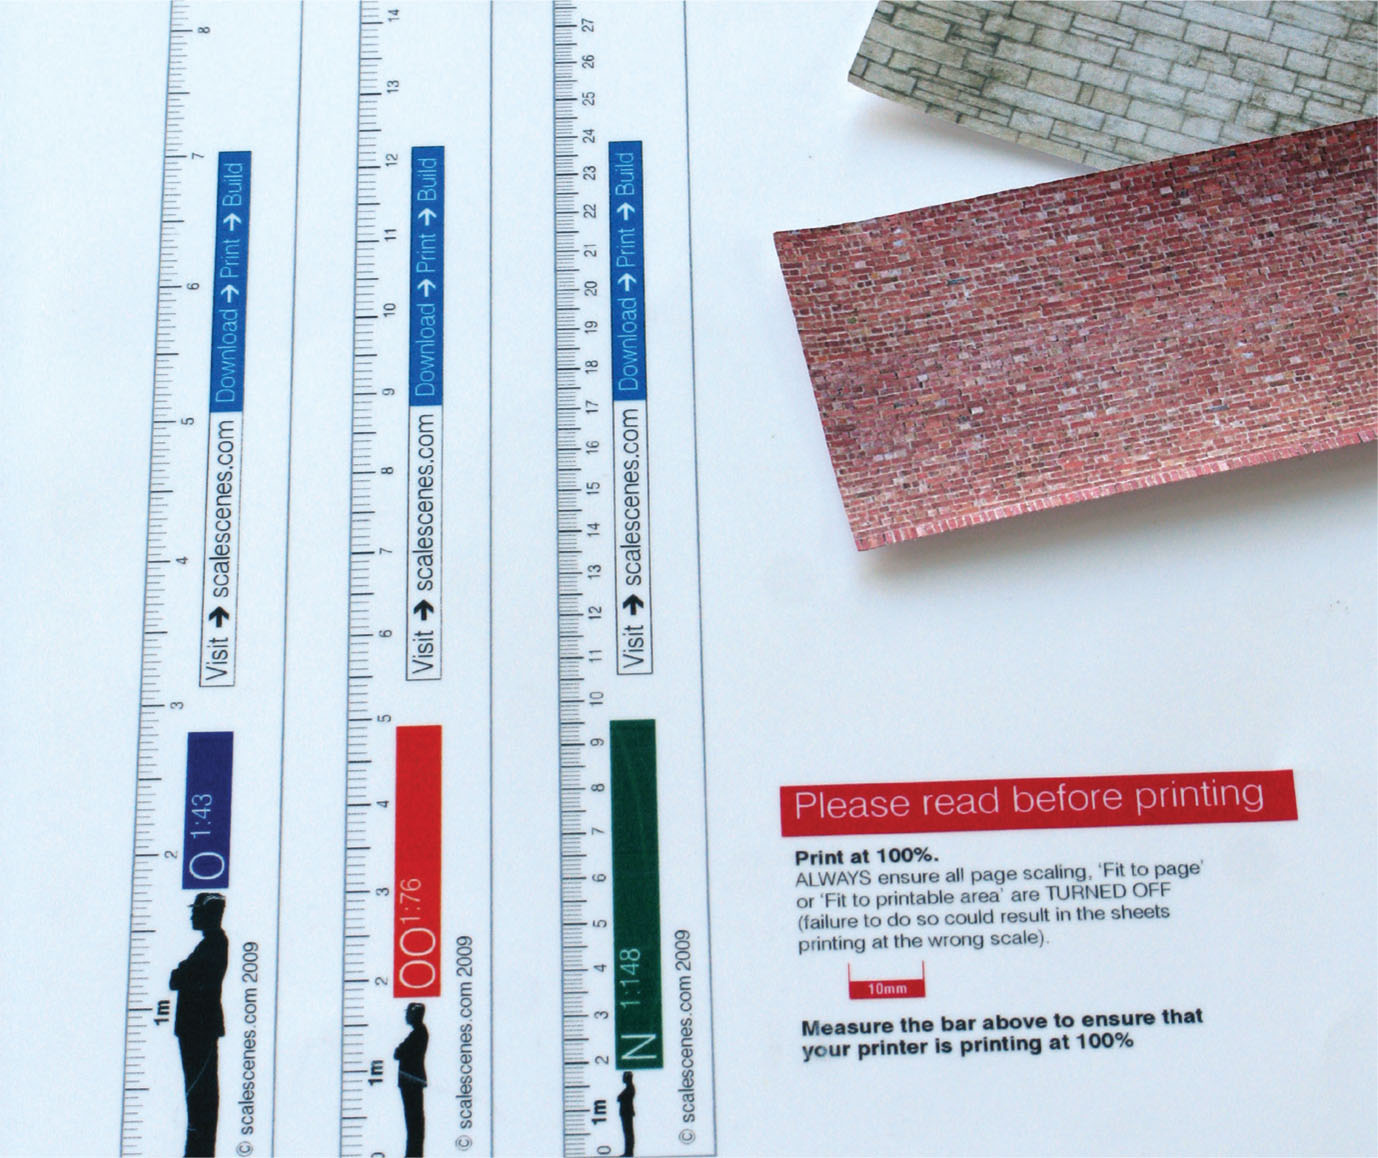
Scalescenes provides a scale ruler that can be downloaded, which is a useful modelling tool to gauge the height of figures and so on. One of the PDFs to be printed is the instructions for the kit; these are quite easy to follow. All the kits of a particular company will share a common set of symbols.
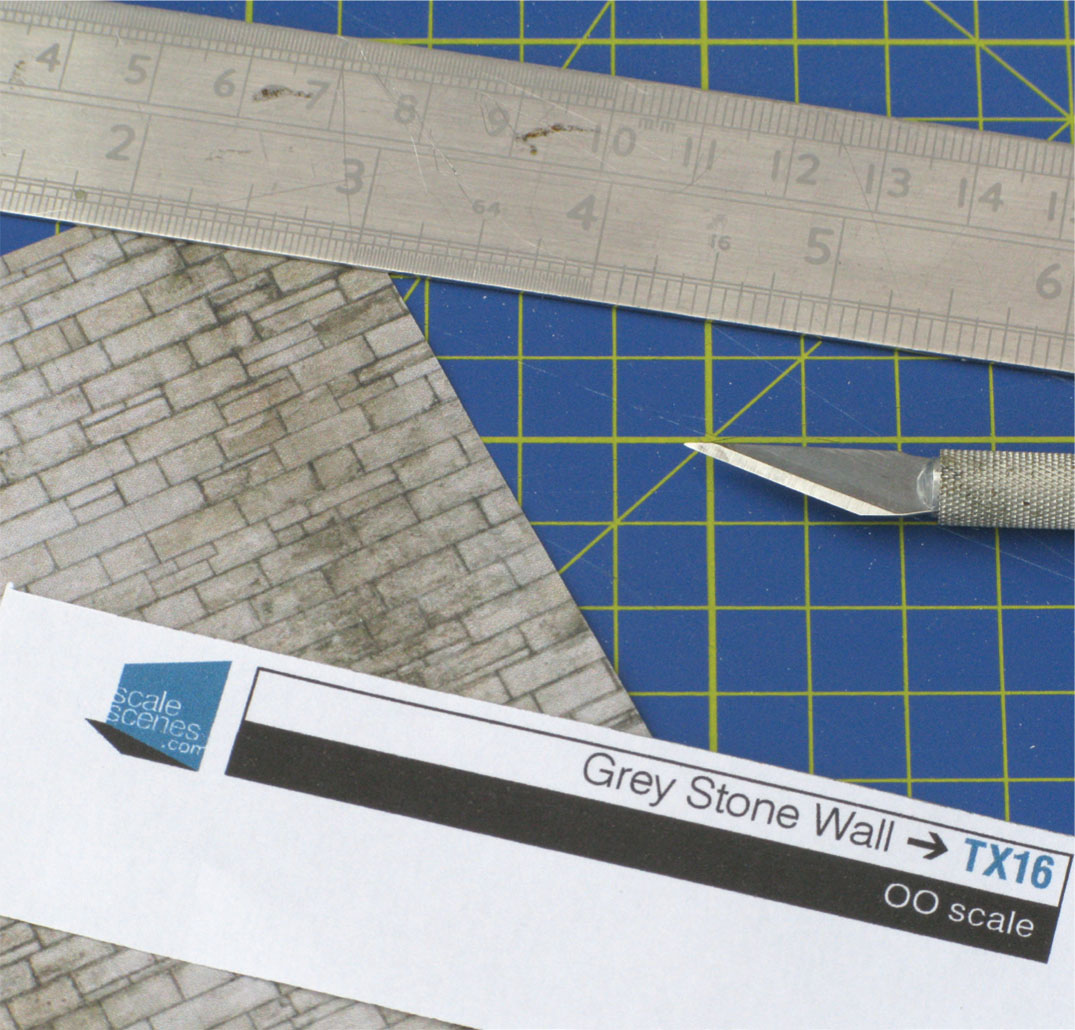
Working with cardboard requires a self-sealing cutting board, a steel ruler and a sharp craft knife (ideally with some spare blades).
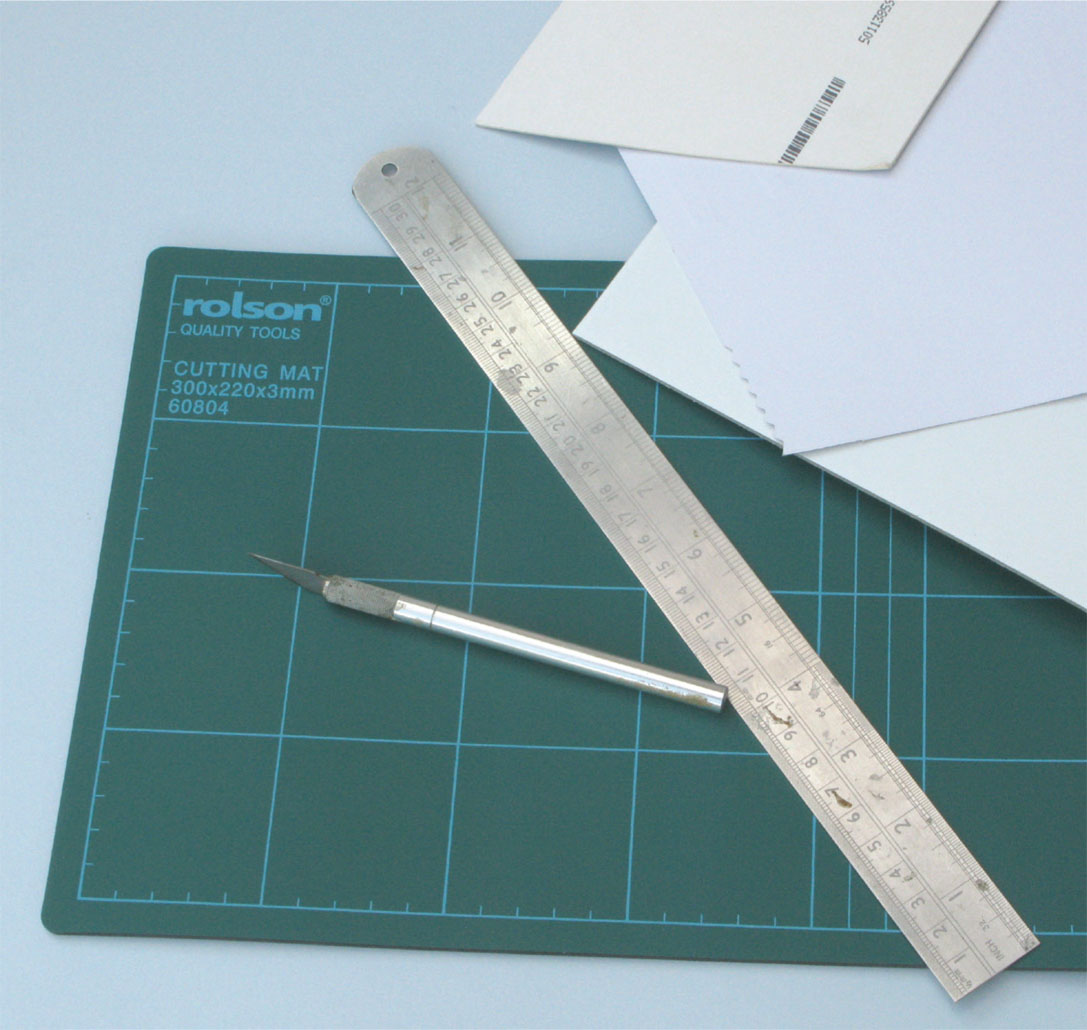
In addition to the kit, you will need a cutting board, a sharp craft knife, a glue stick, a steel ruler and a selection of thicknesses of cards.

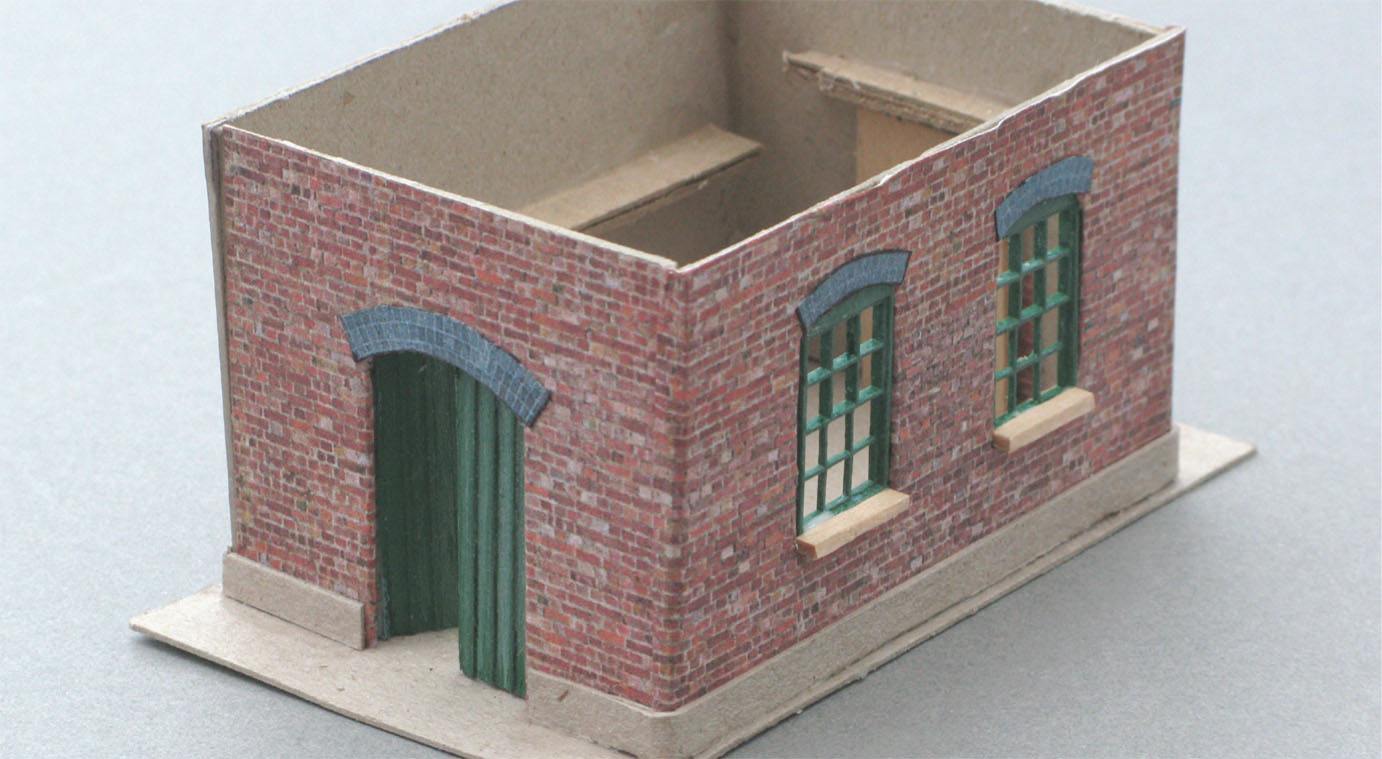
Here, one of the interior walls of a hut has been stuck on to 2mm card using a glue stick.
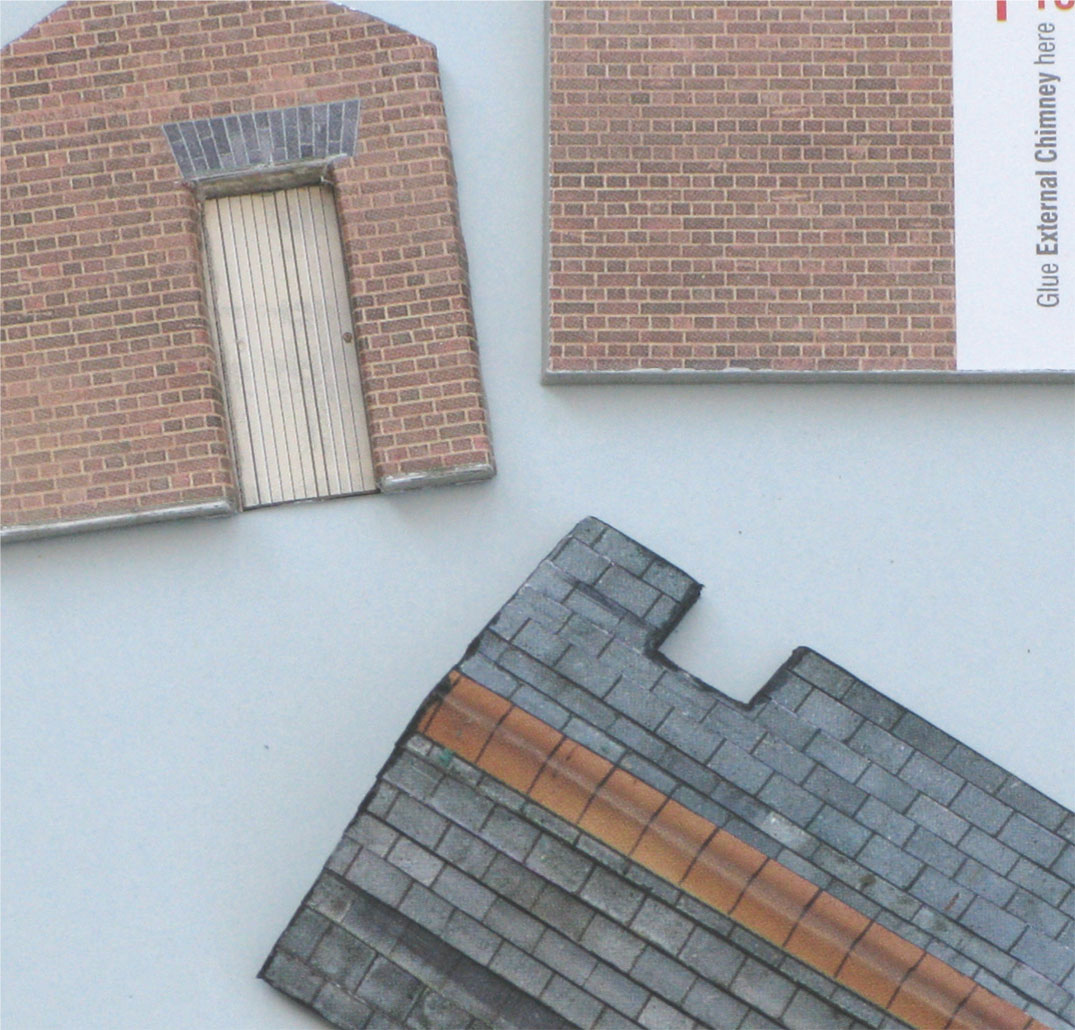
The roof is made up of separate strips of tiling laid on to cardboard, then the ridge tiles are attached. One end of the roof has been cut and finished in this picture. The other end (nearest the camera) is unfinished.
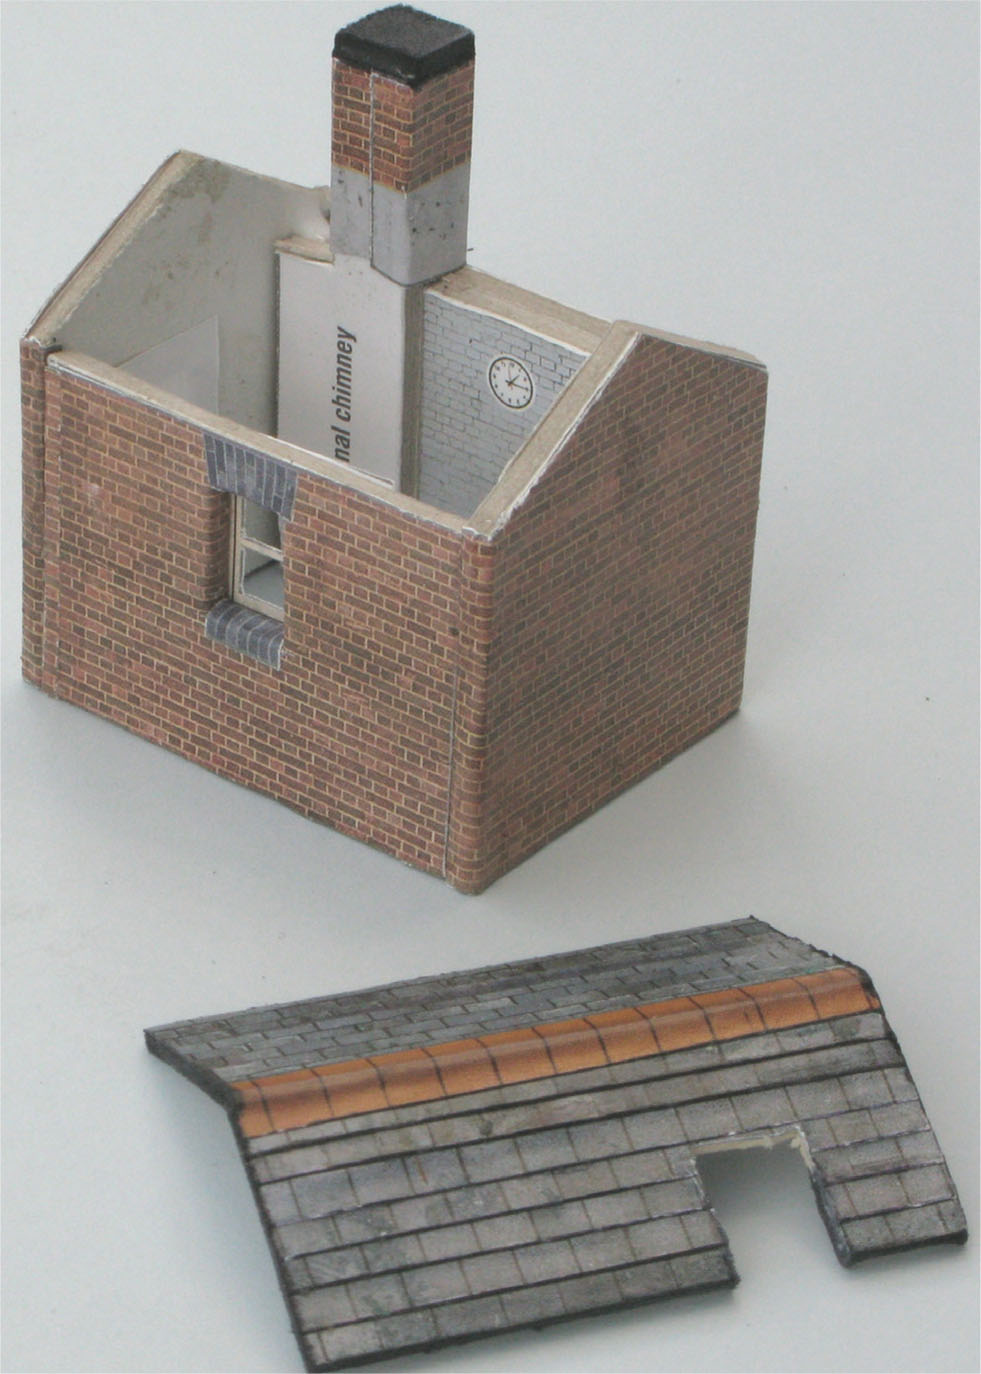
The walls are assembled and the roof is ready to fix into place.
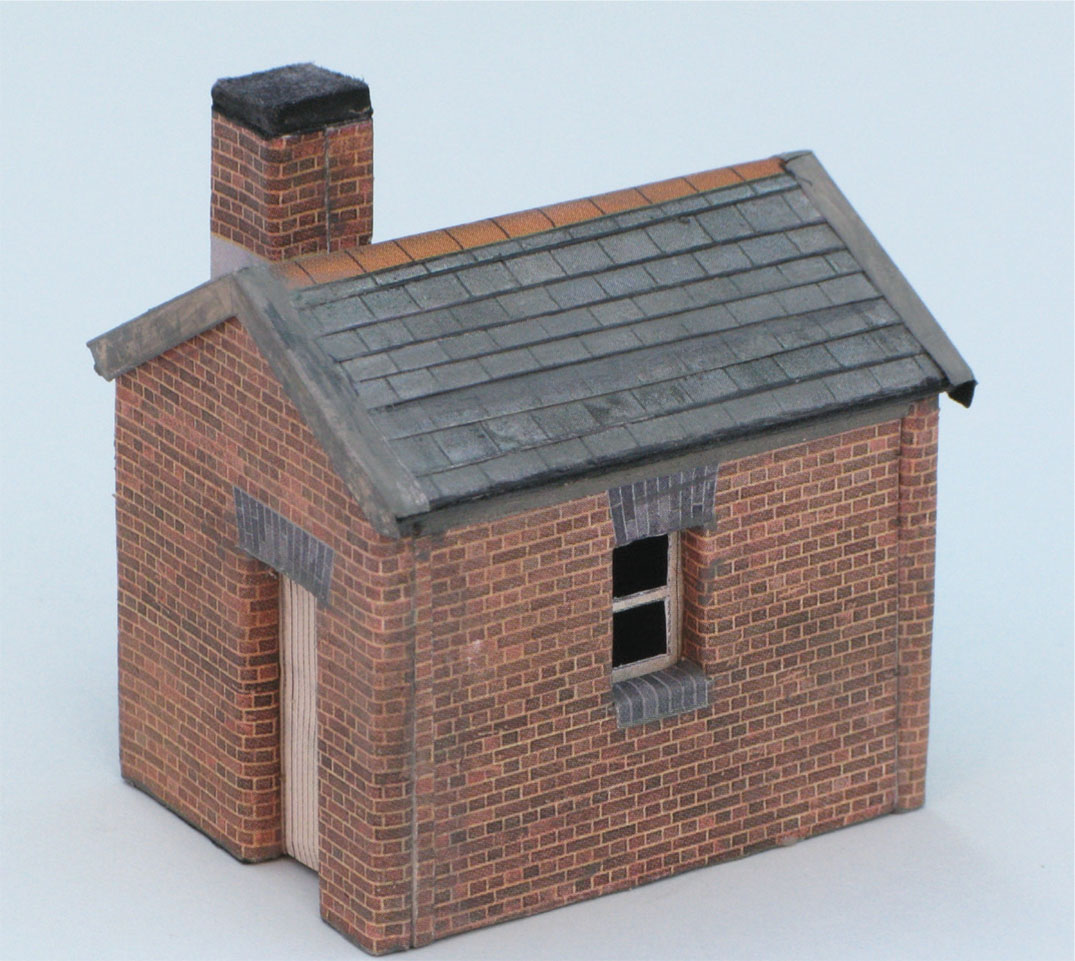
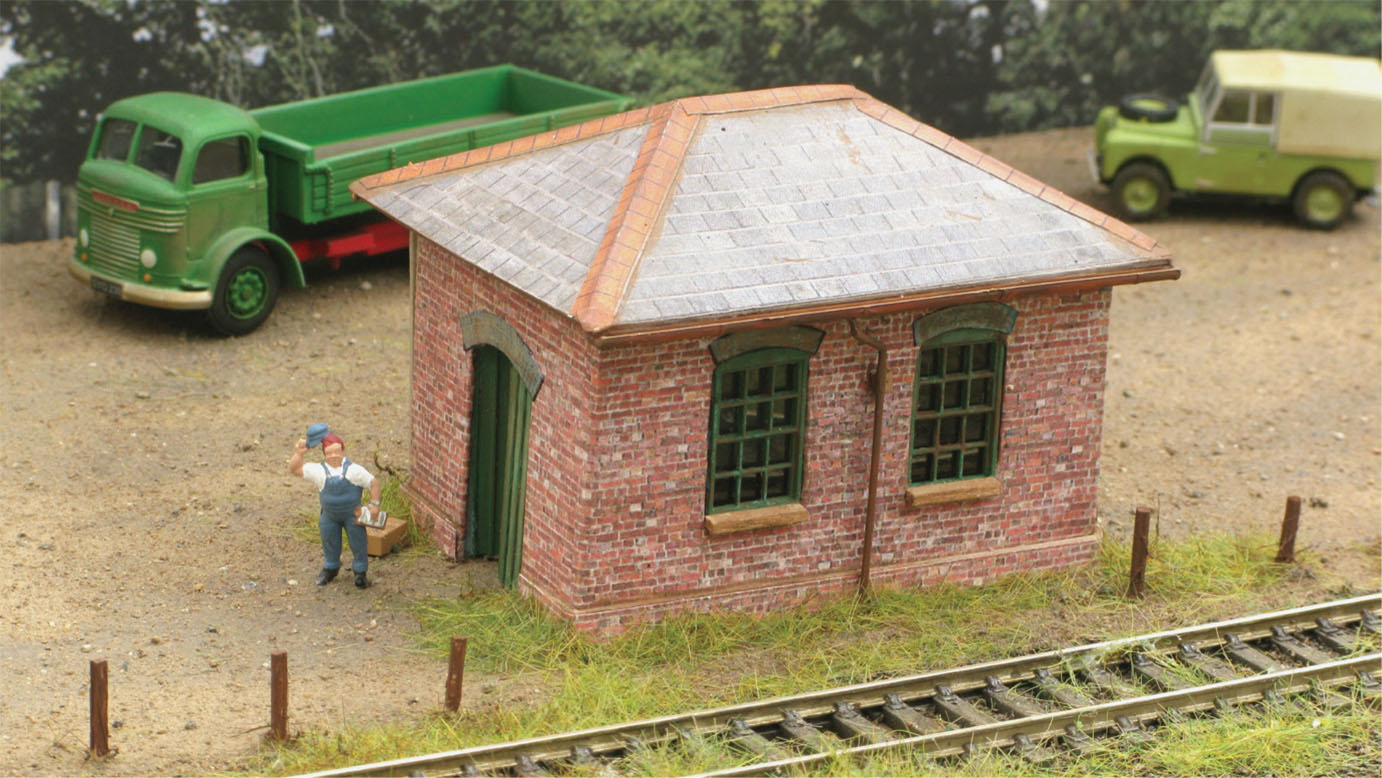
The assembled hut in almost finished state. Drainpipes and guttering are still to be added, along with some touching up of the brickwork.
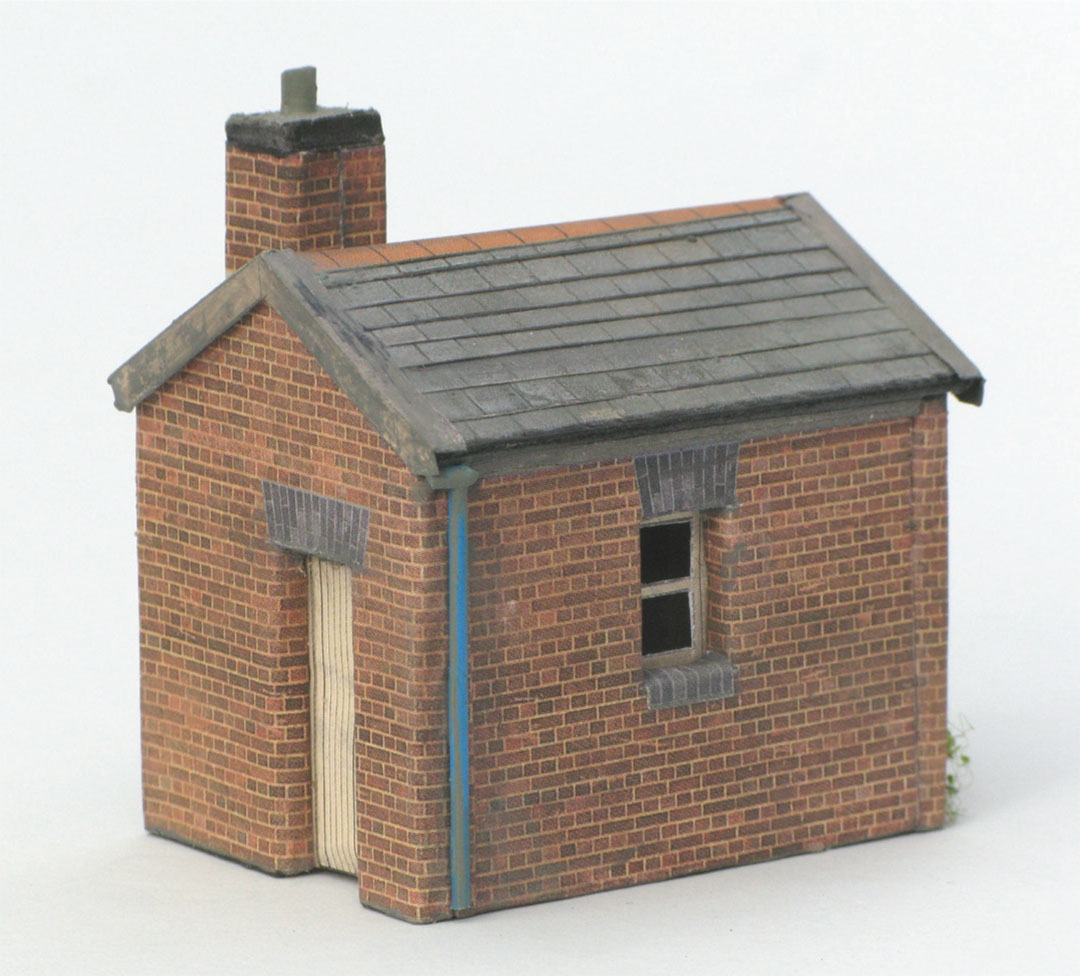
The fully finished hut. This is the result of two hours’ work. The drainpipes are plastic parts left over from other kits. They also hide the join in the brickwork sheets.
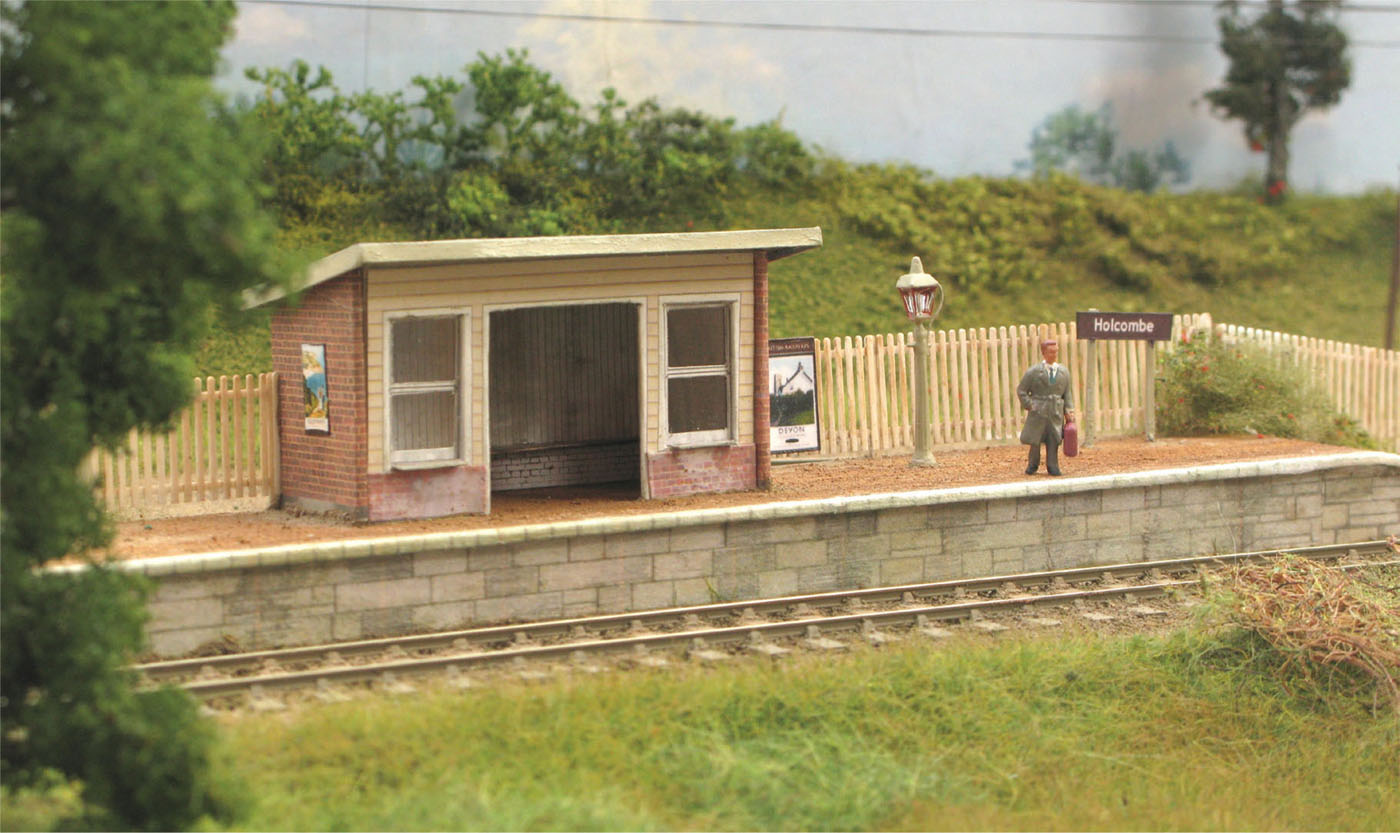
This halt building was made from another Scalescenes sheet. These kits obviously take longer to make than a resin ready-painted building, but you have the satisfaction that you built it.
The Noch range of small building kits includes garden sheds and kiosks. Busch and other companies are also increasingly producing building kits using laser-cut card. Laser-cut card is one of the newer materials now available for modellers and is being used on an increasing number of models. Not only is the card used for buildings and fencing, but also on models of bridges as well as plants and vegetables. Laser-cut card can be delicate, but is also strong.
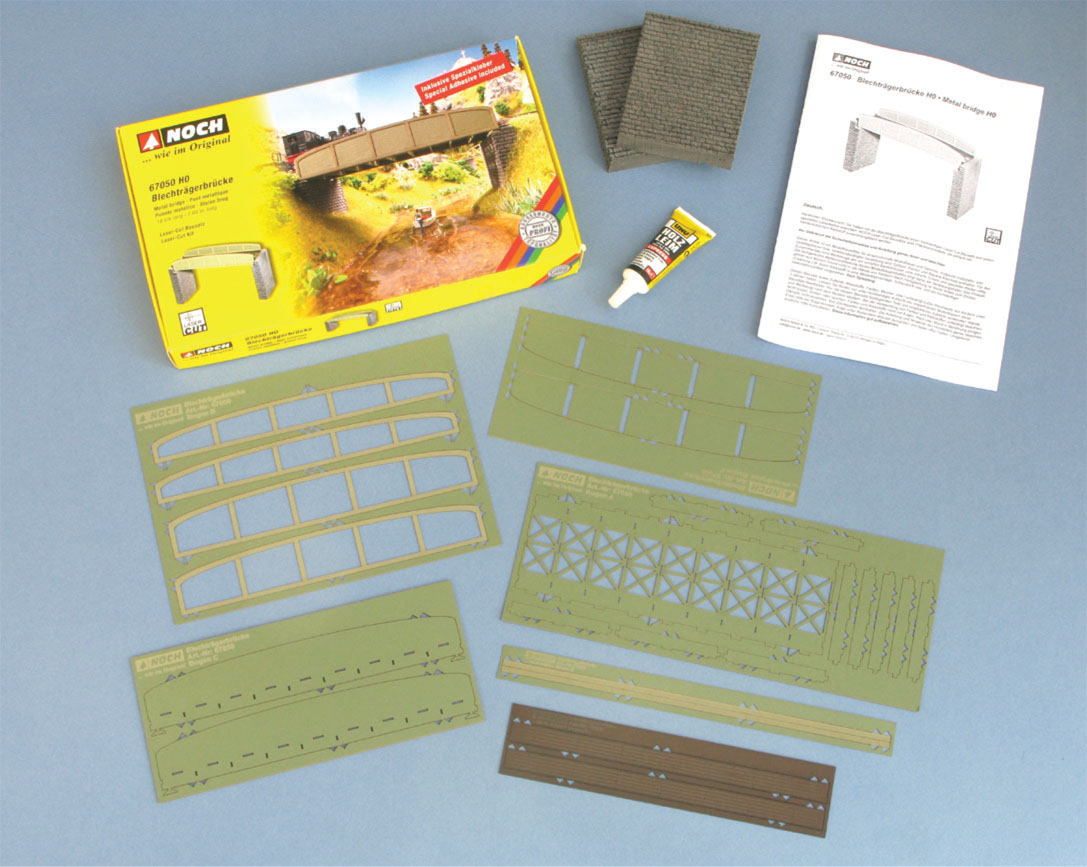
Noch has a large range of laser-cut bridges. Here are the laid-out parts from one of its simpler bridge kits.
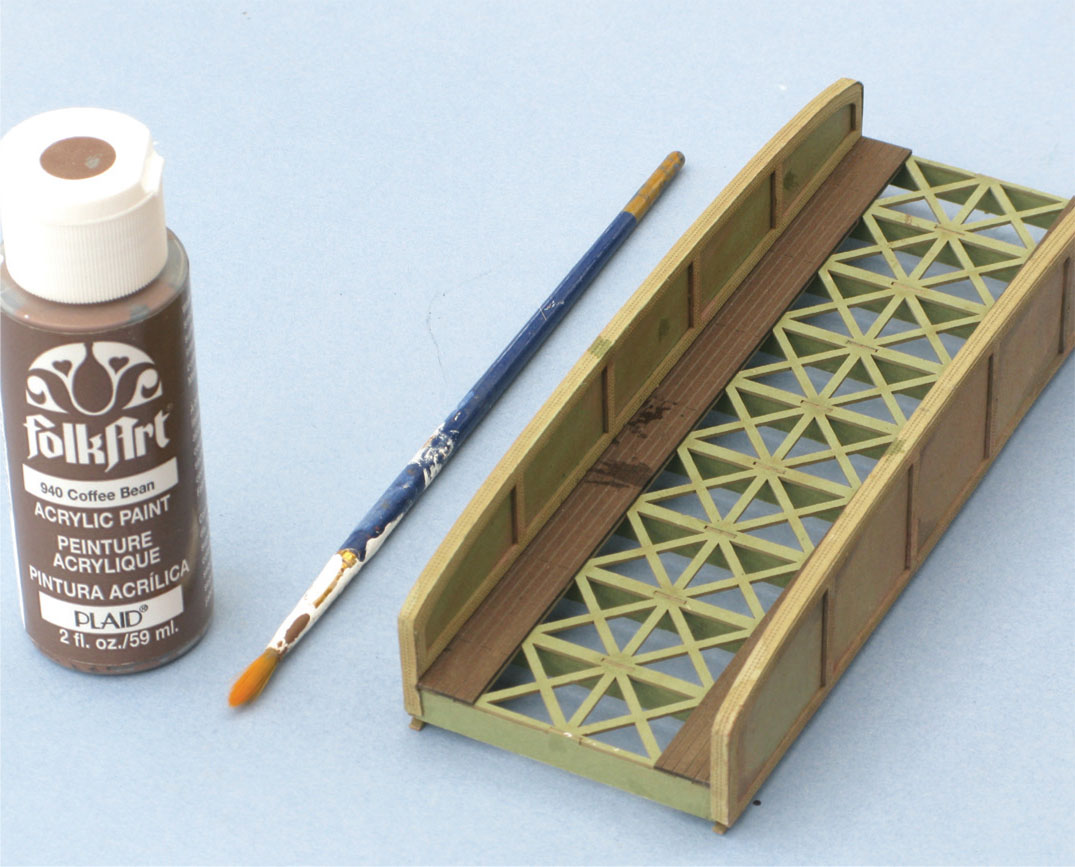
During assembly of the bridge kit acrylic paint was used on the walkway of the bridge.
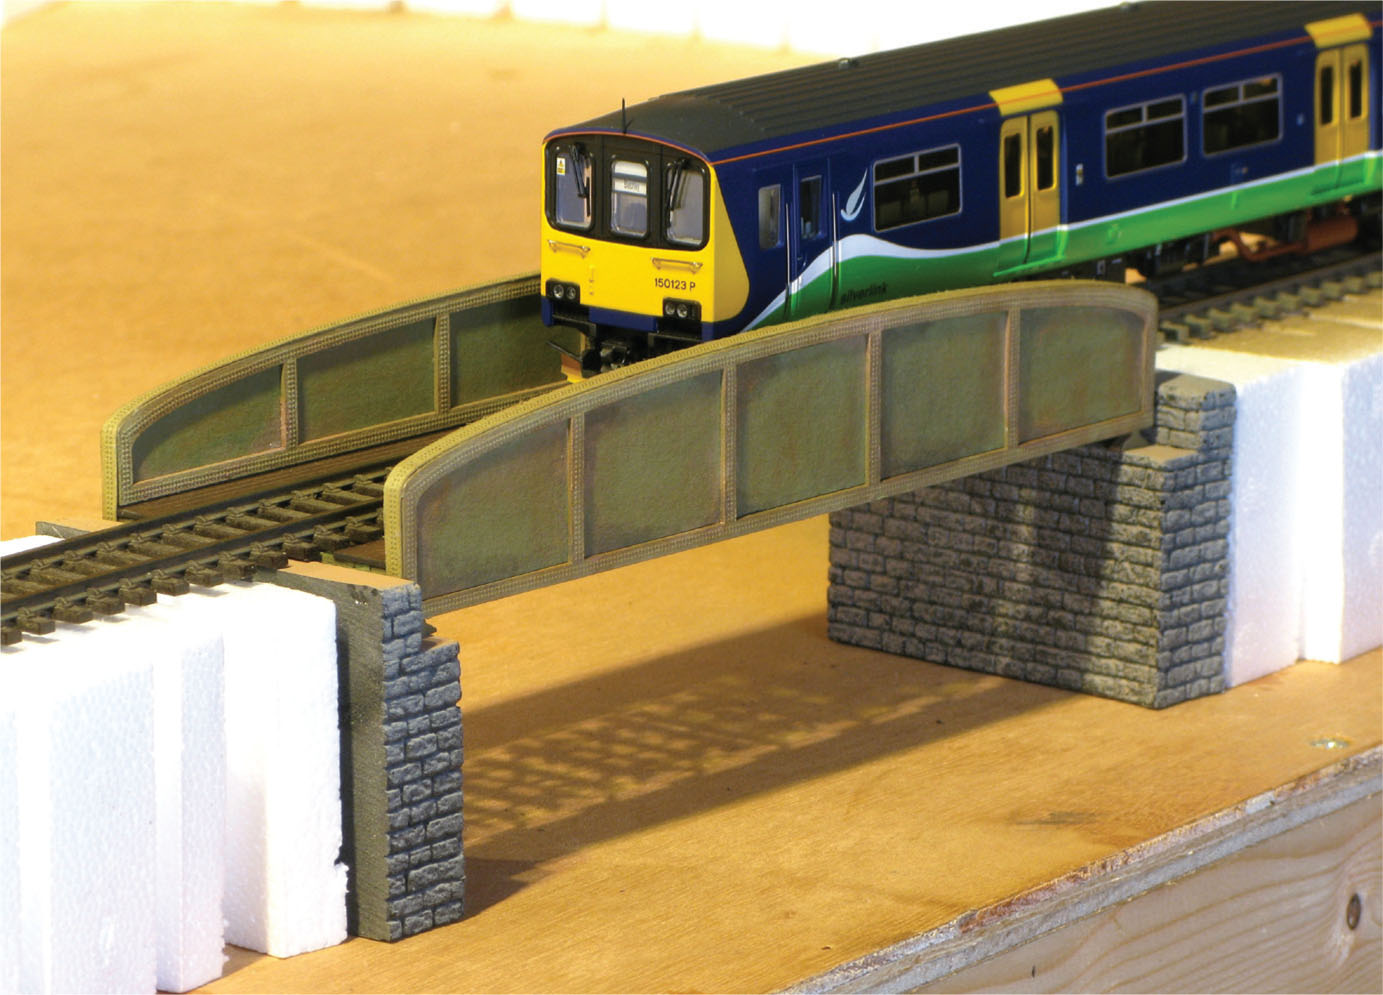
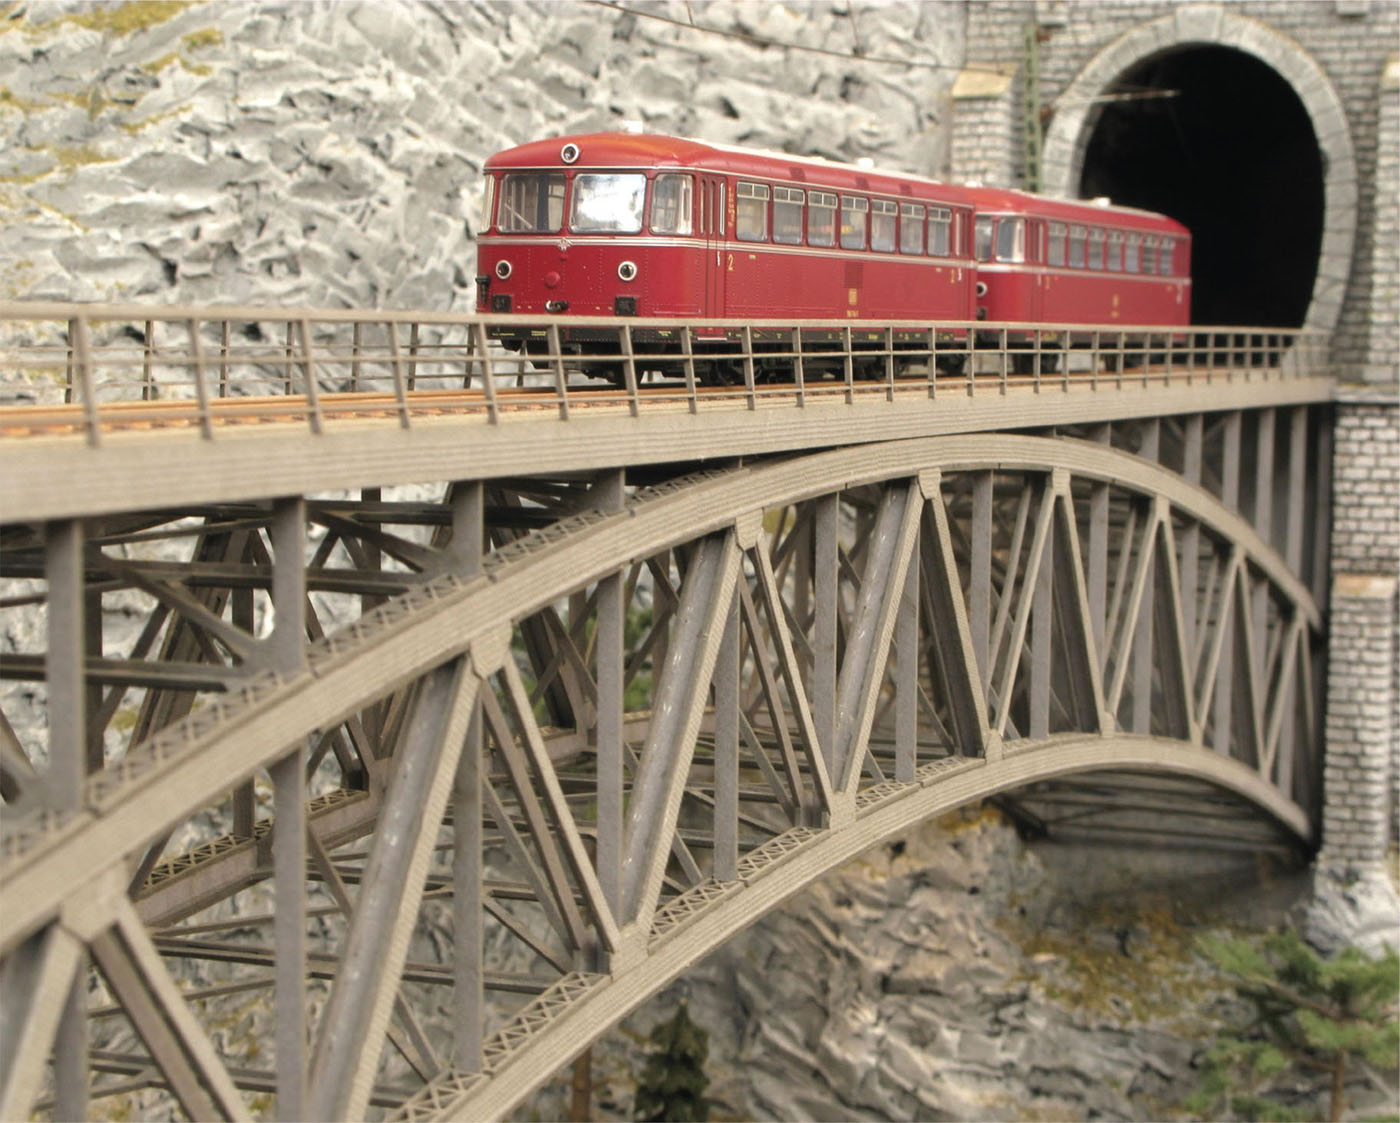
The laser-cut assembled bridge in situ before the scenery was made up around the location.

The finished bridge took just a couple of hours to make. Once you have learned how to assemble laser-cut kits, the next one will be even easier.
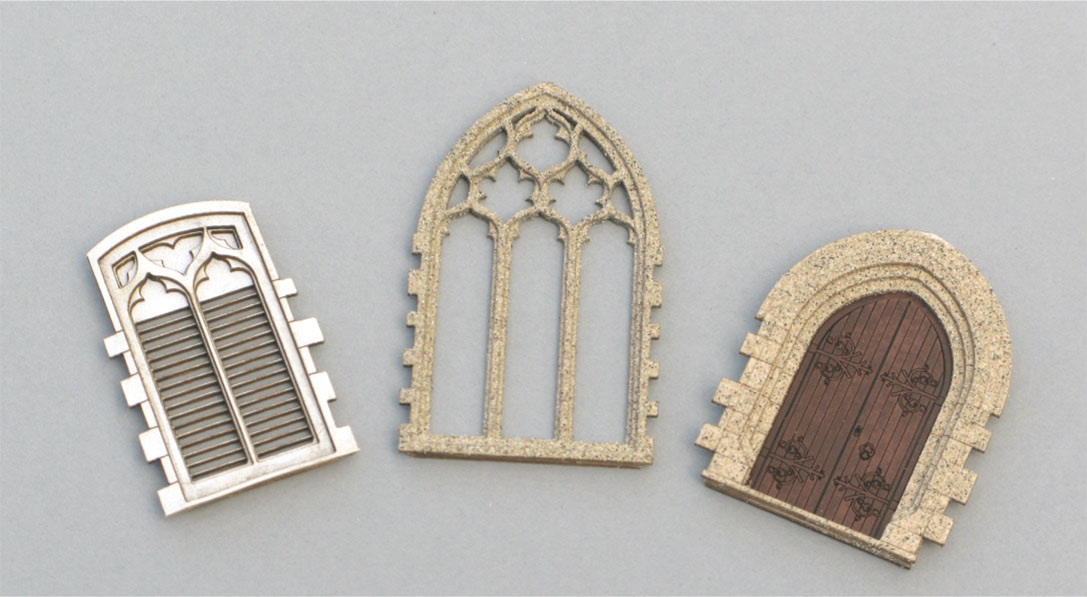
Superbly moulded laser-cut doors and windows from True Texture (www.truetexture.co.uk).
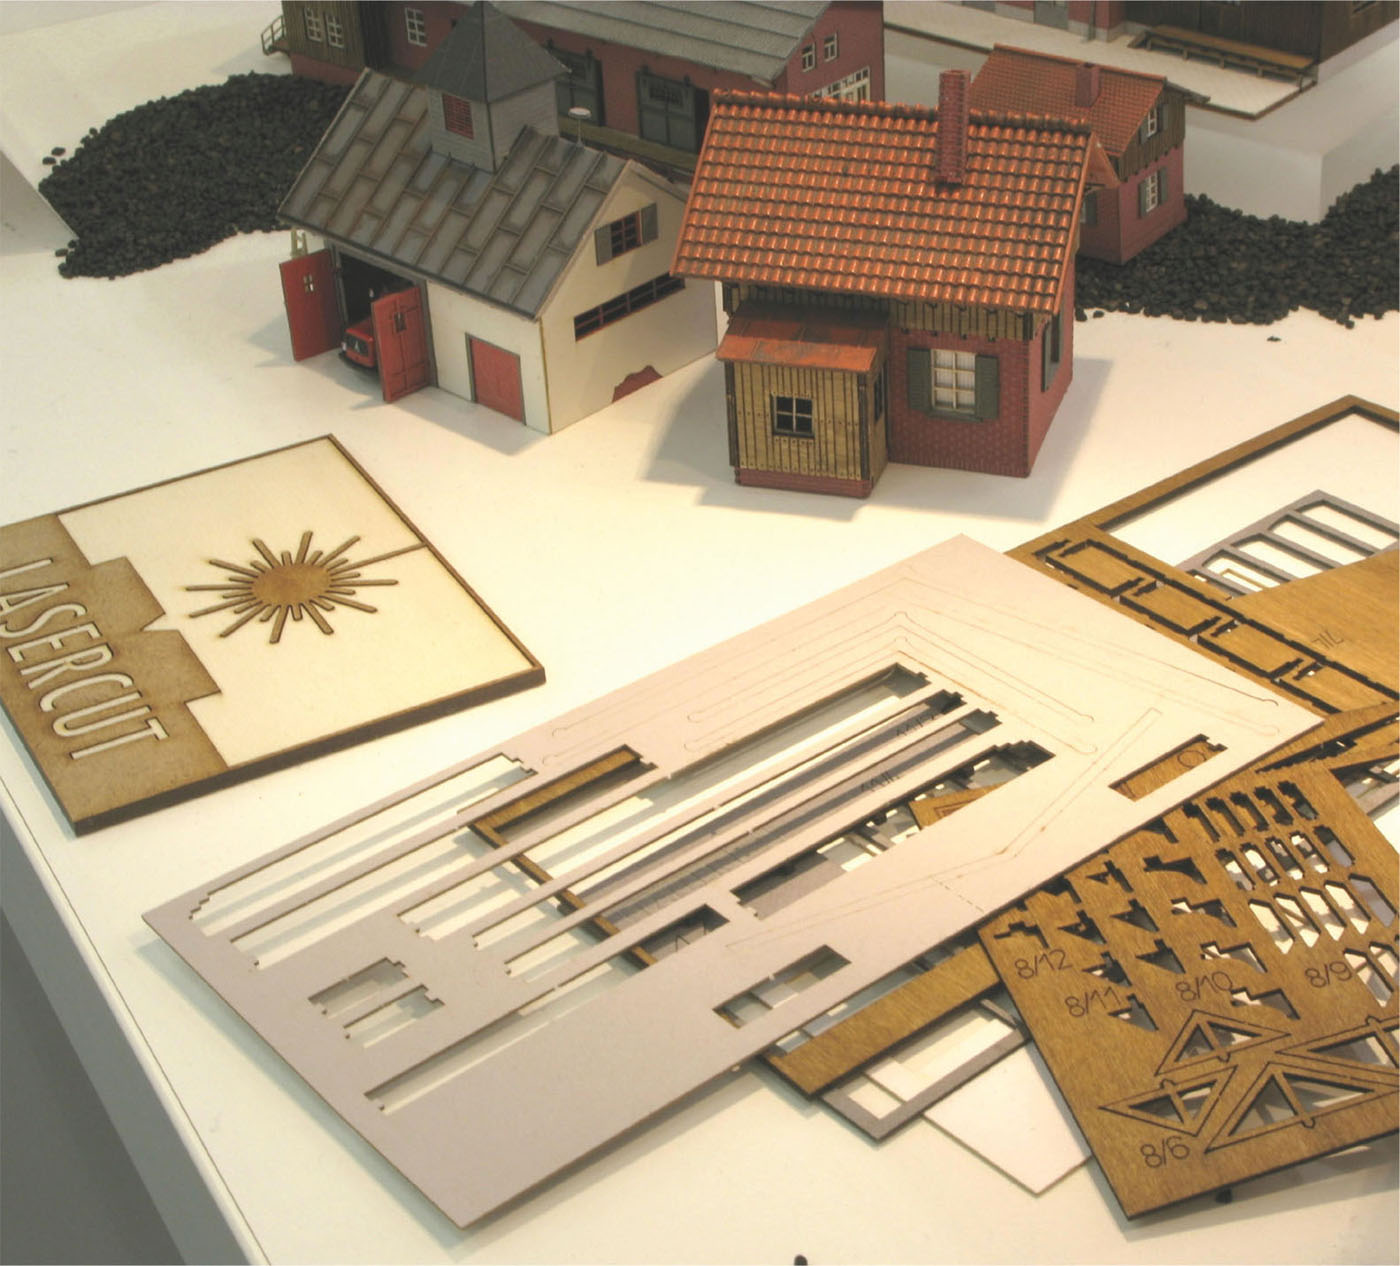
Lots of the big scenery players in Europe make an increasing number of kits using laser-cut technology. This selection of parts is by Faller.
One of the more elaborate bridge kits by Noch. These kits made from laser-cut cardboard are surprisingly robust.
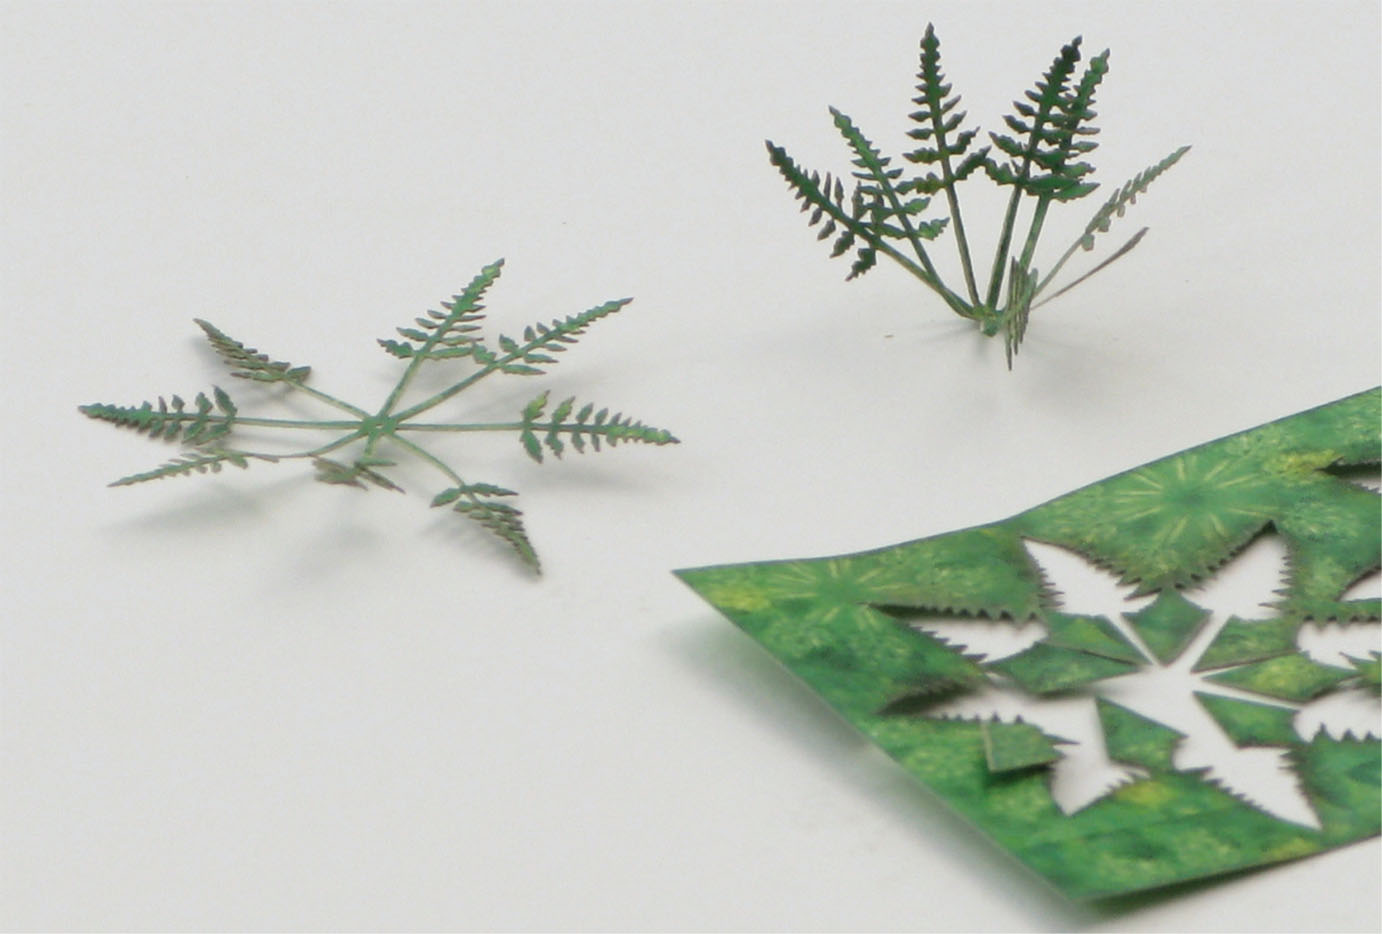
Laser-cut flowers and plants are available from a number of companies and are a good way to add plants to a layout. They do benefit from a light wash of acrylic paint to hide the cut edge of thin cut cardboard.
The tools needed for making laser-cut kits consist of:
MAKING A NOCH LASER-CUT KIT
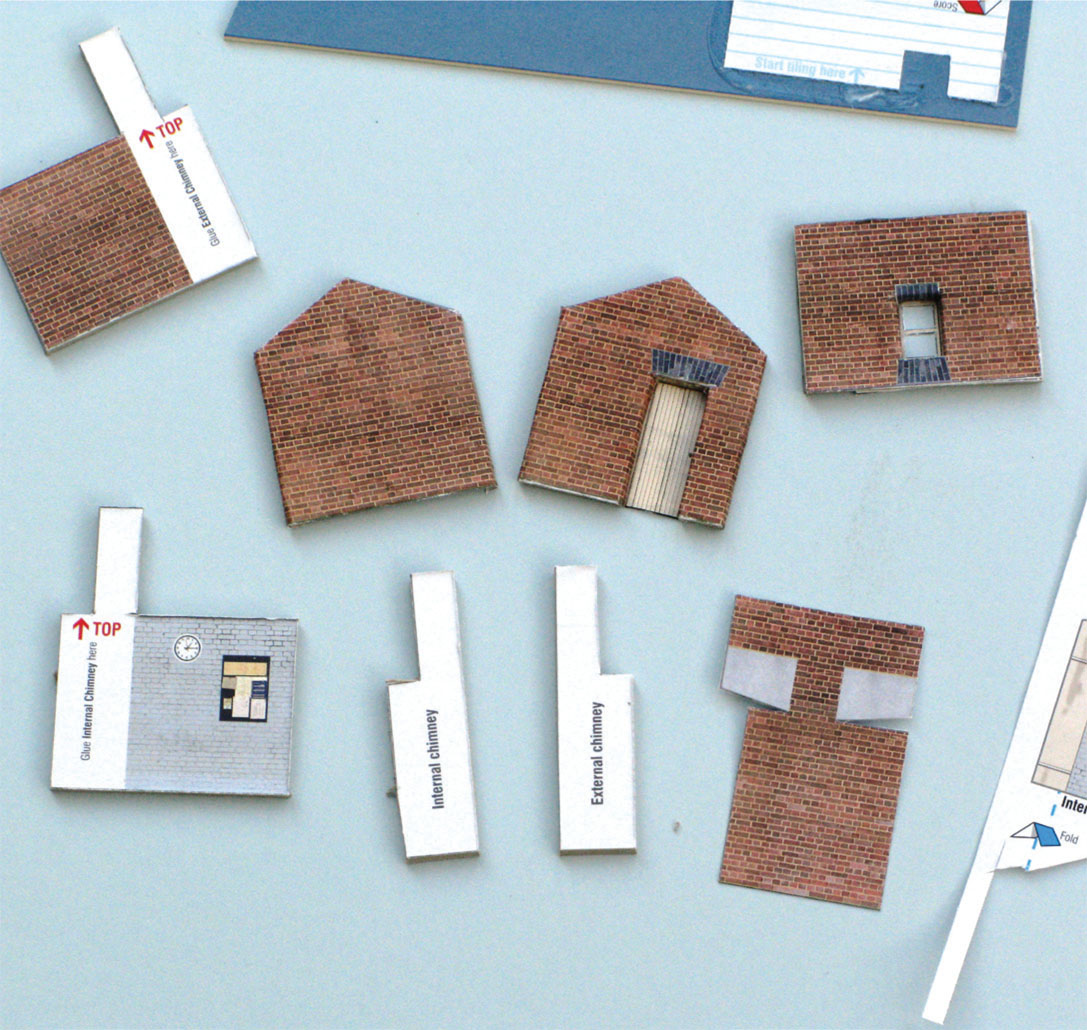
Some of the latest laser-cut kits from Busch, Noch and other companies add a further novel method of assembly by featuring mitred-cut card for the main walls. Noch’s range of laser-cut products is expanding each year. The company is promoting its OO/HO building kits as different to most other kits on the market because of their ease of assembly. The logo on the box is: ‘Glue, Fold – Finished’. But is it really as simple as that?
These kits feature age-resistant cardboard with 45-degree mitred corners on the walls. The corners of the walls need to be glued with the supplied UHU adhesive, then pushed together and held for a few seconds whilst the adhesive dries. The mitred joints ensure that the corner join is not visible, which is a step forwards from traditional card kits. The walls carry a matt finish, while the insides of the walls are finished in black so that if the purchaser decides to add lights he does not need to paint the inside of the building, which is a useful time-saver.
Plastic gutters and drainpipes are included and the roof tiles have been laser-cut. Curtains and glazing are also supplied. The instructions are clear, with text in English and exploded diagrams. The initial range of these buildings by Noch included a station building, a goods shed, a farm scene, a church and a residential house. Some of these buildings are more suitable for UK-based layouts than others. If you omitted to attach the window shutters on this kit house it would not look too much out of place in a UK town setting. The footprint of this building is 120 x 90mm (4¾ x 3½ in).
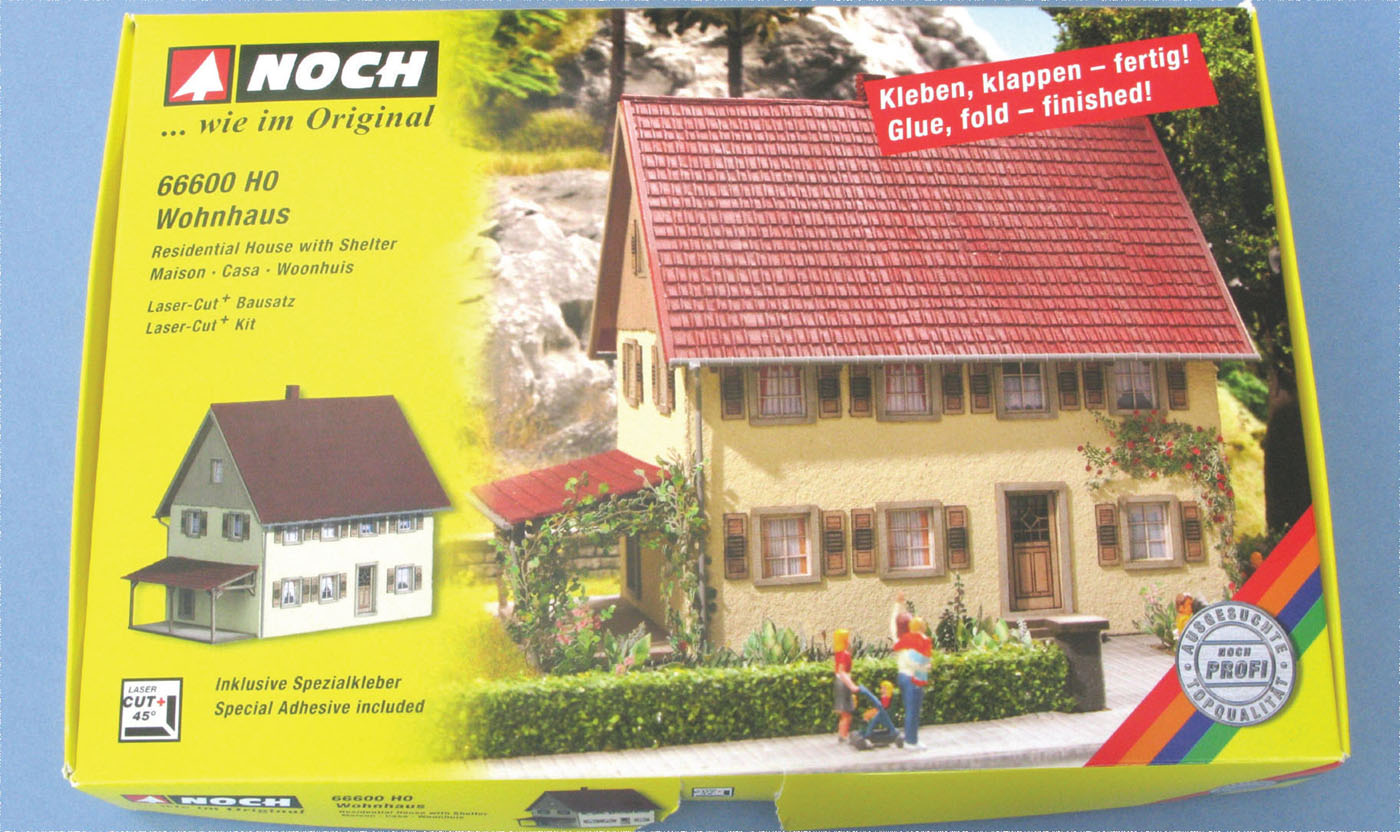
The box of the house kit by Noch displaying the ‘Glue, Fold – Finished’ strapline, which is rather optimistic. These kits are available from www.gaugemaster.com and other Noch dealers.
To me, the ‘Glue, Fold – Finished’ strapline on the box seems a little misleading. That would be correct if you were not intending to fit doors, windows and other details. This kit took me over three hours to build and most of that time was spent on the window frames, doors, curtains, guttering and weathering. It is true that the basic shell could be assembled within fifteen minutes, but the resultant building would look very austere and plain. Only by adding the details does it begin to look realistic. The mitred corner joints work very well and fitment of the parts throughout is very good indeed. All of the parts are of good quality.
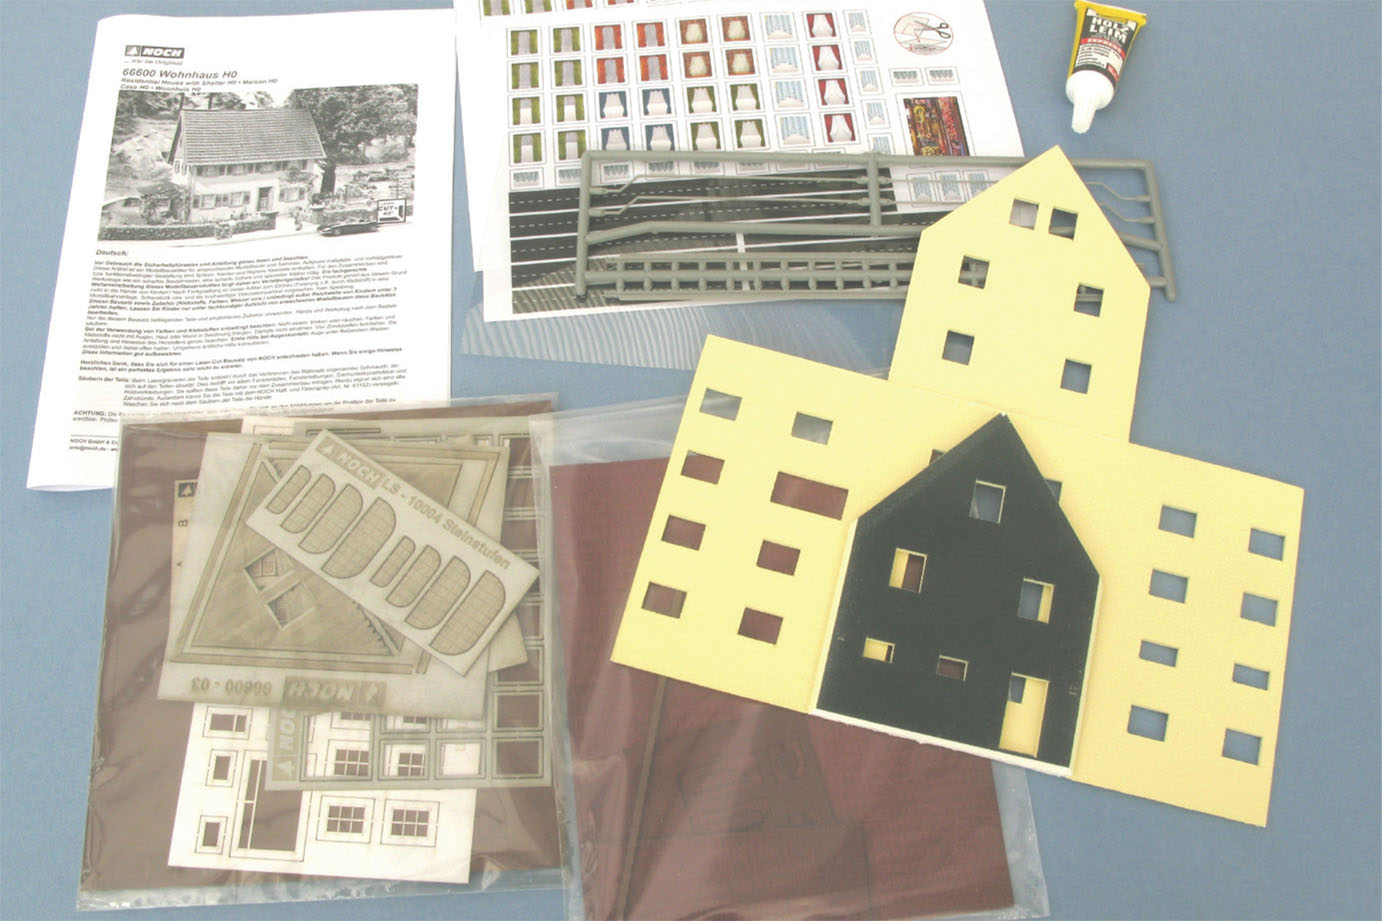
The contents of the kit include parts in laser-cut card and plastic, plus adhesive.
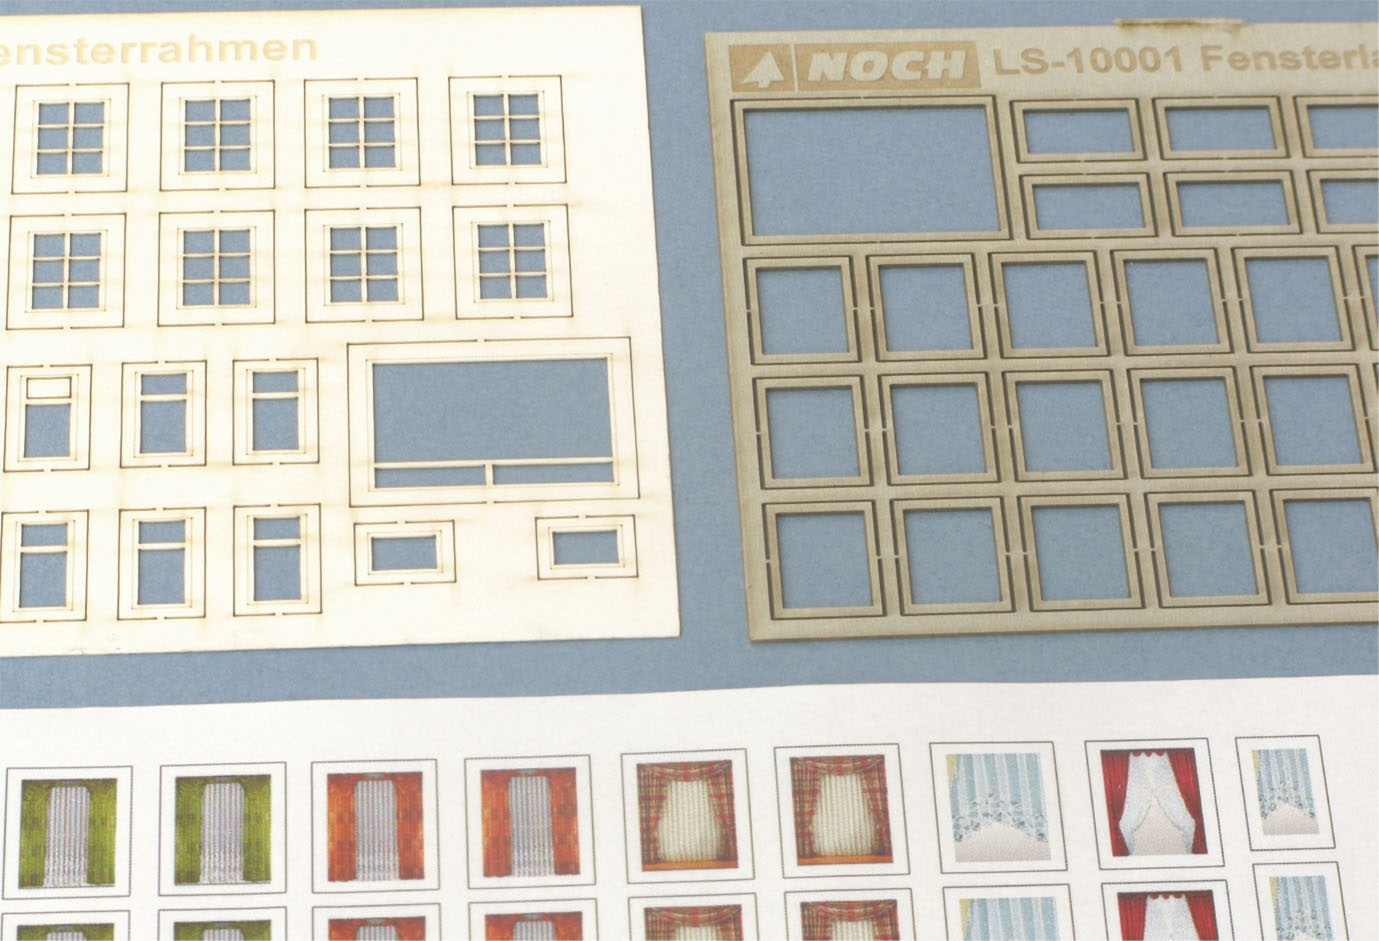
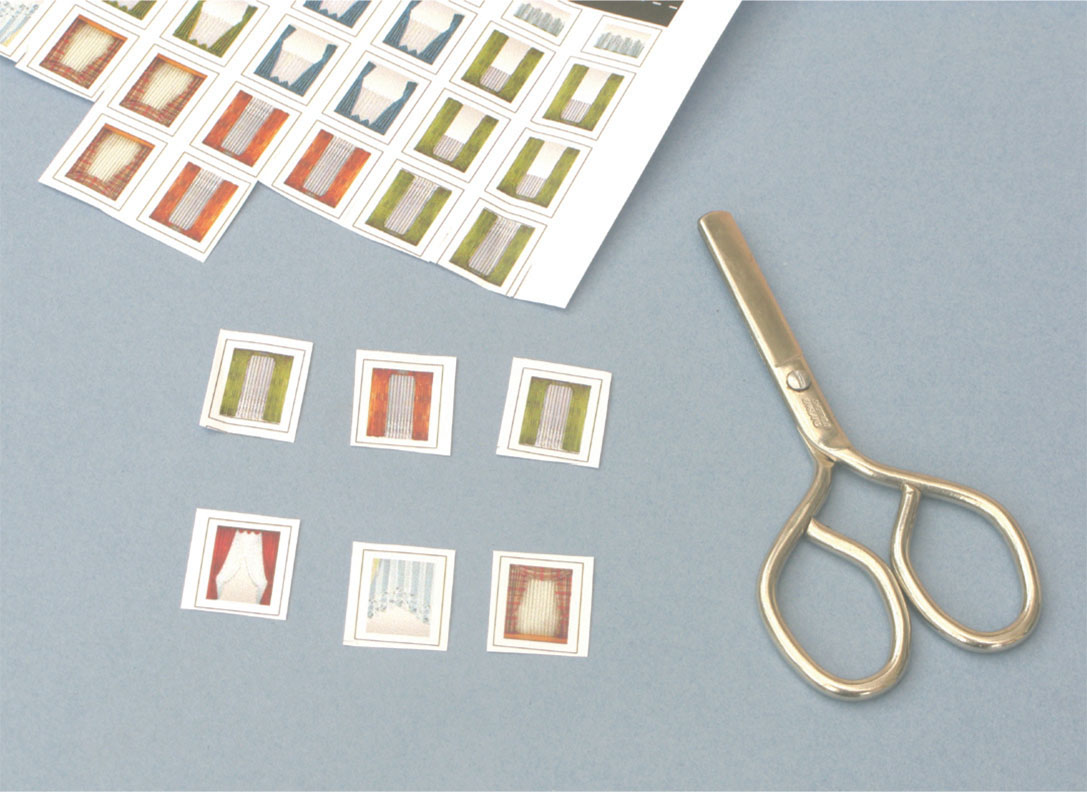
The curtains, window frames and the window surrounds all need to be cut out from the backing sheets using a sharp craft knife over a cutting board.
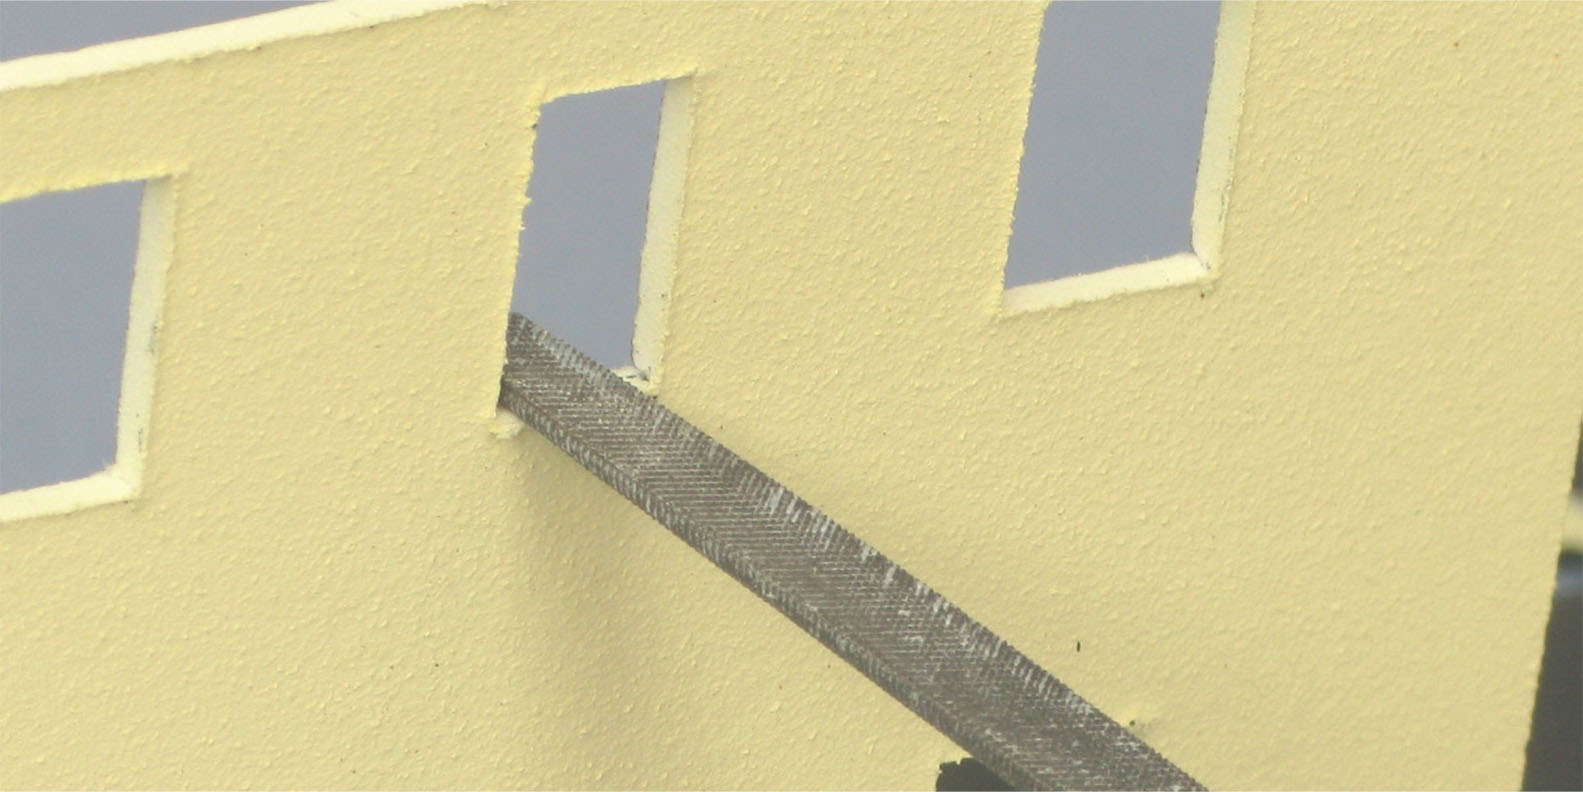
To clean up the edge of the ready-made window apertures use a small craft file. If you do not take off the excess cardboard the window frame will protrude from the wall.
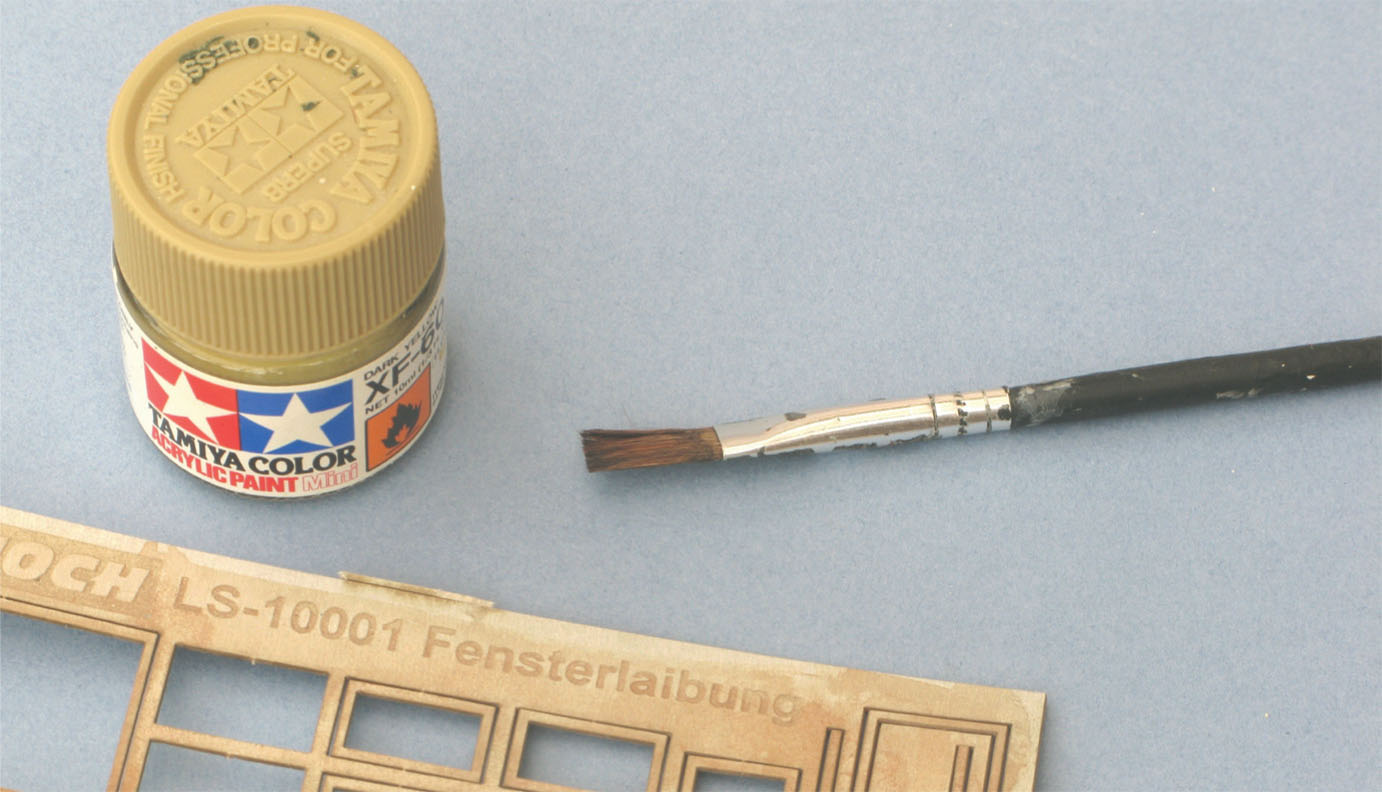
I gave a thin wash of colour to the window surrounds using Tamiya acrylic paint.
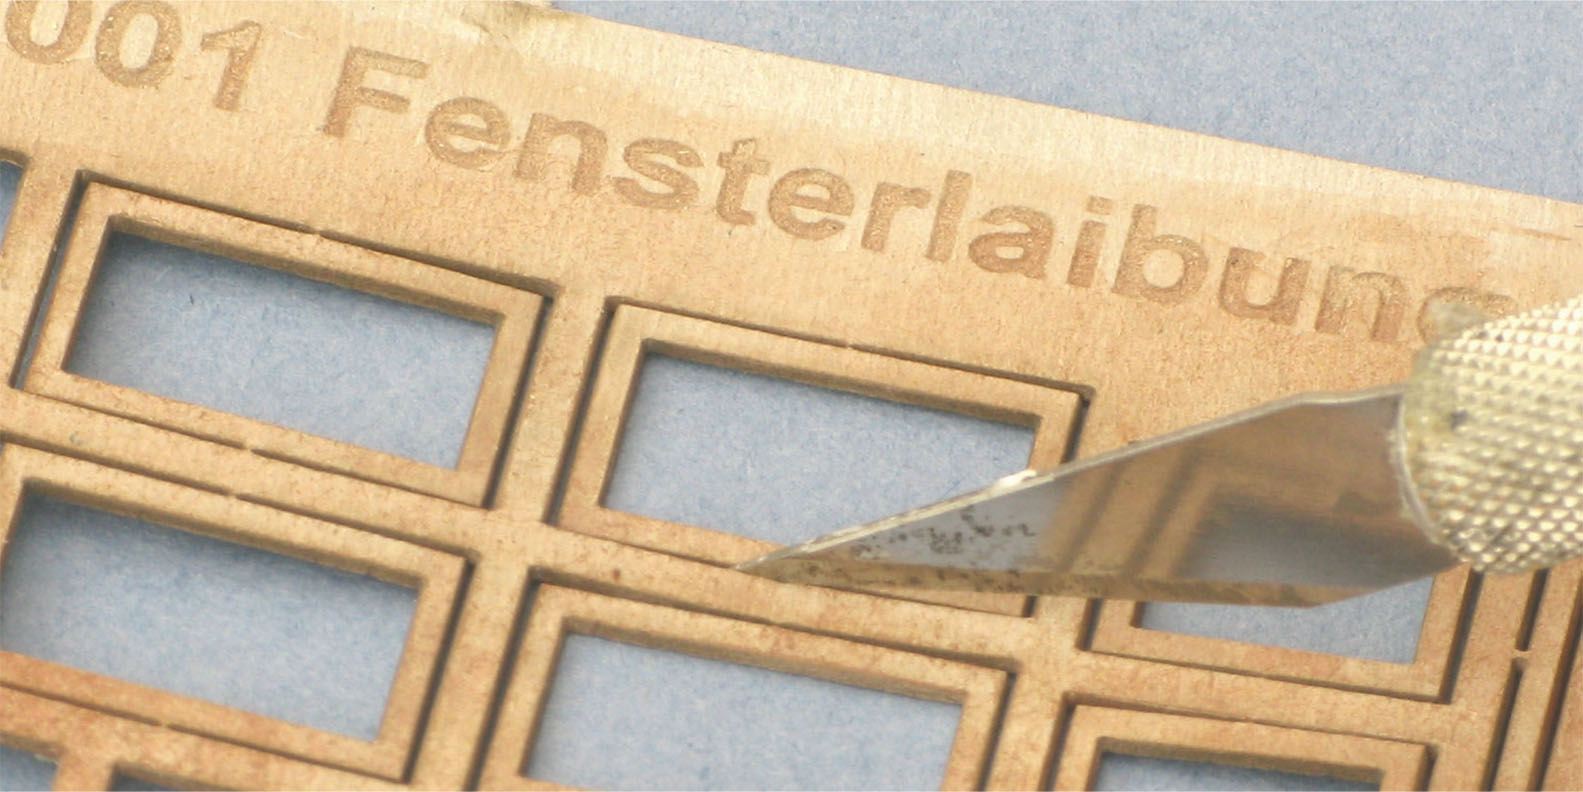
Cutting the window surrounds from the backing card using a sharp craft blade.
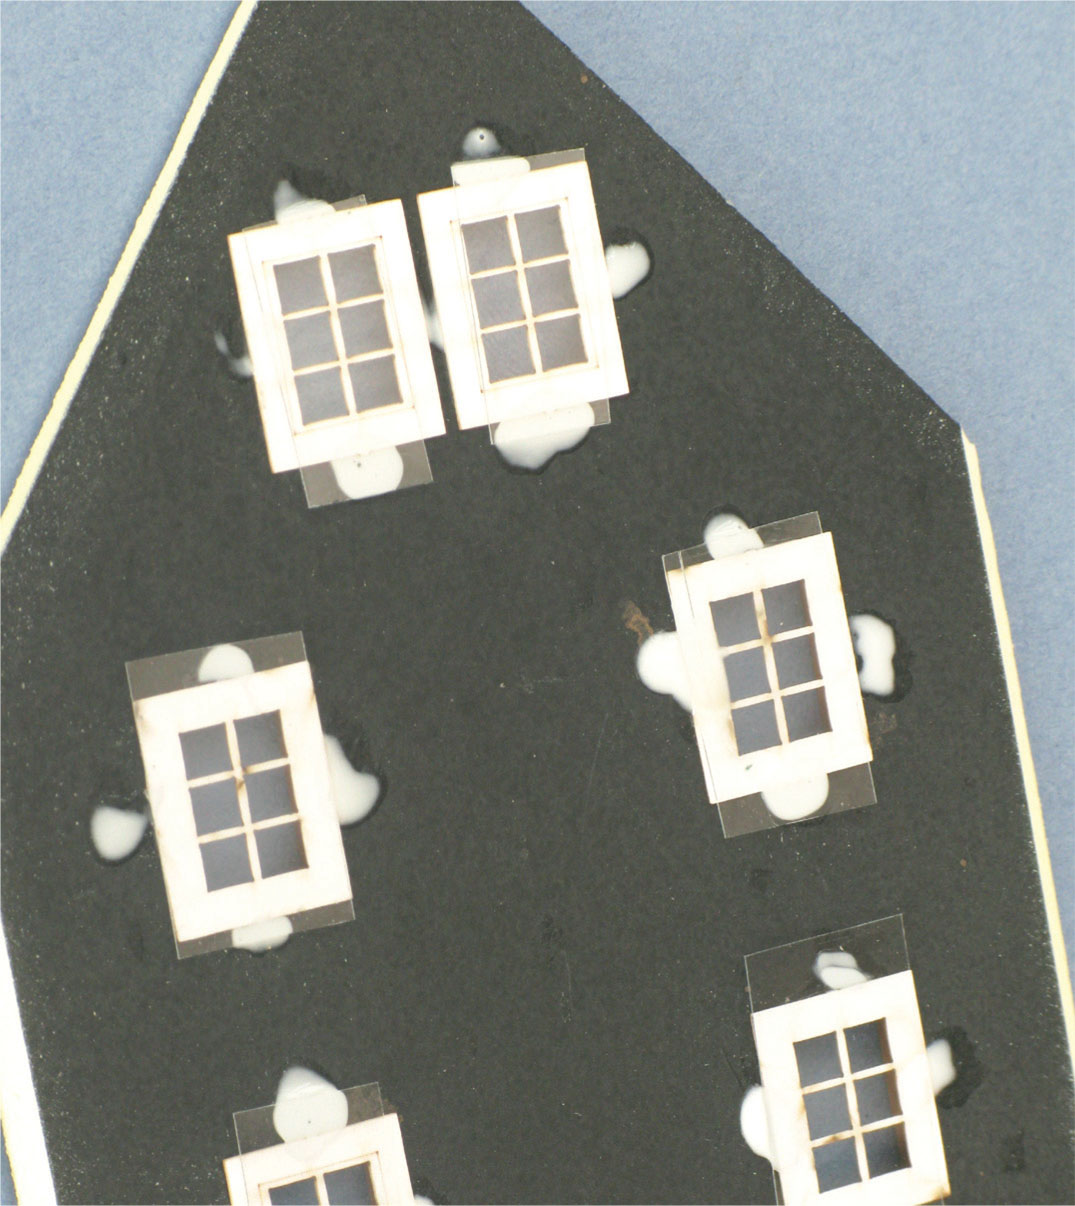
On the inside of each wall the window frames and then the glazing were fixed with small dabs of UHU adhesive. The curtains were added with another dot of adhesive top and bottom. You will need to position the curtains from the viewing side of the model to ensure that they are positioned correctly.
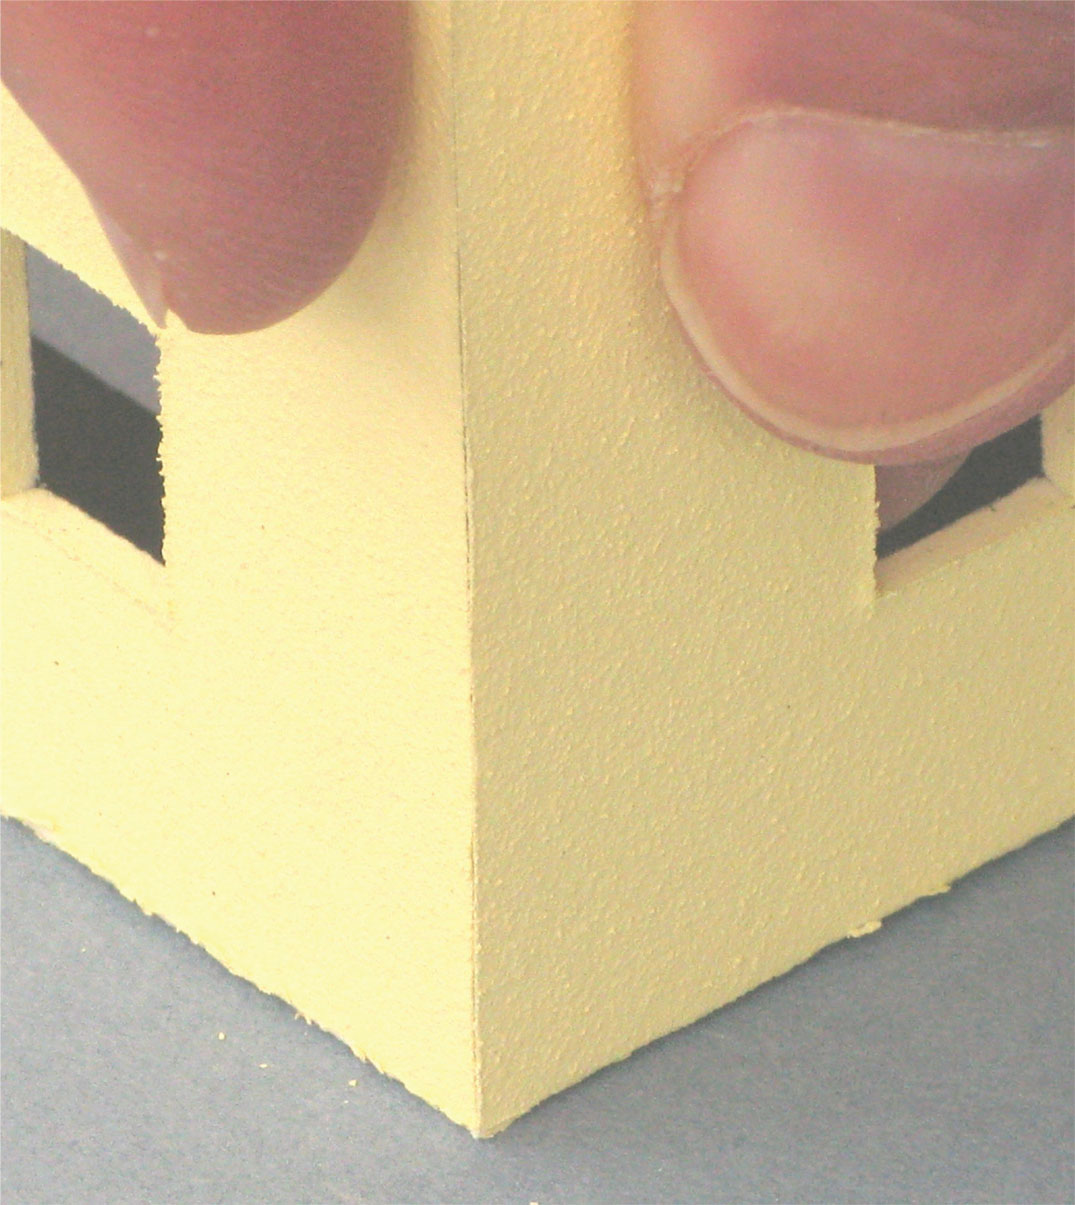
When you are ready to fix the walls in place, give yourself a dry run by holding the walls together before you start applying adhesive.
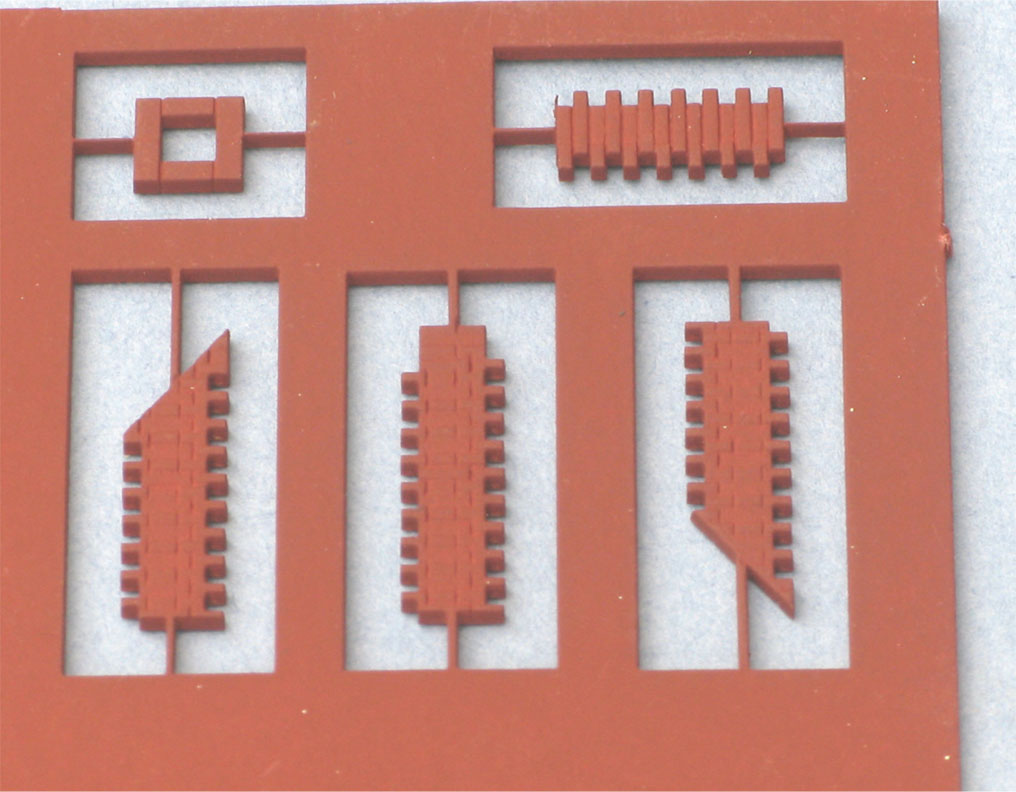
The chimney comes in a five-part section, which needs to be cut from the backing sheet.
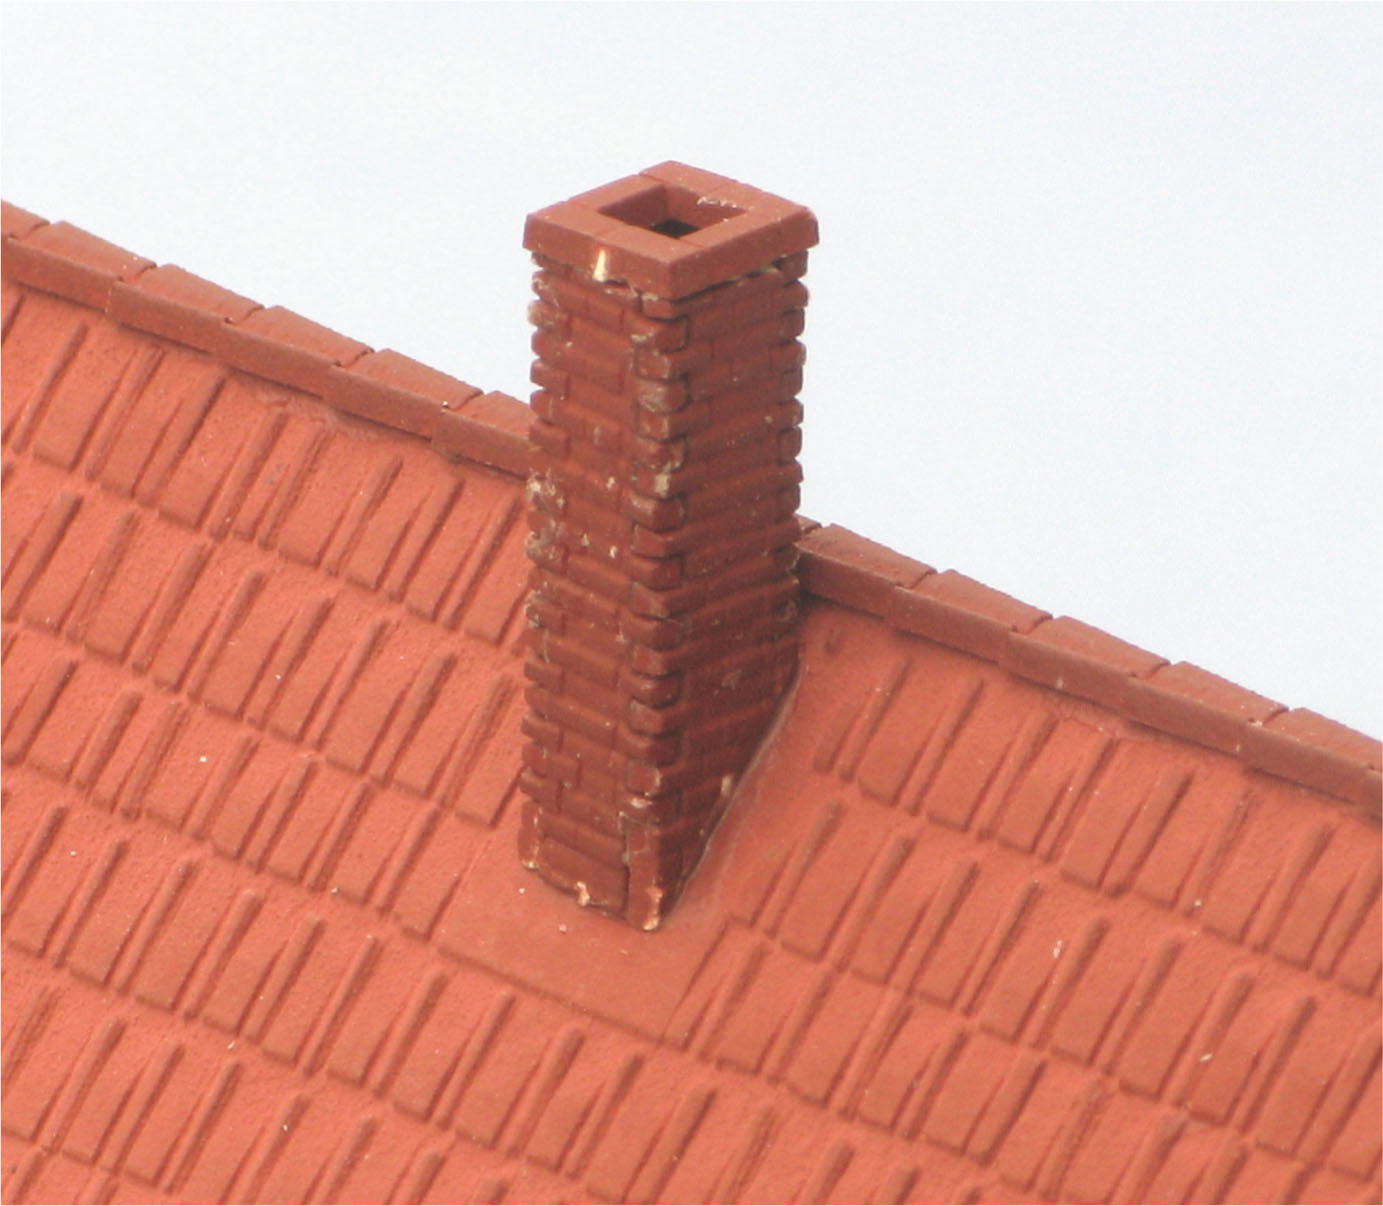
Here is the chimney fixed to the roof. It needs a little patching up of the colour, but this will form part of the weathering process of the entire roof.
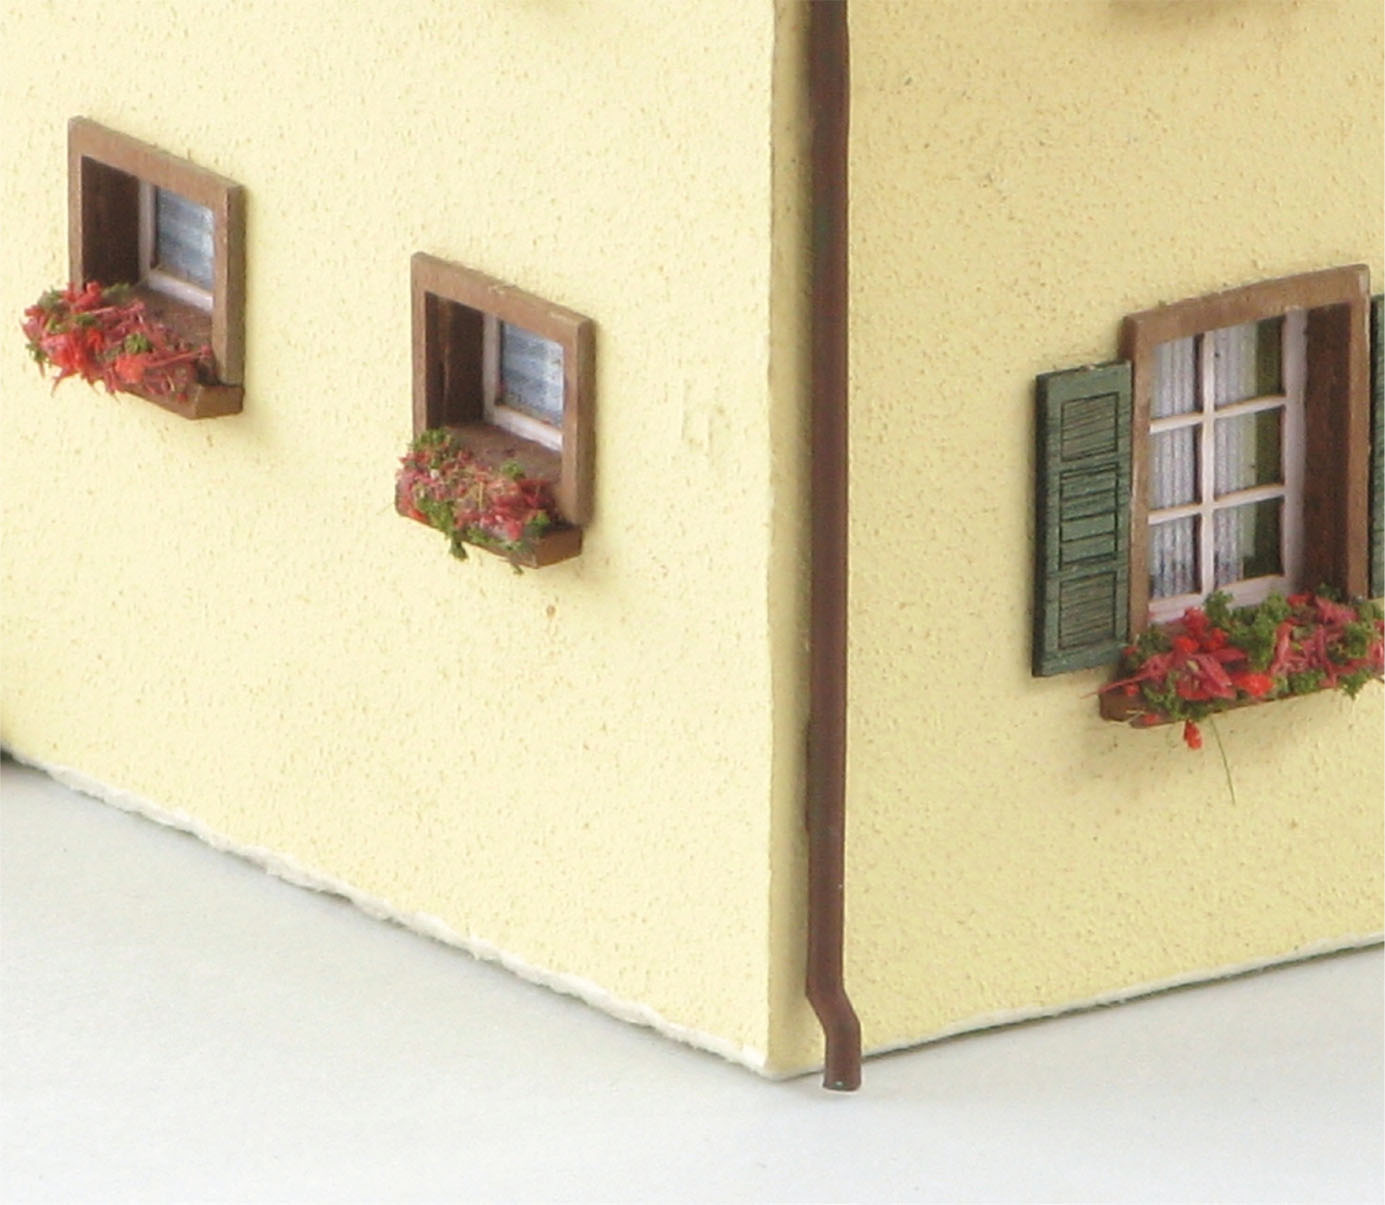
The house, complete with drainpipes, flowering window boxes and shutters. The latter two items would not need to be added if the house was used on a UK layout.
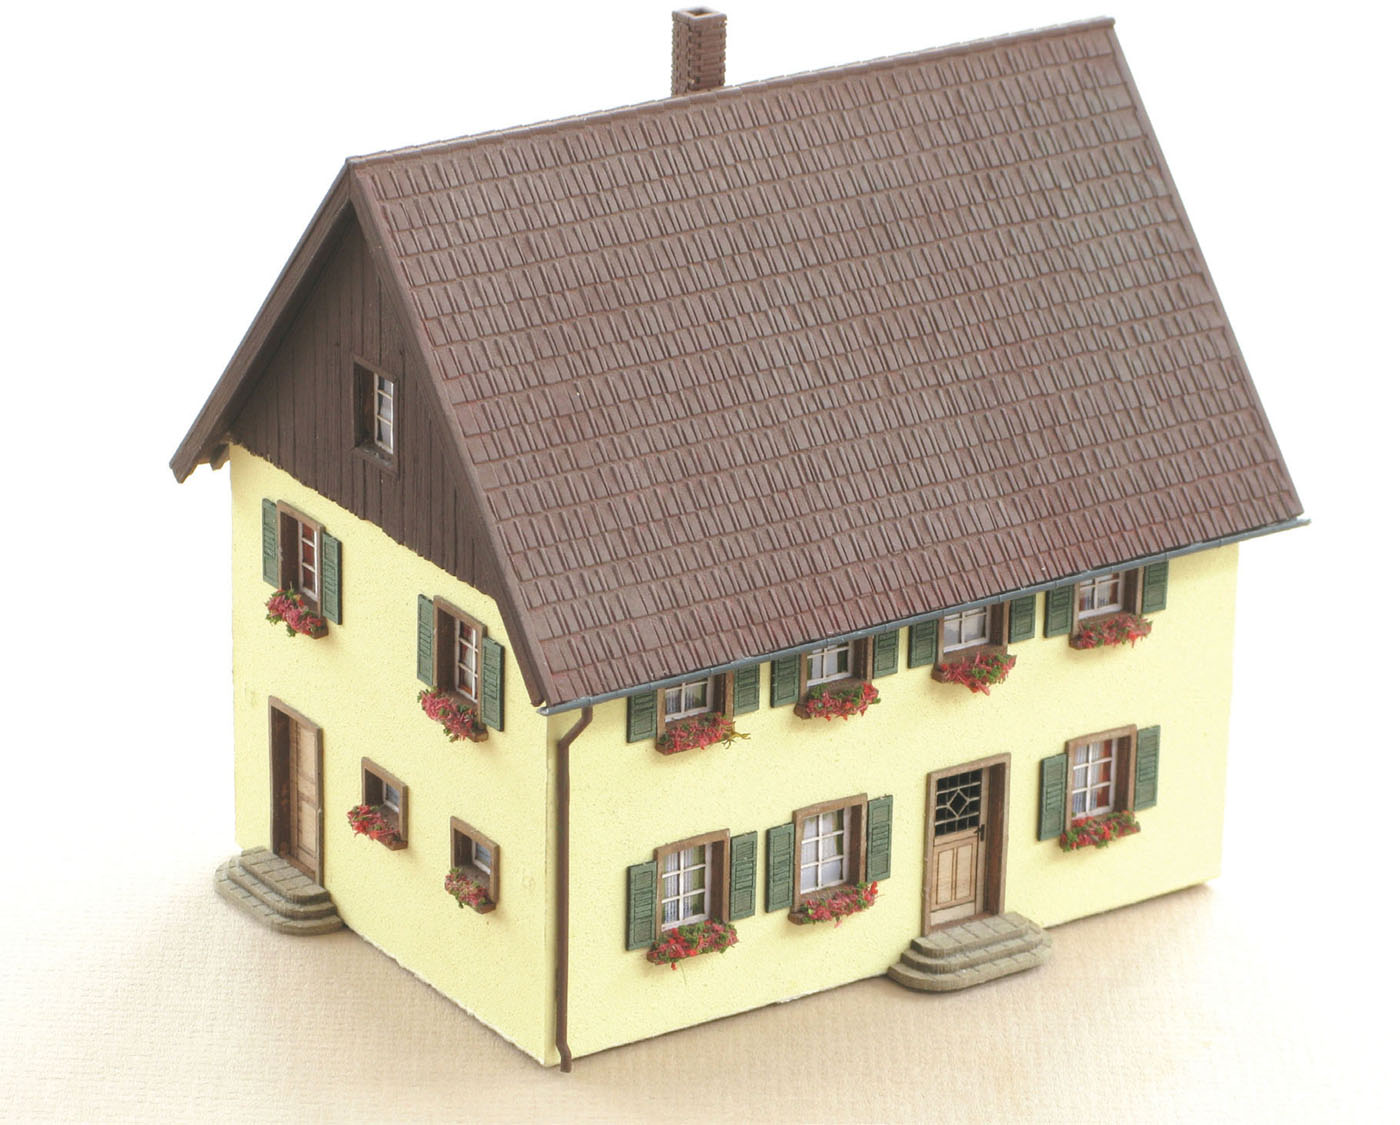
The finished house with a fully weathered roof ready for a European-style layout. The building took around three hours to build and detail. The tiles have been rubbed with Tamiya weathering chalks and look so much better than the original bright red roof tiles.
WHAT SKILLS ARE REQUIRED TO BUILD A LASER-CUT KIT?
It is necessary to cut out window frames and other details from their backing sheets. This is easy provided that you have the necessary tools. The window frames and edges of the cardboard will need to be painted with a small paintbrush or felt-tipped pen.
As with the other materials, use a steel ruler and a cutting board when cutting laser-cut card. Use only new blades when working with laser-cut card. Blades that are tired will leave torn edges and will require more cutting strokes. Whilst PVA glue can be used for sticking laser-cut card together, other adhesives do the job better because they dry quicker. These include: Deluxe Materials Roket Card Glue and UHU Holz Leim Express (available from Noch dealers in the UK). Have a damp cloth alongside you and wipe any excess glue off the model as soon as possible. Set adhesive can sometimes leave a shiny patch on the model.
These are easy kits to build, but your patience might be tested as you cut all those parts from the backing sheets and assemble the windows and glazing in multiple layers.
PLANTING BUILDINGS ON A LAYOUT
The visual impact of a nicely finished building is spoilt if there is a gap running along the lower edge of the building. Models of buildings do need to be carefully fixed to the baseboard to make them look realistic.
PVA or contact adhesive can be used to fix the buildings to the layout and as the glue is drying around the base of the building it is easy to sprinkle on a very fine scatter material that will stick to the drying PVA and hide the join. Alternatively, static grass fibres can be applied to the wet glue with a puffer bottle or an electrostatic grass tool. Static grass has the advantage that the fibres are taller than fine scatter material and will mask any fine gap around the building.
Pavements are another way to improve the realism of model buildings. Metcalfe Models manufactures good self-adhesive paving kits for both OO and N scales. The Metcalfe paving slabs are laid slab by slab. That does sound to be a laborious task, but it is more fun than drudgery. Though the slabs are self-adhesive, it is still worth brushing a little PVA on the underside of the slabs just before fixing them down. The Superquick range includes paving papers in a choice of colours. These can be fixed on to cardboard. Some of the downloadable kit companies such as Scalescenes offer pavement sheets that are easy to work with.
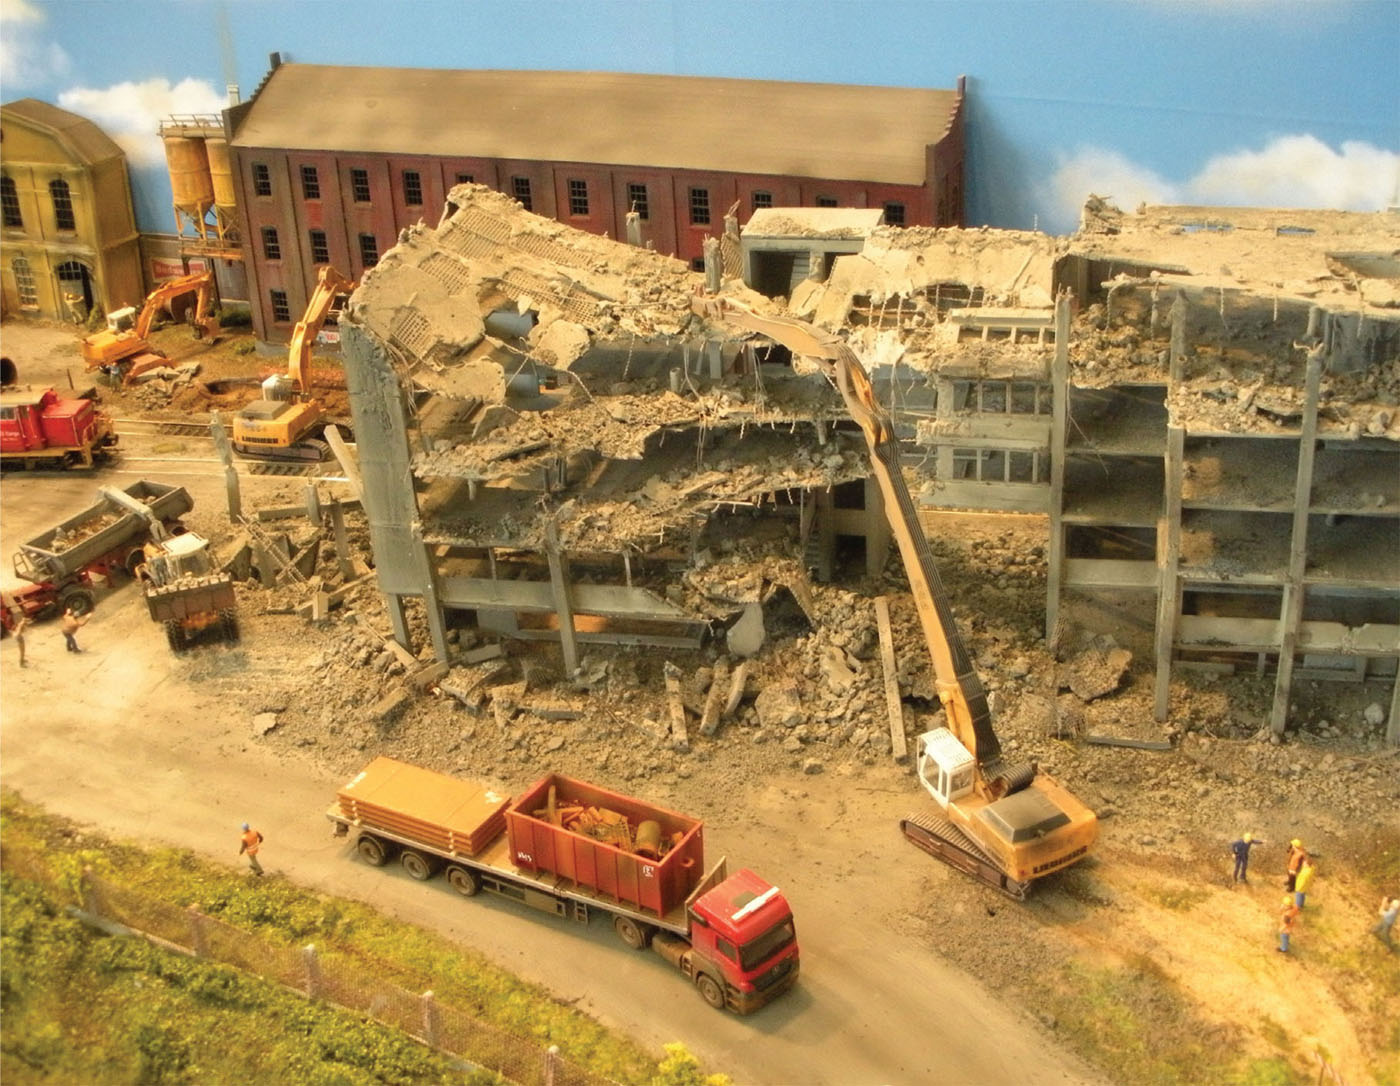
Demolition scenes are the ideal location for models of buildings that you may have built over the years, but which no longer meet your best modelling standards. This scene was at the Nuremberg Toy Fair on the Lädegutter Bauer stand.
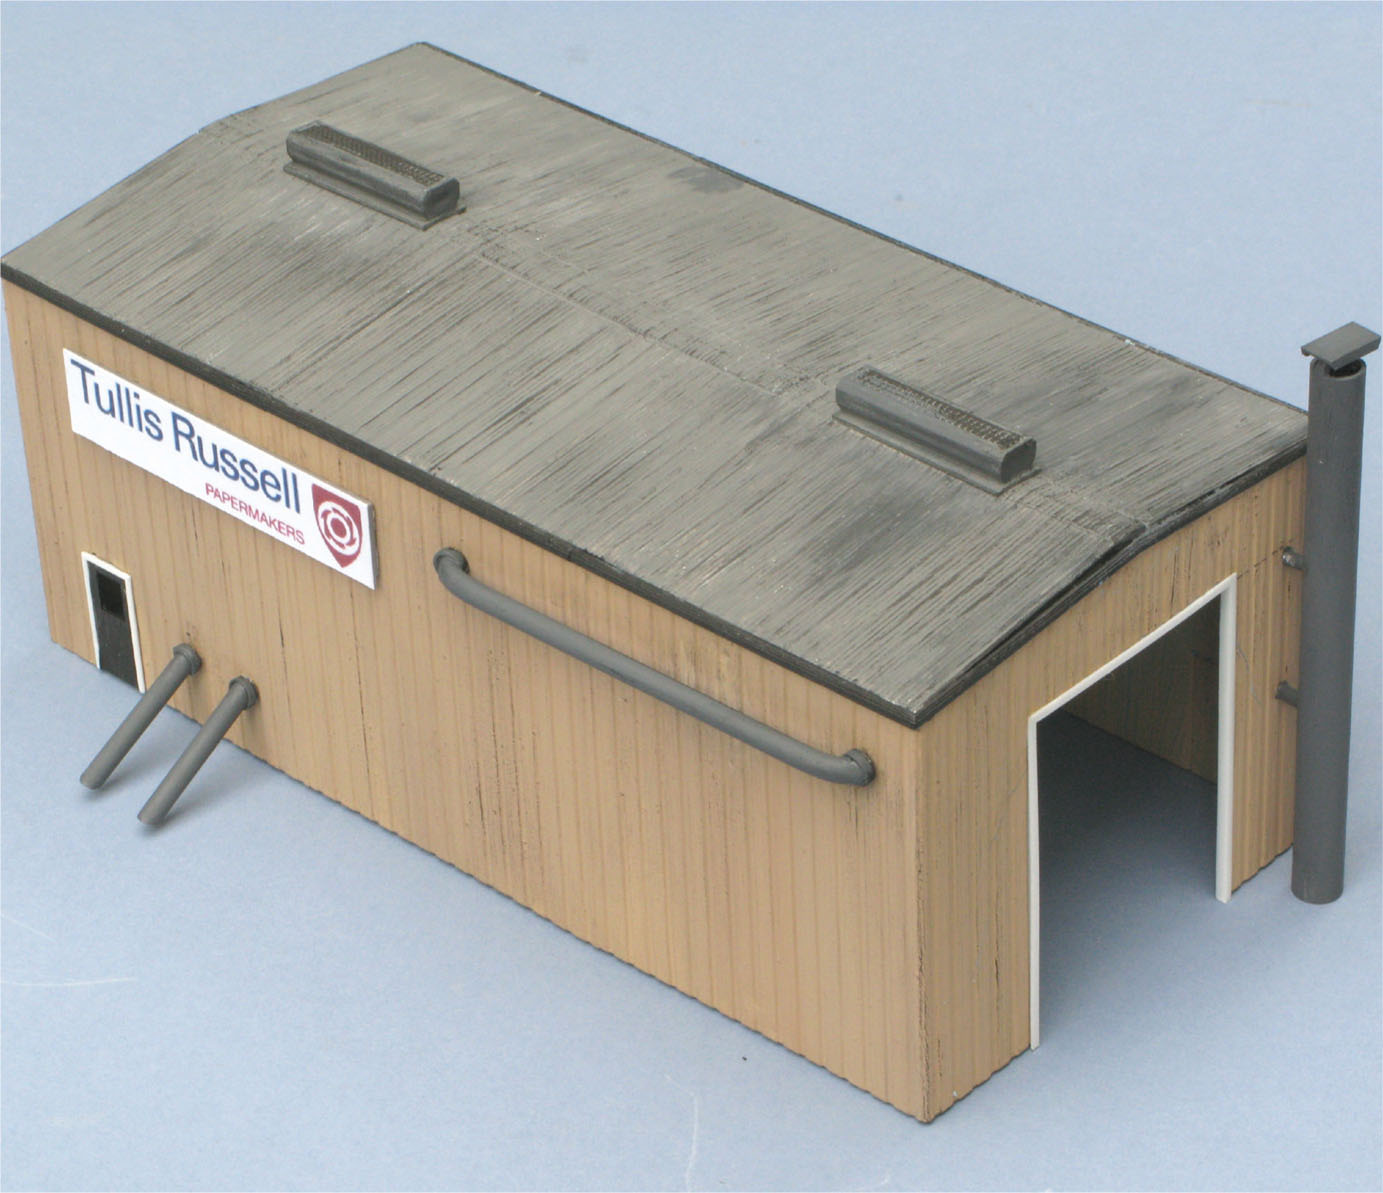
SCRATCH-BUILDING A DEPOT BUILDING
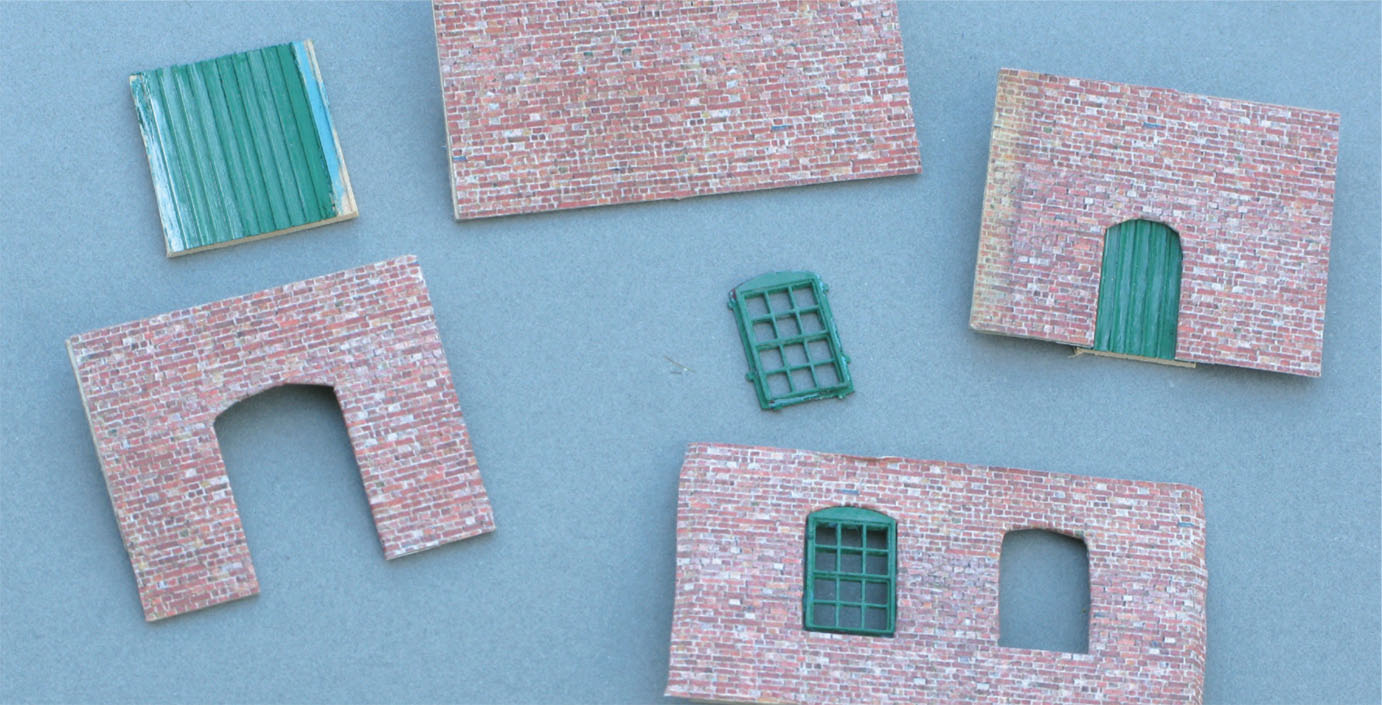
Scratch-building is easier than you think and can be very satisfying. Here are the main parts of a Wisbech and Upwell Tramway depot building. The walls are cardboard covered in Scalescenes brick paper. The windows are plastic pieces left over from another kit. The door is laser-cut timber.
Before the roof was added it was possible to see the strengthening pieces of cardboard along the sides of the building.
The finished building after the window sills had been added (balsa wood), the drainpipes (plastic) and the roof (cardboard covered with Scalescenes roofing tiles and ridge tiles).
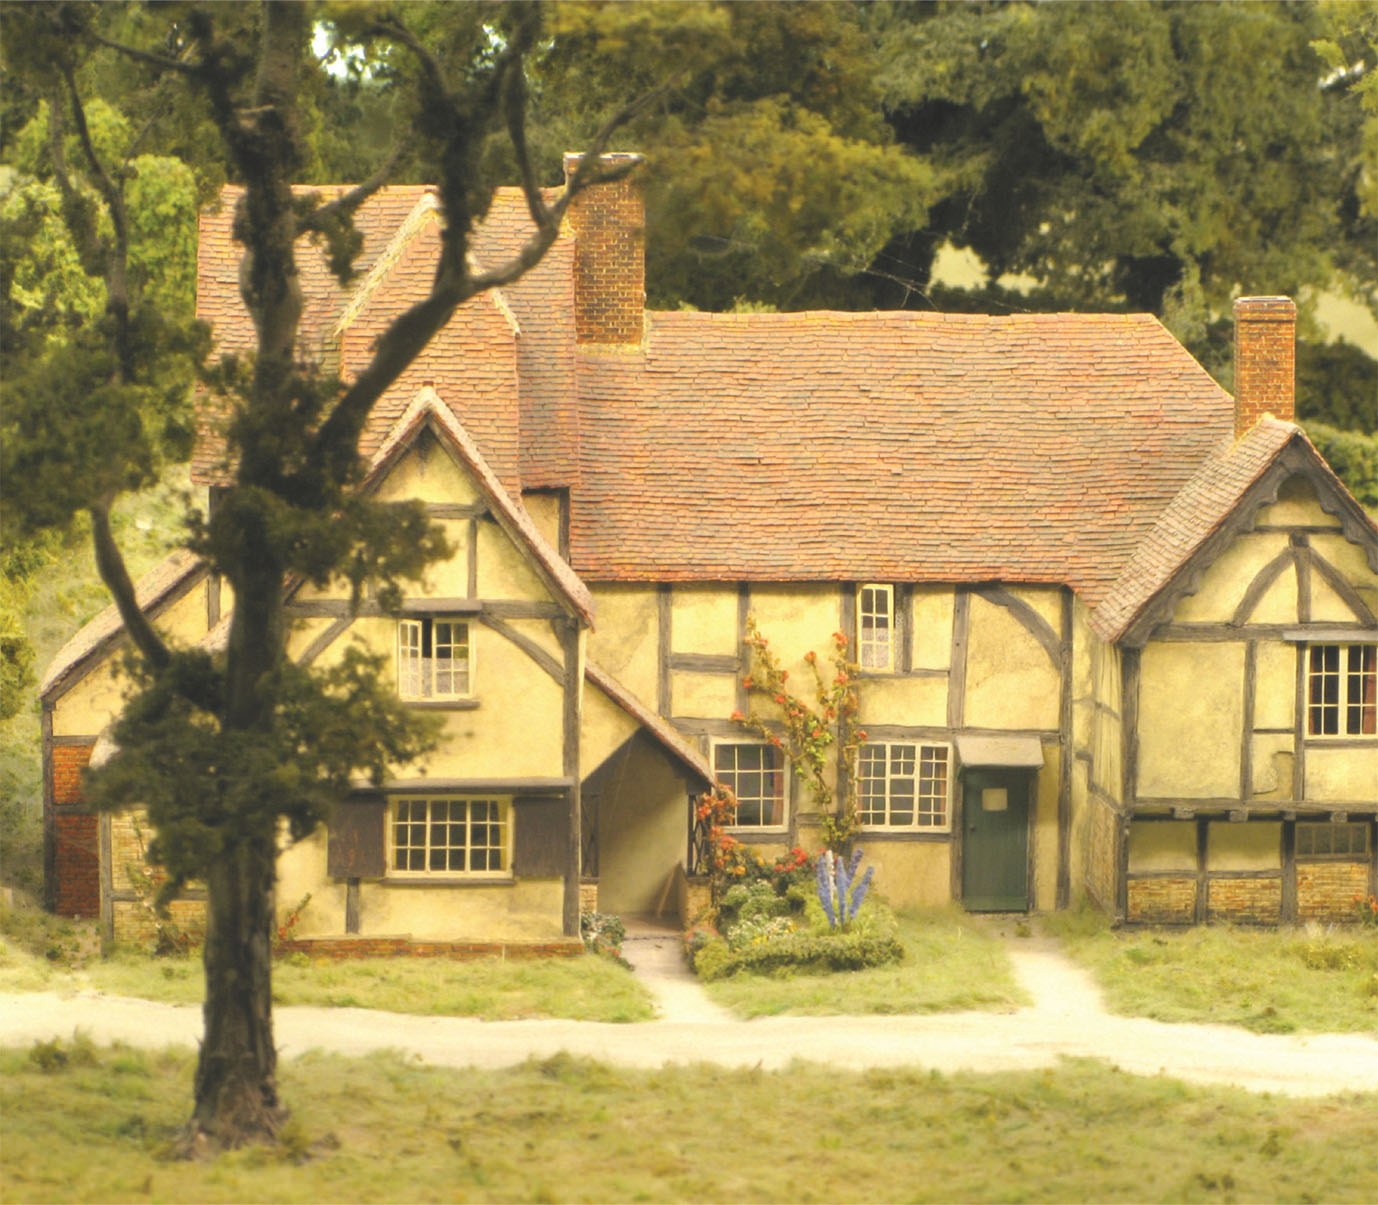
PENDON’S MAGNIFICENT BUILDINGS
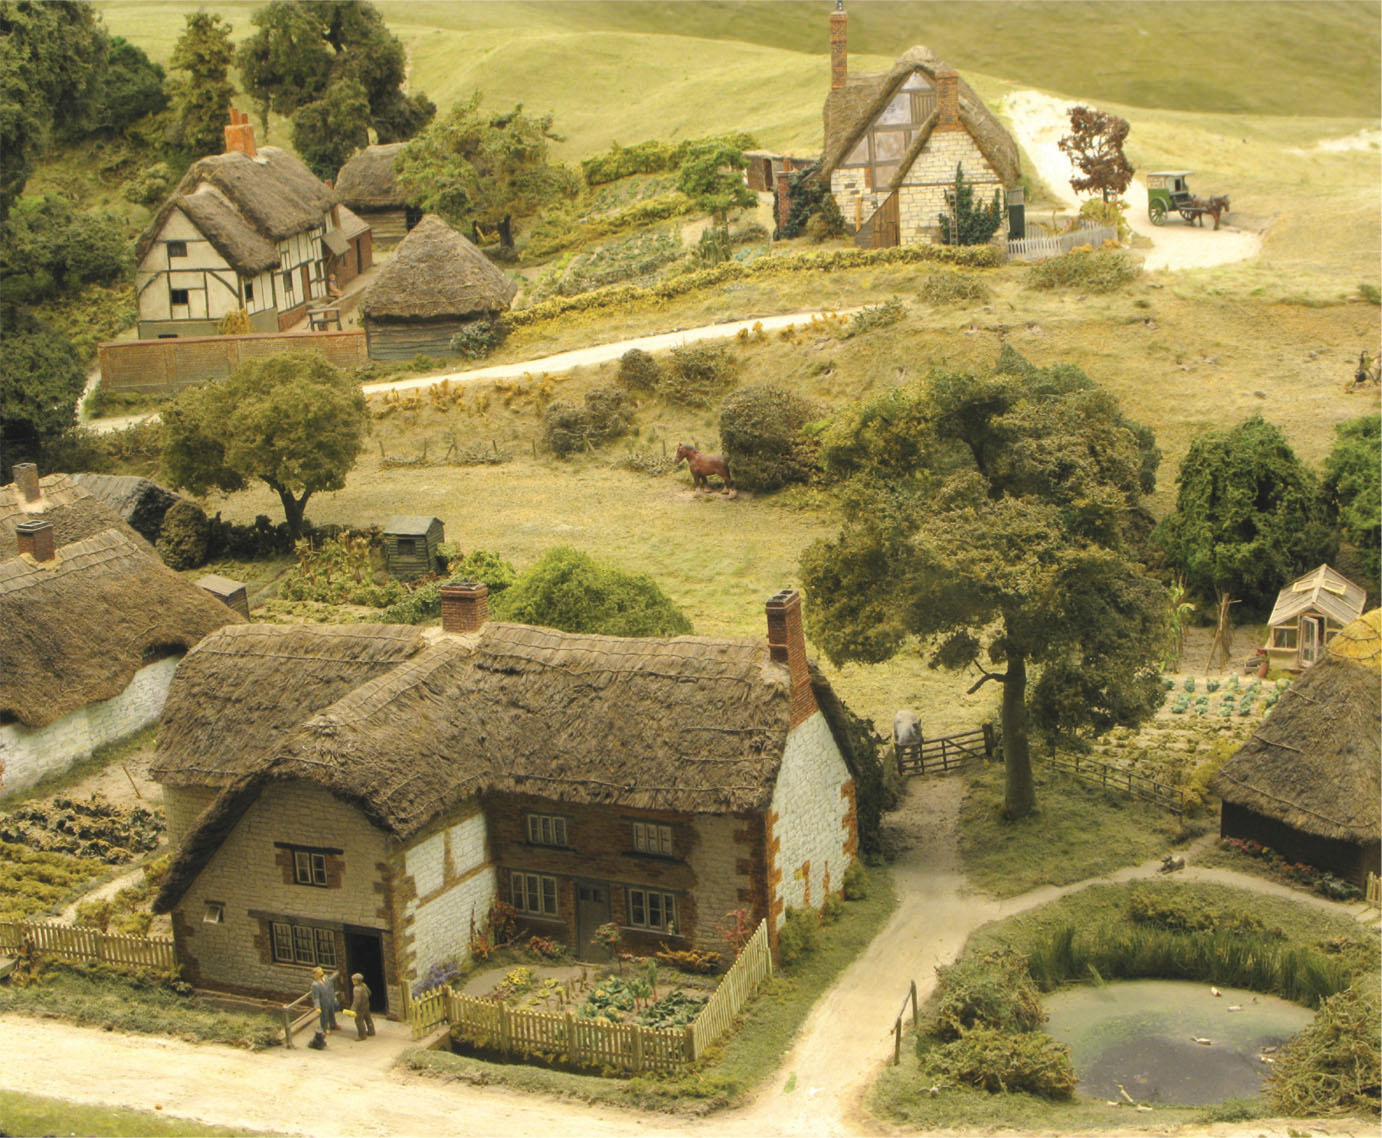
The Pendon Vale scene is inspirational to those who want to model buildings with superb realism.

This farmyard scene at Pendon has all the hallmarks of master modelling at its best.
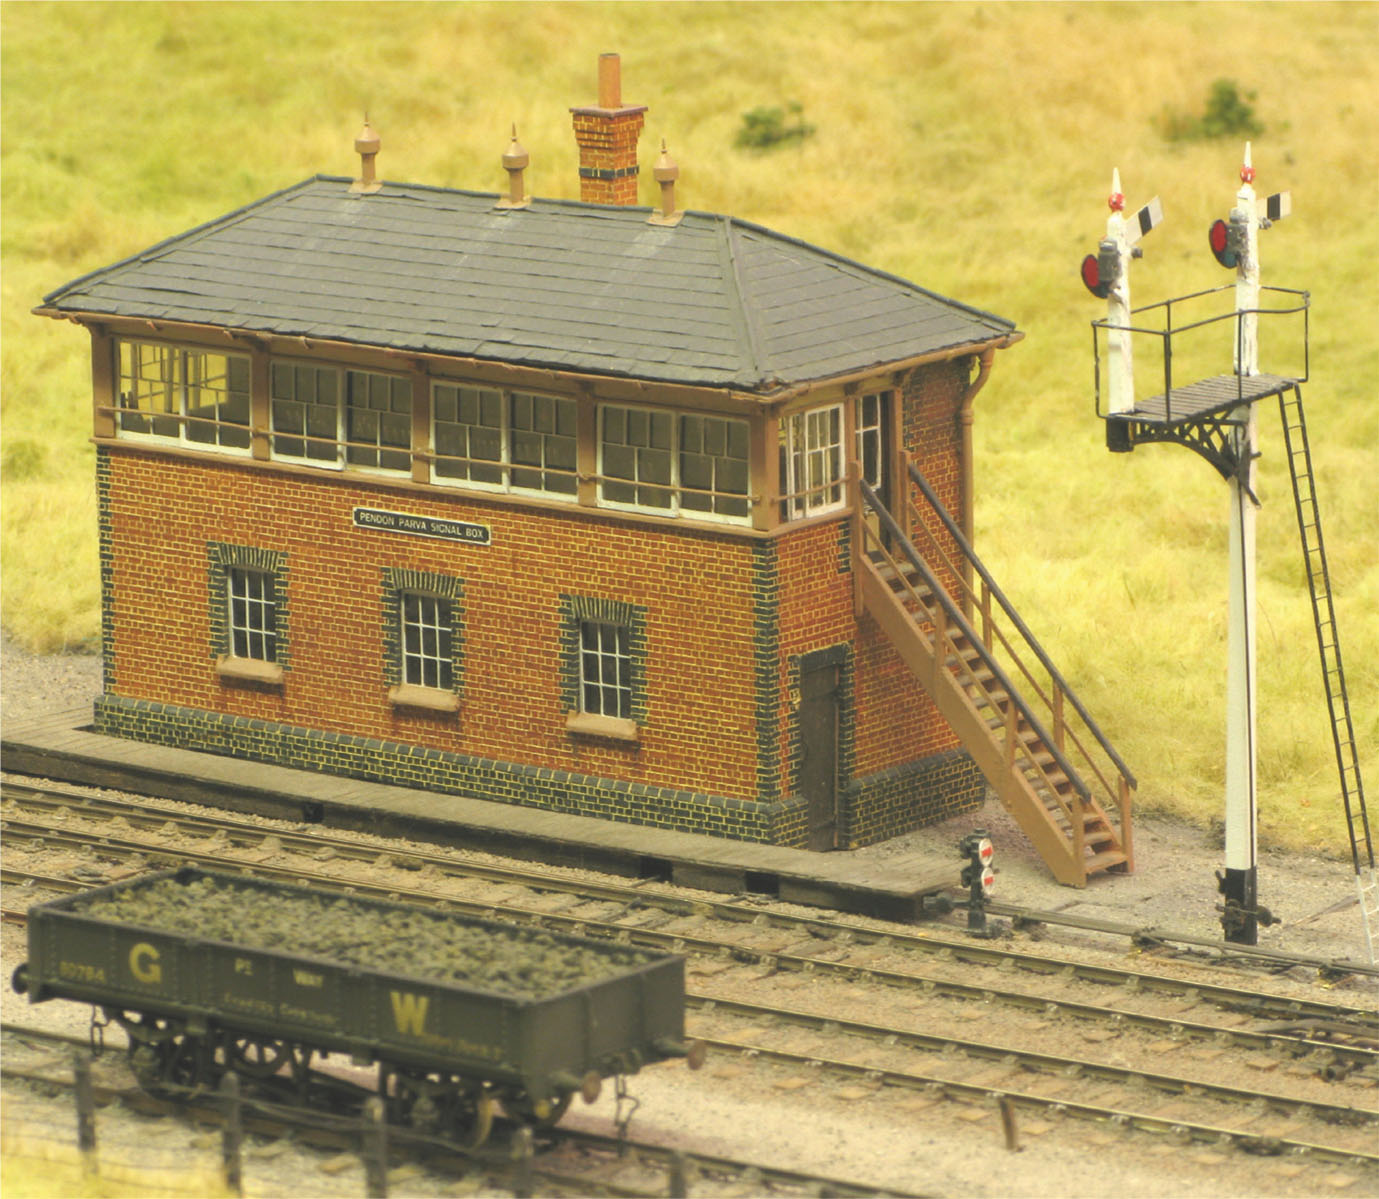
The Pendon Parva signal box and its surrounding details are what most scratch-builders endeavour to achieve.
With some flowers made from human hair, Pendon’s modelling is exquisite.