CHAPTER THREE
HOW TO DESIGN A NEW LAYOUT
Designing a layout to meet most of your needs ensures satisfaction in the hobby.
Some of us build new layouts at regular intervals, whilst others are happy to build just one new layout every decade, or even one layout in a lifetime. One modeller may already know the design and track requirements for their next layout, but others of us are constantly looking around for new design ideas.
HOW DO I GET IDEAS?
Layout designing is a fascinating part of the hobby. If you like sketching track plans on bits of paper you will know what I mean. If you are not one of those who like thinking up plans, there are a number of places to look for inspiration, including the many trackplanning books. In Appendix I, several recommended books are listed to show just some of the available selection. Peco’s track-plan booklets feature many of the famous plans by C.J. Freezer and these are still a source of inspiration. The Peco Setrack booklets are available for N and OO scale and provide a good selection of track plans.
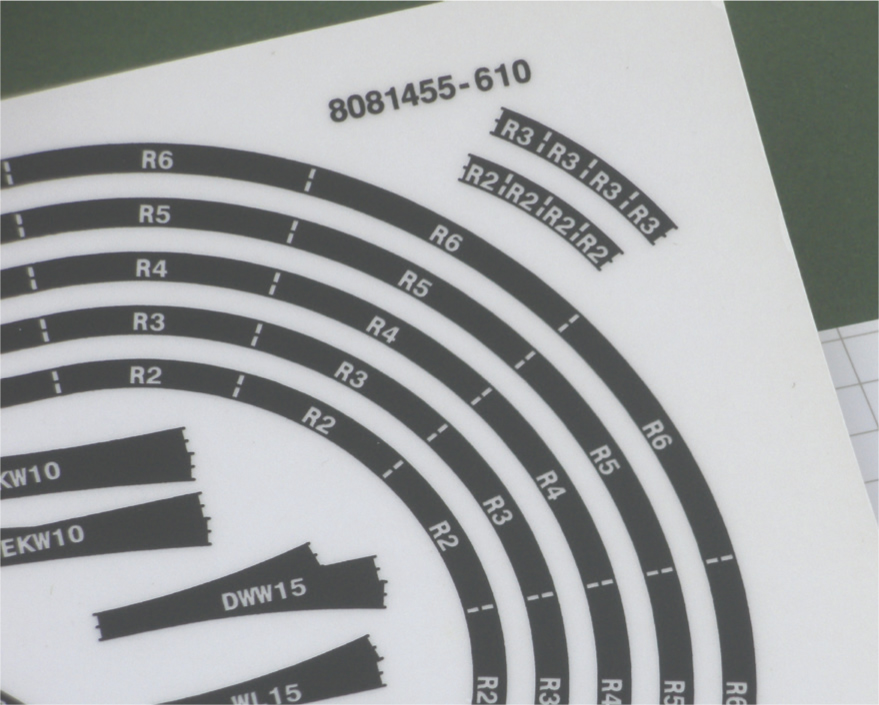
Using true to scale paper templates of track pieces from Peco enables a modeller to see exactly which pieces of track are needed. These full-size templates can be photocopied and cut out for positioning on a baseboard to see exactly what track can be accommodated on your baseboards. These templates can be downloaded from the Peco website at www.peco-uk.com.
Wharfedale Road is an OO-scale compact layout built especially for the Right Track DVD Layout Planning and Design. It shows that can be achieved by using mainly ‘off the peg’ products. For more information go to: www.model-railway-dvd.co.uk/right_track19.php. PAUL MARSHALL-POTTER

The first steps of a new layout are quite exciting. Peco paper-point templates are being used with pieces of sectional track to experiment with a new layout design. This will help to determine whether the plan on paper will work in reality.
Hornby’s quarter-scale plastic track pieces are a useful way to lay out the track plan to see exactly how it will look full size. These pieces can be used over and over again. For more information see www.hornby.com. Hornby also produces a TrakMat that measures 180 x 120cm (71 x 47in) for use by beginners. Roco used to make scale replicas of its HO RocoLine track pieces that could be cut out from a main template and fixed to a lined piece of shiny thick card.
There are websites with track plans for our enjoyment. These include www.freetrackplans.com. A US Internet forum that has a huge number of good ideas on layout design is the Layout Design Special Interest Group, whose purpose is to aid efforts to design and create layouts to achieve an owner’s layout goals. The Group acts as a forum for members’ exchange of information and ideas. It promotes, develops, supports and encourages participation by the public in model railways. The Group’s website is worth looking at: www.ldsig.org.
Roco used to produce miniature track templates for its various sectional pieces of track, which could be positioned on a scale baseboard to ensure that a track plan was workable. Remember that it is always best to leave sufficient room around the edge of the track for scenic work. Track sitting on the edge of a baseboard can lead to locomotives falling off the edge of a layout.
Model Railroader magazine’s annual Model Railroad Planning bookazine published by Kalmbach from the USA describes the design and construction of various layouts in N to O scales. Some of the plans within the magazine are large US-style basement style layouts, but others are compact layout plans (which could be adapted for UK or European layouts), plus tips on layout construction. Do not be put off that this is a US-based publication – most UK modellers will find something of interest. These are available in the larger WHSmith stores, but also at www.spv.co.uk.
A good demonstration of layout design and layout building is the Wharfedale Road layout built specifically for the RightTrack DVD no.19, Layout Planning and Design. The DVD shows the changes that the design went through, as well as different interpretations of the same track plan, to provide inspiration and encouragement for the viewer.
USING TECHNOLOGY
Model railway planning programmes for use on PCs are available from various companies, including: Anyrail (www.anyrail.com/index_en.html); Winrail (www.winrail.com); www.trackplanning.com; and www.templot.com. Some of these websites enable you to try their programmes before purchasing the whole package.
To design compact layouts there are several really useful websites that include: www.wymann.info/ShuntingPuzzles/index.html and www.carendt.com. There are also several companies offering to design and build a layout for you. These include Professional Layout Design (www.pls-layouts.co.uk) and Elite Baseboards (www.elitebaseboards.net).
Hornby’s Virtual Model Railway CD-ROM is a comprehensive design program enabling the user to design and plan layouts in both 2D and 3D. To see a layout virtually before you build it, TrainPlayer is a US-based program that has UK stock and can import files from AnyRail so that the layout you design can be converted into a working virtual layout. For more information, go to www.trainplayer.com or www.elitebaseboards.net/layout-construction-services.
WHAT DO YOU NEED TO THINK ABOUT?
Each time you begin to make a new layout, it is necessary to consider the following questions that will determine the nature of the layout, for example the maximum space that it can occupy. Remember that you need to leave some access room around the layout. Resist the urge to make the layout so big that you cannot get to it.

Seen from above, this OO scale layout is roughly 1.5m square, but in that space there is a large scenic section plus storage sidings to the rear.
Will the layout be exhibited at model railway shows? If it is, the baseboards will need to be portable. Can the baseboards be carried in a car, or will a van need to be hired to carry them to shows? If the baseboards are to be portable, can you carry them on your own, or will assistance always be needed? What sort of supports will the layout require?
It is a good idea to make a list of the features that you want to incorporate on the layout before starting to draw up a track plan. These may include, for example, a locomotive depot, a goods yard, a dockside scene, hidden storage and so on. Where is the layout to be modelled upon? Do you have just one favourite prototype line, which may make your choice of a model railway easier? Determine the longest train that will be able to be used on the layout – this will be the length of the storage sidings or loops. Do you want a predominantly scenic layout, or one with lots of tracks, leaving little room for scenery? Will you use DC or DCC control, or a mixture of both?
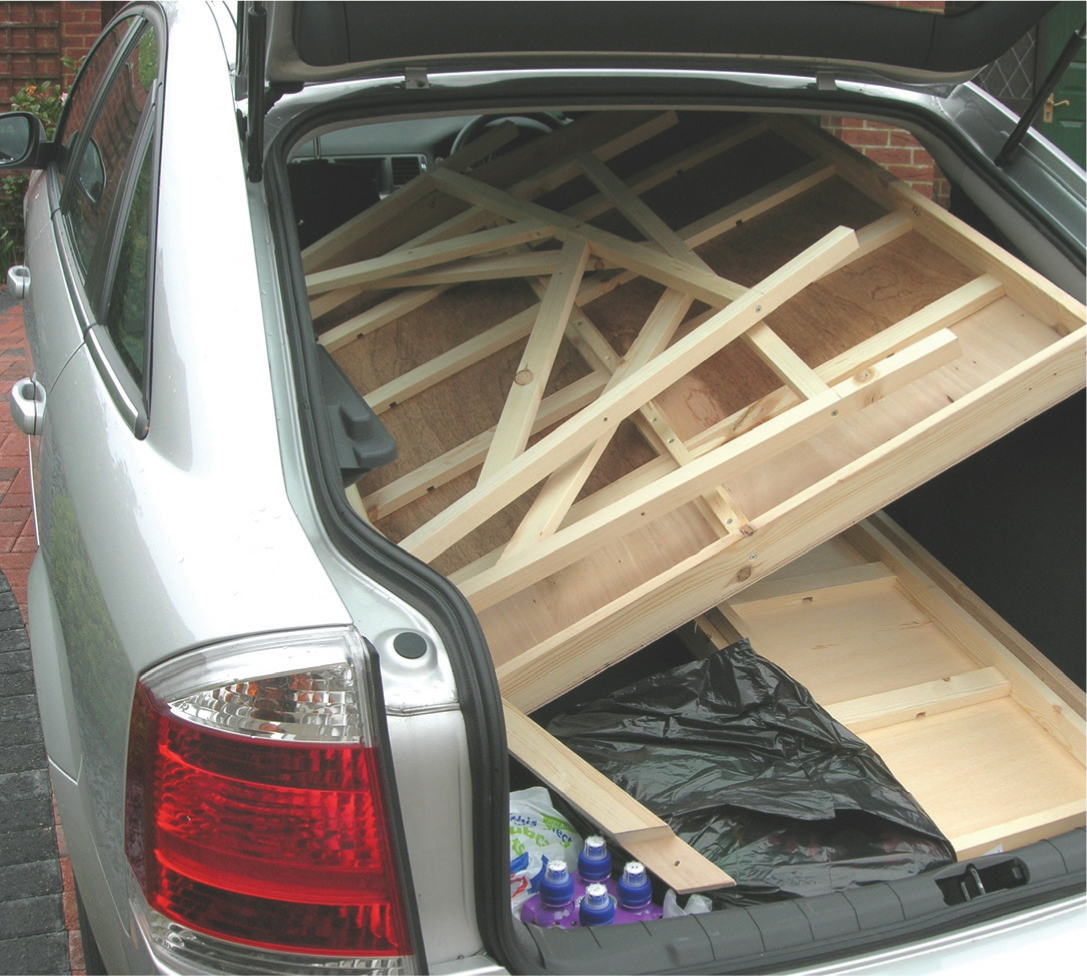
Give advance thought to how a layout will be carried. Here, new baseboards are carried in a Vauxhall Vectra, but once the scenery was added the layout became too large to carry in the car and a van had to be hired to transport it to a show.
Will the points be manually operated, or by point motor or cable? The answer to this question may affect the positioning of the points on the layout in relation to access and the baseboard supports. What is to be the widest section of the baseboards? Will all parts of the layout be easily accessible for track cleaning, derailments and refurbishment of the scenery?
Will you want to use your long-established building techniques, or will you want to experiment with new methods on the new layout? These might include, for example, different baseboard construction, using flexible instead of sectional track, trying out new scenic techniques and so on. If either money or time is in short supply, could the layout be designed so that part of it could be completed and then when resources are forthcoming the next stage could be built? Could the layout be designed so as to be expandable?
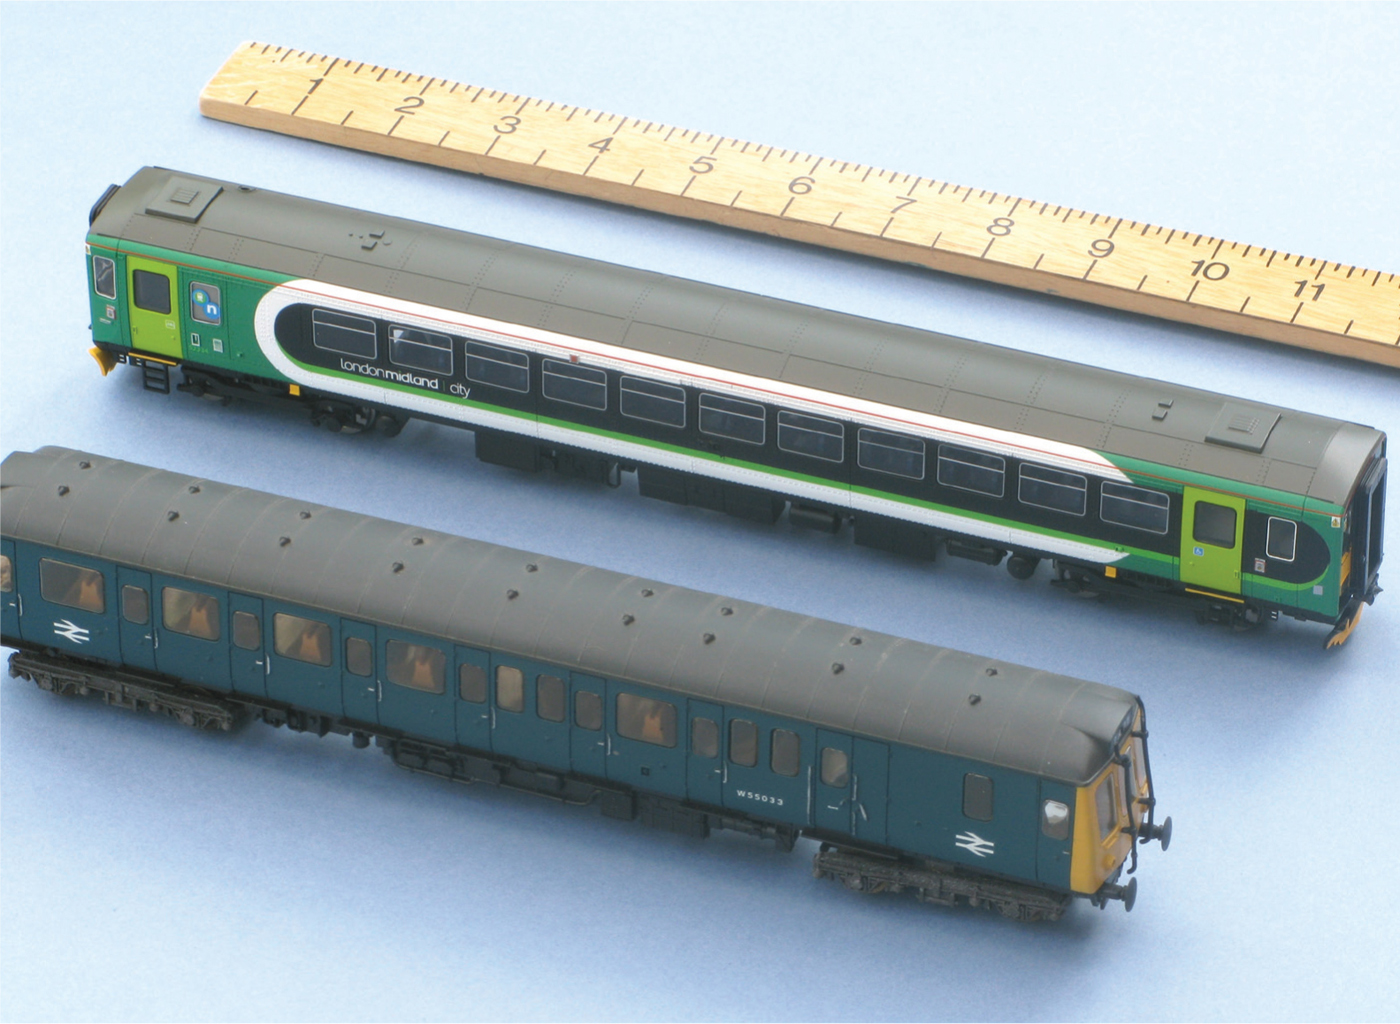
Single-unit trains are a great way to add an entire train in a short length. Here a Hornby Class 153 DMU stands next to a converted Lima Class 121 unit. The Class 121 unit is around 30mm (1.2in) shorter than the more modern Class 153 unit. Both of the units depicted are OO scale, but N-scale models of the same units are available from Dapol.
These are just a number of the questions that we may need to ask ourselves when we are about to build a new layout. There are no right or wrong answers – these questions are simply a tool to enable us to build the layout with which we will be most satisfied.
PLANNING THE CURVES
On most model railway layouts it is generally best to use the largest radius curves that your space permits. In reality, the only real railways that feature sharp curves are those in dockyards and at industrial locations such as collieries. Sharp curves will not look too out of place on a model of a narrow-gauge mountain line in Wales, but they will look totally out of place on an LMS mainline or a model of the high-speed standard-gauge line such as High Speed 1.
The radius of a curve is the length of a line from the centre of the curve to its outer edge. Manufacturers retail a range of sectional curves usually including an R in their descriptions. So, for example, an R1 might be the smallest sectional radius curve and R6 might be their largest radius curve. For curves larger than R6, it is usually necessary to use flexible track.
Some manufacturers specify that their locomotives and rolling stock should use a minimum radius of a number of centimetres. Bachmann, for example, specifies that its locomotives should only be used on R2 track (radius 2 track) and above. The instruction leaflet of locomotives or the manufacturers’ catalogues are the best places to find the suggested minimum radii.
Use the largest radius curves that your baseboard will allow. Graceful curves on model railways look a lot better than sharp ones. The trains will run better too. Be very careful that any S bends on a layout use curves that are as large a radius as possible. Sharp radius S curves will mean that the train will move unprototypically through the track formation – the carriages will not move gracefully and it will be impossible to maintain close-coupled carriage connections.

Use curves that have the largest radius feasible for your layout. If you are making a tunnel entrance, test it with your longest item of rolling stock before fixing the tunnel mouth to the layout.
CONCLUSION
The aim of this chapter has been to bring various layout planning aids to your attention. Layouts are very personal to the builder and display his choices and preferences.
Two notes of warning are necessary: firstly, sad to say, not all published track plans are either workable or realistic. Some layout designers just try to squeeze too much track on to a baseboard. If you have some doubt as to whether a track plan is workable, use the Peco paper templates or Hornby’s plastic quarterscale pieces before starting to lay the track. Secondly, do not be tempted just to design layouts for the rest of your modelling life. Beware of becoming an ‘armchair modeller’ – someone who never actually gets round to building the layouts that they have designed!
Sharing track plans and layout proposals with other modellers is a good way to test out a design. There are a number of excellent railway modelling websites from which you can gain views, help and advice from other modellers (see the Appendices).
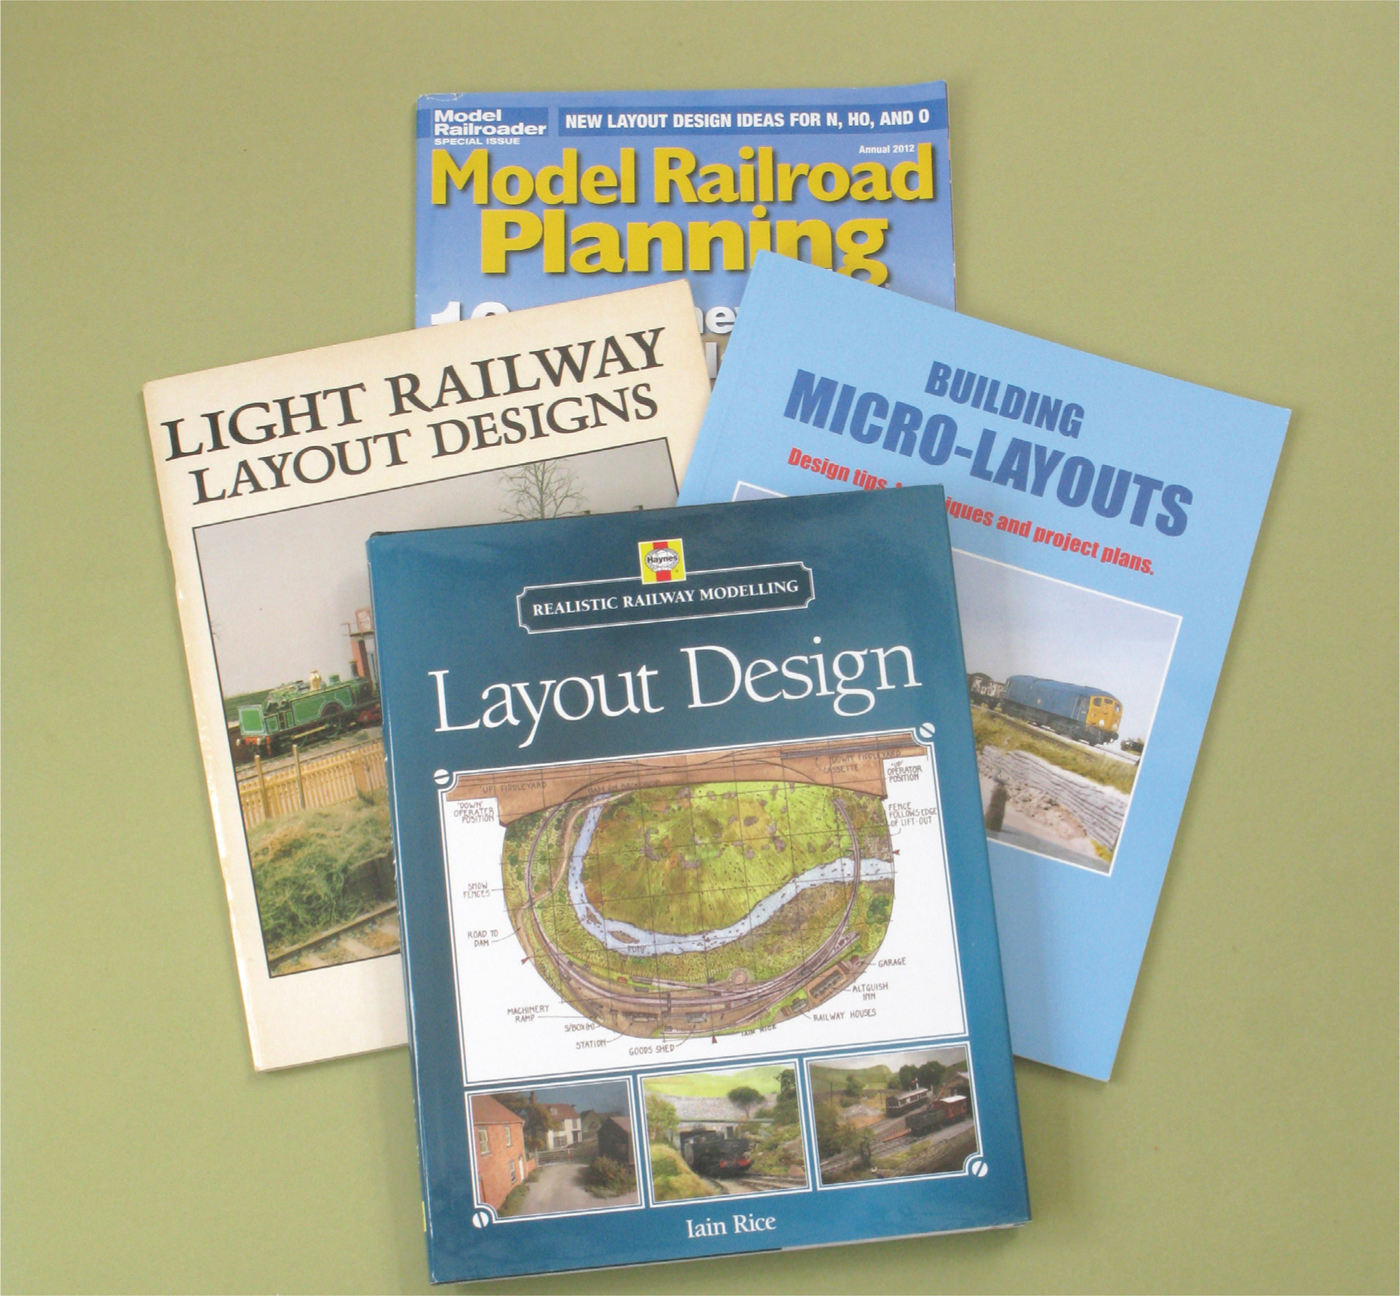
There are lots of track-planning books available in the UK, mainland Europe and the USA. Track planning is one of the armchair aspects of the hobby that many enjoy tremendously.
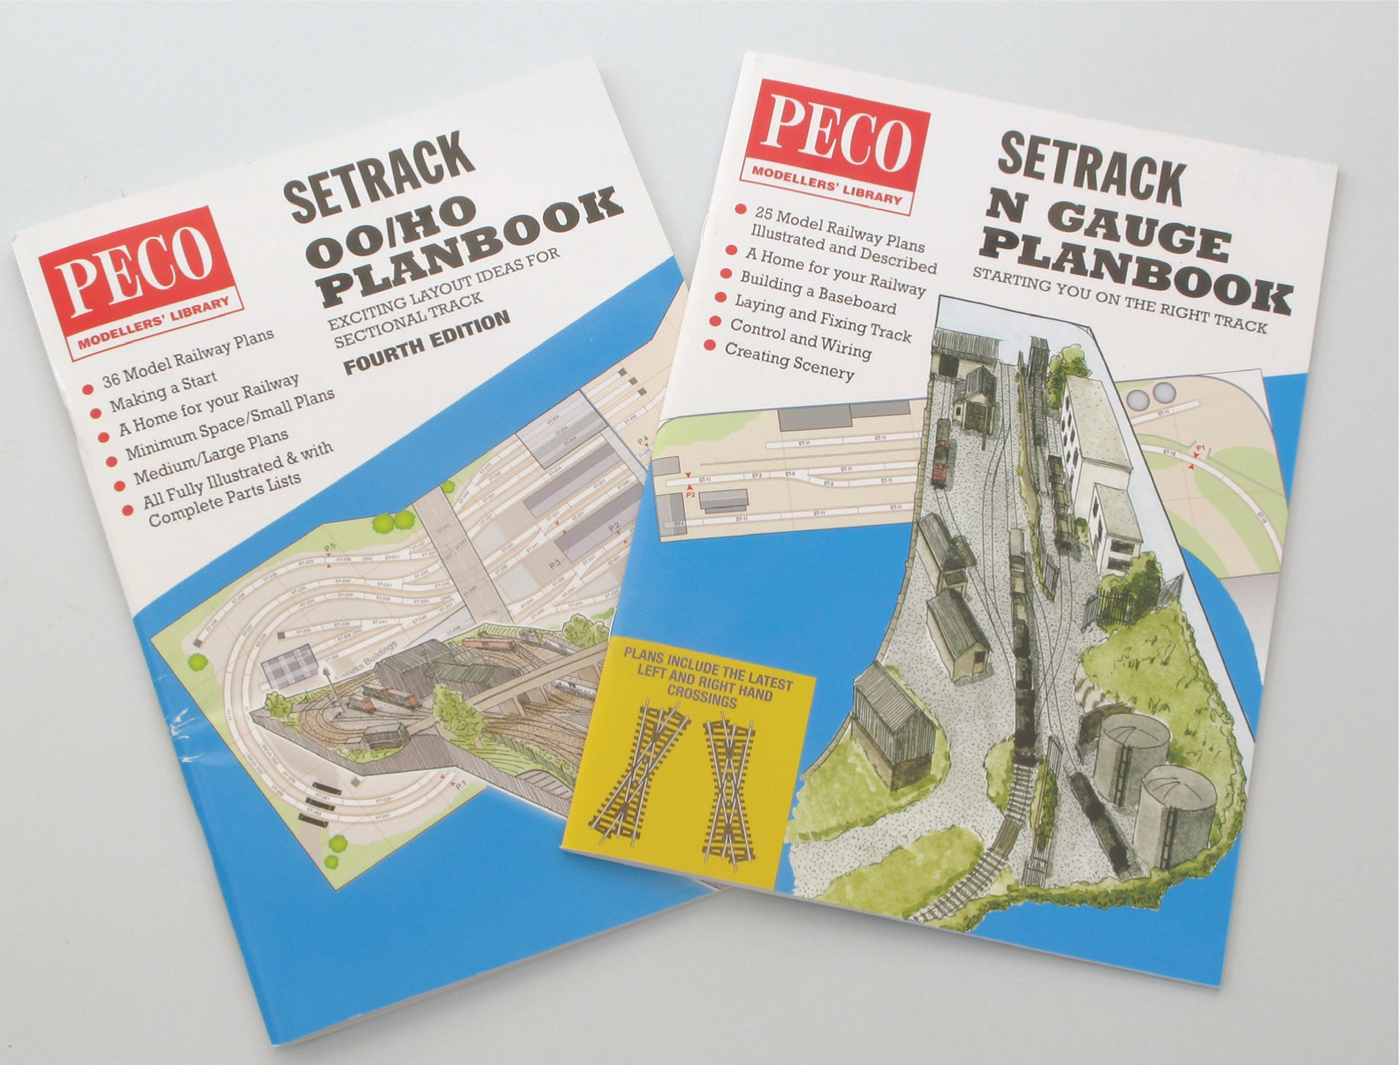
Peco’s Setrack Planbooks are good value for money at around £3 each and contain tested plans of how to make layouts in N and OO scales quickly. The introductory pages contain much advice on building a layout.
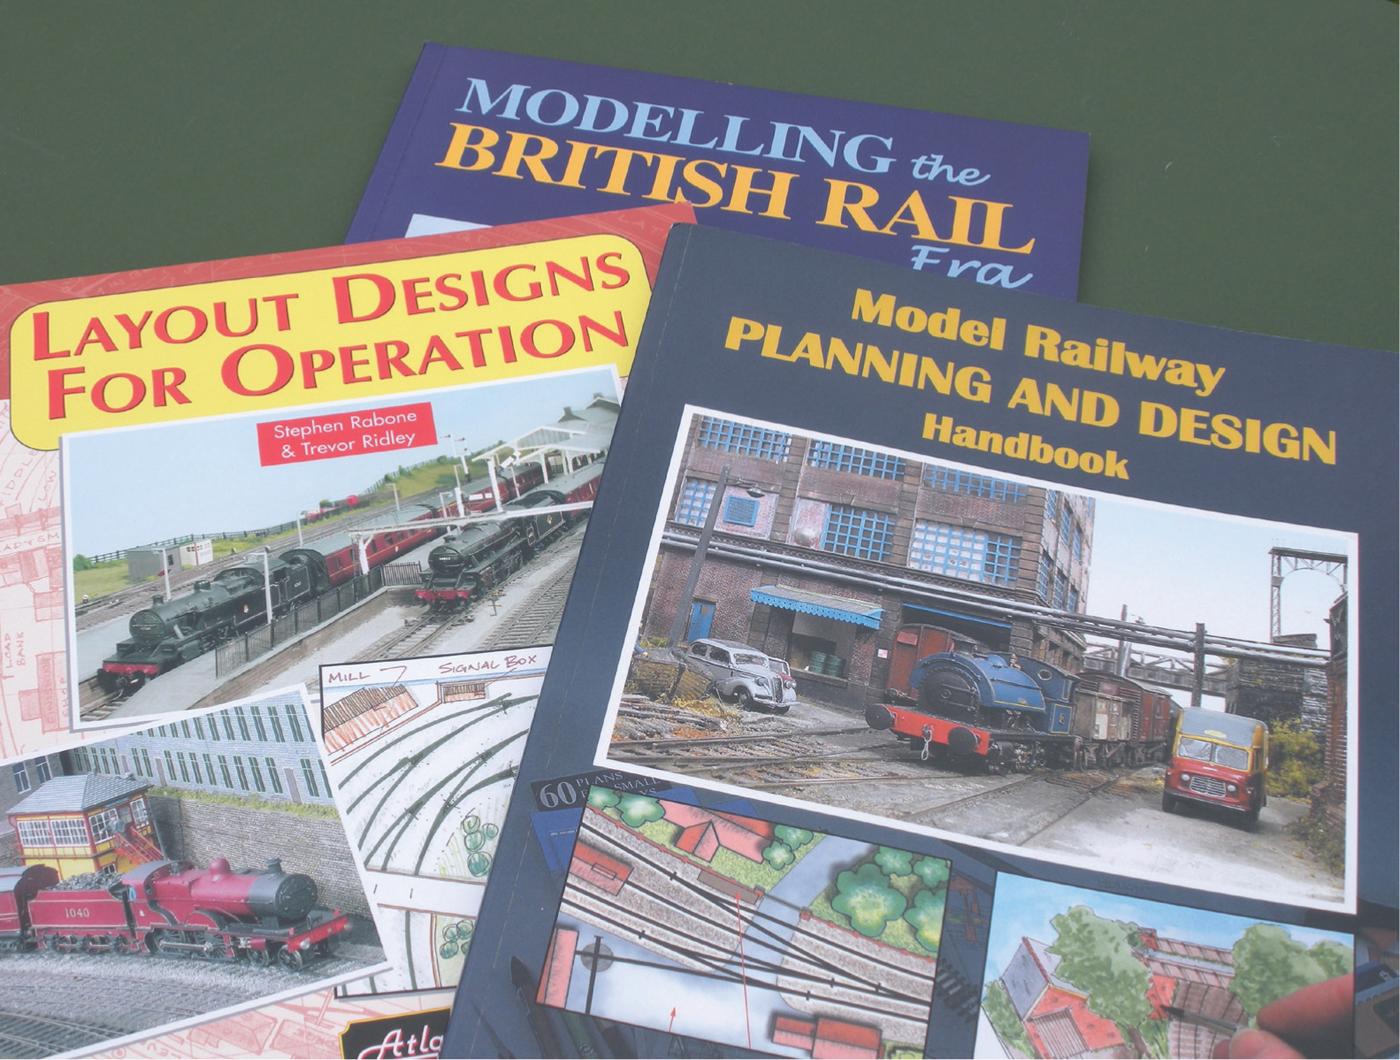
More track planning books that comprehensively discuss the various layout formation possibilities, combined with splendid artwork that encourages one to start a new layout.
Layout Design Essentials
- A solid and level baseboard is essential for good track laying. There is no shortcut to this! You will regret it if you lay track on a poor-quality baseboard.
- Use paper templates from Peco to see which pieces of track you will need. Hornby’s quarter-scale plastic track pieces are another useful way of laying out the track plan to see exactly how it will look full size.
- Consider some of the track-planning PC programs to assist you in planning the track layout and experiment with pieces of track on your baseboard before determining the final track plan and fixing the track down.
- Use isolating points (those that do not carry the current to the line once the point is changed) to reduce the number of electrical connections if you wish to keep the wiring simple. Alternatively, by using DCC control you will not need isolating points.
- If you are going to fit point motors, think ahead – where are they going to go? Can they be fitted beneath the baseboard, or do they need to be situated alongside the point?
- As you fix the track down, make sure that the rails and fishplates fit together properly. Push the pieces of sectional track together on a flat surface. Run your finger along the top of the rails as you lay the track to ensure that the joints are all smooth. A misaligned track connection will derail trains.
- If you are a newcomer to the hobby and are tempted to jump immediately to using flexible track, think again. Valuable experience can be learned by using sectional track. If you begin by using sectional track and later decide to change over to flexible track, those sectional pieces can still be used, for example in hidden sidings and storage yards.
- Be relaxed and enjoy designing track plans, but do not enjoy planning too much because you may never actually build a layout!
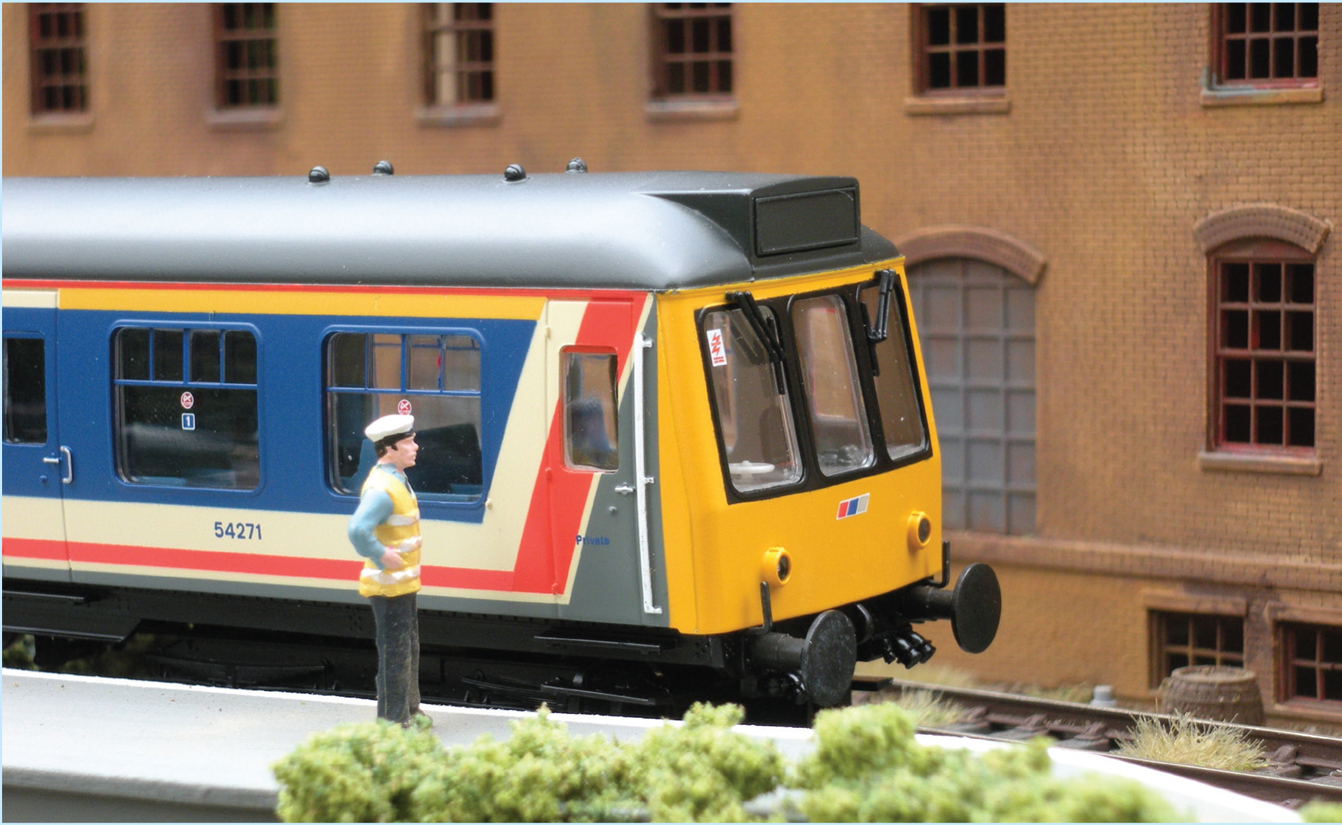
Figures placed in realistic poses can help a layout come alive. This modern station security personnel figure is from the Bachmann Scenecraft range.
SPACING-SAVING SECTOR PLATE
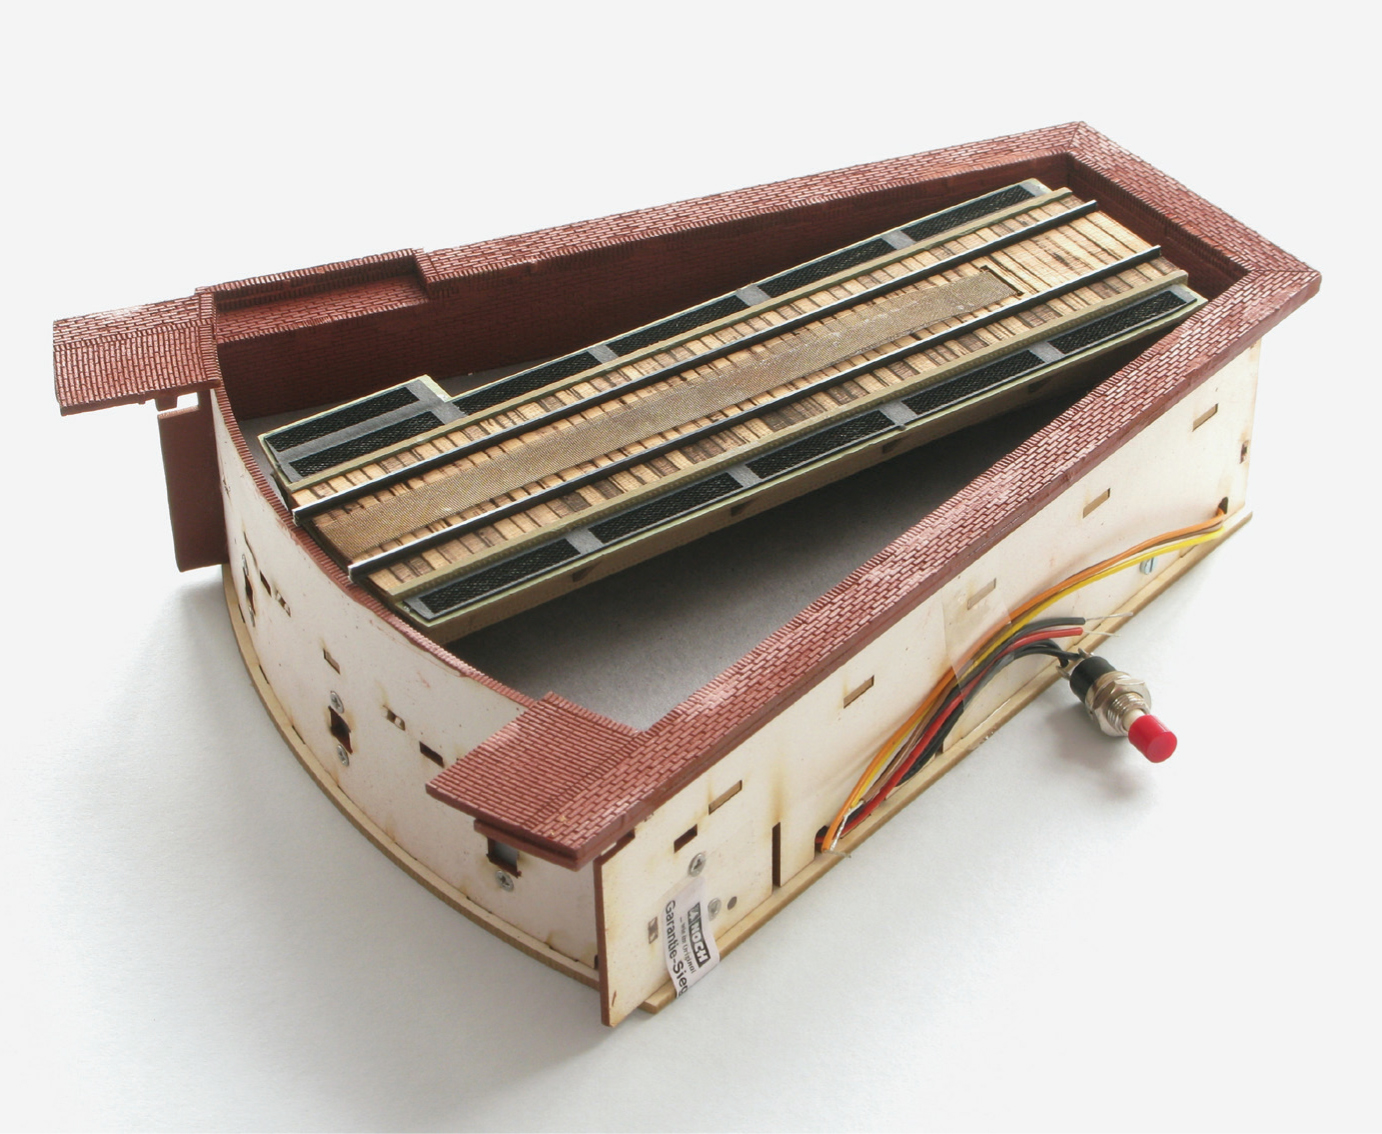
The Noch three-way segment turntable is a real space-saver. Though they were not often seen on the UK rail network, as something ‘a little different’ they are a well-made accessory that can be digitally controlled.
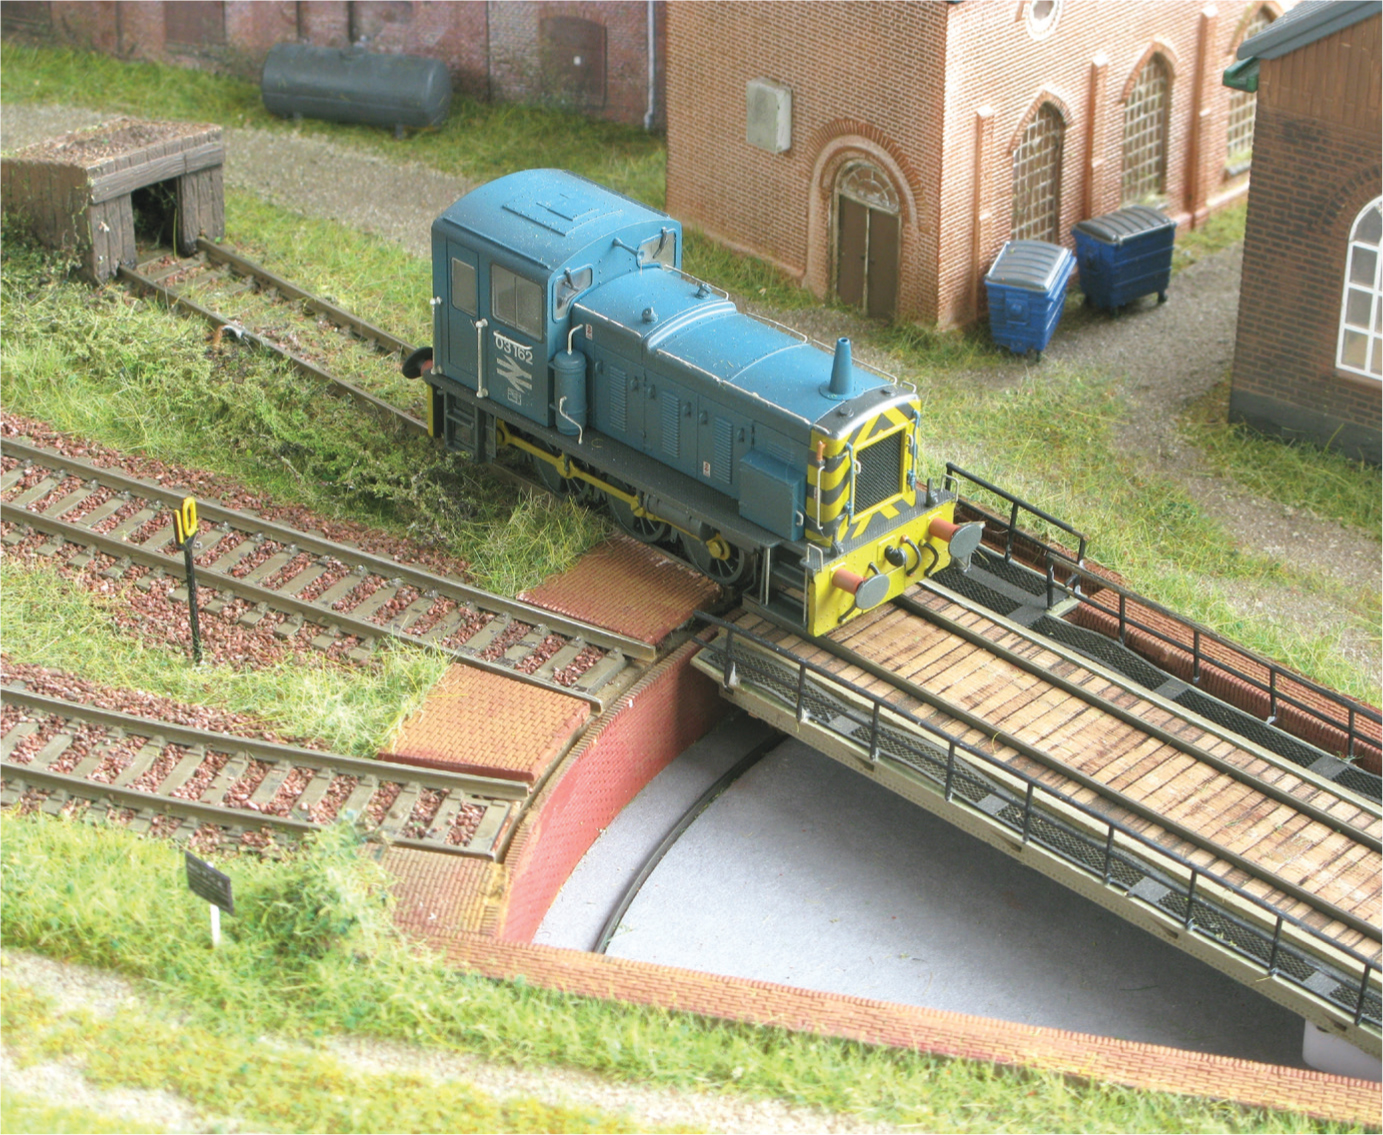
The Noch segment turntable takes short locomotives such as Class 03 and 08 diesels, plus Panniers and Jinties. The three-way action reduces the necessary length of a layout by more than 300mm (12in).
A COMPACT LAYOUT

This OO-scale layout was built on a 122 x 30cm (4 x 1ft) baseboard. Four cork carpet tiles were glued to the top of the baseboard to absorb the noise of the trains. Mainly sectional track was used, but the sidings were pieces of flexible track cut to length. The building is an adapted plastic kit by US firm Pikestuff.
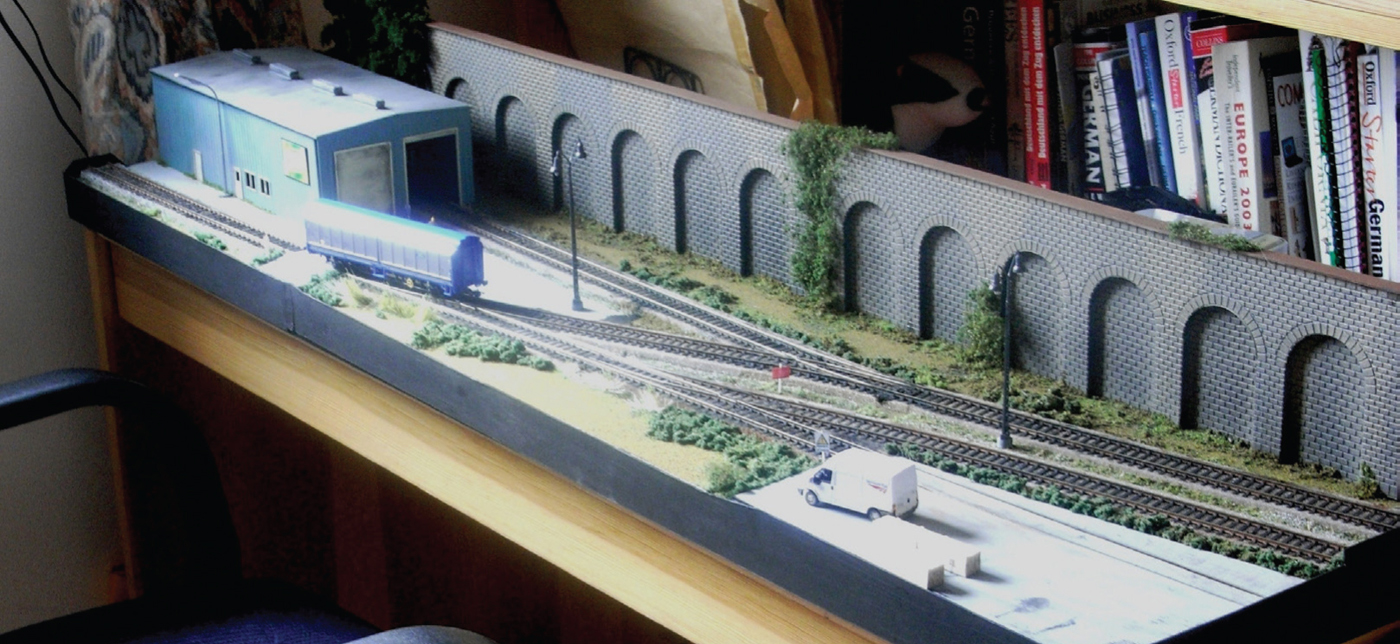
The layout was built to stand on the author’s office desk and because a lightweight timber frame was used, the layout could be easily moved around the house. Merkur retaining walls ran along the rear of the layout so that a back scene was not needed. This layout was made in less than two days in the garden in fine weather.
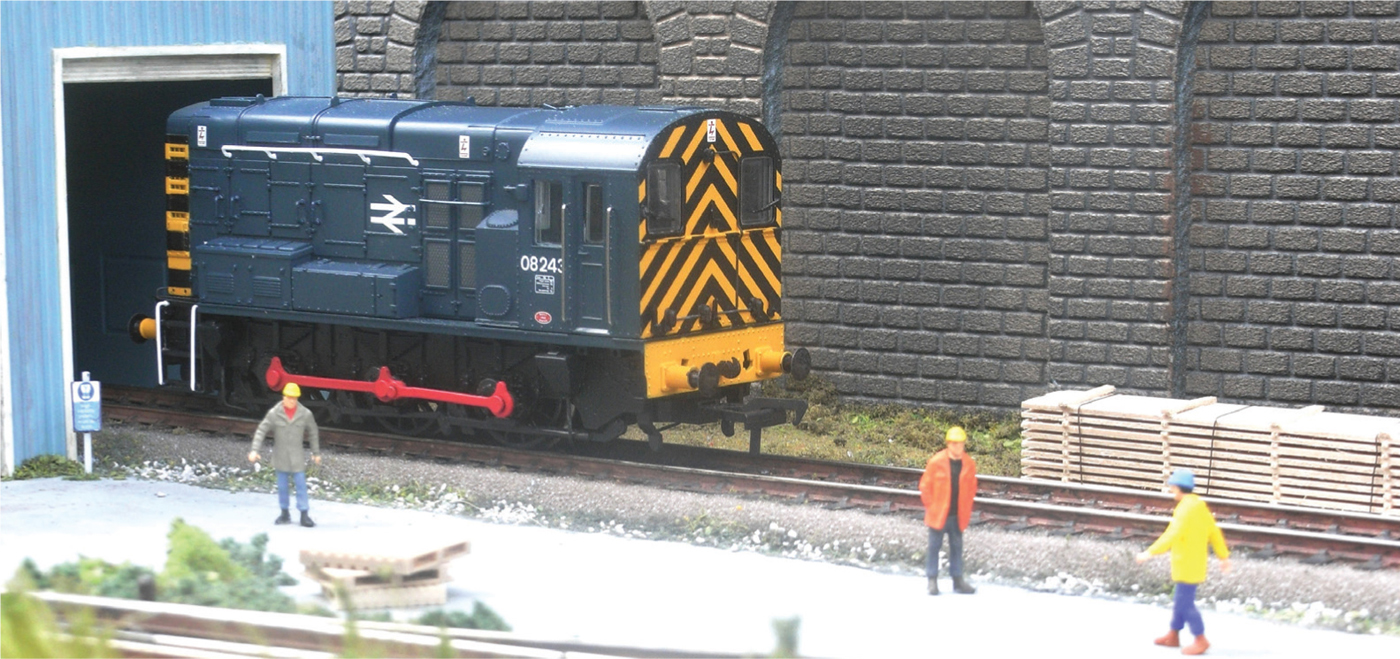
Preiser figures walk around the completed layout. Small details such as these elevate the layout, which is really just a small shunting yard.
STORAGE SIDINGS
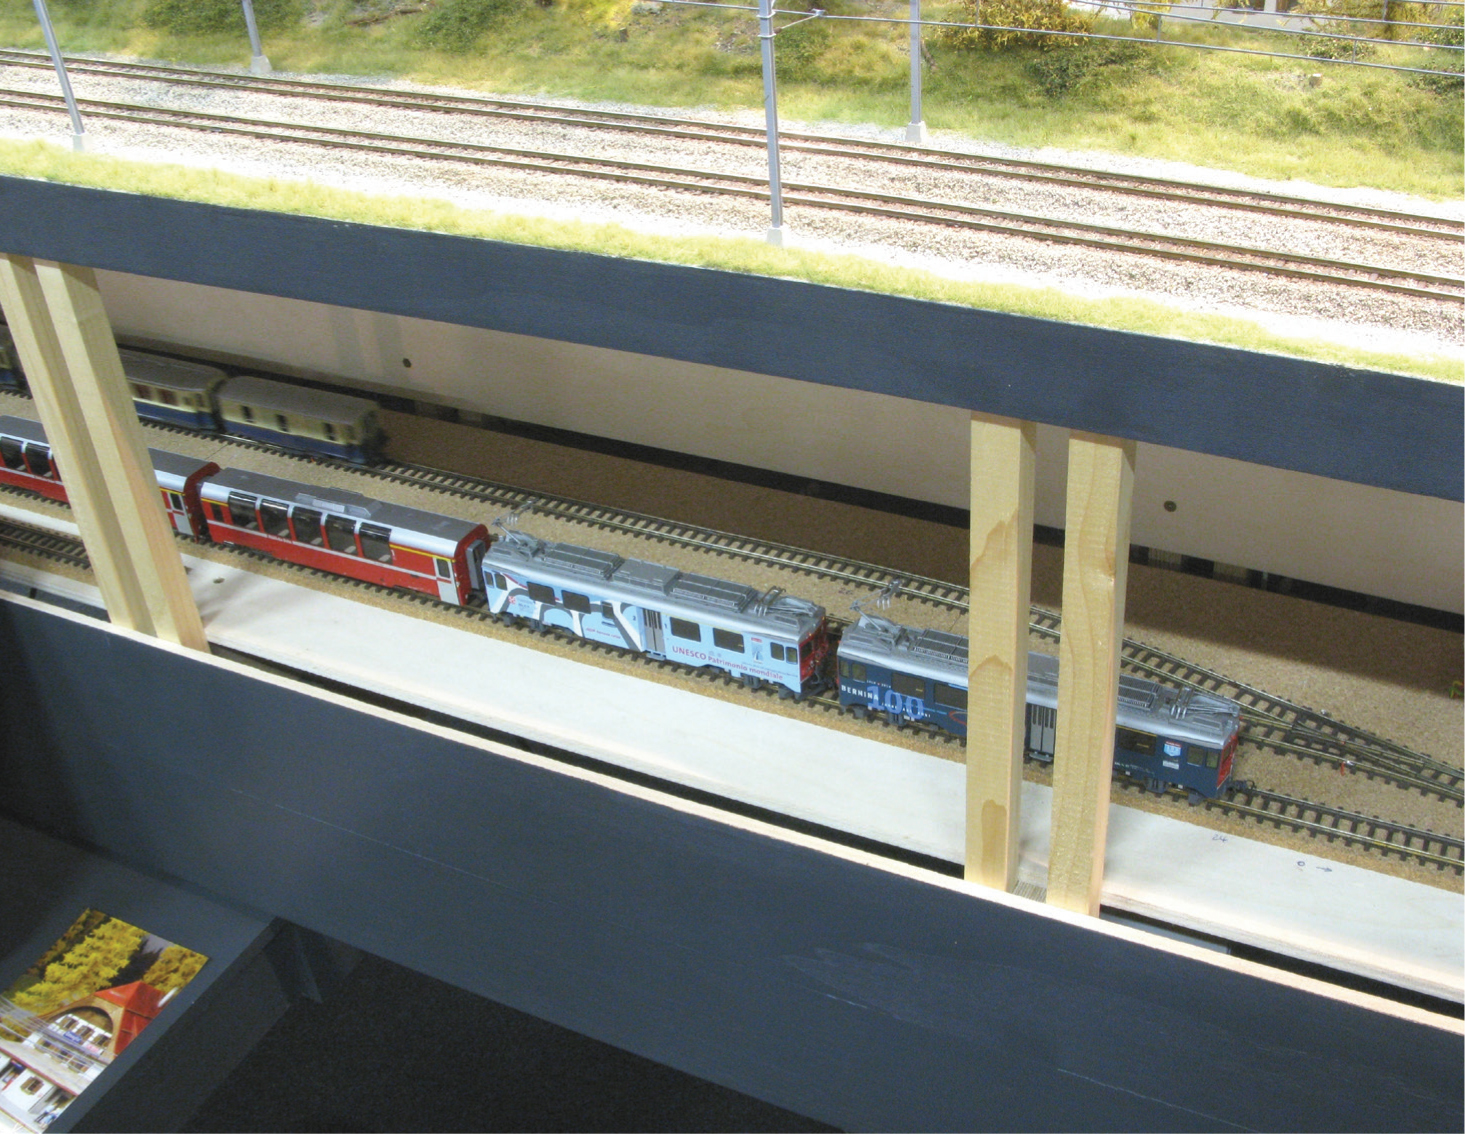
Storage sidings can be hidden under the scenery or indeed other tracks. Here Stephan Kraus has installed three storage loops under the main line on his Swiss narrowgauge model using HOm track. Stephan is a professional layout builder (www.modellbau-smk.de).
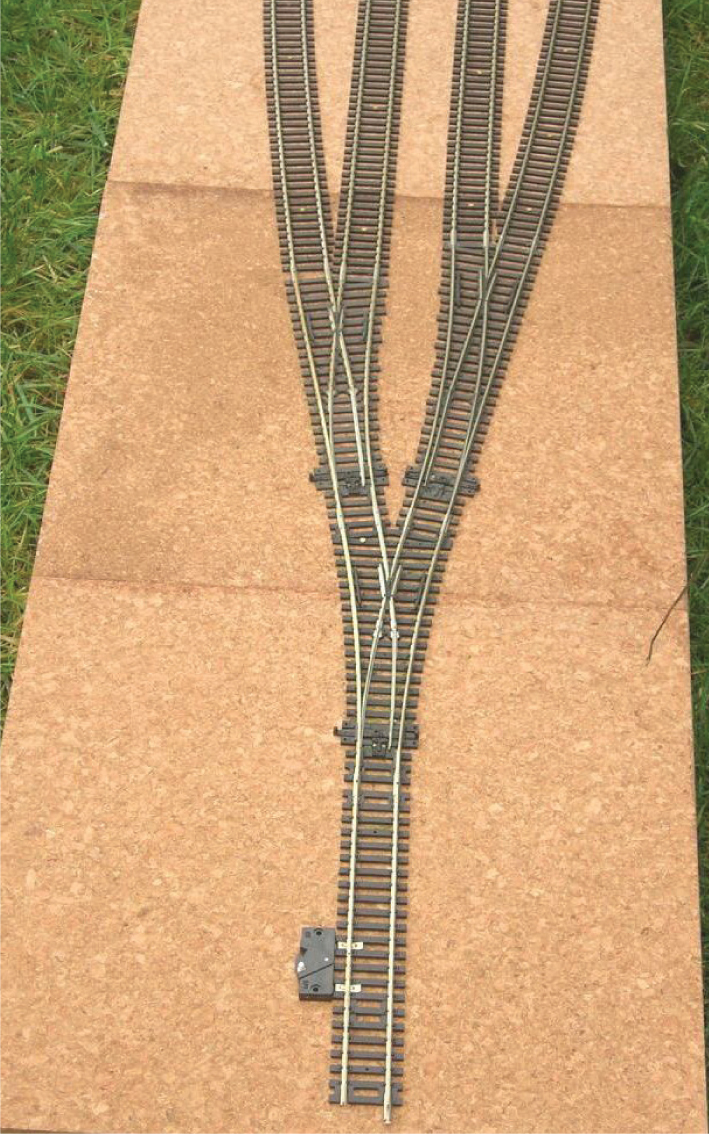
This is one alternative for storage sidings using a Y and a left- and a right-hand point. The sidings can either form dead ends or be loops of track.

Short stub-end sidings on this HO-scale layout need ‘hand shunting’, but because there are no points the length of the storage yard can be kept short. This is not everyone’s cup of tea, but it is one modelling possibility for a storage yard.
A SCENIC INTERLUDE
Today’s ready-to-run locomotives feature separate handrails, sometimes sprung buffers, are ready weathered, DCC Ready or DCC Fitted, or sometimes DCC Sound. Never have railway modellers had it so good!
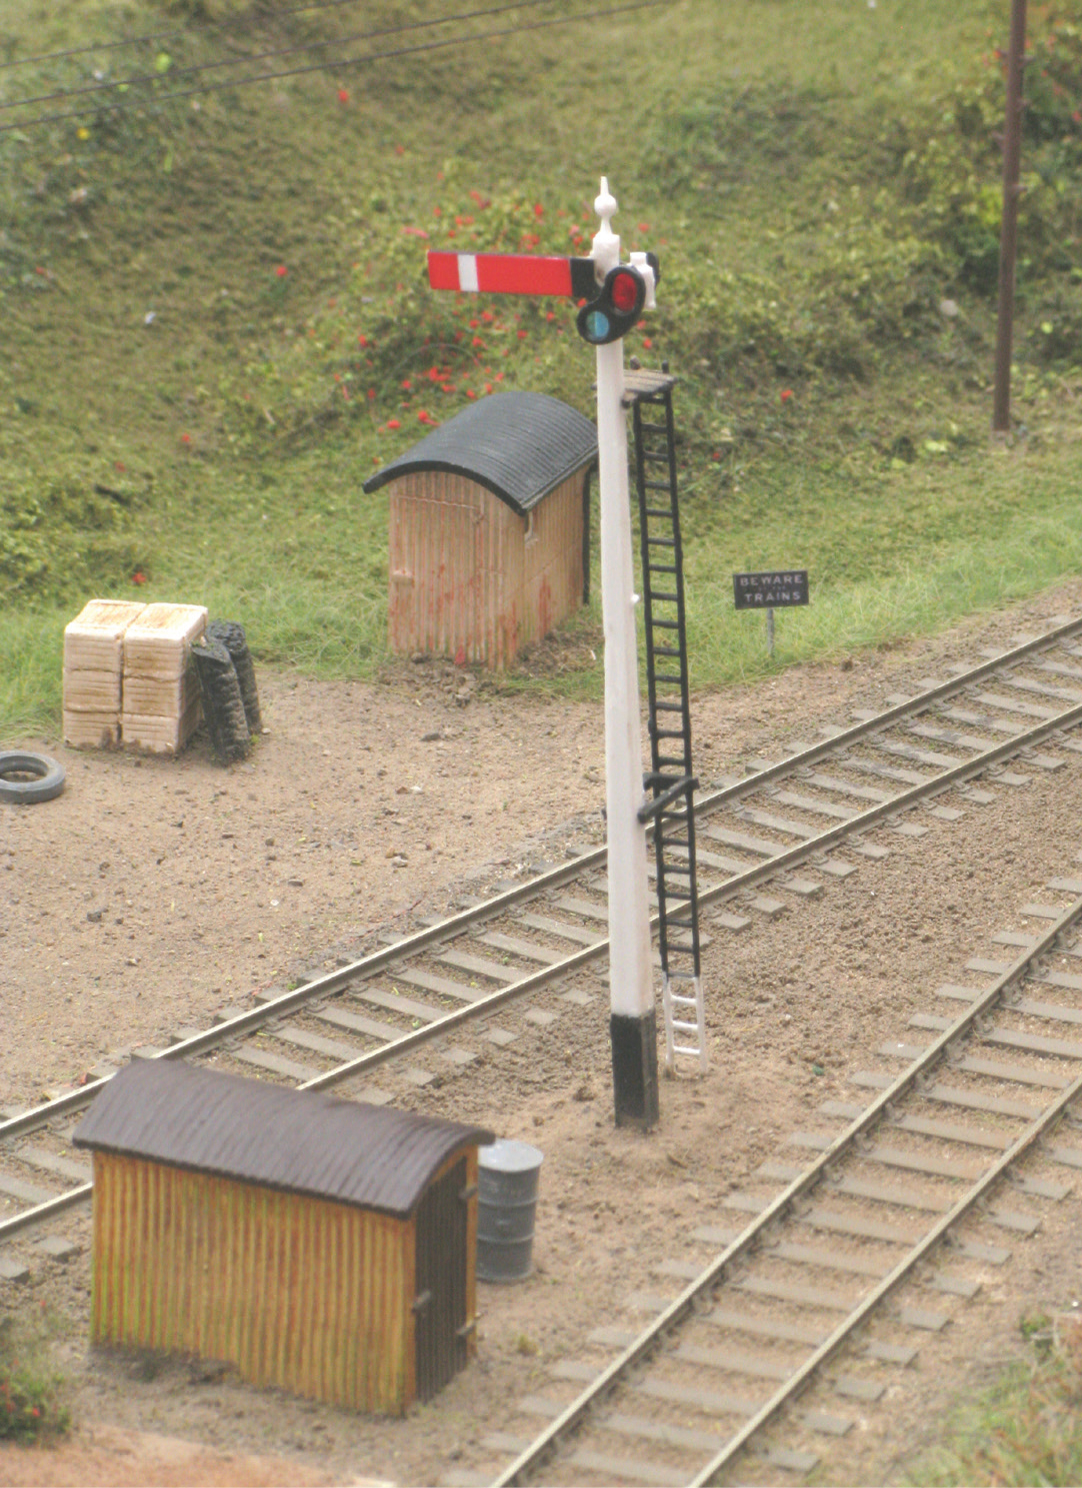
This end of the platform scene uses resin huts from Hornby Skaledale, plastic accessories such as pallets and oil drums, a Ratio kit-built signal and signs by Tiny Signs.
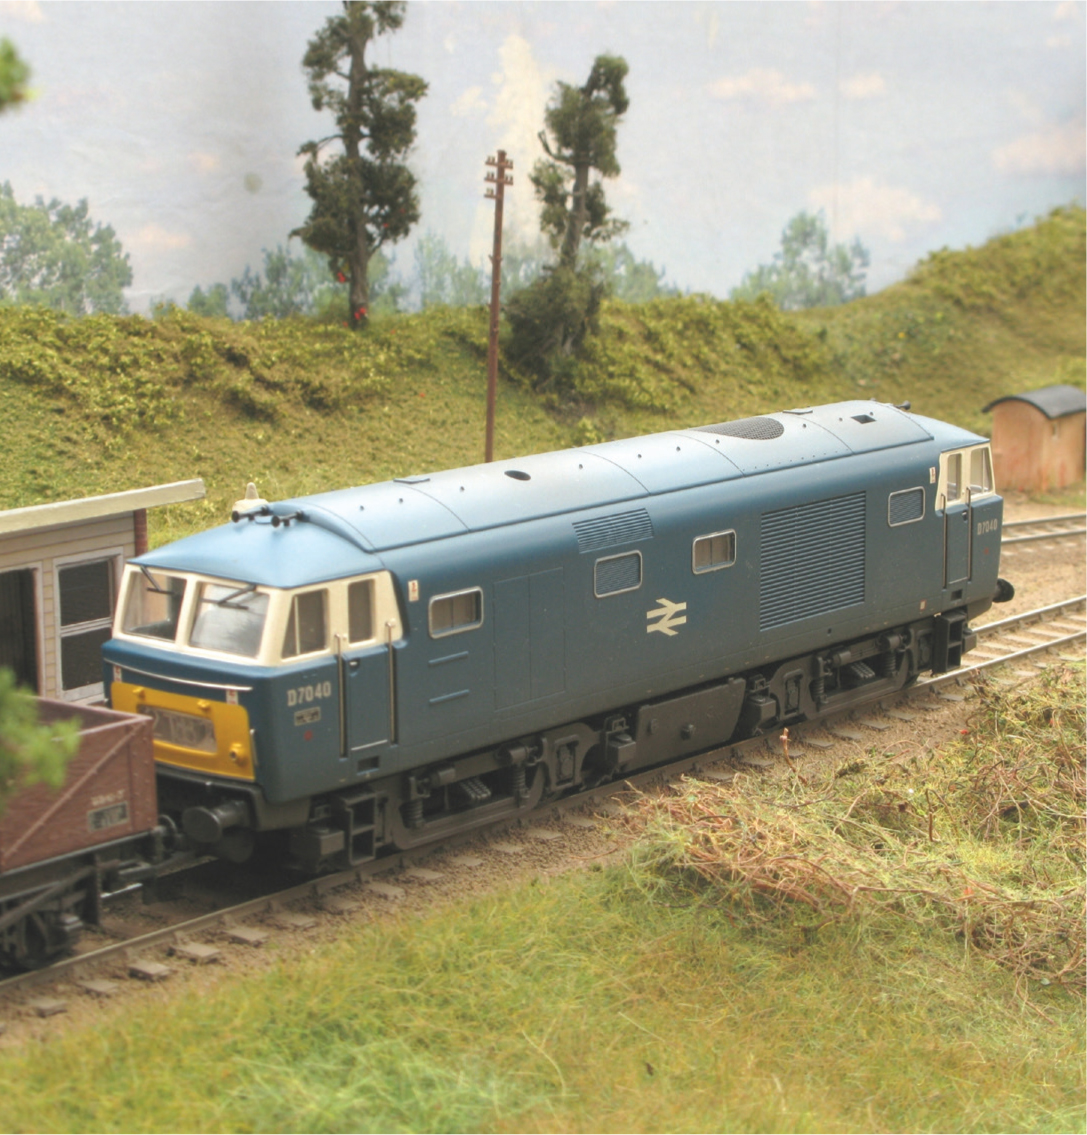
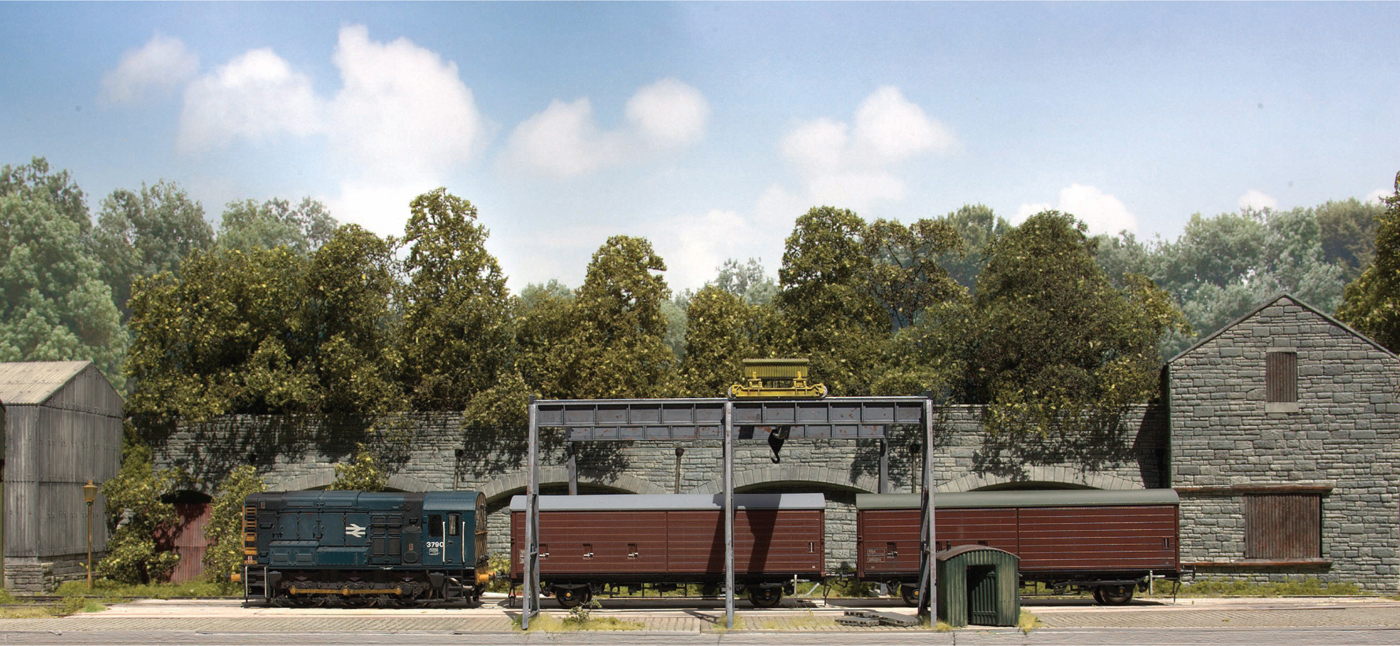
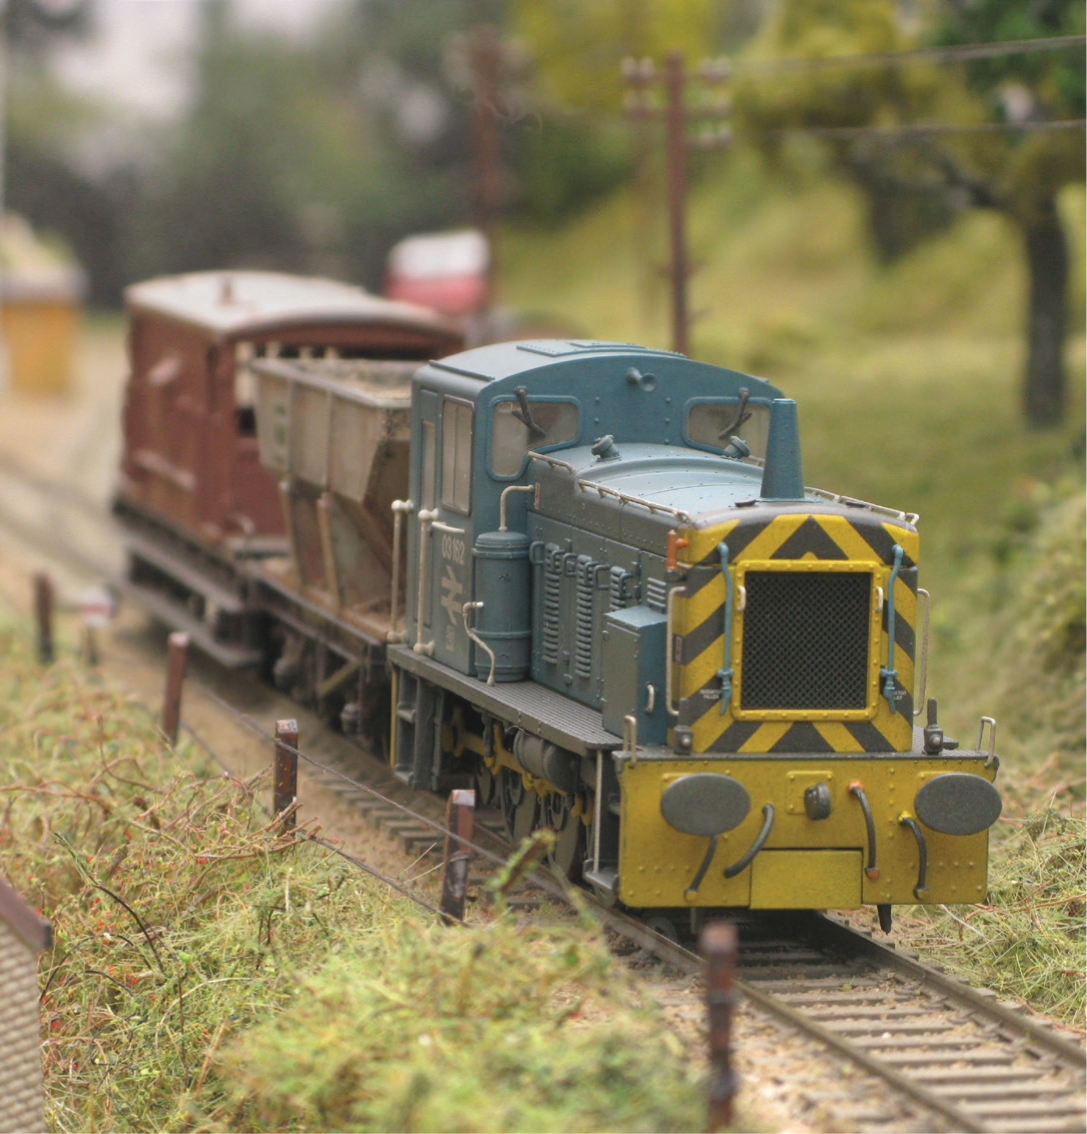
A Heljan Hymek trundles slowly through a rural scene in the days of the much-missed BR Blue era.