
A locomotive that has been improved by a light pass of acrylic paint from a Humbrol aerosol.
IMPROVING ROLLING STOCK
One hour spent detailing a locomotive makes a big difference to the look of the model.
Locomotive models in all scales run better now than at any time in the history of the hobby. This applies to steam, electric and diesel locomotives. All-wheel electrical pick-up is now increasingly common on locomotives. Models run much more quietly and smoothly than they did some years ago. The days of stalling over the points are fading fast if the track is kept clean.
Rolling stock and locomotives are now very well detailed in all scales. Paint finish, lining, numbering and the application of liveries is generally very good indeed. Flush glazing is now common and rolling stock is available in weathered or unweathered finishes.
ADDING THE DETAILS
Many of today’s diesel, electric and steam locomotives arrive with a small plastic bag containing detailing parts to be fitted by the purchaser. Some purchasers choose to fit the detailing parts to their locomotives, while others do not. In this section, we show that it is fun to fit the parts and the models look so much better as a result of an hour or so of work. The more nimble one’s fingers, the better for this task.
Whilst most collectors and modellers agree that the locomotives do look better with the parts attached, there are various reasons why purchasers decide not to fit them. Collectors of locomotives prefer to keep their models in ‘mint and boxed’ condition. Some modellers choose to operate their locomotives with tension-lock couplings on both ends of a model for easy shunting. If the tension-lock couplings are left on the locomotives, it is generally not possible to add all the detailing parts. Some of the parts are rather fiddly to fit and thus some modellers consider that the effort of adding them is not worth the trouble.

A locomotive that has been improved by a light pass of acrylic paint from a Humbrol aerosol.

The level of minute details on today’s models is superb. This is the destination board on a Rivarrossi HO-scale model of a TEE Gotthardo electric multiple unit.
Locomotives come with a different array of add-on parts. For example, a Bachmann ‘Thunderbirds’ Class 57 locomotive comes with the following additional parts to be fitted: two nameplates; two roof aerials; and six pipes for each cab end. A Bachmann Collectors Club Class 85 locomotive comes with five detailing pieces to be added on each end, plus nameplates and depot plaques.
For the purpose of this chapter, a Hornby Colas Class 66 locomotive and a Bachmann Class 85 locomotive are used to illustrate the techniques. Similar methods can be used for diesel, electric and steam locomotives.
DETAILING THE LOCOMOTIVE
The first task is to look carefully at the leaflet showing the assembly details of the particular locomotive. Get familiar with the instructions before you start work on the detailing process. Locomotive models have various small holes in the buffer beam, cab front, cab roof and bogie to push the parts into. Not all locomotives have the same number of holes or bits and pieces to add. At its simplest, it is just a matter of pushing the right detailing part into the right hole.
Work out the order in which you will add the parts to the locomotive, so that the parts you fit first will not obscure your view when working with the other parts. Work on one end of a locomotive at a time. If the detailing parts come on a plastic sprue, cut the appropriate number of parts from the sprue using a sharp craft knife over a self-sealing cutting board. Put the tiny pieces aside in the order that you will fix them to the locomotive.
Use a pair of fine-nosed tweezers to hold the piece and push the ‘plug’ on each part into the correct hole. Sometimes it is possible to use your fingers to do this instead of the tweezers. Occasionally, I find that some of the holes on the locomotive are a little on the tight side and need to be expanded with a very small diameter file. Another way of doing this is to remove carefully a little plastic from the ‘plug’ on the part with a sharp craft knife or a small file. Ensure that the ‘plug’ is pushed well into its hole, then dab a little plastic cement on to the join with a small, fine paintbrush to make it secure.
When the pipes are fixed firmly to the locomotive – the adhesive usually dries in well under an hour – the connections on the pipes can be highlighted using yellow or orange acrylic paint as appropriate. Look at photos of the real thing to see which pipes are painted which colour. Some of the more recent locomotives come with ready-painted pipe connections, which saves time. Adding the roof-mounted air horns and hood-mounted aerials (if supplied) is simply done by putting a little plastic cement into the hole with a very fine paintbrush, then pushing home the aerials (be careful that they are vertical) and horns.
The purchaser can choose whether he wants to fit the parts on both ends, or just one. Many modellers choose to detail just one end of the locomotive and leave the tension-lock coupling on the other end. Sometimes the add-on plastic parts are made from shiny plastic that might benefit from a little repainting with matt acrylic paint, or weathering with chalks or aerosols or airbrushing.
Where manufacturers supply nameplates, they sometimes usefully print a location guide on the side of the locomotive. These guides make the fitting of nameplates a lot easier. It is necessary carefully to cut the nameplates from the metal strip, then fix the plate to the locomotive side with a small amount of superglue.
This detailing work on one end of a locomotive usually takes about one hour. I have found that locomotives with the detailing parts added give a lot of satisfaction to the person who has done the work. Go on, give it a go!
WHAT SKILLS ARE NEEDED?
A little bit of patience is needed to read the instructions thoroughly rather than rushing ahead and fitting a part in the wrong position on the locomotive, then having to remove it after the glue has dried. Learning which pipes go where is best done by looking at photos of the real thing.
A steady hand is required to position the add-on parts. You may find that one of those fixed magnifying glasses works well when doing this. You must be able to work with small drops of adhesive to ensure that it does not get on to other parts of the model and also be able to paint carefully with micro-paintbrushes, masking other parts of the model where corrective painting or varnishing is necessary. Small drills are required for drilling out holes in the buffer beam that need to be opened up a little to take the add-on parts. Working with very small parts can be learnt and tweezers are useful for doing this.
TOOLS AND MATERIALS
Tools and materials needed for adding loco details consist of:
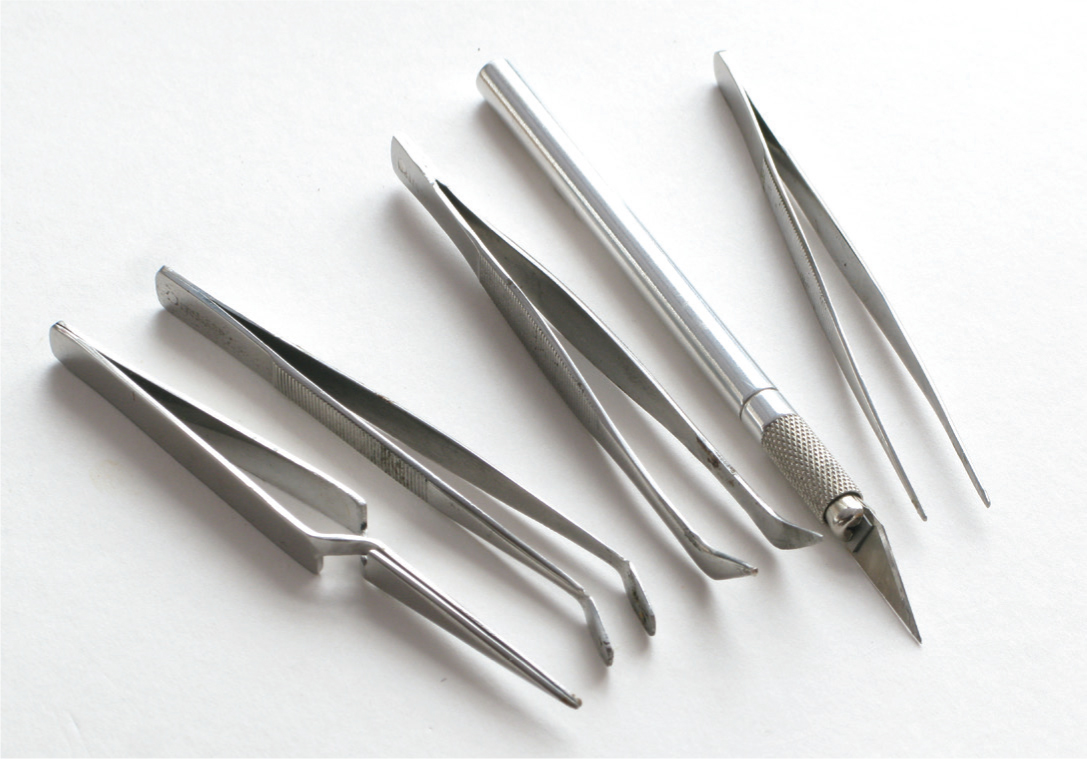
A selection of four pairs of tweezers and a craft knife for work with locomotive add-on parts.
Most manufacturers supply a pictorial guide with each locomotive, showing where the parts are to be inserted on each of their models. The Bachmann website, for example, features its instruction leaflets at: http://bachmann.co.uk/service/assmbly.php.
Before starting work on detailing any locomotive, it is worth referring to the various prototype motive-power books and magazines that are available. These books contain illustrations showing where to fix the various pipes, nameplates, air horns, buffer-bar details and so on. These include Cades Locomotive Guide, which provides information about all British outline models (for more information, see www.cadeslocomotiveguide.co.uk) and the Modern Locomotive Illustrated series (www.mli-magazine.com), which contains good pictures of buffer-beam details.

A Heljan OO-scale Class 26 locomotive with all the buffer-beam details fitted.

The front end of a Hornby OO-scale Colas Class 66 locomotive straight out of the box. Note the tensionlock coupling, holes in the buffer beam and cutaway snowplough/obstacle deflector.

The first step is to remove the cutaway lower front plate, which is a ‘push-on’ feature. The lower front end plates that are fitted to the locomotive enable a tensionlock coupling to be used on both ends of the locomotive. By removing this and fitting the full one, you will no longer be able to use tensionlock couplings.

Next, slide the coupling upwards out of its ‘box’. The coupling is not glued in, so it is quite easy to remove.
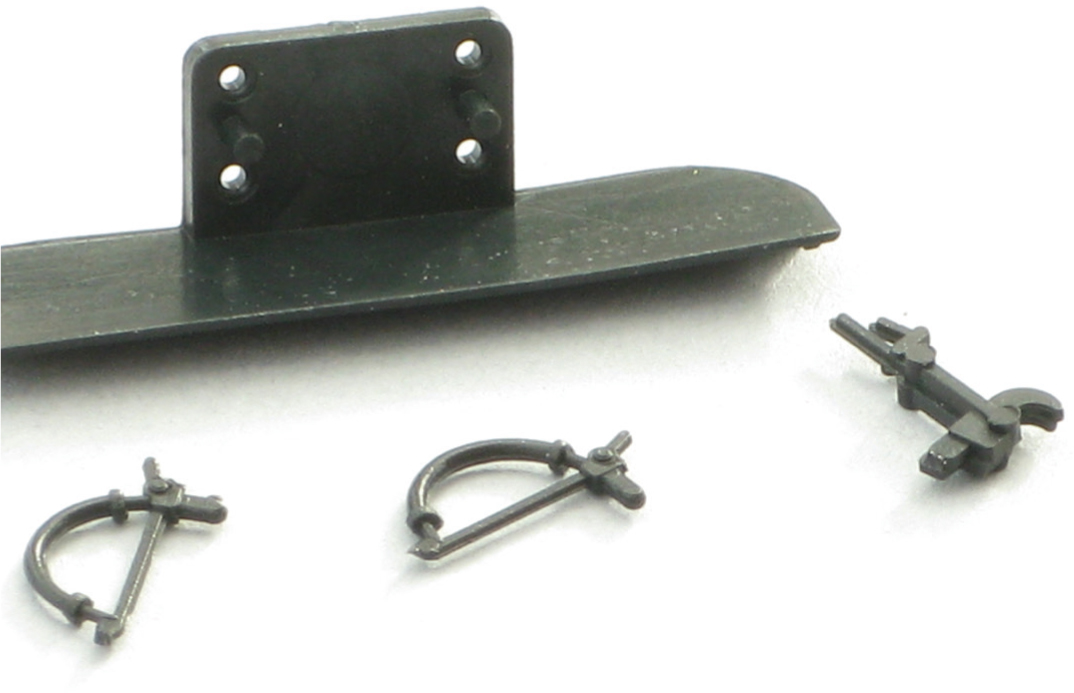
There are the four add-on parts – three pipes and one full-front lower plate that are all moulded in black plastic.

Here is the front of the locomotive after fitment of the detailing parts.
This project required very little time, money and expertise, but really improved the look of a ready-to-run diesel multiple unit (DMU). Similar techniques can be applied to other items of rolling stock. I used a Hornby OO-scale London Midland refurbished Class 153 single-car DMU model as the basis for this project. This model is available in a number of liveries in OO scale and a model of the Class 153 unit is available in N scale by Dapol.
London Midland’s fleet of single-car DMU Class 153s has been used extensively on the Coventry to Nuneaton line and between Bedford and Bletchley. Some of these units were cascaded to Devon and Cornwall, so LM-liveried units have been seen running in the West Country too. The units were upgraded by Wabtec Ltd at Eastleigh to include better cycle storage, information screens and CCTV, in addition to interior and exterior refurbishment.

A Hornby London Midland Class 153 unit before work on it commences. The black Tamiya paint will be used to paint the edges of the snowploughs and the masking tape used lightly to protect other parts of the model when painting is under way. There are weathering chalks and applicator by Tamiya, as well as micro-brushes to be used for the fine painting.

London Midland Class 153 354 at Woburn Sands station on its journey from Bedford to Bletchley on 22 September 2010.
For this quick project, these materials were used: matt black Tamiya paint to paint the edges of the snowploughs/obstacle deflectors; masking tape to protect lightly other parts of the model when painting and weathering; weathering chalks and the supplied applicator by Tamiya for the dusty effects; and micro-brushes for fine painting.
The first time I saw the Hornby Class 153 model I thought that the thickness of the plastic snowplough (or obstacle deflector) marred the look of the model, so I set about thinking how to remedy this. I used a micro-paintbrush to paint the flat edges of the snowplough black, which certainly went some way to disguise the thickness of the plastic moulding. I also weathered and added dust to the snowplough and grilles and details on the lower bodywork using a Tamiya foam applicator to rub on the chalk. I used the other end of the Tamiya applicator to brush off any excess chalk. The result is so much more realistic than shiny plastic.

A view of a pristine Hornby Class 153 London Midland single-car DMU. In my view, the thickness of the snowplough mars the look of the model, but it is quite easy to remedy this.
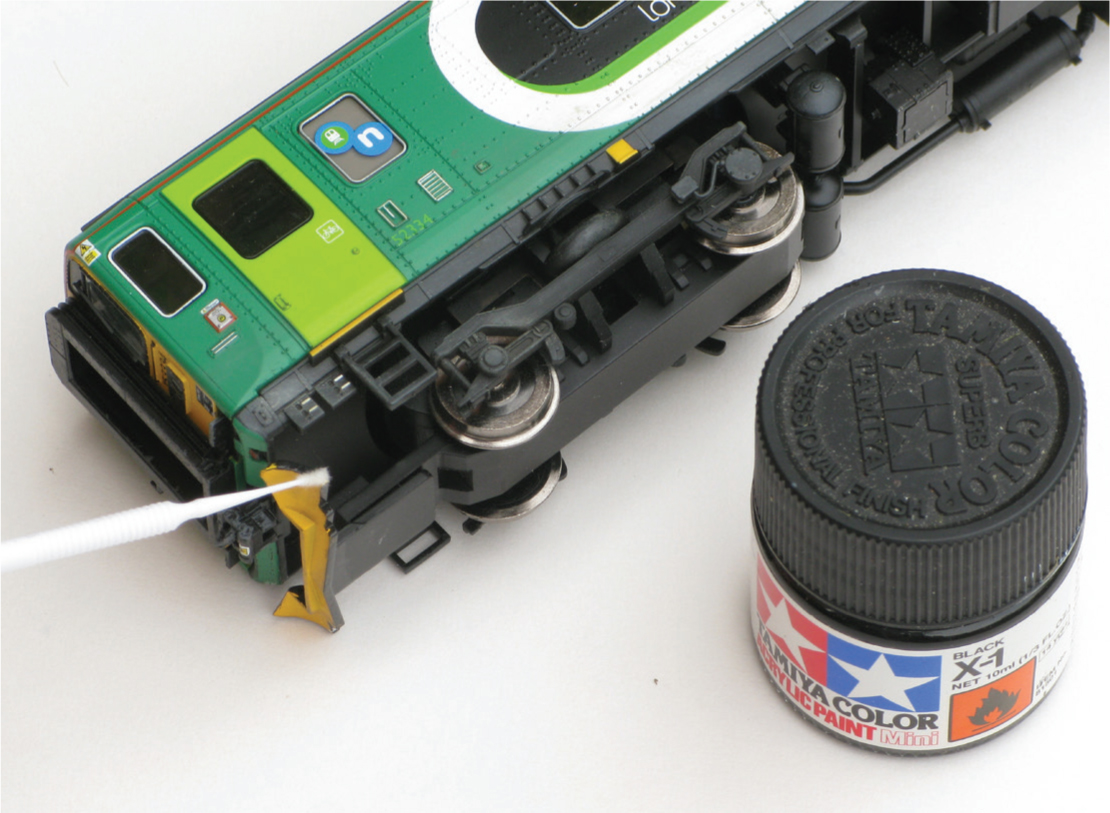
Using a micro-paintbrush to paint the edge of the snowplough. This is arguably the trickiest part of the process, but with a steady hand each end is only a five-minute job.

Here is the snowplough after painting and weathering. The thickness of the plastic is definitely not so obvious now and the weathering makes the front end of the DMU look better.

To weather and add dust to the grilles and details on the lower bodywork, I used a Tamiya foam applicator to rub on the chalk.

I used the other end of the Tamiya applicator to brush off any excess chalk. If you are not using Tamiya weathering chalks, alternatives to their supplied tool are make-up removal ‘tools’, which are basically a little foam cap on the end of a piece of short plastic and a soft paintbrush.
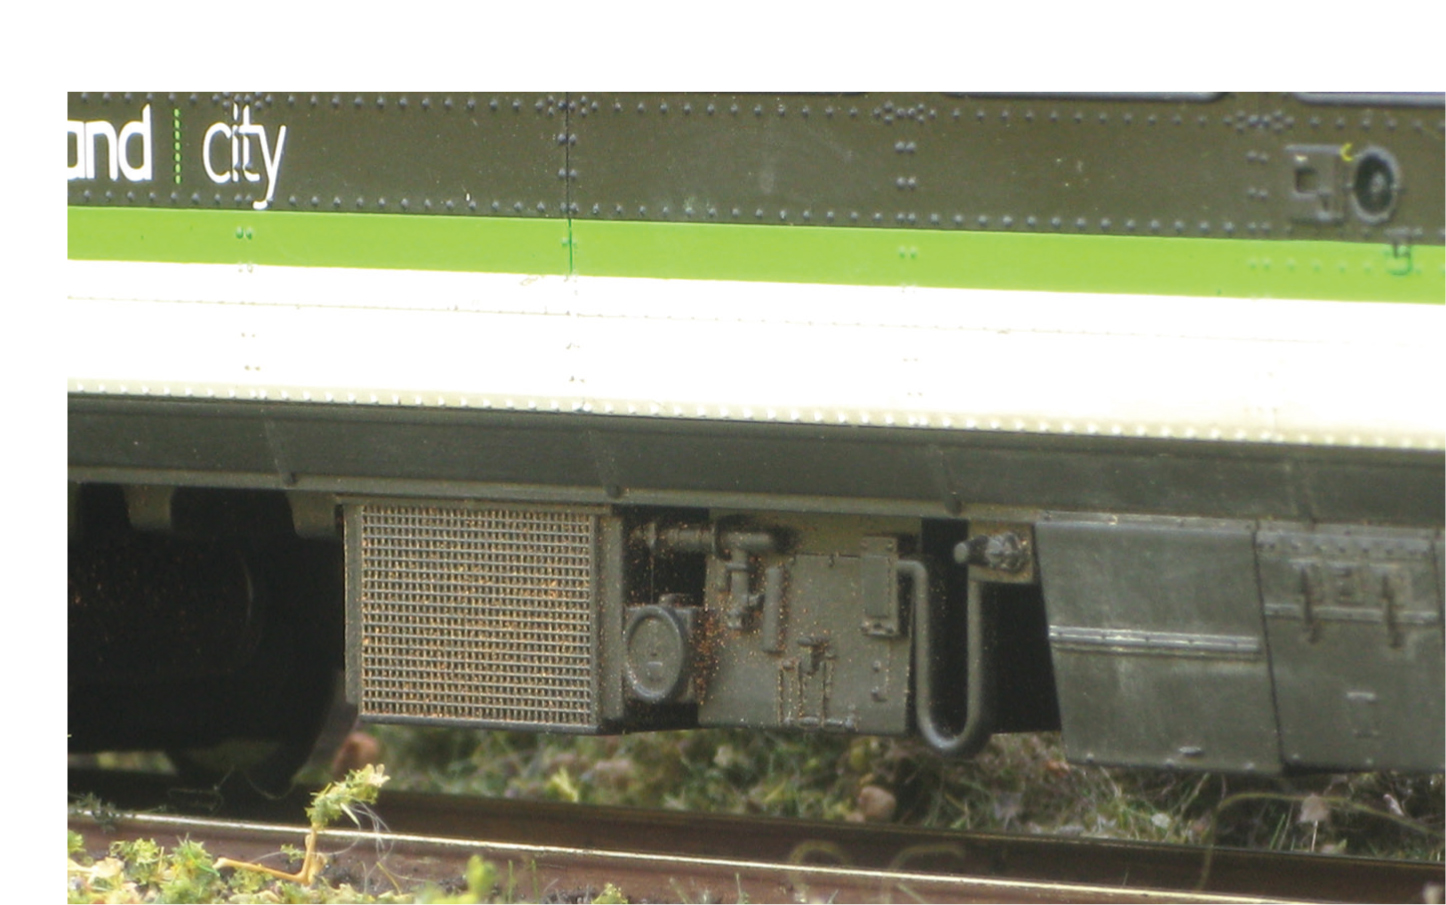
Here is the effect after the chalk has been applied. It looks much more realistic than shiny black plastic.

The front of the unit shows the more discreet snowplough, some weathering around the corridor connection and the general light weathering.

An overall view of the Hornby Class 153 unit after it has been ‘toned down’ by light weathering on the lower body side.
On the ends of the unit I also weathered the door frames with weathering chalk to give the illusion of gathering dirt from the air as the unit travelled along. Finally, weathering chalk was lightly rubbed along the roof too, so that any shine on the model was removed.
The work on the unit took around an hour and cost less than £1 and I am now so much more pleased with the model. I could have gone on to make other adjustments, like fitting a finer-scale replacement snowplough and using matt or satin acrylic varnish aerosol to finish off the model, but I was content with the model after the changes I had made. I thoroughly recommend George Dent’s excellent Detailing and Modifying Ready-to-Run Locomotives in OO Gauge books published by Crowood for more information on improving locomotives.
THE SKILLS REQUIRED
This really is a beginner’s project and requires just looking at the real thing to see what improvements are possible, then painting with a fine brush and weathering with chalks.
TOOLS AND MATERIALS
Tools required for improving the look of a DMU consist of:

Handling the small add-on parts becomes easier after you have decided which pair of tweezers suits you best.

Micro-paintbrushes are really useful for this type of work because they can supply small amounts of paint in a precise way.

The Bachmann USA OO-scale model of Toby looks rather toy-like, but it can be worked on to improve its realism.
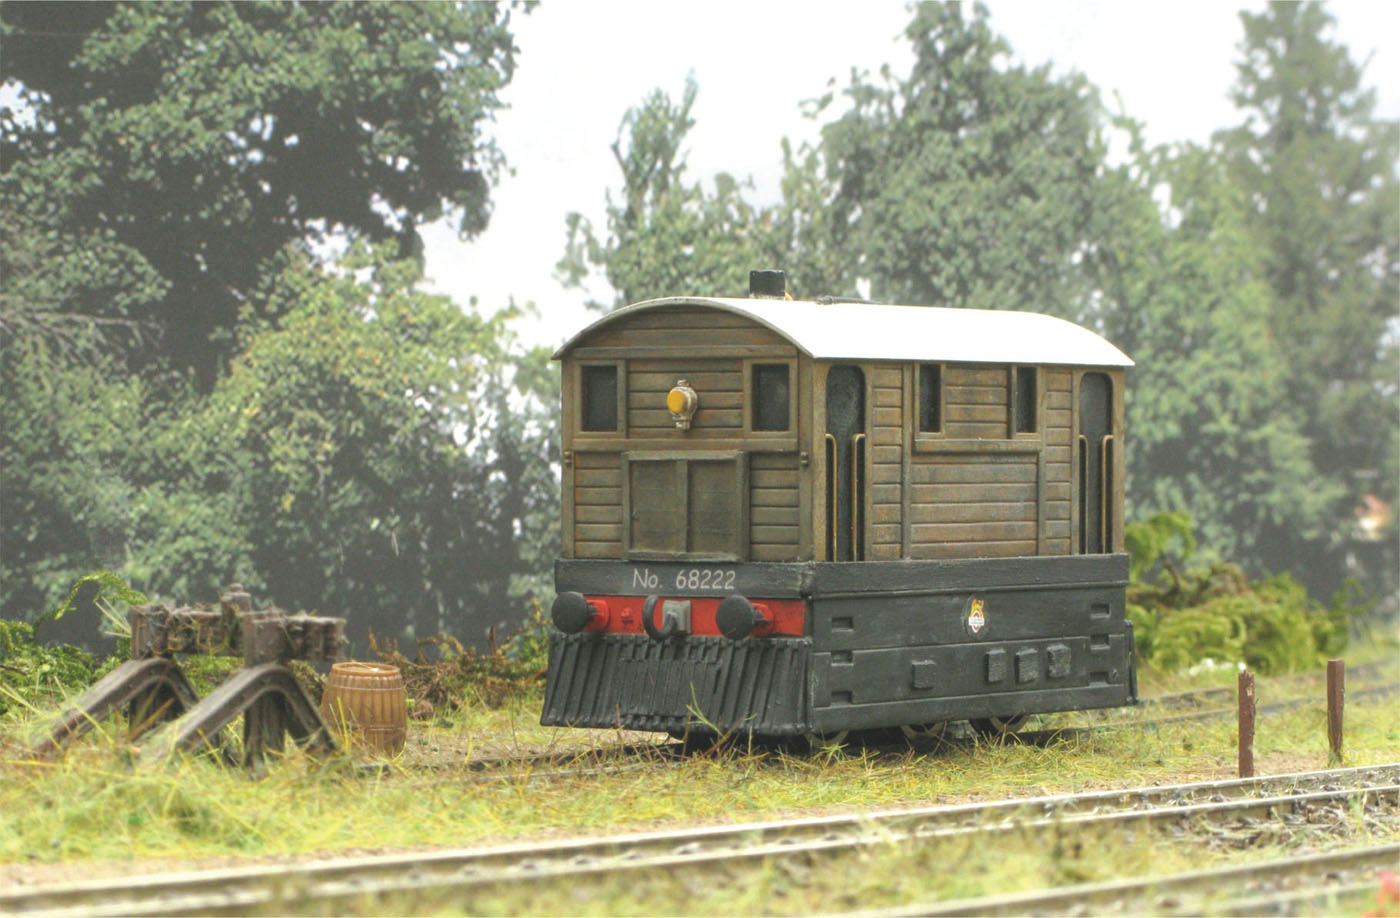
Toby, as seen in the previous picture, after some detailing, repainting and weathering. Though its toy origin is still evident, it does give a fairly decent representation of an LNER Tram locomotive.
DETAILING A BACHMANN CLASS 85 LOCOMOTIVE

A Bachmann Class 85 Collectors’ Club locomotive straight out of the box with the small packet of detailing parts to the left and the instruction leaflet.
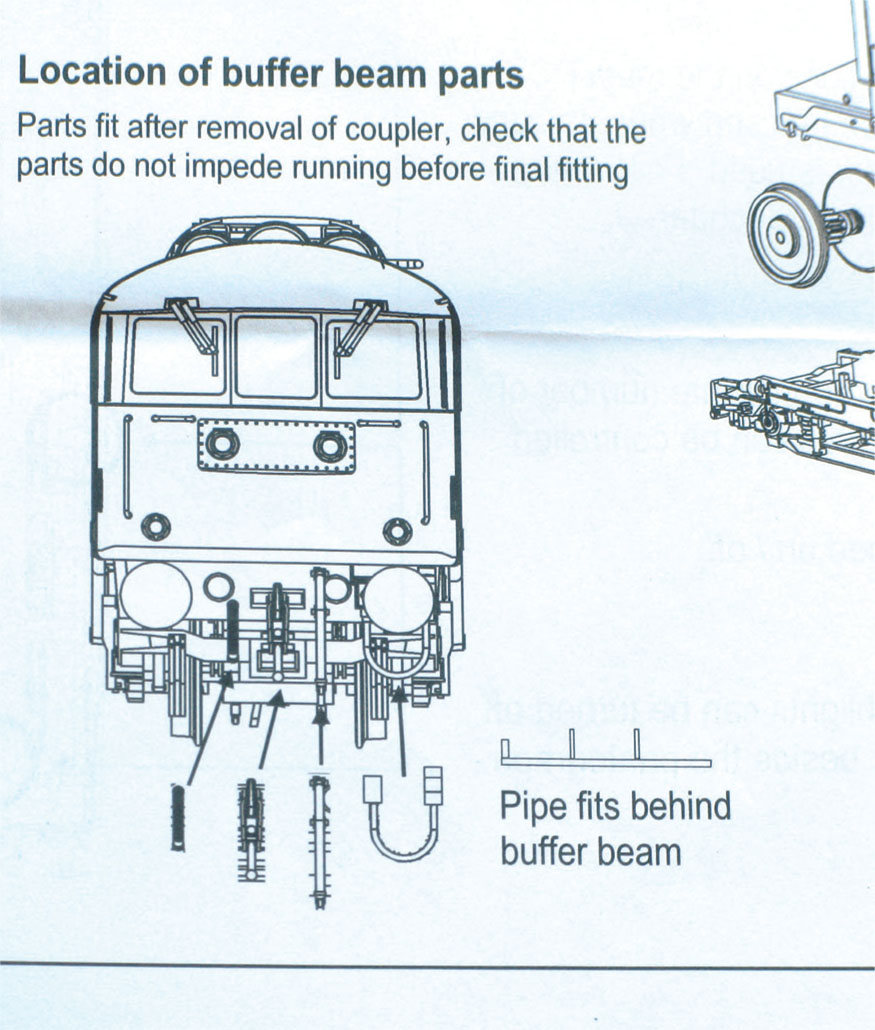
Close-up of the instruction leaflet showing the diagram relating to the fitment of the detailing parts.
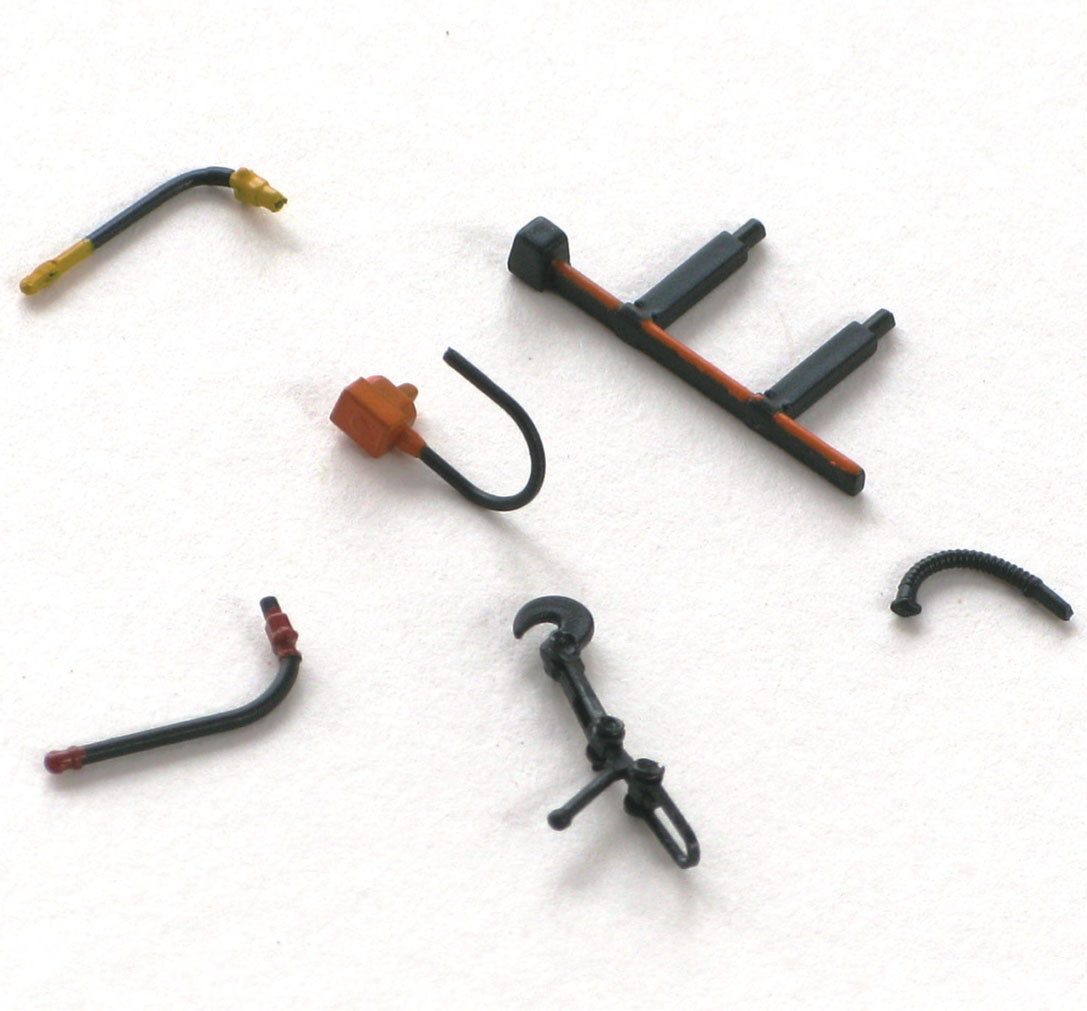
These are the six parts to be fitted to each end of the Class 85 locomotive.
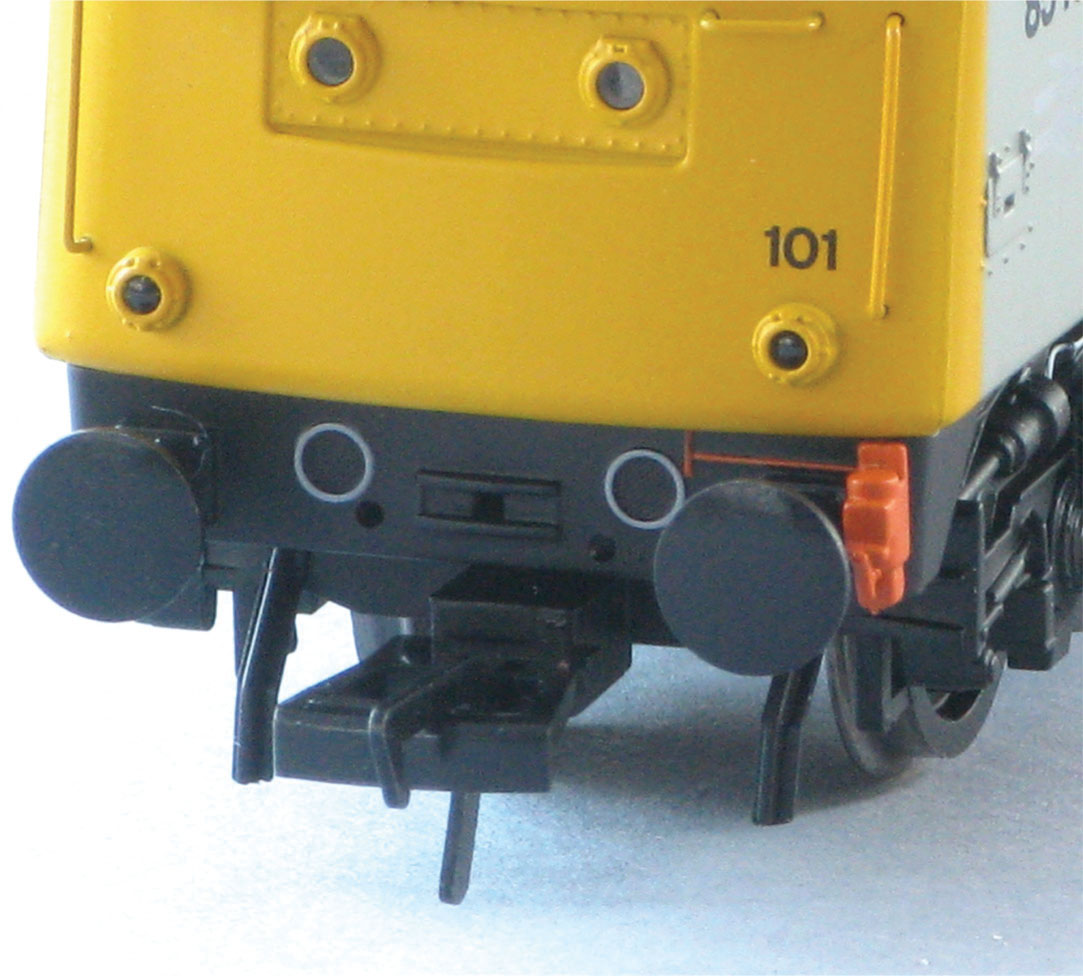
The Class 85 as it comes straight out of the box. Note the ready-drilled holes in the buffer beam. If the tension-lock coupling is to be retained, not all of the detailing parts may be added.
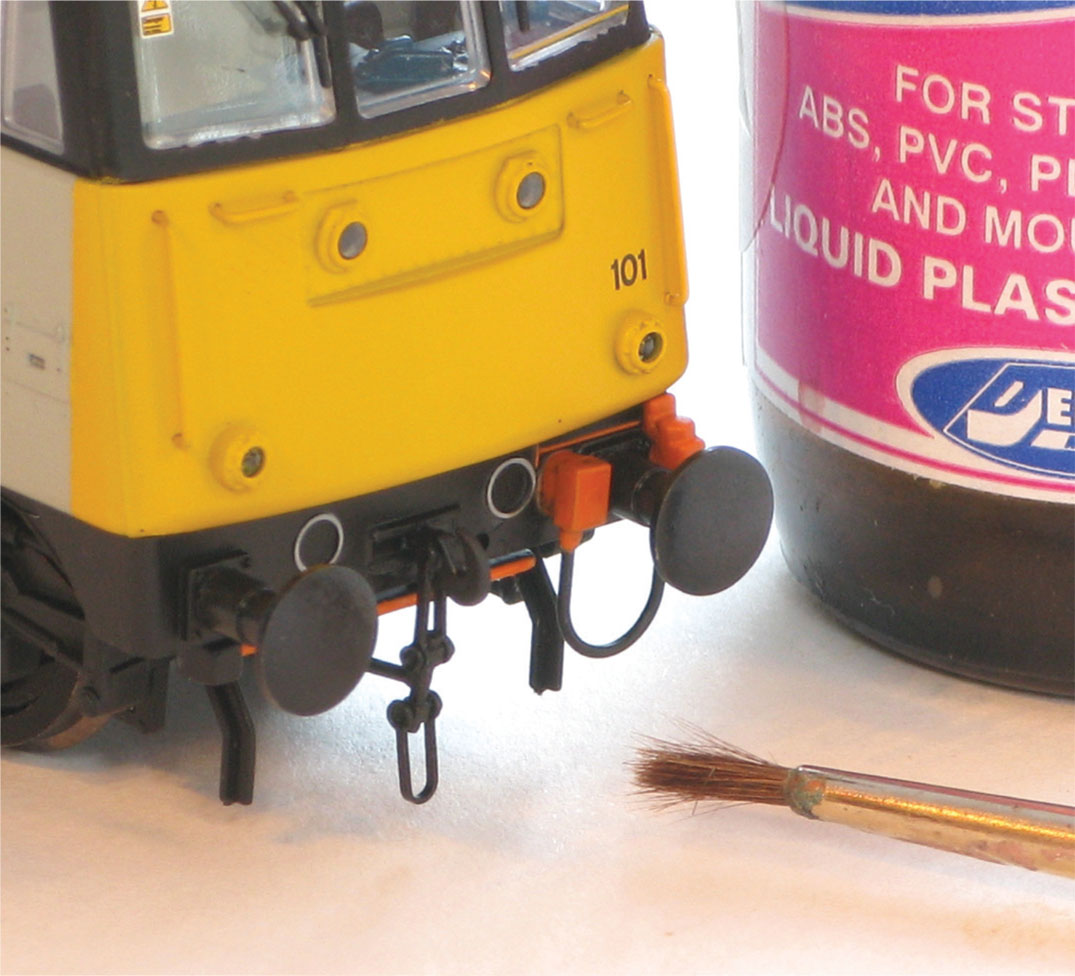
Once the parts are added to the buffer beam, drop a small drop of plastic cement on to the join to fix the part firmly to the locomotive.
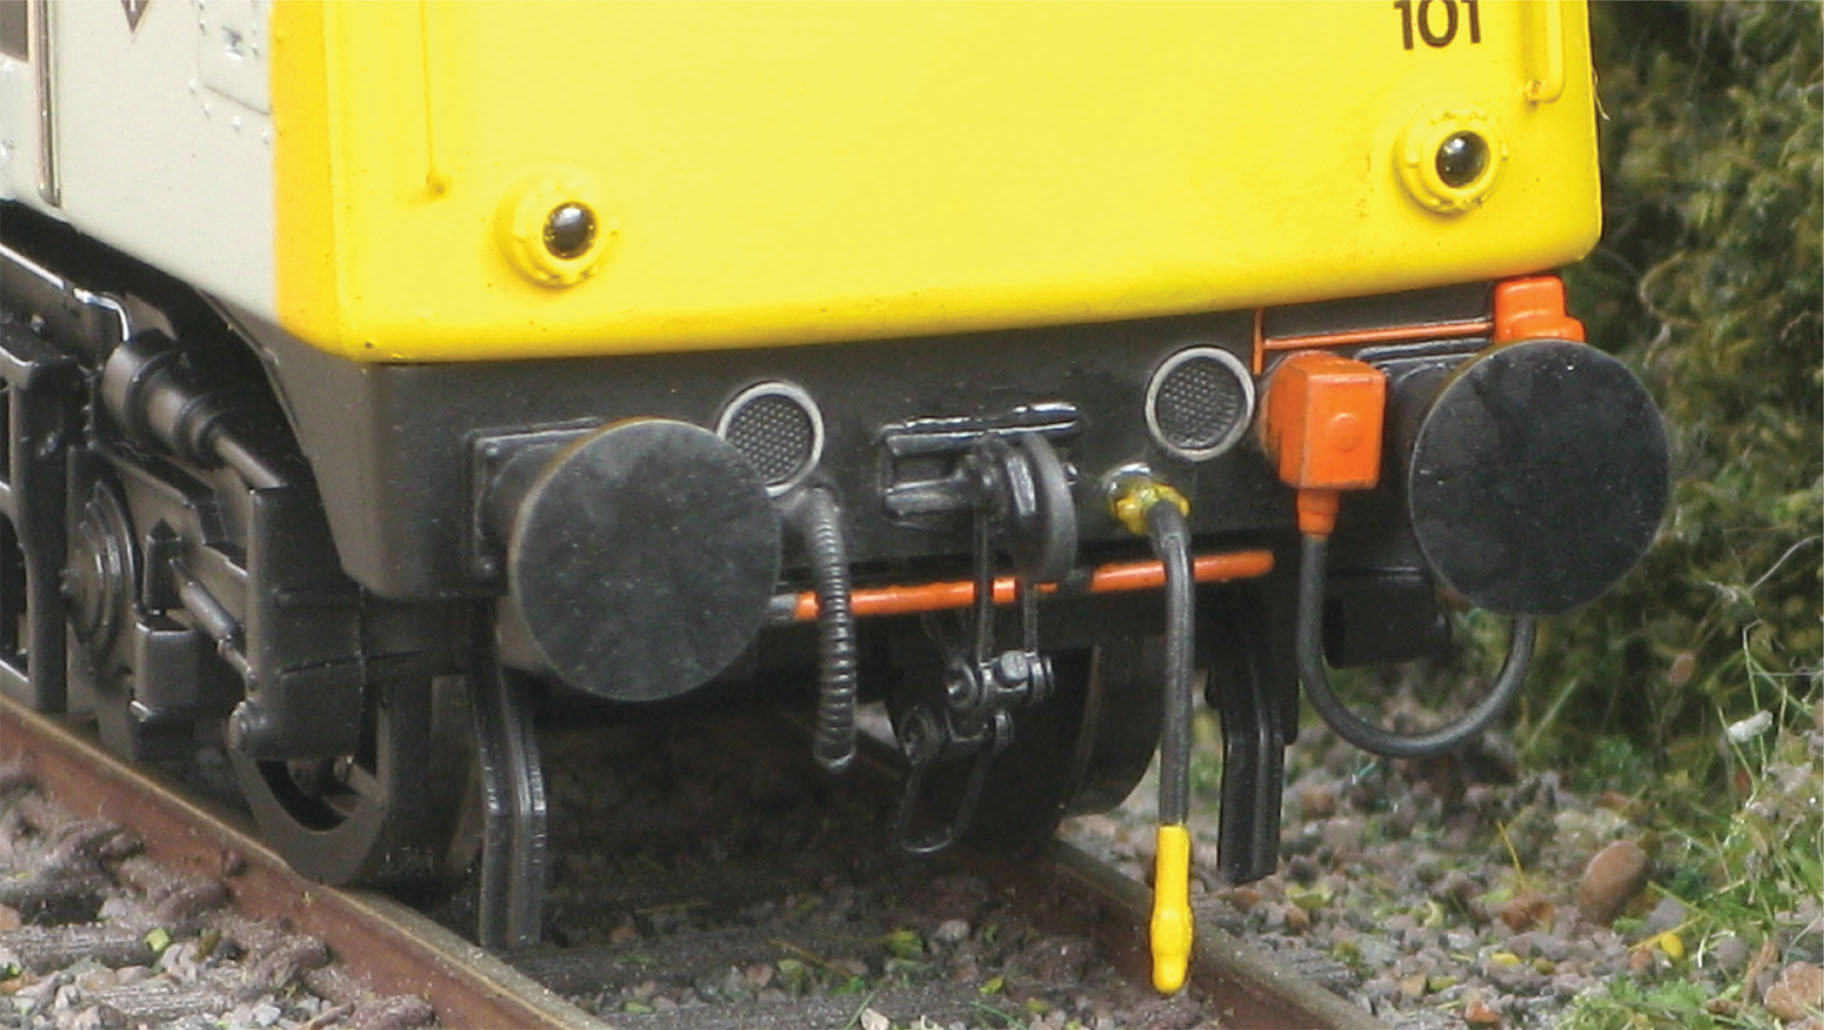
The Class 85 locomotive with the details added. I used just a couple of drops of Woodland Scenics black colour pigments on the tip of a small paintbrush to hide the excess adhesive on the buffer beam.