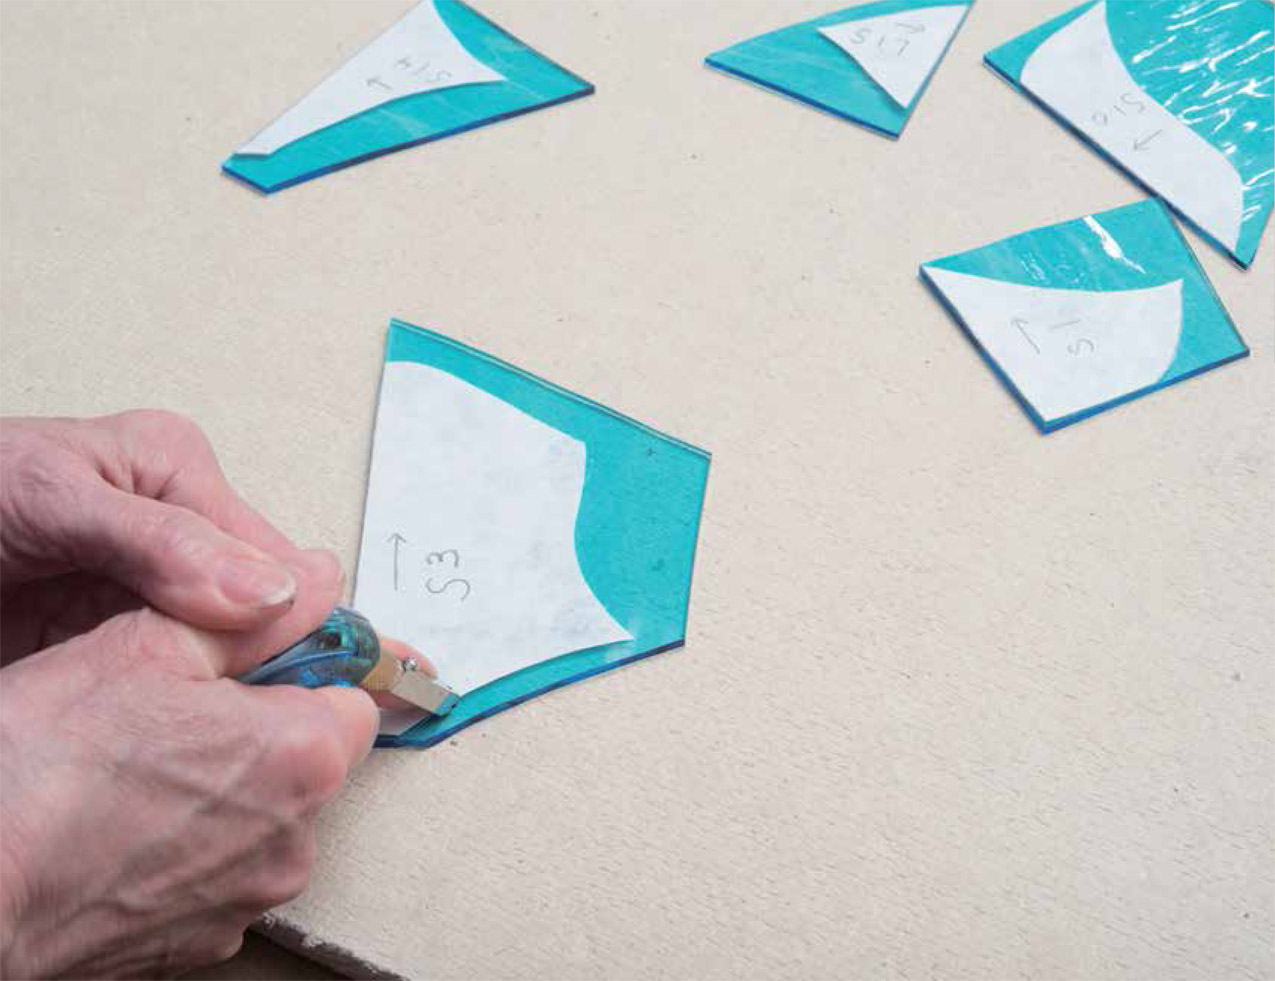

FOR MOST PEOPLE, THEIR FIRST GLASS CUTTING EXPERIENCE can be rather intimidating. Some may be concerned that the glass will shatter into many pieces, while others will be wary of cutting themselves with sharp glass edges. In reality, glass will break easily along your score lines if you take the time to learn the proper techniques. While it is possible to nick your fingers when cutting stained glass, careful handling of glass and its scraps will keep those events to a minimum.
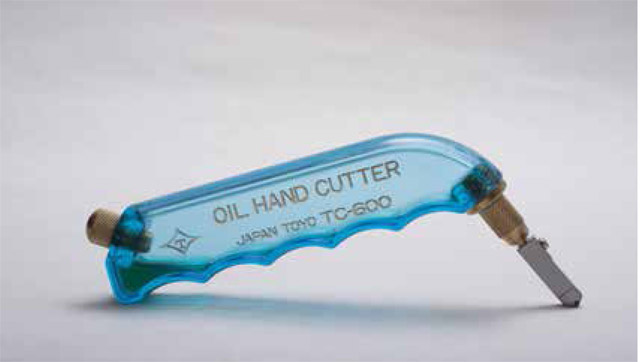
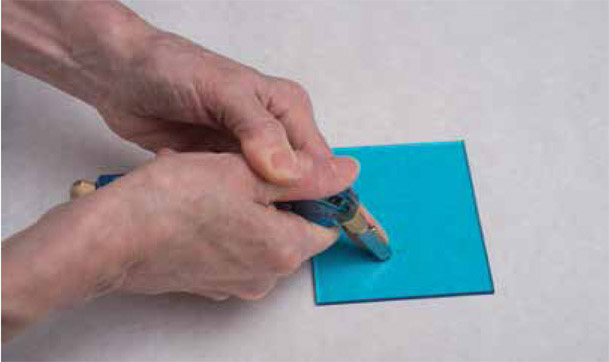
We use the term glass cutting, and we use a tool called a glass cutter, but in actuality we are simply scoring the glass. This means we scratch the surface of the glass with our cutter; then we break the glass using either our hands or a tool. Glass is created by mixing sand, or silica, with other minerals, and heating them to a very high temperature. When the glass has been properly cooled, you can separate the microscopic particles on the glass surface using a tungsten carbide cutter wheel. Your score line creates a weak point in the glass that can be easily broken using the methods described in this chapter.
Learning proper scoring and breaking techniques is one of the most important steps in stained glass work. As you develop good skills in this area, you will find that the quality of your other stained glass skills will also improve. Accuracy in each step will lead to the completion of quality art glass projects.
TRADITIONAL STEEL WHEEL CUTTER
One option is the traditional wheel cutter. If using this tool, you will need to dip it in cutting oil every few scores. To hold this style of cutter, place it between the first two fingers of your dominant hand and grasp the shaft of the cutter with your thumb and forefinger.
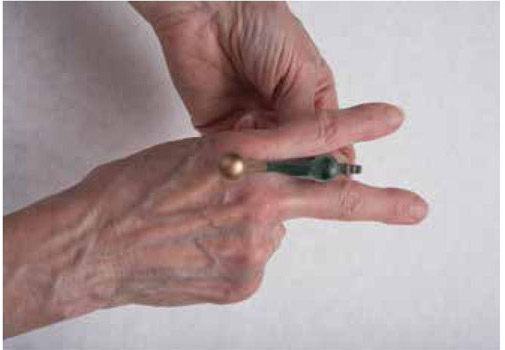
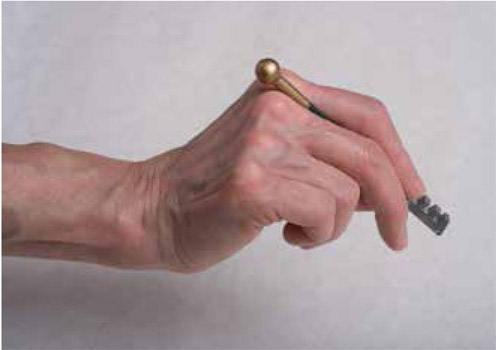
Place the thumb of your non-dominant hand on top of the cutter and your index finger along the cutting wheel. This style of cutter is used while scoring the glass toward your body.
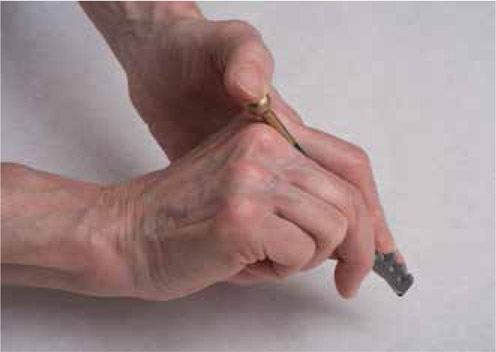
PENCIL GRIP CUTTER
A pencil grip cutter with an oil-fed tip can also do well for scoring stained glass. Hold the cutter in your dominant hand like a pencil and use your nondominant hand to help guide the cutter head. When scoring the glass, you will cut in the direction moving away from your body.
PISTOL GRIP CUTTER
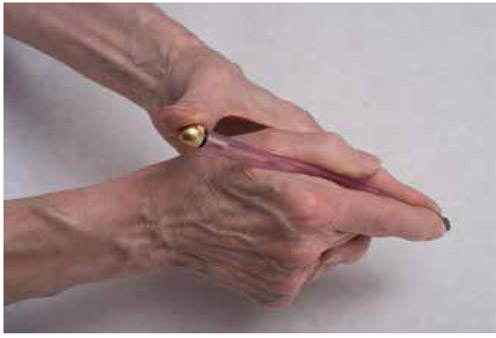
One of the most comfortable glass cutters is the pistol grip style. It fits nicely in your hands, and can be easily guided along the glass. Because of its design, even a beginner can cut glass for quite some time before developing any hand fatigue.
To hold a pistol grip cutter, hold it in your dominant hand and wrap your nondominant hand over the top. Extend your index finger from your nondominant hand down along the cutter wheel, which will guide it as you score the glass. When scoring the glass with this style of cutter, you will cut away from your body.
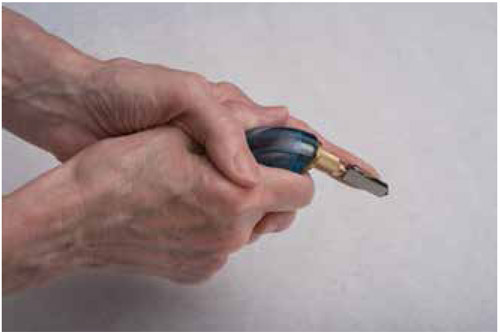
For safety, put on protective glasses. When cutting glass, you’ll want to set up your work area with a work surface, such as Homasote. This material will protect your work space, as well as provide a nonrigid surface that will have just a bit of give to it.
Stand up so that you are in a better position over the glass. Holding the pistol grip cutter as described above, make sure that the barrel of the cutter is parallel to your work surface.
Start with the cutting wheel up on the edge of the glass and glide with continuous pressure toward the opposite side of the glass.
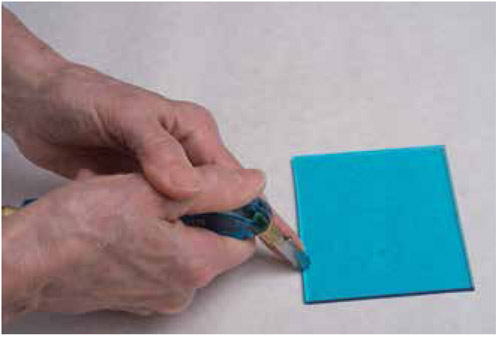
Just before reaching the other edge of the glass, lift the cutter about 1/16 of an inch from the edge so that the cutter head doesn’t chip the glass.
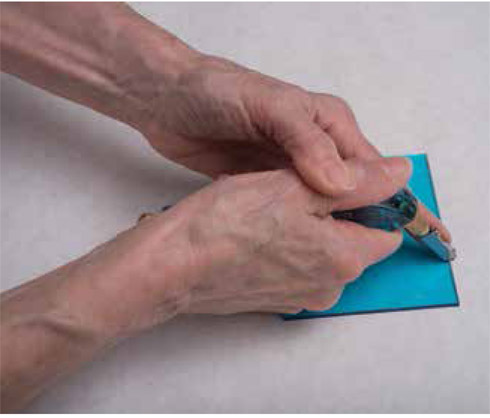
Here you can see a good score and a bad score; one that is too heavy chips the glass. The one on the bottom is just right.
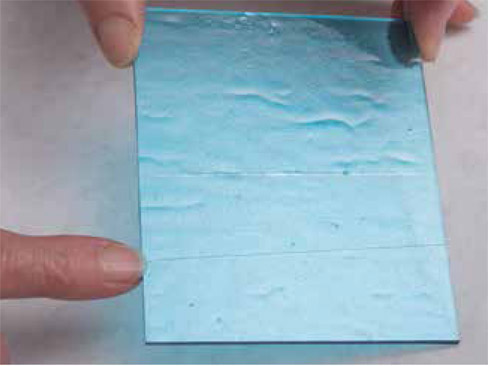
Notice that if you run the cutter over the edge when completing the score, the glass is likely to chip.
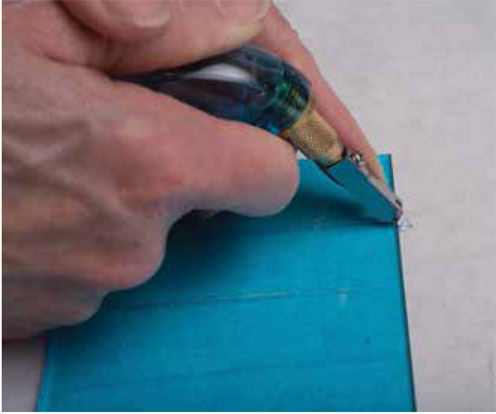
To begin your glass cutting session, assemble some scraps of glass. Window glass can be an inexpensive material to begin with that is also fairly easy to cut. You will want ten or twelve pieces of glass, cut into 3- or 4-inch squares to practice your skills.
Put on your safety glasses.
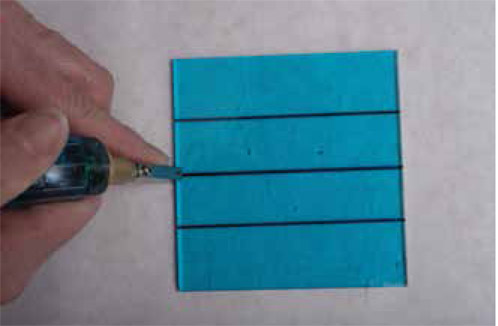
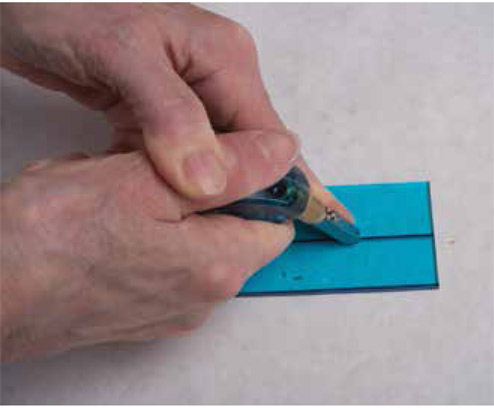
Take a square of practice glass and draw three straight lines on it with a permanent marker. Score the middle line first, centering the notch of the cutter wheel on the marker line. Remember to lift up just before you reach the opposite edge.
The easiest way to break a piece of glass is with your hands. Put your thumbs on either side of the score line at the base of the score, and curl your fingers underneath.
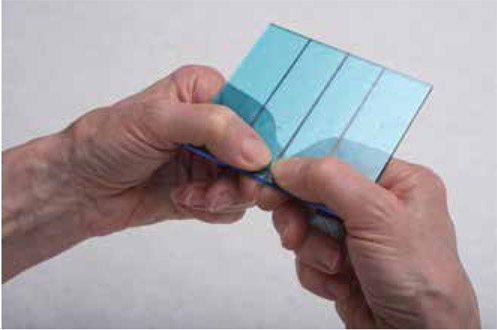
Push up with your fingers to break the glass.
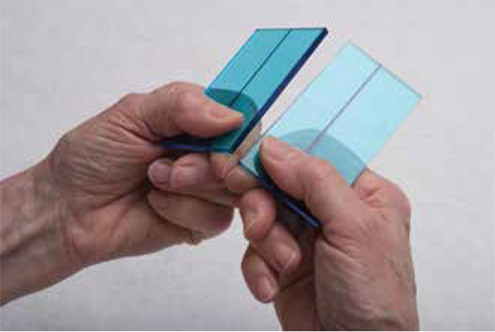
On a remaining section of glass, make a second score following the marker line.
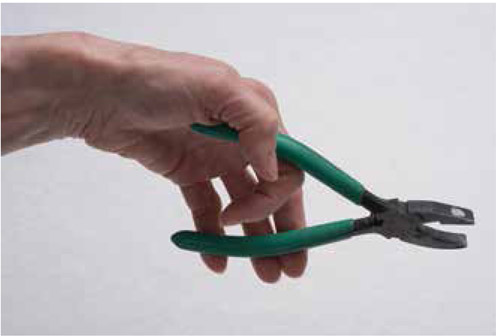
Here are grozing pliers. Notice that the bottom jaw is rounded and the top jaw is anvil shaped. To break the glass, keep the anvil side up.
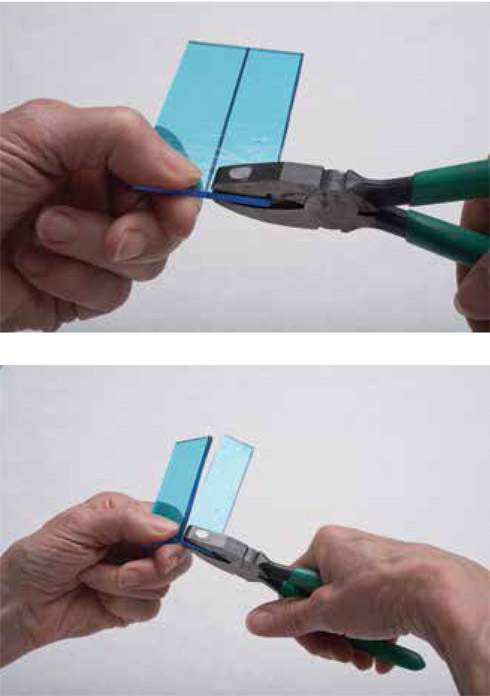
Bring the pliers in perpendicular to the score line at the base of the score, with your thumb on the opposite side. With the pliers and your curled fingers underneath, push up with your fingers to break the glass.
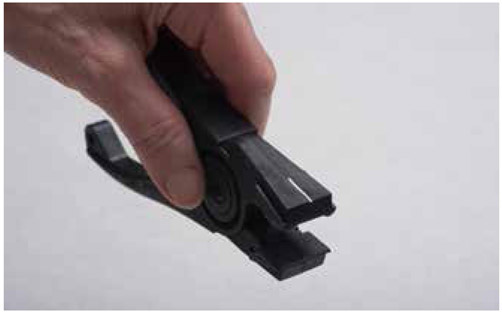
Make a third score and break this one with the running pliers. These running pliers have a line on the top to indicate that side faces up when breaking glass. Inside the pliers there is a bump that provides the leverage for breaking the glass.
Place the glass in the jaws of the running pliers so that the marking aligns with the score. The glass should sit in the jaws of the pliers about a quarter of an inch.
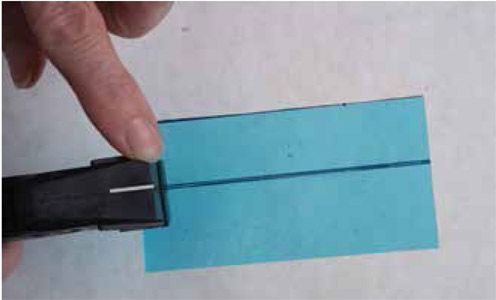
A gentle squeeze with the pliers will break the glass.
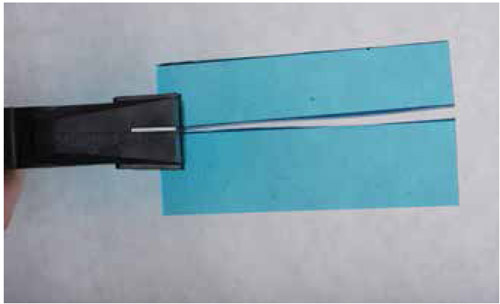
Here are basic cuts.
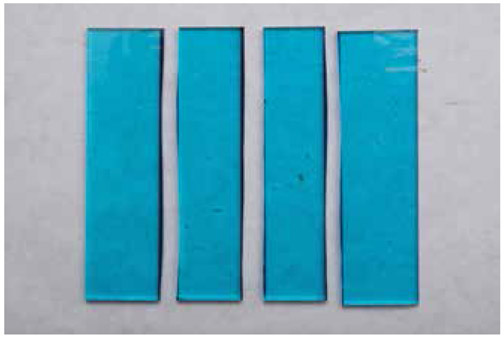
Now it’s time to practice cutting some shapes. Refer to chapter 13 for patterns of the practice shapes.
To cut out this shape, start at the edge of the glass, follow the design, and go to the opposite edge of the glass. Score and then break that line using your hands.
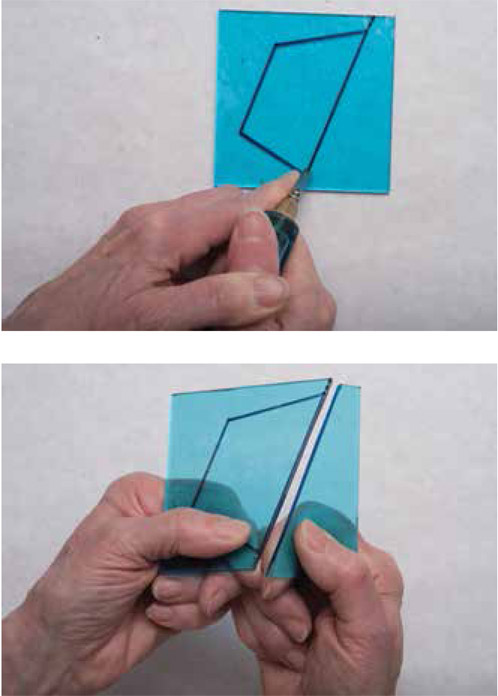
Now score the next side and continue to the opposite edge. Break that off with grozing pliers, remembering to position the pliers at the base of the score, perpendicular to the score line.
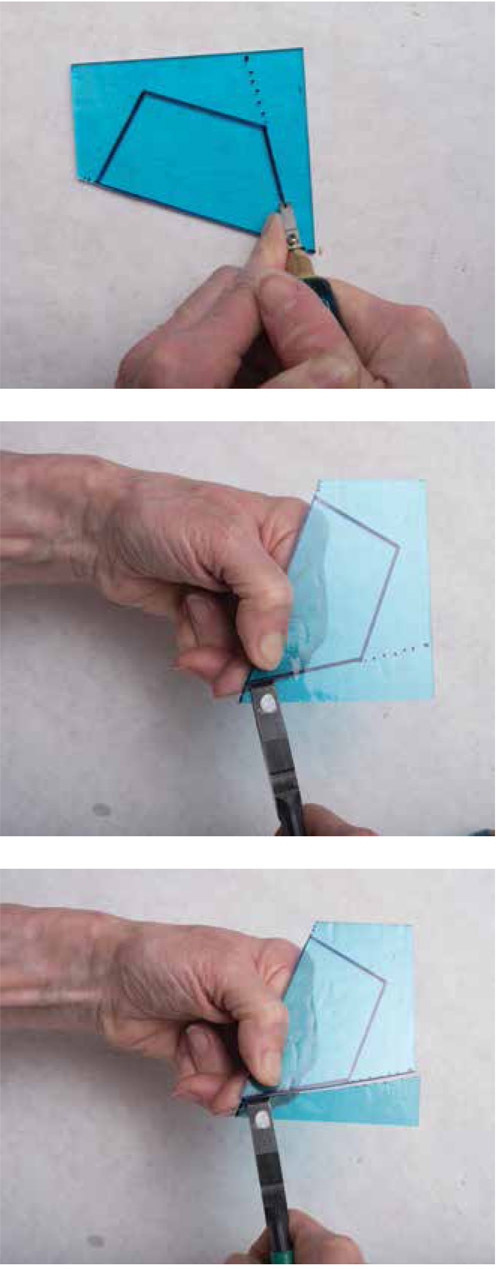
Score the third side, continuing to the opposite edge of the glass. Break the score with running pliers.
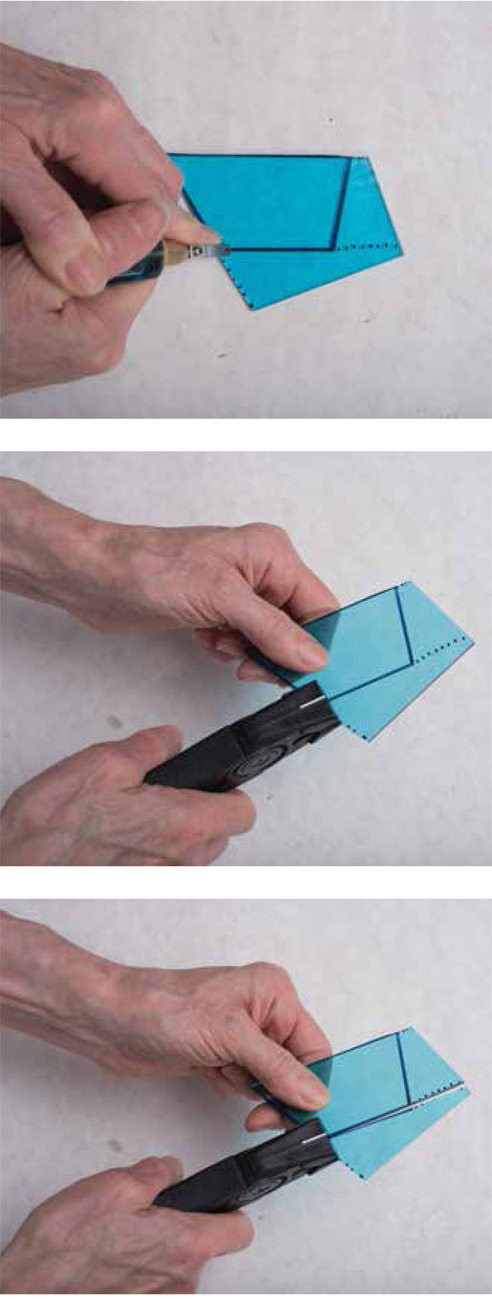
Score the final side from edge to edge. Break it off using grozing pliers.
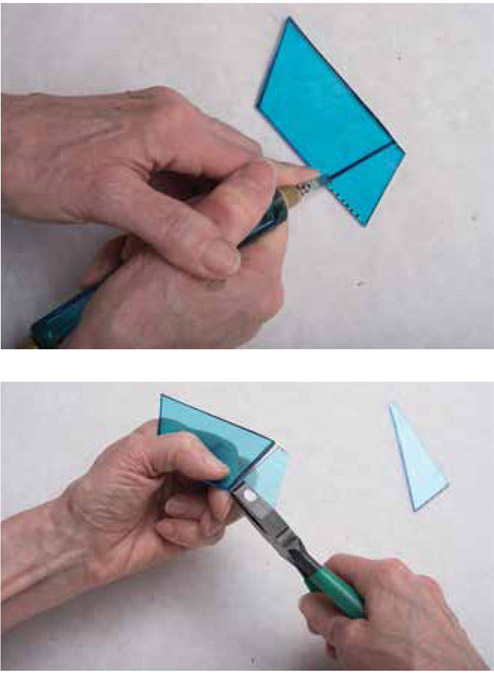
Here you can see everything that did not look like the desired shape has been taken away.
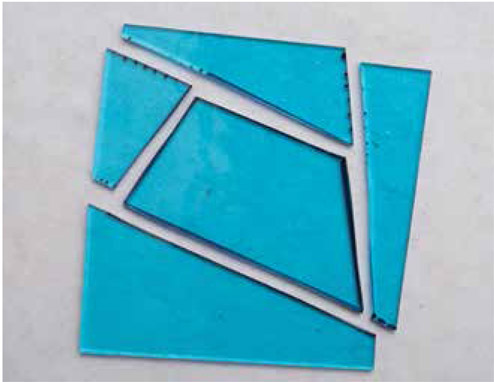
Notice that in this sample a variety of tools have been used to break the glass: hands, grozing pliers, and running pliers. This stage just gives you a feel for using these tools.
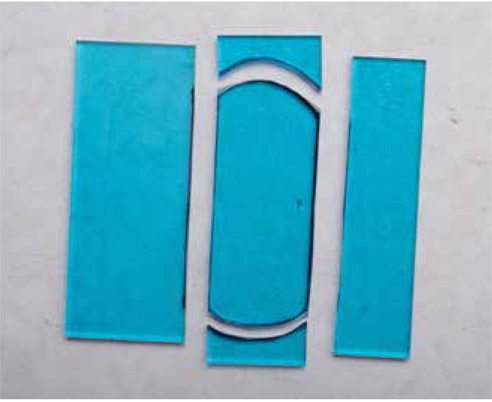
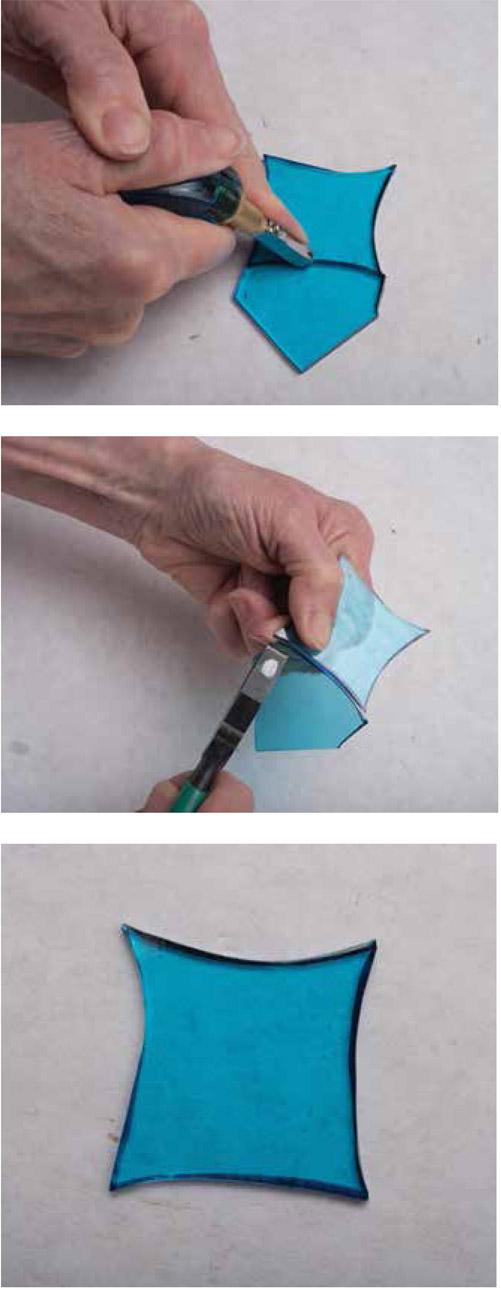
Score and break a straight side first.
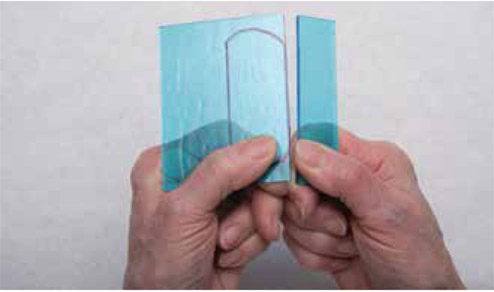
Score and break the other straight side next.
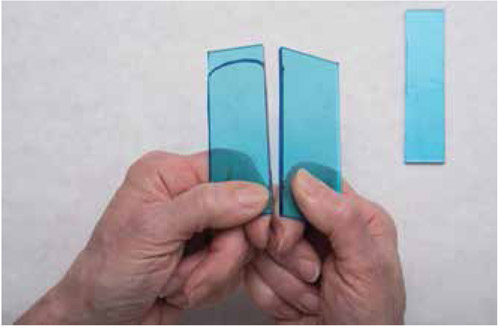
Now score an end piece, following the gentle curve with your cutter wheel. To break, angle the pliers like the curve. Notice they are placed at the edge of the score, not in the middle.
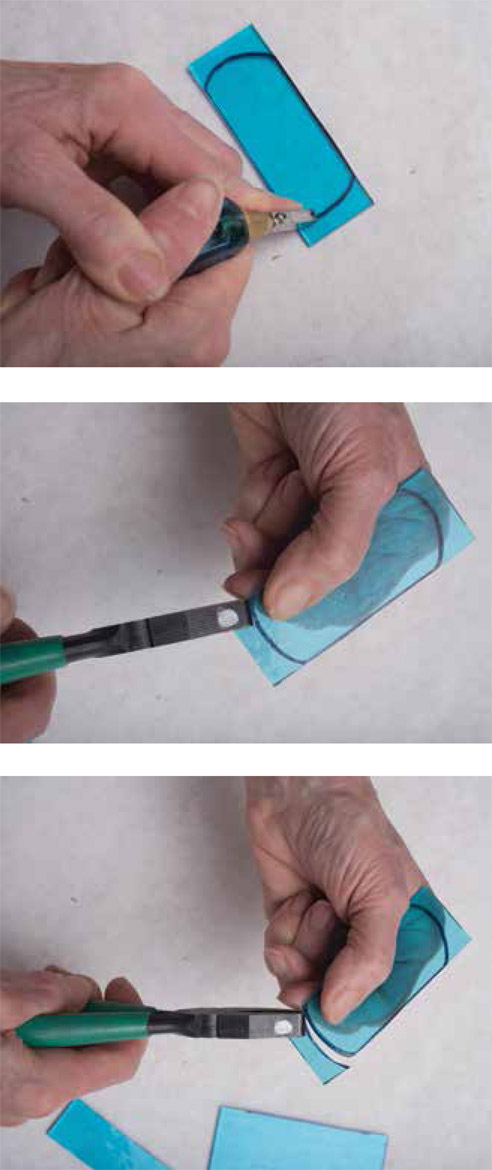
Repeat that step with the other curved end.
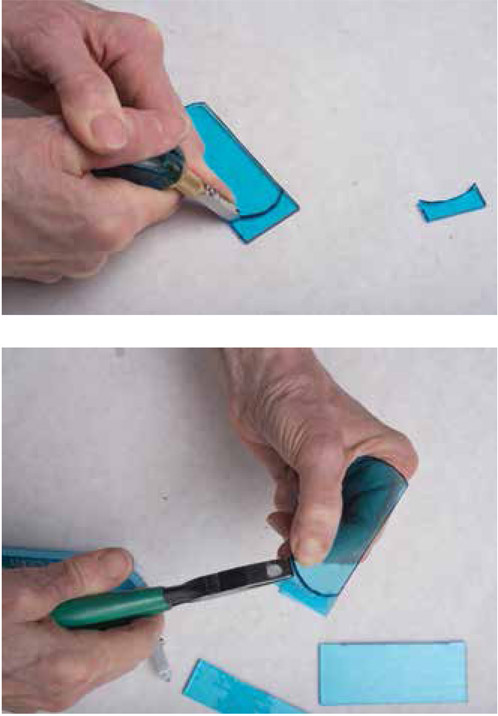
Here is the finished shape and its cut-away pieces.
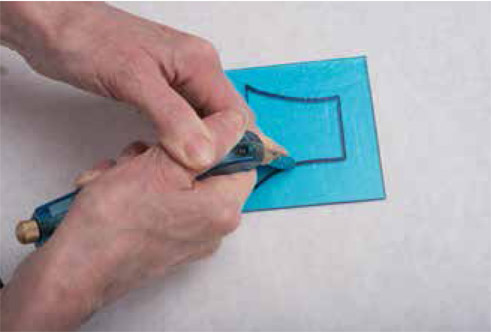
Start your score at the edge of the glass and follow the gentle curve, continuing to the opposite edge.
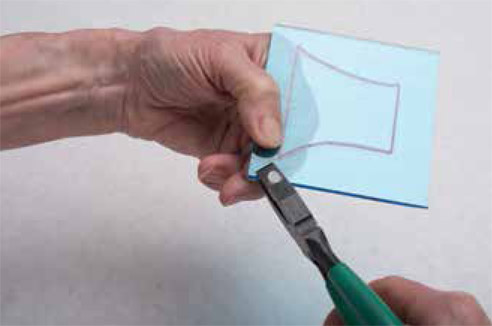
Break the score with grozing pliers, angled with the curve of the score line. The pliers should be positioned at the beginning of the score.
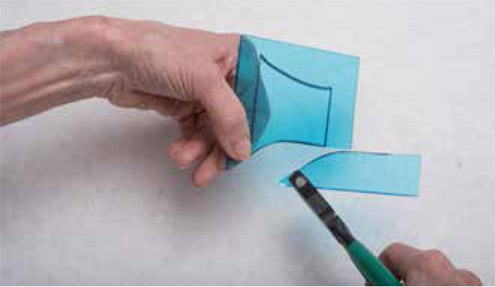
Repeat with the second gentle curve.
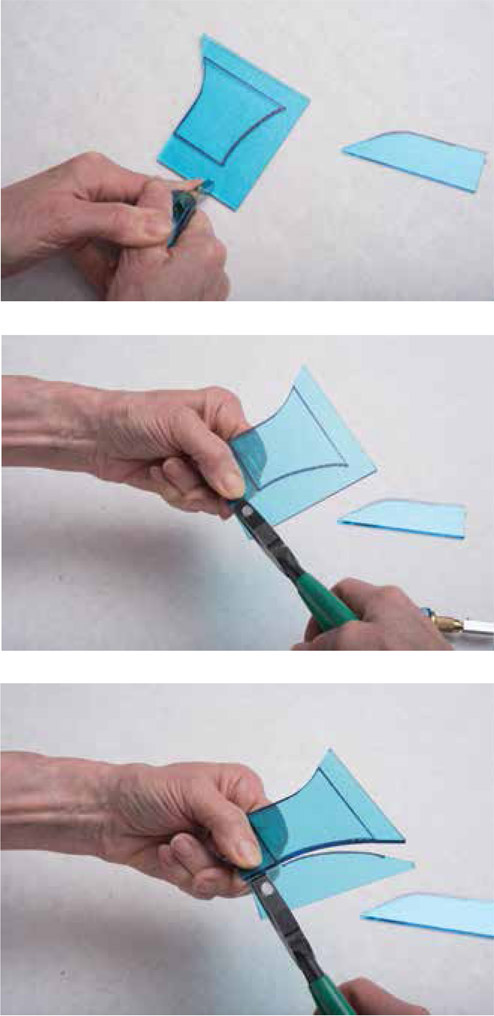
Finally, score and break off each of the straight sides.
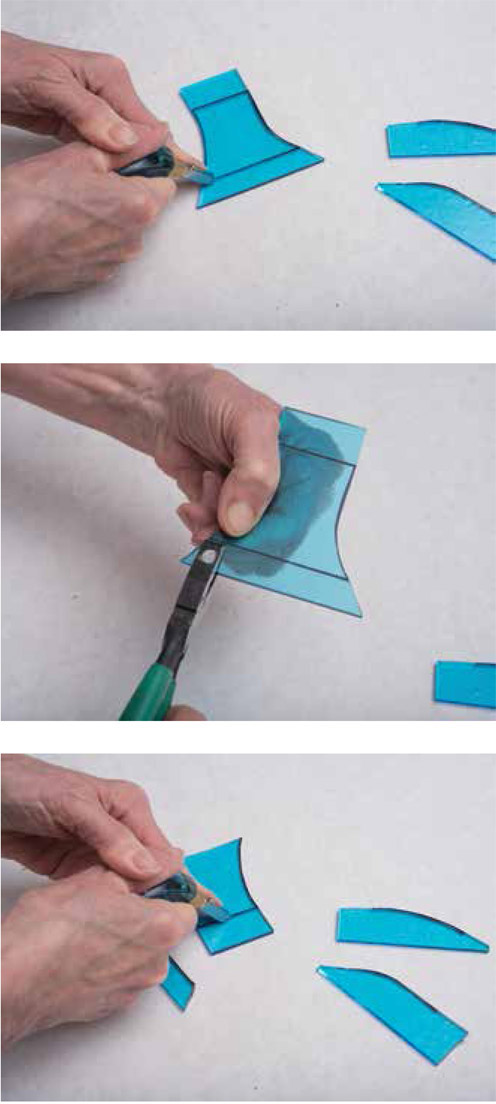
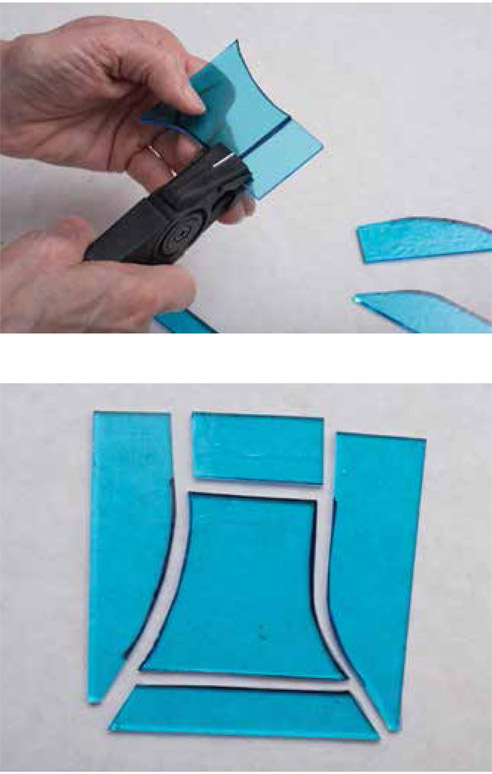
Rather than cutting this whole curve at one time, first cut across the glass just touching the edges of the shape in order to remove some excess glass.
Break off the excess.
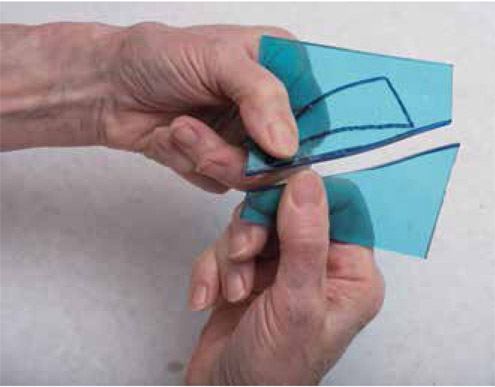
Now score the shallow curve that remains.
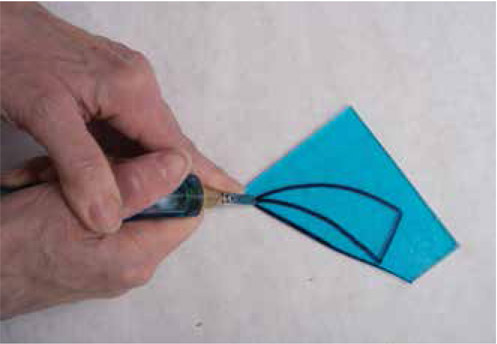
Break this off with grozing pliers.
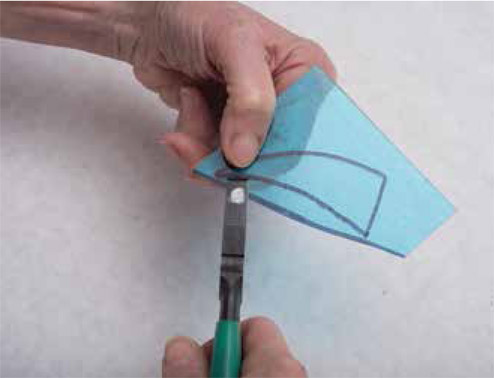
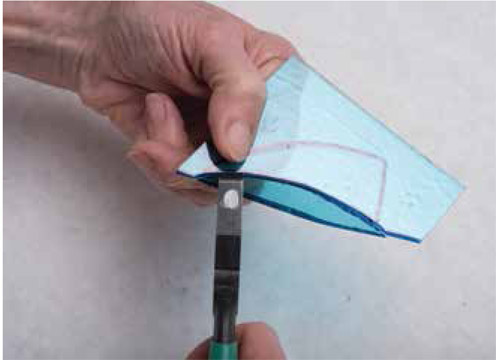
Score and then break the straight side.
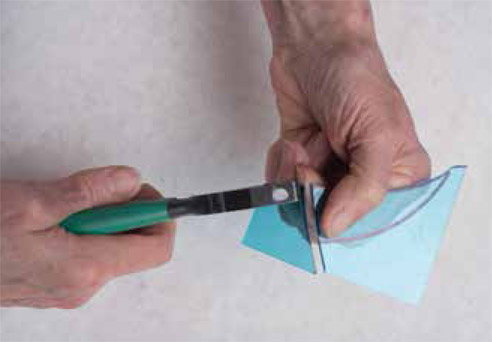
Score and break off the gentle outward curve.
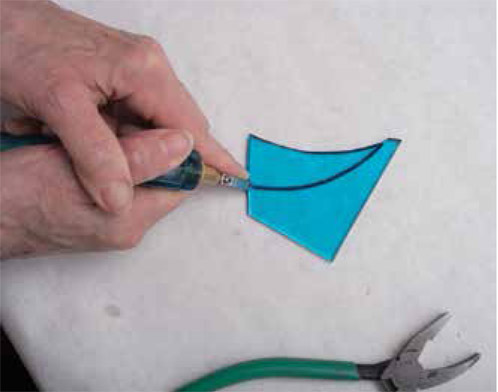
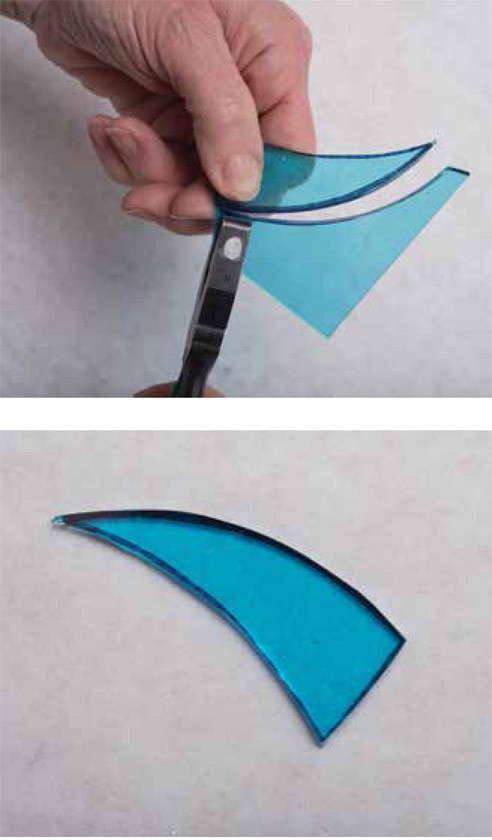
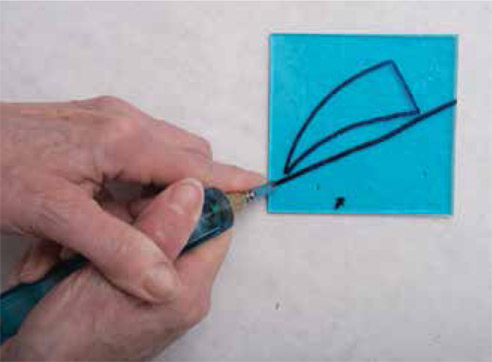
First, draw a line across the glass, just touching the pointed ends of the shape.
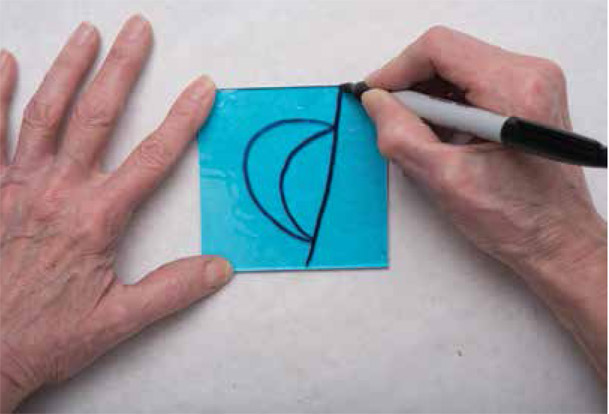
Next, draw in a gentle arc, leading from the inside curve.
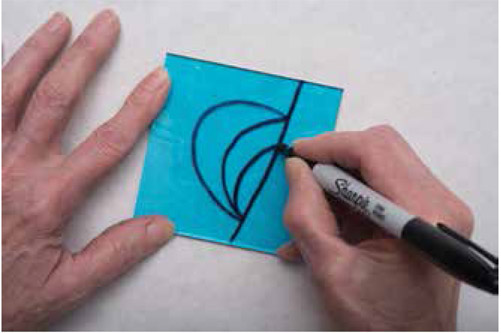
Then draw another gentle arc, coming from the opposite point of this shape.
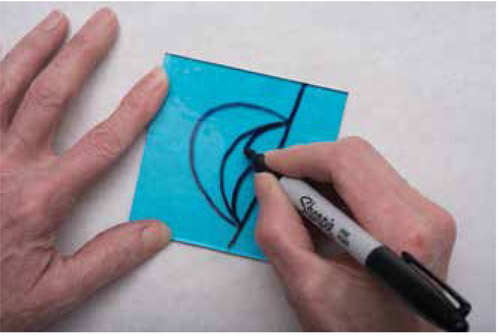
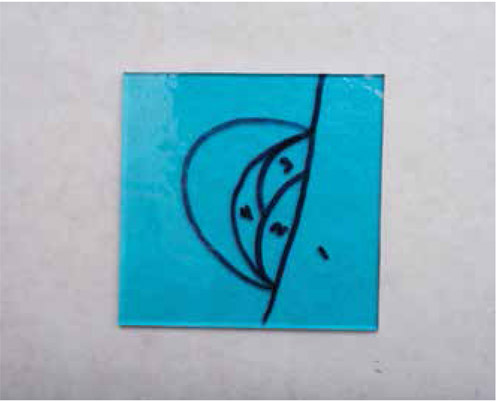
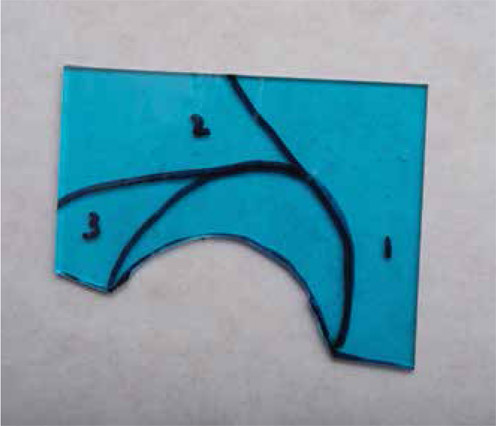
This is the numbered order in which you will score and break these pieces.
To begin cutting this shape, score and break away the excess glass, just touching the ends of the shape.
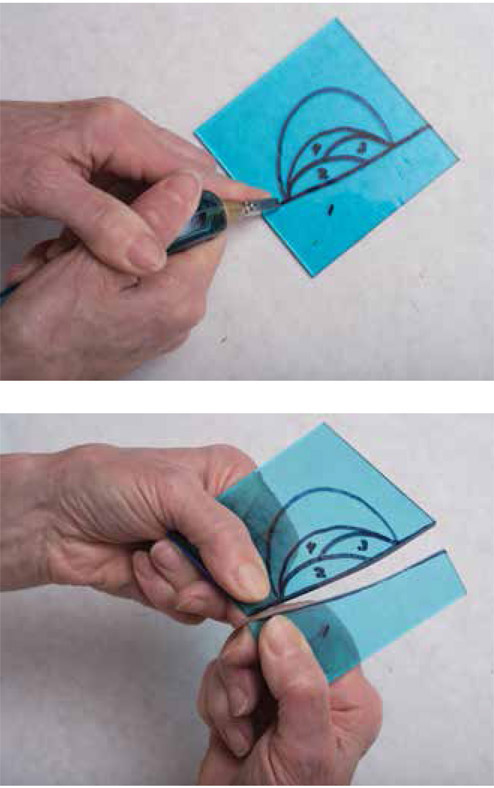
Now score the first curve.
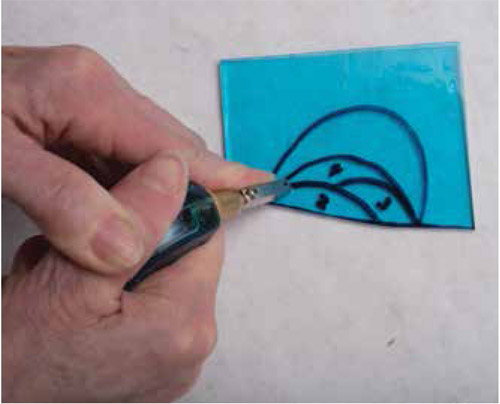
Use grozing pliers to break off the small, curvy piece.
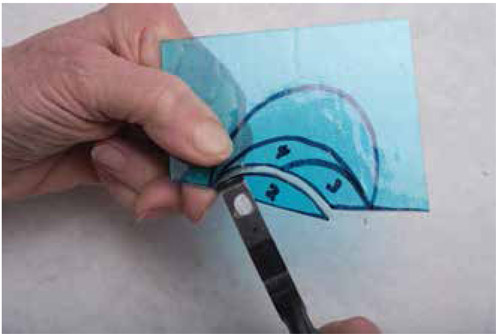
Now come in from the opposite side to score the next section.
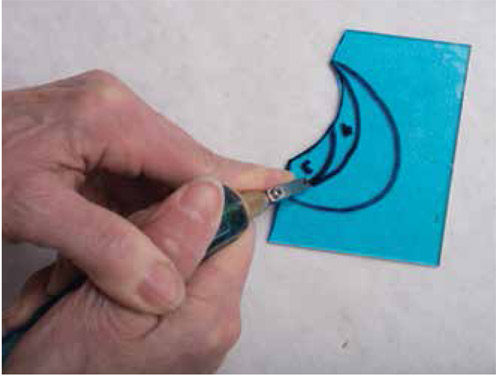
Use grozing pliers at the end of that curve to break it off.
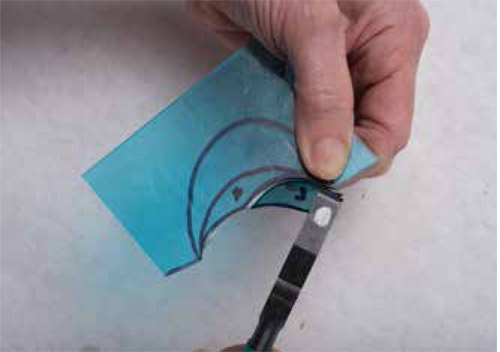
Lastly, complete the inner curve by scoring and breaking it off with grozing pliers.
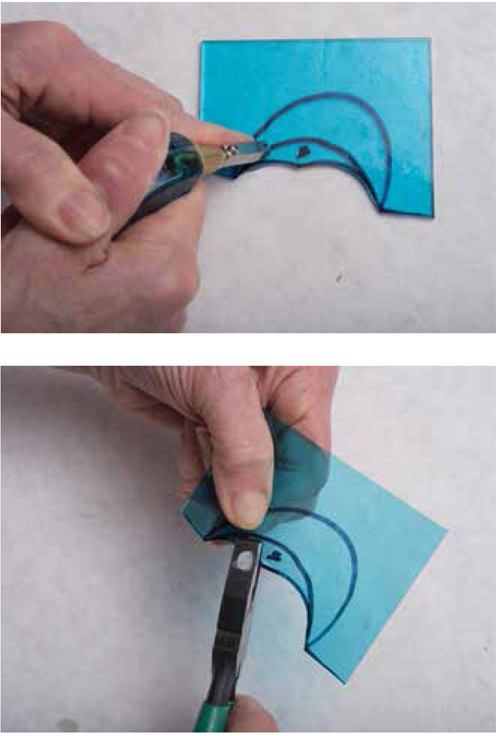
The outside of this shape is too extreme to successfully score and break in one cut, so it is done in a series of three steps.
To cut the outside curve, score the arc for just a bit and continue to an outside edge. Break that section off with grozing pliers. Place them at the opposite end to break this piece. Breaking toward a point makes it more likely to be a successful break.
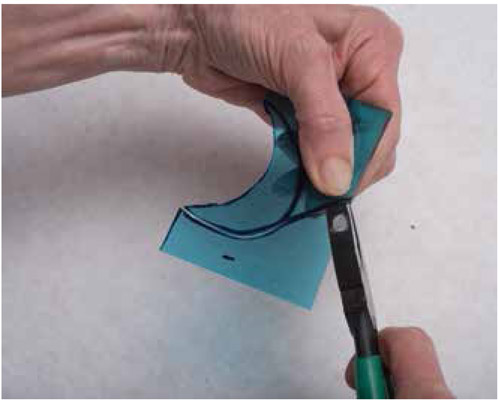
Score the next section of the curve, going to an outside edge.
Break that off close to the start of the score.
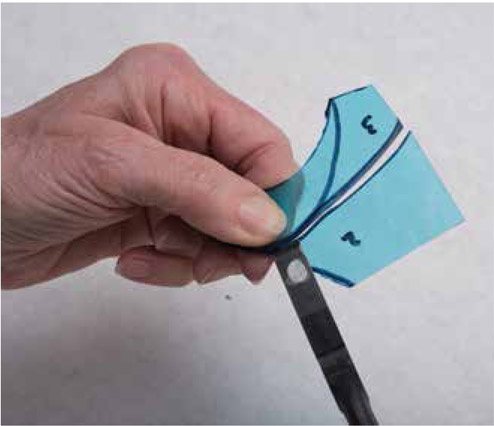
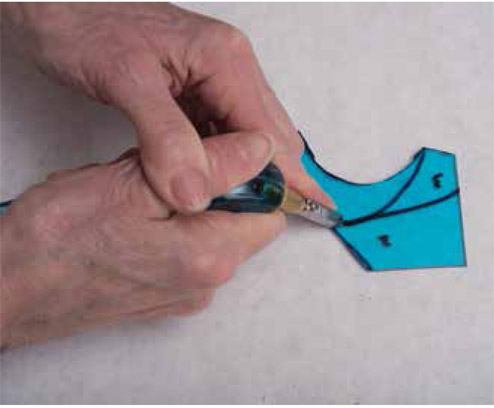
Score and break the remaining section.
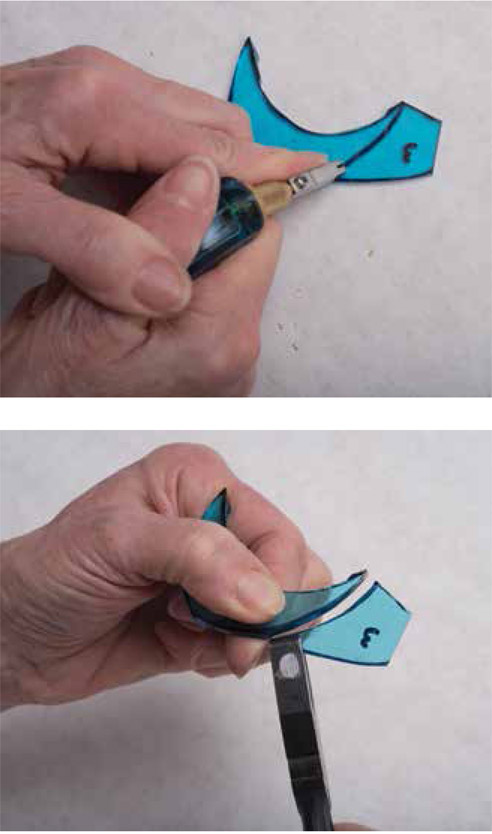
Now break off the extra nubs.
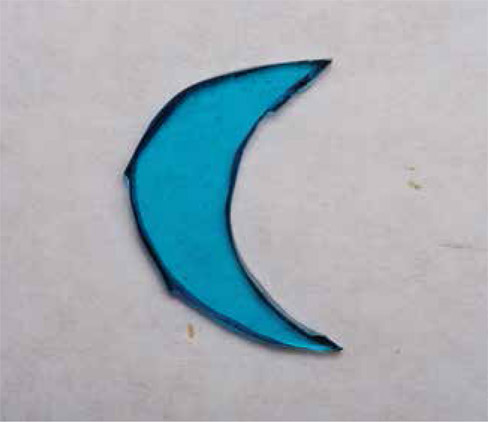
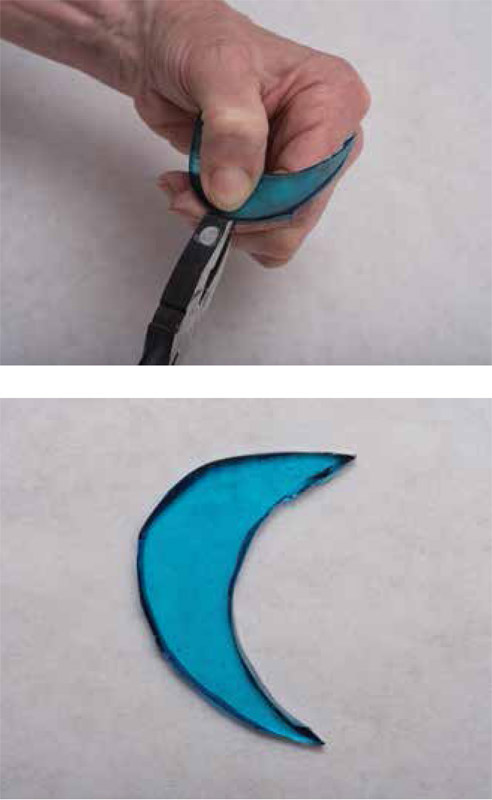
Use the grozing pliers to remove any sharp points that remain from the previous scores and breaks.
Score and break away excess glass first.
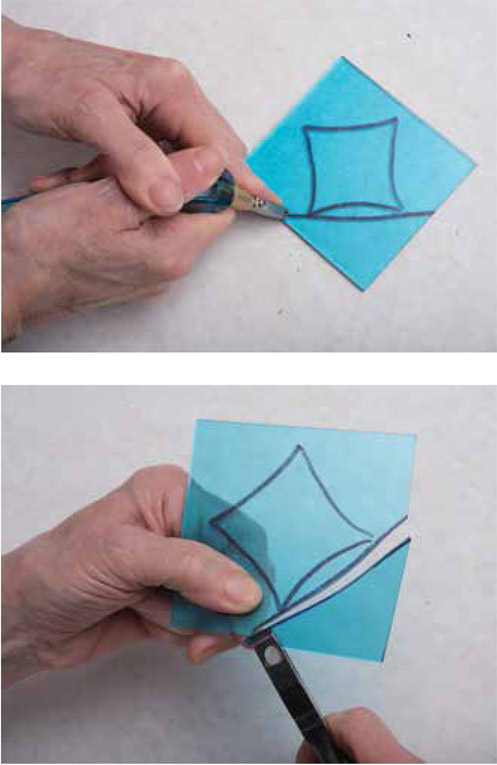
Then, score the curve and break it with grozing pliers.
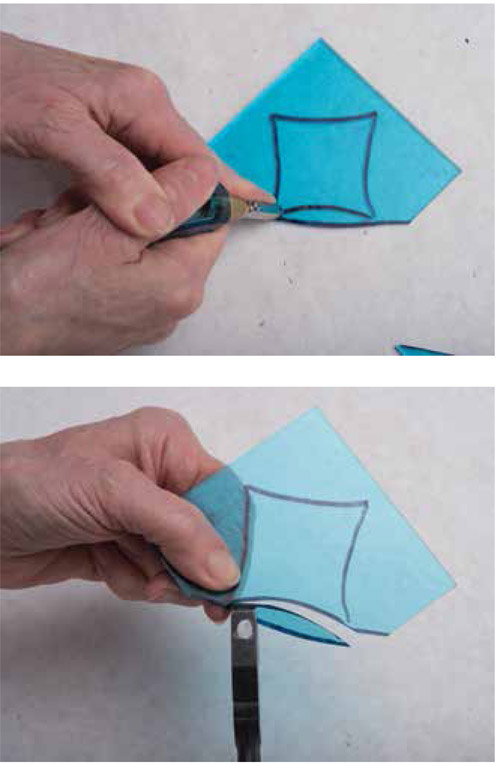
The remaining curves are quite shallow, so they can be scored and broken without removing excess glass first. Score the second side and break it away.
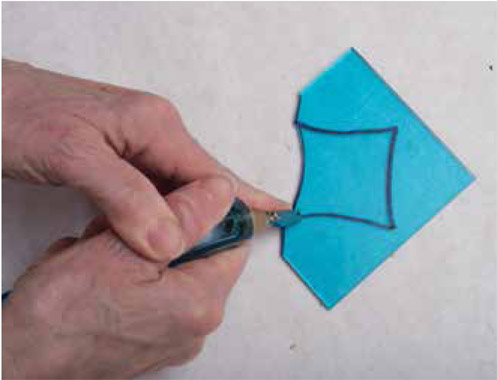
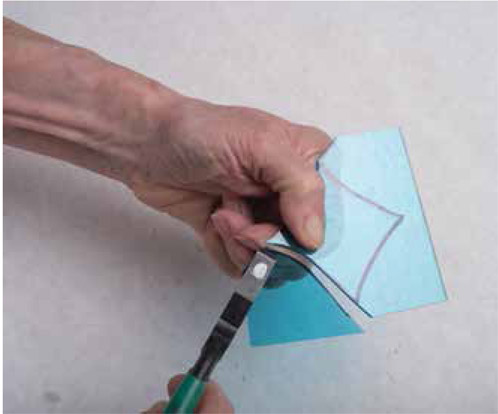
Score and break away the third side.
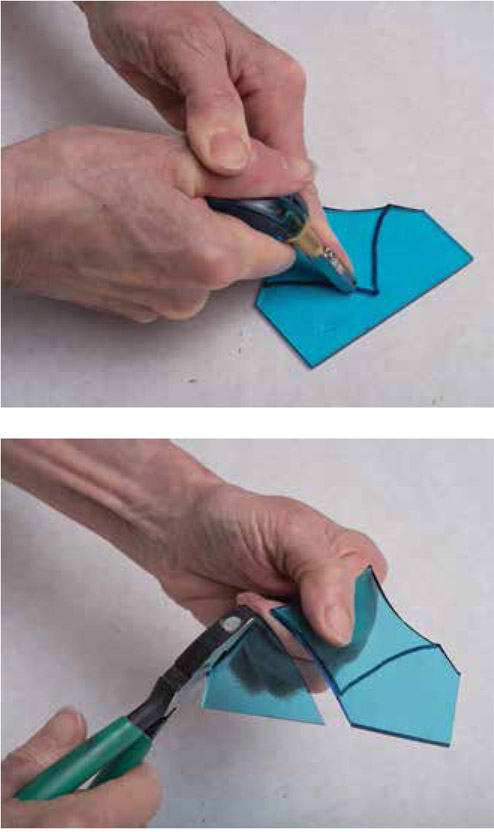
Score and break away the remaining side.
Score and break away excess glass, just touching the edges of the design.
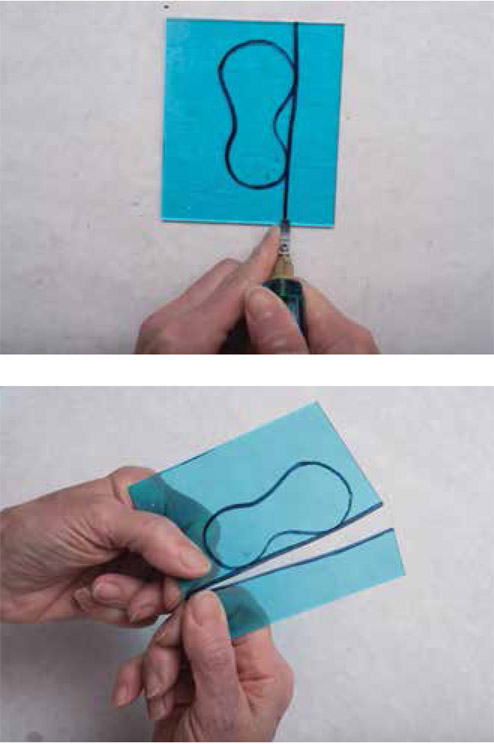
Now score the inner curve on that side and break it with grozing pliers.
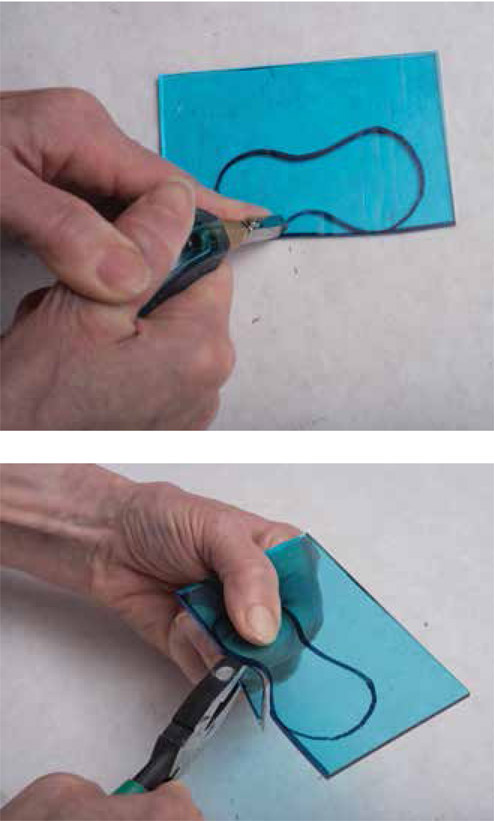
Score and break away excess glass on the other side, just touching the edges of the design.
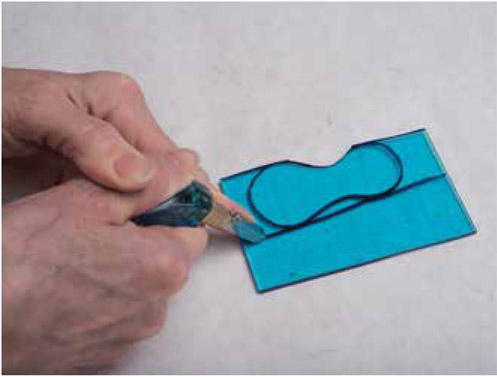
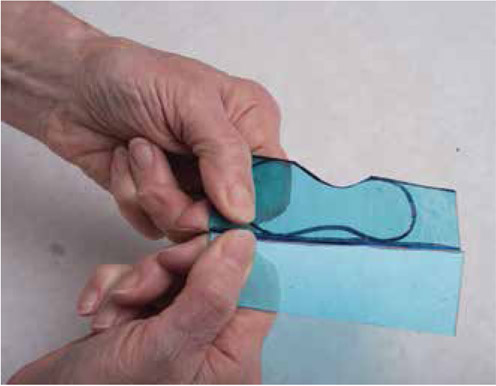
Score the inside curve and break away the glass with grozing pliers.
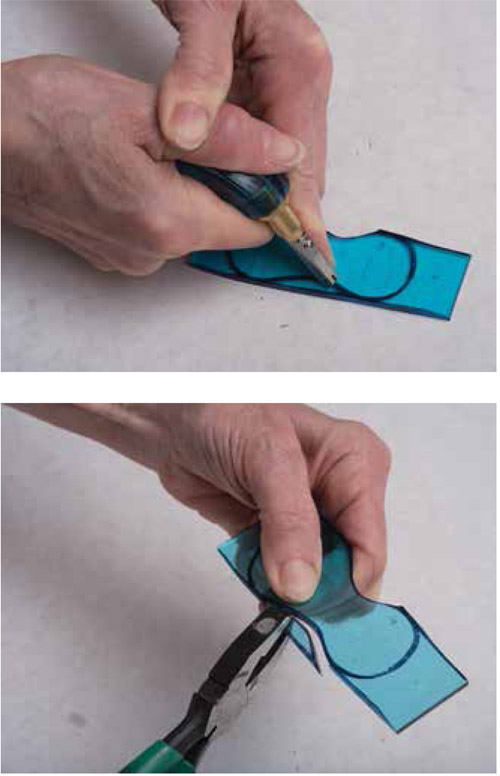
Score and break off each remaining end.
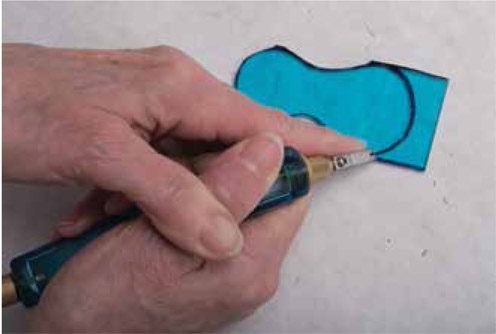
You can see in the sample that in breaking off the final end, it split in two.
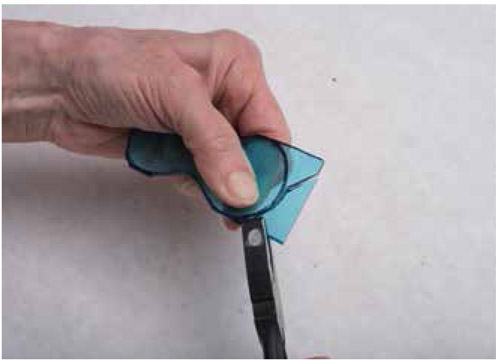
Should this happen in your practice, simply go back with the grozing pliers and remove the remaining glass piece(s).
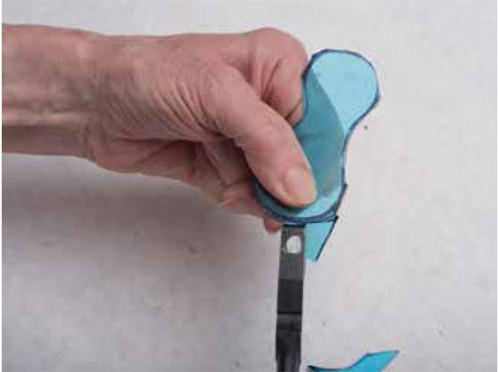
Use the grozing pliers to remove any sharp points that remain from the previous scores and breaks.
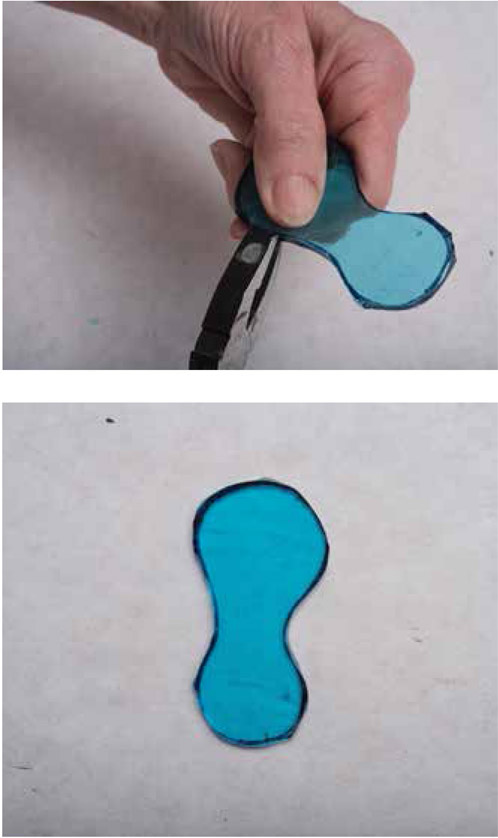
As you did with Shape #5, draw in the lines for cutting a deep curve.
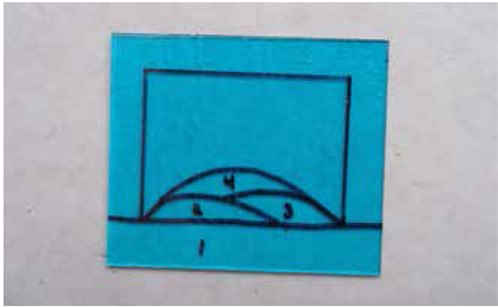
Score and break away excess glass along the bottom of the design.
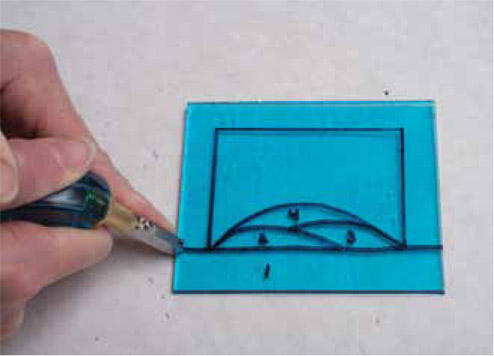
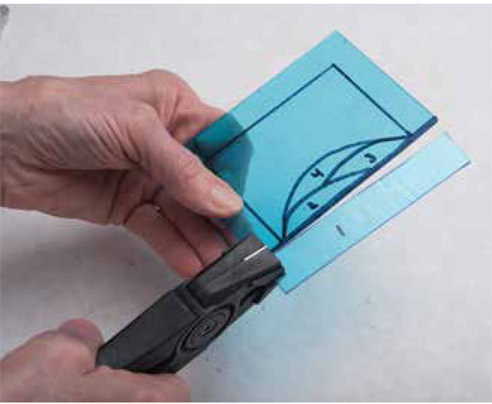
Score and break the first small curve.
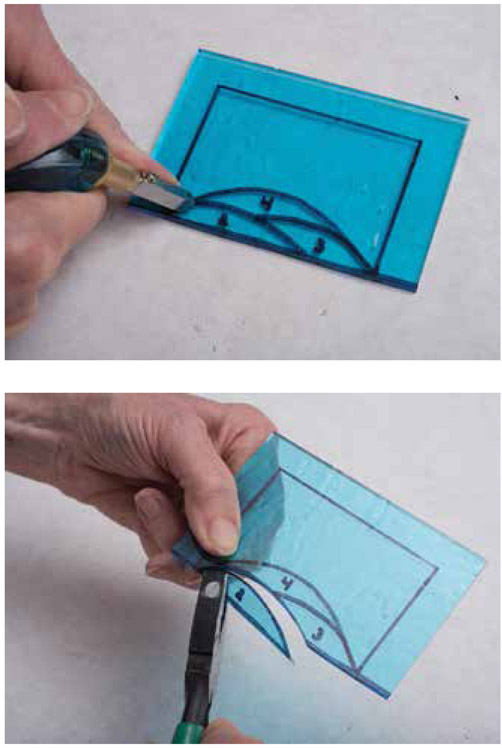
Go to the opposite side to score and break the next curve.
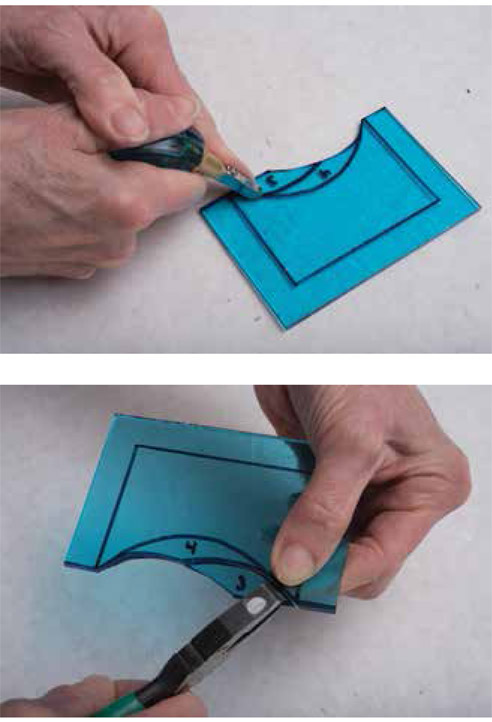
Score and break the final curve.
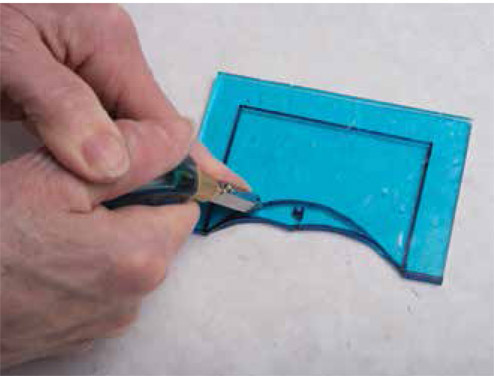
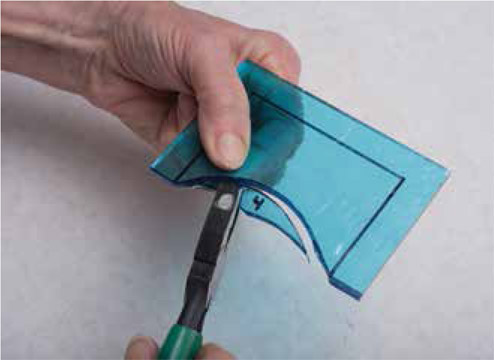
Now you can successfully score and break the straight sides.
Score the first side. Using grozing pliers, break the glass toward the pointed end.
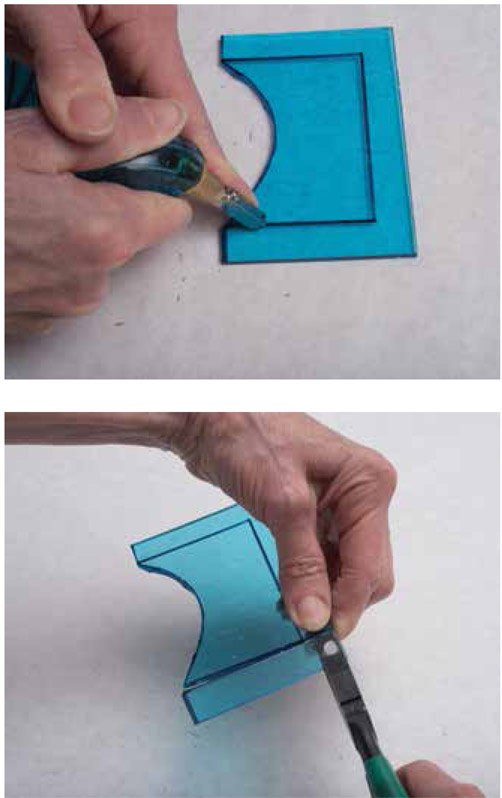
Score and break the second side.
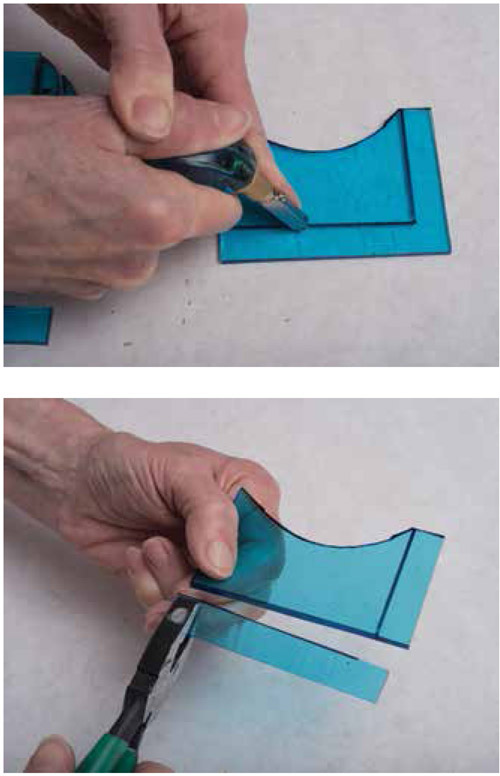
Score and break the final side, again breaking toward the pointed end.
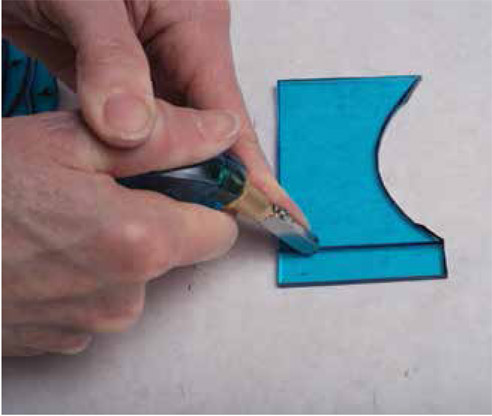
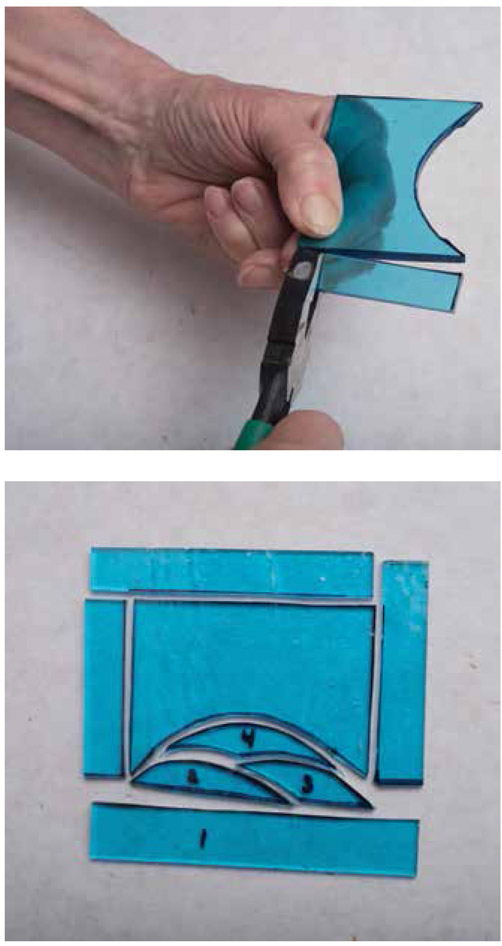
Begin by drawing in your cut lines. The first score should come in at an angle, follow part of the circle, and continue to the edge of the glass.
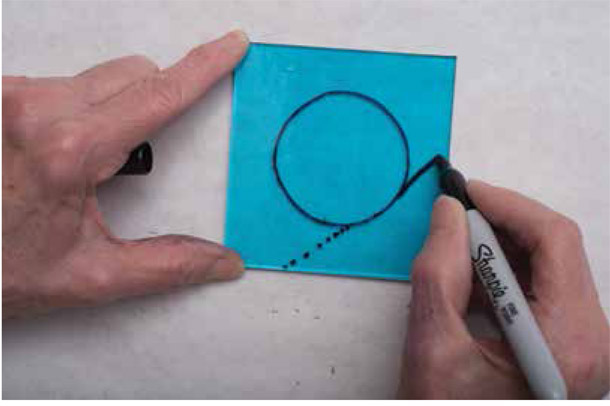
The next score should begin where your last one left off the circle, follow the arc, and continue to the edge of the glass.
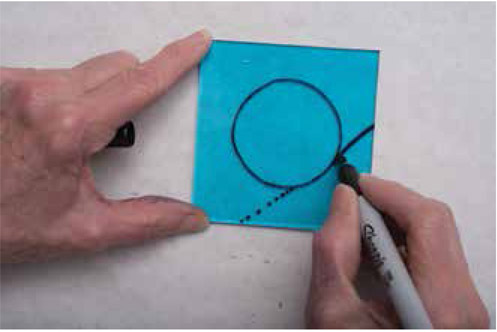
A third score should continue along the arc and go to the edge of the glass. The final section should be cut in one piece.
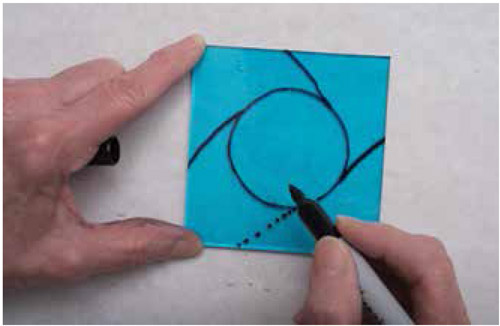
Begin your first score, following the lines you’ve drawn.
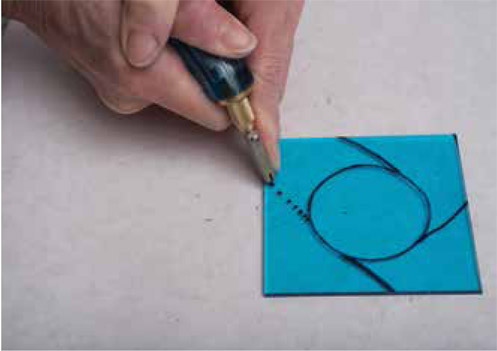
Break that piece with grozing pliers.
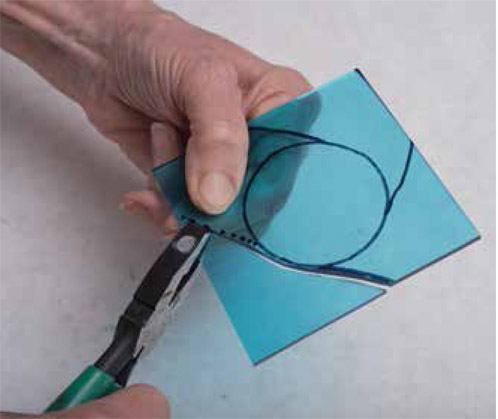
Score the second segment and break it off.
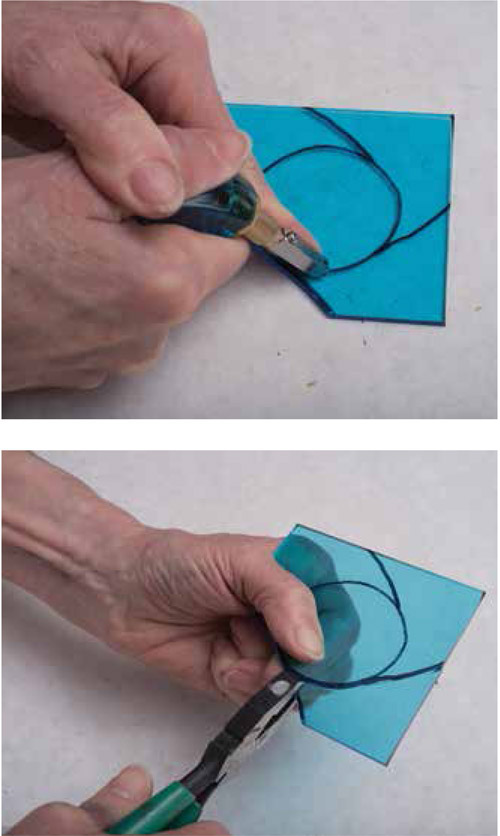
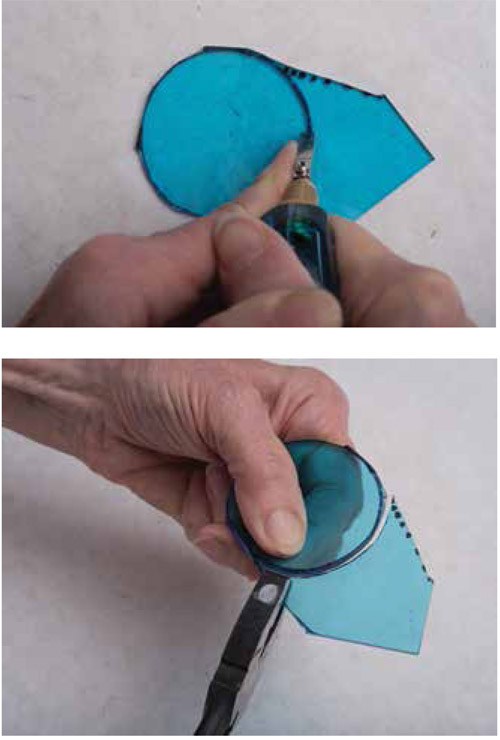
Score the third section and break it off.
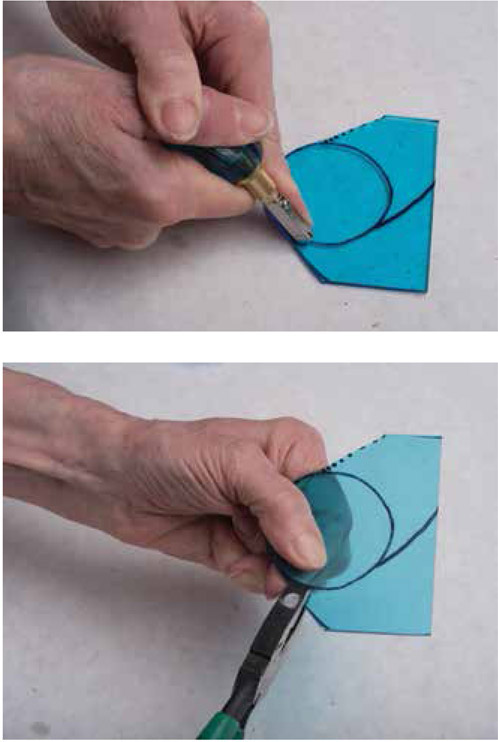
Score the remaining arc and break off that piece.
Here are all the pieces cut from practice glass.
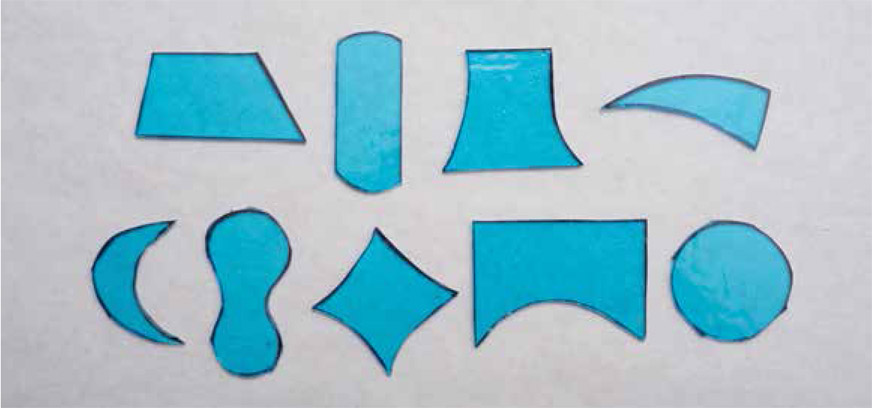
After successfully completing these practice pieces, you will be ready to tackle a stained glass project with a variety of shapes.
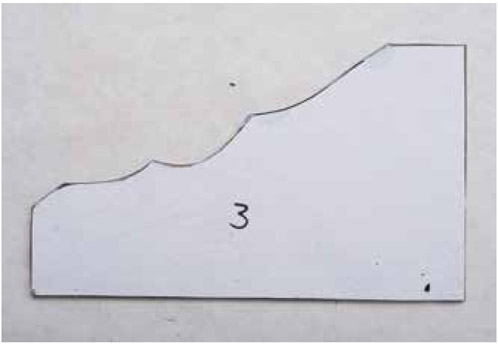
In our classroom, we find that students are most successful in cutting glass pieces using a paper pattern that has been glued to a piece of glass. Try cutting out this sample piece following all the same principles learned in the practice session. The pattern is in chapter 13.
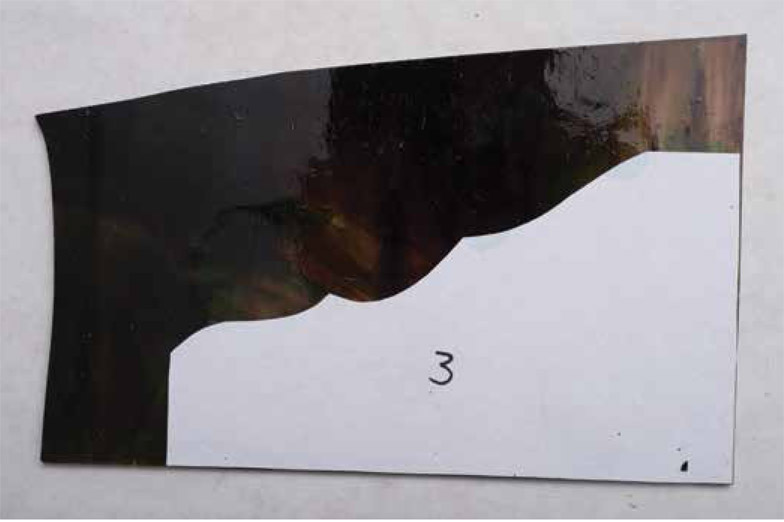
Begin by cutting the side of the design that has the inner curves. Draw in a line to get rid of excess glass first.
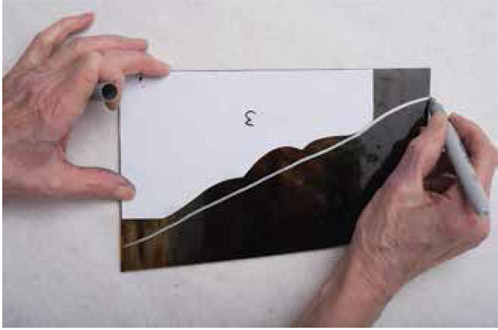
Score and break off the excess glass.
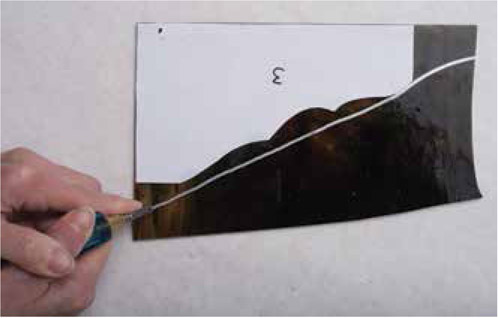
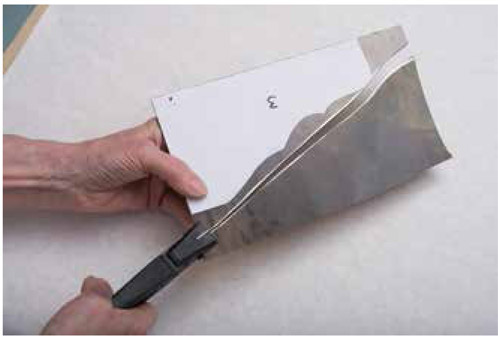
The center curve is the deepest, so cut it next. Break down this curve into two scores and breaks.
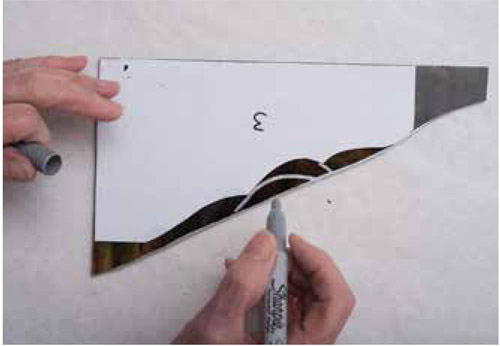
Score the first line you have drawn and break out this piece with your grozing pliers.
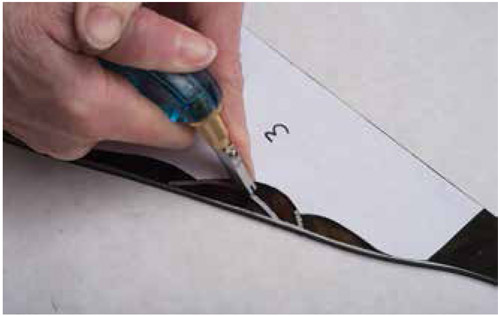
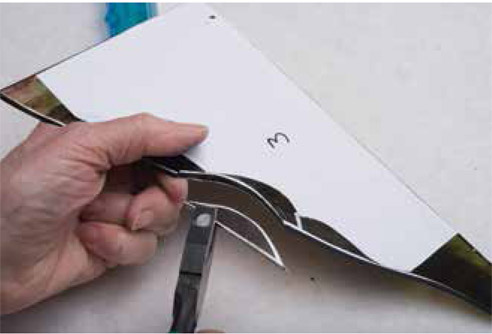
Go back and score the remaining part of this deep curve. Your cutter wheel should be as close to the edge of the paper pattern as possible.
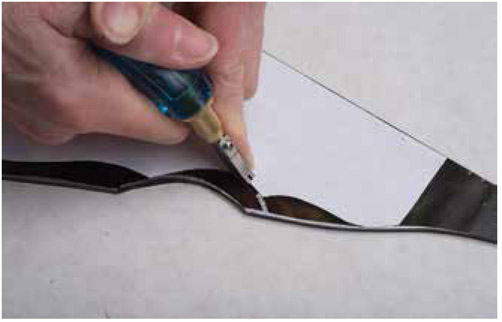
Break off that piece.
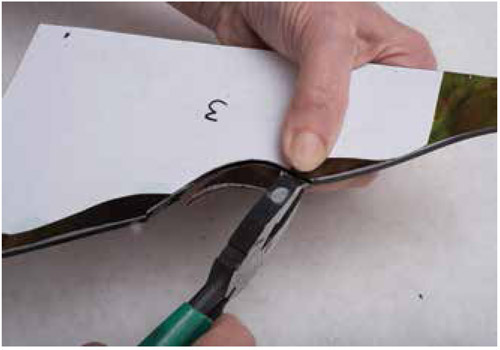
This next curve is shallow enough to do in one score and break.
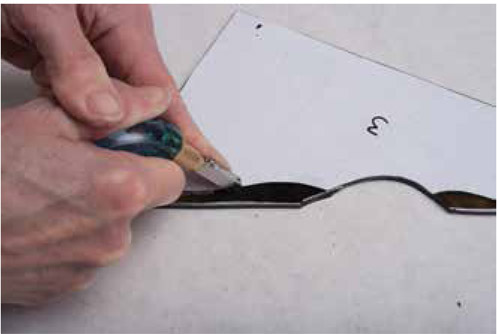
Remember to break toward the point.
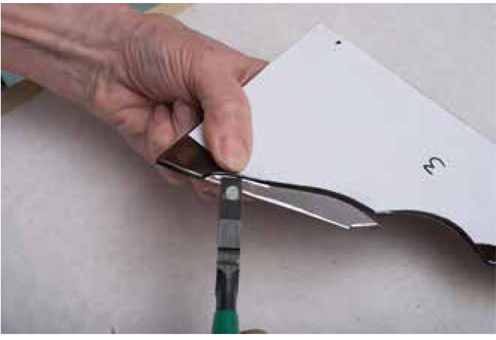
Score and break the final curve, breaking toward the point with grozing pliers.
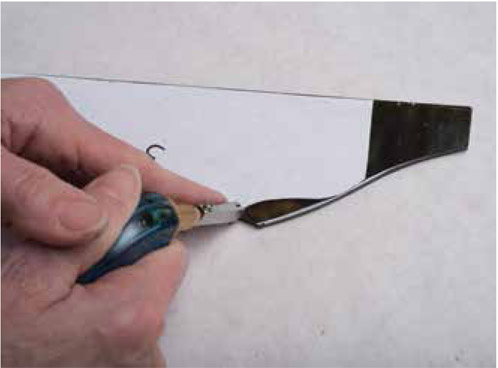
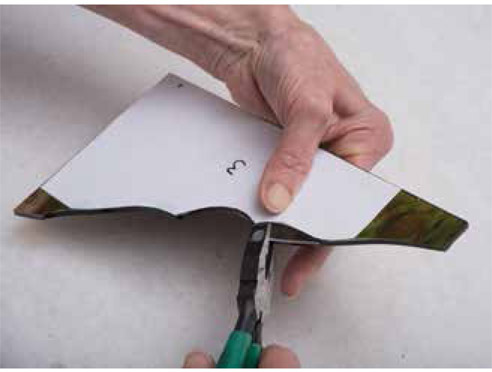
Score and break off the remaining straight sides.
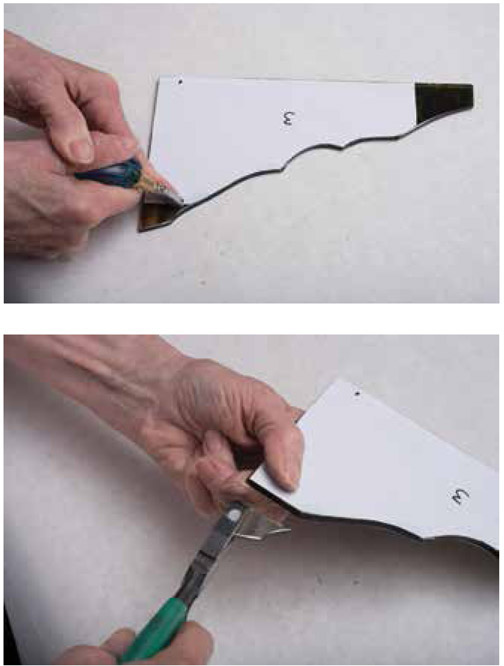
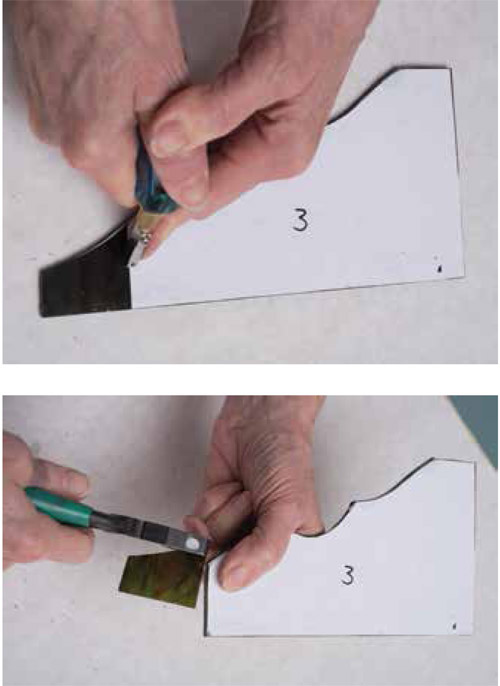
Each score and break is right up along the edge of the paper. The more accurate your cutting is at this point the more time you will save at every subsequent step along the way.
