

6-8 HOURS
IF YOU HAVE PRACTICED THE BASIC GLASS CUTTING TECHNIQUES set out in chapter 5, you are ready to put your new skills to use on your first project: a copper foil stained glass panel.
Additional skills you will learn during the construction of this panel include preparing a paper pattern, using a grinder to smooth glass edges, and applying copper foil to the glass pieces. After mastering these steps, you will move on to soldering the panel together and framing the panel with lead came. You will also learn cleaning and polishing steps that will bring a beautiful glow to your finished work.
Once you have completed the project, you can hang your stained glass panel in a window where the sun shining through it will brighten your entire room. The skills you will learn in creating your first project will improve with practice, and will open new opportunities for you in the art of stained glass!
SUPPLY LIST
❍ Paper pack: oak tag, carbon paper, tracing paper
❍ Pattern
❍ Drawing tools: pencil and silver permanent marker, black permanent marker
❍ Ruler
❍ Masking tape
❍ Scissors
❍ Pattern shears for foil
❍ Rubber cement
Glass
❍ 1 square foot for the background
❍ 2 square feet for the flower petals
❍ 1 square foot for the flower center
We used Oceanside’s Sky Blue Waterglass (S5331) for the background, Oceanside’s Yellow/Amber Corsica (S606181) for the flower petals, and Oceanside’s Brown/Gold Streaky Granite (S41115G) for the flower center.
❍ Safety glasses
❍ Bench brush
❍ Homasote board or work surface
❍ Glass cutter
❍ Glass cutting oil
❍ Grozing/breaking pliers
❍ Running pliers
❍ Glass grinder
❍ ⁷⁄₃₂-inch black-backed copper foil
❍ Fid
❍ Craft knife
❍ Lead came: 16-foot ¼-inch U channel
❍ Lead vise
❍ Lead cutters
❍ Lead board with 90 degree angle corner
❍ Horseshoe nails, approximately 1 dozen
❍ Glazing hammer
❍ Flux and brush
❍ Solder
❍ Soldering iron, stand, and wet sponge
❍ Layout strips and pins
❍ 30°-60°-90° tool
❍ Needle-nose pliers
❍ Hanging rings: 2, made of pretinned copper wire
❍ Mild detergent
❍ Wash basins
❍ Newspaper
❍ Flux and patina neutralizer
❍ Protective gloves
❍ Black patina for lead and solder
❍ Small sponge
❍ Stained glass polish
❍ Towels
PATTERN PREPARATION
1 Begin with a paper packet that is larger than your pattern. A paper packet consists of a sheet of oak tag or heavy card stock, which will become the pattern for rebuilding your panel; a sheet of carbon paper, which will transfer the design to the oak tag when you trace your pattern; and a sheet of tracing paper, which will be cut apart and glued to the glass so you will be able to accurately cut your glass pieces.
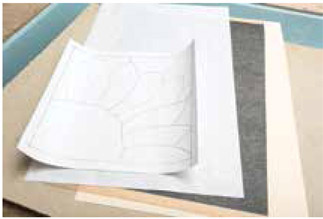
2 It is important to arrange your paper packet in the proper order. Begin with the oak tag or heavy card stock on the bottom. Next, place the carbon paper with the carbon side down against the oak tag. The next layer will be your full-size pattern, faceup. Finally, the tracing paper becomes your top layer.
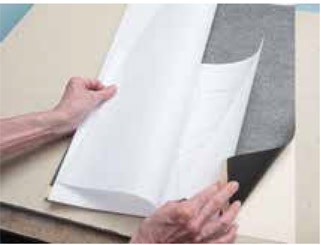
3 Even up the edges of your completed paper packet and place it on your work surface. Center your pattern within the packet, and tape the paper packet edges to your work surface.
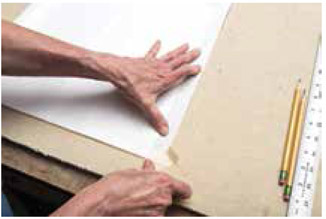
4 Use a ruler and a pencil to trace the perimeter of your design. Press firmly so that the markings transfer well through all layers and onto the oak tag. Continue to trace over all pattern lines until your design is complete. Slight imperfections in your tracing should not affect your finished project, but any lines that vary by more than 1/4 inch should be redrawn.
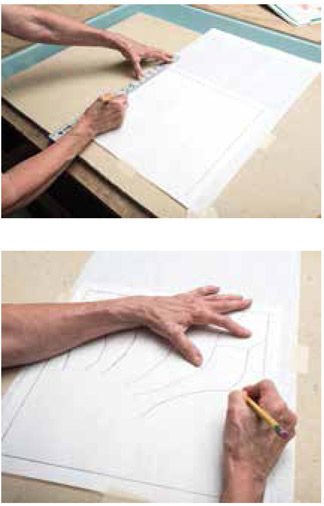
5 Before taking the paper packet apart, number each piece of the design. This will prevent confusion when assembling the glass pieces for soldering. For this design, we used a left-to-right numbering system, but use whatever system seems logical to you.
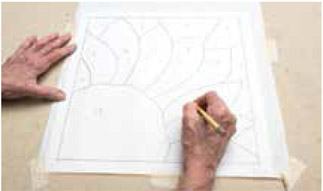
6 Next, color-code your pattern pieces. This will help identify which pattern pieces to glue on which glass color once the pattern has been cut apart. There are three colors for this project:
• Sky—Sky Blue Waterglass. These pattern pieces are designated with an S.
• Flower petals—Yellow/Amber Corsica. These pattern pieces are designated with a Y.
• Flower center—Brown/Gold Streaky Granite. These pattern pieces are designated with a B.
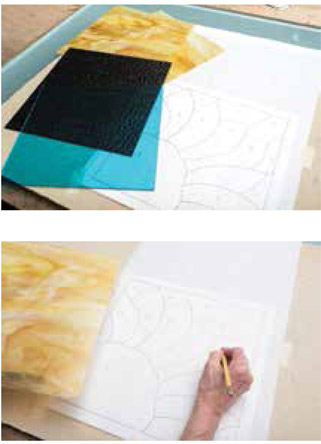
7 The last thing you will mark on your pattern will be directional arrows. These arrows will designate the direction in which you want the color or texture to follow. In our panel we wanted the sky to have a horizontal texture, so we drew horizontal arrows on those pattern pieces.

For the flower petals, we wanted the color and texture of the glass to ray out from the flower center, so we marked our arrows on the pattern pieces in that manner.

We wanted the texture in our brown flower center to angle toward the petals, and marked that pattern piece accordingly.
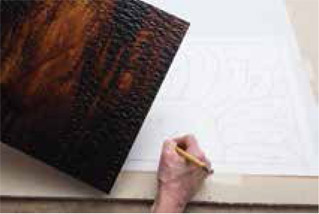
8 Remove the tape from your pattern pack and pull the pieces apart, revealing a hard copy of the pattern on the oak tag. Your original pattern will remain intact so that you can re-create the design at a later time if you wish.
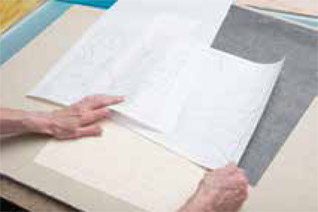
9 Use the tracing paper copy of your paper pack to create the pattern to cut out the glass pieces. Set aside the rest of the paper pack for later use.
Using regular scissors, cut along the perimeter of your tracing paper pattern. Follow the pattern precisely.

10 The rest of the pattern will be cut out with a pair of pattern shears designed for copper foil projects. Pattern shears are unique in that they have a single blade on top and two blades on the bottom. These shears remove a tiny sliver of paper from each pattern piece; this allows room for the copper foil and the glass pieces to fit together nicely.
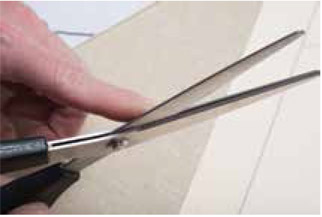
The best way to cut with pattern shears is to keep the jaws open wide and take small cuts. Center the top blade on the pattern lines.
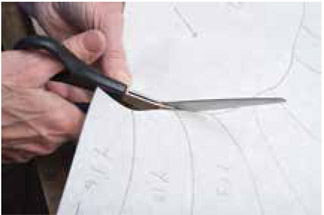
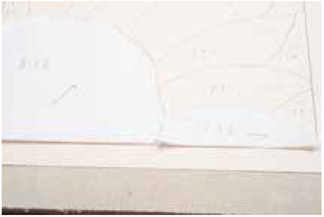
11 After all pattern pieces are cut out, reassemble on the oak tag. You will notice a small gap between each pattern piece.
12 Place each S pattern piece on the Sky Blue Waterglass. When positioning pattern pieces on the glass, you can use the straight edges of the glass to your advantage. Allow enough space between each pattern piece to be able to separate them before cutting out individual shapes. Line up the arrows on the pattern with the direction of the texture in the water glass. Water glass has a gentle texture and is smooth enough to cut on the rippled side.
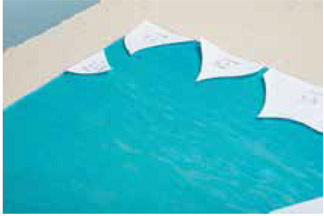
13 Turn over each pattern piece and apply rubber cement to the back of the paper, covering the piece thoroughly. Replace each pattern onto the glass, making sure the edges and points are well-adhered. Set this glass aside to allow the glue to dry.

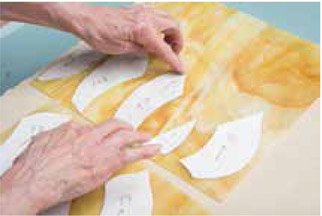
14 Moving on to the Yellow/Amber Corsica, line up the directional arrows with the color designs in the glass. Arrange the pattern pieces so there is enough space between them to allow you to separate the pieces before cutting out their specific shapes. Glue the pattern pieces to the smooth side of the glass with rubber cement.
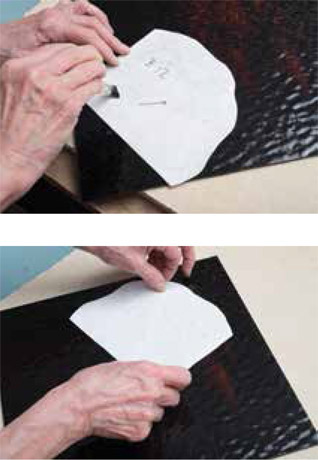
15 We chose a heavily textured Brown/Gold Streaky Granite glass for our flower center so as to feature that texture on the face of the panel. It would be very difficult to cut the textured side of this glass. In order to get a proper piece cut out, you will put the glue on the front of the pattern and place it facedown on the smooth side of the glass.
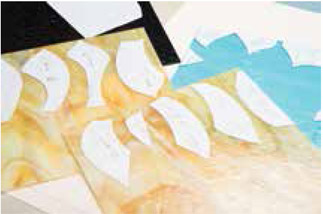
16 Once all the pattern pieces are glued onto the glass, allow the glue to dry for a few minutes.
GLASS CUTTING
1 It is time to cut out the glass, so put on your safety glasses. Your first cuts will be to separate the pieces. Break each score with your running pliers. Continue to score and break until all pieces of glass are separated.
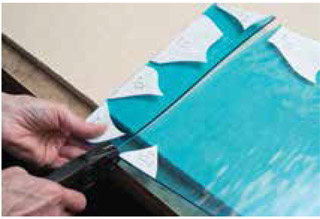
2 Now cut out each individual shape, following the pattern as closely as possible. Remember to use the principles learned in chapter 5 to make successful scores and breaks. When using a paper pattern, the last cut on each side should be right up to the edge of the pattern.
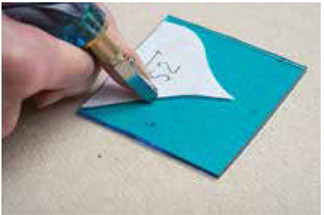
3 Here is a rather deep curve. Remember to take an initial score to remove excess glass and expose the curve. Then, go back to precisely cut along the curve.
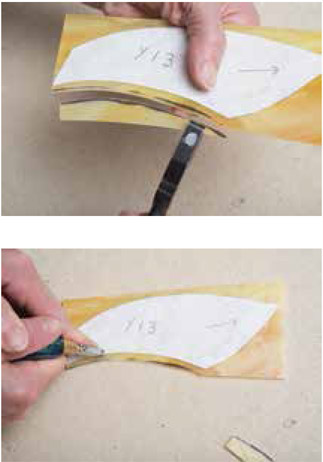
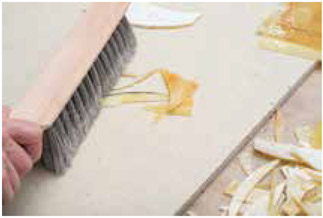
4 While you are cutting the remaining glass pieces, remember to sweep away any excess glass, including small chips to keep your work surface clean.
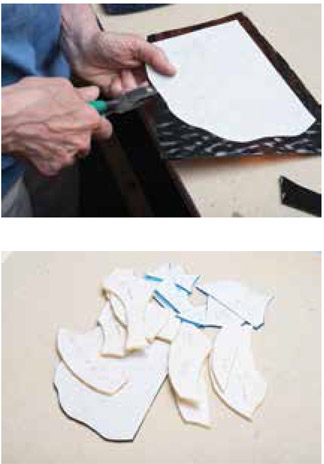
5 Lastly, cut out the brown flower center. You will recall that because this glass is heavily textured, the pattern has been turned upside down and glued to the smoother side of the glass. As you cut, break down each side into multiple scores and breaks. Cut the straight sides last.
GRINDING
When all the glass pieces are cut, it is time to use the grinder to smooth the glass edges. To keep the grinder bit cool, and to keep the glass chipping to a minimum, add water to the grinder according to the manufacturer’s recommendations. Do not overfill, as this can damage the grinder’s motor and risks causing an electrical shock. Wet the grinder’s sponge and place it in the proper position. Make sure the eye shield is in place and always wear safety glasses while you operate your grinder.
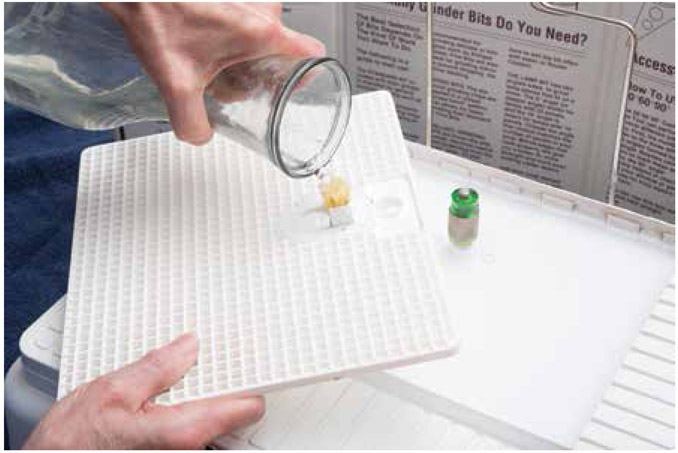
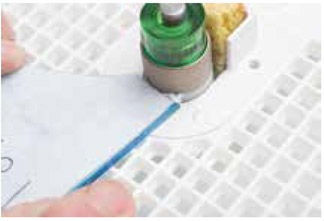
1 Grind every edge of each piece of glass. You are grinding to remove any excess glass, but you are also roughing up the edge of the glass a bit. This will help the copper foil tape stick well to the glass when you reach that stage. Grind right up to the edge of your paper pattern, but not beyond. Take care not to grind off any of the glass points.
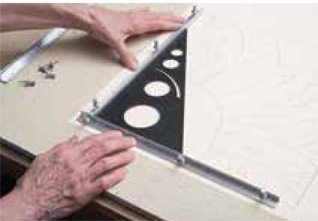
2 Set up the oak tag pattern on your work board. Pin layout strips along the left side and the bottom of the pattern to keep the edges straight. You can check the corner you have created with a 30°-60°-90° tool to make sure the corner is square.
3 Remove the pattern from each piece of glass and wipe the glass with a towel to dry it. Immediately write the number of the pattern piece onto the glass with a permanent marker.
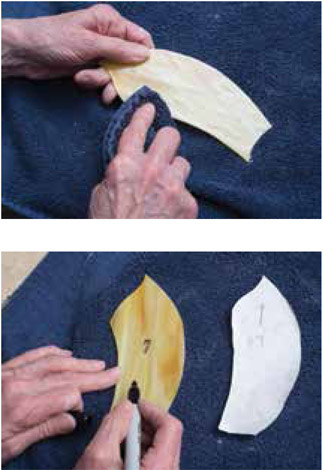
4 Place each numbered piece of glass onto your oak tag pattern. Remember to flip the brown flower center so that it fits into your panel with the textured side up.
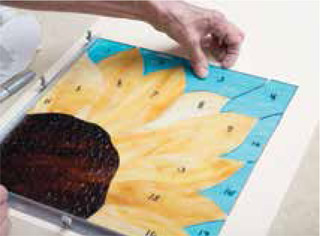
5 With all the glass pieces laid out, check that everything fits together well. There should be a small, even space between each piece to allow for the copper foil. Any areas that do not fit well will need some additional grinding. As you can see here, this bump needs to be ground to fit more closely with the neighboring pieces. After touch-up grinding, be sure to dry the glass again before replacing it on the pattern.
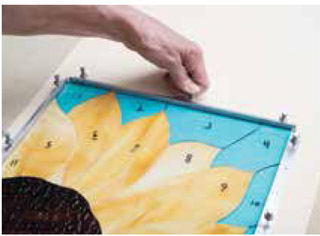
6 Add a layout strip at the top of the panel and at the right side of the panel. Pin the layout strips into place.
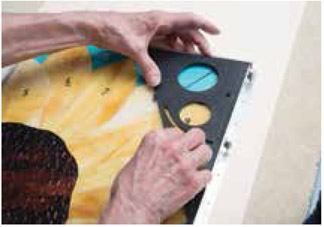
7 Check the corners with the 30°-60°-90° tool to make sure the corners are square.
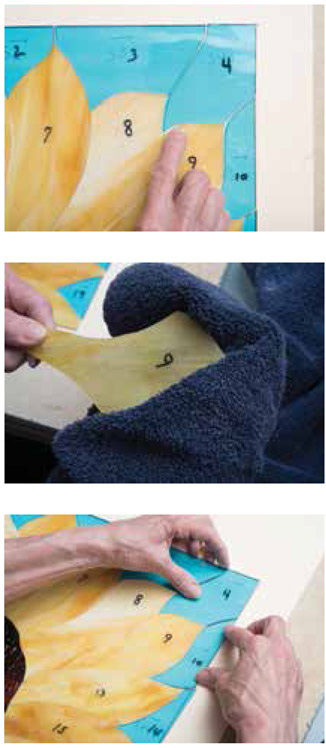
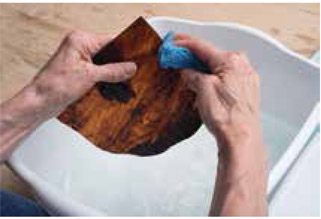
8 Once the pieces all fit into place, take each one individually and wash the grinder dust off of its edges. Wash with a mild detergent, rinse, and dry. If the number washes off, make sure to write it back on the glass before proceeding.
COPPER FOILING
1 Now that everything is clean, you are ready to foil the glass. Solder will not stick to glass, so by wrapping the glass in adhesive-backed copper foil, the solder will have something to adhere to. To foil the glass, you will need a roll of copper foil, regular scissors, and a fid.
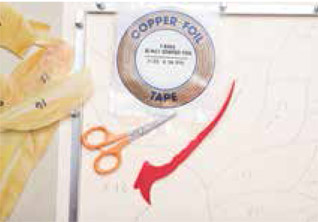
2 Peel back the protective paper from the end of the roll of foil to expose the adhesive black backing. You are using a black-backed foil to match the black patina you will later put on the project.
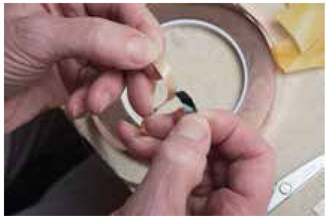
3 To begin the foiling process, place the glass onto the adhesive side of the foil, centering the glass so there is an even amount of foil on either side. It is best to begin the foil away from a corner. Continue turning the glass while you are pressing it against the foil. Make sure there are no gaps between the glass and the foil, especially when working with inside curves.
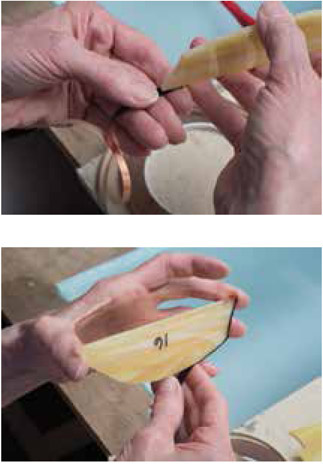
4 When you reach your starting point again, overlap the foil about a quarter of an inch. Make sure the sides line up well and cut off the excess foil.

Now use your thumb and forefinger to crimp the corners. Press in from one direction, then down from the other. Repeat this step with each corner.
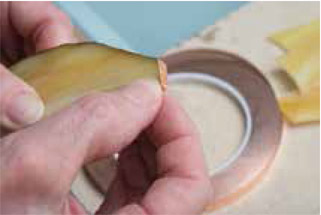
5 Now take your thumb and forefinger and slide them up the edge, folding the foil over the glass on both sides at the same time.
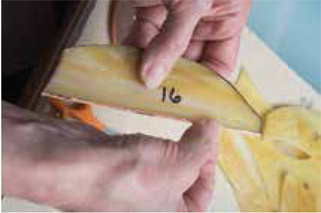
6 Use a plastic fid to burnish the edges of the foil onto the glass. Use the broad edge of this tool to smooth the foil.
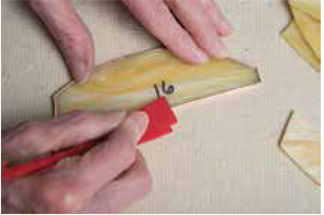
7 Turn the glass over and repeat that process on the back. If there is a texture on the back of the glass, take extra care to make sure the foil is well-adhered.
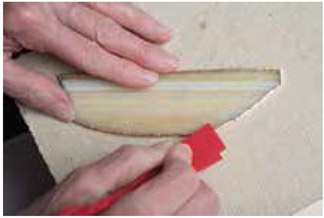
8 Smooth the foil on the edge by running the fid along the sides of the glass as well.

9 If the overlap on any piece is a little off center, you can use a craft knife to trim off the excess foil.
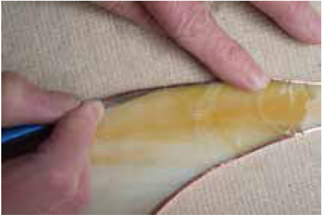
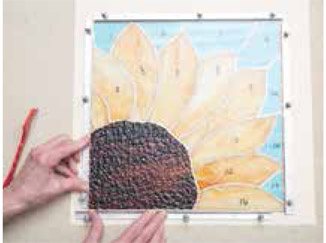
10 Once all the pieces have been foiled, lay them back onto the pattern in their proper places. They should fit snugly within the borders of the pattern.
SOLDERING
Now you are ready to solder.
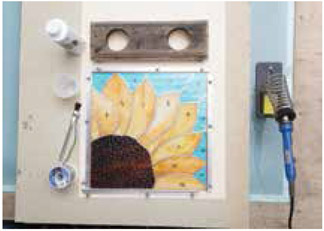
1 If you have an adjustable temperature control iron, set it at the temperature recommended for soldering copper foil seams. Our soldering iron is set to 410 degrees Celsius.
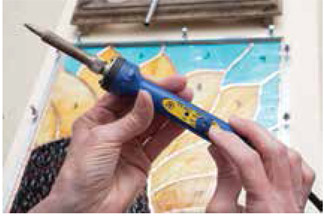
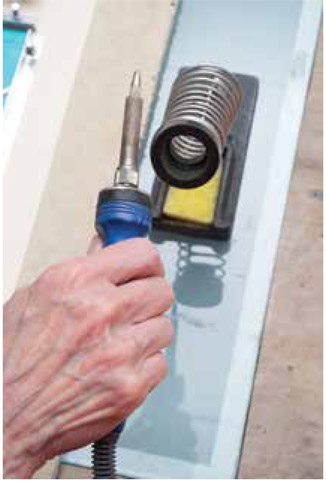
Make sure the sponge is wet in the soldering iron stand.
Pour some flux into a disposable cup so that you do not contaminate the bottle. Dip the brush into the flux and wipe it on the edge of the cup. Paint the flux over all of the copper foil seams. The purpose of flux is to clean the oxidation from the foil surface so that the solder will flow smoothly.
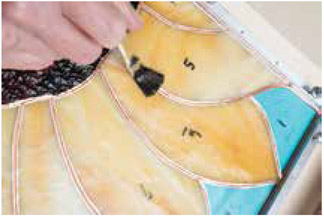
2 Hold the spool of solder so that about 8 inches of solder extends from the roll.
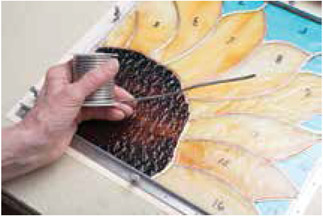
3 Put your hand over the soldering iron, the same way you would hold a flashlight.
4 Put the end of the solder where pieces of glass intersect. Come down flat with the soldering iron to melt about a quarter of an inch of solder onto the copper foil seam. Lift the solder up first, then lift the iron. This will melt a tack of solder to hold the glass pieces together. Continue to tack every place where corners of glass intersect and then add a tack of solder at each of the seams near the edges of the panel.
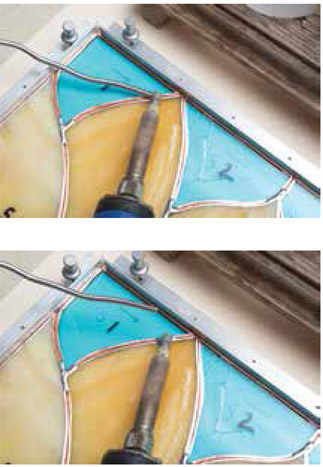
5 After each junction has been tack soldered, remove the pins and layout strips. Pull the pattern out from underneath the panel. Now you can move the panel in any direction so that you can comfortably solder each seam.
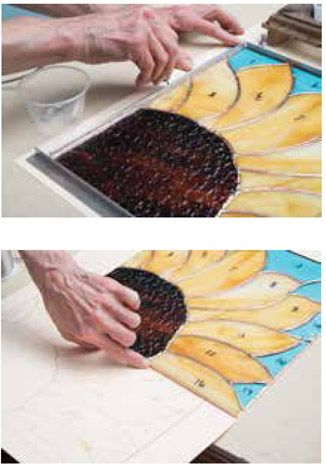
6 Again, begin with about 8 inches of solder extended from the spool. Take your iron out of the holder and wipe each side of the tip on the wet sponge to clean it.
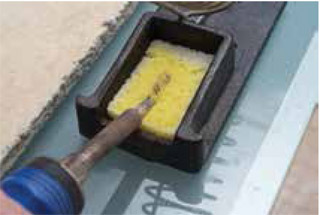
7 Place the tip of the soldering iron on its edge and set it against the copper foil. Tilt the iron back about a quarter of a turn and place the end of the solder onto the flat side of the iron tip.
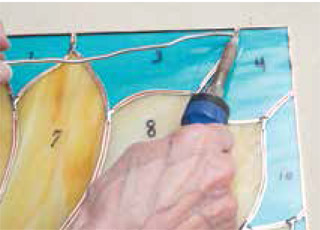
8 As the solder melts, pull the iron down the seam toward you in a slow, steady motion.
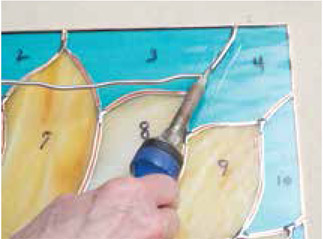
9 As the solder melts away, unspool more so that you always have 6 to 8 inches of solder extended and you are holding only the spool. Heat will flow up the length of solder, so make sure your fingers are back from the unspooled amount. Continue soldering slowly, one seam at a time. We find that many of our students tend to solder too quickly at first. If you find that you are not getting adequate coverage with your solder, slow down!
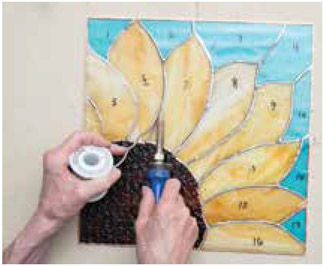
10 The first coat of solder does not look even or consistent. There are many spots that are flat and others that are a bit bumpy. This is typical and will smooth out with an additional layer of solder.
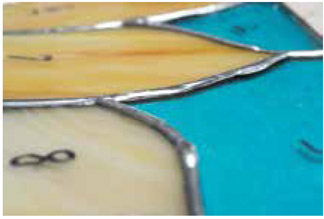
11 After the first coat of solder is complete, paint a second coat of flux over each solder seam.

12 For the second coat, you will again place the iron on the seam, starting straight up and then turning it back a quarter turn to reveal the flat edge. Place the end of the solder against the flat side of the iron. Slowly pull your iron down the seam, allowing the second coat to melt into the first.
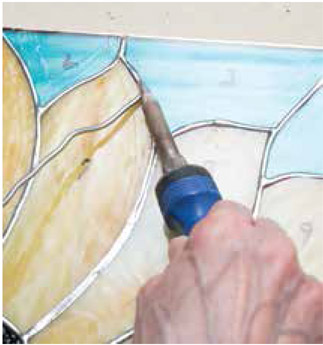
You can see the difference between one coat of solder and two.
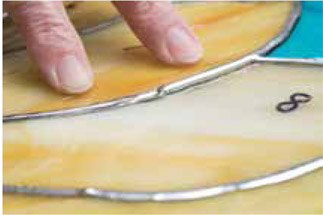
13 Continue adding a second layer of solder to each seam of the panel. Smooth any rough spots by slowly pulling your iron over the seam once more. After all seams are soldered, let the panel cool for about 30 seconds.
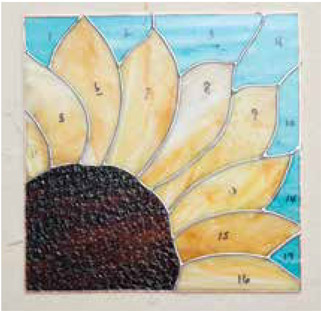
14 Carefully turn the panel over. On the back you will notice that some of the solder has come through from the front and has filled in any gaps between pieces.
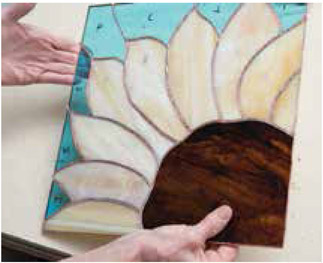
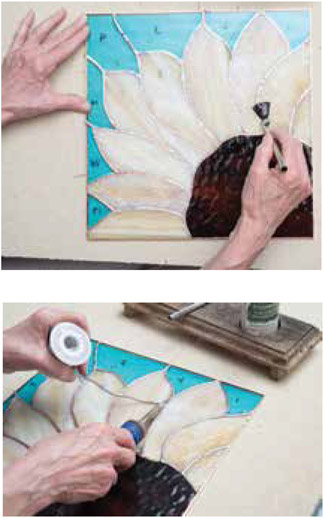
15 Paint the foil lines with flux. Then proceed with soldering the back of the panel. You do not need to “tack solder” this side, because the piece is already held together. On the back side you may only need one coat of solder to get the same beaded look that you got from two coats on the front. In some areas you may need to add a second layer of solder if the seam appears flat. Add whatever combination of one to two layers of solder so that the back of the panel looks as nice as the front.
PRO TIP
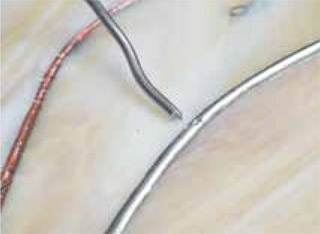
See the pit in the solder line here.
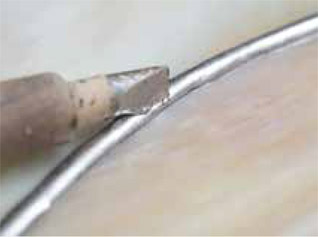
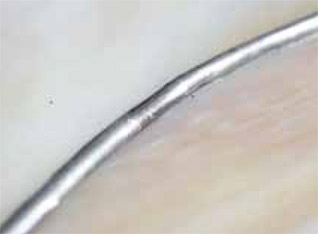
Sometimes flux gets caught in the solder and boils up to the surface. To fix that area, just put the side of the iron down onto the solder until it melts, then lift the iron straight up again.
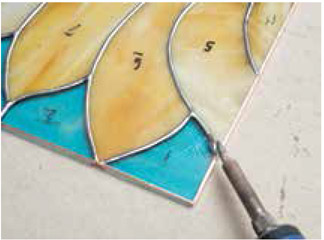
16 When the back is completely soldered, carefully turn the panel over so the front side faces up. You may discover an area where solder has melted through from the opposite side of the panel.
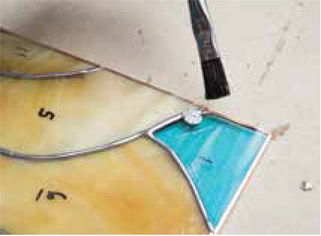
In order to fix it, add some flux, then place the side of the iron over the bump until the solder melts. Lift the iron straight up.
FRAMING
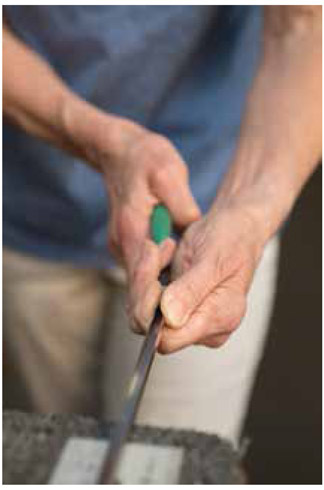
1 For the frame, use 1/4-inch U-channel lead. Stretch the 6-foot length of lead with a lead vise. To stretch it, put the end of the lead, channel side up, into the vise and clamp it down. Hold the other end with pliers and pull the lead straight until you feel it give just a bit. Stretching the lead makes it stronger and straighter, creating more stability for the longevity of the panel.

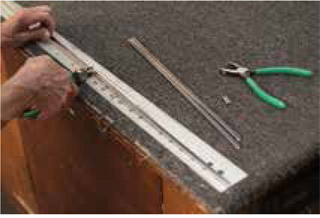
2 Cut the lead into manageable pieces to make it easier to frame the panel. Since this panel is 12" square, cut four pieces of lead that are about 14 inches long.
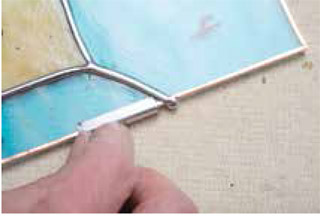
3 Cut a sample piece of lead that is just a couple inches long. With this sample piece, test the edges of the panel to see if the lead will fit over the solder seams.
At any place it does not fit, take the iron and remove about a quarter inch of solder from the panel by melting it off the edge.
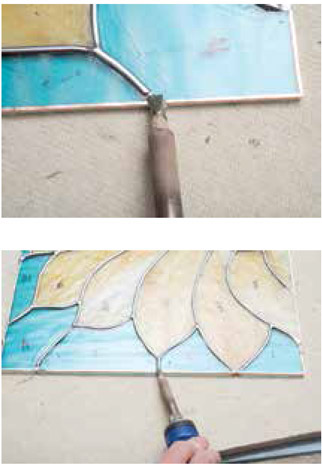
4 Turn the panel over and do the same for each seam on the back. Then stand the panel up on end and use the iron to clean the excess solder off the edges of the panel. Use the sample piece of lead again to test that it fits over every seam of the panel.

5 Transfer the panel to a lead board, made from 1/2-inch plywood with a 90 degree angle permanently attached—this one is made with two pieces of 1/2 x 3/4-inch wood strips.
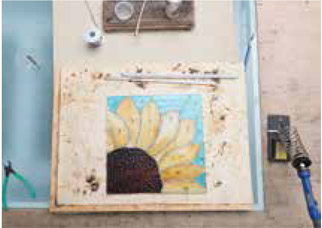
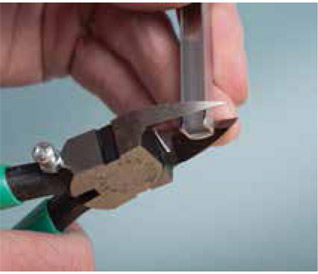
6 You will need to begin framing with a good edge on the lead. Use lead cutters to cut a nice, straight edge to work with on the first strip of lead.
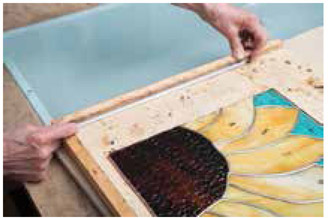
7 The side pieces of lead will go fully from top to bottom, and the top and bottom pieces will fit in between. Lay the left lead strip in place, extending to the bottom of the lead board.
PRO TIP
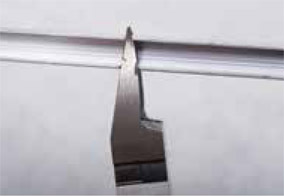
To cut lead properly, always use your lead cutters perpendicular to the open channel of the lead strip. The flat side of the cutters will leave a clean, straight cut.
8 Lay the bottom piece of lead into place, butting up against the left one.
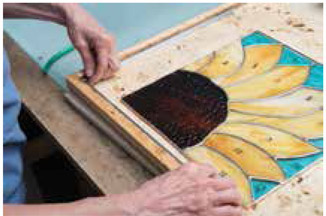
9 Insert the panel into the U-channel lead.
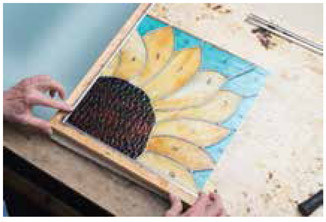
10 Take the sample piece of lead and lay it in position on the right side of the panel. Scratch the bottom piece of lead with a nail to mark where you will cut it.
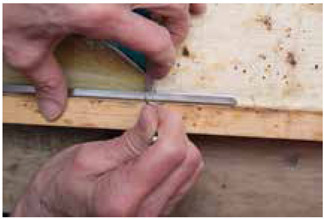
11 Take the lead off the board and cut it at your mark. Place the bottom piece of lead back into position and insert the panel back in the U-channel lead.
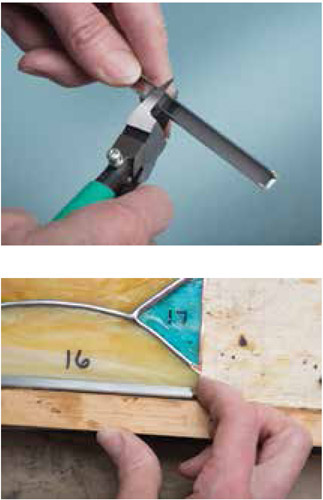
12 Lay the top lead into place, butting up against the left one. Use the sample piece of lead on the right side to mark the top piece where you will cut it.
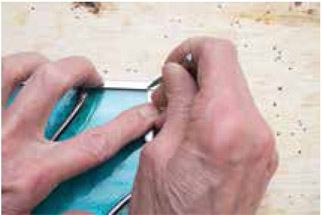
13 Cut the lead at the mark. Place the top lead back into its place.
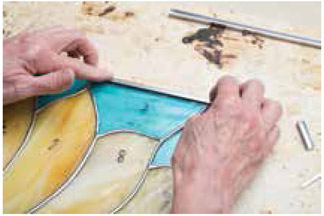
14 Use horseshoe nails to hold the top lead snugly against the panel. Hammer the horseshoe nails into the board.
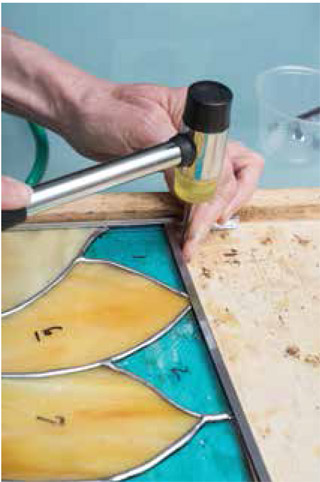
15 Lay the right lead into place and secure it with horseshoe nails. The left and right lead pieces will extend beyond the top of the panel at this time. You will cut those off later.
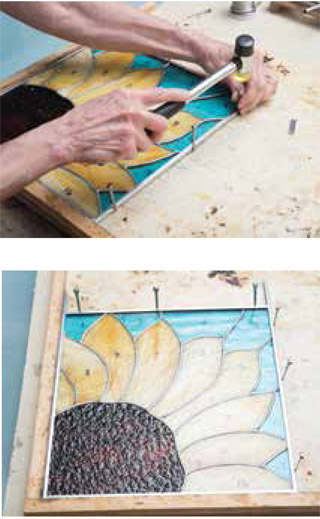
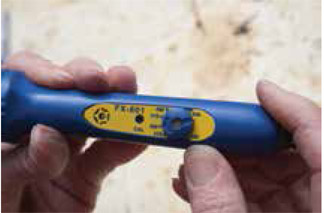
16 Lead framing is very soft. If you have a temperature control iron, turn your iron down to 360 degrees Celsius. If your iron does not have a temperature control, you will need to use a separate rheostat or cool the iron on a wet sponge. An iron that is too hot will melt through the lead framing.
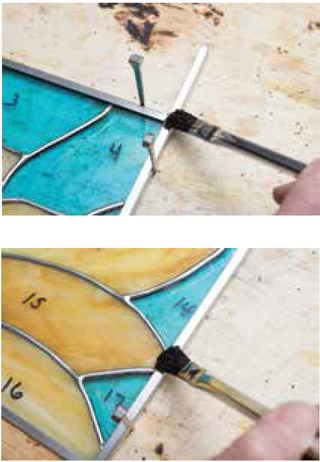
17 Add a bit of flux to each corner of the frame, as well as to the ends of each seam where they meet the lead came.
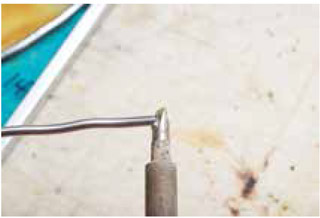
18 Put a dot of solder onto the iron tip.
19 Bring the dot of solder down onto the corner of the lead framing where two pieces intersect.
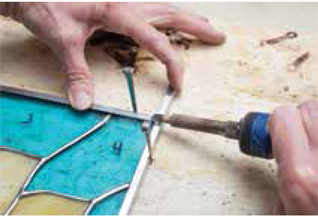
20 Bring the iron straight up as soon as it attaches.
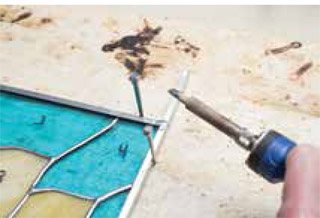
21 Add a dot of solder to each of the remaining three corners.
22 You will also connect each solder seam to the lead frame. Put a dot of solder on the end of the iron. Melt that solder dot into the end of the seam, then rock the iron back to attach the seam to the lead frame. Lift the iron up as soon as it attaches. Do not linger on the lead, as it will melt more quickly than the seams of solder.
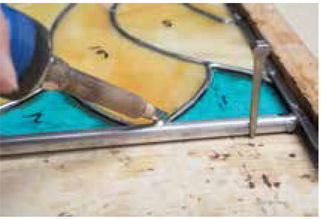
Note: Do not spread the solder up and down the lead framing. It will just get bumpy and will never fully smooth out the way a solder seam does in the panel. This part of the project is not as forgiving.
23 Once the seams are all connected to the frame, remove the nails and move your panel back to the Homasote board.
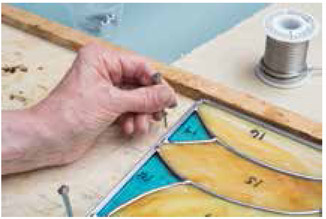
24 Turn the panel over so that you can solder the back seams.
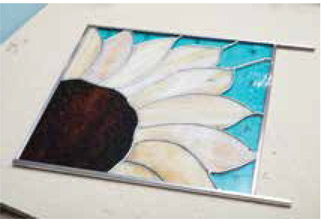
25 Flux each corner of the frame and the connection points for each seam.
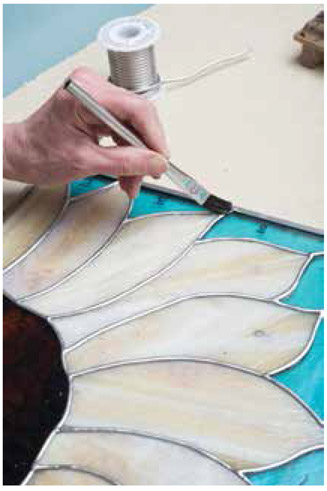
26 Proceed as you did on the front, connecting each seam to the frame and also adding a dot of solder over the junction of the framing at the corners.
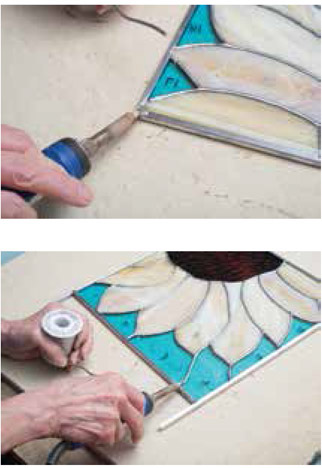
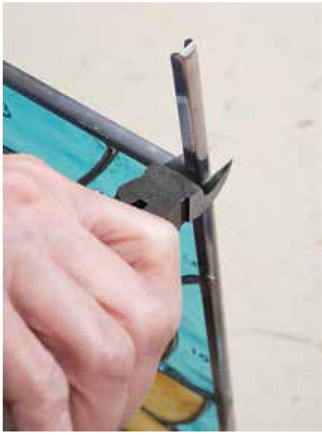
27 Now stand the panel up and trim off the lead that extends beyond the top of the frame.
28 The holes that remain from trimming the lead can be filled in with solder.
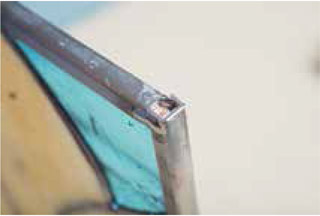
29 Flux the area of the hole and add just a dot or two of solder with your iron to fill the space. You can also fill the holes on the bottom of the frame.
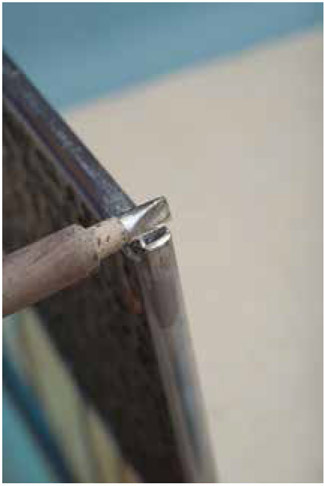
Don’t forget to recycle your lead scraps!
30 Flux the two rings that will become the hooks. Also flux the two corners that will be the top, back side of the panel.
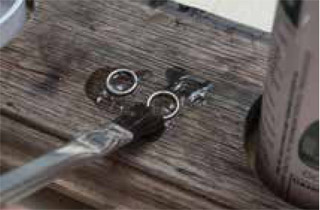
31 Hold one of the rings with a pair of pliers. Position the split in the ring over the corner of the panel’s frame.
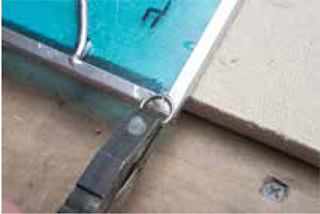
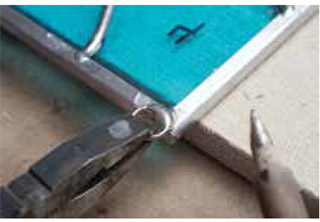
32 With a dot of solder, add the ring to the corner of the panel. Add the second ring to the other corner in the same manner, soldering over the split in the ring.
FINISHING STEPS
1 Wash the panel with a mild detergent and water. Scrub off all the numbers and flux residue, as well as any loose solder balls. Make sure you wash both sides of the panel.
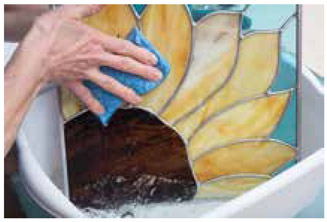
2 Rinse and dry the panel.
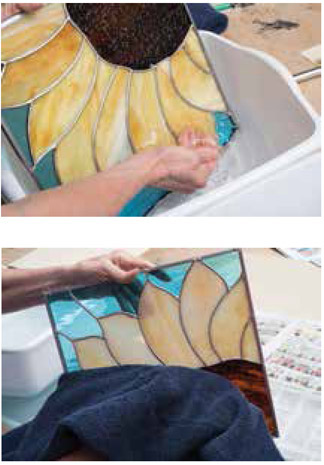
3 Set up some newspaper to protect your work surface and place your panel over the newspaper. Spray the panel liberally with a flux and patina neutralizer. Wipe that side dry. Turn the panel over and repeat this on the back side.
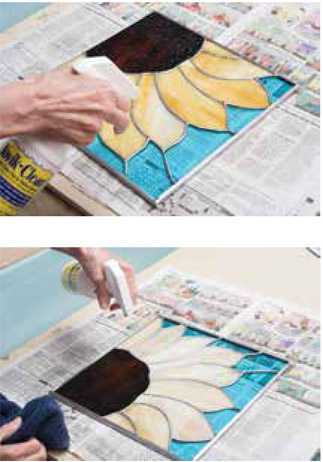
4 Silver solder lines tend to draw your eye, so add a black patina to the piece. This allows the colors of the glass to be the central focus of the panel.
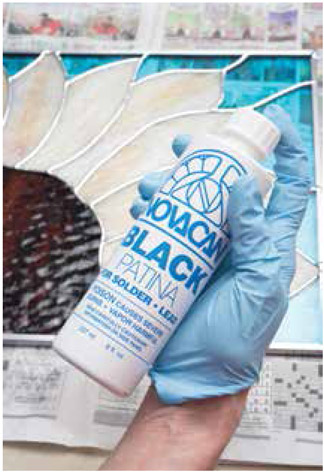
5 Put on a pair of protective gloves. Shake up the black patina. Add a bit of patina to a small sponge and apply it to all of the solder lines and the lead frame. Make sure to get the edges of the frame as well as the hooks. Turn the panel over and repeat the same on the back.
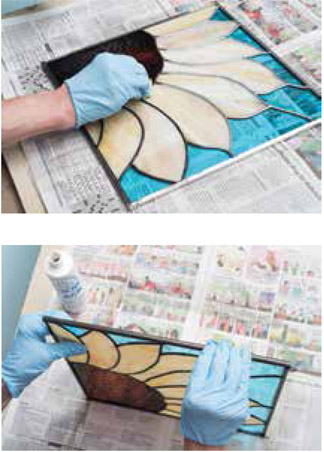
6 Wash the panel gently with detergent so as not to scratch off any of the patina. Rinse the panel in cool water, which will help set the patina. Dry the panel with a towel.
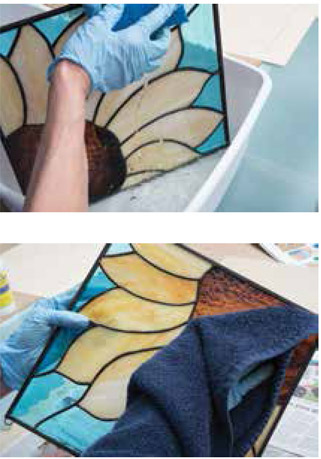
7 Again, spray the panel with the flux and patina neutralizer and dry it. Turn the panel over and repeat this step on the back.
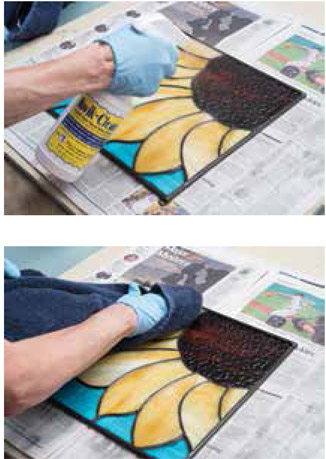
8 Drizzle glass polish onto one side and rub it around with a clean towel.
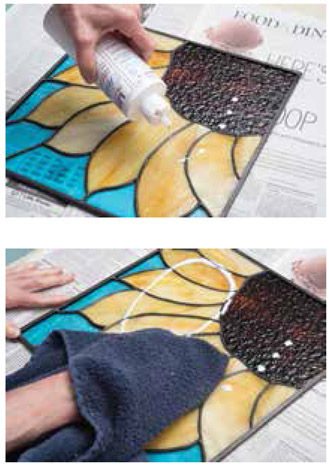
9 Spread the polish onto the glass, the solder lines, and the frame. Turn the panel over and do the same to the back surface. Let the polish film up for a few minutes on both sides of the panel.
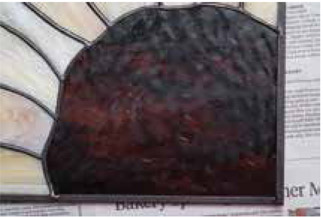
10 Take a clean area of the towel and buff each side of the panel to a clean, beautiful shine.
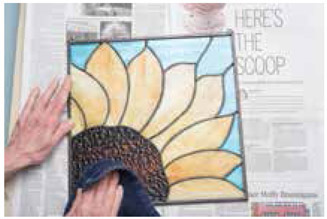
11 Your panel is now ready to hang in a sunny window!
