One of UIViewPropertyAnimator's great features is that you can use it to create interactive and reversible animations. Many of the animations you see in iOS are interactive animations. For instance, swiping on a page to go back to the previous page is an interactive transition. Swiping between pages on the home screen, opening the control center, or pulling down the notification center are all examples of animations that you manipulate by interacting with them.
While the concept of interactive animations might seem complex, UIViewPropertyAnimator makes it quite simple to implement them. As an example, we'll implement a drawer on the contact detail page in the HelloContacts app. First, we'll set up the view so the drawer is partially visible in the app. Once the view is all set up, we'll implement the code to perform an interactive show-and-hide animation for the drawer.
Open Main.storyboard and add a plain view to the contact detail view controller's view. Make sure that you do not add the drawer view to the scroll view. It should be added on top of the scroll view. Set up Auto Layout constraints so the drawer view's width is equal to the main view's width. Also align the view to the horizontal center of its container. Next, make the drawer 350 points in height. The last constraint that you must add is a bottom space to view constraint. Set the constant for this constraint to -305 so most of the drawer view is hidden out of sight.
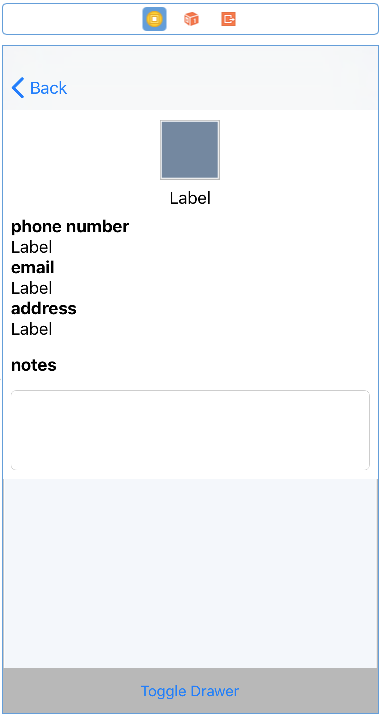
Next, add a button to the drawer. Align it horizontally and space it 8 points from the top of the drawer. Set the button's label to Toggle Drawer. You also might want to add a background color to the drawer so you can easily see it sliding over your contents. The following screenshot shows the desired end result:
In order to implement the desired effect, the code must be able to do the following:
- Toggle the drawer by tapping on the toggle button.
- Toggle the drawer interactively when swiping on the drawer.
- Allow the user to tap on the toggle button and then swipe the drawer to manipulate or even reverse the animation.
Behavior like this is not straightforward; without UIViewPropertyAnimator, you would have to write a lot of complex code and you'd still be pretty far from your desired results. Let's see what UIViewPropertyAnimator does to make this effect manageable.
To prepare for the implementation of the drawer, add the following two properties to ContactDetailViewController:
@IBOutlet var drawer: UIView!
var isDrawerOpen = false
var drawerPanStart: CGFloat = 0
Also, add an extension to ContactDetailViewController that holds an @IBAction for the tap action. We use an extension so we can group together the animation code nicely:
extension ContactDetailViewController {
    @IBAction func toggleDrawerTapped() {
    }
}
Connect the outlet you've created to the drawer view in Interface Builder. Also, connect @IBAction to the toggle button's touch up inside action by dragging the connection from the outlet's inspector panel.
Lastly, add the following lines to the end of viewDidLoad():
let panRecognizer = UIPanGestureRecognizer(target: self, action: #selector(didPanOnDrawer(recognizer:)))
drawer.addGestureRecognizer(panRecognizer)
The preceding code sets up and attaches a pan gesture recognizer to the drawer view so we can detect when a user starts dragging their finger on the drawer. Gesture recognizers are a great way to respond to several user interactions, such as tapping, double-tapping, pinching, swiping, panning, and more.
Also, add the following placeholder method to the extension you created earlier for the @IBAction:
@objc func didPanOnDrawer(recognizer: UIPanGestureRecognizer) {

}
Now that all of the placeholders are there, let's create a simple first version of our animation. When the user taps on the toggle, we open or close the drawer depending on the current state. The following snippet shouldn't contain anything surprising for you:
@IBAction func toggleDrawerTapped() {
    animator = UIViewPropertyAnimator(duration: 1, curve: .easeOut) { [unowned self] in
        if self.isDrawerOpen {
            self.drawer.transform = CGAffineTransform.identity
        } else {
            self.drawer.transform = CGAffineTransform(translationX: 0,
            y: -305)
        }
    }

    animator.addCompletion { [unowned self] _ in
        self.animator = nil
        self.isDrawerOpen = !(self.drawer.transform == CGAffineTransform.identity)
    }

    animator.startAnimation()
}
Depending on the current state of the application, an animation is created. Once the animation finishes, the isDrawerOpen variable is changed, depending on whether the current transformation of the drawer is the default transformation or not. If the drawer is not transformed, the drawer is closed. Otherwise, the drawer is opened. You can build and run the app now to see this animation in action.
To allow the user to interrupt or start the animation by dragging their finger on the screen, we'll need to create a new animator if one doesn't already exist. If one does exist, but it's not running for any reason, we'll also want to create a new animator. In all other circumstances, it's possible to reuse the existing animator. So let's refactor the animator creation code from toggleDrawerTapped() so it reuses the animator if possible or creates a new animator if needed.
Add the following method to the extension and replace all lines except for the line that starts the animation in toggleDrawerTapped with a call to this method:
func setUpAnimation() {
    guard animator == nil || animator?.isRunning == false
        else { return }

    animator = UIViewPropertyAnimator(duration: 1, curve: .easeOut) { [unowned self] in
        if self.isDrawerOpen {
            self.drawer.transform = CGAffineTransform.identity
        } else {
            self.drawer.transform = CGAffineTransform(translationX: 0,
            y: -305)
        }
    }

    animator.addCompletion { [unowned self] _ in
        self.animator = nil
        self.isDrawerOpen = !(self.drawer.transform == CGAffineTransform.identity)
    }
}
Now add the following implementation for didPanOnDrawer(recognizer: UIPanGestureRecognizer):
@objc func didPanOnDrawer(recognizer: UIPanGestureRecognizer) {
     switch recognizer.state {
         case .began:
             setUpAnimation()
             animator.pauseAnimation()
             drawerPanStart = animator.fractionComplete
         case .changed:
             if self.isDrawerOpen {
                 animator.fractionComplete = (recognizer.translation(in: drawer).y / 305) + drawerPanStart
             } else {
                 animator.fractionComplete = (recognizer.translation(in: drawer).y / -305) + drawerPanStart
             }
         default:
             drawerPanStart = 0
             let timing = UICubicTimingParameters(animationCurve:
             .easeOut)
             animator.continueAnimation(withTimingParameters: timing,
             durationFactor: 0)

             let isSwipingDown = recognizer.velocity(in: drawer).y > 0
             if isSwipingDown == !isDrawerOpen {
                 animator.isReversed = true
             }
     }
}
This method is called for any change that occurs in the pan gesture recognizer. When the pan starts, we configure the animation and then pauseAnimation() is called on the animator object. This allows us to change the animation progress based on the user's pan behavior. Because the user might begin panning in the middle of the animation, for instance after tapping the toggle button first, the current fractionComplete value is stored in the drawerPanStart variable.
The value of fractionComplete is a value between 0 and 1 and it's decoupled from the time that your animation takes to run. So imagine that you are using an ease-in and ease-out timing parameter to animate a square from an x value of 0 to an x value of 100, the x value 10 is not at 10% of the time the animation takes to complete. However, the fractionComplete will be 0.1 (10%). This is because UIViewPropertyAnimator converts the timescale for your animation to linear once you pause it. Usually, this is the best behavior for an interactive animation. However, you can change this behavior by setting the scrubsLinearly property on your animator to false. If you do this, fractionComplete will take any timing parameters you've applied into account. You can try playing with this to see what it feels like for the drawer animation.
Once the initial animation is configured and paused, the user can move their finger around. When this happens, the fractionComplete property is calculated and set on the animator by taking the distance traveled by the user's finger and dividing it by the total distance required. Next, the progress made by the animation before being interrupted is added to this new value.
Finally, if the gesture ends, is canceled, or anything else, the start position is reset. Also, a timing parameter to use for the rest of the animation is configured and the animation is set up to continue. By passing a durationFactor of 0, we tell the animator to use whatever time is left for the animation while taking into account its new timing function. Also, if the user tapped the toggle button to close the drawer, yet they catch it mid-animation and swipe upward, we want the animation to finish in the upward direction. The last couple of lines take care of this logic.
It's strongly recommended you experiment and play around with the code that you just saw. You can do extremely powerful things with interruptible and interactive animations. Let's see how we can add some vibrancy to animations by using springs!