The first thing you're going to want to do when you're gearing up to release your app is to register your app with iTunes Connect. To do so, you must be enrolled in the Apple Developer program. You can do this through Apple's developer portal at https://developer.apple.com. After purchasing your membership, you can log in to your iTunes Connect account on https://itunesconnect.apple.com using your Apple ID.
After logging into your iTunes Connect account, you are presented with a screen that has a couple of icons on it:

This screen is your portal to manage your App Store presence. From here, you can manage test users, track your app's downloads, track usage, and more. But most importantly, it's where you create, upload, and publish your apps to Apple's beta distribution program called TestFlight and to the App Store. Go ahead and peek around a bit; there won't be much to see yet but it's good to familiarize yourself with the iTunes Connect portal.
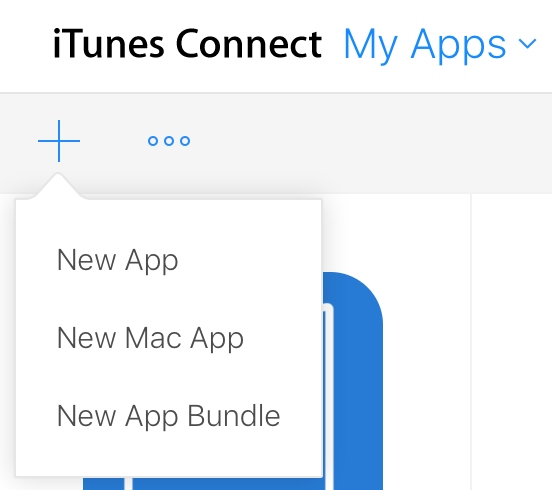
The first step in getting your app out to your users is to navigate to the My Apps section. Once you're inside of the My Apps area, you'll see all the apps you have currently created and you're able to add new apps. To add your app, click the + icon in the top left and click New App:
After clicking this, you're presented with a window in which you can fill out all the basic information about your app. This is where you reserve your app's name, select the platform on which it will be released, and more:
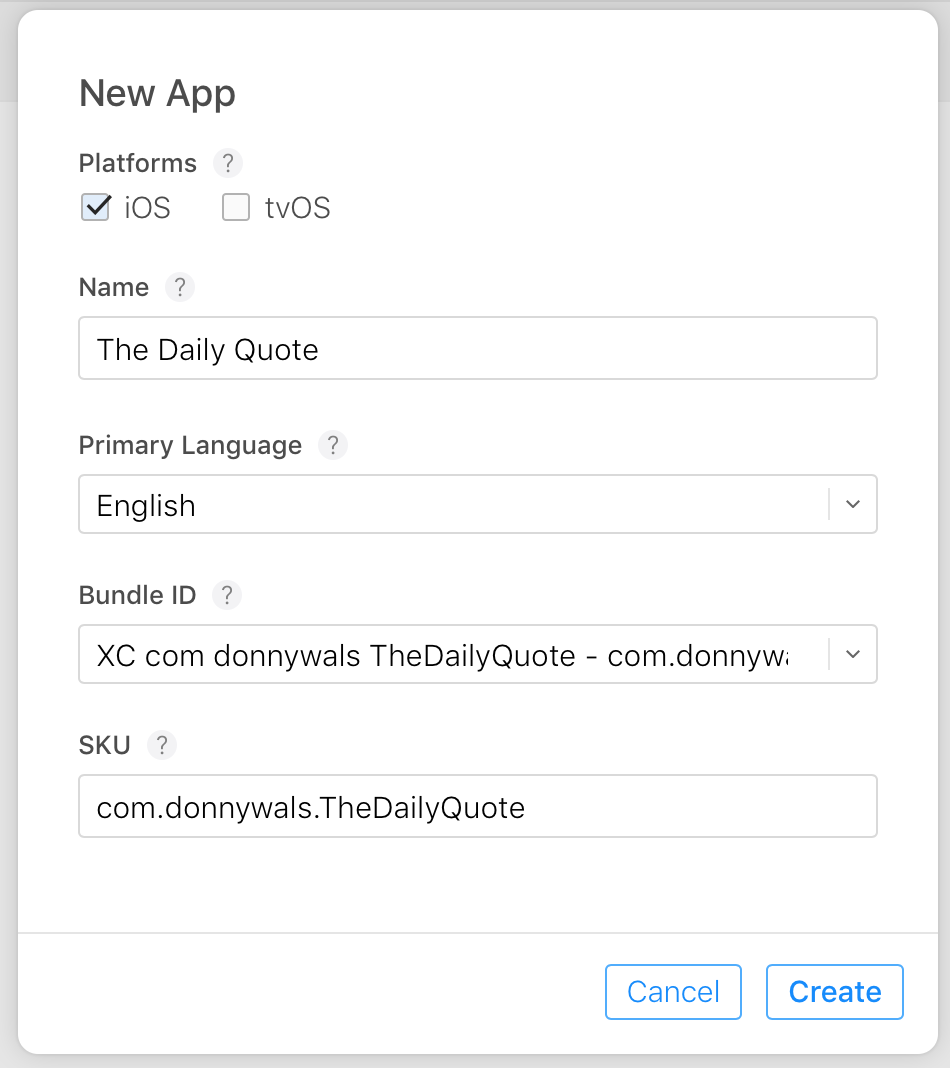
The Bundle ID field is a drop-down menu that contains all of the app IDs that you have registered for your team in Apple's developer portal. If you've been developing with the free-tier developer account up until the last minute, or you haven't used any special features such as push notifications or App Groups, chances are that your app's Bundle ID is not in the drop-down menu.
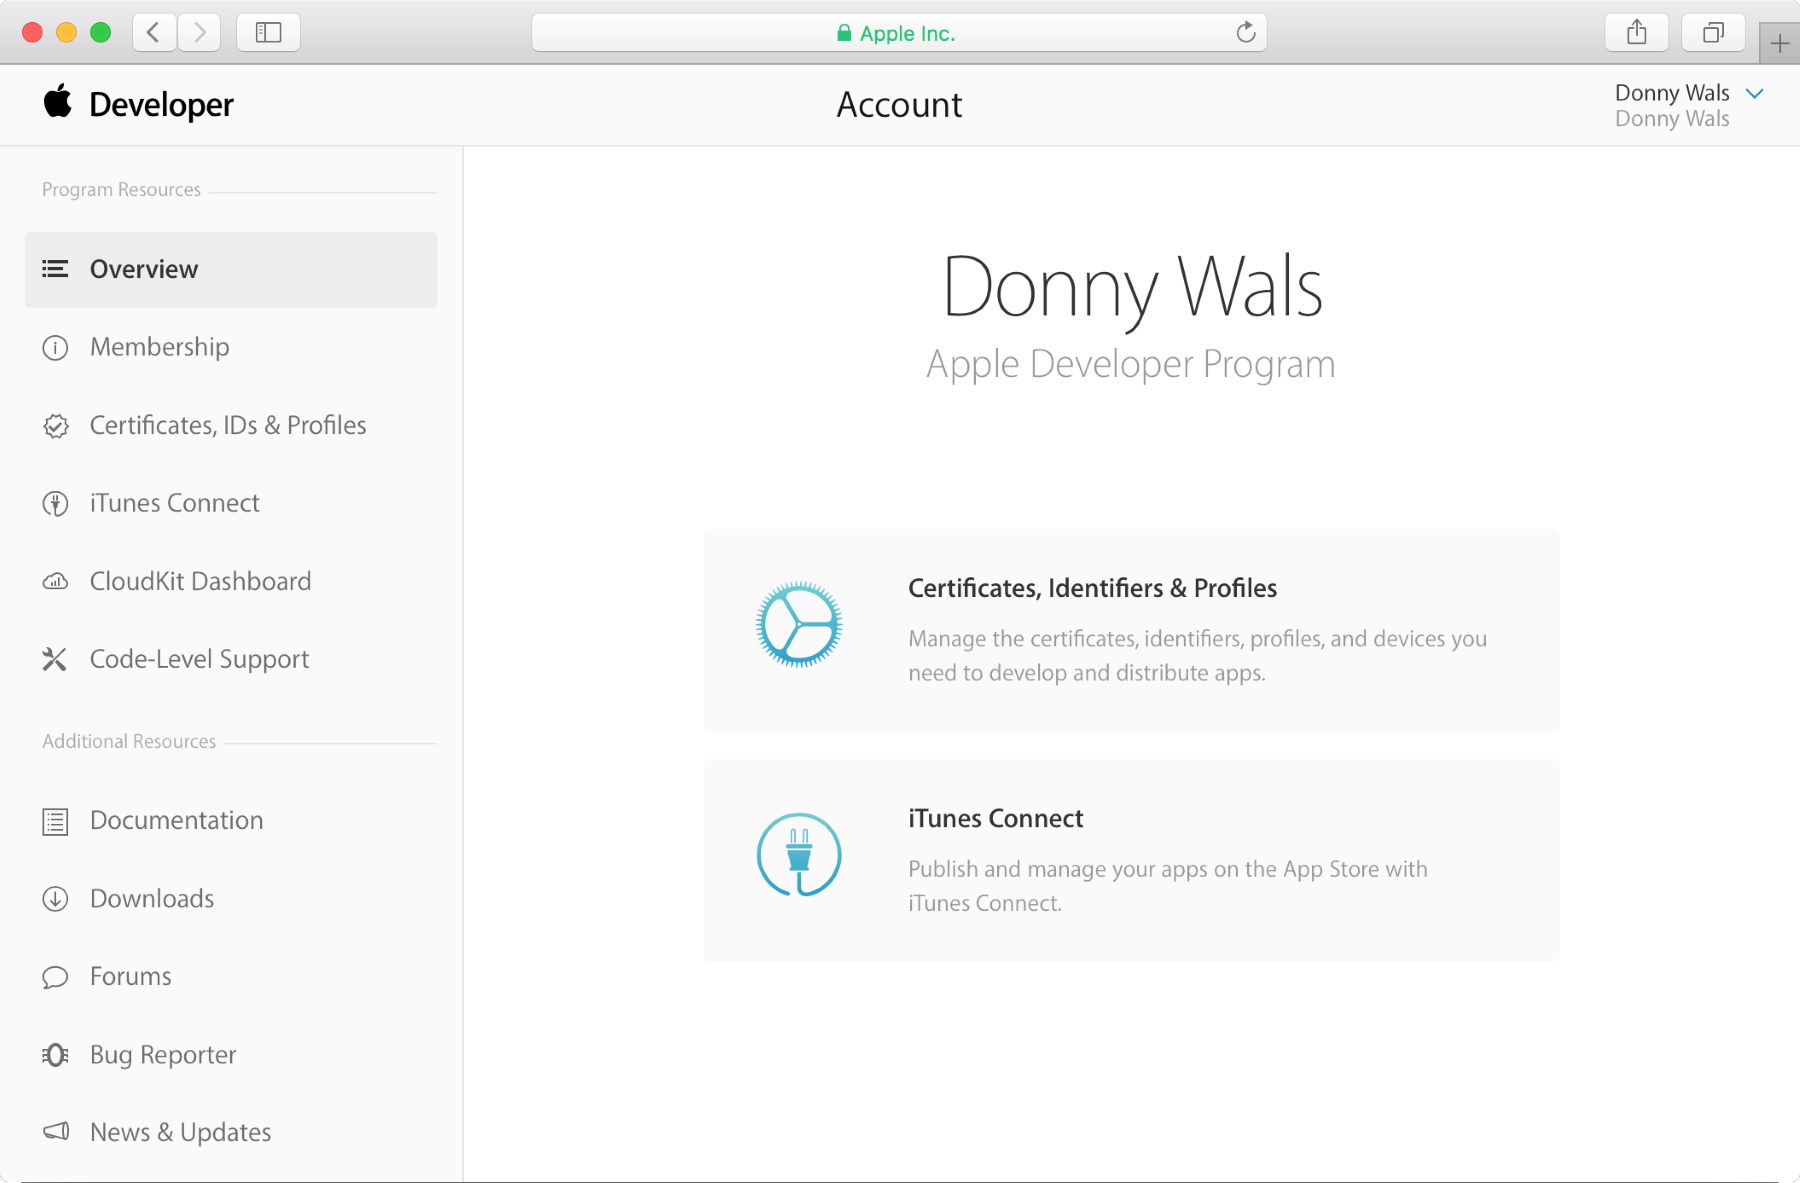
If this is the case, you can manually register your Bundle ID in the developer portal. Navigate to https://developer.apple.com/ in your browser and click the Account menu item. From this page, you can manage certificates, Bundle IDs, devices, and more. A lot of this is automatically taken care of by Xcode but you'll occasionally find yourself in this portal, for instance, to manually register your app's Bundle ID:
To register your Bundle ID, click on the Certificates, IDs & Profiles item on the left-hand side. On the page you're taken to, click App IDs in the menu on the left-hand side. This will present you with a list of currently registered apps. In the top-right corner, there's a + icon. Click this to add a new ID to your profile:

To add your Bundle ID, simply fill out the form fields. You'll want to use a descriptive name for your app's name. It can be the same as the name you have set for your app in Xcode but it can also be a different name; it doesn't have to match. Make sure to select the Explicit App ID field and copy the Bundle ID from your Xcode project. It's important that you perfectly match this. If you don't do this, you'll run into issues later because your app can't be identified.
Once you've done this, you can scroll all the way down and save your new ID. You don't have to select any capabilities since Xcode will automatically manage this for you when you enable or disable them in the Capabilities tab.
After manually registering your Bundle ID, you should be able to move back to iTunes Connect, add a new app, and select your app's Bundle ID. After you've done this and you've created your app in the iTunes Connect portal, have a look around in your app's settings. There are a lot of form fields that you can fill out. The first screen you'll see is your App Information screen. This is where you fill out basic information about your app, assign it a localized name that appears in the App Store, and you can assign categories to your app:

Next, there's the Pricing and Availability screen. This is where you decide in which countries your app can be downloaded and also how much it costs. Lastly, there is the Prepare for Submission menu item.
Whenever you add a new version of your app, you should fill out the form fields on this screen and there are quite a lot of them. The Prepare for Submission form is used to provide screenshots and add keywords, a description for your app, privacy policies, and more. Go ahead and have a look at what's in there. Luckily, everything you have to fill out is pretty straightforward.
Now that our app is registered and ready to be uploaded, let's go back to Xcode, package up the app, and send out some sweet beta invites to our testers!