Chapter 16
Capturing (Or Stopping) Motion through Photography
In This Chapter
Looking at the main considerations when shooting images with motion
Getting great images of hard-to-capture subjects
When most people think of photography, they think of a process that provides a still, motionless image. But you also can use photography to convey motion, and knowing how to handle moving subjects to achieve the results you want opens up new avenues for your photography. Because your digital sensor has a much stronger reaction to light than its film predecessors, your subjects don’t have to have to sit still and wait for the camera to (slowly) capture an image. Shooting at 1/250 second is fast enough to freeze most normal amounts of motion, and most cameras even have the ability to shoot at speeds much faster than that.
Freezing motion and creating sharp images seem to be the most technically correct ways to photograph, but many types of subjects move in a lot of interesting ways. Deciding how to photograph each subject is up to you, and part of that decision is choosing when to eliminate and capture the appearance of motion in your compositions. For example, if you want movement to be a key element in your message and the identity of your subject isn’t necessary, adding motion blur could be the way to go. A random businessman walking down the city street in the rain could become even more anonymous with motion blur. The rain would be blurred as well and its visual impact may be increased.
If you’re ready to show motion in your photos, you need to know how to successfully capture it so you get the exact look you want in your image. In this chapter, I provide you with all the information you need.
Following Compositional Principles When a Subject Isn’t Stationary
A subject in motion may cause you to become apprehensive and concerned about your technical performance while shooting an image. And when you become too concerned with technical issues, it’s difficult to pay proper attention to your subject and surroundings. But don’t worry. Knowing how to use your equipment is the best way to be prepared to achieve great results and make the most out of any situation. (Chapter 3 provides some details to help you discover your equipment.)
 The basic rules of composition (see Chapter 5) apply to moving subjects just as they do to stationary subjects. However, trying to capture or convey motion does bring some new challenges. Perhaps the three main elements to think about when shooting moving subjects are getting the subjects in focus, placing them in your frame in the most appropriate way, and determining whether to freeze the motion or to show it. I explain each of these elements in the following sections.
Focusing on moving subjects
Focus is one of the most important compositional elements, and whether you can get a moving subject in focus depends on the methods you use. With a digital SLR, you can either focus manually or you can take advantage of the camera’s ability to autofocus.
 If you’re familiar with focusing manually, and you’re confident in your skills, you may succeed using that method. But beware. Using manual focus for moving subjects is risky because there’s a lot of room for human error. When you focus manually, you need to take your time and ensure that your focus is exactly where you want it to be. However, by the time you get the focus right on a subject in motion, you may have already missed the shot.
So, taking advantage of autofocus enables you to spend less time thinking of focus and more time concentrating on other aspects of composition and exposure. Consider the two types of autofocus:
One-shot autofocus: You use one-shot autofocus primarily for still subjects. However, you can use this setting while shooting subjects in motion by predetermining where your subject will be, locking the focus on that area by holding the shutter release button down halfway, and then waiting for the subject to enter the area of your focal plane to take the picture. (For more information on focus, see Chapters 3 and 7.)
Sometimes I use one-shot autofocus when I shoot fashion images. I ask a model to step into a specific area, lock my focus on that area, and then ask him to back up and walk toward me. I take the shot when he reaches the area of focus. This way I get a natural walk from him and achieve sharp focus.
Continuous autofocus: When photographers shoot subjects in motion, they usually use a setting designed to track movement and automatically adjust focus accordingly. Nikon refers to this setting as continuous, and Canon refers to it as AI Servo. (Read your owner’s manual to find out which autofocus settings your camera has and exactly how to use them.)
Continuous focus allows you to focus directly on a moving subject by leading it. Leading a moving target refers to aiming ahead of it in order to make up for the distance it will travel. The continuous focus setting causes your camera to focus ahead of your subject based on how fast the subject is moving. Leading is best for shooting unpredictable subjects that are likely to be moving.
Composing subjects in motion
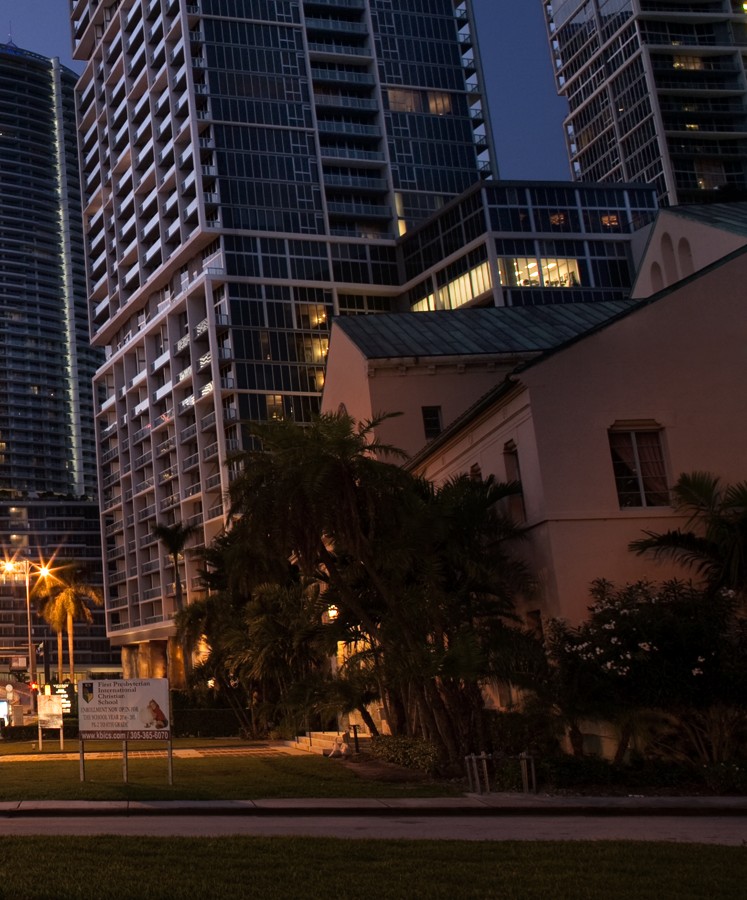
Most often, photographers compose images of moving subjects based on the direction in which they’re moving. The general rule is to provide more space in front of the subject than behind it. This space in front is referred to as active space. It gives the subject room to move into the frame and gives viewers a sense of where the subject is going.
Figure 16-1 shows an example of active space in a composition. You may often follow this example, but remember that each situation is unique and should be photographed accordingly. Look for what’s most interesting in telling the story of your subject. Perhaps where the subject came from is more interesting than where it’s going. For instance, a rally car kicking up a trail of dust behind it could create interesting lines and shapes.
Because action is part of the message when photographing a subject in motion, be on the lookout for compositional elements that help give the sense of movement. Here are some elements that can help you:
Lines: Lines are a great tool for emphasizing and hinting at movement. They lead people’s eyes in certain directions. Try to compose your scenes so the compositional lines assist in moving a viewer’s eyes in the direction of the suggested motion.
Supporting elements: These elements help tell the story of why a subject is in motion or where it’s going. If, for example, a runner is giving it everything she has, you may find it helpful to show the finish line that’s motivating her. Or you can reveal the runner behind her who’s causing her to push it.
Image format: Whether your composition should have a vertical or horizontal format is an important decision to make. If the subject is moving in a horizontal direction, a horizontal format may work best. If it’s moving vertically through the scene (as a space shuttle might), a vertical format may tell the story better. For more on horizontal and vertical formatting, check out Chapter 11.
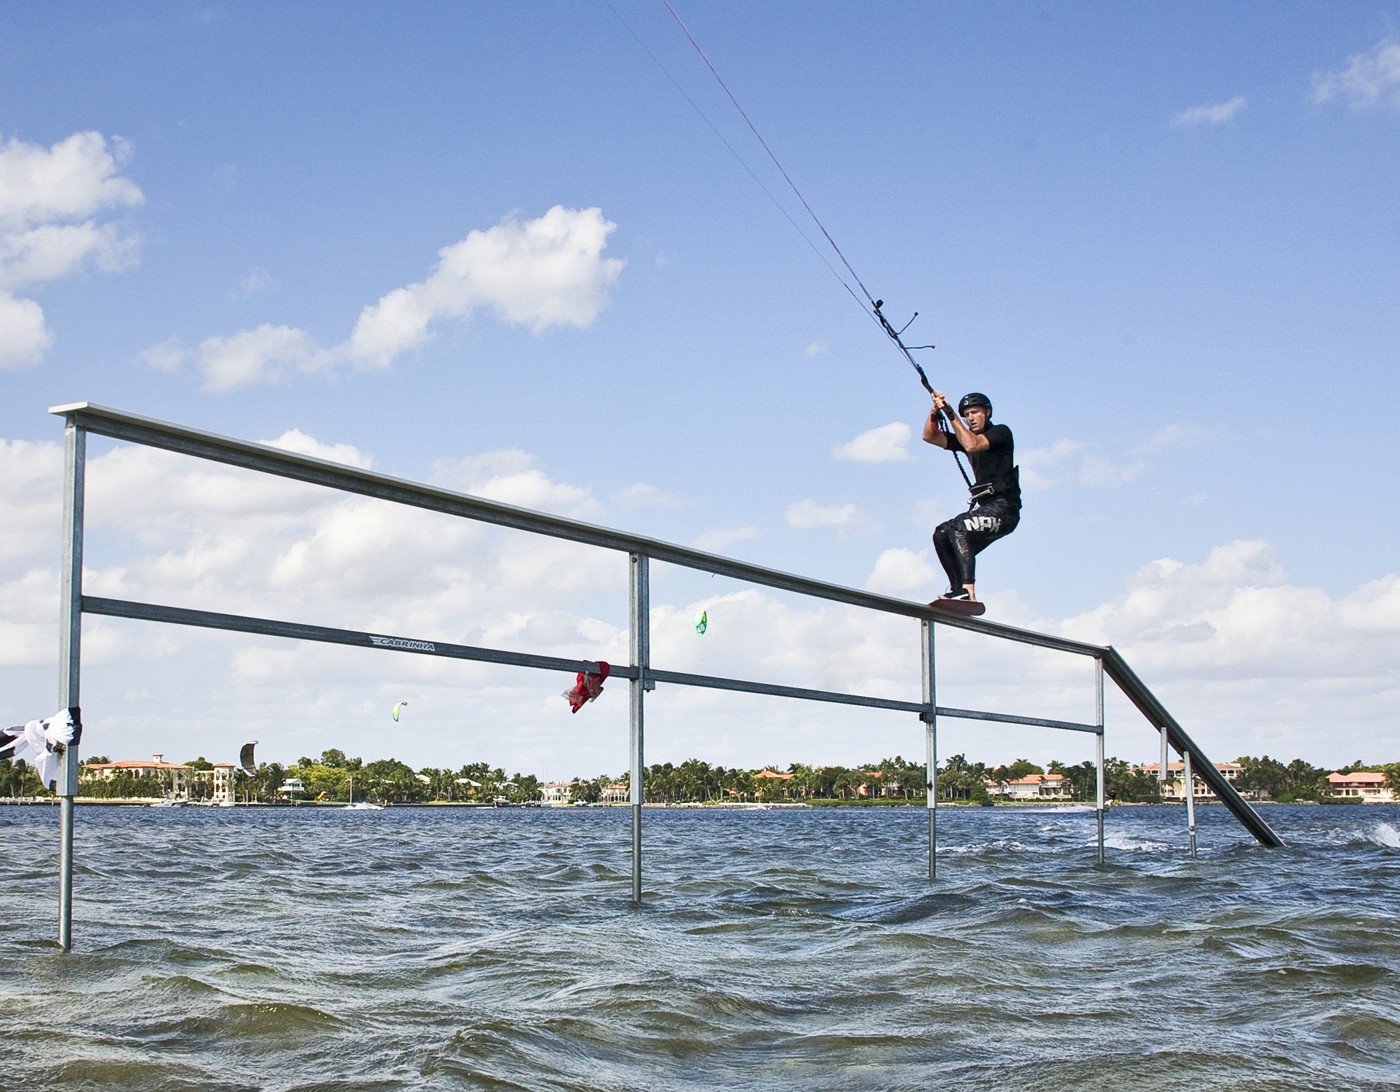
Figure 16-1: The space provided in front of the subject shows the extreme length of the rail he’s attempting to slide across.
Deciding whether to freeze or show motion
When you’re photographing a subject in motion, you have the option to freeze or show the motion. Each situation is different, so you have to decide which way to go. I describe the methods in the following sections.
Producing sharp detail by freezing motion
When you want the maximum amount of clear and sharp detail in your photographs, you want to freeze motion as much as possible. Some situations where you may want to freeze motion completely include the following:
Your subject has made impact with a liquid and created a splash, and you want to capture the effect.
The details in your subject (which is moving) and background need to be clear for your message to be effective.
A water drop is falling from a leaky faucet, a rock face, or a melting icicle.
You’re photographing an explosion or a bullet passing through something.
You freeze motion primarily by shooting with a fast shutter speed. The quicker your subject is moving, the more you should speed up your exposure time. An exposure time of 1/250 second is a good starting point for freezing motion in most cases, and it’s the maximum speed in which most cameras can still sync with a flash. So, if you’re shooting with a flash, you shouldn’t go any faster than this unless your camera is capable. (Refer to your owner’s manual to find out the max sync speed of your camera.) If you’re shooting with available light, you don’t have to worry about sync speeds, and you can shoot as fast as your camera allows.
Keep in mind that your shutter speed also controls your exposure (in combination with your aperture and ISO, which I cover in Chapter 3). So, if your exposure setting is 1/250 second at f/11 with an ISO of 200 and you speed up your exposure from 1/250 to 1/500 second, you need to open the aperture 1 stop to f/8 or raise the ISO 1 stop to 400 in order to compensate for the 1 stop loss of light. When the aperture is opened up all the way and using the maximum ISO, you’ll be limited as to how fast you can shoot while maintaining a proper exposure. The brighter a scene, the less you have to worry about this dilemma.
Freezing the motion caused the drama in Figure 16-2. This image shows that the kite surfer just did a trick at a high speed with a lot of power behind it. The spray helps to suggest movement.
Showing motion blur
Motion blur occurs when your shutter speed is too slow to freeze the motion of your subject. As a result, your image doesn’t have sharp focus and may include some streaking. Sometimes motion blur ruins the outcome of a photo, but you also can use it to tell the story of a subject in motion more effectively. The relationship between your subject and your shutter speed determines how much motion blur you have in your image.
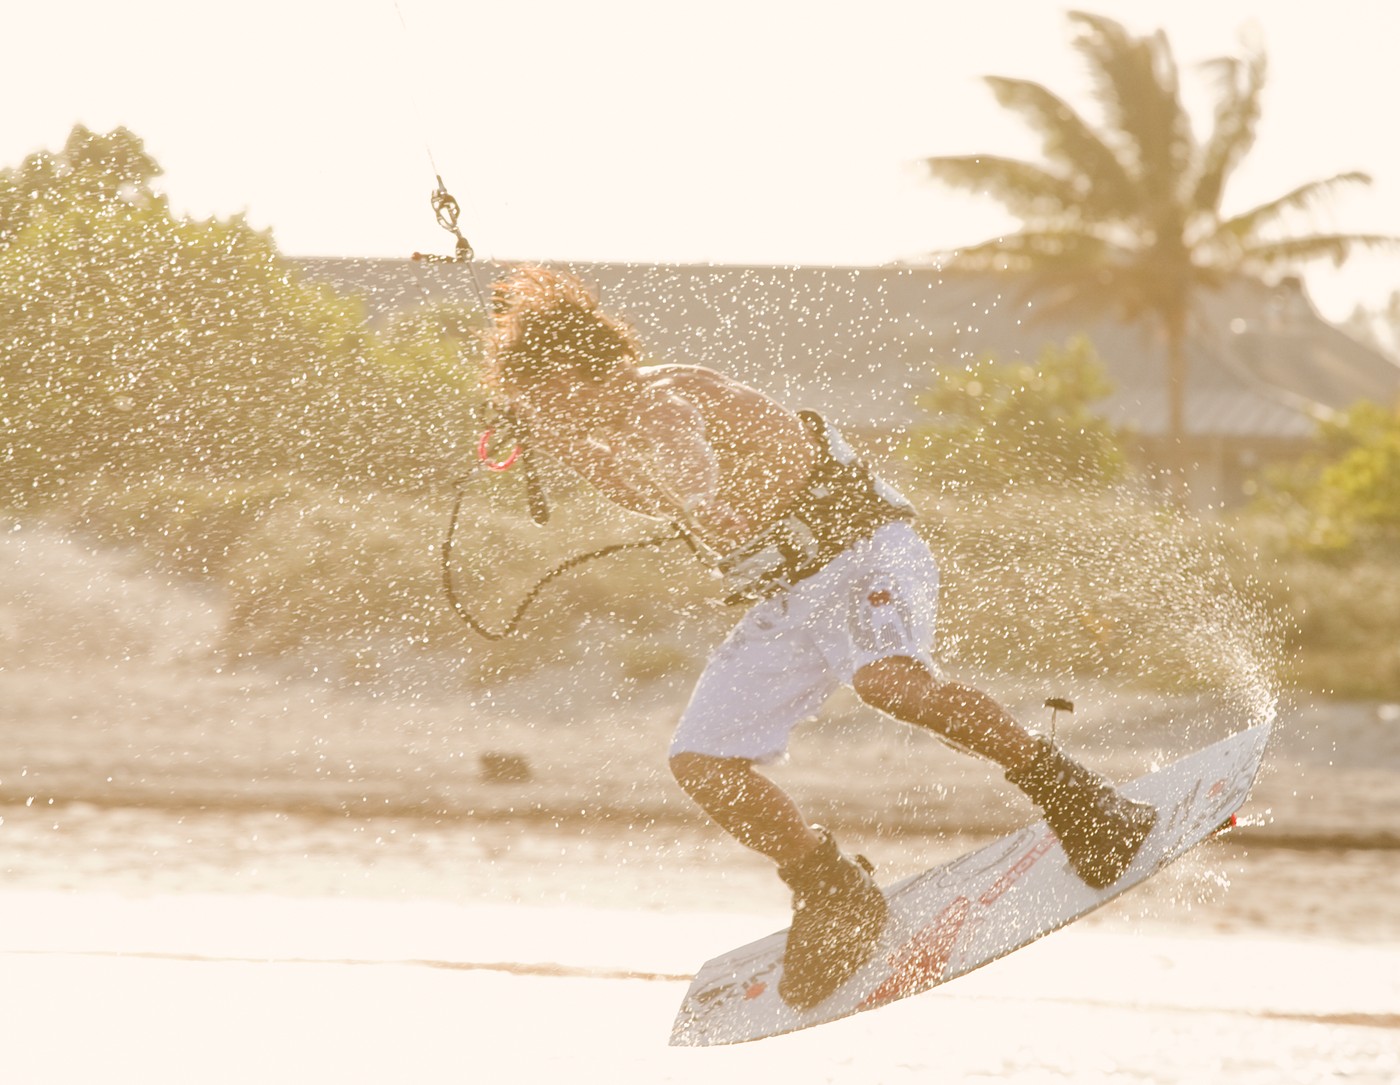
Figure 16-2: Capturing the moment by freezing time.
Results vary when it comes to motion blur. The more practice you have, the more reliably you can predict the results. You can slightly blur a person walking down the street with a 1/30-second shutter speed. Depending on how fast or slow the person is moving, however, this technique could cause results that appear out of focus rather than blurred by motion. In order to emphasize the motion in his walk, a 1/15-second shutter speed may work better.
 The slower your shutter speed, the less identifiable the subject and the stronger the emphasis on the motion that’s happening. A car going 35 mph down the street may start to streak at 1/60 second.
In the following sections, I discuss capturing motion in light (fireworks, headlights, and so on) with long exposures. I show you how to create an effect that captures detail in your subject while causing the environment around it to streak with motion. I also explain how to combine the techniques of freezing motion and motion blur in one image.
Streaking lights
One interesting way to use motion blur is to shoot long exposures at night in order to capture moving lights. In Chapter 10, for example, I discuss the technique of setting your camera on a tripod for long periods of time to photograph star trails. This technique also works with cars passing through your scene. Composing a frame of a winding road with the city or mountains in the background provides a great opportunity to practice with this method. Take some practice shots to make sure you have the correct exposure and an effective composition. When a car is about to enter the scene, start your exposure.
You want the car to enter and exit the scene during the time of the exposure. Doing so gives the sense that the car passed through the scene. If your exposure stopped before the car exited the scene, it would seem as though the car stopped in your image. Plan your shutter speed accordingly.
In Figure 16-3, I photographed a night scene in downtown Miami to demonstrate the effect of moving cars and long exposures. I got this shot just after rush hour on a Friday, when many cars were passing through the scene. The heavy traffic gives the impression that the city is busy and full of life. I chose a perspective that caused the streaks from the car lights to lead you into the frame toward the heart of the city. A lot is going on in this image, and my intention was to give a sense of the potential energy the bicycle has. It’s still on the sidewalk in the photograph, but it could tempt a viewer to imagine riding it alongside all the streaking cars in the street toward the downtown area.
Fireworks, lightning, fire dancers, and ravers dancing with glow sticks all offer further opportunities for capturing streaking light. You also can create your own streaking-light scene by asking someone to hold a light source like a flashlight and draw. Figure 16-4 shows you an example of this technique, which is called drawing with light.
To expose properly for a photo showing a person drawing with light, shoot in an area that’s very dark (the darker the better). Doing so ensures that the motion of the person drawing isn’t detected by your camera’s sensor. Use a long shutter speed to give the person enough time to draw out what you have planned. By lighting your subject and scene with a flash or strobes, you can freeze one moment during the exposure. In this case, the flash fired at the beginning of the exposure, and the remaining time in the exposure was used to draw with the flashlight.
Panning
Usually motion blur arises from elements in motion, not from anything that’s still. So, because your camera is still, only moving things streak. Panning, or tracking your subject with your camera while using a slow shutter speed, enables you to show your moving subject in a clear way while the background and elements around it are affected by motion blur. The goal is to move your camera in the same direction as your subject and at the same speed for the duration of the exposure. If you get it right, your subject is mostly sharp and identifiable but surrounded by a mass of streaks that represent motion. For an example of panning, refer to Chapter 7.
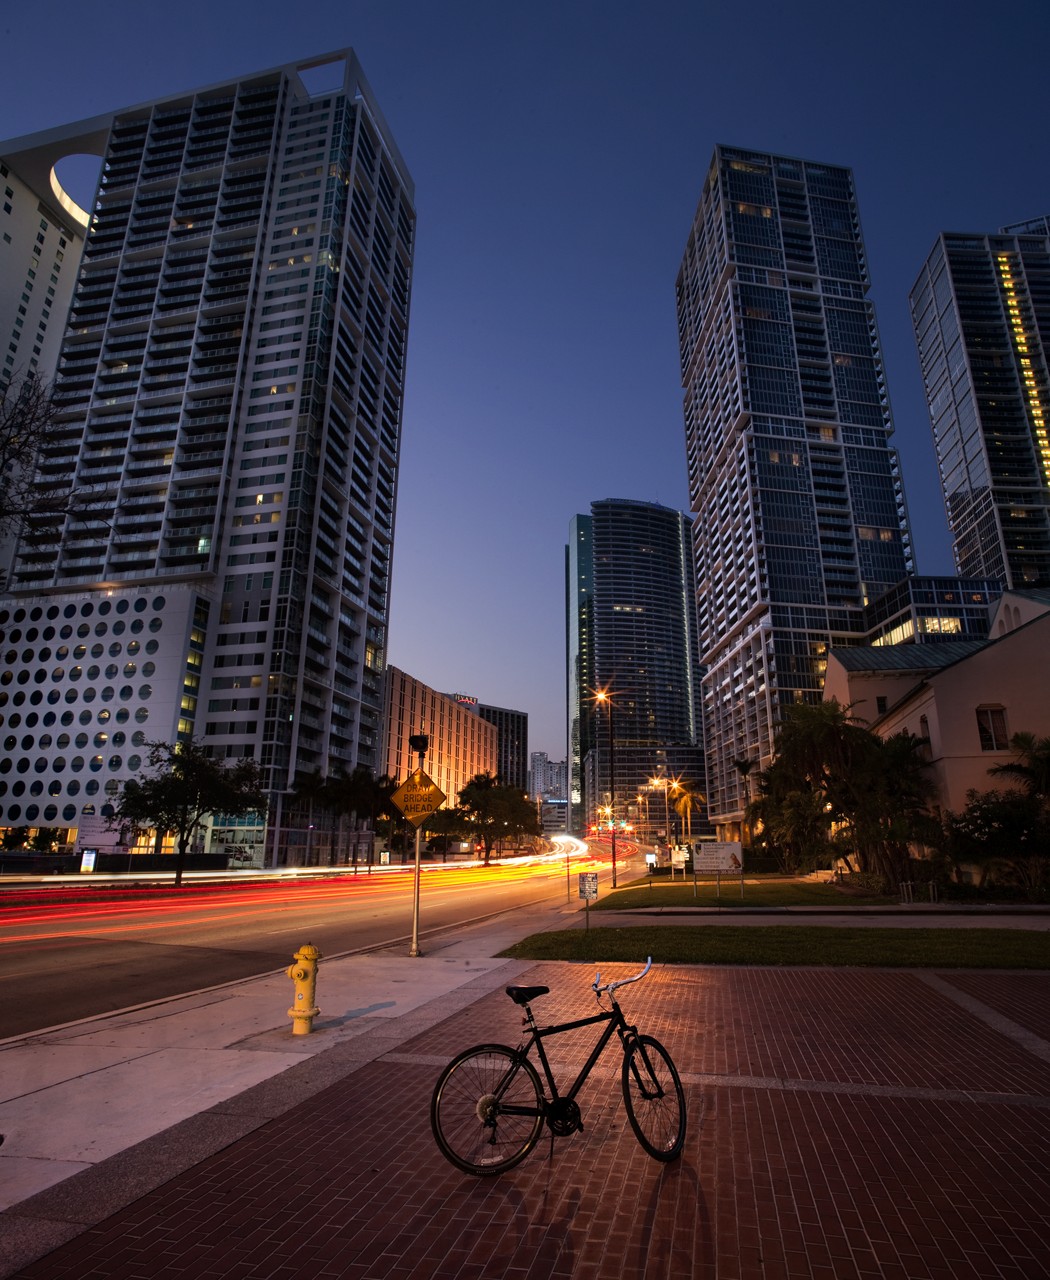
Figure 16-3: Streaking car lights in Miami at night show a way to use motion blur.
The longer your shutter speed, the more drastic the streaks in your image will be. Longer shutter speeds mean that you need to be more accurate when you track your subject, however.
Combining flash with motion blur
Because your flash provides light for such a brief instant, it tends to freeze motion in photographs. This makes for an interesting tool when combined with a slow shutter speed. Mixing flash with available light is a common technique; it requires that you balance the intensity of the two light sources to achieve the contrast you desire.
Sometimes your flash acts as the key light and sometimes it acts as a fill light. When using your flash to freeze motion during long exposures, the flash is your key light and creates a clear image of your subject that’s frozen in time. The available light causes motion blur. Because the flash lasts only an instant and your shutter is open longer, the exposure continues to take place while the subject is moving. The result is a clear image of the subject with motion streaks behind it suggesting movement. You get the best of both worlds. (For more information on lighting, refer to Chapter 10.)
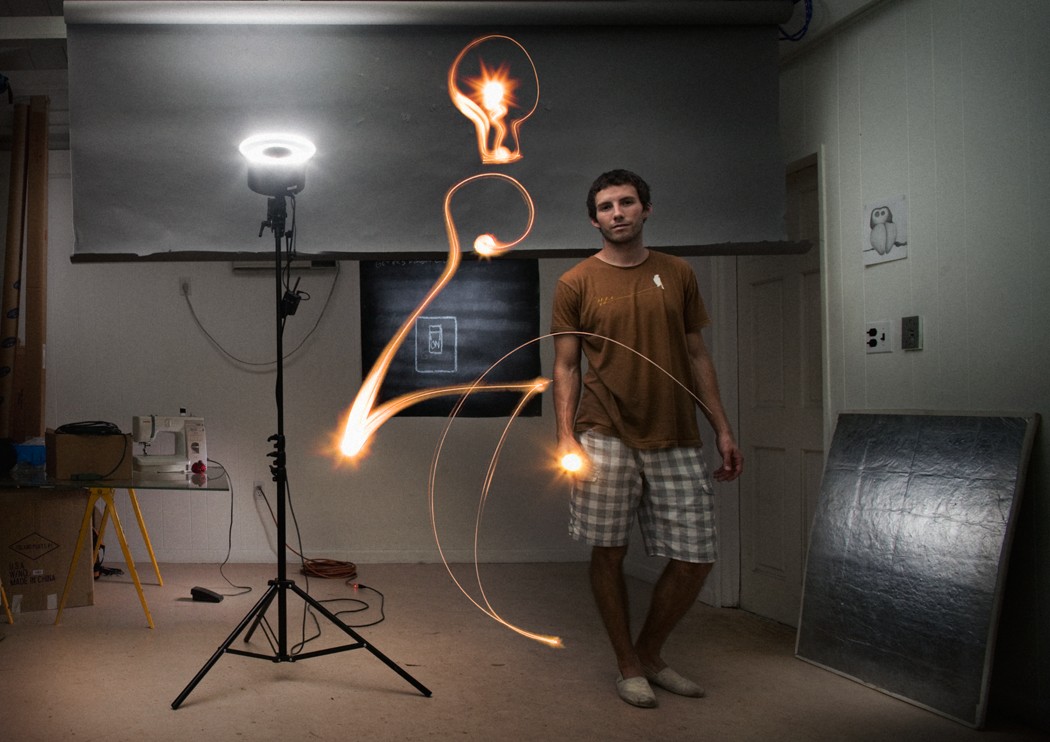
Figure 16-4: Drawing with light during a long exposure is a good way to have some creative fun with friends.
When using this technique, understanding how your camera works is important. The flash can sync with your shutter in the following two ways:
At the very beginning of the exposure (when the shutter curtain first opens): This sync setting, called the front curtain sync, isn’t appropriate for combining with motion blur. If your subject is running across your frame, the flash lights her, and the motion blur occurs in the direction she’s running. She then looks like she’s running backward in the photograph.
At the end of the exposure: Most cameras allow you to set the flash to sync with the end of the exposure just as the shutter curtain is closing. (This setting is called the rear curtain sync setting.) The blur is then captured first; when the subject is at her final point in the exposure, the flash captures the clear image of her. The result is an image of someone running with motion blur behind her.
Check your camera’s owner’s manual to find out what sync options you have.
Figure 16-5 shows examples of using the rear curtain sync setting combined with a slow shutter speed, a flash, and a moving subject. Forward motion is emphasized and a clearer depiction of the subject is created.
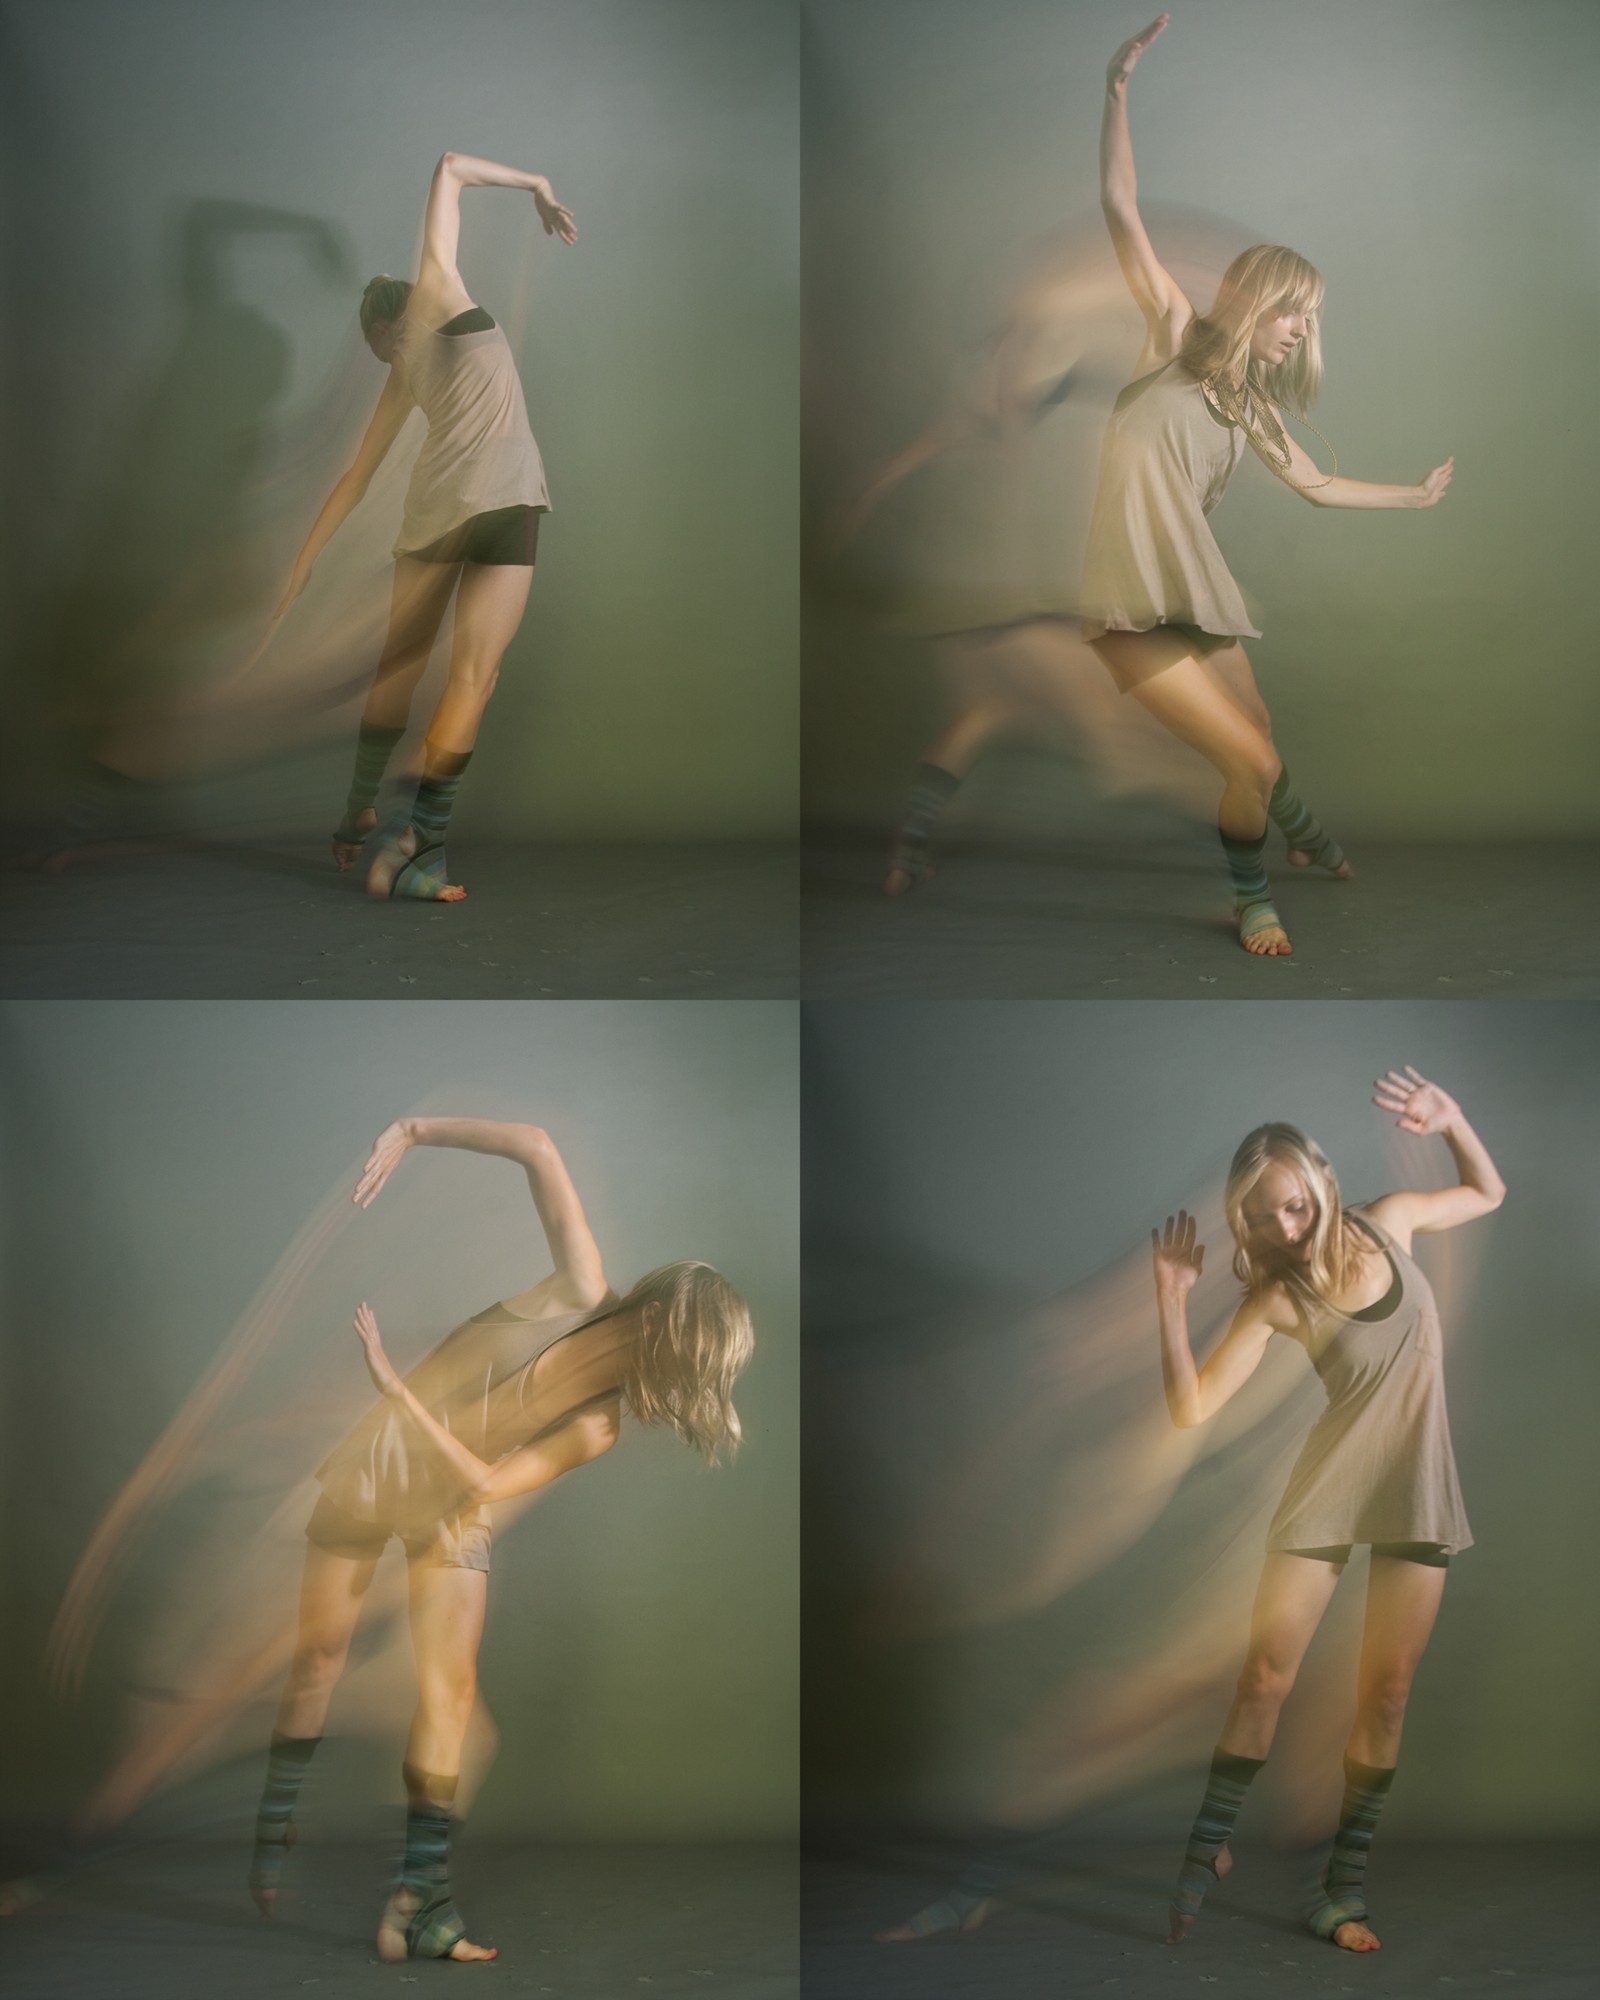
Figure 16-5: The rear curtain sync setting provides a creative motion blur that more clearly shows the subject.
Up for the Challenge: Photographing Subjects Constantly on the Move
Life doesn’t always stand still for you to get the photograph you desire. In many instances, you’ll be faced with subjects that are in constant motion. Being prepared and knowing what you want and how to get it are necessary skills for creating great compositions in these scenarios.
In the following sections, I discuss capturing great images of children at play, successfully photographing the family pet, and getting the shot during sporting events.
Taking successful images of children
Kids rarely stand still, so photographing them can be a challenge. However, the cool thing about children who are playing or engrossed in something is the possibility that they won’t even notice you’re taking their picture. Even if they are aware of it, chances are they won’t pay much mind to it — that is, as long as you don’t interfere with what they’re doing.
When you photograph children playing or otherwise in motion, you have to be able to capture images as you see them, and you can’t ask children to stand still for too long. In fact, you may even get more realistic images if you don’t interfere with their natural actions at all. As a result, you need to be prepared to act fast. The more practice you have with your equipment, the better you can predict its results in different circumstances.
Here are the main things to consider when photographing children:
Have fun with it. Kids sense when you’re taking something too seriously, and it could ruin their mood. You don’t want to create a lawless scenario and allow things to get too carried away, but it’s wise to keep things interesting enough to avoid temper tantrums.
Vary your angle. Get low angles so that some of your images are on the same level as the children. Doing so brings your viewers into the heart of the action. Also, try getting up high for a different perspective. A bird’s-eye view could be an interesting take on children at play. Too many images from your own eye level start to become boring. For more on perspective and camera angles, head to Chapter 8.
Remain conscious of how your composition looks overall. As you’re photographing children, things will be happening quickly. However, that’s no excuse to have a pole sticking out of a kid’s head, or to have your subject constantly positioned in the center of the frame. For a refresher on arranging visual elements in a frame, see Chapter 5.
Make sure your focus is clear. Use a method of focusing that you’re comfortable with and that allows you to achieve sharp focus on your pint-sized moving subjects. In the earlier section “Focusing on moving subjects,” I suggest continuous focus as the best automatic setting for shooting moving subjects.
Look for interactions between the children, or expressions created with their hands. Children reveal their emotions more freely than most adults, even when they’re shy.
Switch back and forth between freezing the motion and allowing for motion blur. Most of the time people want clear photos of their kids, but sometimes an image with motion blur tells the story better and is appreciated.
Catching shots of the family pet
Photographing your pets is similar to photographing children at play. They tend not to hold poses for very long, and they have short attention spans. So many of the techniques discussed in the previous section apply. For instance, getting down low (on the same level as the animal) is a great way of showing a perspective that’s more personal and reveals more specific details. And taking multiple images gives you more options to choose from. This way it’s more likely that you’ll find an image that exudes the personality of your pet.
Animals tend to give sincere facial expressions 100 percent of the time. All you have to do is choose a location with scenery that speaks to your pet’s personality and has nice lighting. (For more information on lighting, head to Chapter 10.)
Animals may not do what you tell them all the time, but unlike humans, they act natural even when the camera is out. Watching and waiting for the right moment is one method for getting great images of your pets. You can’t ask them to redo something cute that has already come and gone though, so don’t hesitate to take the shot. If you see a great moment, grab it. Then, if your composition isn’t perfect, you can always tweak the crop and exposure in postproduction. (I discuss photo-editing software in Chapter 18.)
The image in Figure 16-6 is a snapshot that captured a fleeting moment. This type of shot shows the personalities of the dogs and can be enjoyed for a lifetime.
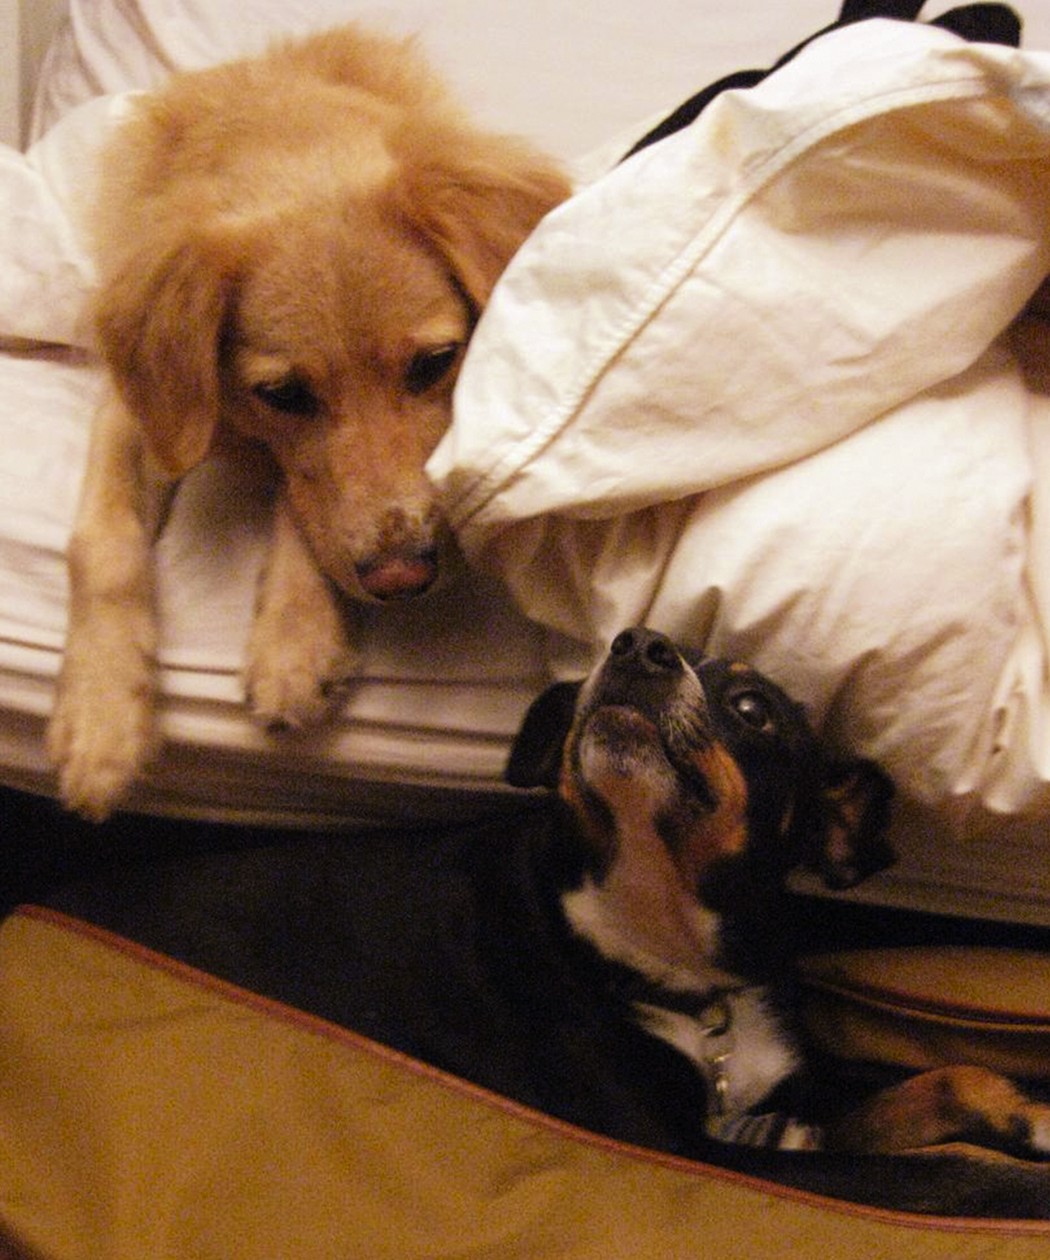
Figure 16-6: Unlike humans, animals act natural even when the camera is out.
If your animal is well trained and you can get him to sit still for portraits, you should have a fairly easy time getting great images of him. After you have the animal’s attention, take a few shots and reward him for being a good boy.
Tackling sporting events
Photographers line up on the sidelines of professional and college sports venues with giant lenses to record the events as they unfold. The images captured from those sidelines are as real as it gets (without getting into war photography, of course). Players are filled with adrenaline and are living in the moment unaware of and unfazed by the cameras. Picture-perfect moments are happening left and right, but if you don’t have the appropriate equipment and skills, you’ll miss everything.
Details, such as sweat getting knocked off one player’s face when another player hits him, are important in sports photography. And you can’t capture them unless you have a long, fast lens. By long, I mean telephoto. The closer your lens gets you to the action, the better. And a fast lens has a large maximum aperture, which allows you to shoot with faster shutter speeds. Shooting with a slow shutter speed usually is unacceptable in sports photography — unless it’s a race and you’re panning to show speed to show motion. (I discuss panning earlier in the chapter.)
Don’t be tricked into buying a telephoto lens that isn’t fast. Doing so would be a waste of money. The typical max aperture for a fast telephoto lens is f/2.8.
Telephoto lenses are naturally slower than normal and wide lenses. Because more distance exists from the front of the lens to the digital sensor, the light’s intensity weakens on the journey. So, to make a long lens faster, a large amount of quality glass is required to let more light in. The more light that comes in, the more intense it will be by the time it reaches the sensor. And the more glass a lens has, the more expensive it will be.
If you find yourself in need of a fast telephoto lens but unable to afford one, you can rent one. It’s better to rent a good lens than to buy a cheap one. Cheap telephoto lenses provide soft images that are useless in a photographer’s portfolio.
In the following sections, I discuss some ways to get the best sports photos possible — assuming you’ve picked up the proper equipment.
Getting the shot
If you’re at a sporting event and have the right lens for the job, your first task is to determine how much available light you have to work with and to choose the best exposure settings for your subject. You most likely want to be able to freeze motion, so you should try to shoot at 1/250 second or faster.
Opening your aperture all the way and using a high ISO enables you to have the quickest shutter speed possible. Just keep in mind that opening up the aperture on a telephoto lens gives you a very shallow depth of field. And using an ISO that’s extremely high causes your images to have a lot of digital noise (the equivalent to film grain, but less attractive). Figure out what’s most important to capturing your subject in the best way possible, and then set your exposure based on that. (See Chapter 3 for more on exposure.)
As a sports photographer, you document events that you can’t change or affect. But, you can control your composition. What you choose to include or exclude from your frame determines how viewers understand and read the image. Familiarity with the sport you’re photographing helps you compose interesting and informative images. Be prepared for climactic moments so you don’t miss the shot, and look for less obvious moments of relevance, too. Capturing facial expressions and reactions of players and coaches is sometimes more interesting than the action in the game.
Vertical crops work well to maximize the size of individuals in a frame, and they’re also good for headshots. Horizontals sometimes are better for showing the action.
Some sporting events are easier to move around at than others, but when possible you should try to change your position and cover some different areas. Doing so allows you to capture multiple angles and types of shots. Think creatively when choosing where to shoot. For example, a marathon could be covered in many different (and equally interesting) ways:
Arial shots show the mass of people and the amount of space they take up.
Side shots are best for capturing movement and action.
Shooting from directly in front of the runners is great for creating a sense of power in the mass of runners. The best way to get this shot is to position yourself at a turn. This way the runners run straight toward you and turn before reaching you rather than running you over.
Minimizing unwanted motion blur
When shooting subjects in motion, you want to minimize motion blur in order to achieve sharp, high-quality photographs. If you’ve ever held a 400mm lens, you know that it packs some weight — and holding a long, heavy lens steady while photographing is a challenge. Getting the shot without having motion blur is difficult when you’re shaking the camera and your subject is moving. Some lenses come equipped with an image stabilization function that’s supposed to keep your shaky hands from affecting the shot. Even so, the only recommended way to hold a long lens in hand is if your shutter speed is a higher number than the lens. For instance, a 400mm lens shouldn’t be held in hand unless the shutter speed is 1/500 second or faster.
The best way to get sharp images is to put your camera on a tripod or monopod. A tripod is more stable than a monopod, but it’s less efficient for moving around quickly. So, if you’re going to be staying in one spot most of the time, a tripod would be ideal; if you have to be mobile, stick with the monopod. (Refer to the earlier section “Deciding whether to freeze or show motion” for information on eliminating motion blur.)